Choose a trigger, develop the notification, and let Lead Gen & CRM do the work. This article will detail how to create and apply custom email notifications.
| Administrators | ✓ | |
| Company Managers | ✓ | |
| Marketing Managers | ✓ | |
| Sales Managers | ||
| Salespersons | ||
| Jr. Salespersons |
There are two different types of notifications:
Lead Gen & CRM provides a stock set of notifications and form notifications that provide the necessary information about who has done what when interacting with your tasks. However, you may want to personalize these emails to your tastes. You can use these notification types to create customized email notifications.
Note: Lead Gen & CRM users who have not opened an email or logged into the application for 180 days will have their system notifications suppressed. This includes VisitorID, billing, and automation-based notifications.
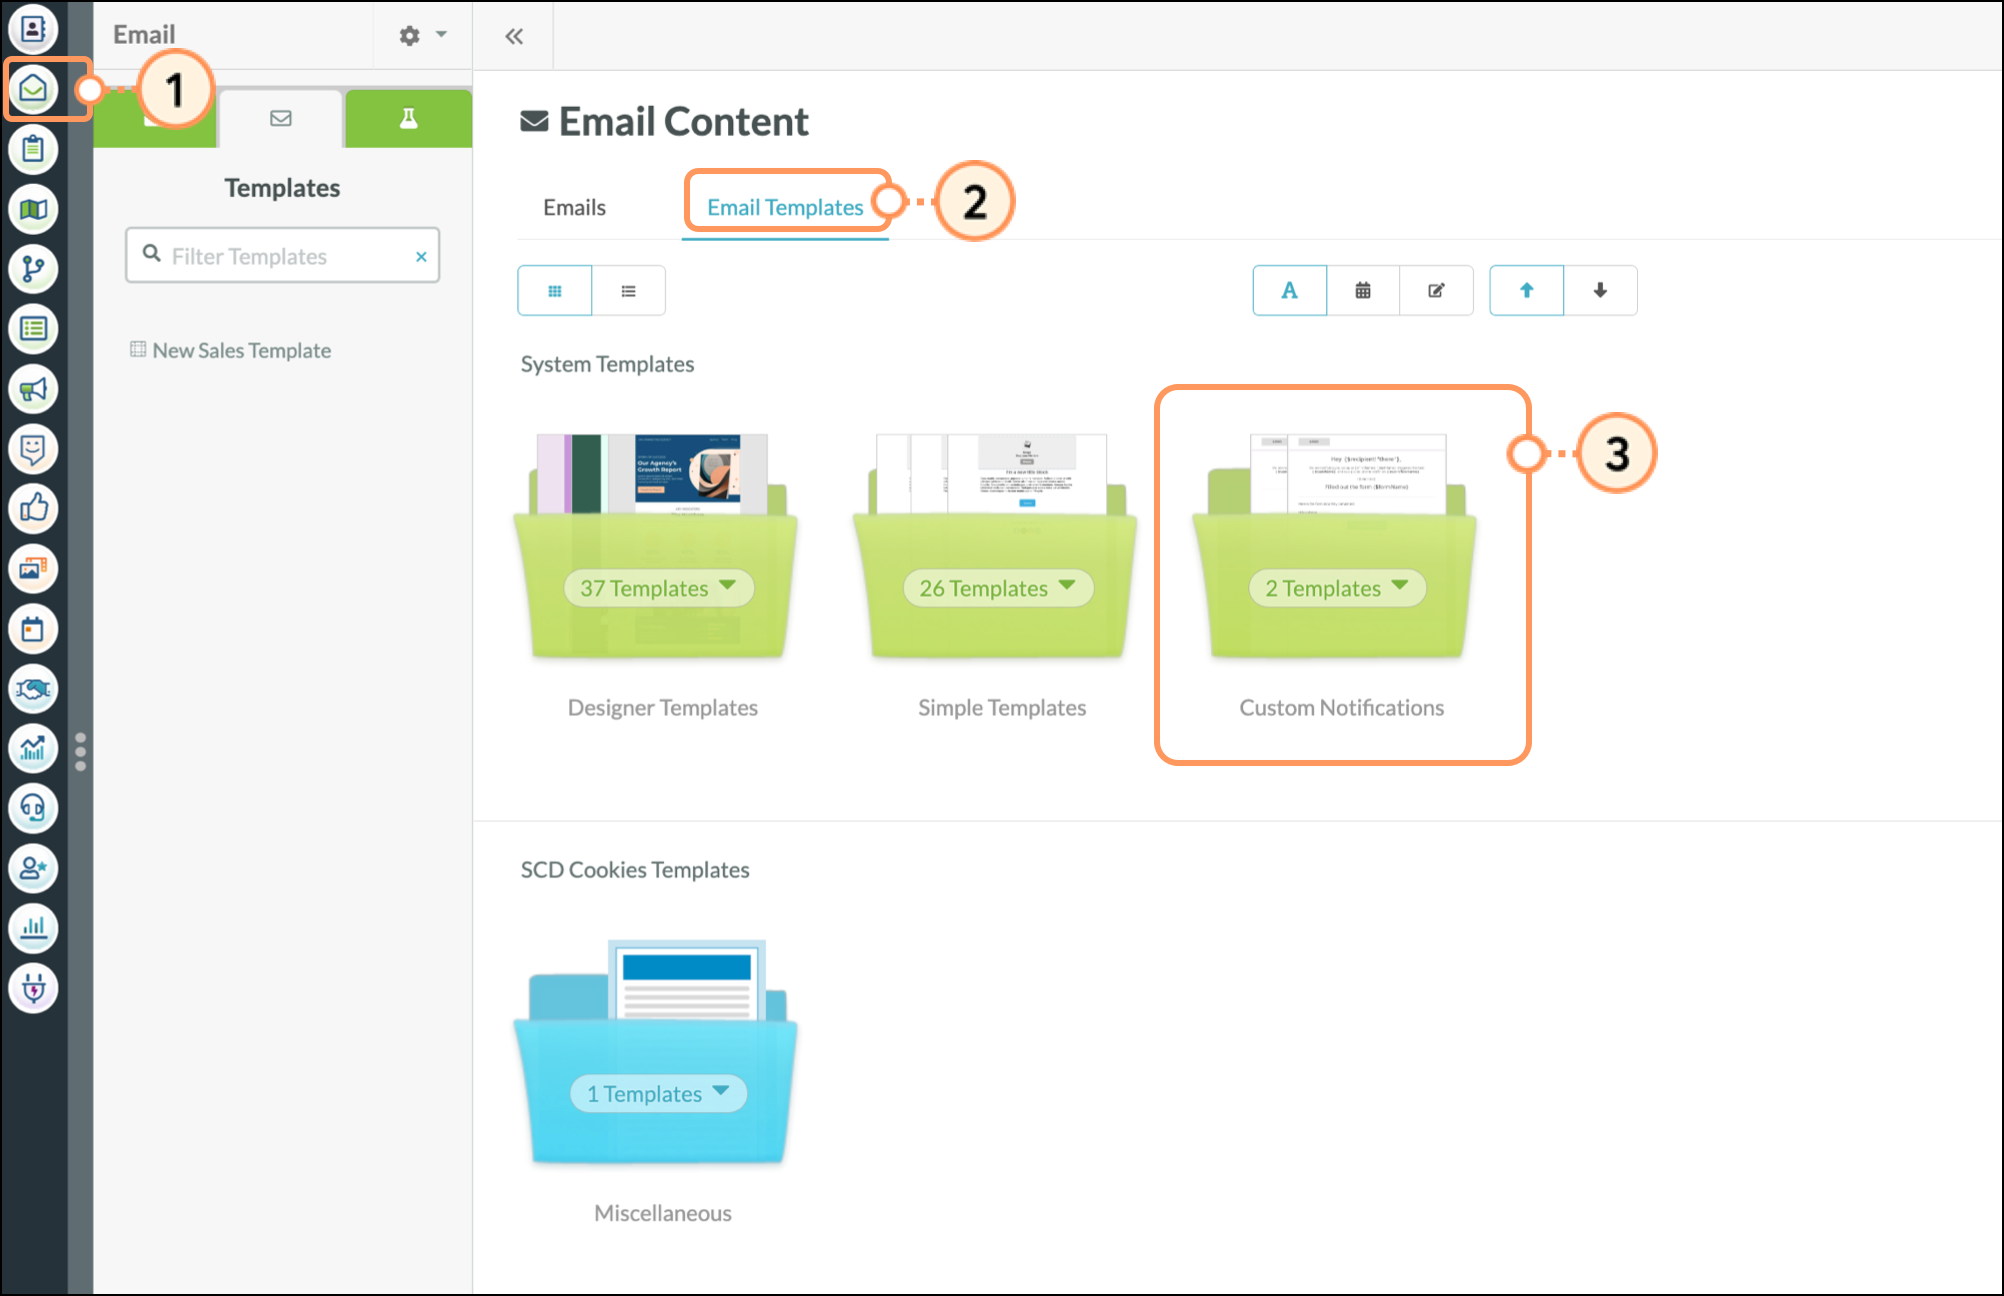
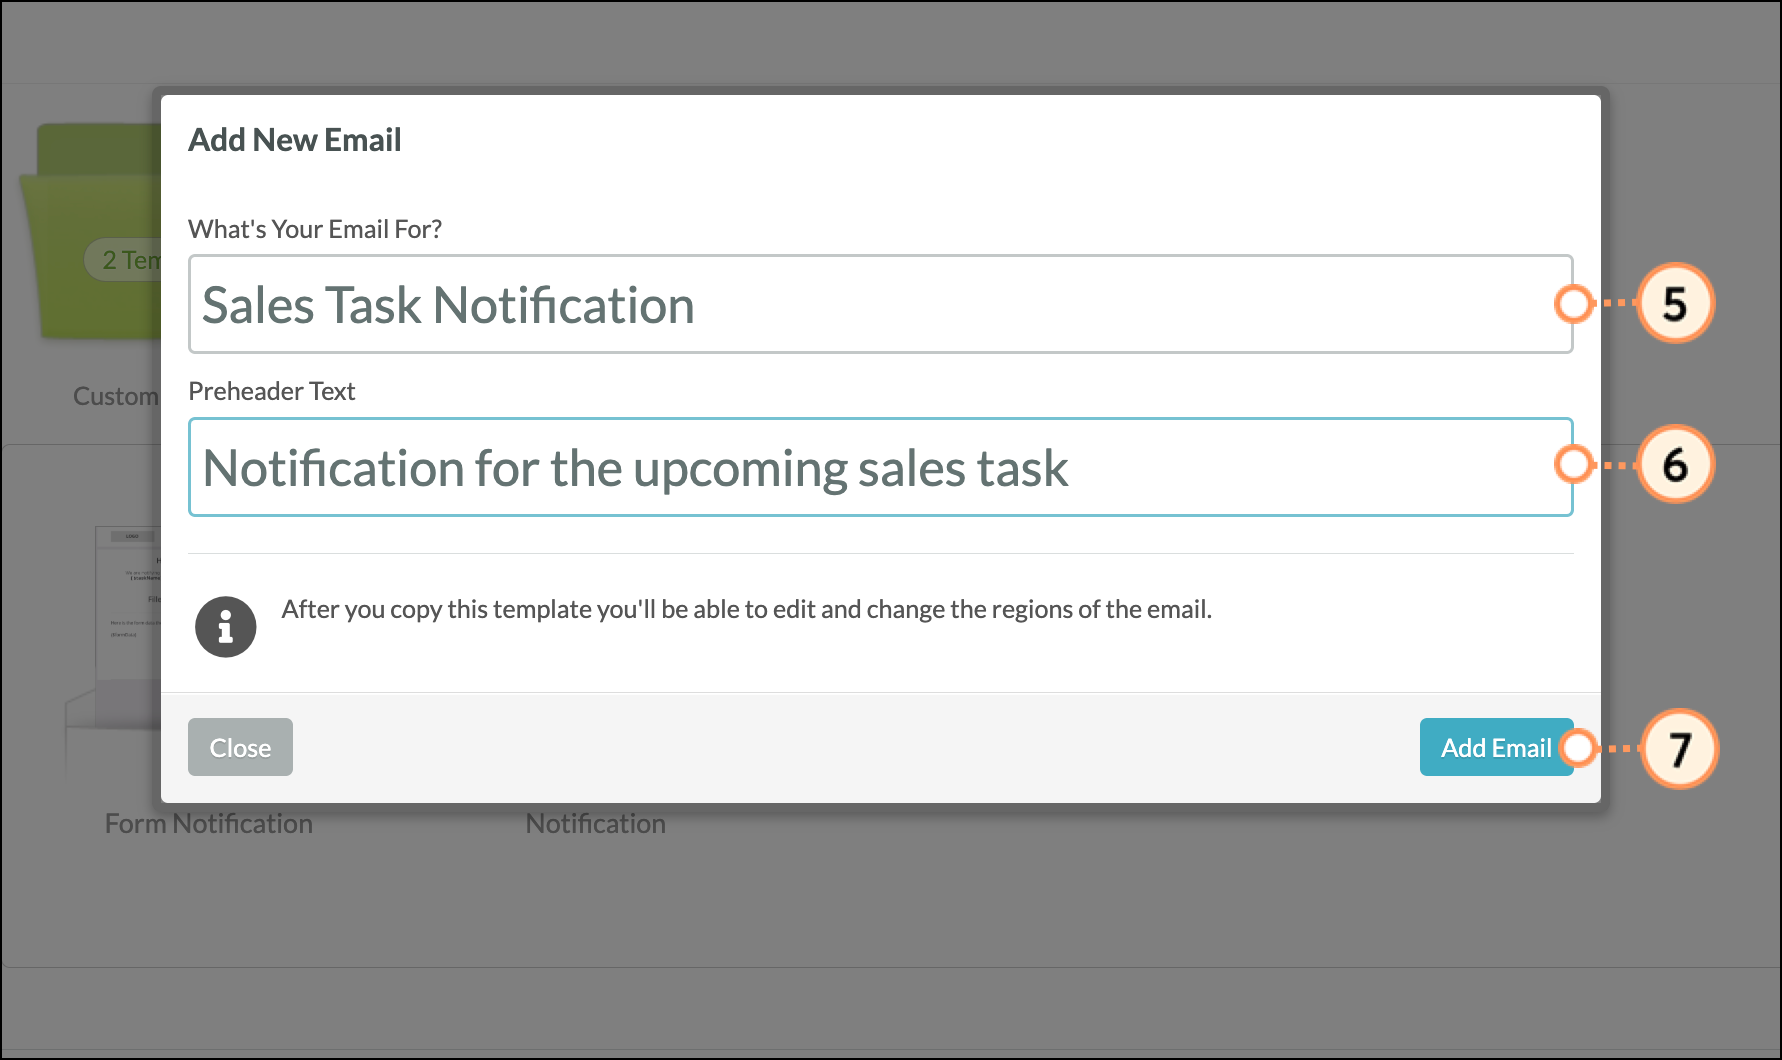
You can create email custom notifications as necessary. To create a custom email notification, do the following:
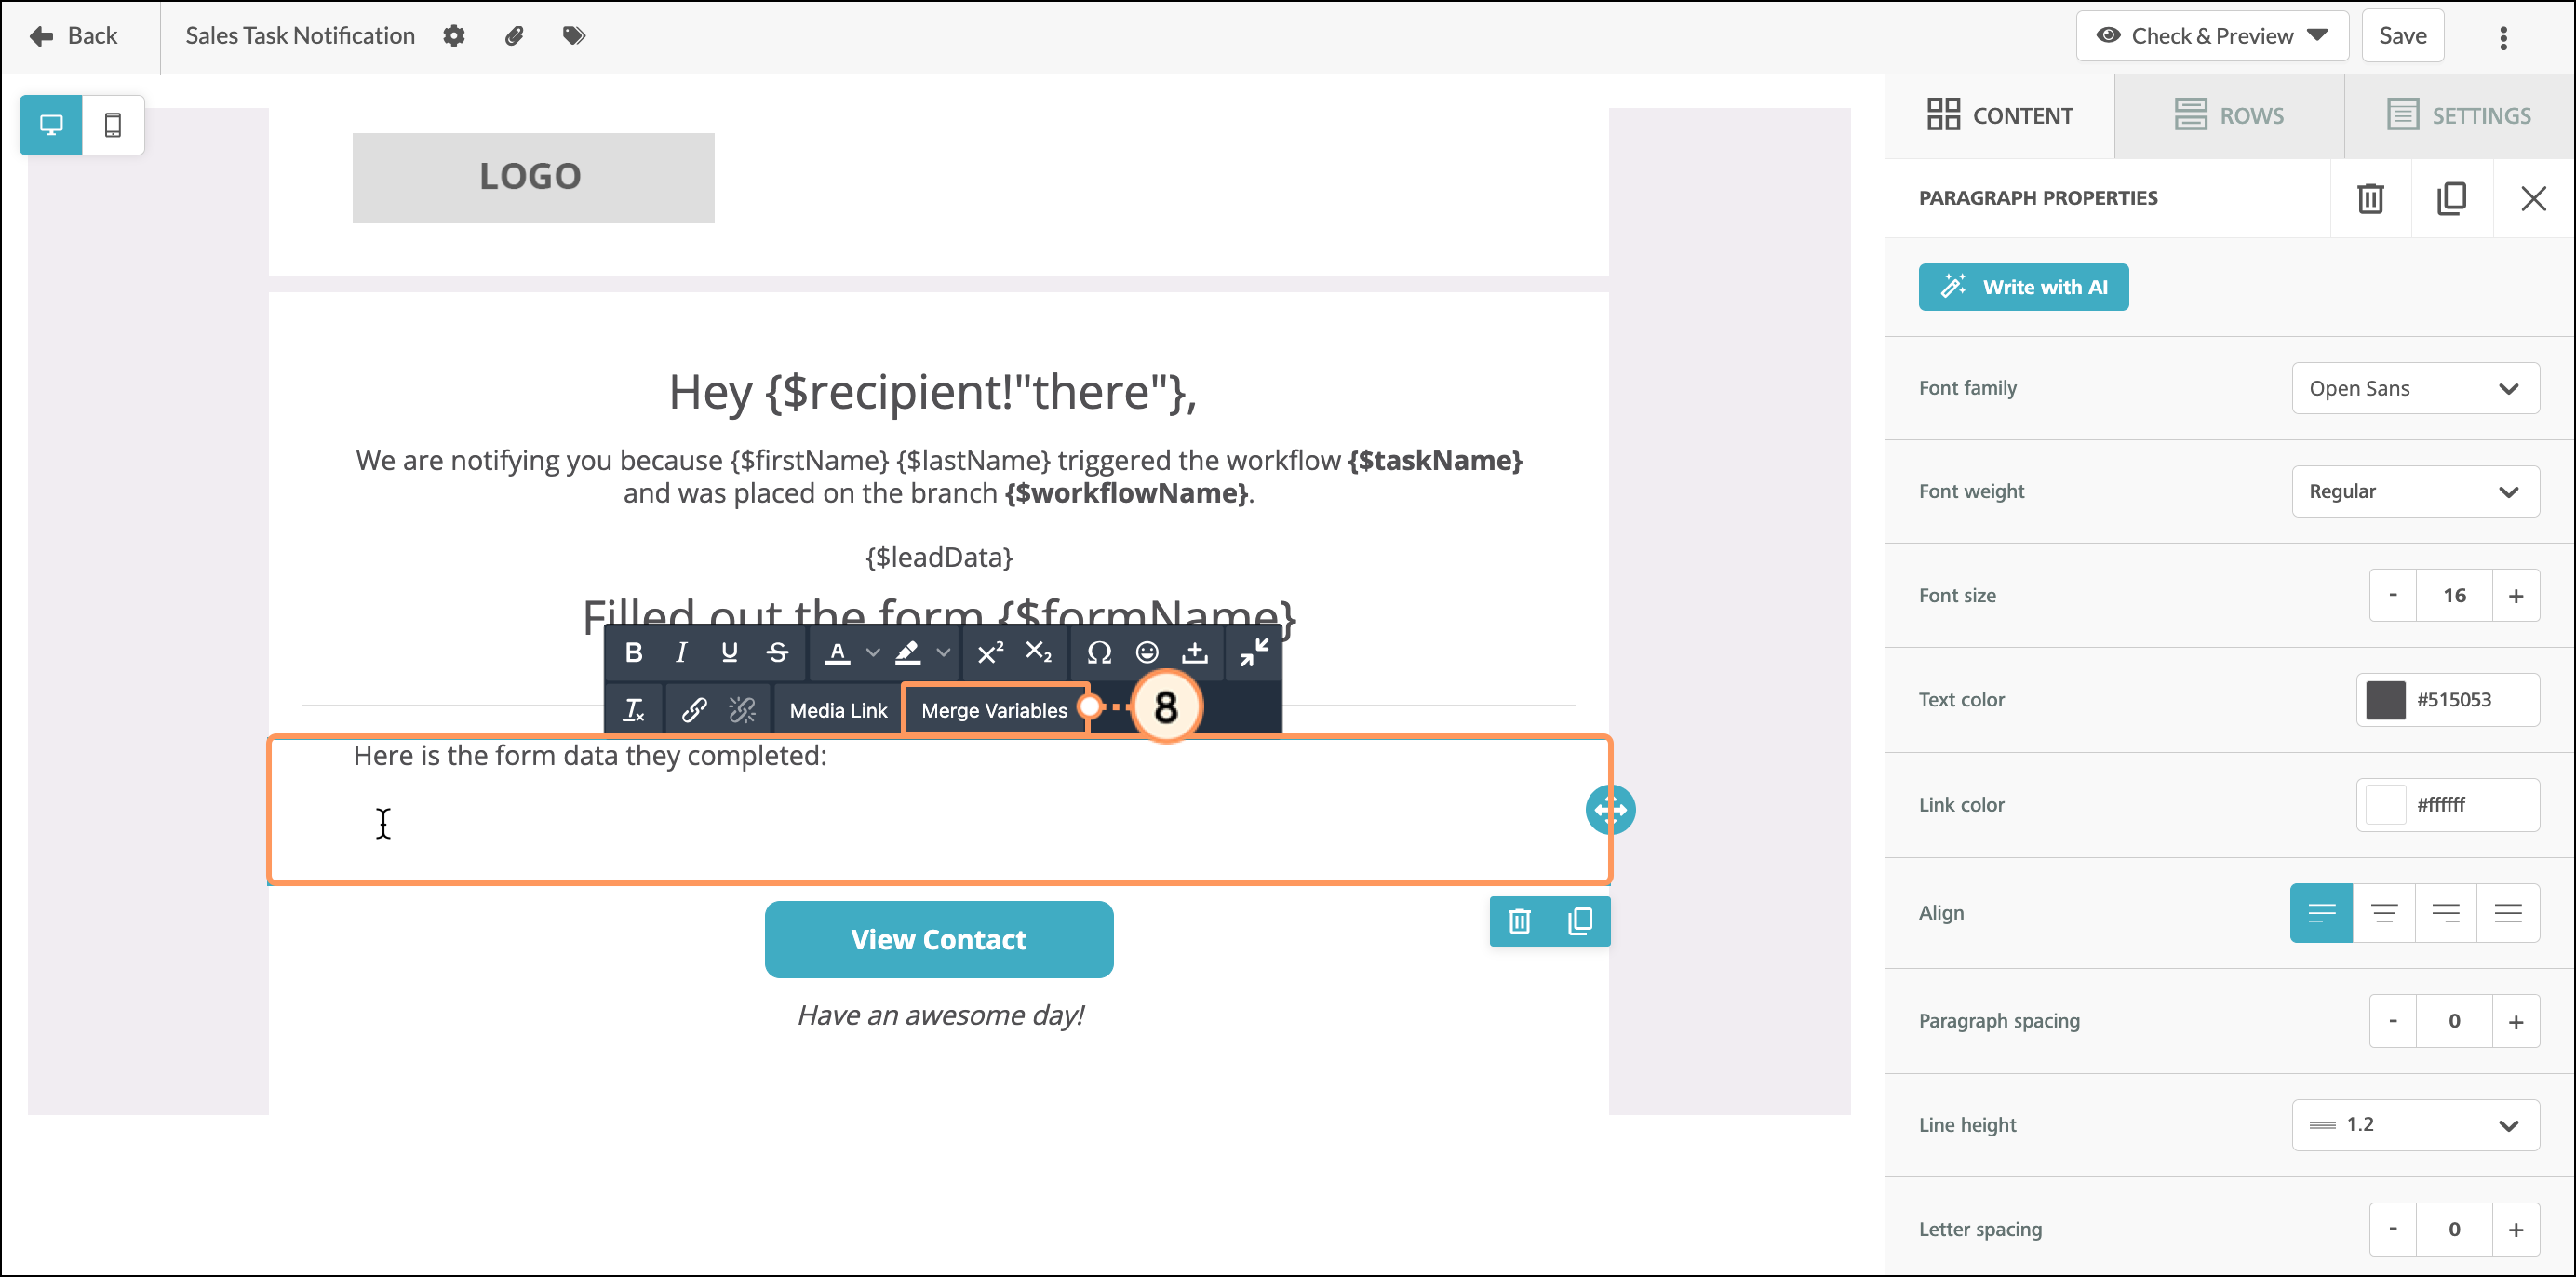
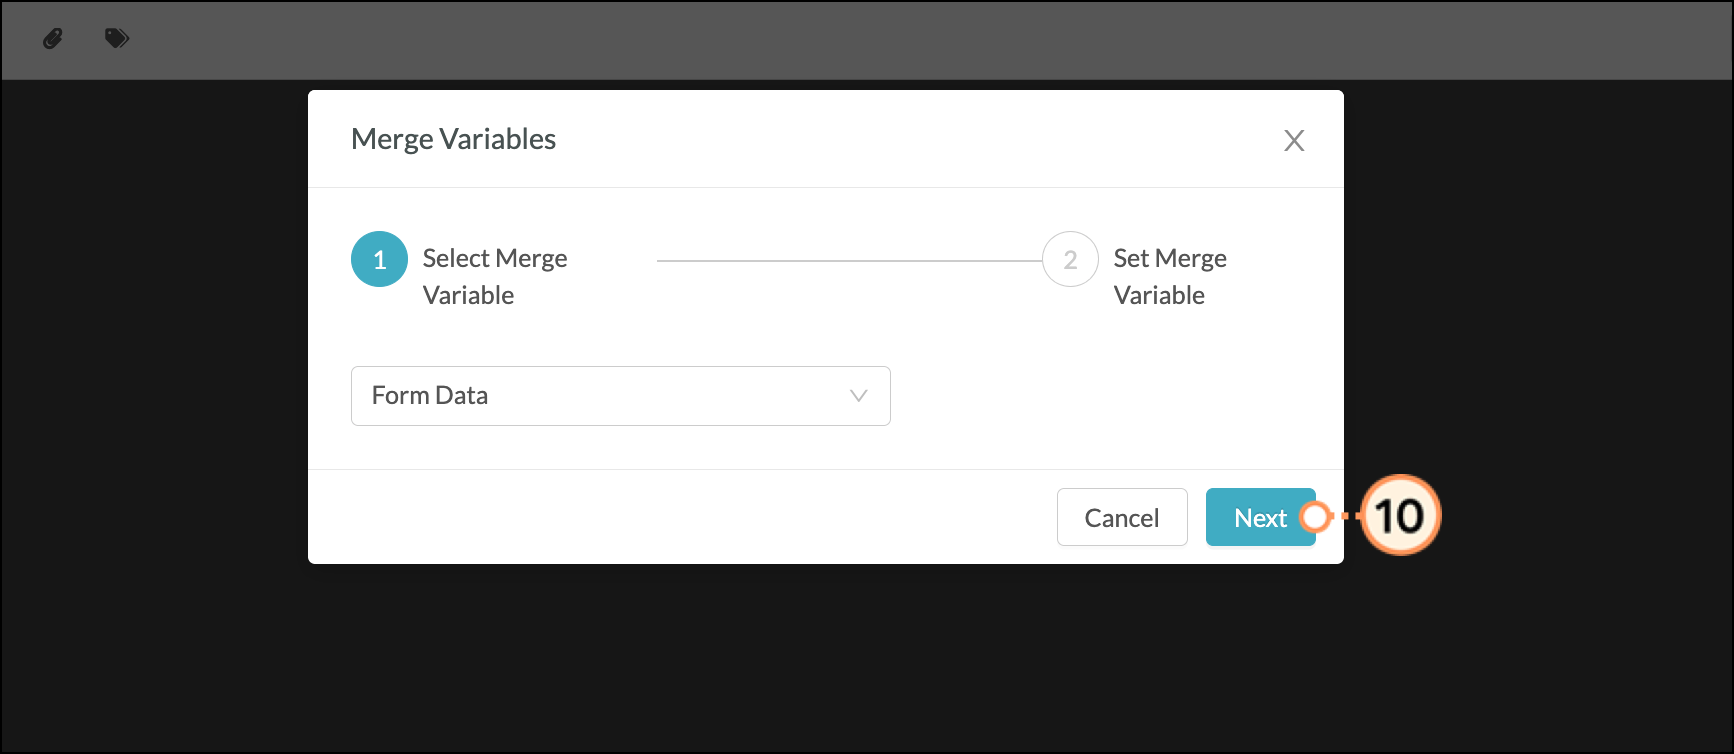
For example, the default notification email template has the following text and merge variables:
Hey {$recipient!"there"},
We are notifying you because {$firstName} {$lastName} triggered the task {$taskName} and was placed on the workflow {$workflowName}.
The merge variables in this email template will change based on:
Next, create an action group to apply the notifications. Notification emails will come from notification@marketingautomation.services. The address cannot be changed within the notification action group, however, you might consider a modified workflow and custom email solution if you want a different From address.
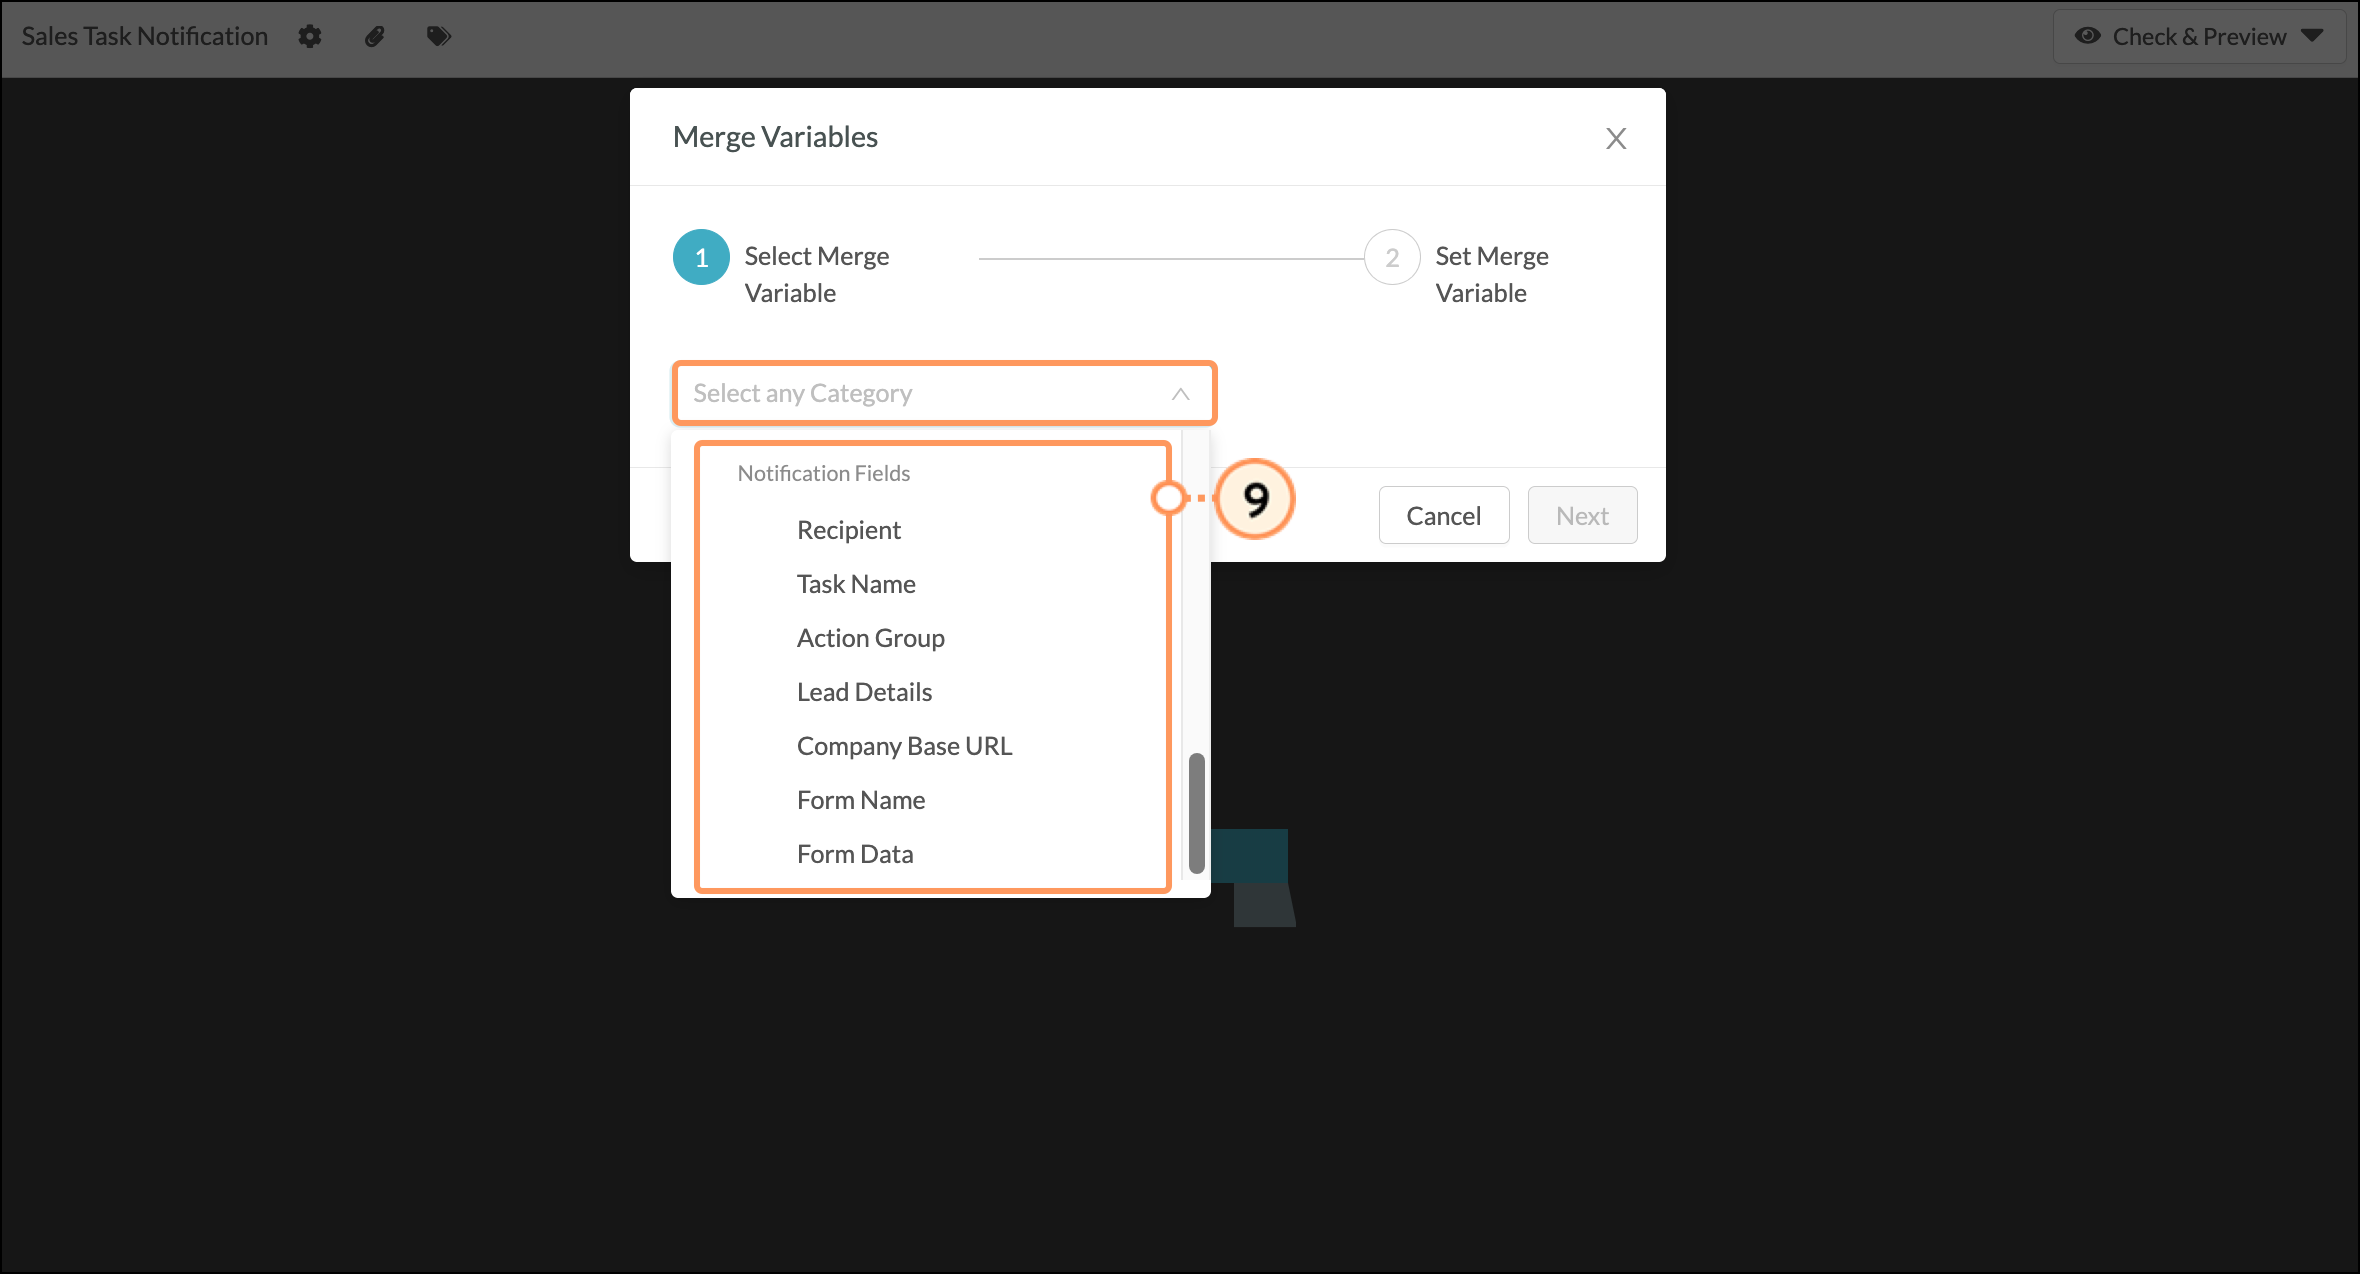
The available merge variables are as follows:
| Merge Variable | Appearance | Definition | ||
| Recipient | {$recipient} | The name of the user receiving the notification. | ||
| Task Name | {$taskName} | The name of the automation that triggered the notification. | ||
| Action Group | {$workflowName} | The name of the workflow branch that contained this notification. | ||
| Lead Details | {$leadData} | First name, last name, email, and lead score of the lead who triggered the task. | ||
| Form Name | {$formName} | The name of the form that the lead filled out and submitted. | ||
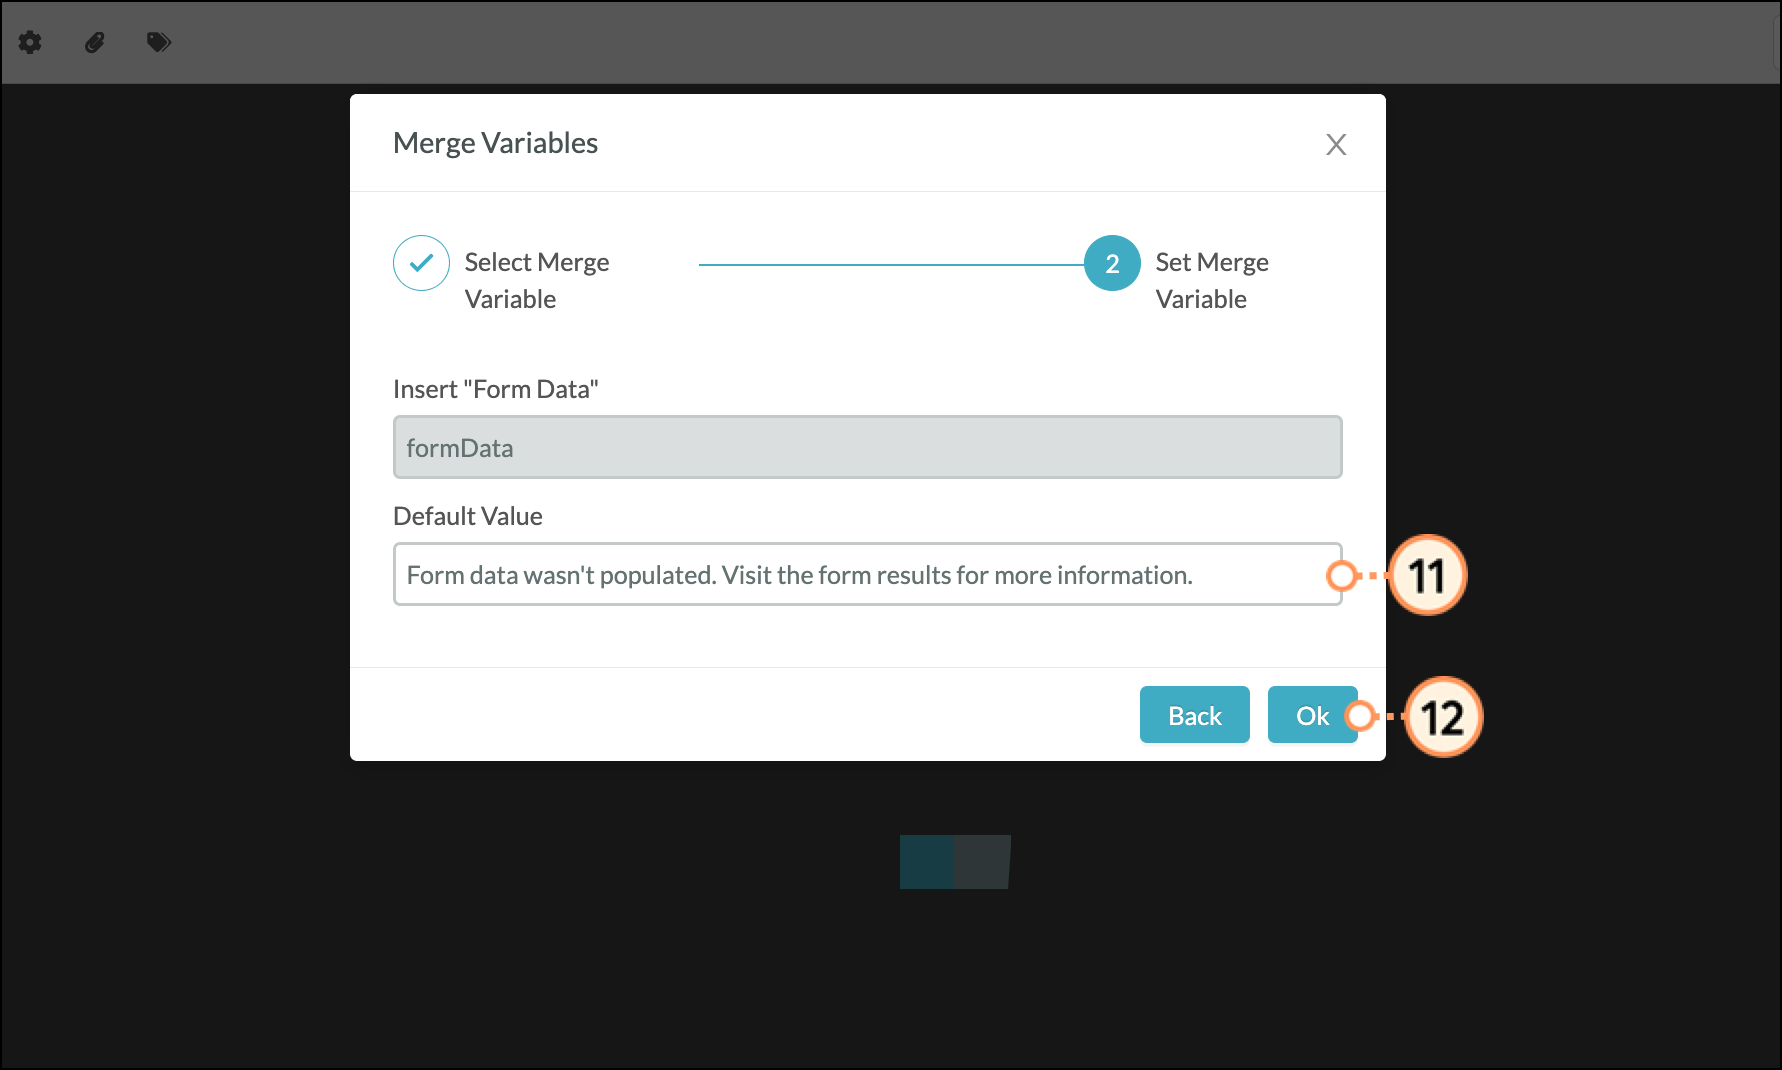
| Form Data | {$formData} | All information that was submitted by the lead through filling out a form. This includes submitted referral fields. |
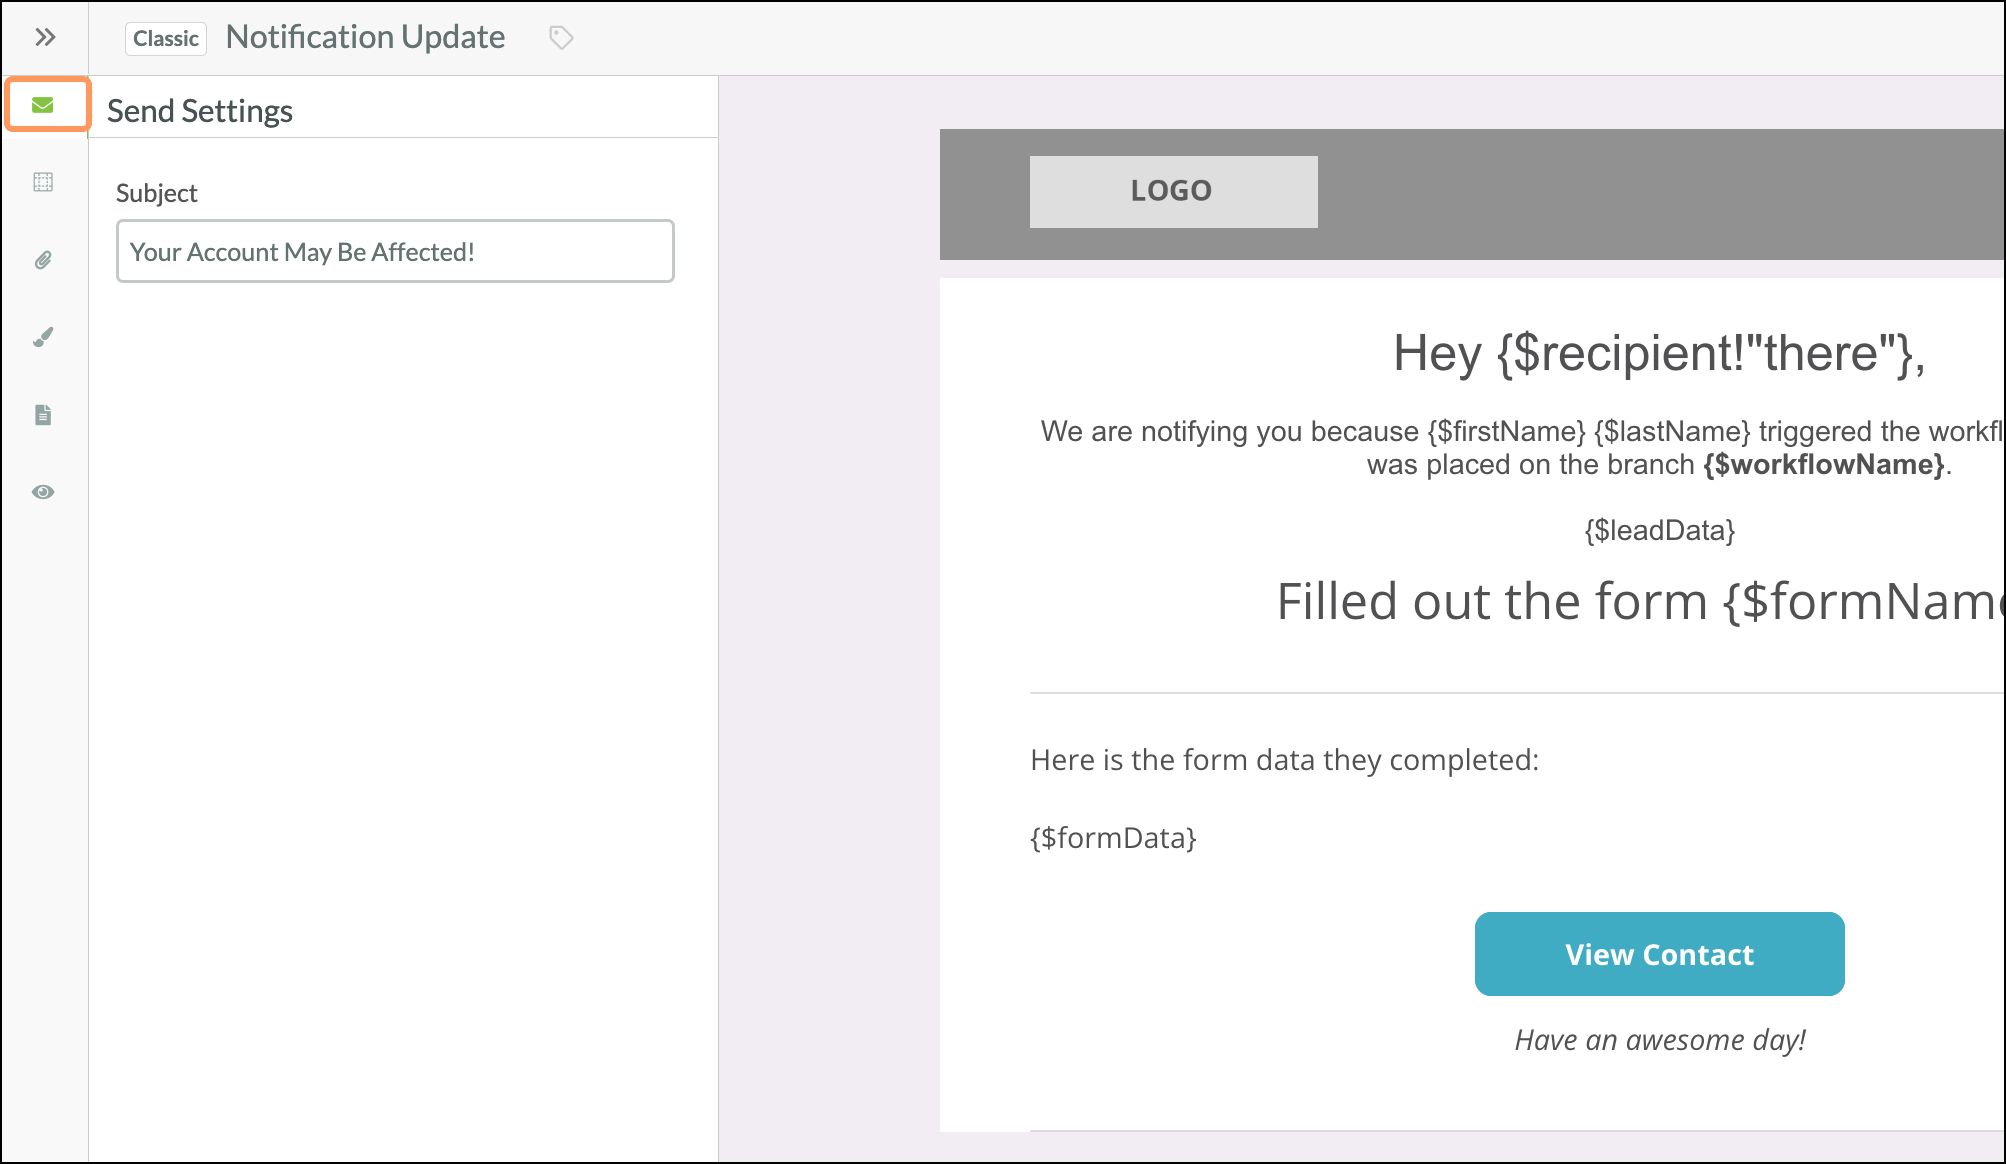
The Classic Email Editor:
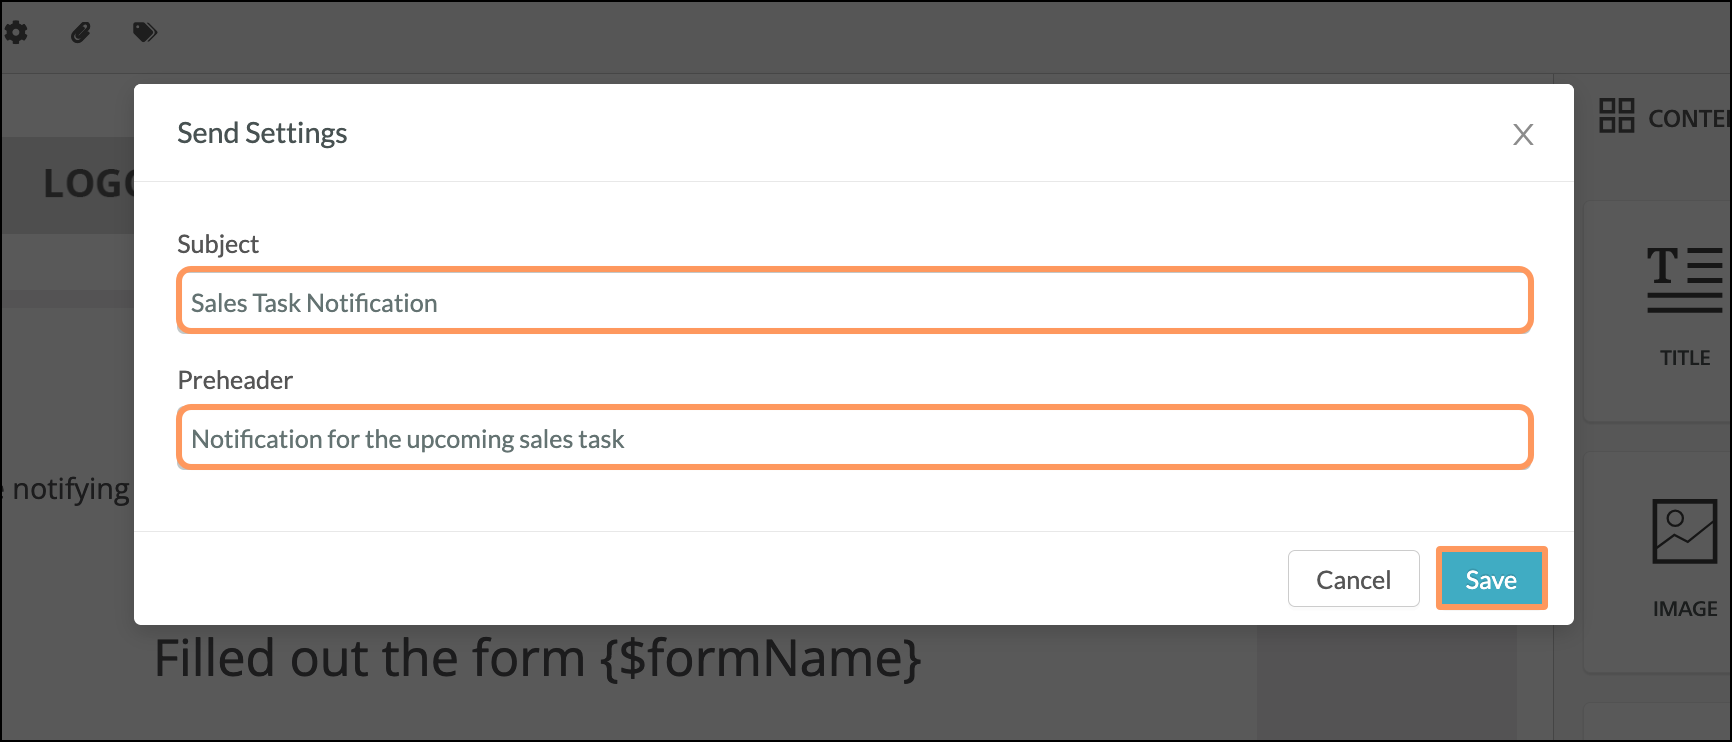
To modify the subject line for the notification emails, in the Classic email editor, click the Send Settings button in the left toolbar.
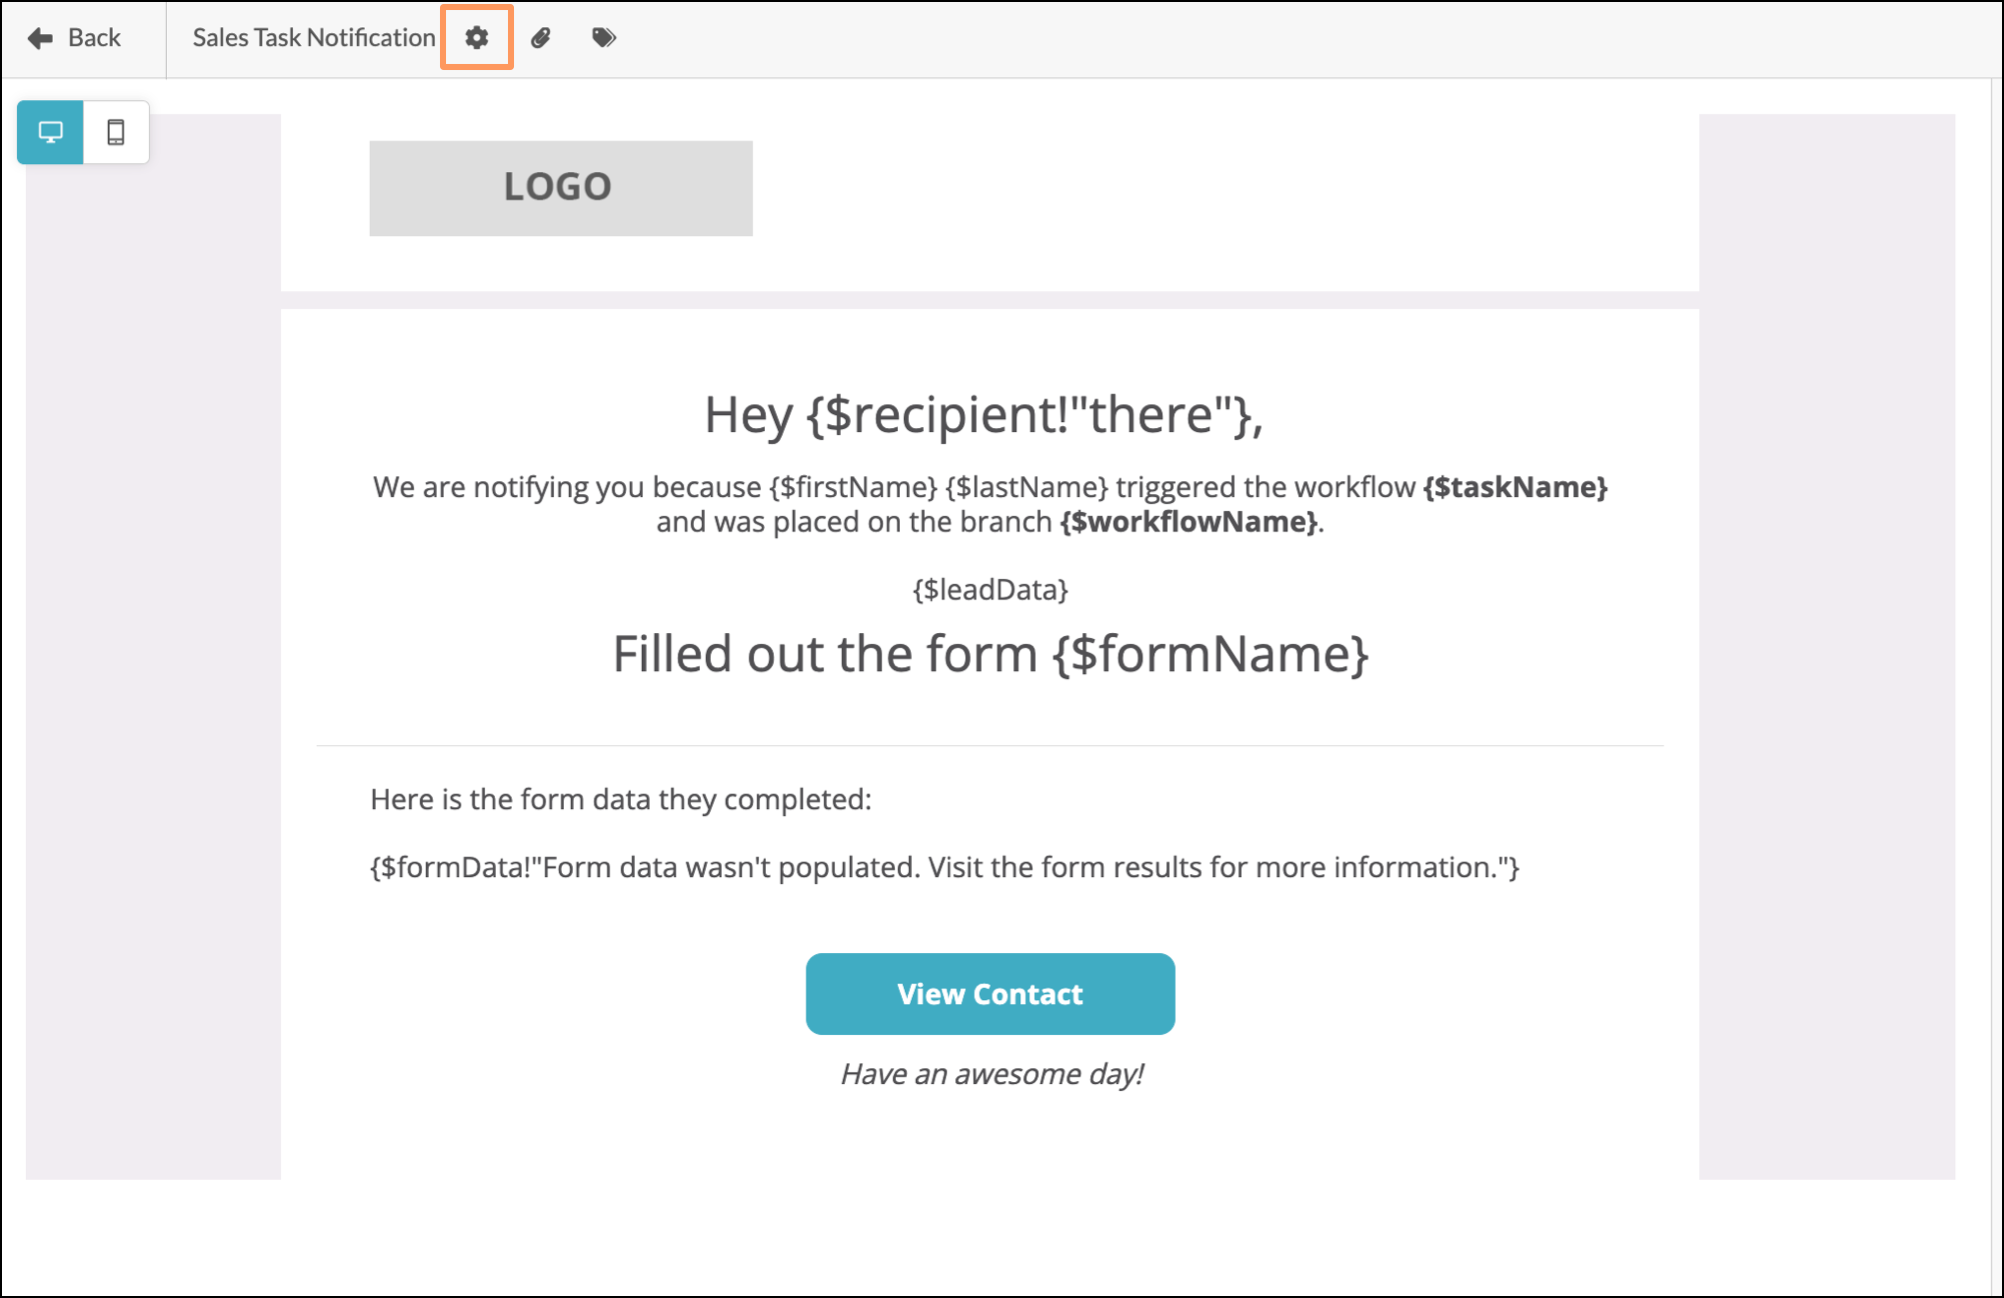
The New Email Editor:
To modify the subject line for the notification emails, in the new email editor, click the ![]() Settings icon in the top toolbar.
Settings icon in the top toolbar.
Then fill out the Send Settings form and click Save.
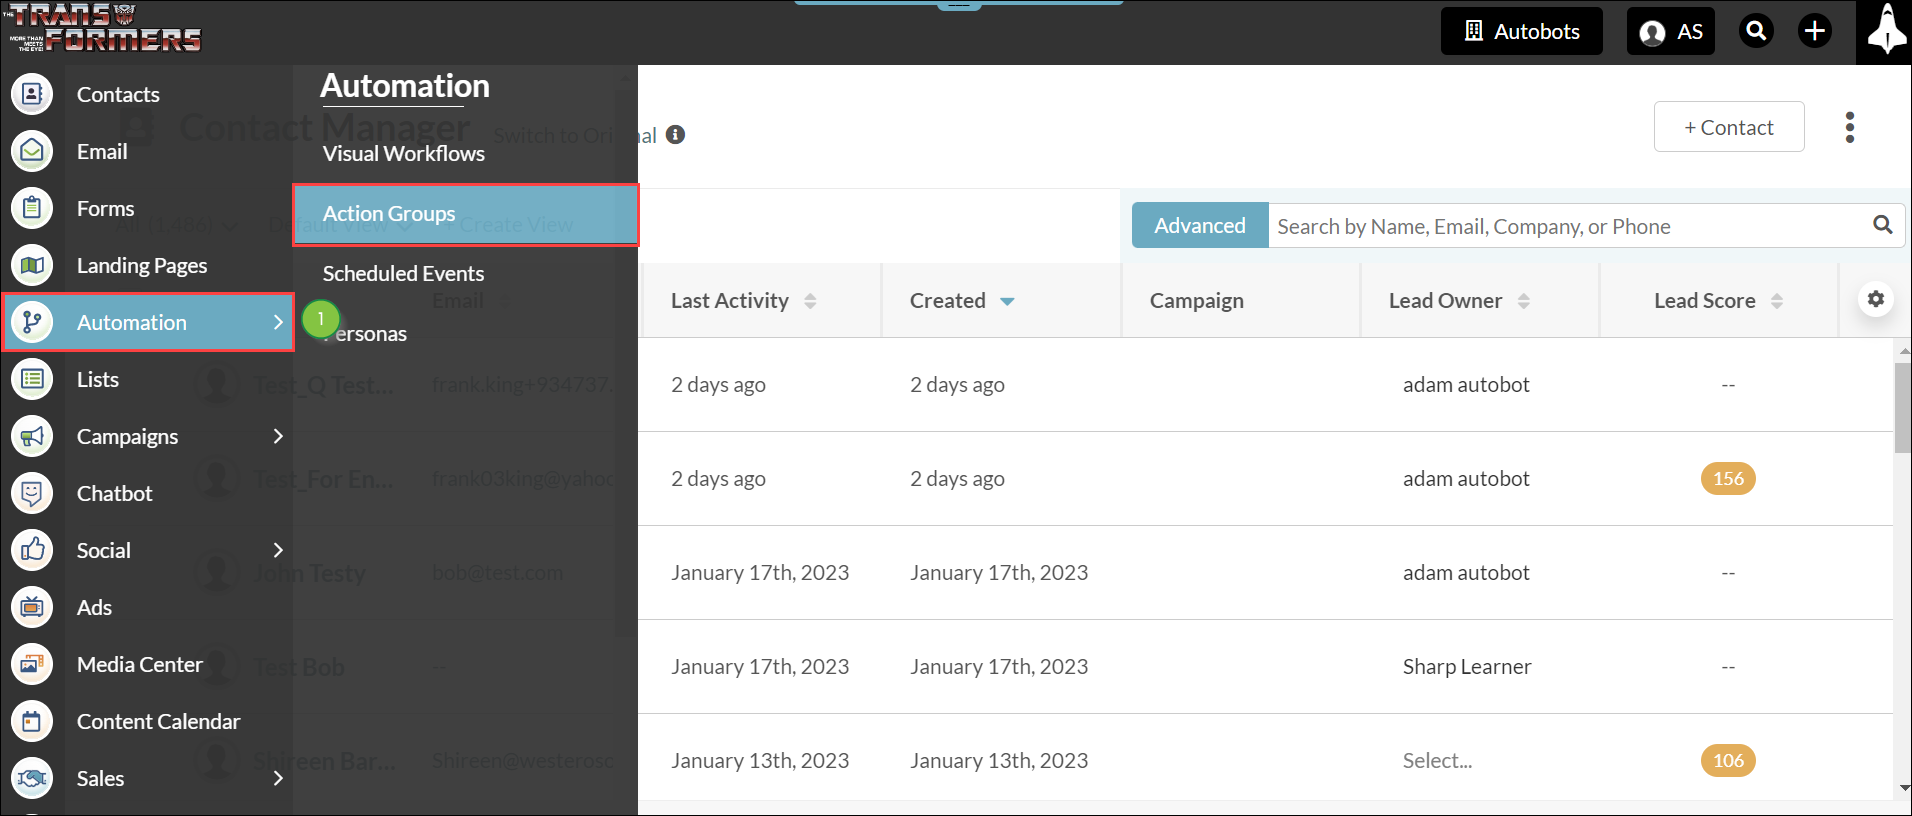
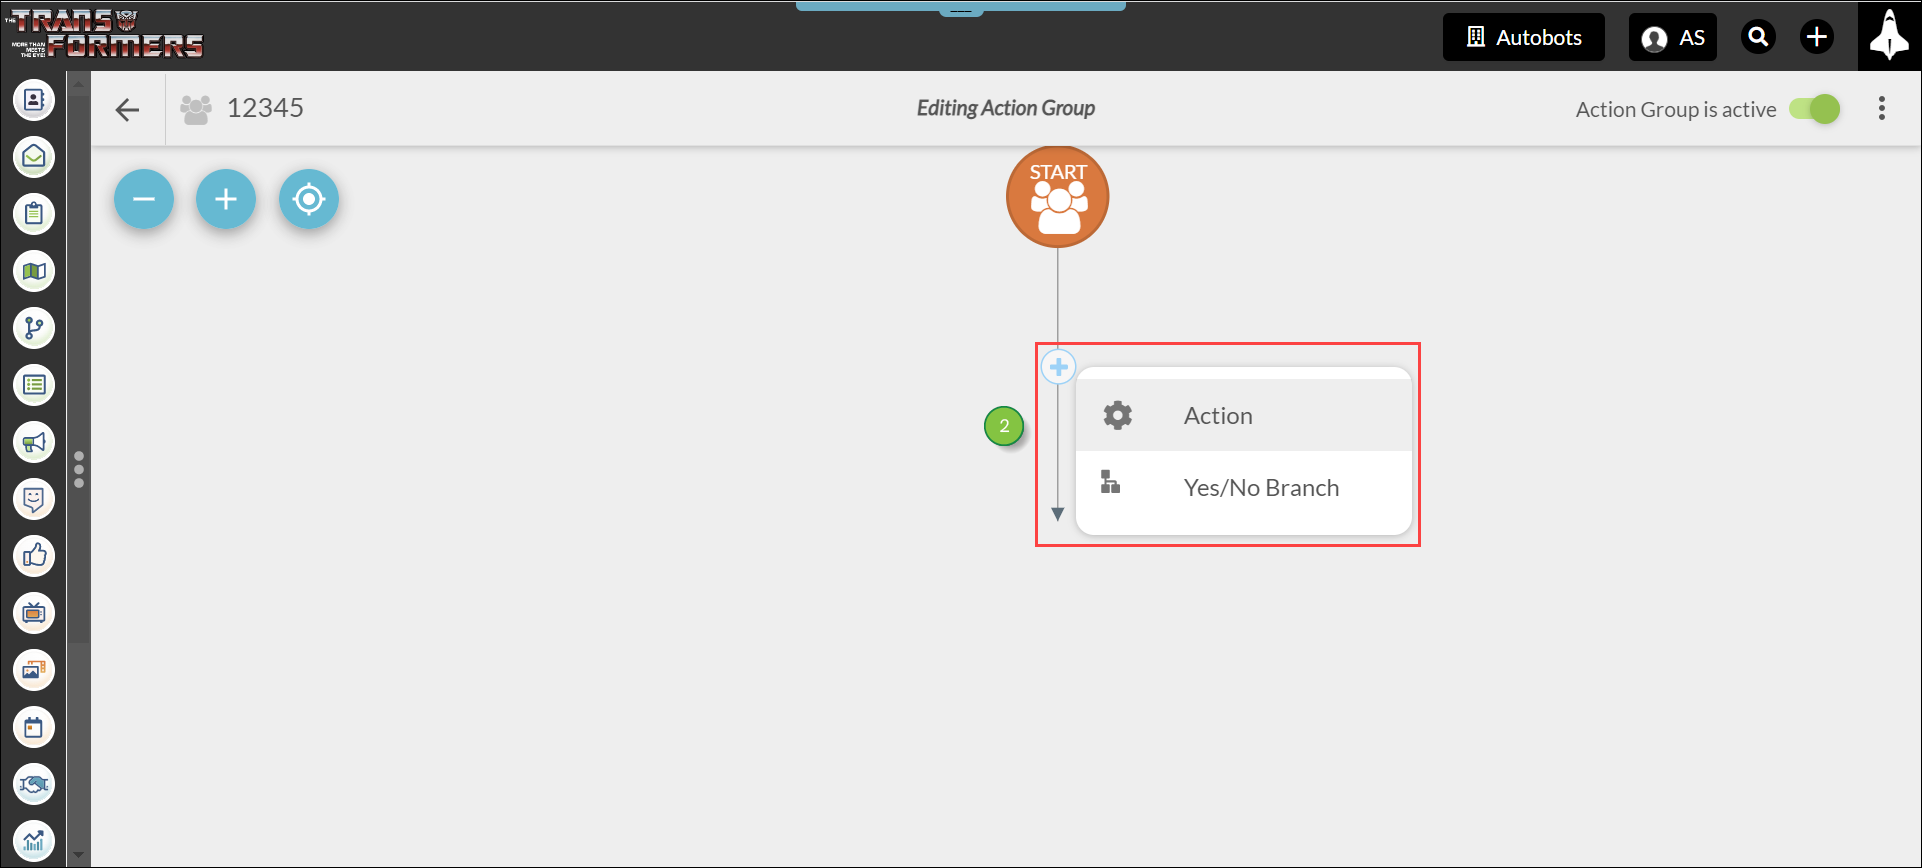
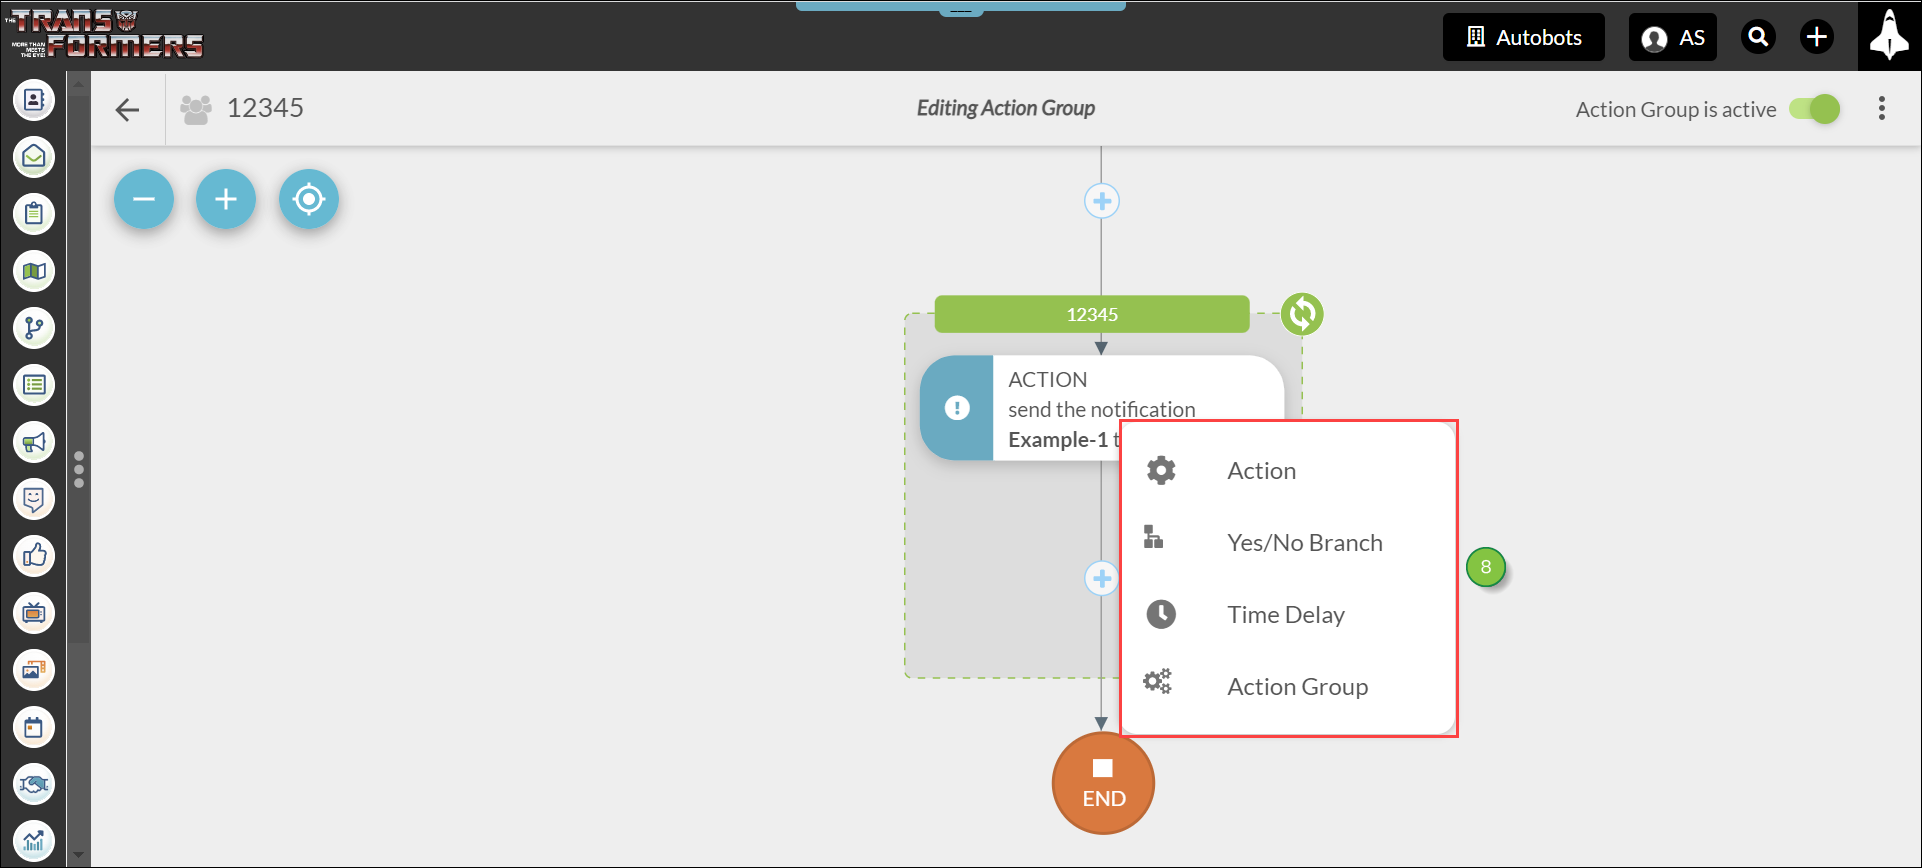
Once you have created a custom notification email, you will need to apply it to an action group in order to send it.
To apply a custom email notification to an action group, do the following:
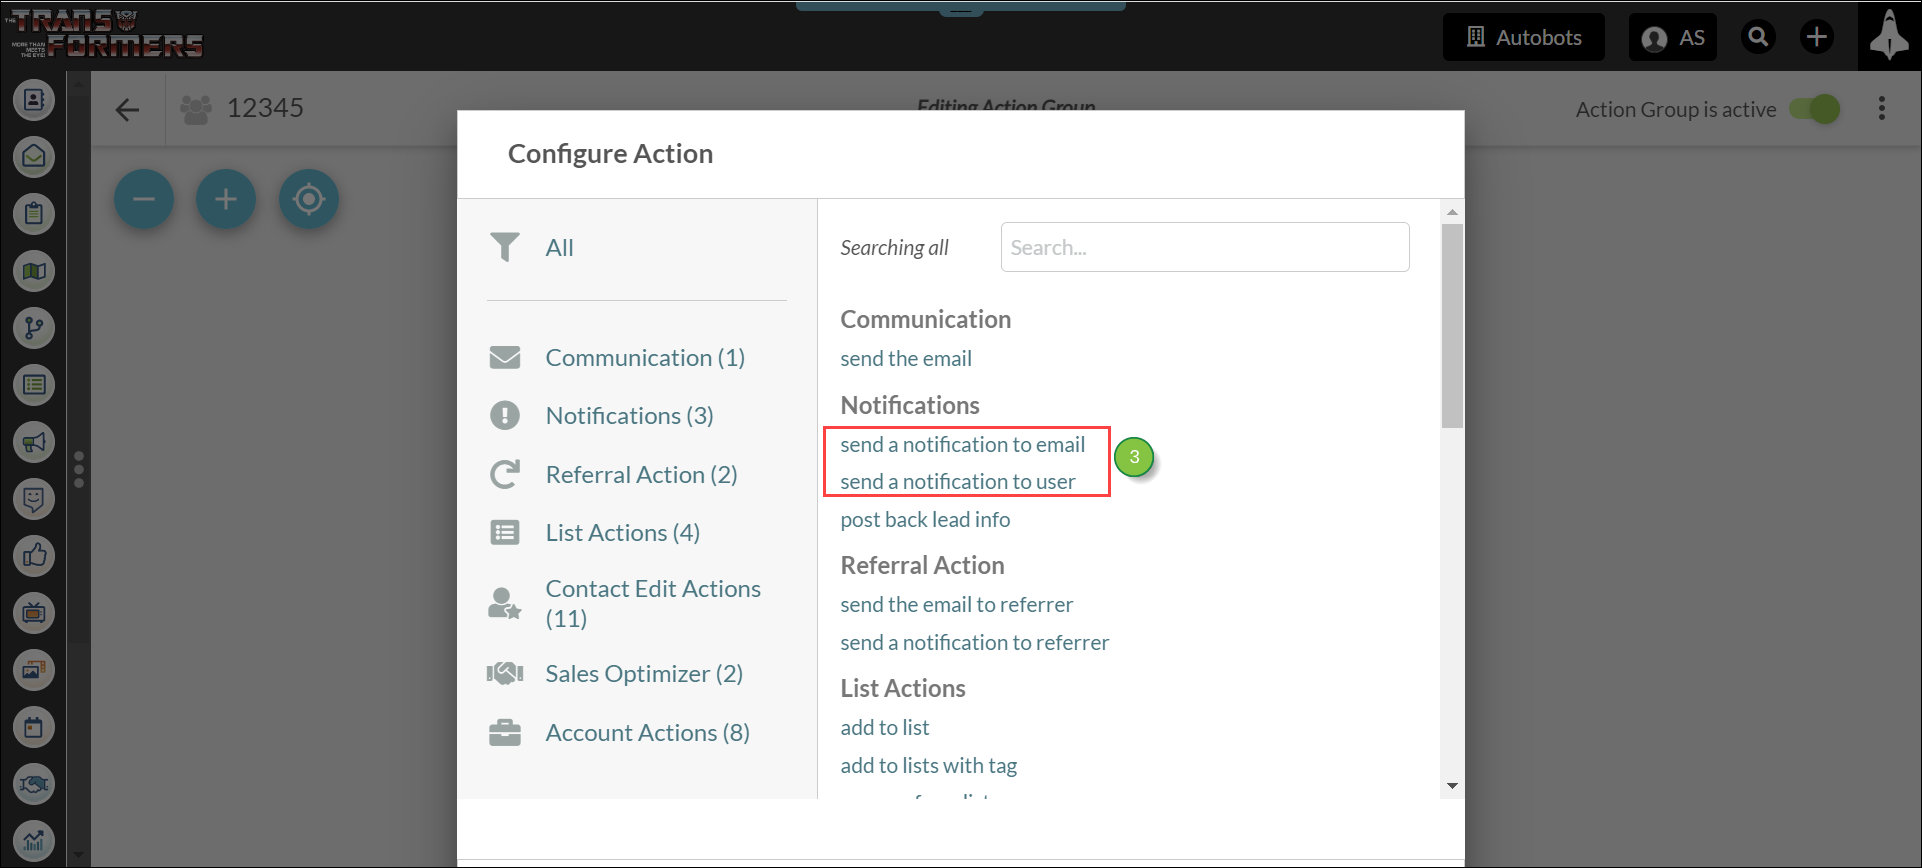
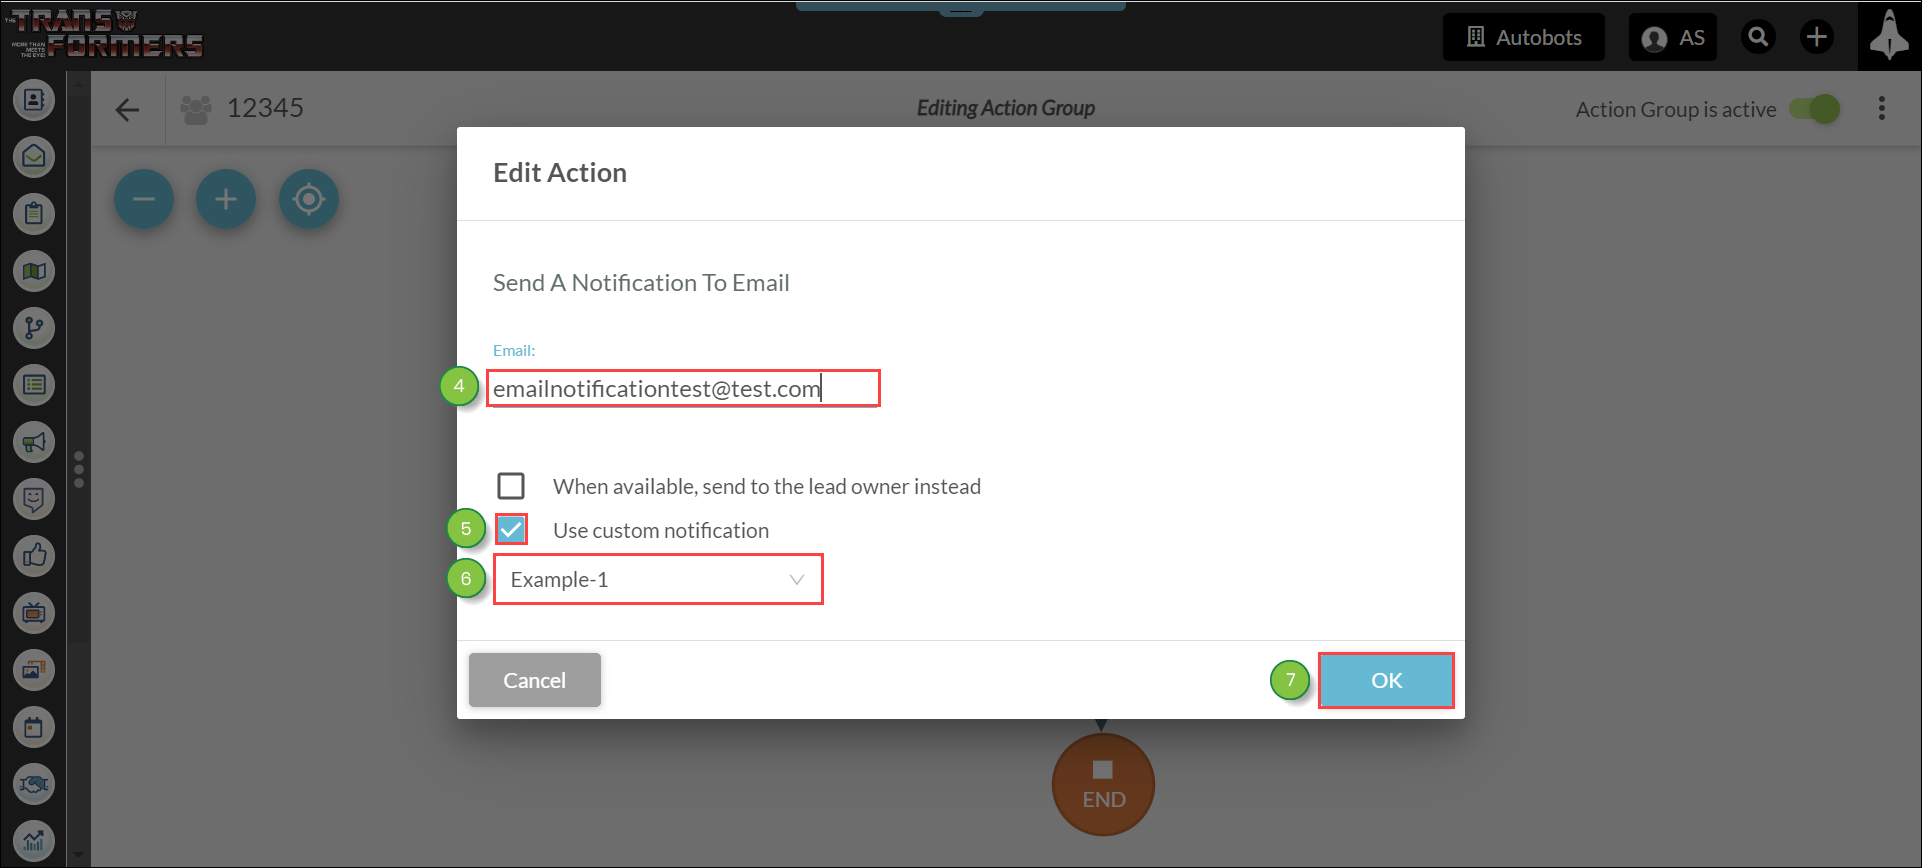
Note: Custom notifications cannot be used with post-back lead info alone. That notification action will need to be paired with either of the send a notification actions to send custom notifications.
Notification emails will come from notification@marketingautomation.services. The address cannot be changed within the notification action group, however, you might consider a modified workflow and custom email solution if you want a different From address.
Copyright © 2026 · All Rights Reserved · Constant Contact · Privacy Center
