Lead Gen & CRM
How can we help you?
Search our help articles, video tutorials, and quickstart guides

You've got this. You've got us. Search our Knowledge Base to quickly find answers to your questions.

Creating Dynamic Landing Pages

Article: 000050312
Updated: November 14, 2023

Set up your landing pages to display different content to users depending on their attributes

Providing content that is personalized to a visitor helps to increase conversions. With Lead Gen & CRM's landing pages, you can add dynamic web content without the need for a developer.


Article Contents

 
Users:
Administrators 
Company Managers 
Marketing Managers 
Sales Managers  
Salespersons  
Jr. Salespersons  

Light Bulb IconTip: Are you looking for information about Constant Contact’s Email and Digital Marketing product? This article is for Constant Contact’s Lead Gen & CRM product. Head on over to the Email and Digital Marketing articles by clicking here. Not sure what the difference is? Read this article.


Important Information Regarding GDPR Consent

Landing page dynamic content will not work with General Data Protection Regulation (GDPR) consent banners. This is due to how using personal identifiable information to change dynamic content could violate the rules regarding tracking information and consent within the law. 

For more information on the GDPR, refer to the following help articles:


Adding Dynamic Content Rules

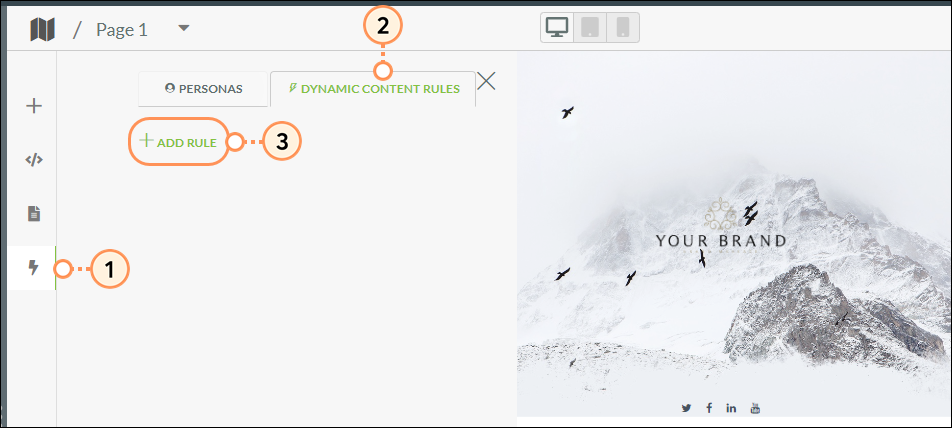
Dynamic content rules are what Lead Gen & CRM uses to control what content a specific visitor sees based on information known about that visitor in your instance of Lead Gen & CRM. To create dynamic content rules, create or edit a landing page:

  1. Click  bolt.png  Dynamic Web Content in the left panel.
  2. Click the Dynamic Content Rules tab.
  3. Click Add Rule.

    Add a new dynamic content rule to your landing page
     
  4. Click Add.
  5. Enter a name for the rule group.
  6. Select either all or any in the criteria drop-down menu.
  7. Select the desired lead field in the Select Lead Field drop-down menu.

    Enter name for your new dynamic content rule
     
  8. Select either is equal to or is not equal to in the conditional drop-down menu.
  9. Optionally, click Add to add more dynamic rules.
  10. Click Create and Add Dynamic Content Rule to this Page Group.

    Enter criteria for new dynamic content rule
Exclamation Point IconImportant: Rule groups and rule segments are universal, and modifications to either will impact all emails or landing pages the rules are currently applied.


Configuring Dynamic Content Rule Segments

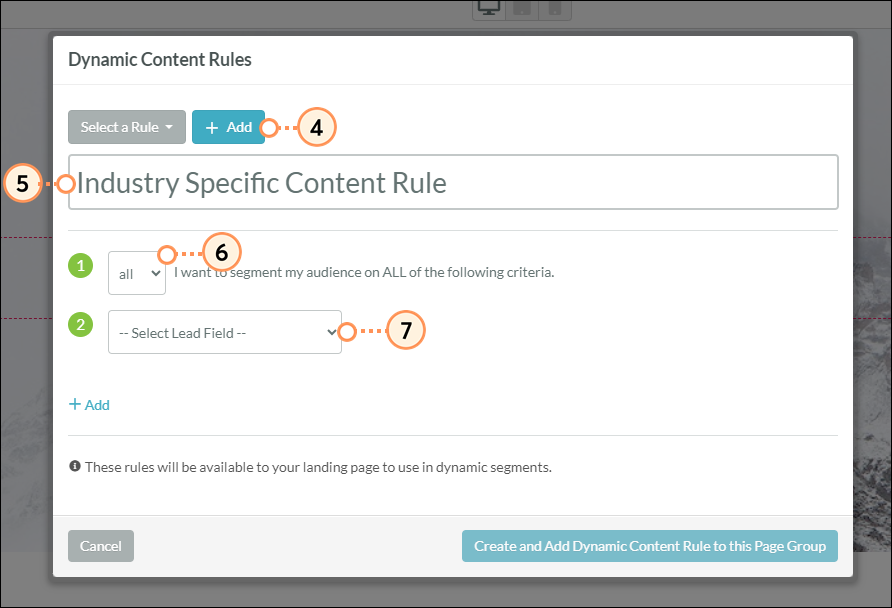
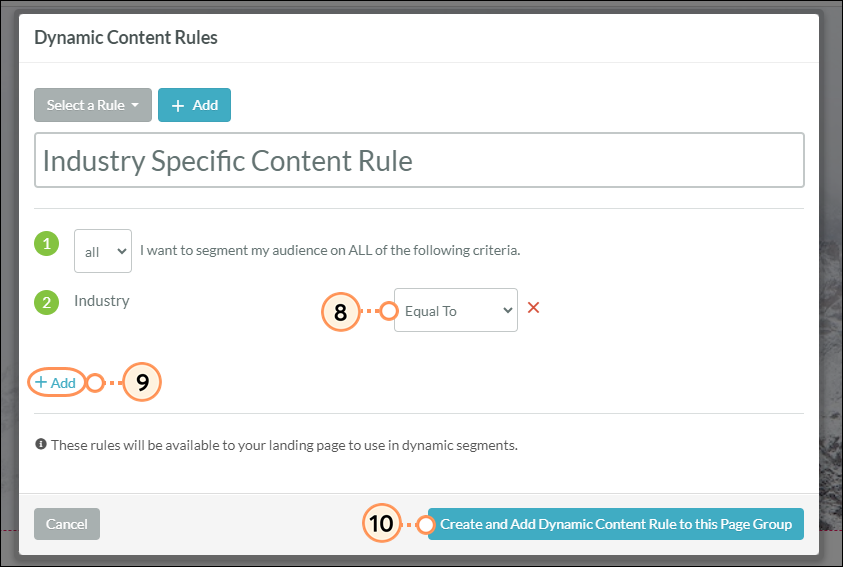
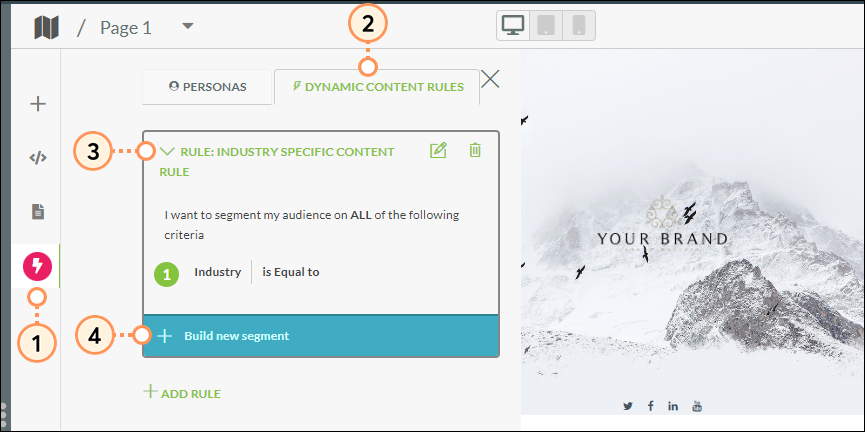
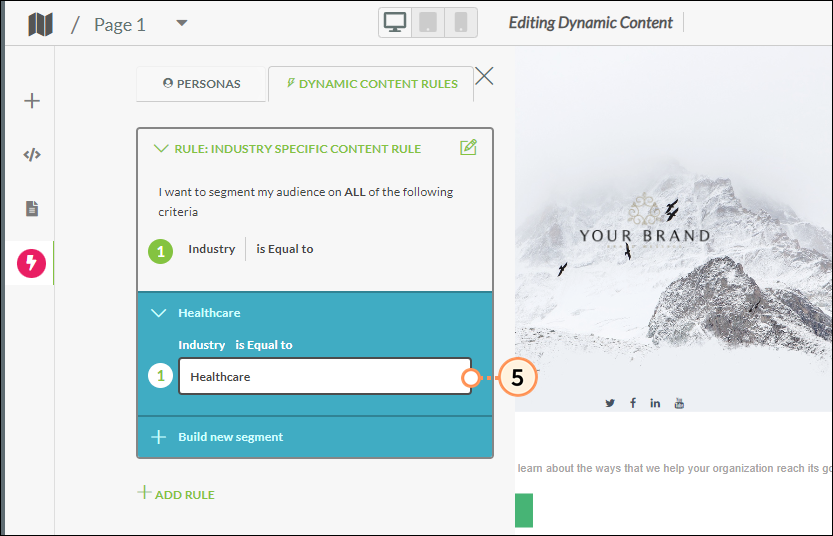
Once you have created a dynamic content rule, you will see the dynamic content icon in the left sidebar navigation turn red. This indicates there are active rules on the page. In order for Lead Gen & CRM to know how to differentiate content, you need to create rule segments. Rule segments are the variations of the field type and the conditional. To build rule segments into a landing page with dynamic content rules:

  1. Click  bolt.png  Dynamic Web Content in the left panel.
  2. Click the Dynamic Content Rules tab.
  3. Click the desired dynamic content rule.
  4. Click Build new segment.

    Add new segment to dynamic content rule
     
  5. Enter text or select an applicable value, depending on the rule type in the Select a value drop-down field.

    Enter value for segment
     
Repeat as necessary. At any time, you can edit the dynamic content rule by clicking the  edit.png  Edit icon and delete the dynamic content rule by clicking the  close.png  Delete icon.


Setting and Previewing Dynamic Content

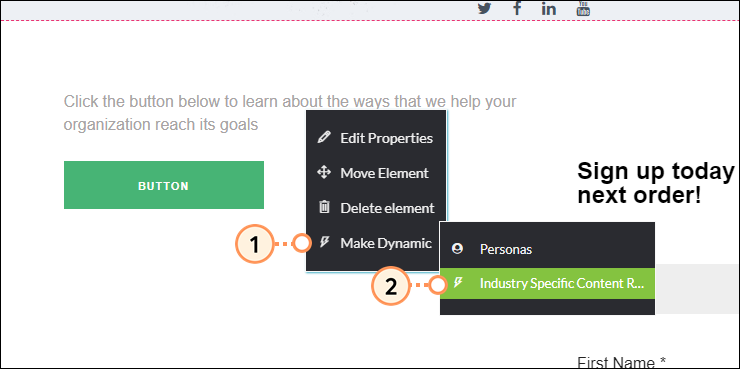
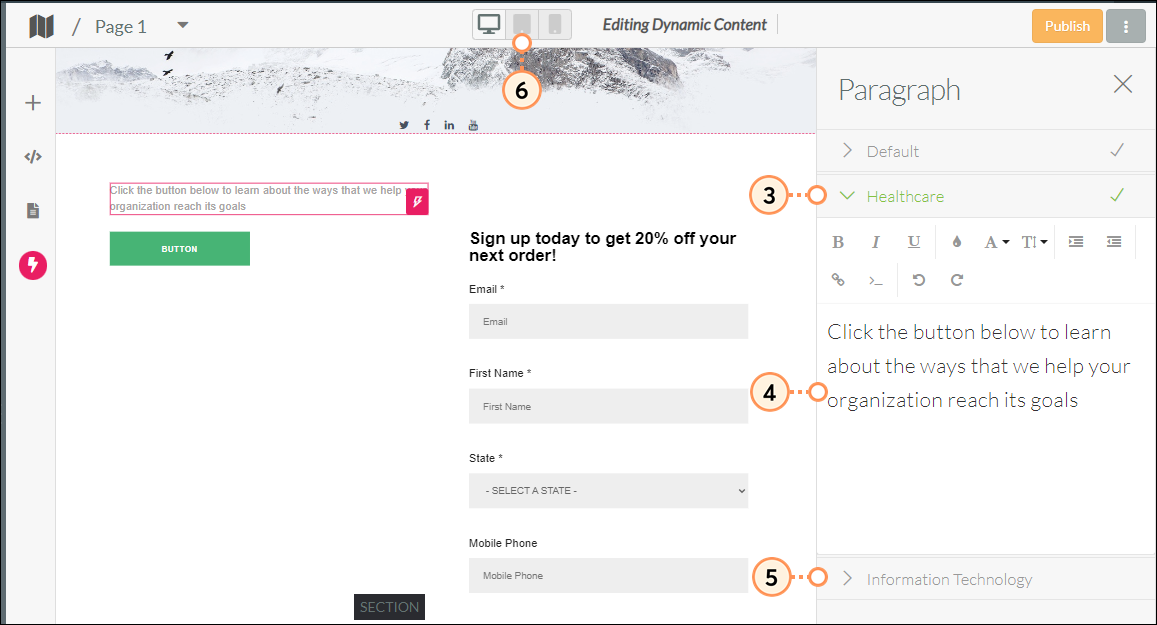
Once your rule segments have been created for your rule attributes, you can start making your content dynamic. Even certain elements can be dynamic. For example, Header (<h1> through <h6>), paragraph (<p>), and image (<img>) elements can all be made dynamic. To set and preview dynamic content:

  1. Right-click on the desired element and click Make Dynamic.
  2. Choose the desired rule from the available dynamic content rules.

    Click on element and make dynamic
     
  3. Select a rule segment in the right panel.
  4. Enter the dynamic text to display under Content and modify the text formatting as necessary.
  5. Repeat for other dynamic content.
  6. To Preview, at the top of the screen, select one of the following device views:

       •   screen.png  Desktop
       •   tablet.png  Tablet
       •   mobile3.png  Mobile

    Enter in segment specific content


Setting Lead Records

Once the dynamic content has been set, it is imperative to test the content to ensure it is active. To set lead records and test dynamic content, first ensure you are a lead in your own instance of Lead Gen & CRM and ensure tracking has been established on your device.

  1. Click Contacts in the left toolbar.
  2. Click your own lead record.
  3. Change your fields to match to the fields you used in the dynamic content rules and rule segments.
  4. Return to the landing page.
  5. Refresh the landing page.

Once refreshed, you should see the content of the page has changed based on the value in those fields.


Using Merge Variables in Landing Pages

To set merge variables for a landing page with dynamic content, do the following:

  1. Right-click on the desired element and click Dynamic Content > Edit.
  2. Click the desired rule drop-down menu.
  3. Select the text that you want to set as a merge variable.
  4. Click  mergevariable.png  Insert Merge Variable in the toolbar.
  5. Select the merge variable to show in the Merge Variables list that appears.
  6. Click back into the landing page.


Did this article answer your question?


Constant Contact Logo

Copyright © 2025 · All Rights Reserved · Constant Contact · Privacy Center