Lead Gen and CRM's landing pages come equipped with a comprehensive, robust content editor. Before you begin building landing pages, gain an understanding of the features available to you within the editor. Learn how to access blocks, layouts, and elements. See where to access your page's HTML code and the page settings.
Once you're ready to start building, refer to Creating and Editing Landing Pages.
| Administrators | ✓ | |
| Company Managers | ✓ | |
| Marketing Managers | ✓ | |
| Sales Managers | ||
| Salespersons | ||
| Jr. Salespersons |
| Tip: Are you looking for information about Constant Contact’s Email and Digital Marketing product? This article is for Constant Contact’s Lead Gen & CRM product. Head on over to the Email and Digital Marketing articles by clicking here. Not sure what the difference is? Read this article. |
To match your landing pages to your website and existing brand, we recommend building a set of custom pages within a funnel. Design the layout and elements of those pages to match your brand. Common brand elements include the header, the footer, button shapes, and button colors.
You can then copy the funnel whenever you want to replicate that design. While you'll need to manually change the colors and fonts of any elements added to your pages, starting from a copied funnel can make your designing process easier.
The ![]() Add Content feature allows you to add pre-made content, like blocks and layouts, or insert HTML elements. This content can be arranged and rearranged as necessary. Blocks, layouts, and elements are different from one another, and they should be utilized in different ways.
Add Content feature allows you to add pre-made content, like blocks and layouts, or insert HTML elements. This content can be arranged and rearranged as necessary. Blocks, layouts, and elements are different from one another, and they should be utilized in different ways.
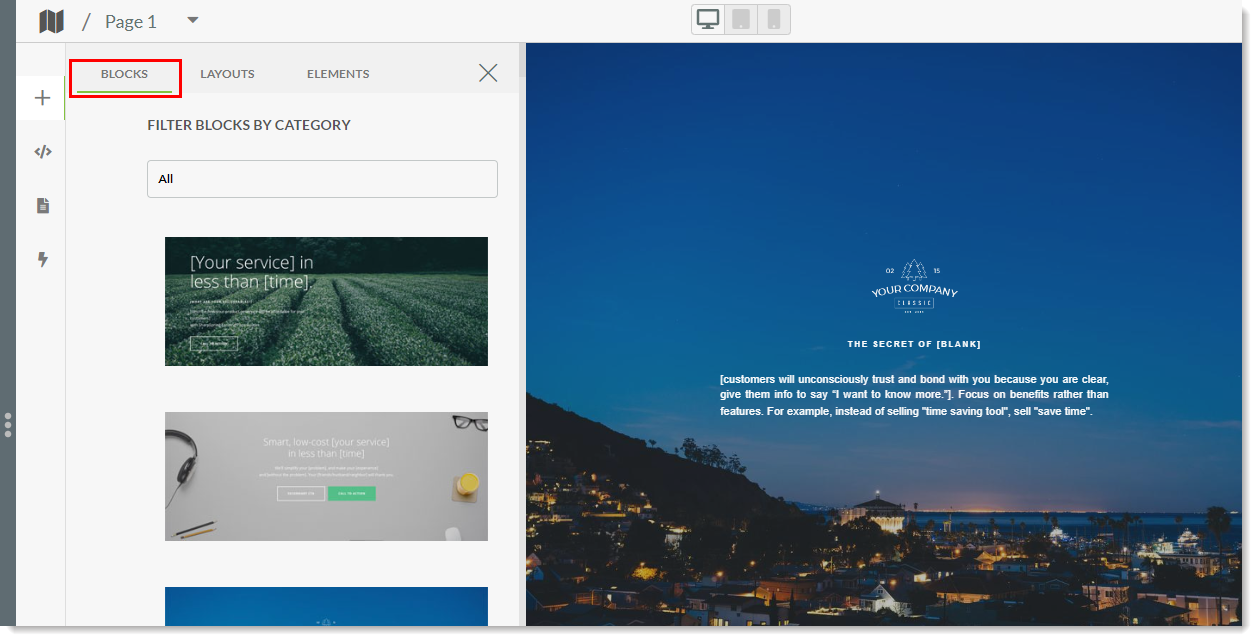
Blocks are pre-made sections of content. Blocks have a specific design, color scheme, set of fonts, and presentation. Blocks often come with buttons and text fields included. As these are pre-made and are stock content, you will need to customize it all to better reflect what it is you want your page to represent. To that end, be aware that blocks can be customized with elements, such as other buttons and text fields.
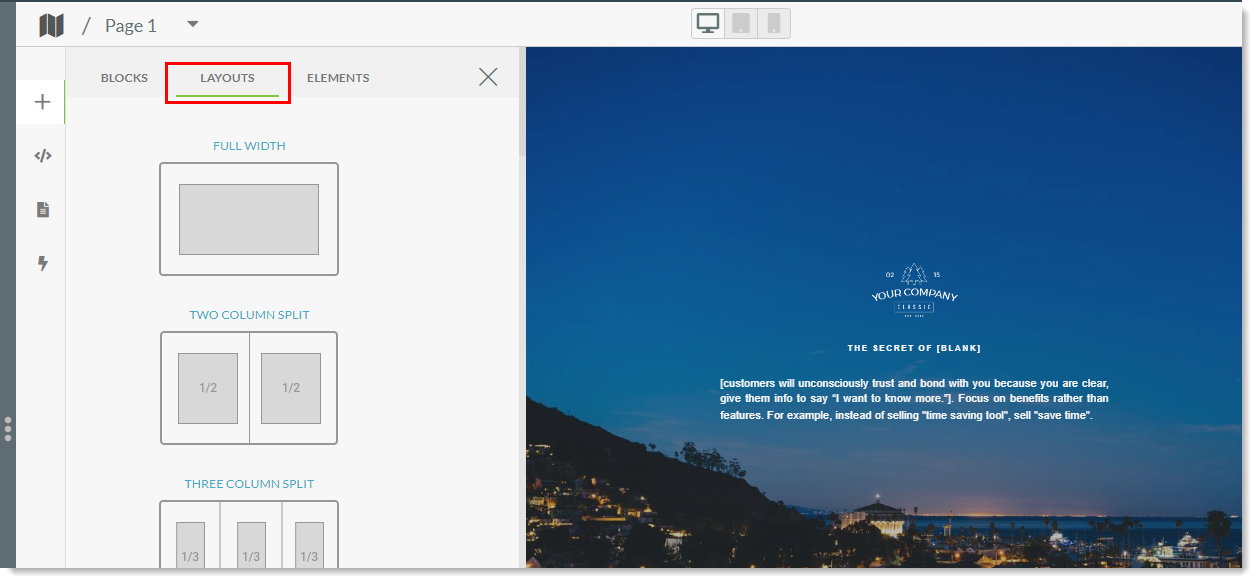
Layouts are pre-formatted text structures and serve as the arrangement of visual and text elements on a page. Layouts, by default, are blank and are structural in nature. As such, they must have elements inserted and arranged. Layouts determine the overall look and feel of how a section of content is presented. For example, the Two-Column layout will display text, images, and other elements two equally sized columns that extend the length of the section.
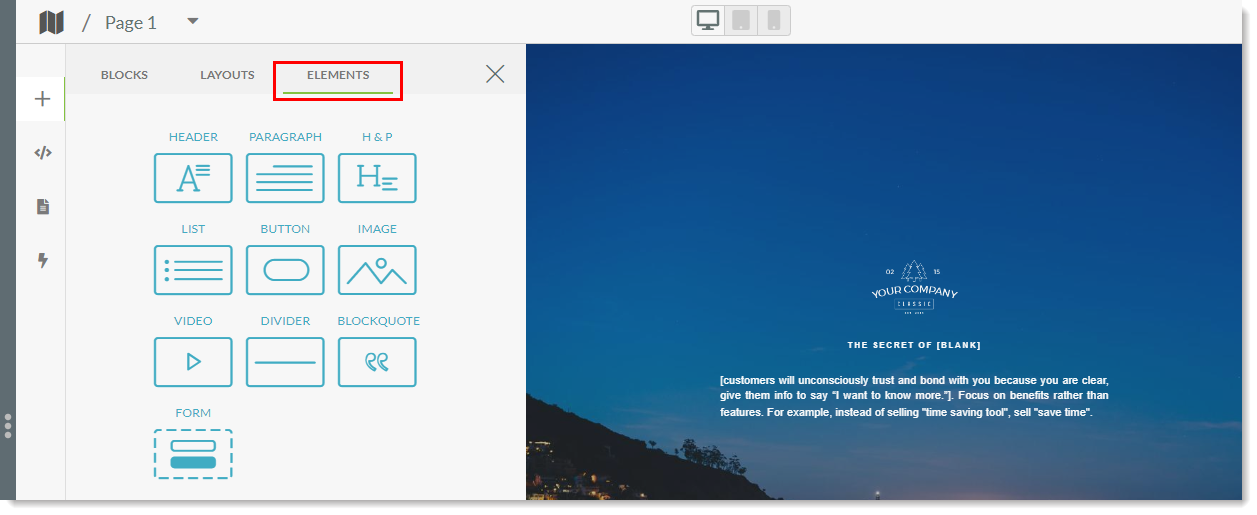
Elements are simple text, image, video, and functionality objects that are the building blocks of your landing page. They determine what is presented and how the page viewer can interact with the available content. Elements are set within blocks or individual layout sections and can be modified as needed.
Double-clicking into added content allows you to directly edit the content in blocks or layouts, as well as inserted elements. When editing content, you can edit entire content blocks or specific content elements on a page. Double-clicking allows you to edit both sections and elements.
Alternatively, you can edit the properties of an element or section by right-clicking and selecting Edit Properties.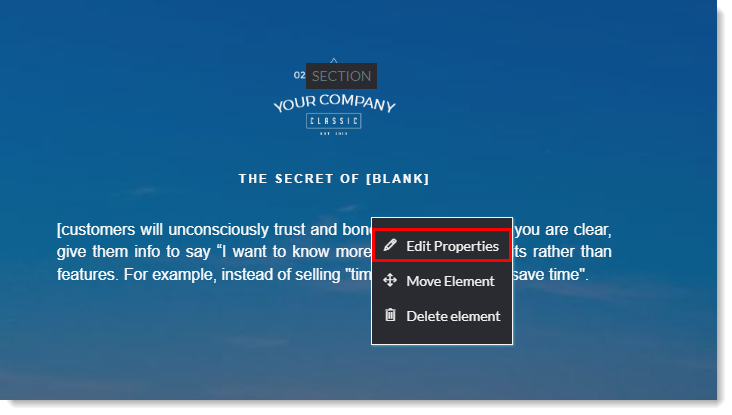
You can also edit individual versions of the landing page for different devices. For more information, refer to Editing Mobile Versions of Landing Pages.
You can hide specific content sections from appearing on mobile devices by going into the section properties and using the Hide on Mobile toggle. This toggle is unavailable on individual blocks, layouts, or elements.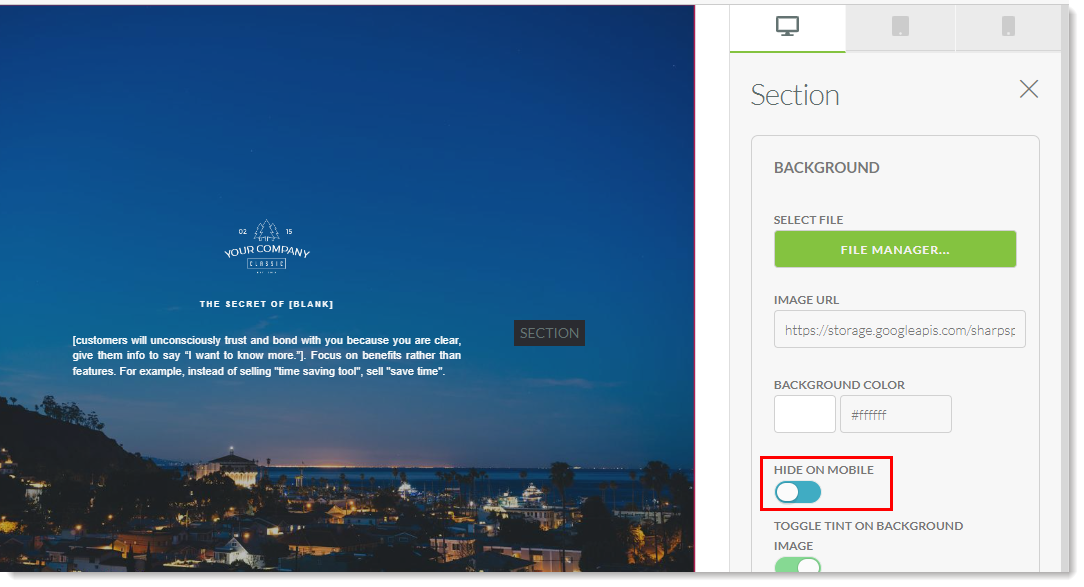
The ![]() Edit Code feature allows you to create custom HTML markup, add your own CSS, or insert custom JavaScript into the pages. This will expose the framework for the existing landing page you are editing, allows you to edit the raw code. Code can be added to and edited in the Head and Body sections. Code can be edited across all pages, or on individual pages.
Edit Code feature allows you to create custom HTML markup, add your own CSS, or insert custom JavaScript into the pages. This will expose the framework for the existing landing page you are editing, allows you to edit the raw code. Code can be added to and edited in the Head and Body sections. Code can be edited across all pages, or on individual pages.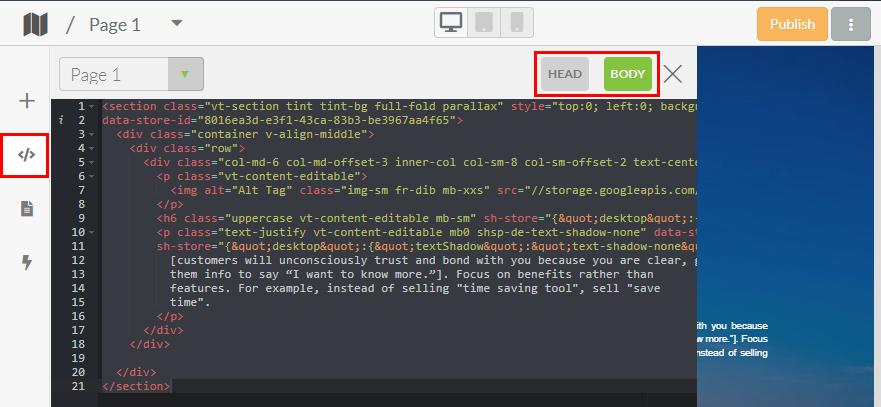
|
• Use Consent Banner
• Description
• Consent Label • Deny Label
| • Link Name • Link URL • Theme |

The ![]() Dynamic Web Content feature is where you can personalize your landing page content for different audiences. This personalization deals with which personas and dynamic content rules you apply to landing pages.
Dynamic Web Content feature is where you can personalize your landing page content for different audiences. This personalization deals with which personas and dynamic content rules you apply to landing pages.
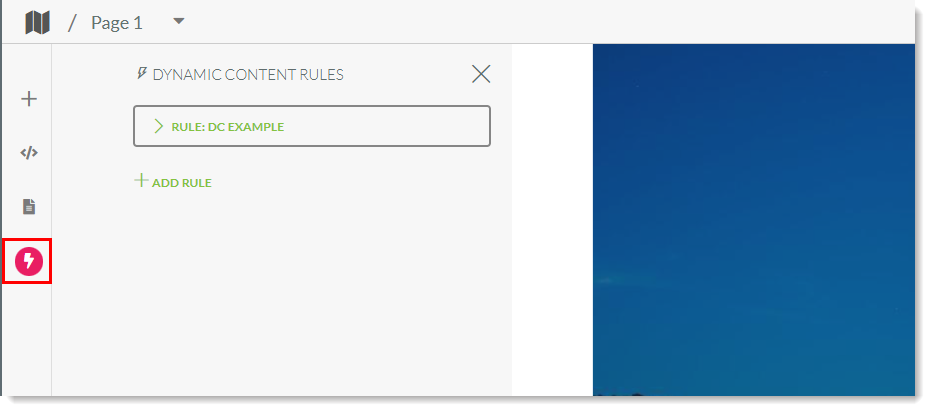
Refer to the following help articles for more information on the many ways to apply dynamic content and personas to landing pages:
The ![]() Auto-Save feature is, by default, turned on to ensure edits to your landing pages are saved in real time. If you would only like to save changes when you actively choose to, click this icon to toggle auto-save off.
Auto-Save feature is, by default, turned on to ensure edits to your landing pages are saved in real time. If you would only like to save changes when you actively choose to, click this icon to toggle auto-save off.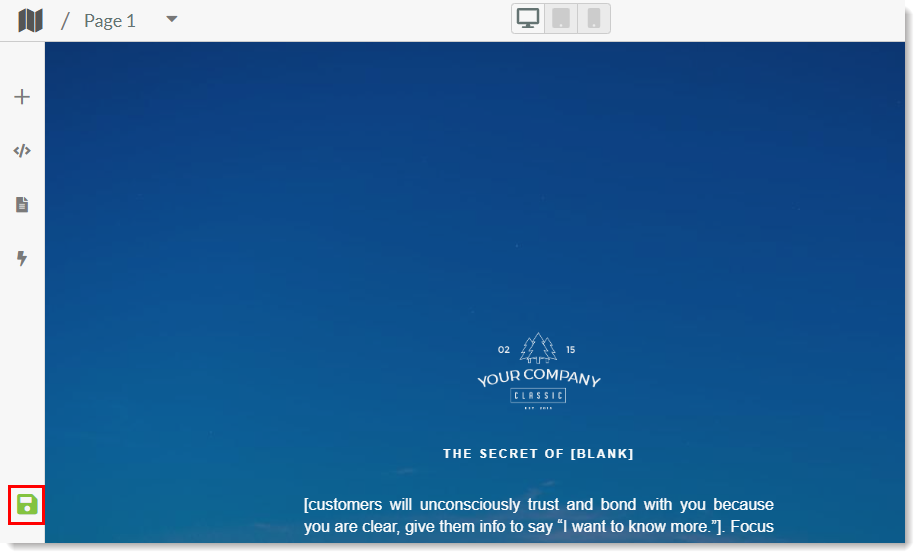
The Preview on Different Devices feature is in the toolbar above the landing page screen. This feature allows you to preview your landing page as it will appear on a desktop, tablet, or mobile device.
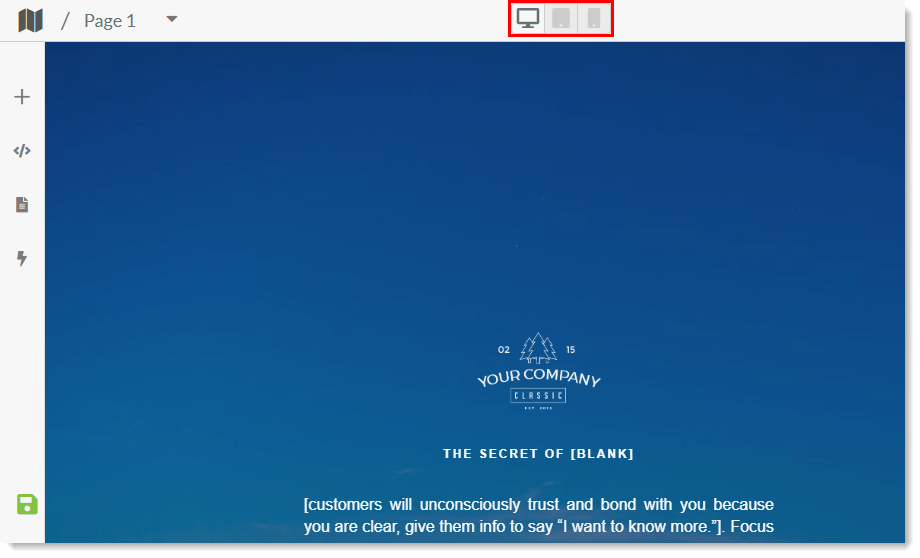
Any page sections that had Hide on Mobile toggle turned on will disappear when using the mobile preview. These sections will only appear on desktop and tablet devices.
When you visit your published landing page, you will notice a timestamp (?ts=123...) appended to the landing page URL. This is a timestamp of that publication and does not need to be included in the link. You can delete anything that comes after the question mark (?) in your URL.
Copyright © 2026 · All Rights Reserved · Constant Contact · Privacy Center