We're making it easier to get around Constant Contact with a brand new left navigation. Not all accounts have that change yet, so if your navigation looks different from our articles, that's why–but everything from the top can now be found on the left!

Email and Digital Marketing
How can we help you?
Search our help articles, video tutorials, and quickstart guides

You've got this. You've got us. Search our Knowledge Base to quickly find answers to your questions.

Message new or existing list members using the Automation Path Builder

Article: 000049710
Updated: March 13, 2025

Create a list join path to automatically reach out to all of the contacts on a specific list, whether they’re new sign-ups to the list or if they’re existing contacts that are moved onto the list


A well-segmented contact list ensures you're getting the right content to the right contacts. It's ok to move contacts from one list to another when they don't fit the list criteria anymore! Or, maybe sometimes you want your contacts to be on multiple lists for different reasons—that's ok, too! When you add a contact to a different list, our Automation Path Builder gives you a chance to send an email or SMS message to engage with them


Light Bulb IconDid you know? There are a few ways your contacts can end up on a different list. If you have the Update Profile link enable in your footer, your contacts can change the list they're on themselves. The shopping activity of your ecommerce customers affects the lists they're on. You can also manually change the list a contact is part of at any time.


Create a list join path to engage with your contacts

Once your list join path is created and saved, you can find it again through Marketing campaigns > Automations page, or Marketing campaigns > All campaigns page.

  1. Click Marketing campaigns > Automations.
  2. Click the Create an automation path button.

    Marketing campaigns drop-down menu and Automations option selected, and Create an automation path button
     
  3. Click the View all templates button.

    Select a template overlay with Recommended templates section and View all templates button
     
  4. Scroll down to the Contact activity section and select the Added to specific list option.
  5. Click Create path or Next button.

    Select a template overlay with Contact activity section with Added to specific list option, and Next button


Customize the list join trigger

Exclamation Point IconImportant: If you have a welcome path already active for a specific list, either choose a different list for your list join trigger or deactivate the welcome path. If both paths are active for the same list, a contact that joins the list will trigger both paths and potentially receive duplicate or conflicting content from you.


You have control over which list serves as the trigger for your automation path, and you can even select multiple lists.

  1. Click the three dots on the Trigger step in your path, then select "Edit."

    Automation Path Builder with Added to specific list template, and Trigger step with menu expanded and Edit option
     
  2. Select a list or several lists from the drop-down menu.
    Note: If the list doesn't already exist, you first have to create a new list from the Contacts tab.
  3. Click Save.

    Trigger details overlay with On these lists field with list selected, and Save button


Light Bulb Icon
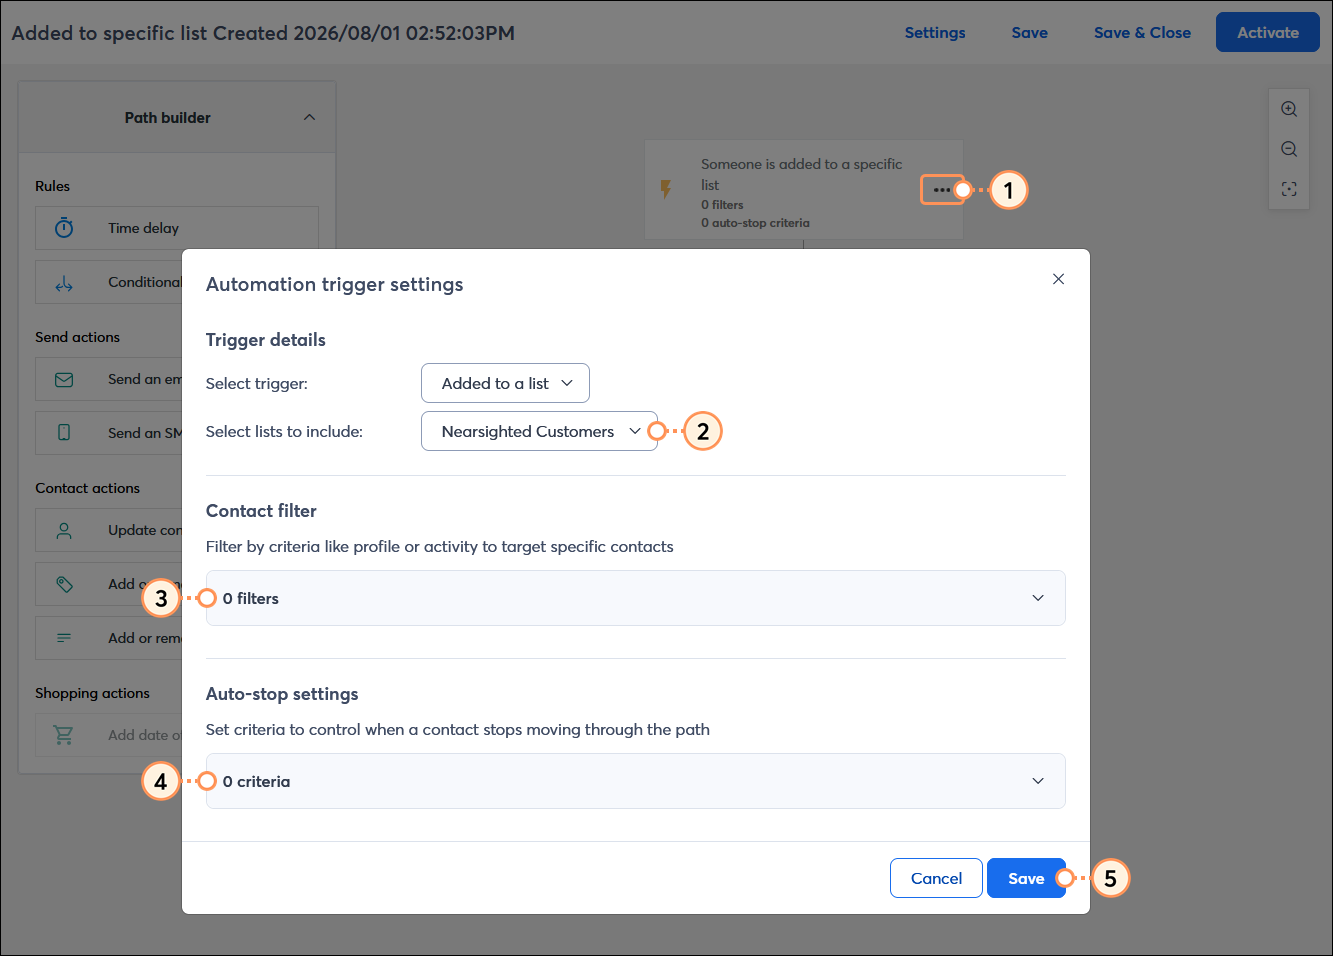
Design tip: Want to learn more about the triggers in your automation path? Check out this article for understanding triggers.


Create your email message content

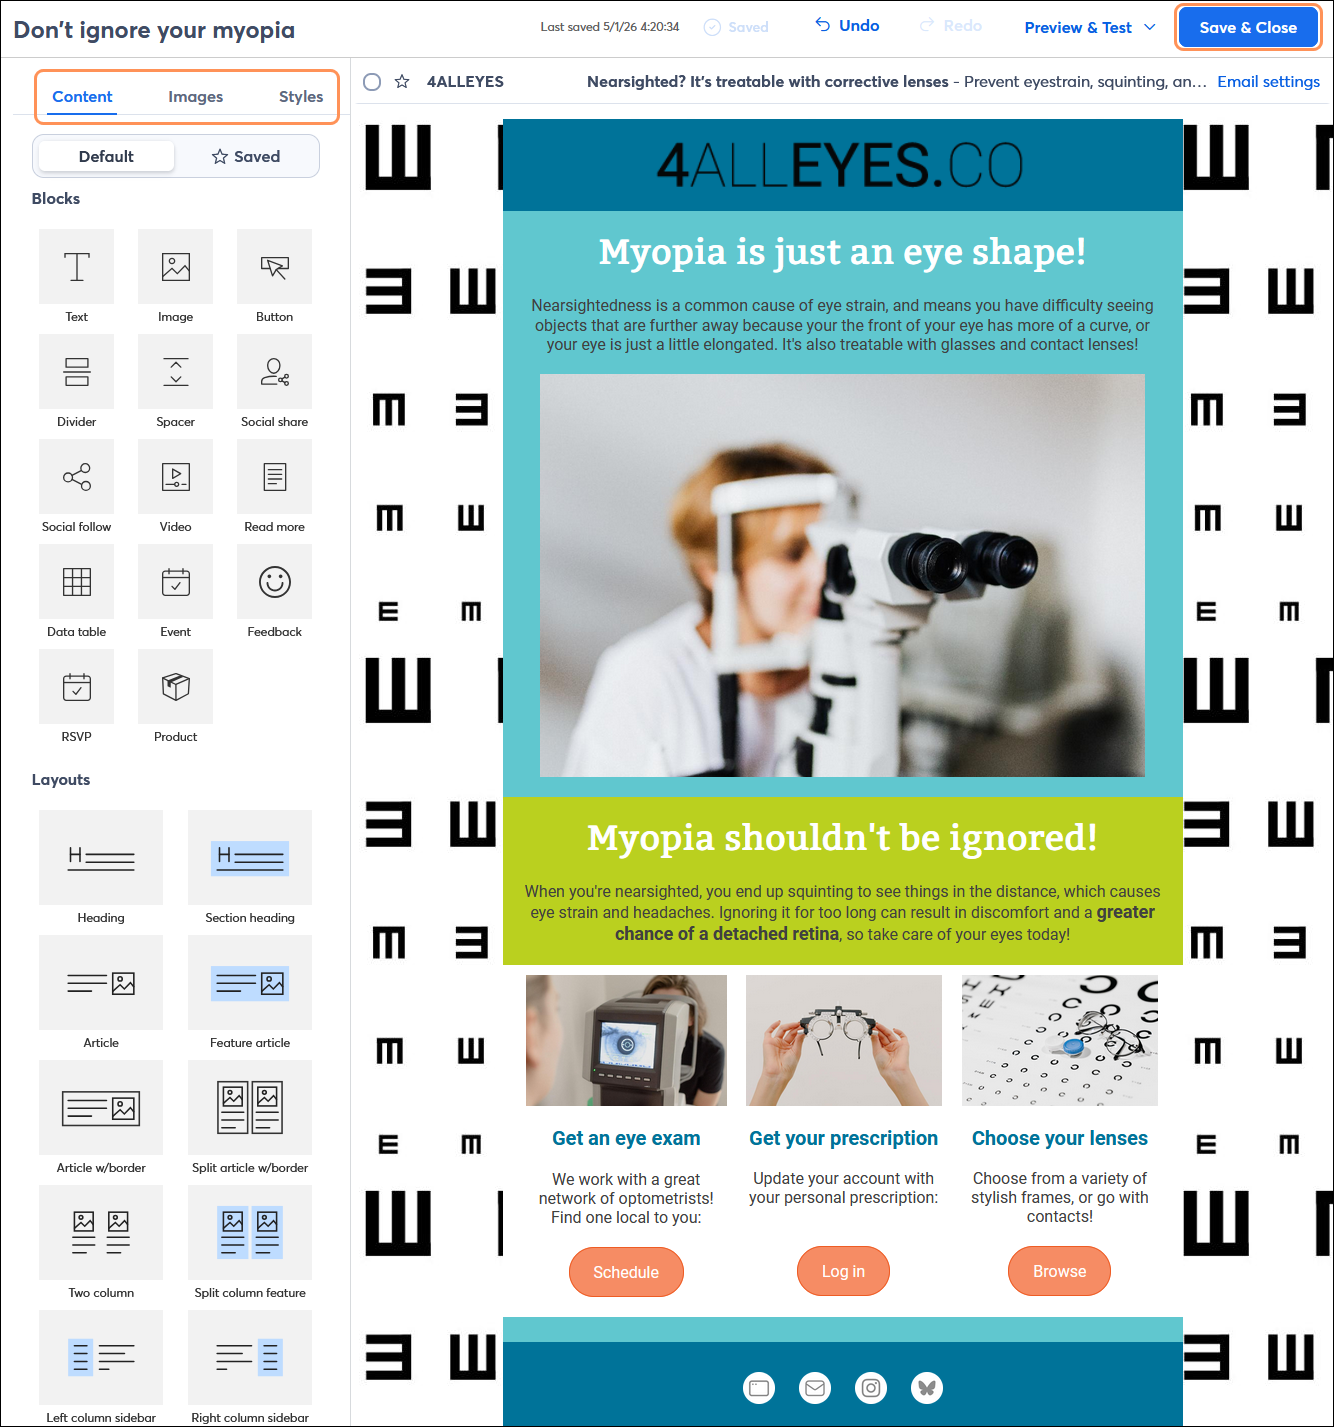
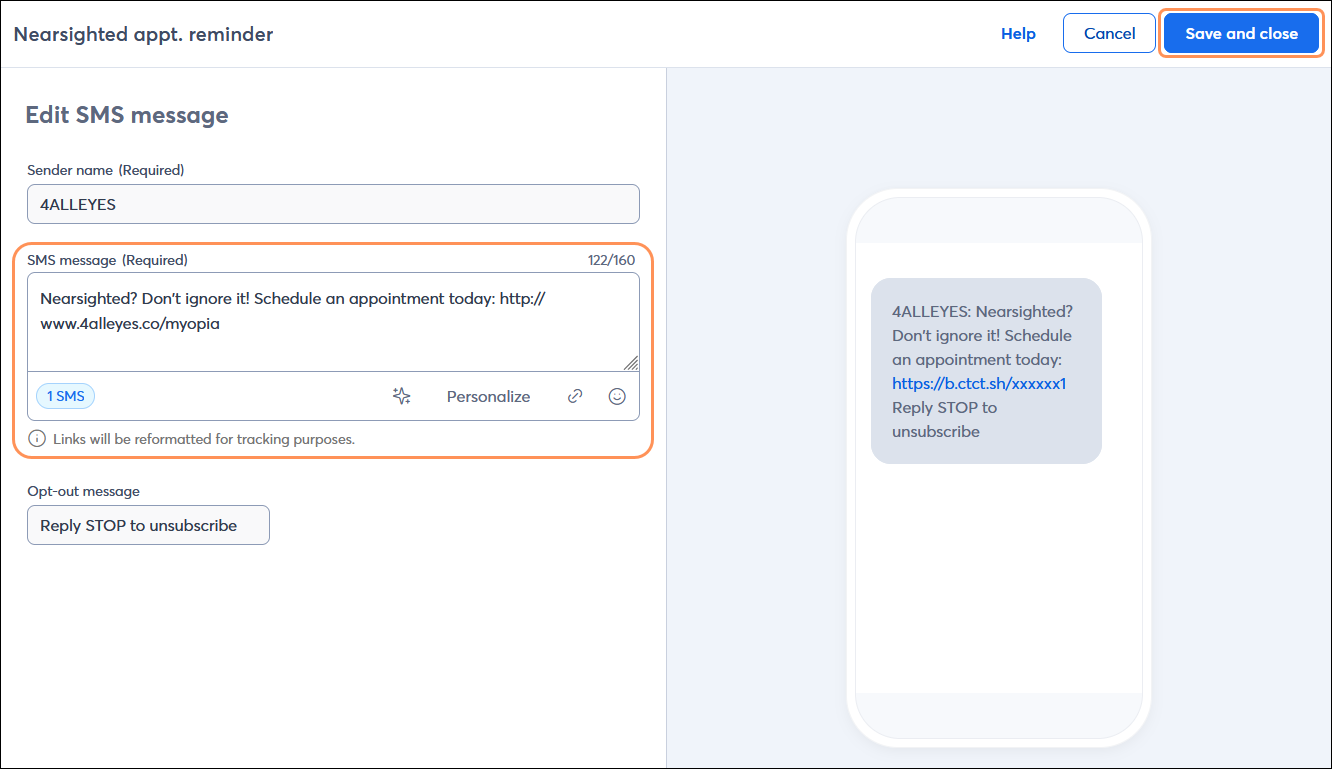
Your message content is fully customizable! It can be a simple "welcome" message, or use it to dive into details for your target audience.

  1. Click the three dots on the Send an email or Send an SMS step in your path, and select "Edit."

    Automation Path Builder with Added to specific list path, Send an email step with menu expanded and Edit option selected
     
  2. Give your new email or SMS message a unique name. If you're editing an email, you can choose to start from scratch or copy an existing email to give you a jumpstart.
  3. Click Continue.

    Automation Path Builder with Added to specific list path and Send an email overlay with Create a new email and Copy an existing email options, Name your new email field, and Continue button
     
  4. Use the email editor to customize your anniversary message content. First select a template, then use the email editor to customize your content. You also have the option to copy an existing email draft or sent email. Your message can include multiple images, links, and larger blocks of text. Learn more.
  5. Click Save and Close in the upper right-hand corner of the editor to return to the Path builder.

    Email editor with Build tab selected and email content and Save and Close button
     

Repeat the steps for each email or SMS message in your path.


Light Bulb IconDesign tip: The Added to specific list template doesn't include SMS by default, but if you're registered for SMS marketing, you can add SMS messages to your path too!


(Optional) Build out your list join path

The list join template provides you with a basic path that just needs the message content, but you also have the flexibility to make your path more complex with additional messages. Emails provide enough space for the most content flexibility, and SMS messages have a higher likelihood of being read and engaged with.

Use the Path builder to:


Activate your list join path

When you're ready, all that's left to do is activate your list join communication.

  1. Click the Activate button in the upper right-hand corner of the screen.

    Automation Path Builder with Added to specific list path and Activate button
     

Once your automation path is activated, you’re brought to the details page where you can review your performance and reporting information.


Questions?

Ask the Community

Did this article answer your question?


Constant Contact Logo

Copyright © 2025 · All Rights Reserved · Constant Contact · Privacy Center