Email and Digital Marketing
How can we help you?
Search our help articles, video tutorials, and quickstart guides

You've got this. You've got us. Search our Knowledge Base to quickly find answers to your questions.

Edit and manage an Automation Path

Article: 000044328
Updated: November 11, 2025

Make changes to the name or steps in a draft or active path, activate a path, or prevent emails and SMS messages from sending


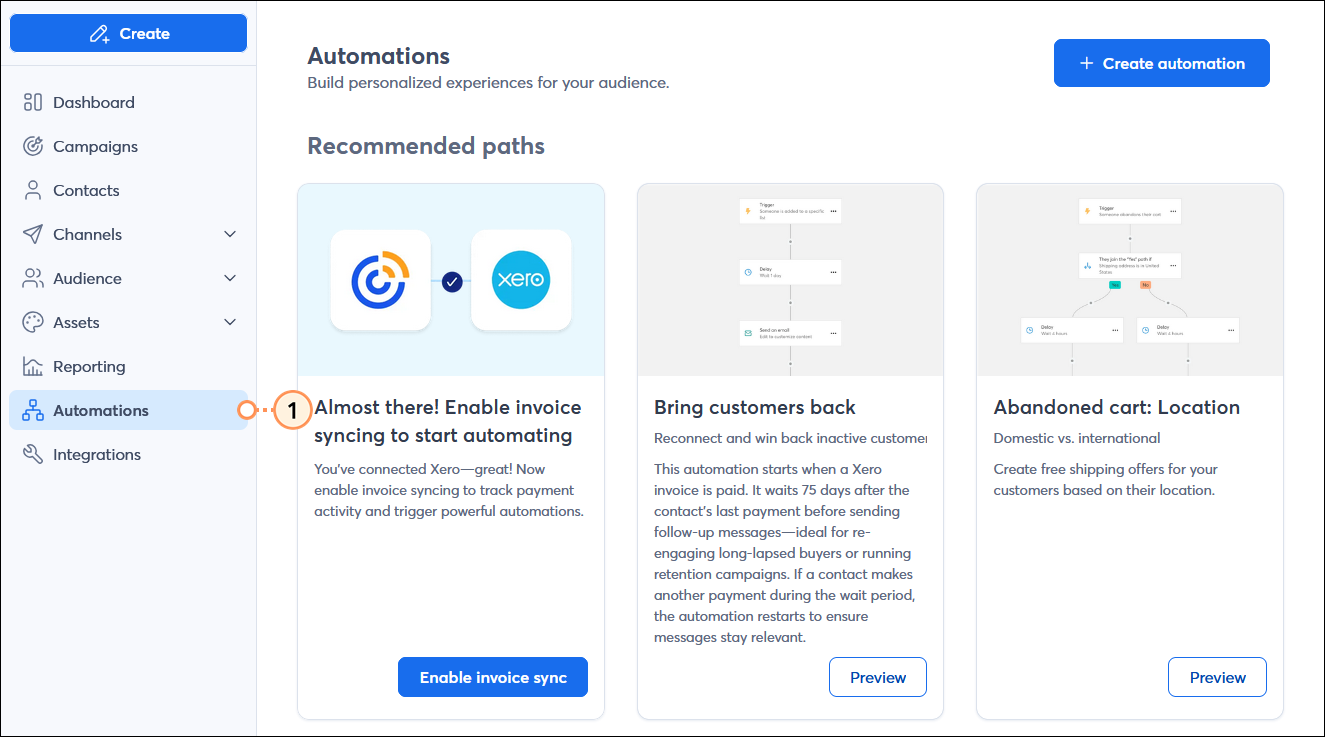
Business is always changing! Once an automation is set up and you learn more about your contacts' and customers' habits, making edits and deactivating outdated automations gives you full control over their experience. You can continue to modify these prebuilt templates as many times as needed, and stop them from sending when it's time for a new automation.

  1. In the menu on the left-hand side, click Automations.

    Left-hand menu with Automations option selected, and Automations dashboard

  2. To help narrow your search:
  • Select an automation status from the Status drop-down menu.
  • Select an option from the Last modified drop-down menu.
  • Select an automation based on its template type from the Goal drop-down menu.
  • Click the Clear all button to remove the selected filters.

    Automations dashboard with Status, Last modified, and Goal drop-down menus, and Clear all button

  1. From the Automations dashboard, you can:


Edit an automation

Exclamation Point Icon
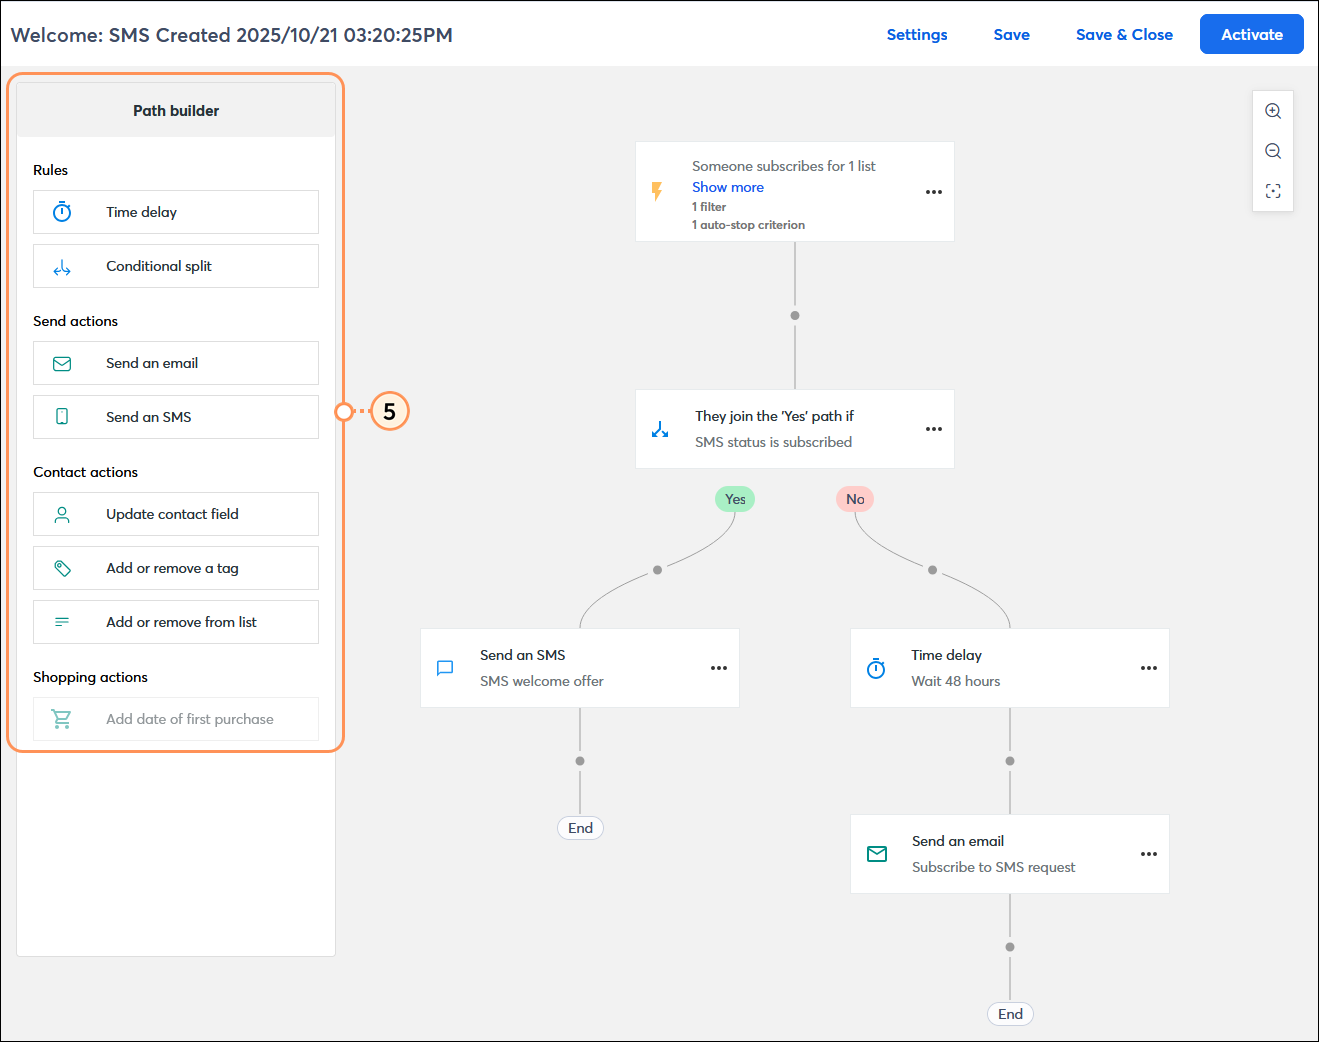
Important: Removing steps from a path that was already activated causes some contacts to drop out of the path altogether if they're on the deleted step when you reactivate your path.


Before an automation is activated, you can edit it as often as you need, and active automations can be edited at any time and then reactivated. When you edit an active automation, the contacts who already started your path continue to move along from the point where you begin to edit it. New contacts can also still join your path when they trigger it while you're making edits. Please keep in mind that deleting steps cause contacts to fall off of of the path, so procede with caution. Once you reactivate your path, your contacts won't know that there have been changes. New contacts that trigger the path follow the path including all of your edits. Contacts who were already on the path don't see any of the changes to steps that they have already passed, but do follow the updated path going forward.

  1. Next to the automation you want to change, click the button with the three dots and select the "Edit" option from the drop-down menu.
    Note: If you are editing an active automation, you must then click the Edit automation path button to confirm the action.

    Automations page with Automation paths section, Status drop-down menu and Draft option selected, draft automation with menu expanded and Edit option selected

  2. This brings you into the Automation Path Builder so you can continue building out your automation and creating your email and SMS content:


Activate a draft automation

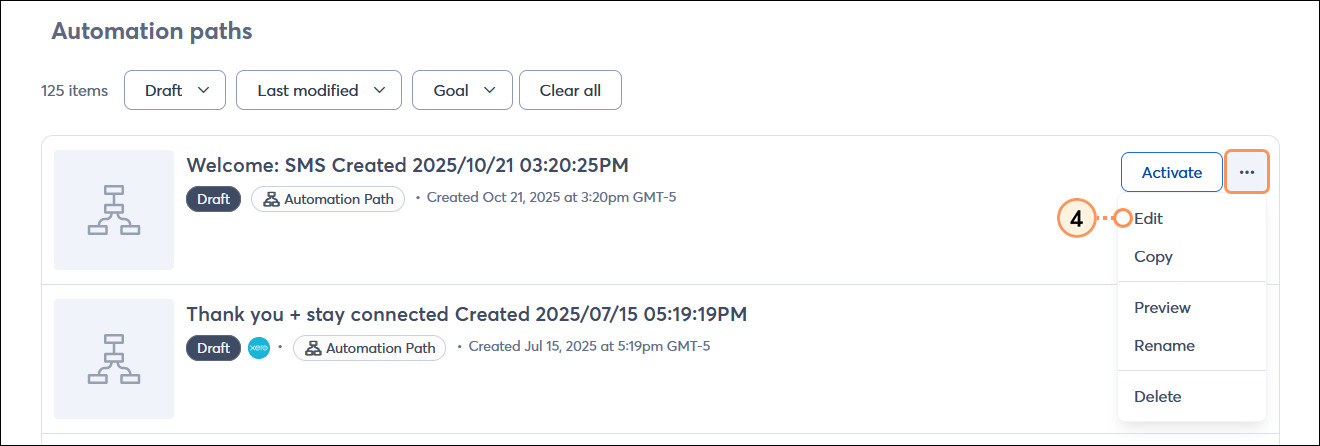
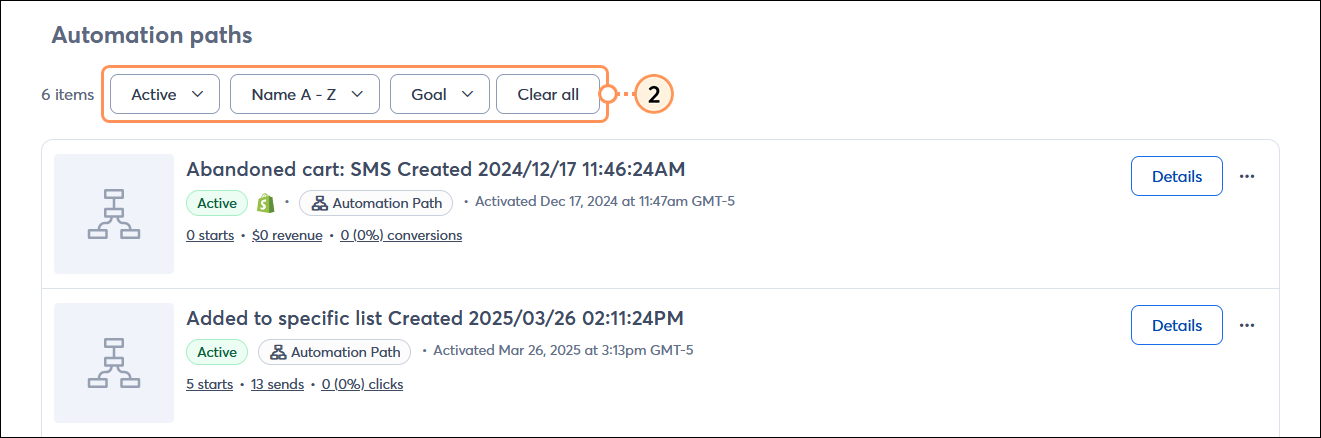
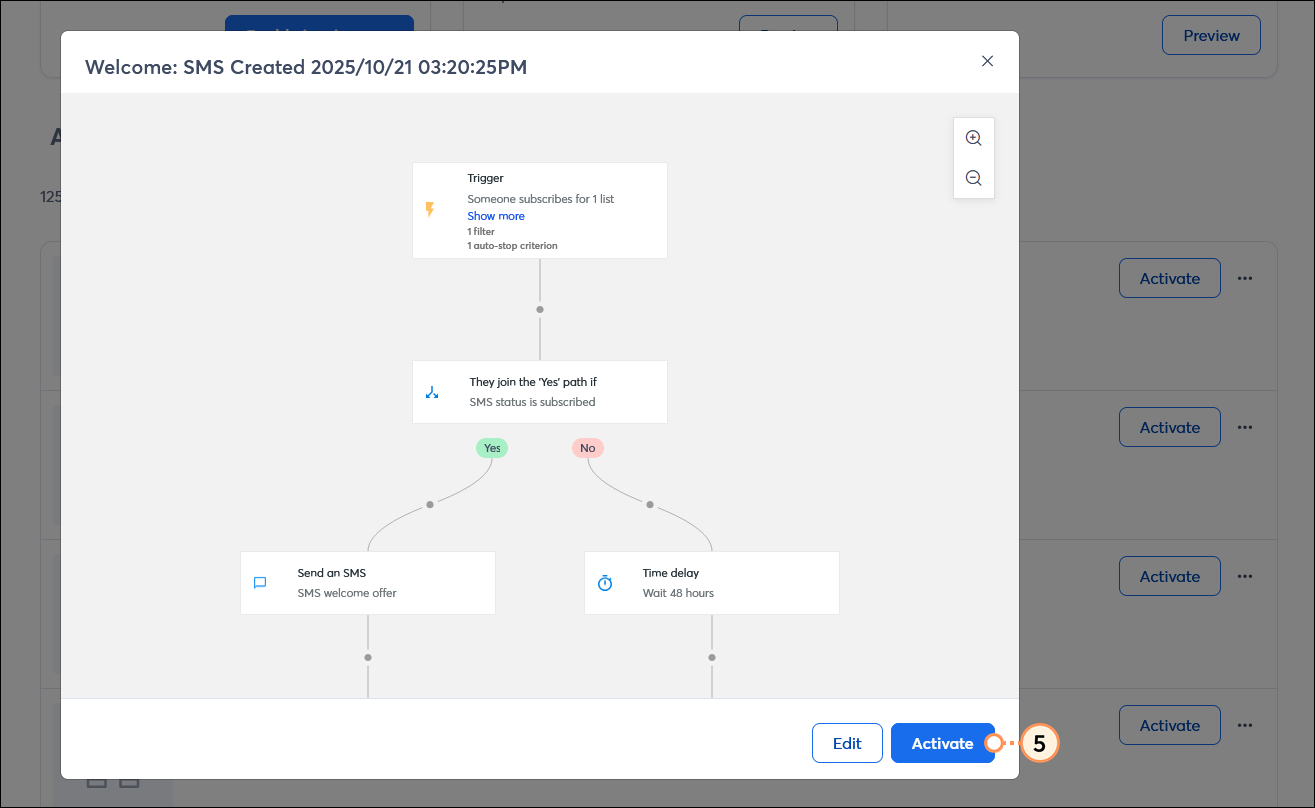
An automation in "draft" status can be activated at any time. Before you activate your automation, it's always a good idea to make sure that all of the path rules have the right settings and that the path actions have the right content.

  1. Next to the automation draft you want to activate, click the Activate button.

    Automations page with and Automation paths section, Status drop-down menu with Draft option selected, and draft automation with Activate button

  2. In the overlay for your automation, click the Activate button.
    Note: If you want to make sure that your path is fully built, click the Edit button to open the path builder. After reviwing, click the Activate button in the upper right-hand corner of the path builder.

    Automation overlay with path preview and Activate button


Rename an automation

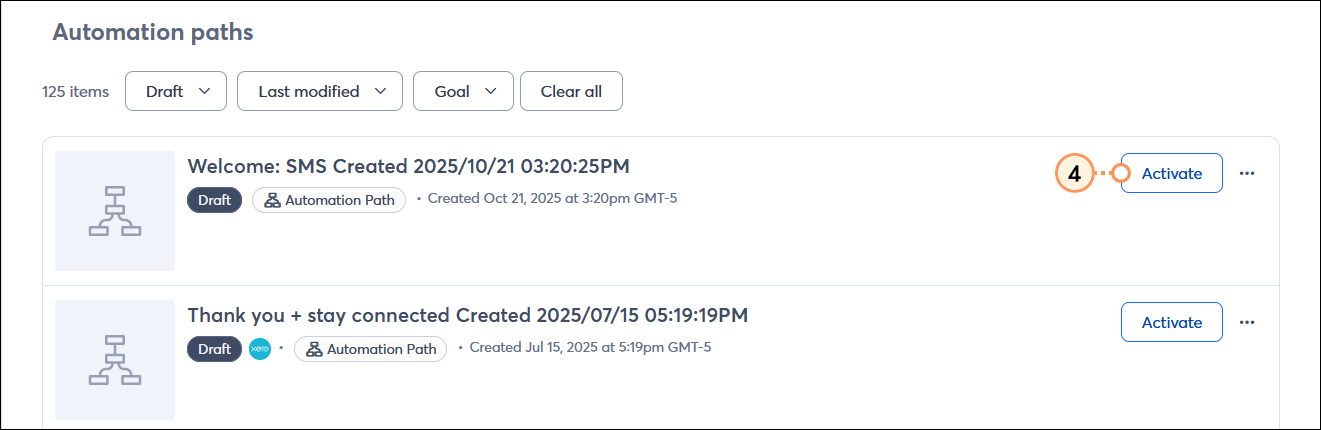
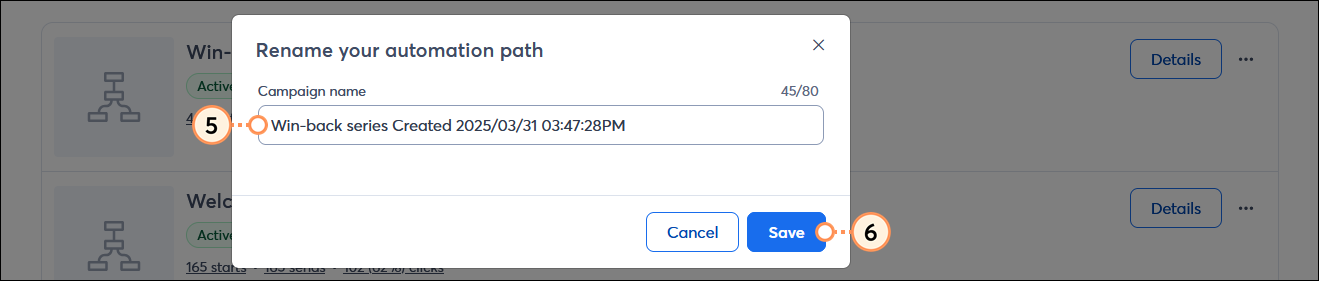
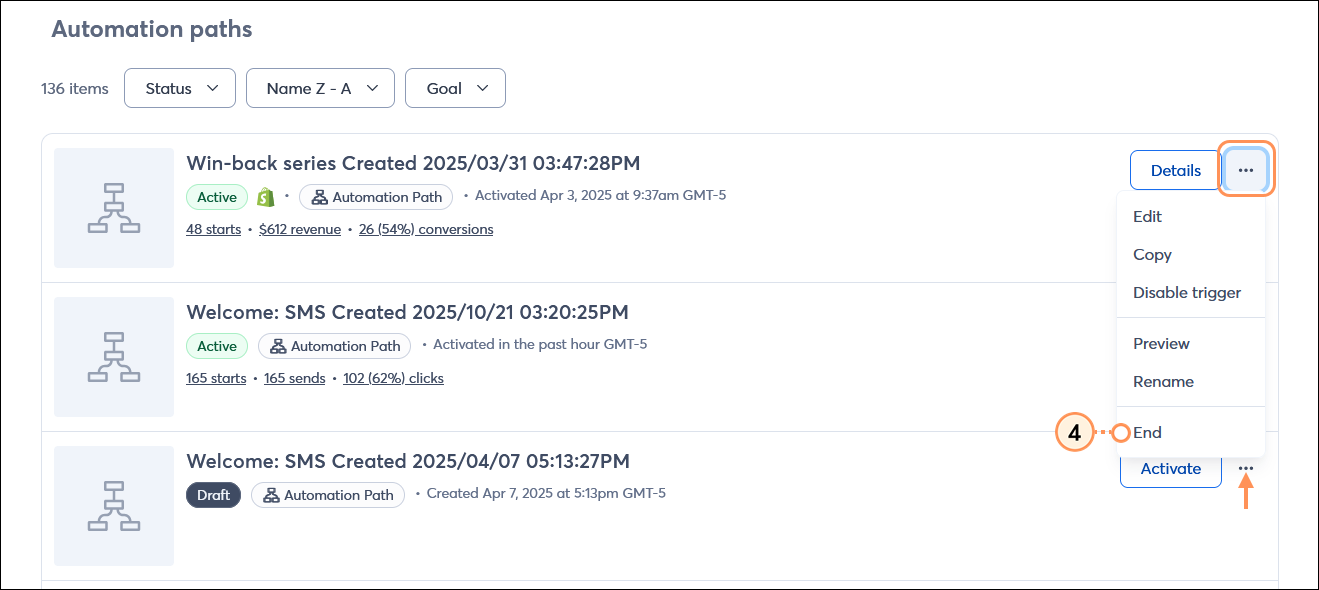
An active or draft automation can be renamed at any time. The automation's name is internal, so your contacts never see it. Each name must be unique and can be up to 80 characters long.

  1. Next to the draft or active automation you want to change, click the button with the three dots and select the "Rename" option from the drop-down menu.

    Automations page with Automation paths section, active automation with menu expanded and Rename option selected

  2. Enter the new name for your path into the Campaign name field.
  3. Click the Save button.

    Rename your automation path overlay with Campaign name field and Save button


Disable the trigger for an active automation

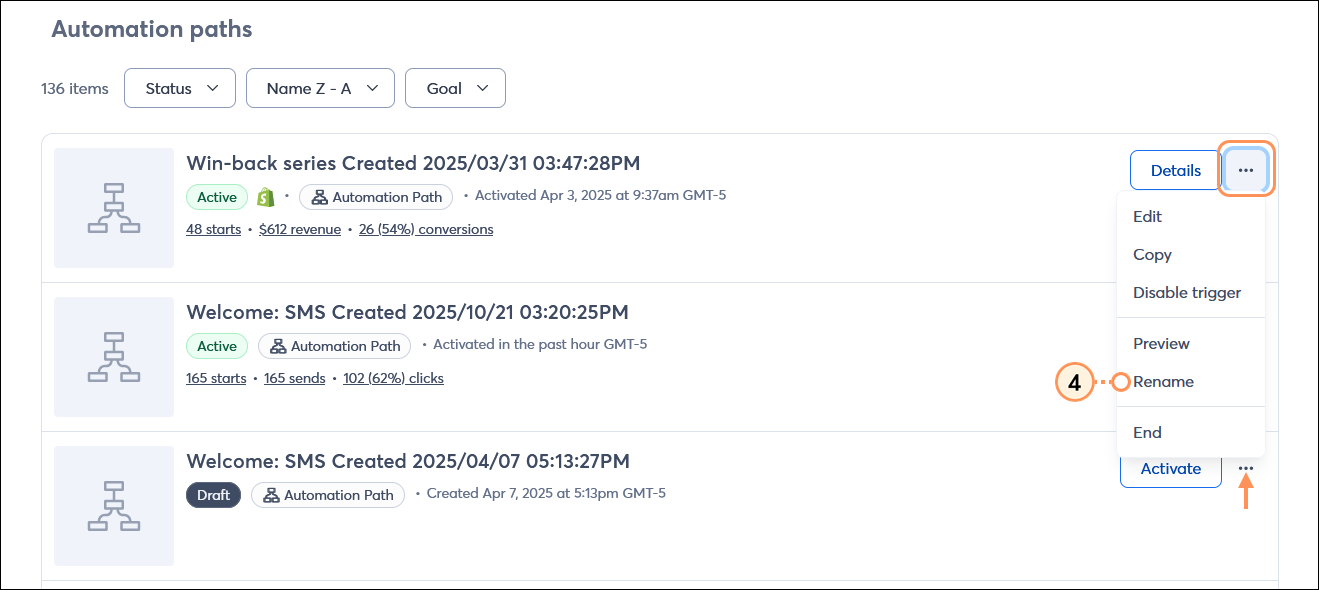
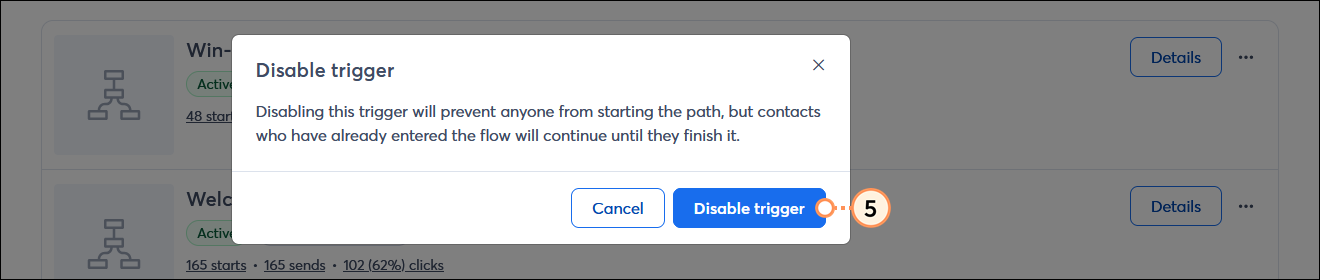
Disabling the trigger for your automation lets the contacts who are already on the path finish it, but it prevents new contacts from joining the path.

  1. Next to the active automation you want to review, click the button with the three dots and select the "Disable trigger" option from the drop-down menu.

    Automations page with Automation paths section, active automation with menu expanded and Disable trigger option selected

  2. Click Disable the trigger to confirm the action.

    Disable the trigger overlay with Disable the trigger button


End an active automation

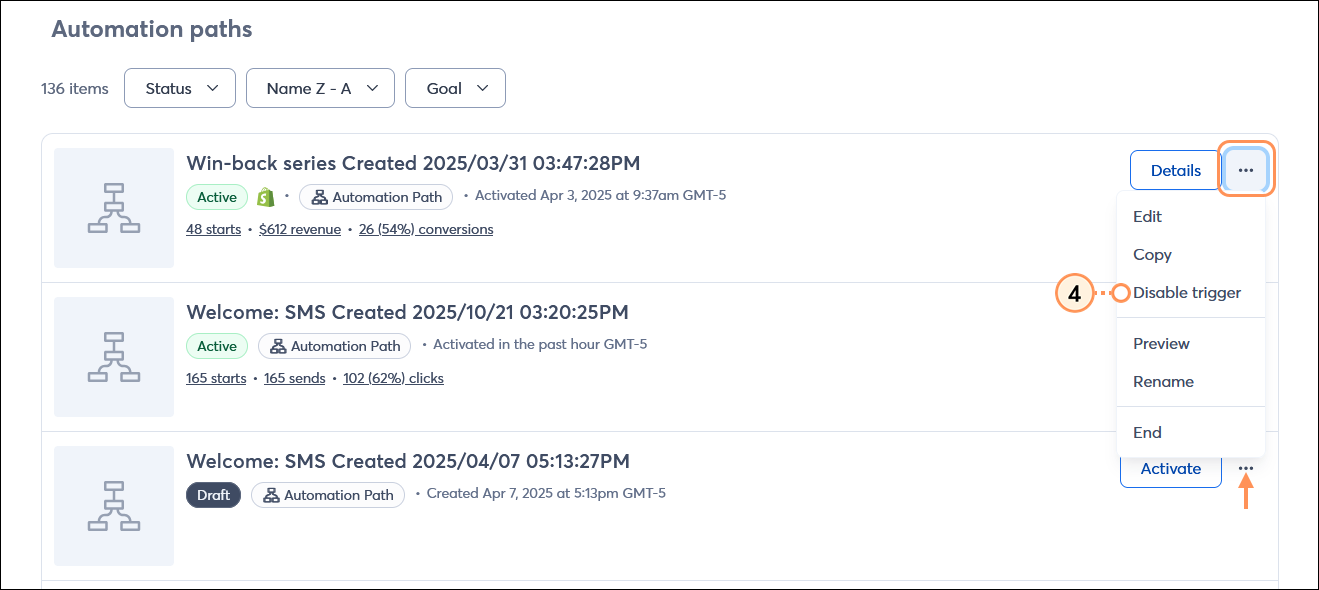
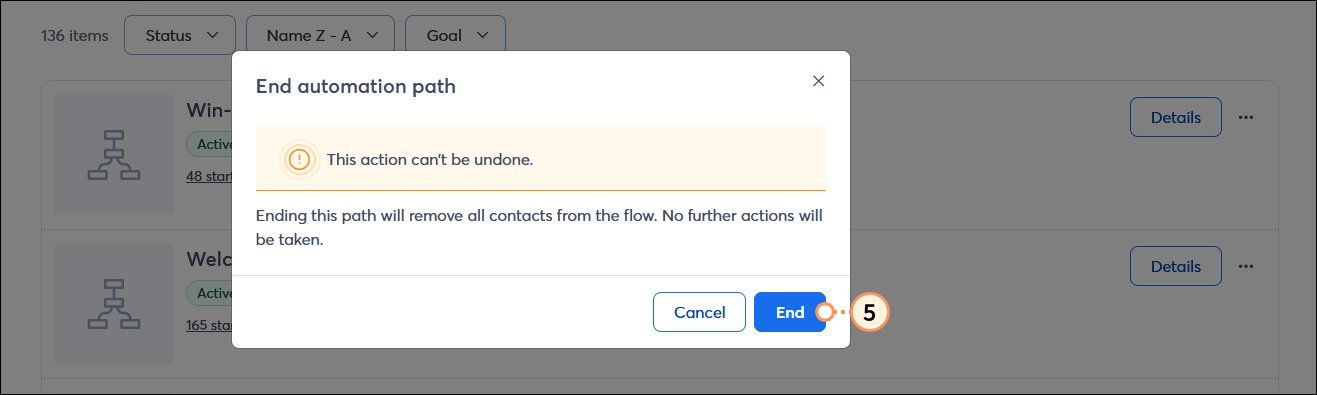
Ending a path prevents new contacts from triggering the automation and stops sending email and SMS communications to the contacts already following your path.

  1. Next to the active automation you want to end, click the button with the three dots and select the "End" option from the drop-down menu.

    Automations dashboard with active path menu expanded and End option

  2. Click the End button to confirm the action. This can't be undone.

    End automation path overlay with End button


Delete a draft or ended automation

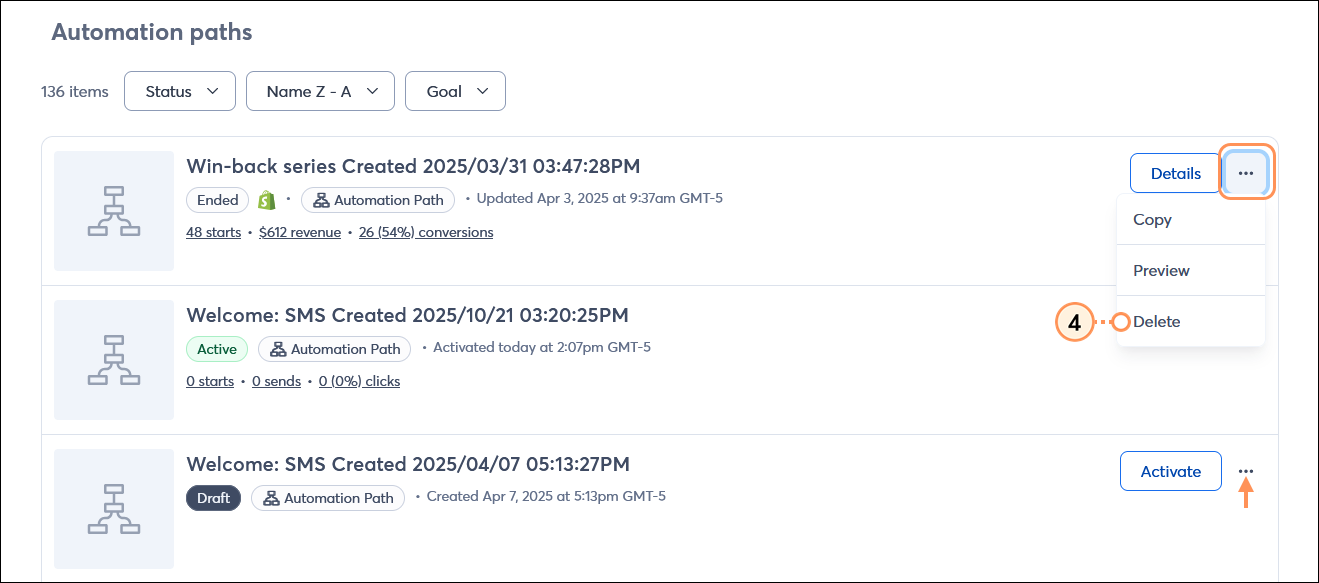
Automations in the draft status or that have ended can be deleted anytime, however a deletion isn't permanent and your automation can be restored.

  1. Next to the draft or ended path you want to delete, click the button with the three dots and select the "Delete" option from the drop-down menu.

    Automation page with Automation paths section, ended automation with menu expanded and delete option selected

To restore a path, select the "Deleted" option from the status drop-down menu at the top of the Automation Paths section, then click the Restore button next to your automation.


Questions?

Ask the Community

Did this article answer your question?


Constant Contact Logo

Copyright © 2026 · All Rights Reserved · Constant Contact · Privacy Center