An anniversary is a great time to encourage engagement with your organization on a personal level. The Automation Path Builder lets you send an email or SMS message based on the anniversary date you have on file for your contacts. Send a single message or customize a path by adding multiple messages to meet your needs.
 | Did you know? In order to receive an anniversary communication, your contacts must have an anniversary date in their contact records. Learn more. |
Create an automation path to celebrate an anniversary
Follow the steps to create an automation path using a pre-built template and select one of the following templates:
- Anniversary: SMS - Select this option to include both email and SMS marketing messages in your anniversary path
- Anniversary: Basic - Select this option to acknowledge anniversaries through email-only communications.
Once your anniversary path is created and saved, you can find it again by selecting Marketing > Automations in the left-hand menu.
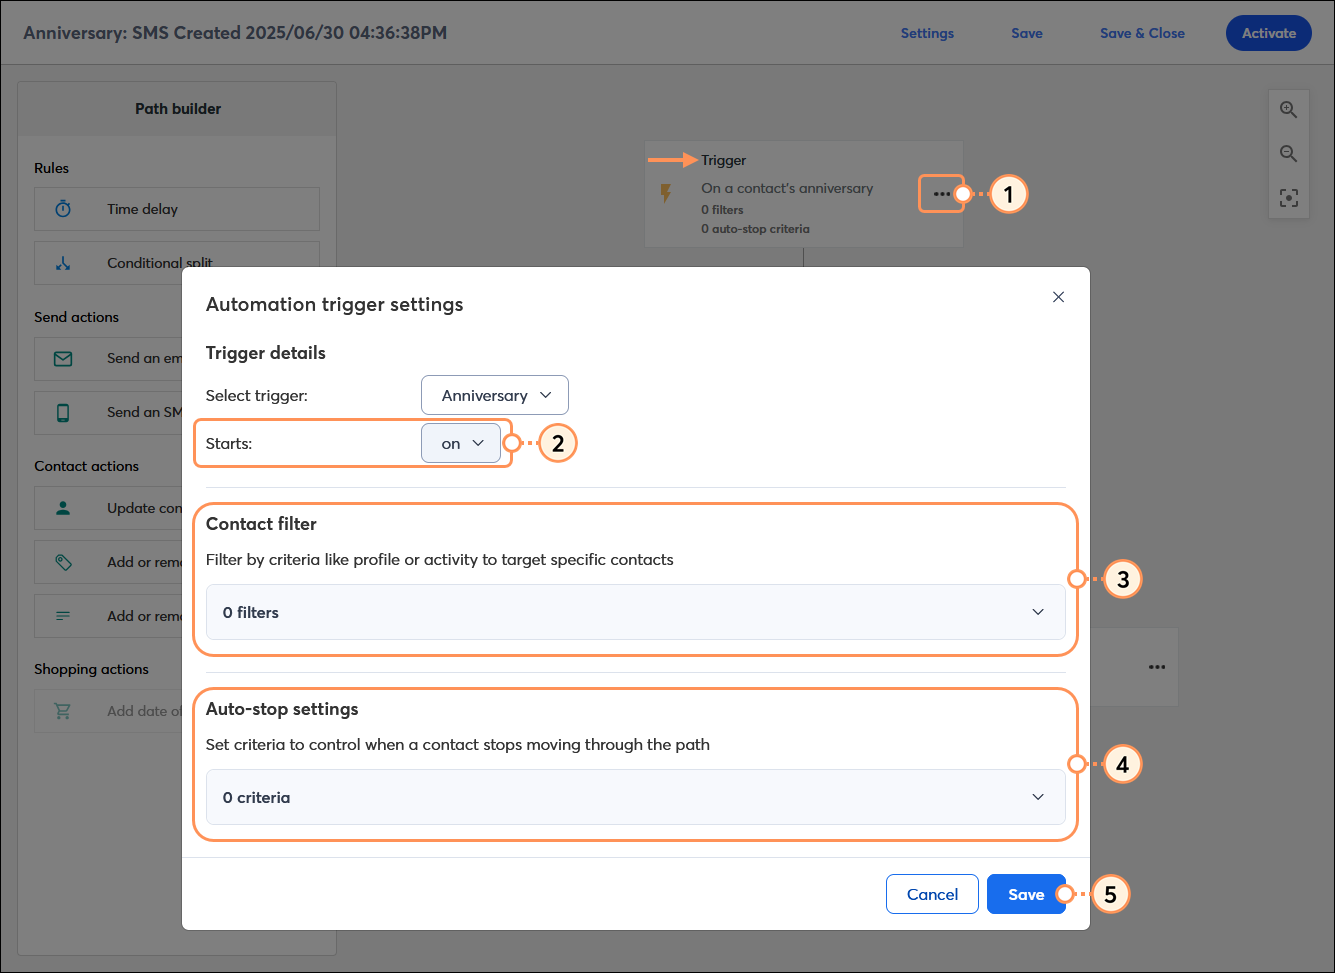
Customize the anniversary trigger details
You have control over when your anniversary communication is sent. Choose to send the communication on the exact anniversary or up to a year in advance.
- Click the three dots on the Trigger step in your path, and select "Edit."
- In the Trigger details section, choose the criteria for when you want your automation path to start:
- From the first drop-down menu, enter the number of days (1 - 363), weeks (1 - 51), or months (1 - 11).
- From the second drop-down menu, select from days, weeks, or months.
- From the third drop-down menu, select if you want the path to begin before or after the anniversary date.
- In the fourth drop-down menu, select the birthday contact field or choose to create a date-based custom field.
- (Optional) In the Contact filter section, select additional criteria for your contacts to be eligible to start your automation path. For example, you can limit your automation path to contacts on a specific list, contacts that take an action like clicking a link, or contacts that spend a specified amount in your online store. You can even create more complex filters that include a variety of criteria.
- (Optional) In the Auto-stop settings, select criteria to stop the automation path for a contact before they finish it.
- Click Save to return to the Path builder.
Note: A trigger check is performed daily at 6:00 a.m. based on the time zone you selected in My Account. If a contact meets the trigger requirements at the time of the trigger check, the anniversary email and SMS message are scheduled to send. Email messages are immediately queued, and SMS messages are scheduled to send after the end of the SMS quiet period.
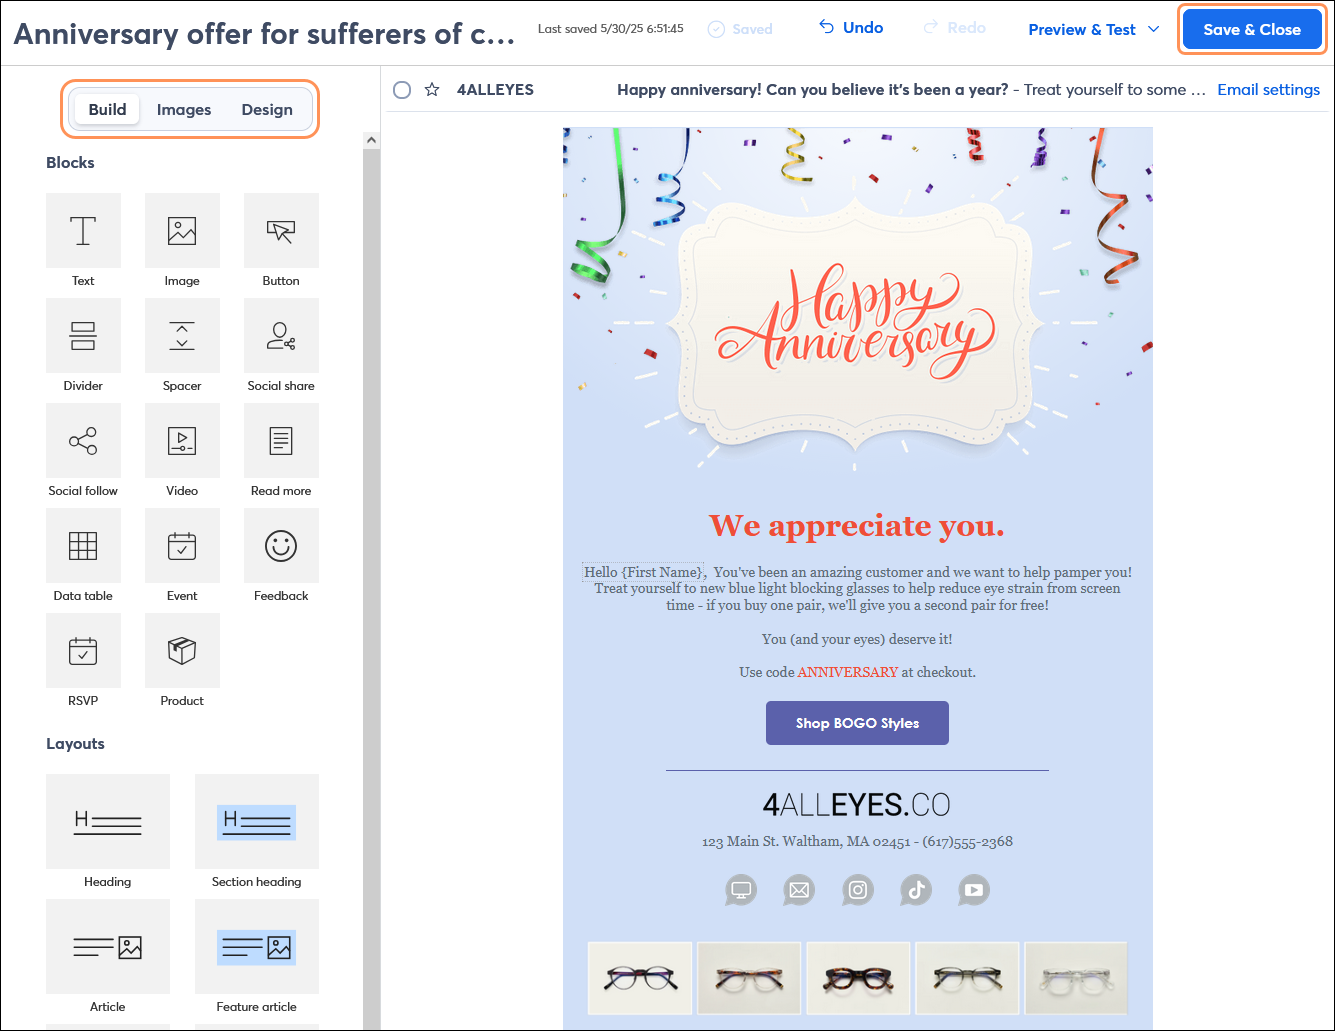
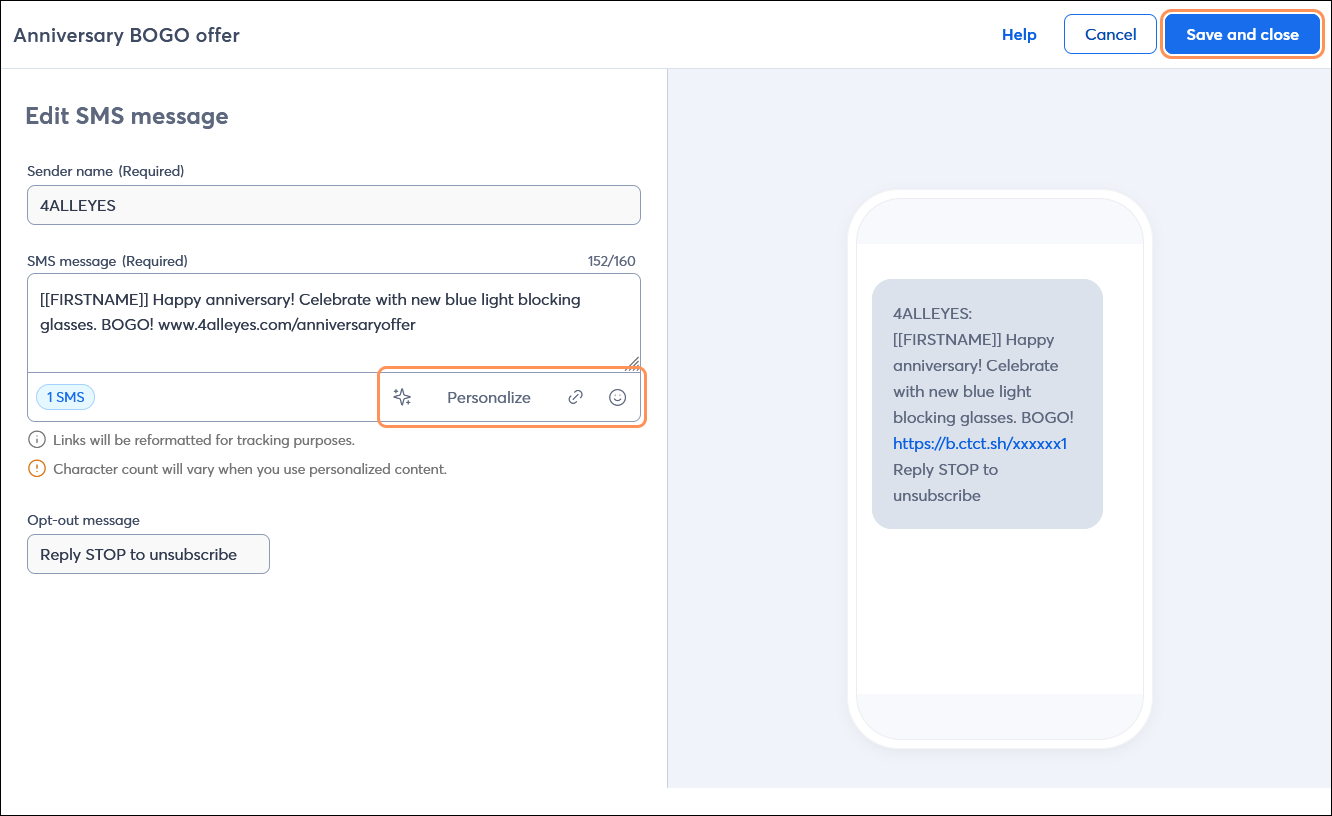
Create your email or SMS message content
Your message content is fully customizable! It can be a simple "happy anniversary" message, or use it to send a gift by sharing coupons, exclusive content, or a special webpage. Emails provide enough space for the most content flexibility, and SMS messages have a higher likelihood to be read and engaged with.
- Email - Follow the steps to add a Send an email action to your path. First, select a template, then use the email editor to customize your content. If you need help getting started, try using the AI Content Generator while you're editing your text. You also have the option to copy an existing draft or sent email. Your message can include multiple images, links, and larger blocks of text. Learn more.
- SMS - Follow the steps to add a Send an SMS step to your path. Enter the content of your text message or use the AI Content Generator to help get you started. Your message can include a single URL, but it doesn't allow for images. Longer messages are broken into individual text messages that impact your billing. Learn more.
Repeat the steps for each email or SMS message in your path.
Build out your anniversary path and activate it
The anniversary templates provide you with a basic path that just needs the message content, but you also have the flexibility to make your path more complex with additional messages.
- Use the Path builder to:
- Click the Activate button in the upper right-hand corner of the screen.
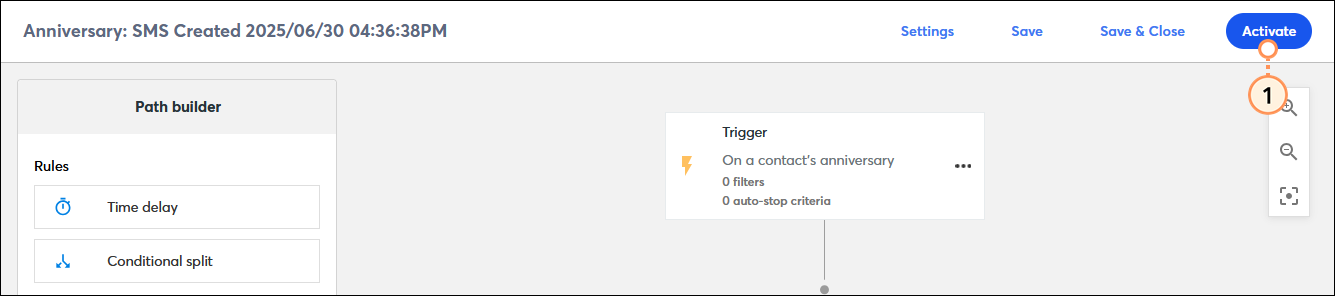
Once your automation path is activated, you’re brought to the details page, where you can review your performance and reporting information.