We're making it easier to get around Constant Contact with a brand new left navigation. Not all accounts have that change yet, so if your navigation looks different from our articles, that's why–but everything from the top can now be found on the left!

Email and Digital Marketing
How can we help you?
Search our help articles, video tutorials, and quickstart guides

You've got this. You've got us. Search our Knowledge Base to quickly find answers to your questions.

Use auto-stop to control when a contact is automatically removed from an automation path

Article: 000053997
Updated: May 9, 2025

Automatically remove contacts from an automation path by selecting auto-stop criteria in the trigger step

Email Plus IconUpgrade your plan: Not seeing this feature in your account? It may not be an available feature in your current email plan or trial account. Upgrading your email plan gives you access to additional features and products. Learn more.


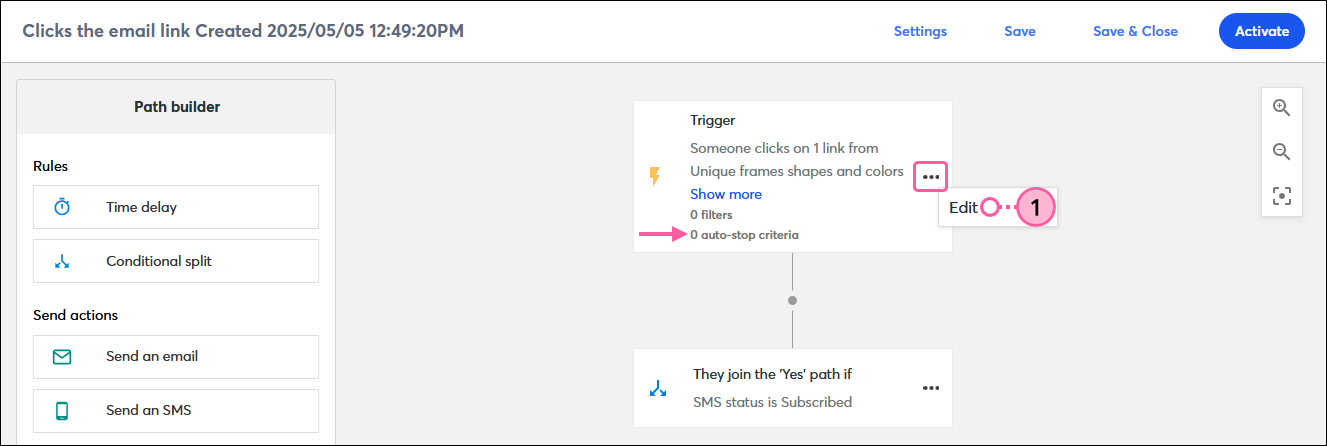
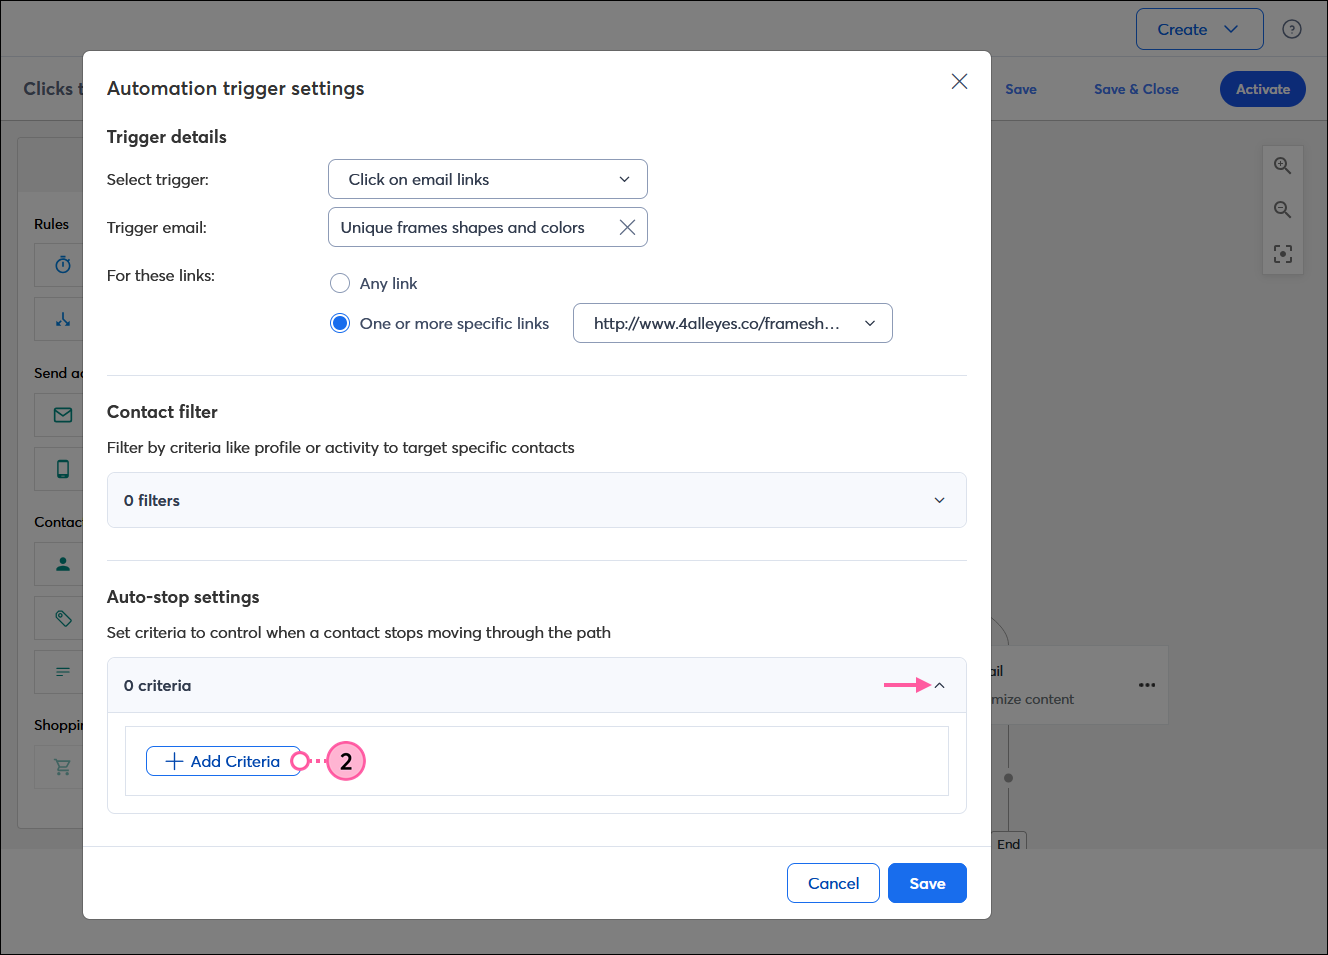
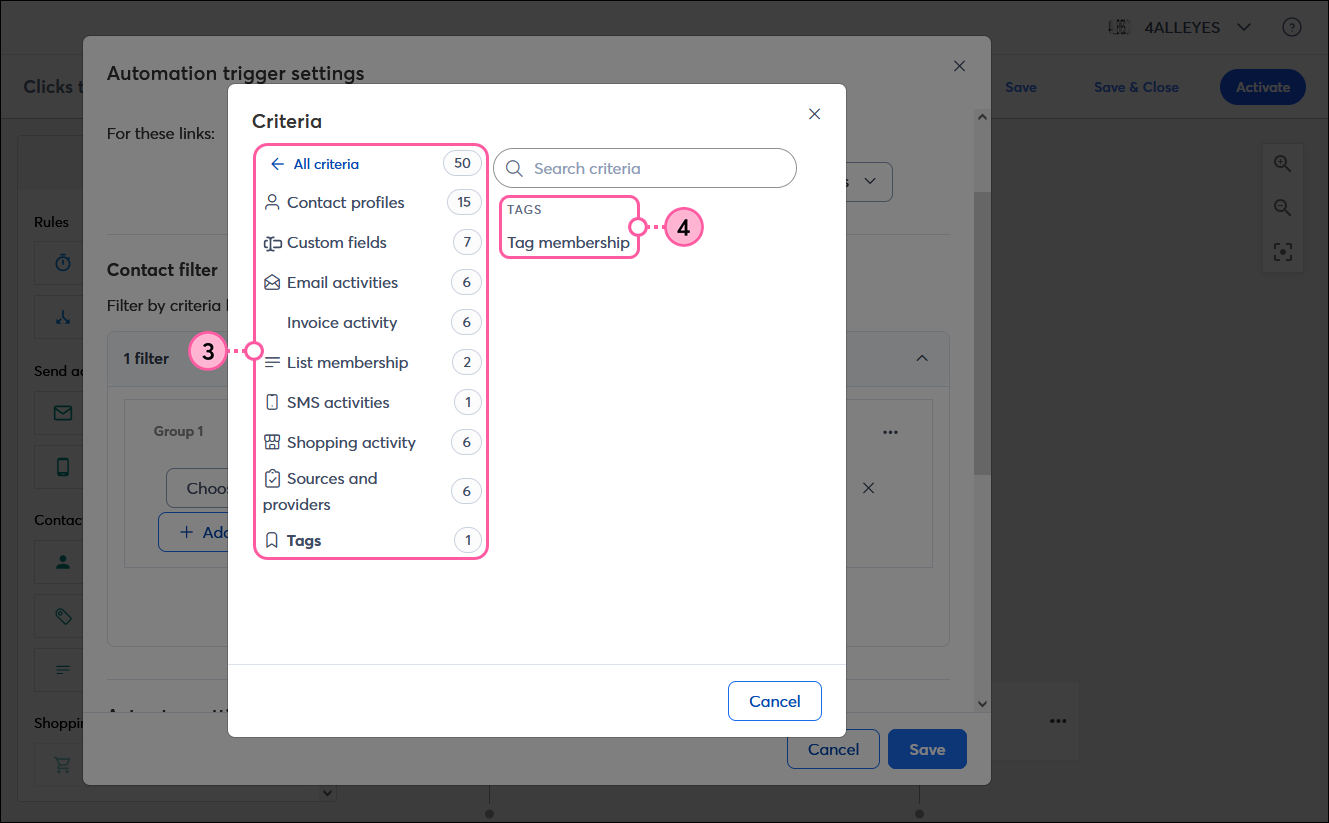
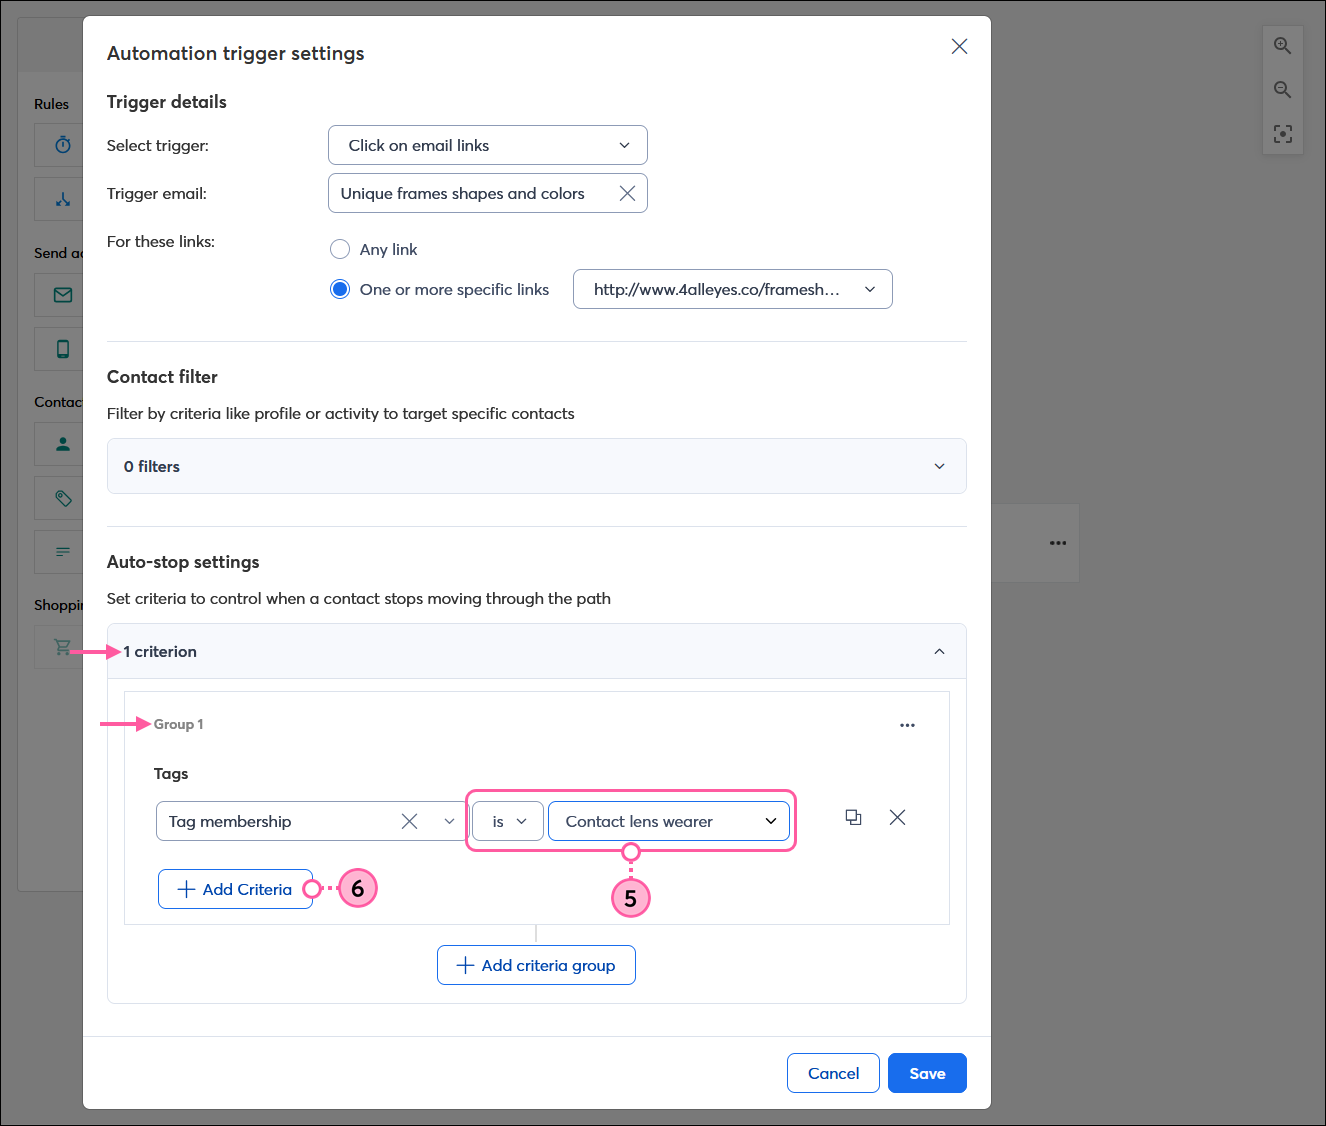
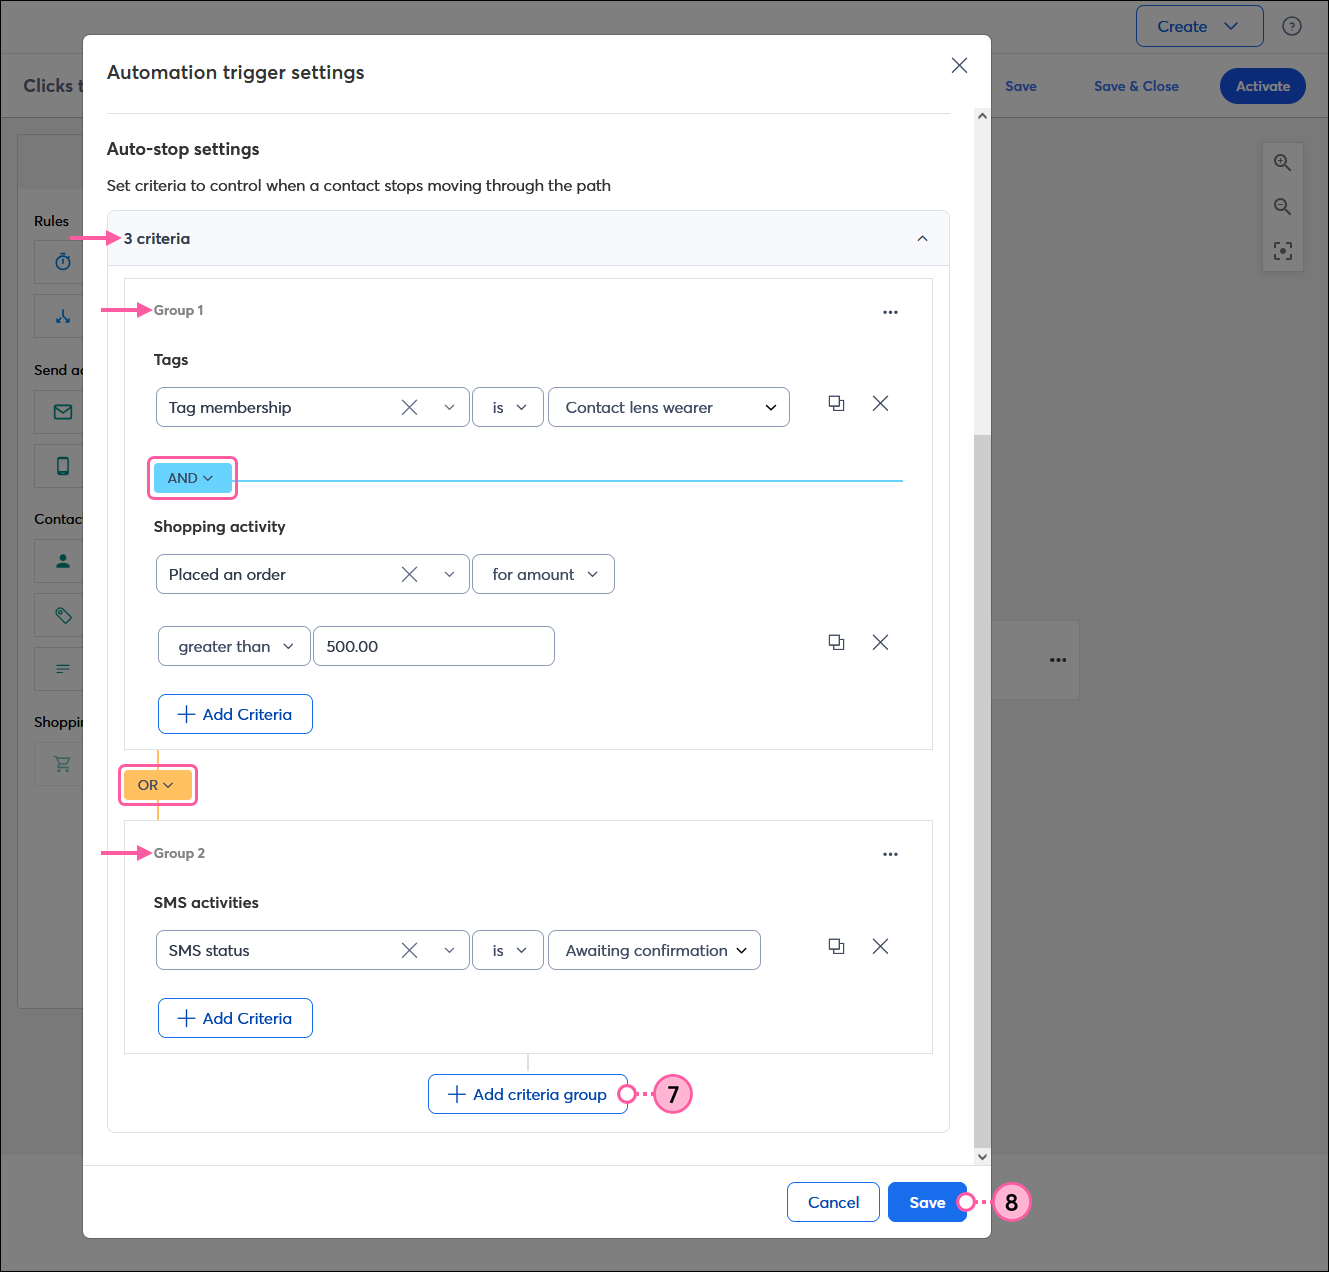
Where a trigger lets you define who is eligible to start your path, auto-stop lets you define when you want a contact to exit your path before they complete it. Just select criteria to remove contacts based on things like email engagement, list membership, and shopping activity. You can also use AND/OR logic to create complex rules to remove your contacts from the path.

  1. On the Trigger step in your path, click . . .  > Edit.

    Automation path builder trigger step with 0 auto-stop criteria and menu expanded and Edit option selected

  2. In the Automation trigger settings overlay, click the 0 criteria section within the Auto-stop settings section to expand it, then click the + Add Criteria button.

    Automation trigger settings overlay with Auto-stop settings section, Criteria section expanded and Add Criteria button

  3. Select the category of criteria you want to use.
  4. Click on a criterion to select it.

    Automation trigger settings overlay with Criteria overlay displayed over it, All criteria section with criteria options and Tags option selected, and Tags criterion selected with Tag membership criterion selected

  5. Use the drop-down menus to select the operators for your criterion. (See a full list of operators for contact profiles and behaviorengagement, and shopping activity.)
    Note: If you change your mind about which criterion you're using, you can always click on its drop-down menu to select a different one, or click the X to delete it and start again.
  6. (Optional) Click the + Add criteria button within the group to use AND/OR logic between the criteria within the group. For example, in the image below, Group 1 only has 1 criterion for having the "Contact lens wearer" tag, but by using AND logic, a second criterion can be added so that a contact exits the automation path if they are both tagged as a contact lens wearer AND they have placed an order for over $500 (see step 7 image).

    User-added image

  7. (Optional) Click the +Add criteria group button to use AND/OR logic between groups of criteria. For example, in the image below, there is OR logic between Groups 1 and 2 so that a contact exits the automation path if they are both tagged as a contact lens wearer AND they have placed an order for over $500 OR when they are in the "awaiting confirmation" status for SMS marketing.
  8. Click the Save button to continue building your automation path.

    Automation trigger settings with Auto-stop settings section with 3 criteria, Group 1 uses AND logic between two criteria, and OR logic is used between Group 1 and Group 2, + Add Criteria Group button below Group 2, and Save button 


Light Bulb IconDid you know? If you want more control over when a contact starts your automation path, create a contact filter.


Questions?

Ask the Community

Did this article answer your question?


Constant Contact Logo

Copyright © 2025 · All Rights Reserved · Constant Contact · Privacy Center