Contacts can be key stakeholders whom you have started a conversation with, or leads who have reached out to you to start a working relationship.
In this article, you'll learn how to create a new contact within an account, add a contact to an account, and edit existing contact information within the account page.
| Administrators | ✓ | |
| Company Managers | ✓ | |
| Marketing Managers | ✓ | |
| Sales Managers | ✓ | |
| Salespersons | ✓ | |
| Jr. Salespersons | ✓ |
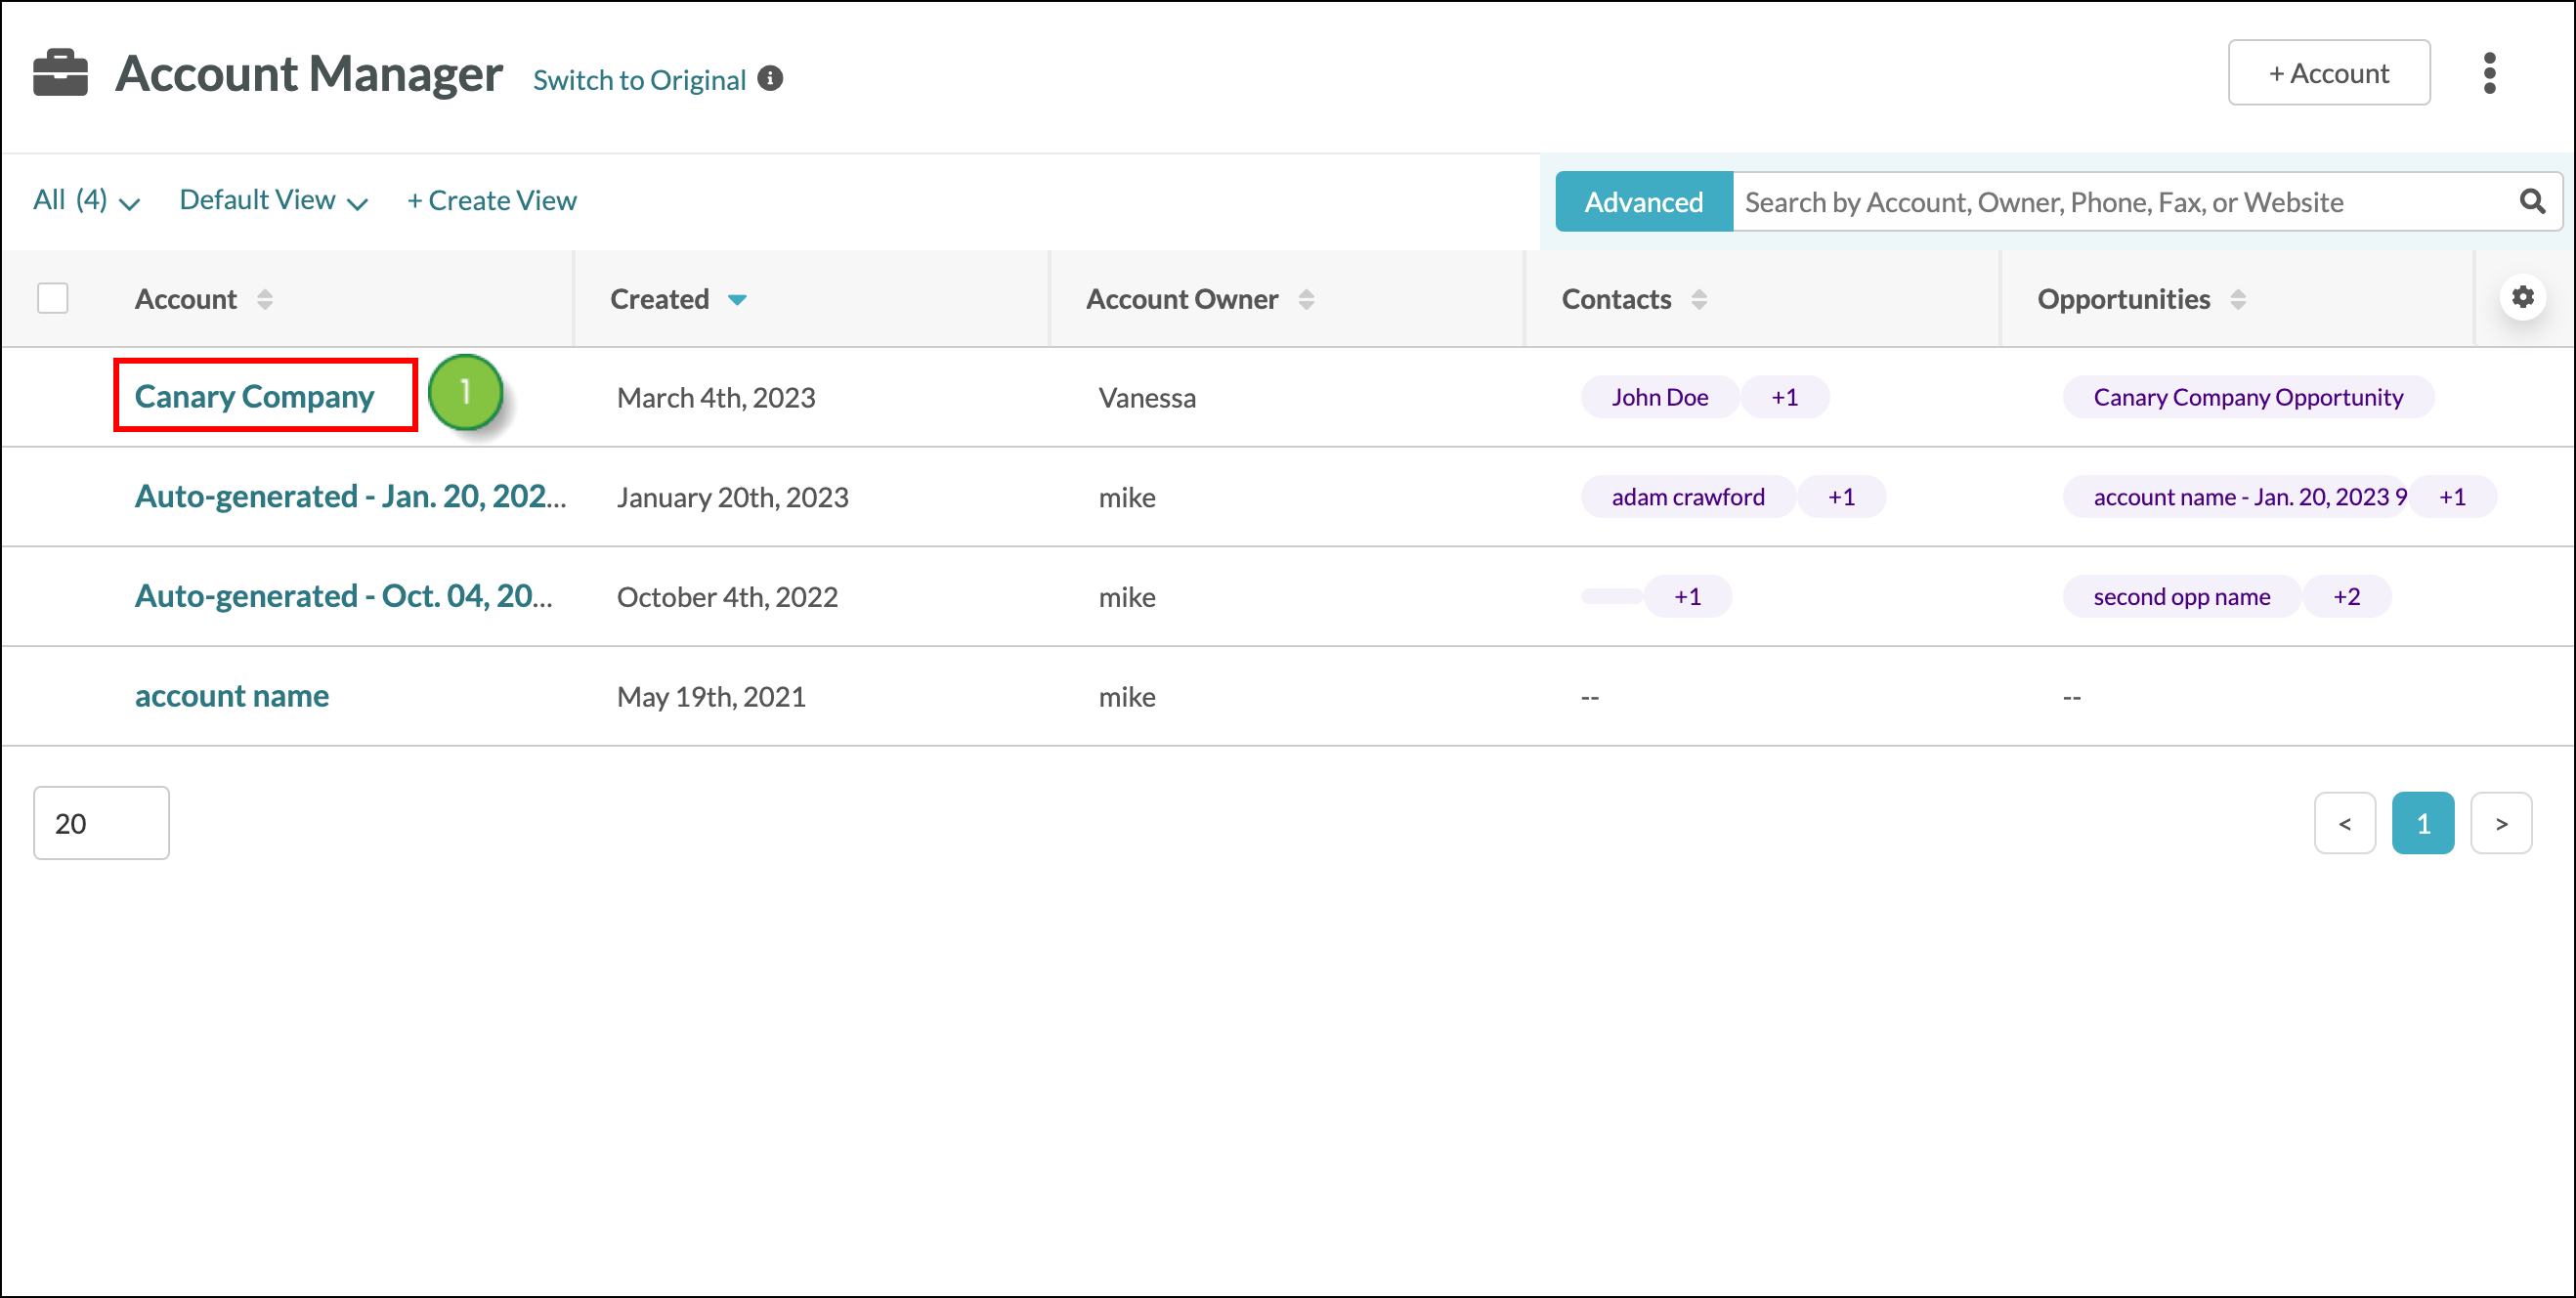
To assign a contact to an account, create or edit an account from Sales > Accounts in the left toolbar.
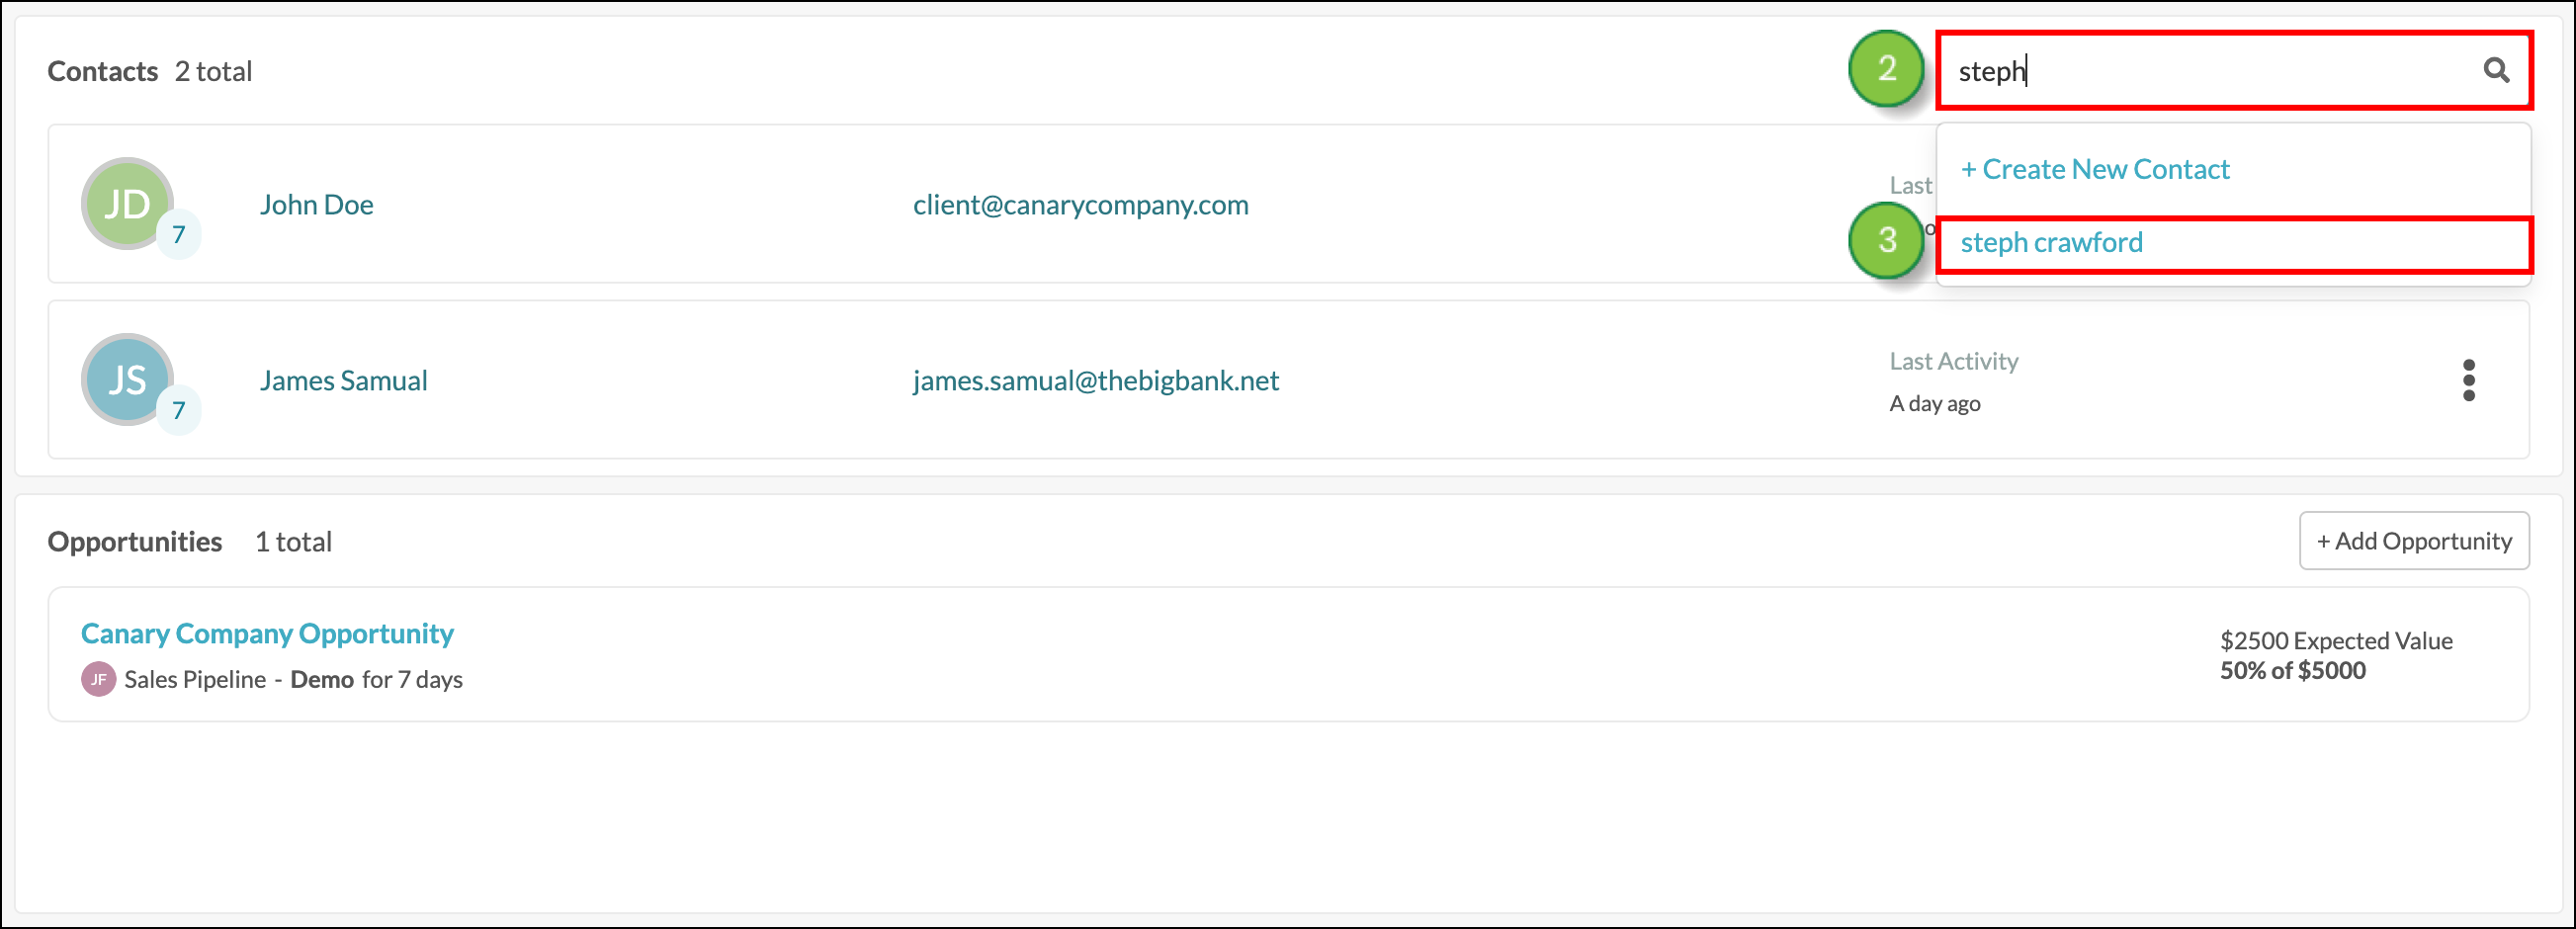
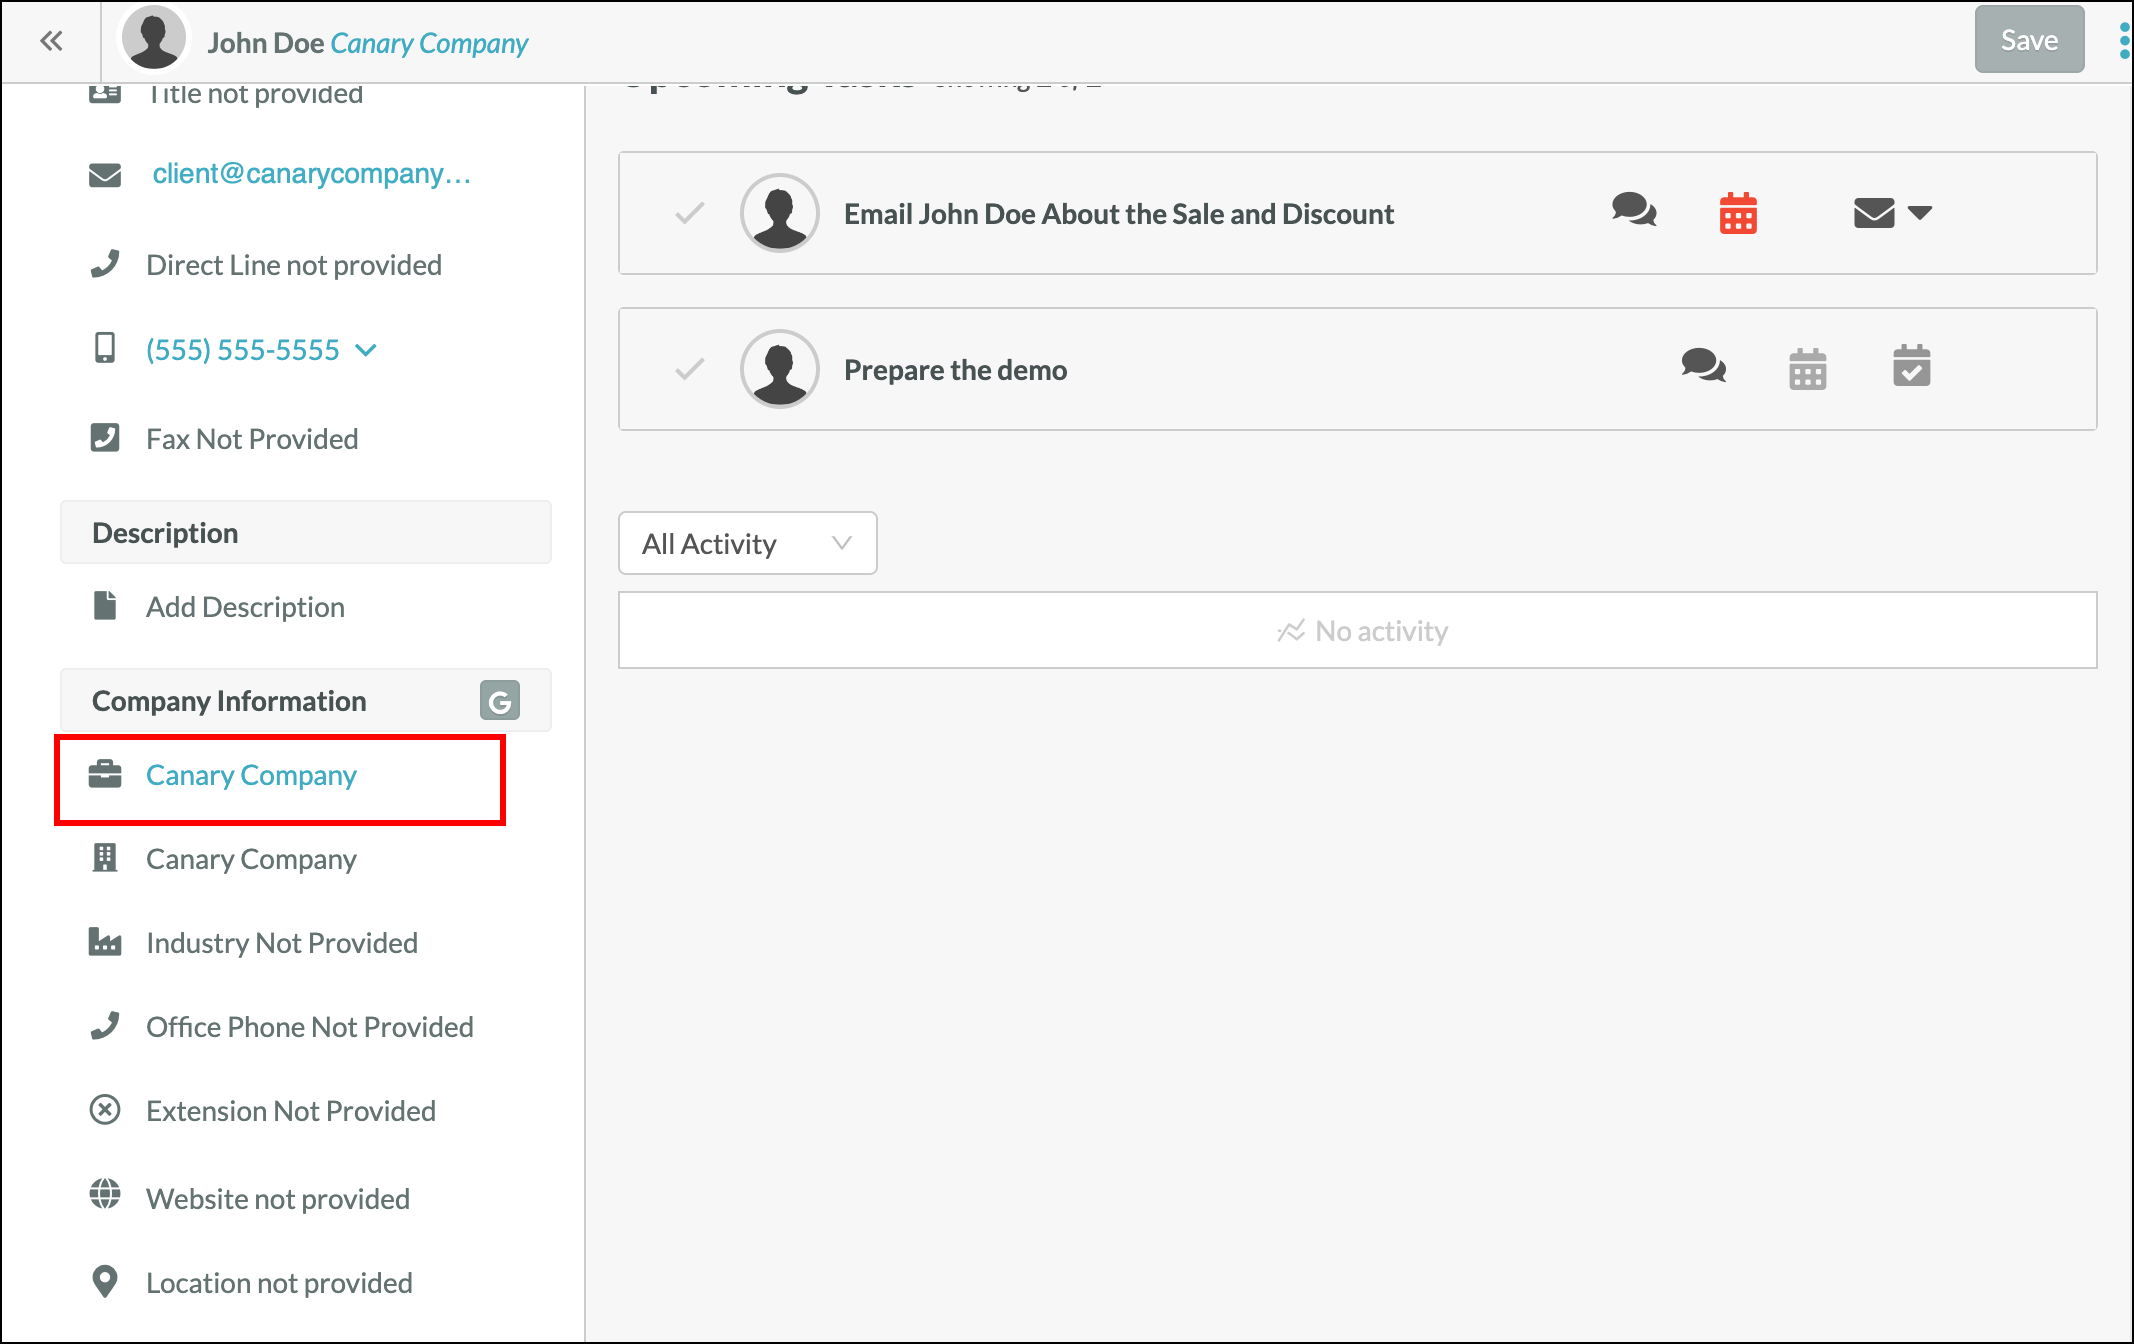
Once a contact has been added to an account, the contact page will display the new account name under the Overview tab. Check the Company Information section.
Activity from the account page, such as logging a call, will be updated and recorded on the contact page.
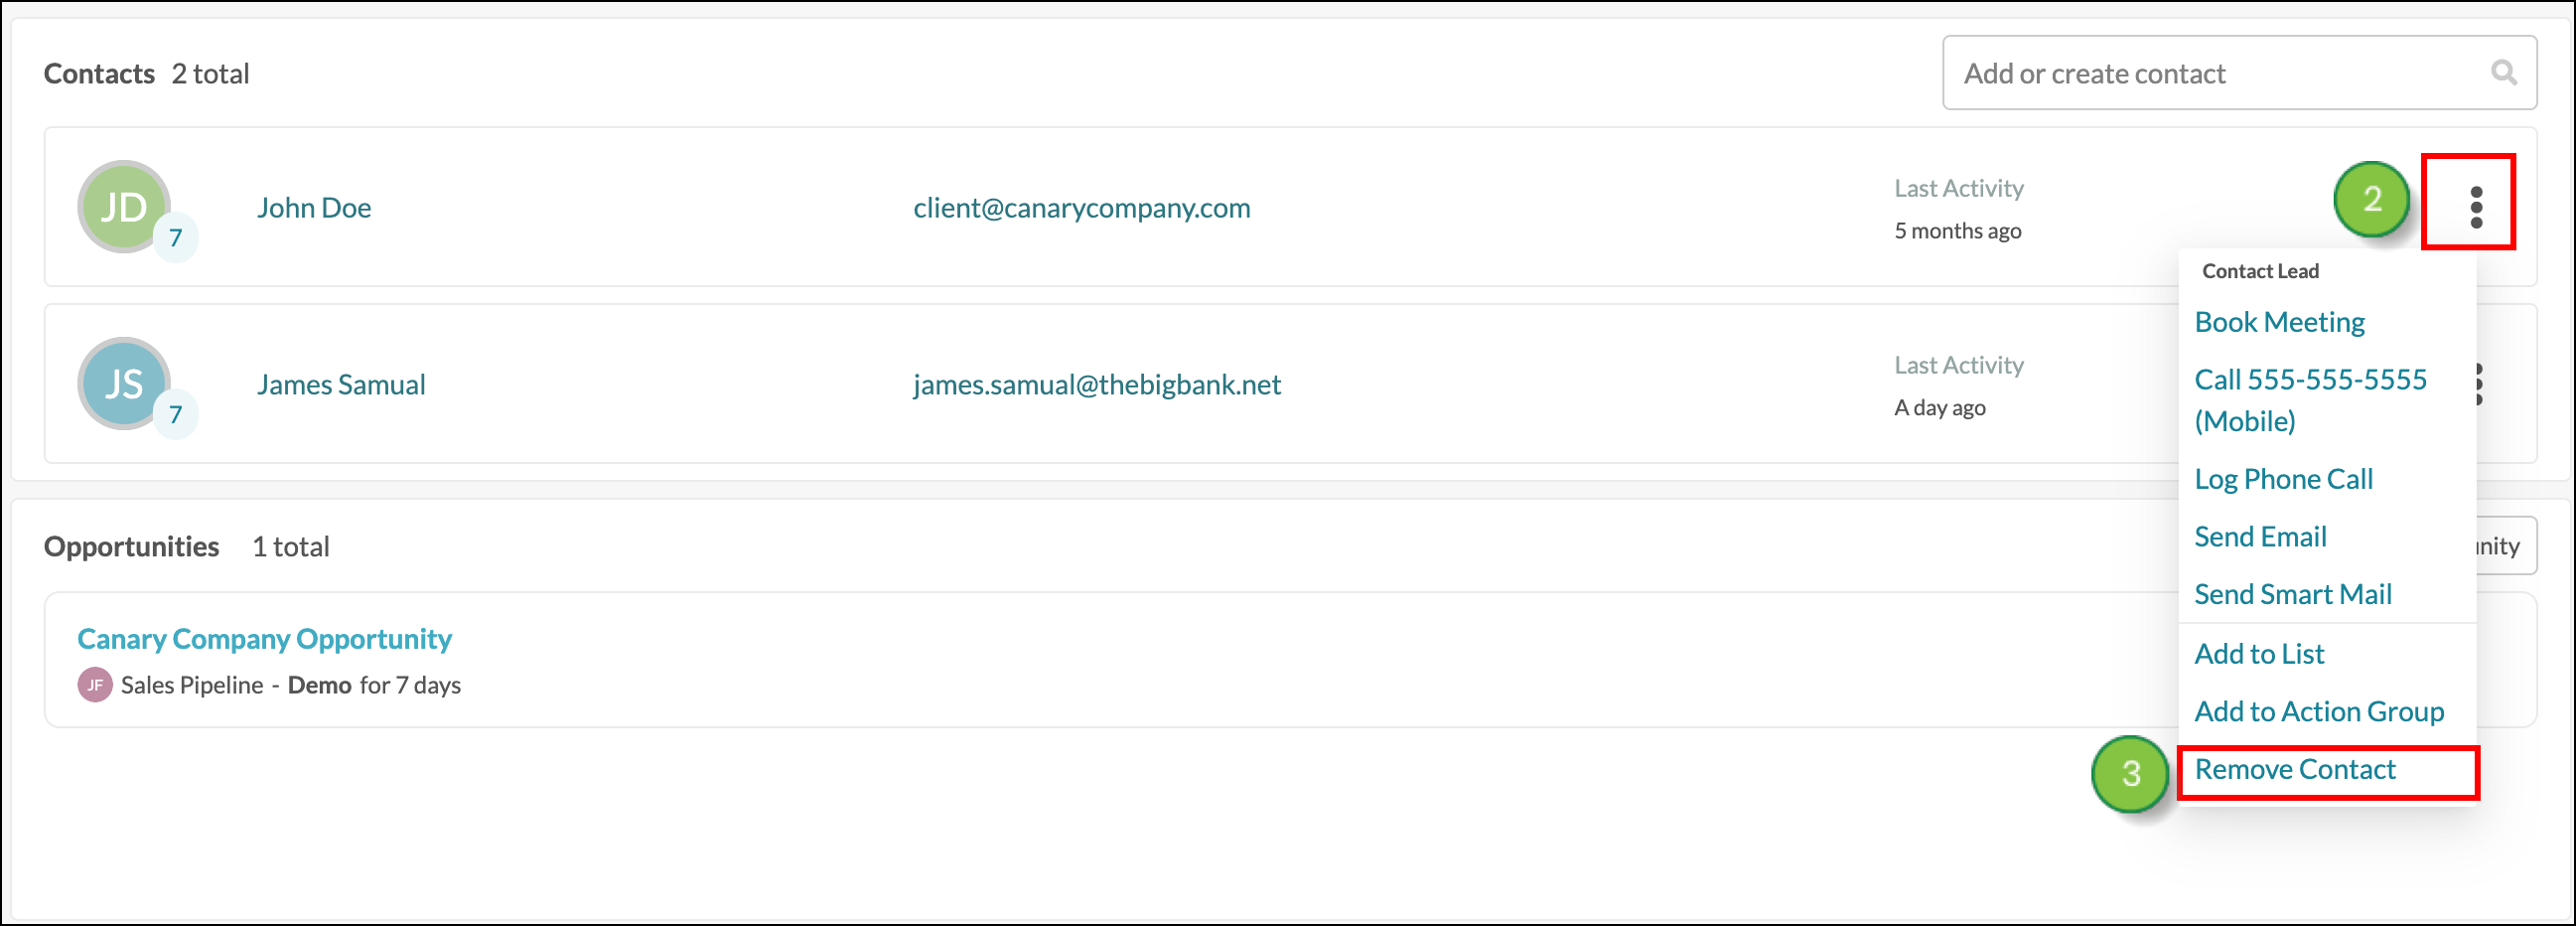
To remove a contact from an account, create or edit an account from Sales > Accounts in the left toolbar.
Activity previously completed under the Account will remain in the account history regarding reports. Records under Life of the Lead or the Activity section of the contact page will also remain.
Clicking the Book A Meeting button will start the process of sending an email to the contact, inviting them to click your meeting link to schedule a meeting. You can also choose to send a different email that has already been created.
To send a meeting invitation to a contact from the account page, create or edit an account from Sales > Accounts in the left toolbar.
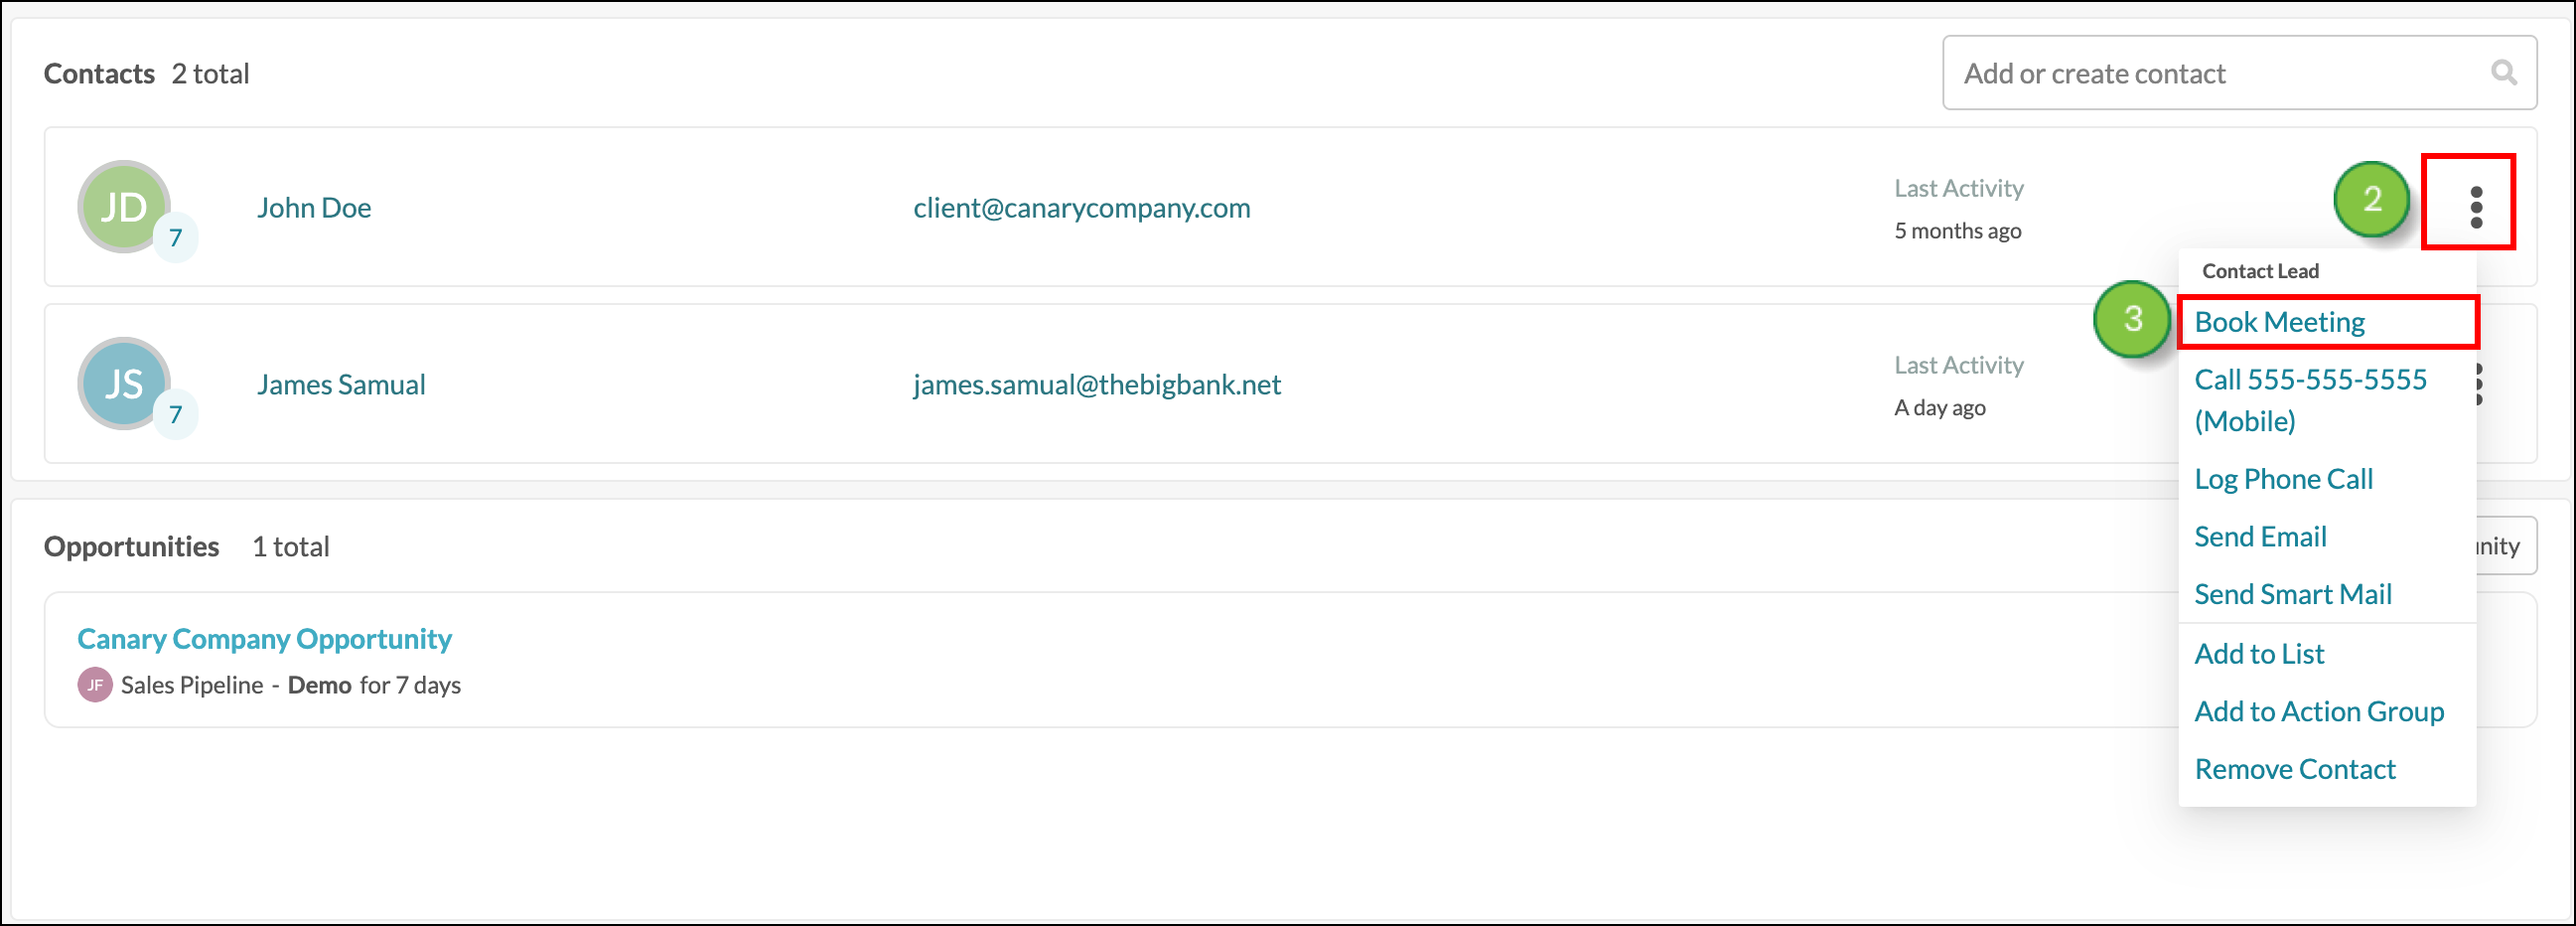
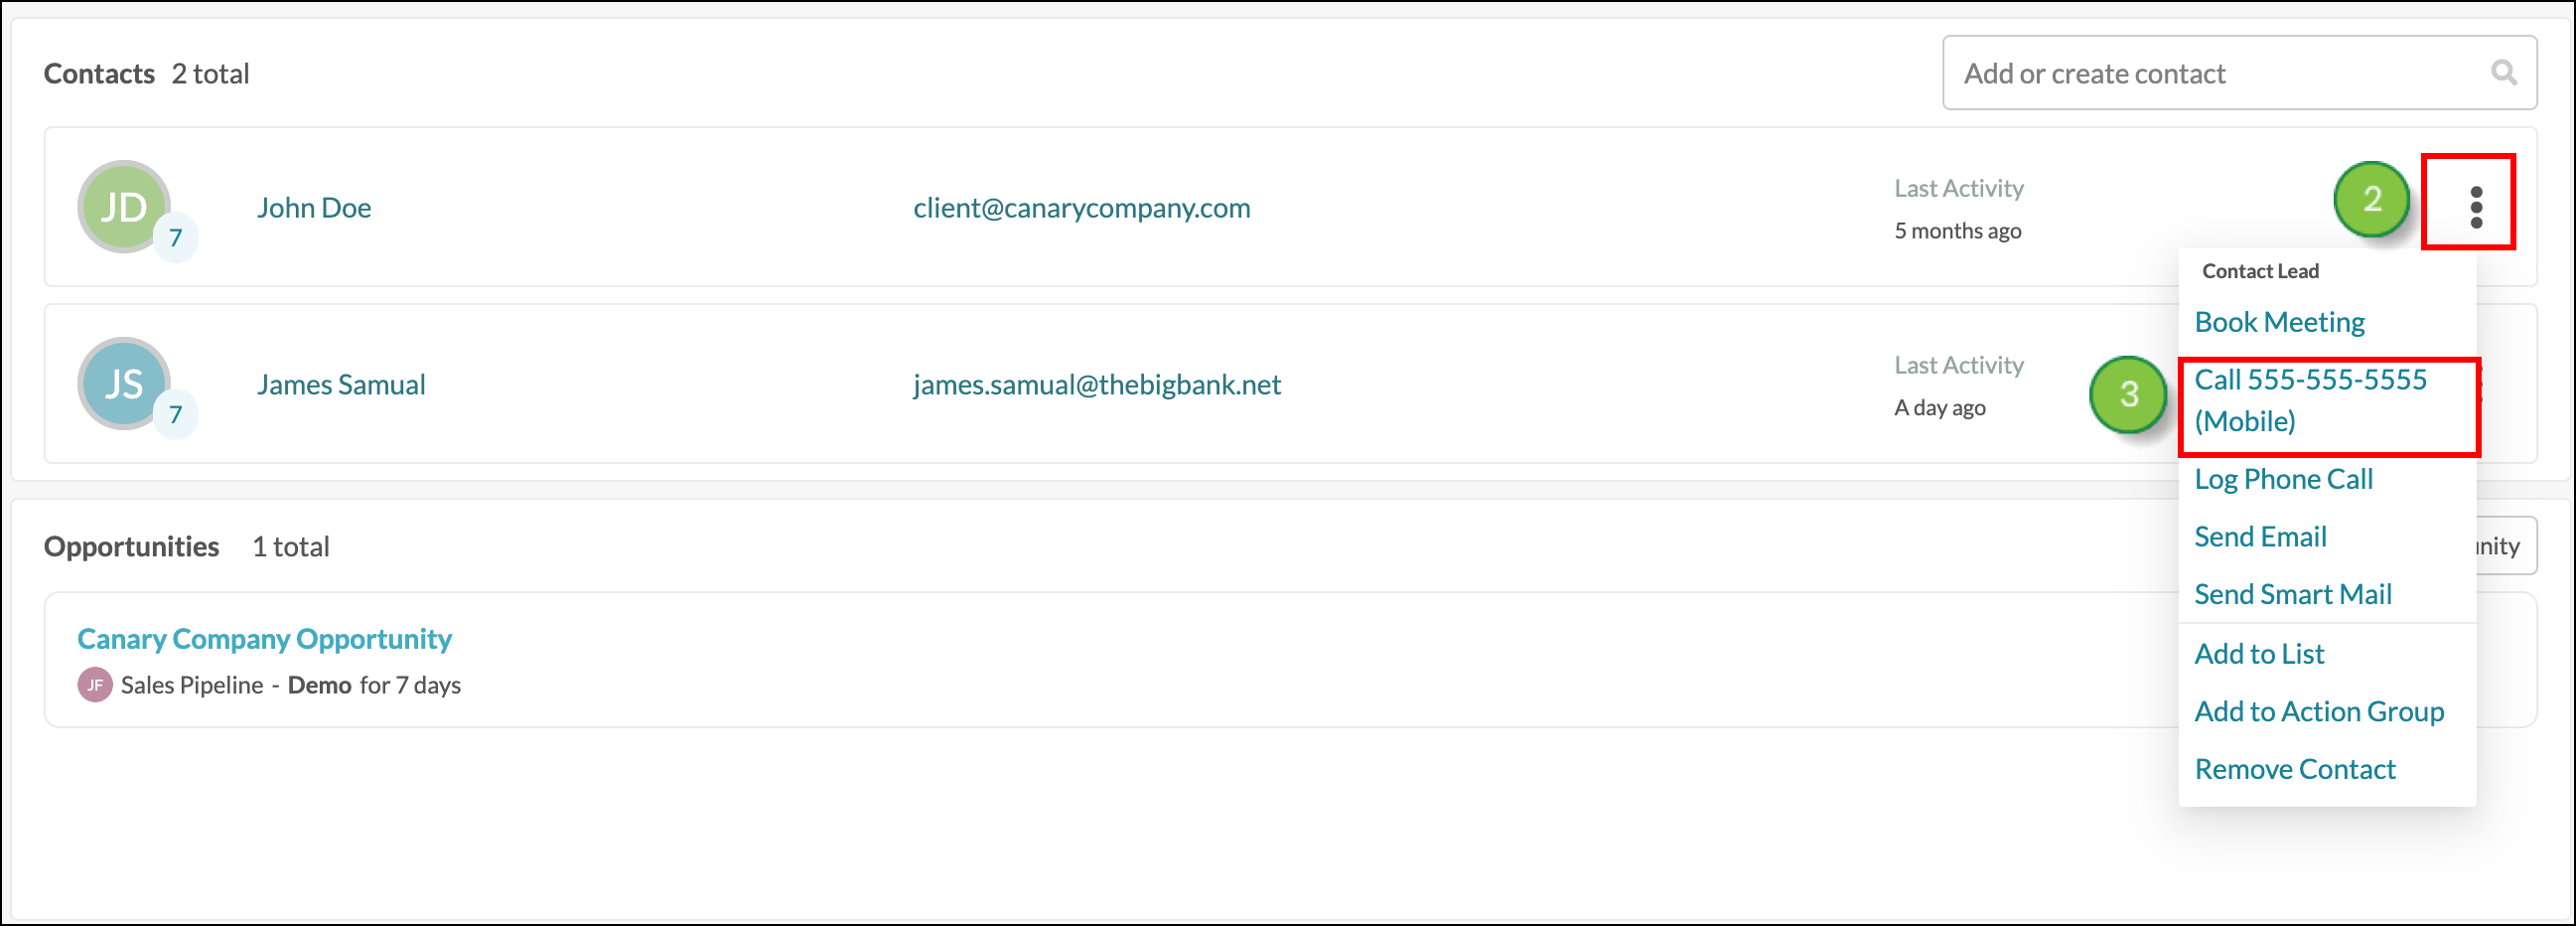
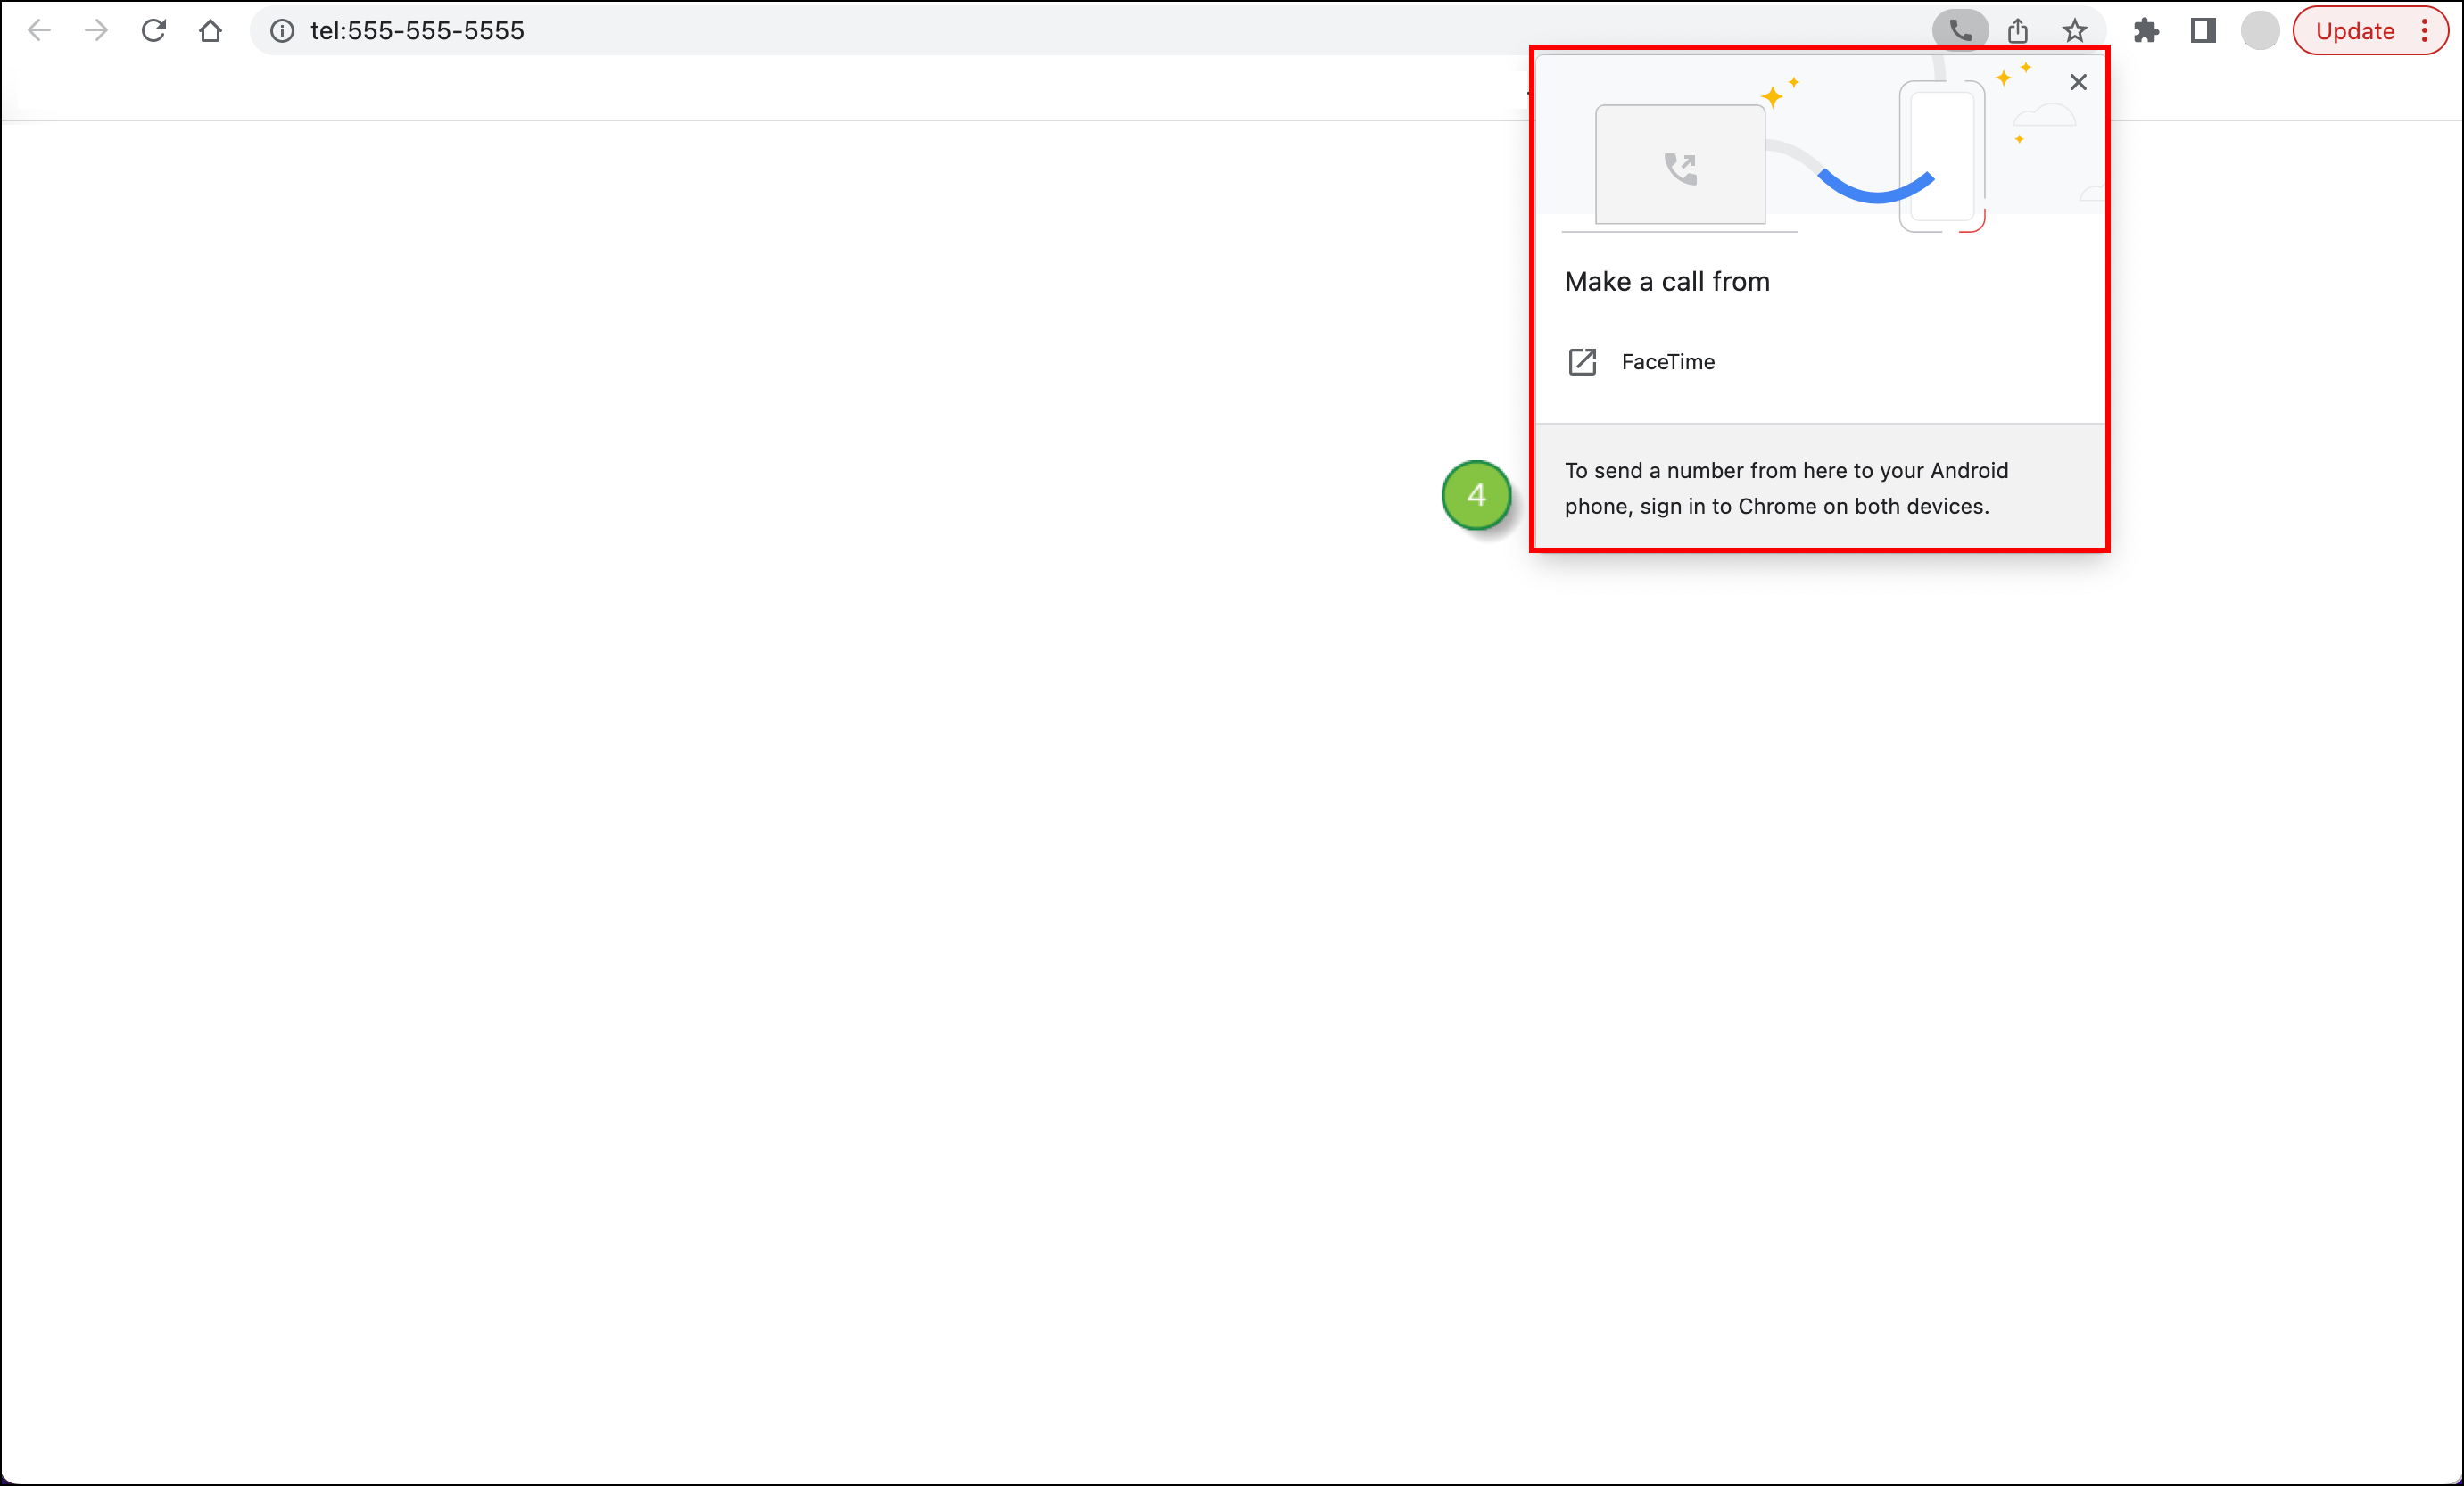
Call the contact directly if a number is provided for the contact, in the contact record. To call a contact from the account page, create or edit an account from Sales > Accounts in the left toolbar.
If a call has already been placed, either using the Sales Dialer, or another method that is not connected to Lead Gen & CRM, you may want to record that communication for the sake of keeping your account activity organized.
Log a call to or from a contact, create or edit an account from Sales > Accounts in the left toolbar.
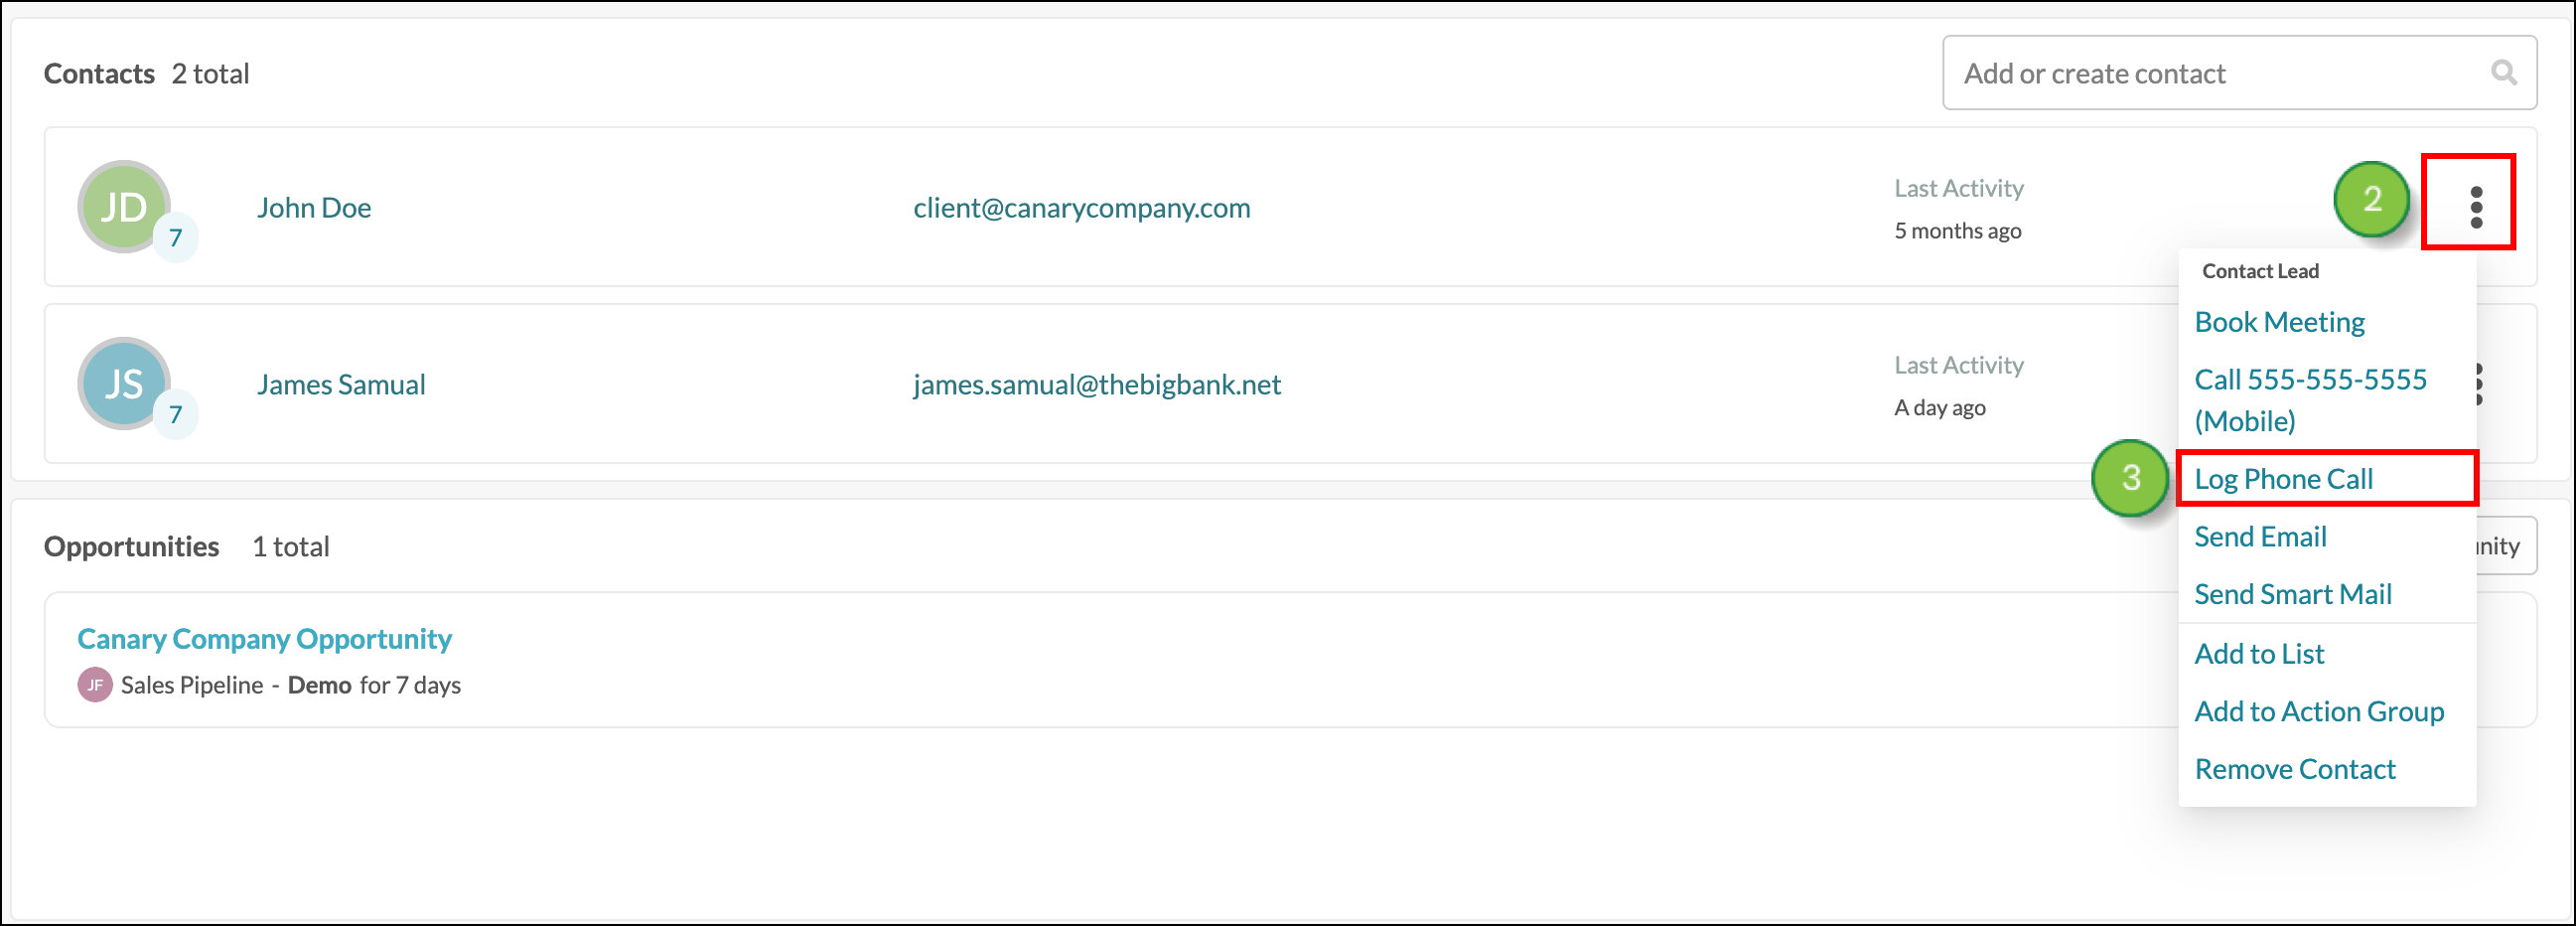
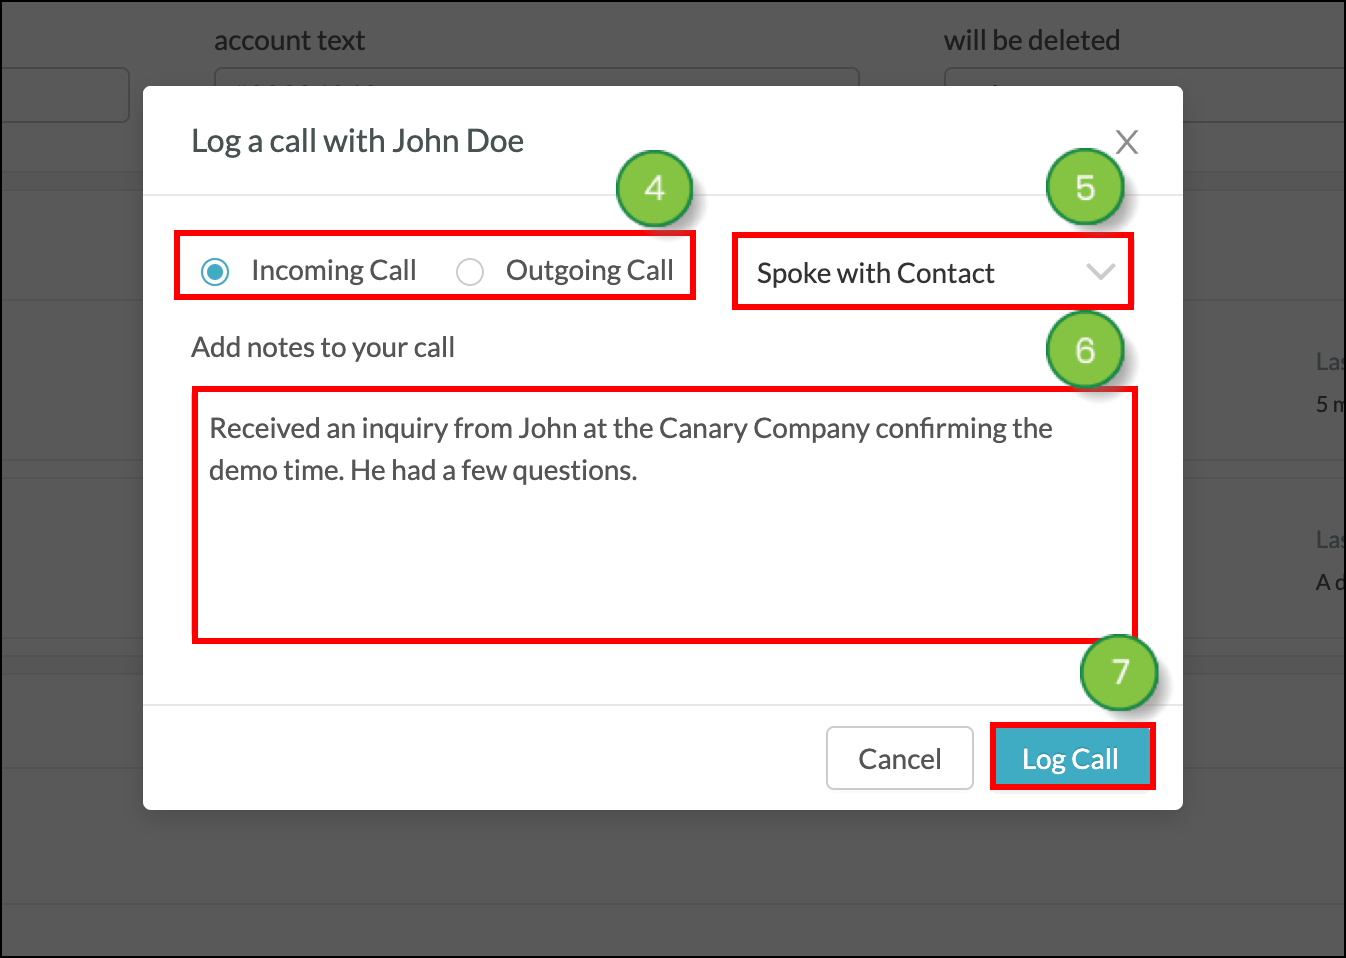
All calls will be logged in the Activity section of the contact page's Overview tab.
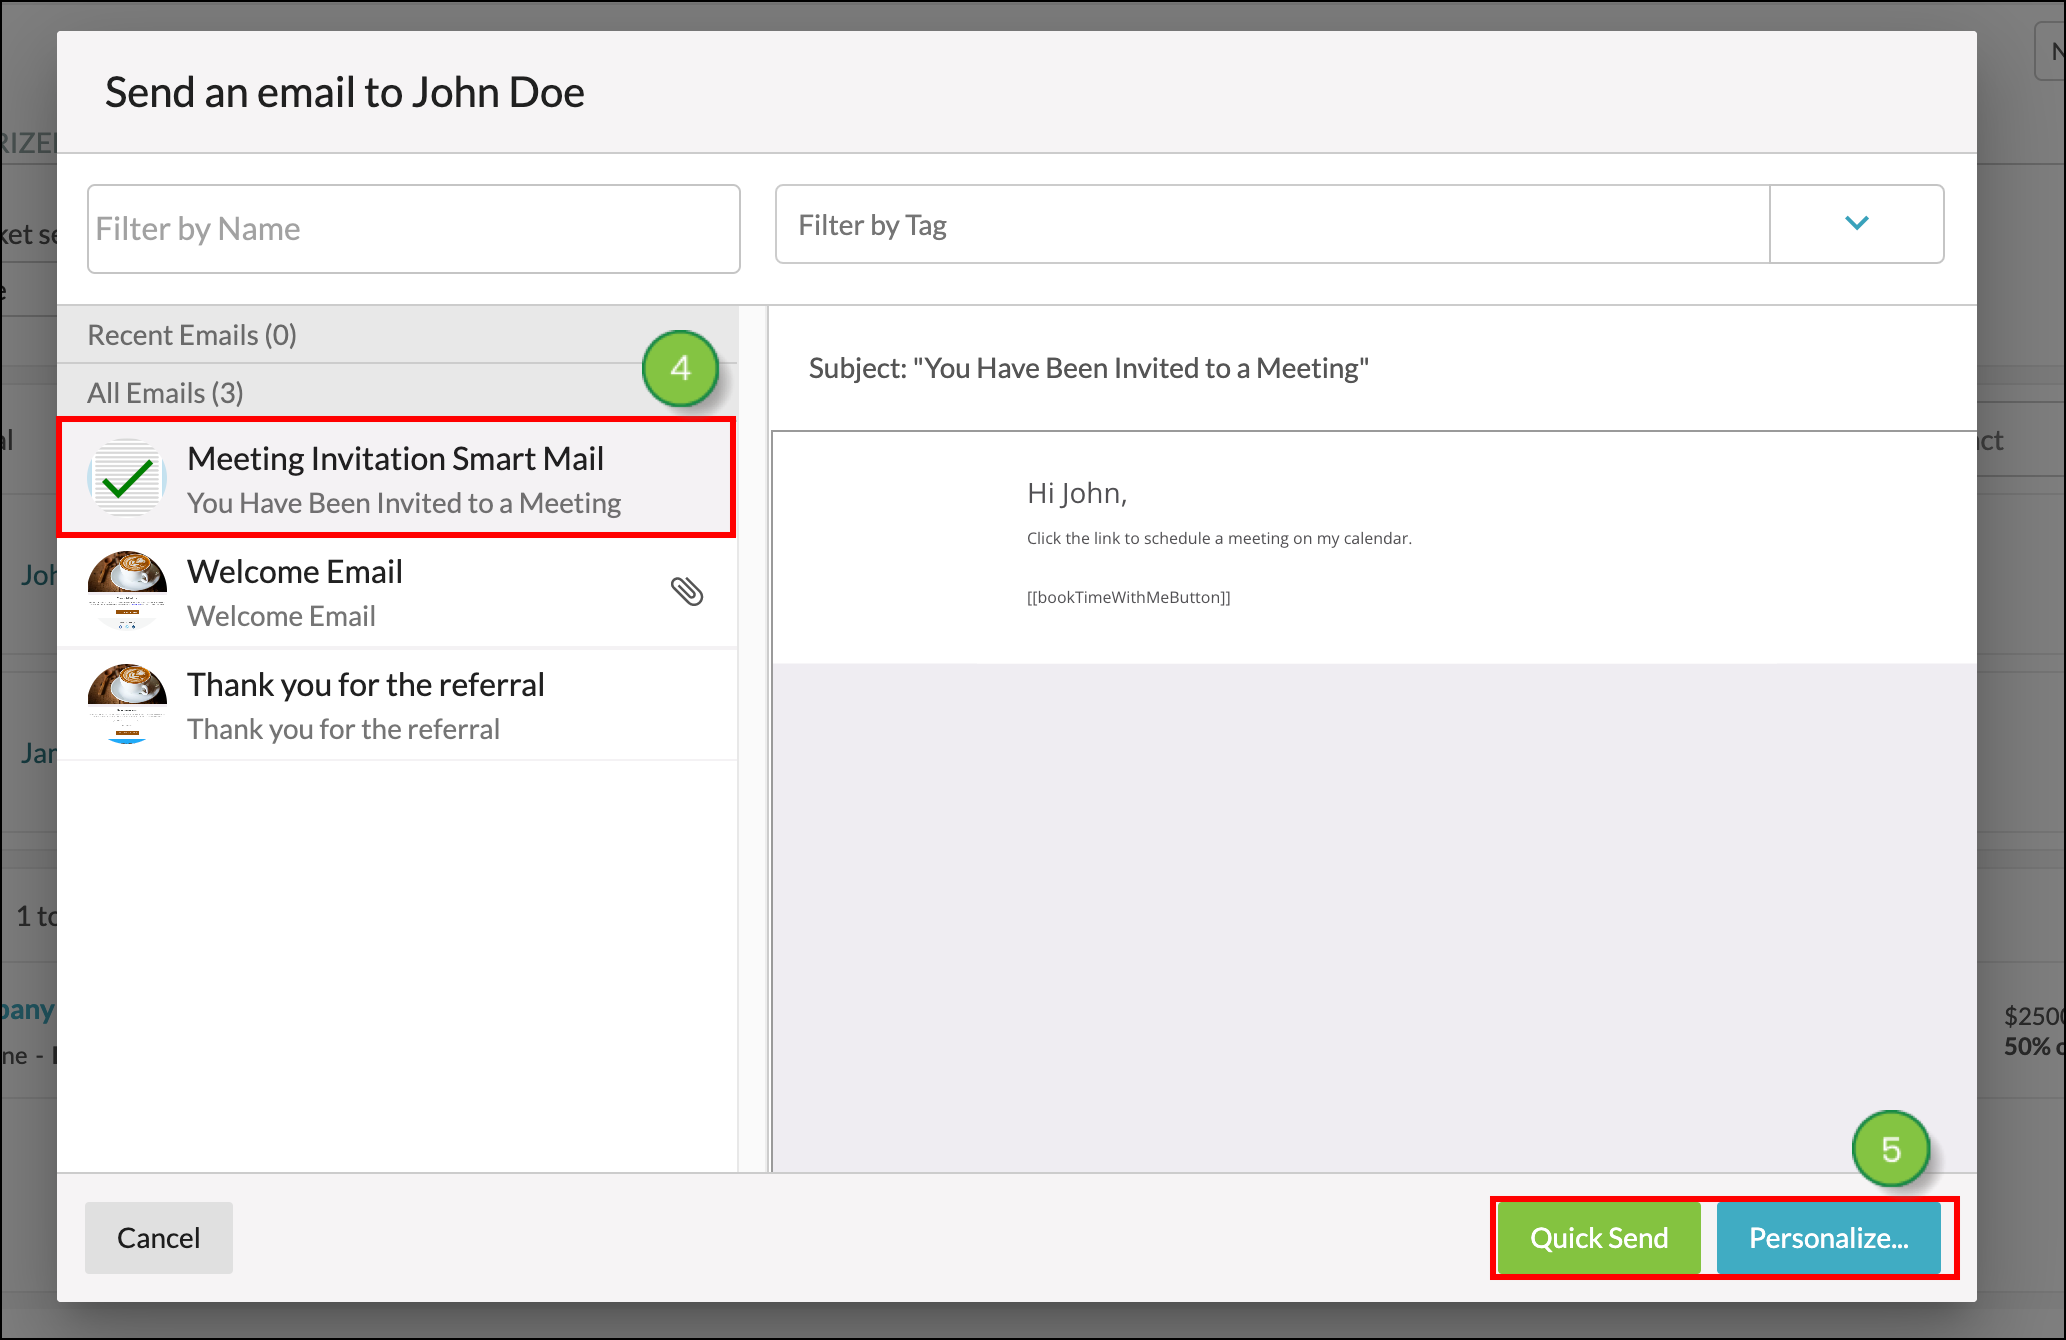
You can send an email to a contact using the default email client setup for your computer, or you can send a Smart Mail. Smart Mail, is mail created in Lead Gen & CRM that is designated to be accessible from the Contacts or Accounts page. While most Lead Gen & CRM emails can be sent only from the Email tab, Smart Mail can be sent from other areas of the app.
To send an email to a client from the Account page, create or edit an account from Sales > Accounts in the left toolbar.
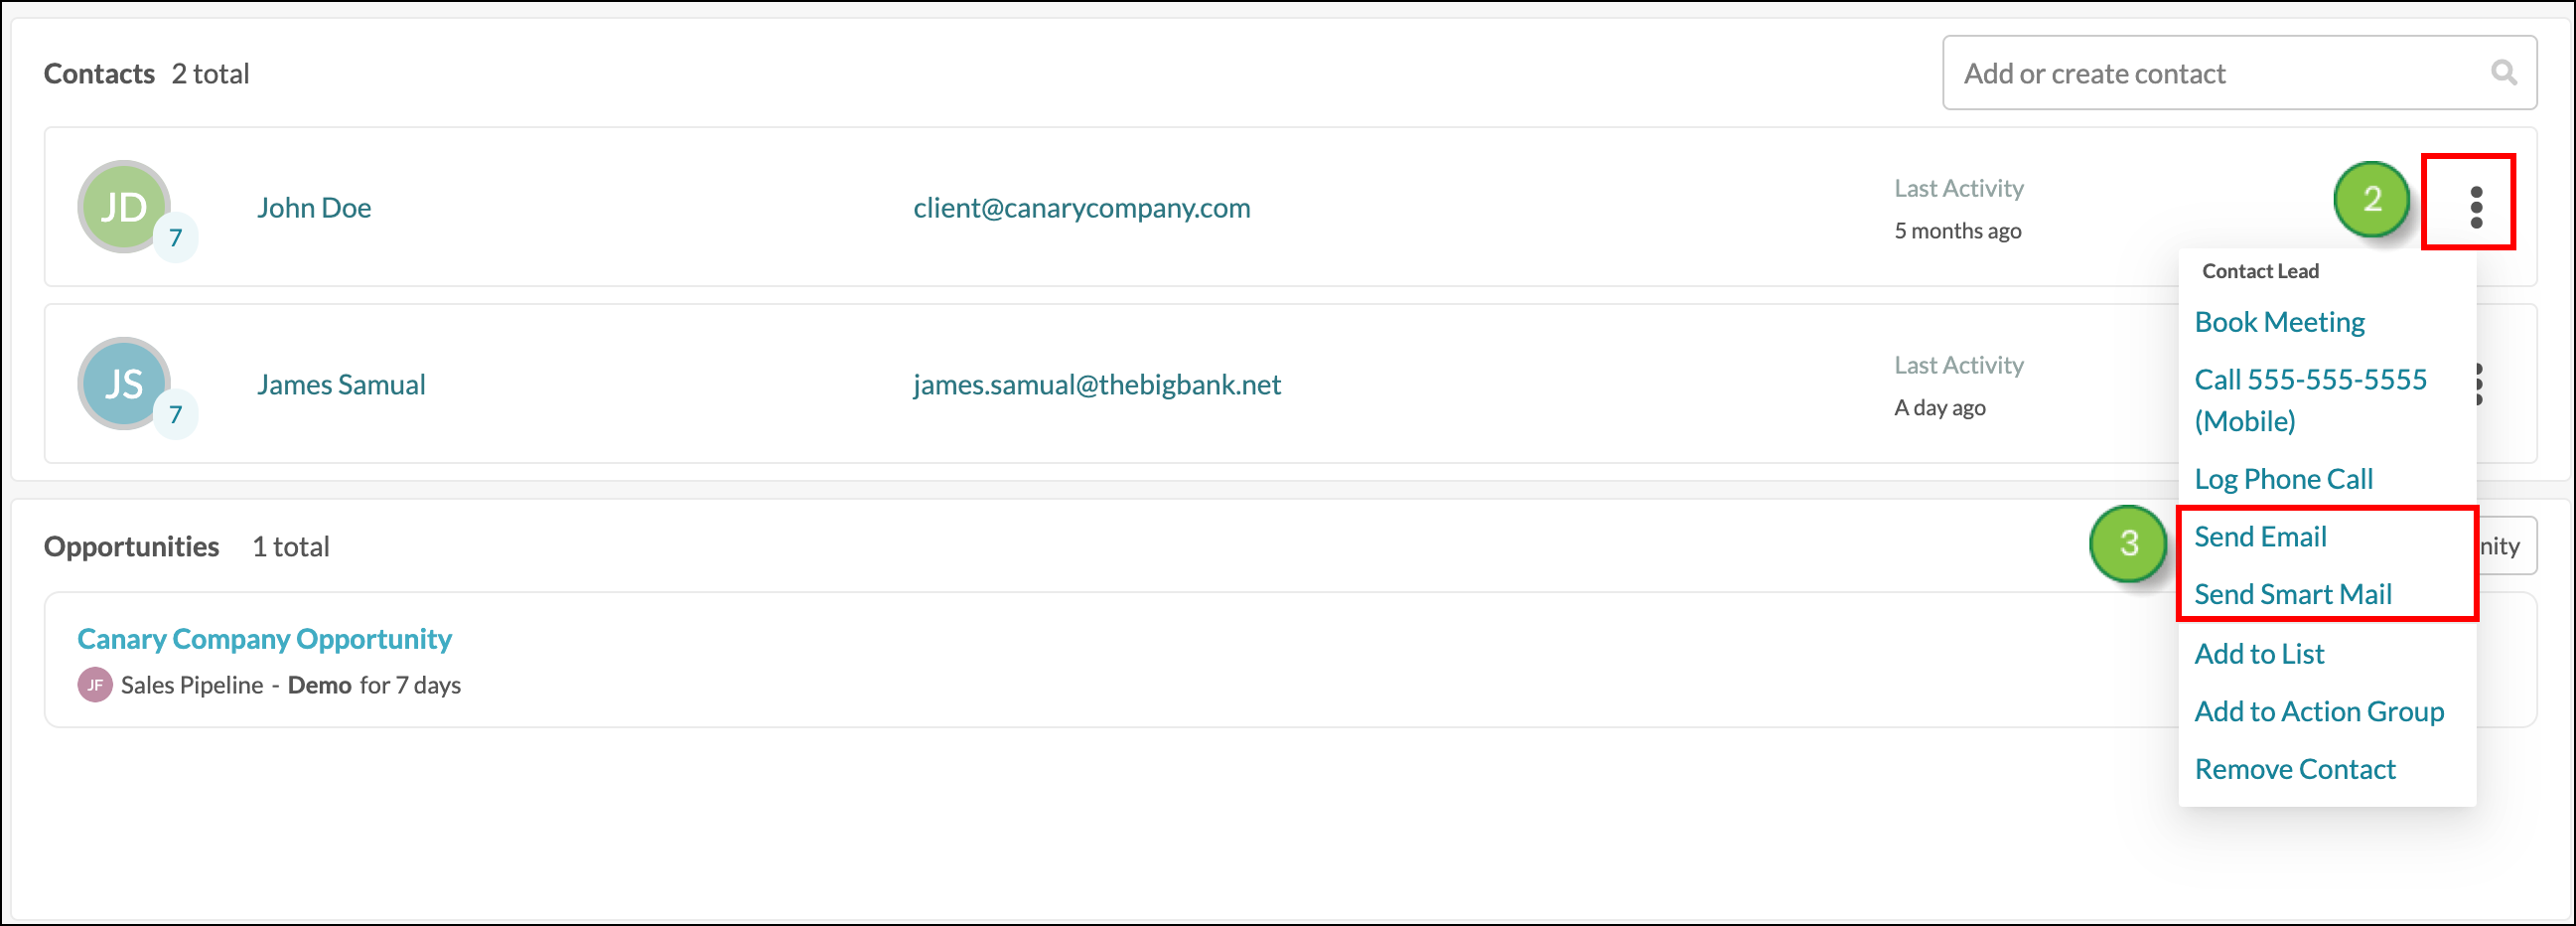
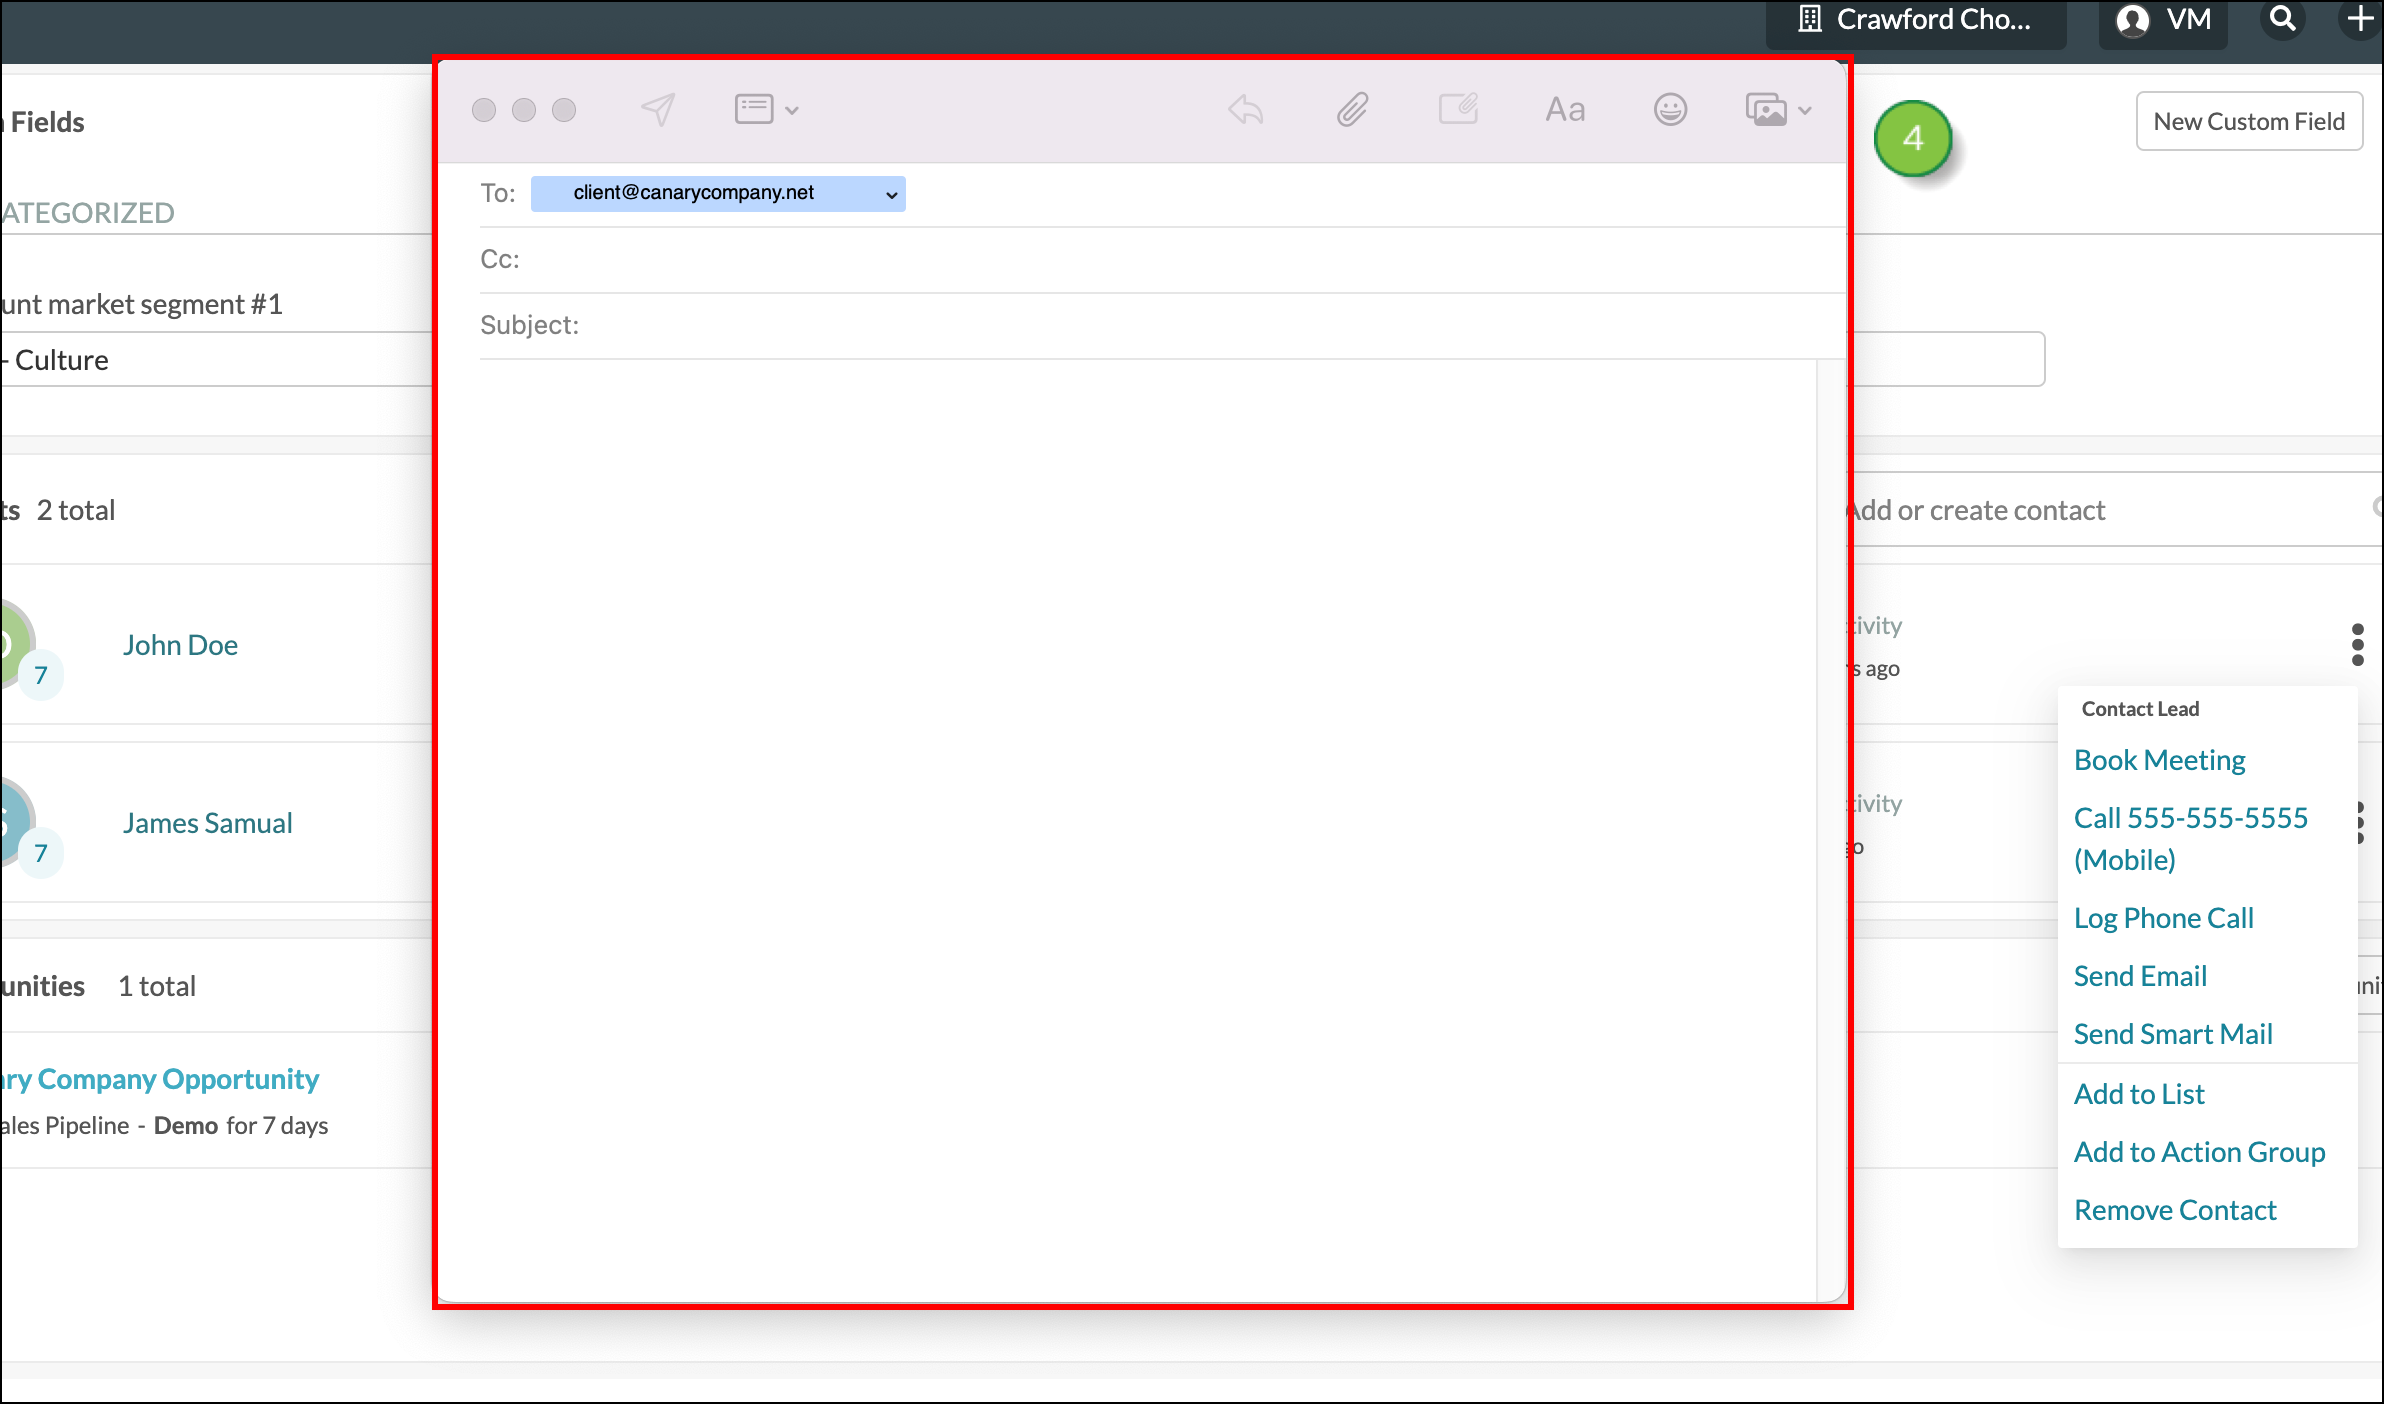

Send Email will allow you to send an email directly to the contact’s email address from your computer’s default client. Send Smart Mail will allow you to send an email to the contact’s email address from the Lead Gen & CRM app. Send emails that were created in Lead Gen & CRM and dedicated as Smart Mails.
You can add a contact to a List from the Account page. To add a contact to a list from the Account page, create or edit an account from Sales > Accounts in the left toolbar.
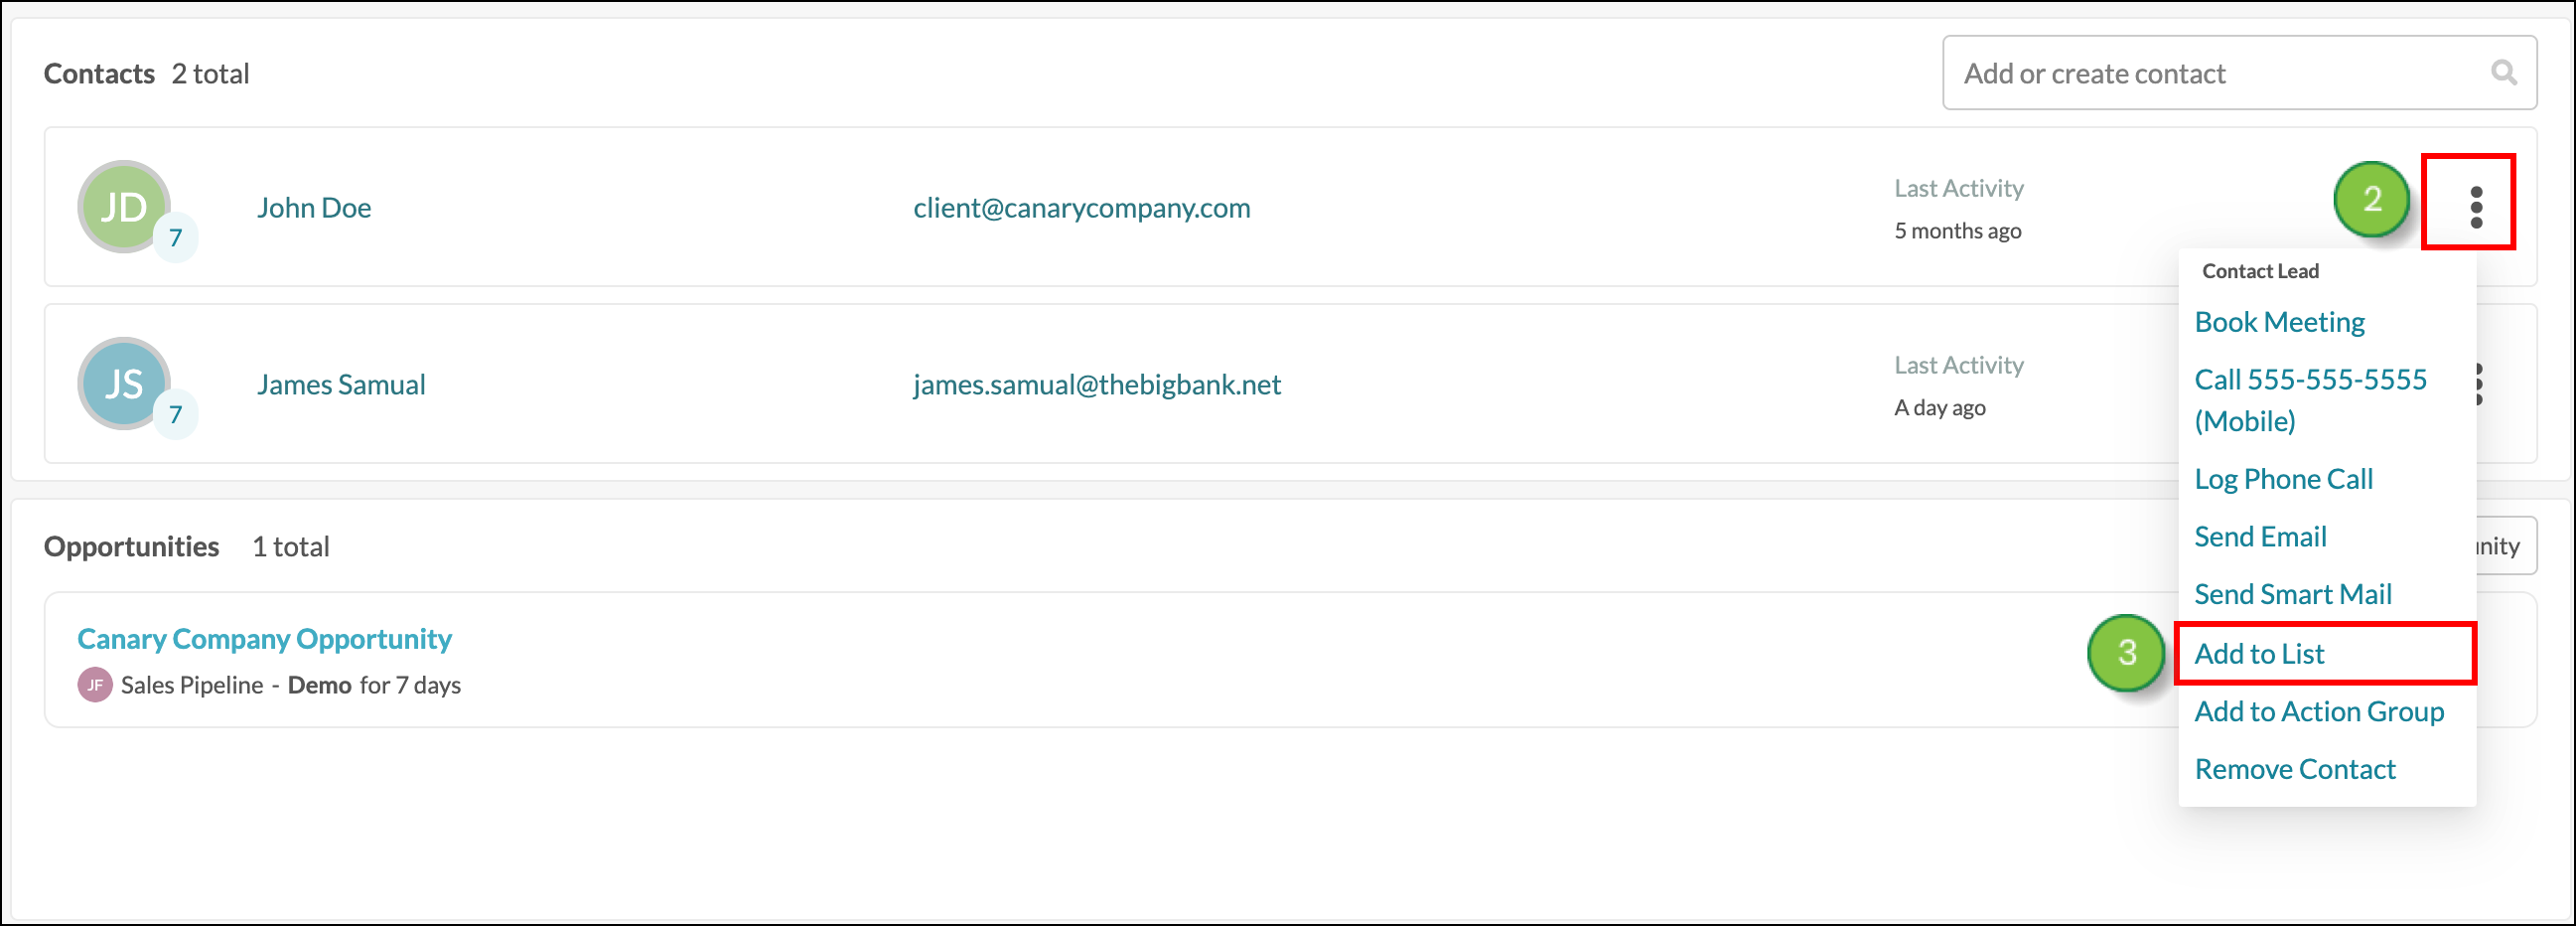
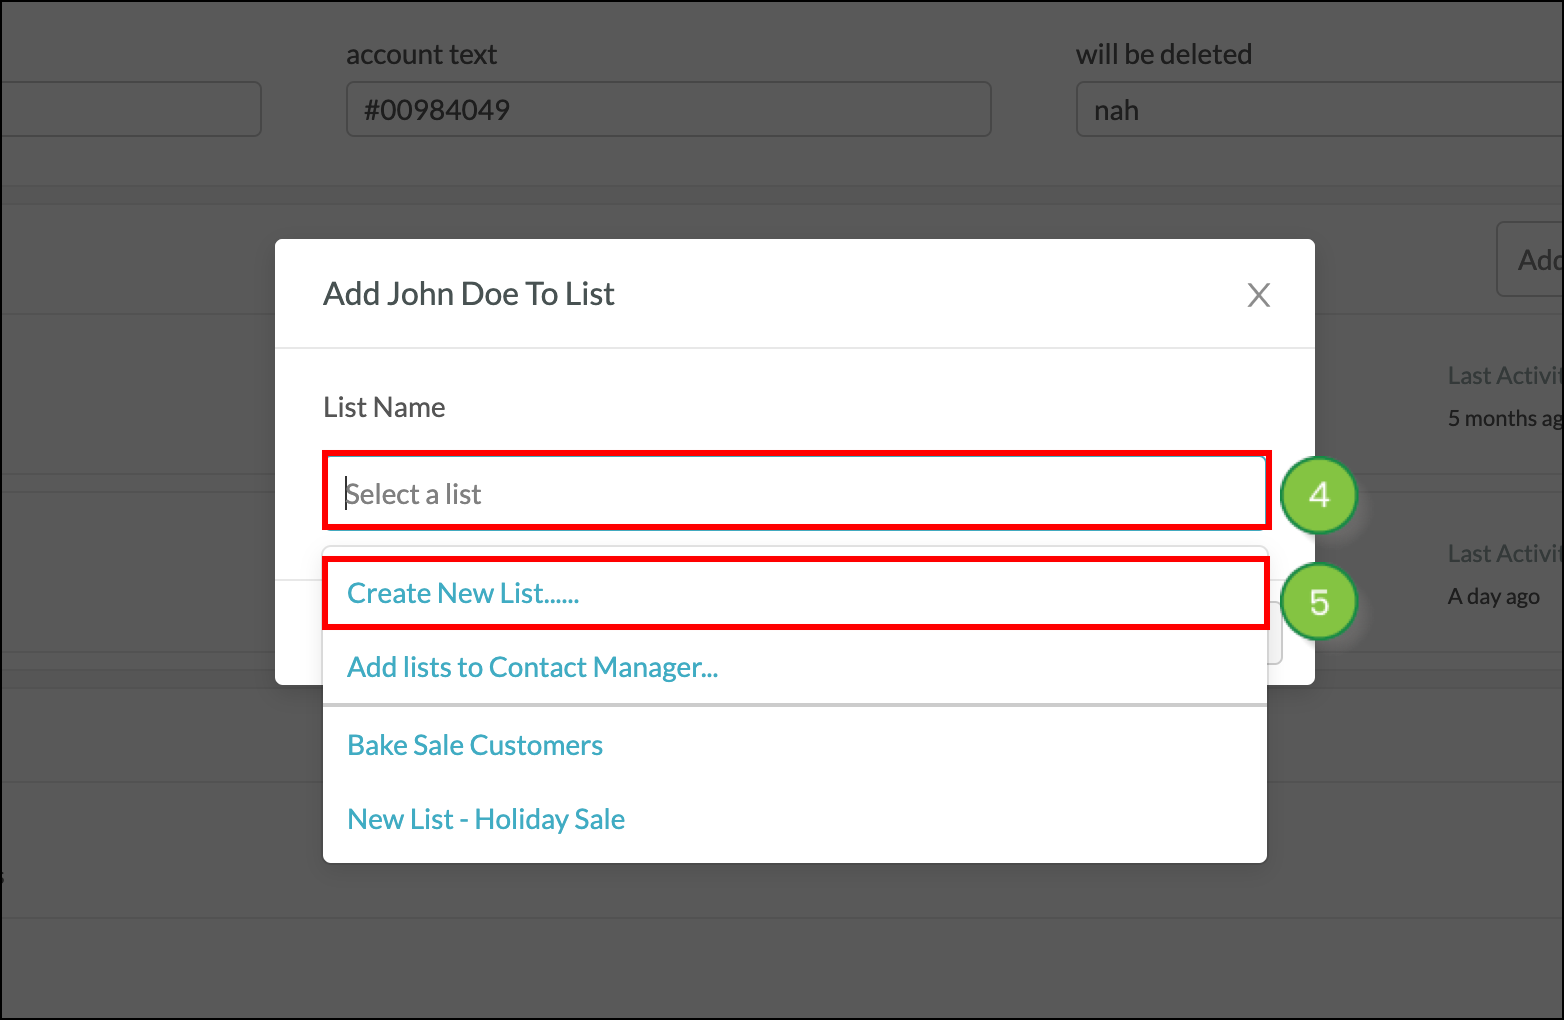
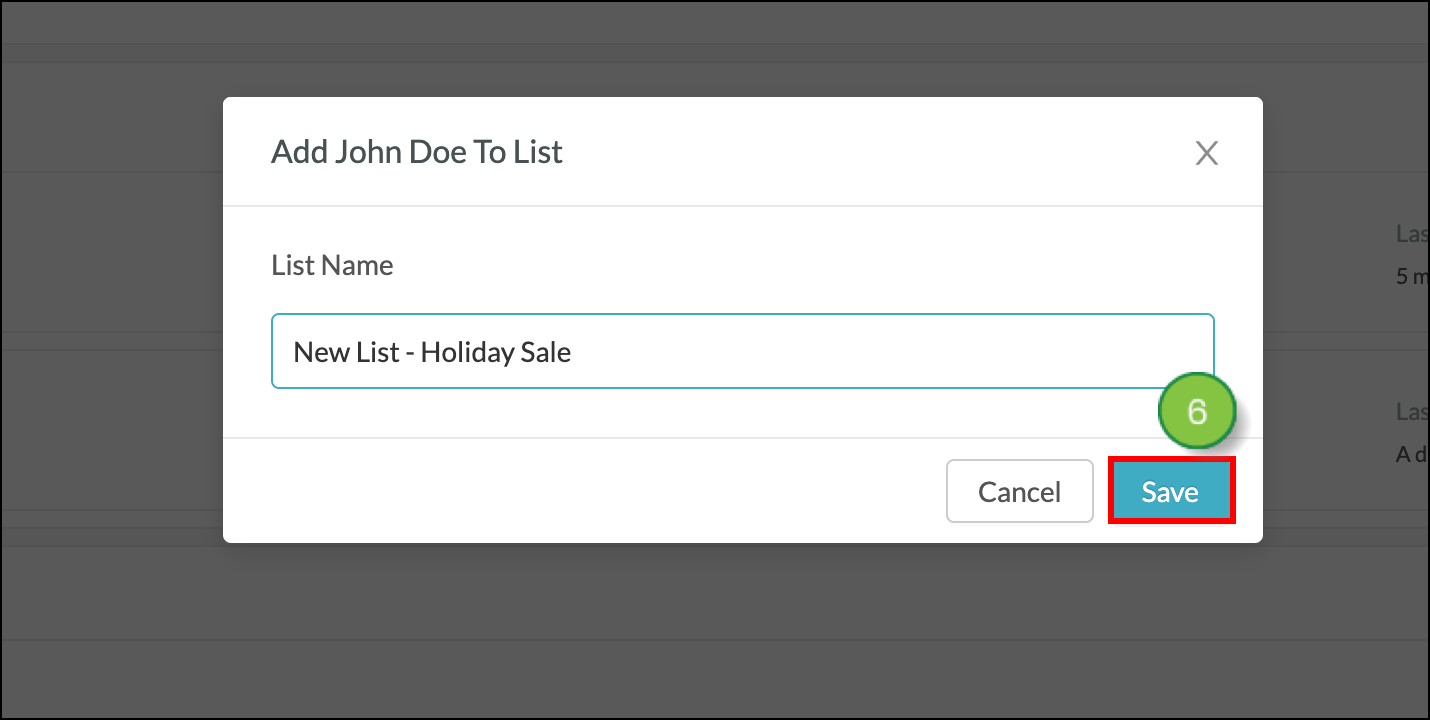
You may add a single contact to multiple different lists.
You can add a contact to an action group. Action groups are a series of events that can be scheduled by visual workflows (or manually), to lists or leads. Add a contact to an Action Group from the account page to start an automation involving the contact.
To add a contact to an Action Group from the Account page, create or edit an account from Sales > Accounts in the left toolbar.
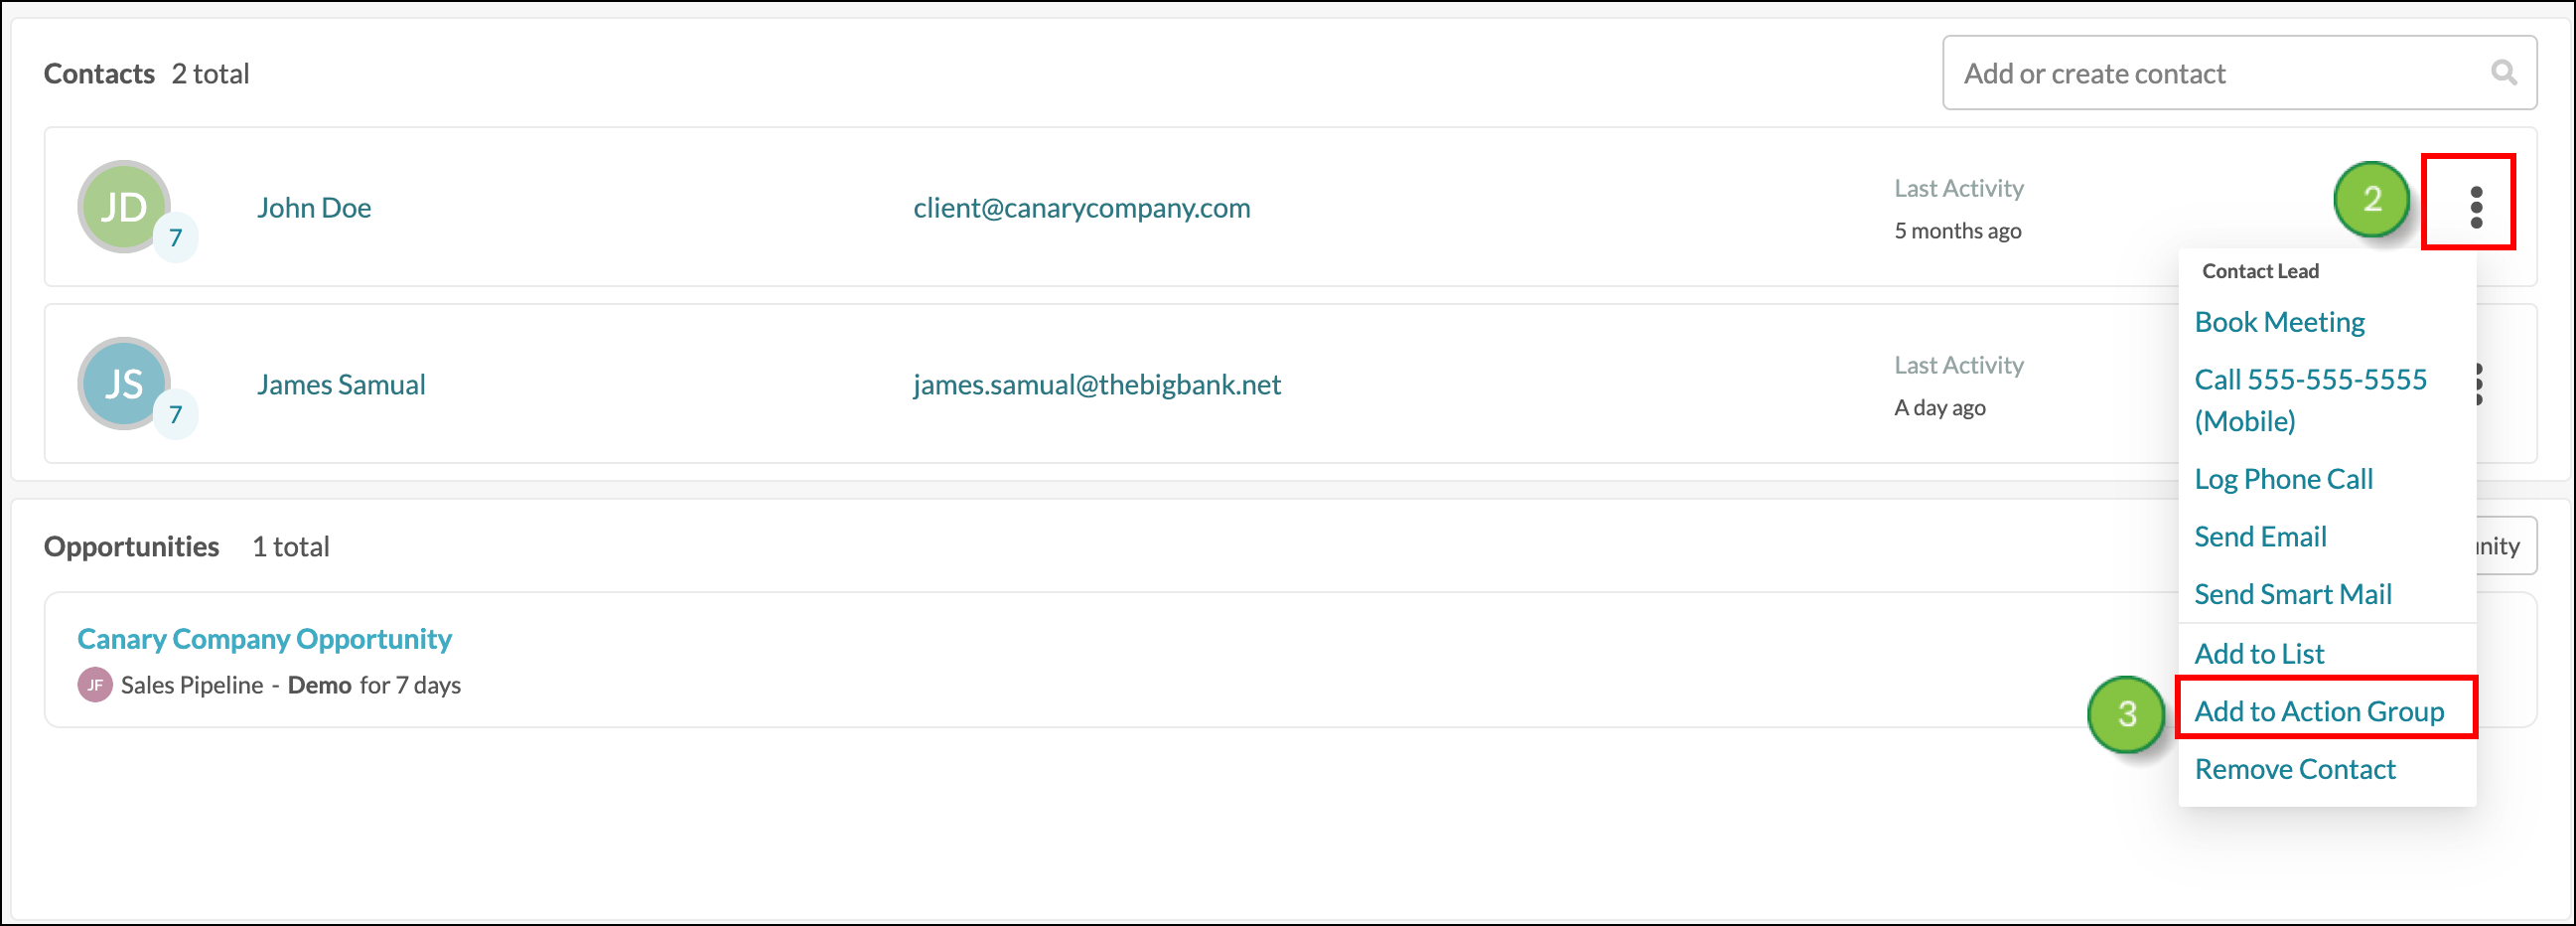
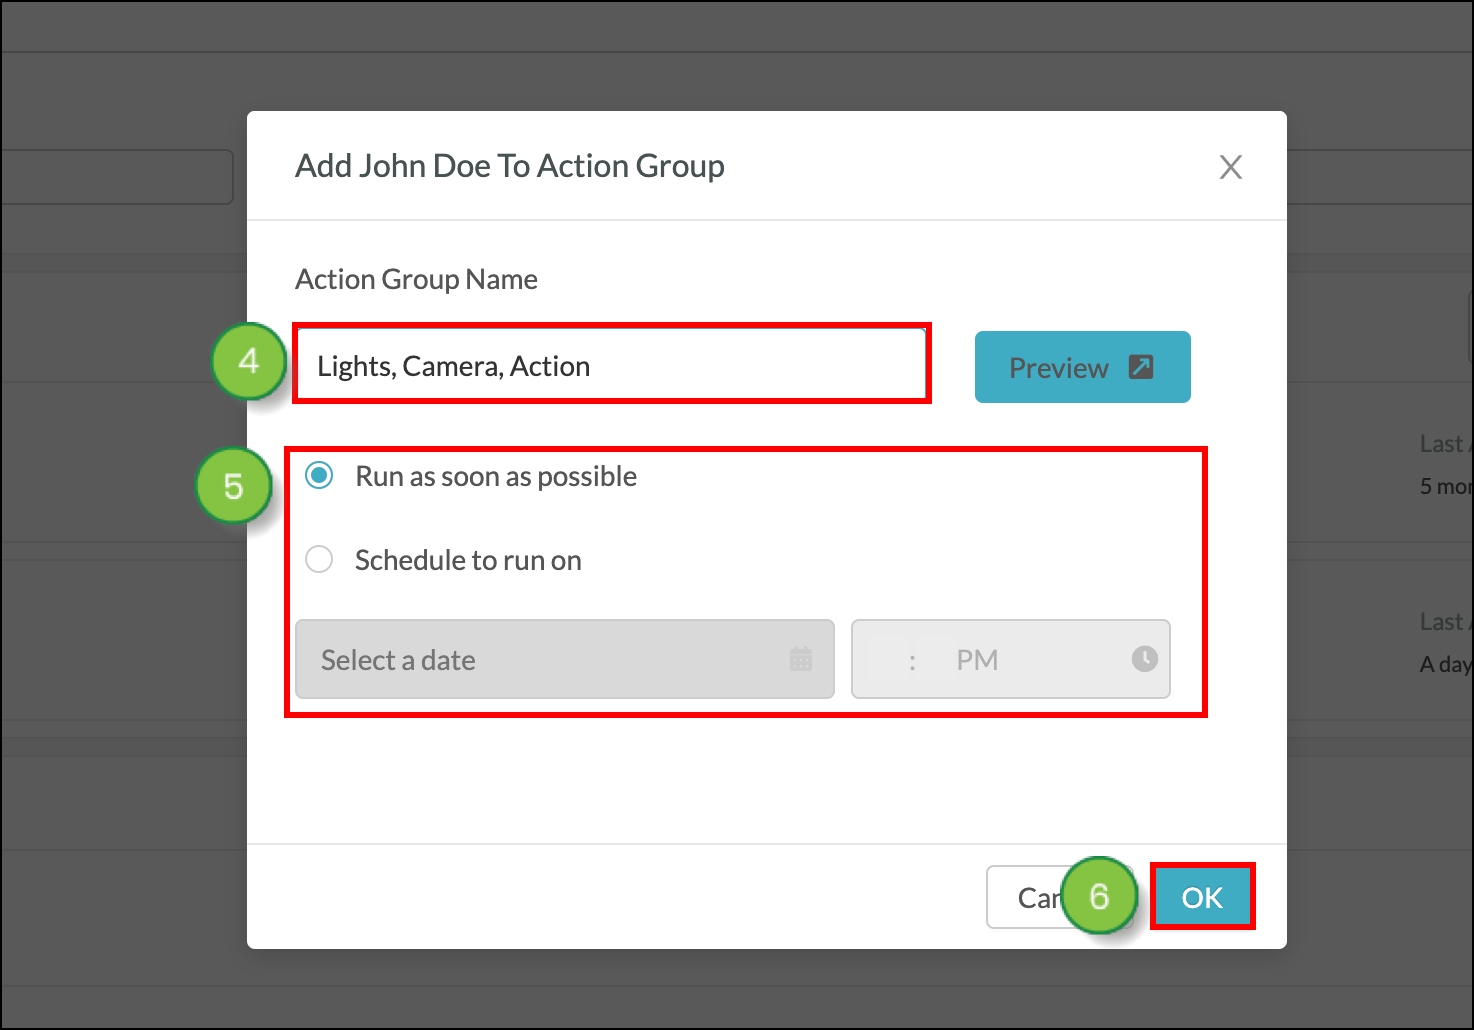
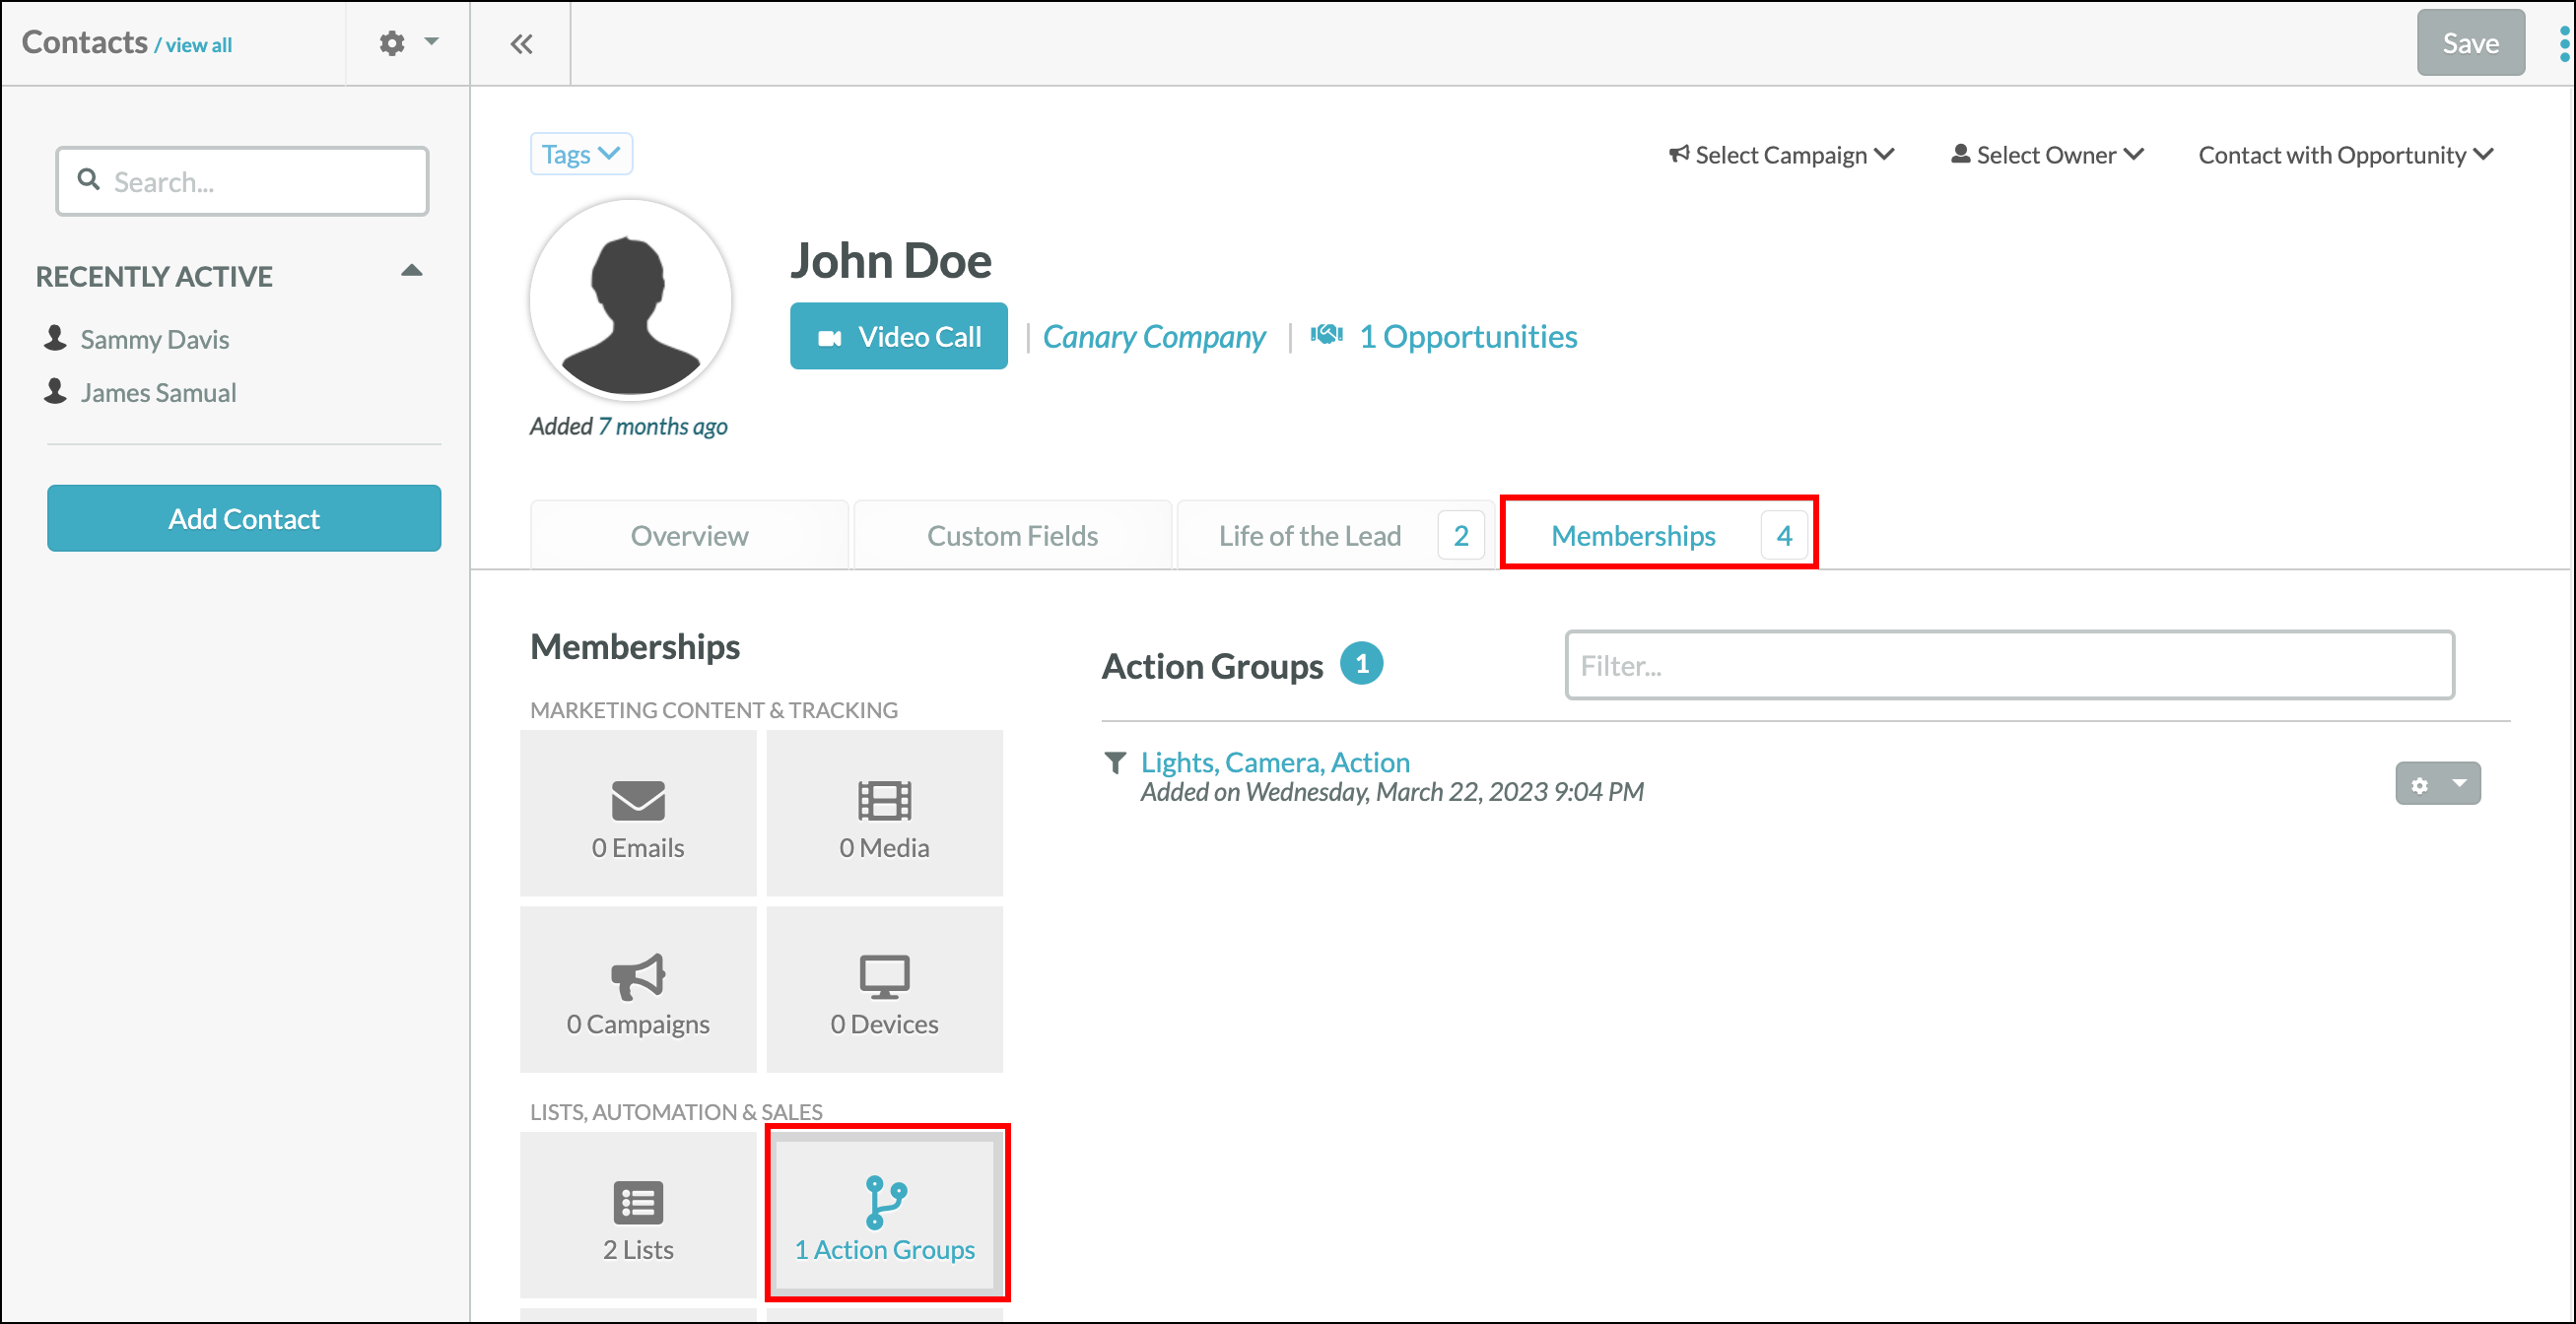
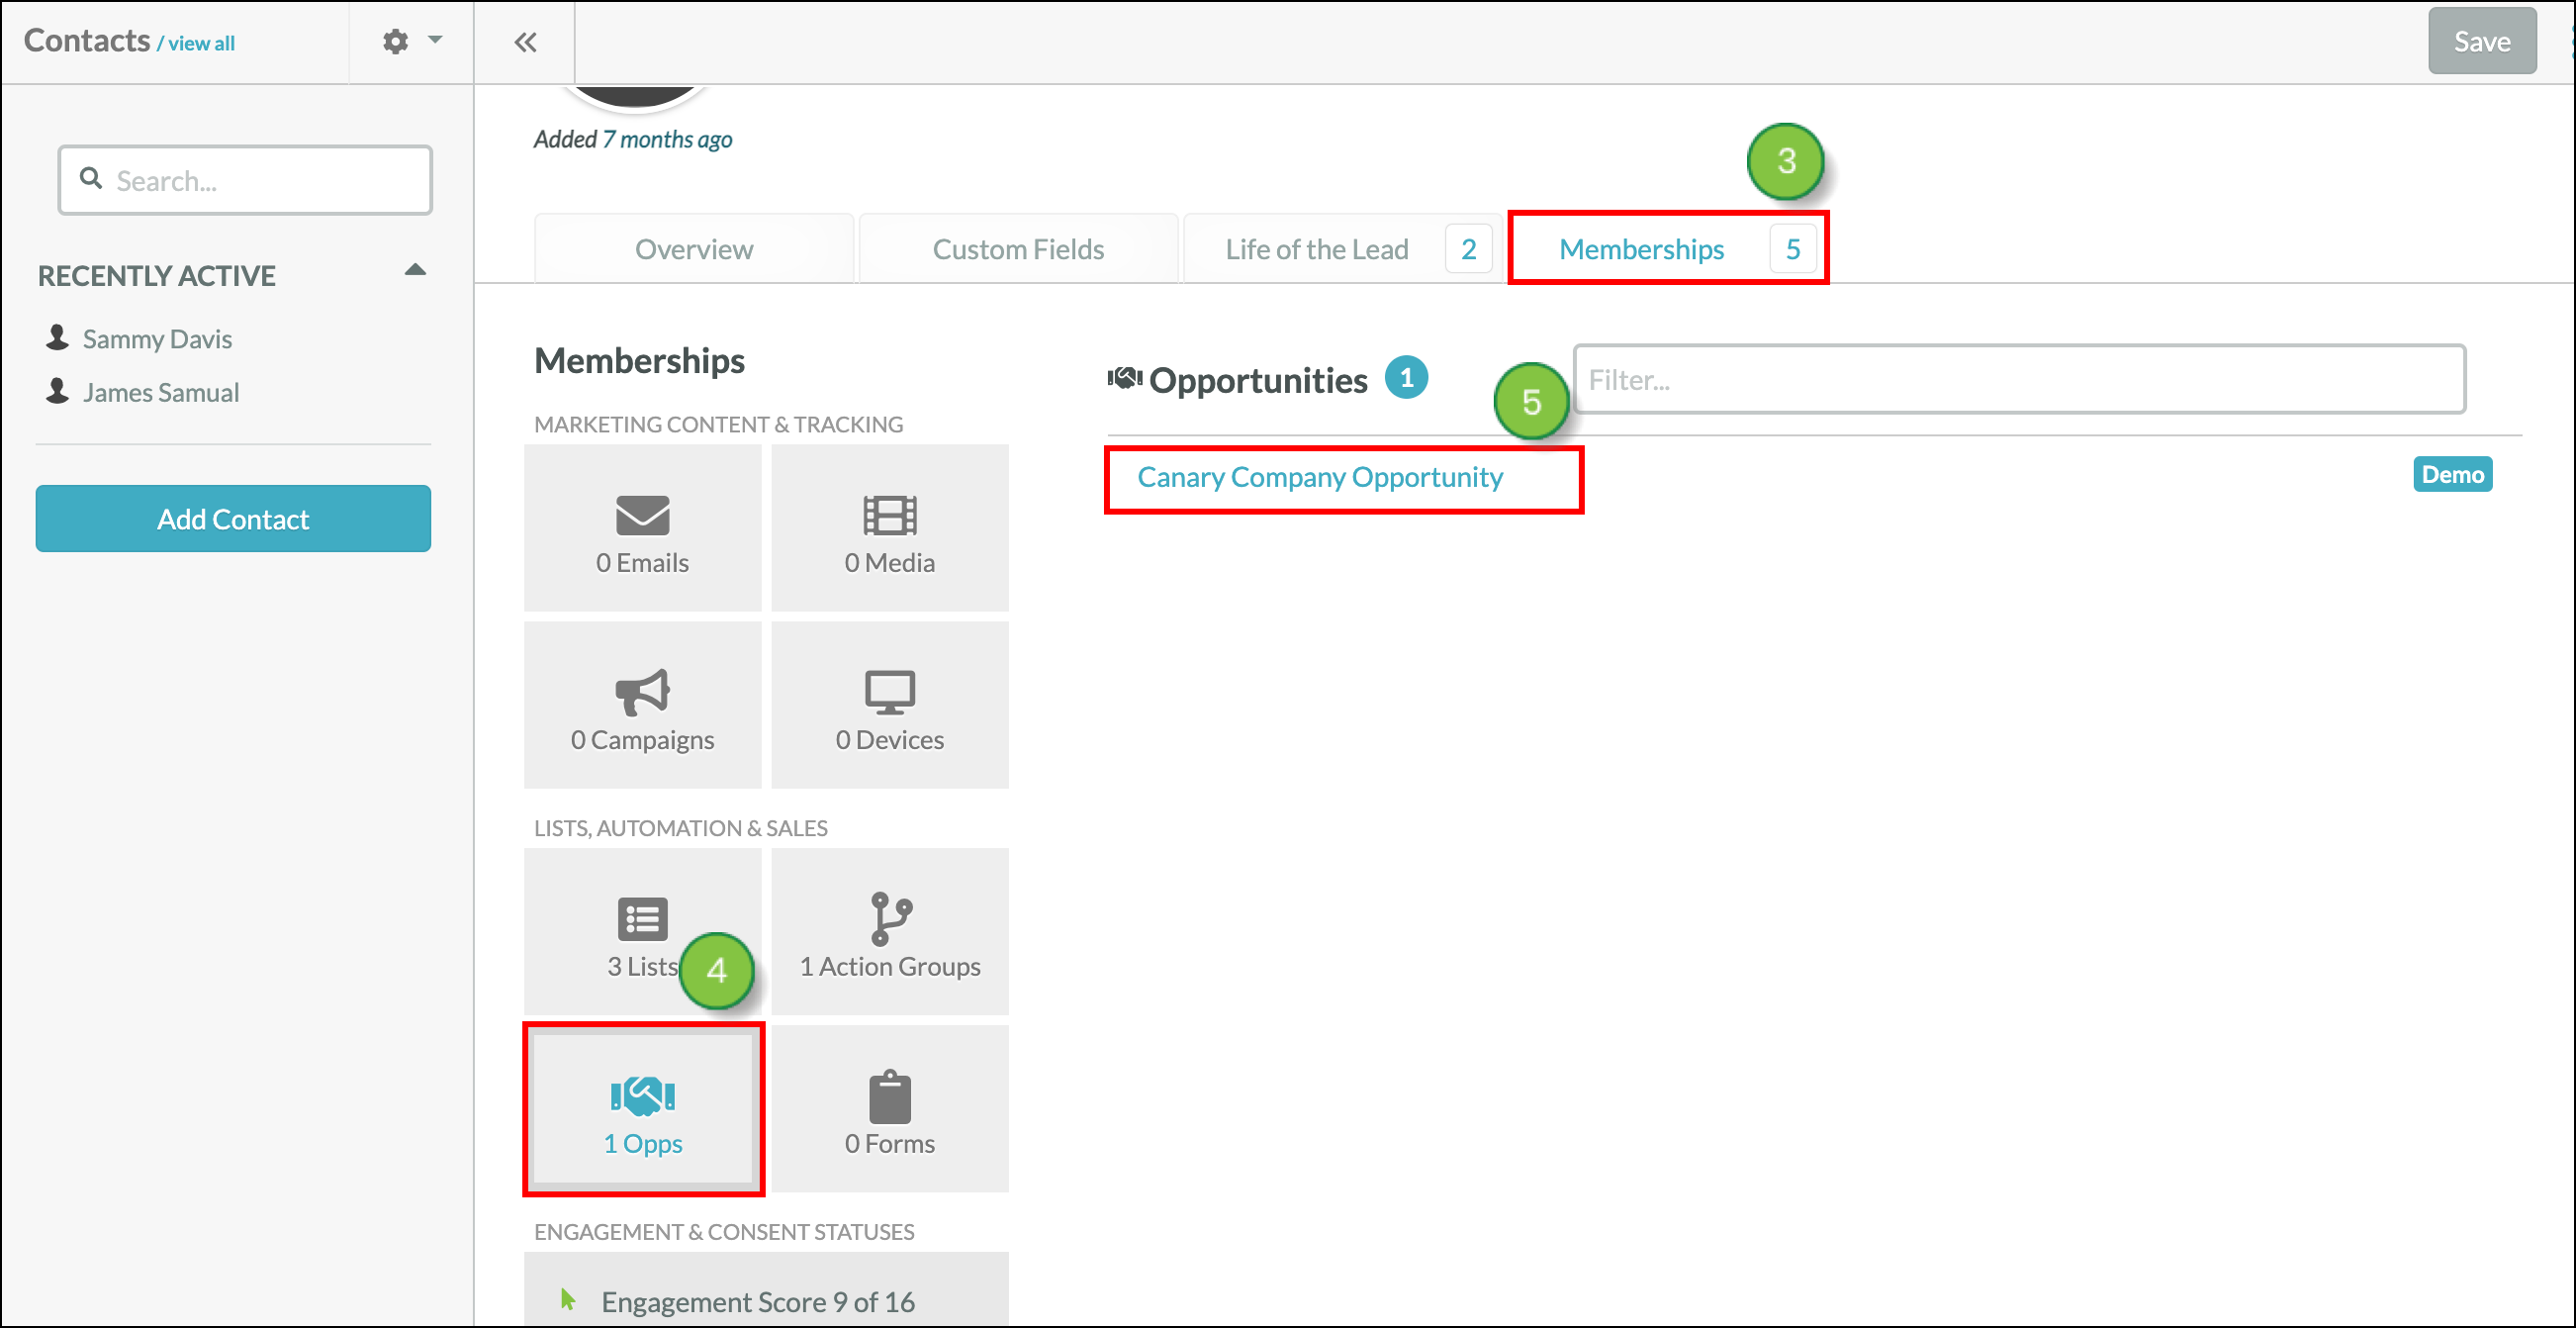
To see which action group your contact has been added to, view the Memberships tab on the Contact page. You can remove contacts from Action Groups from the Memberships tab.
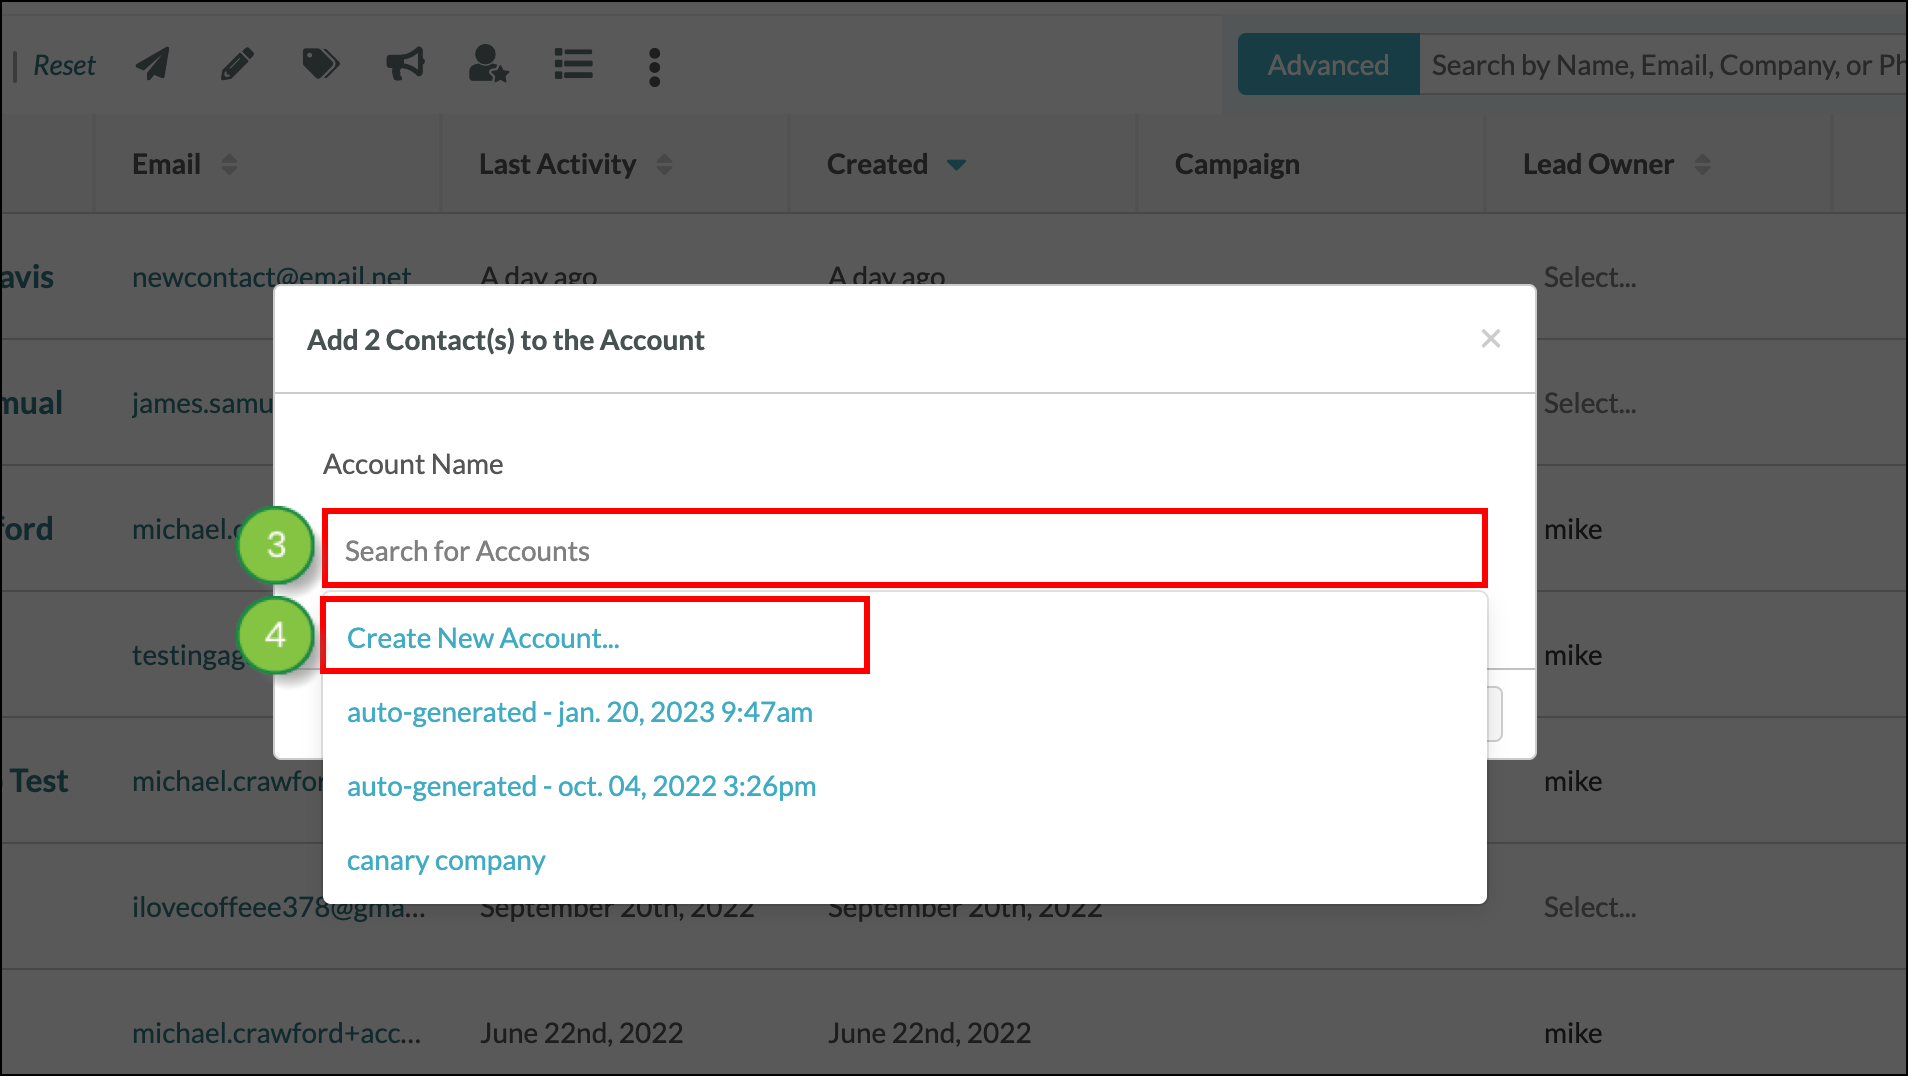
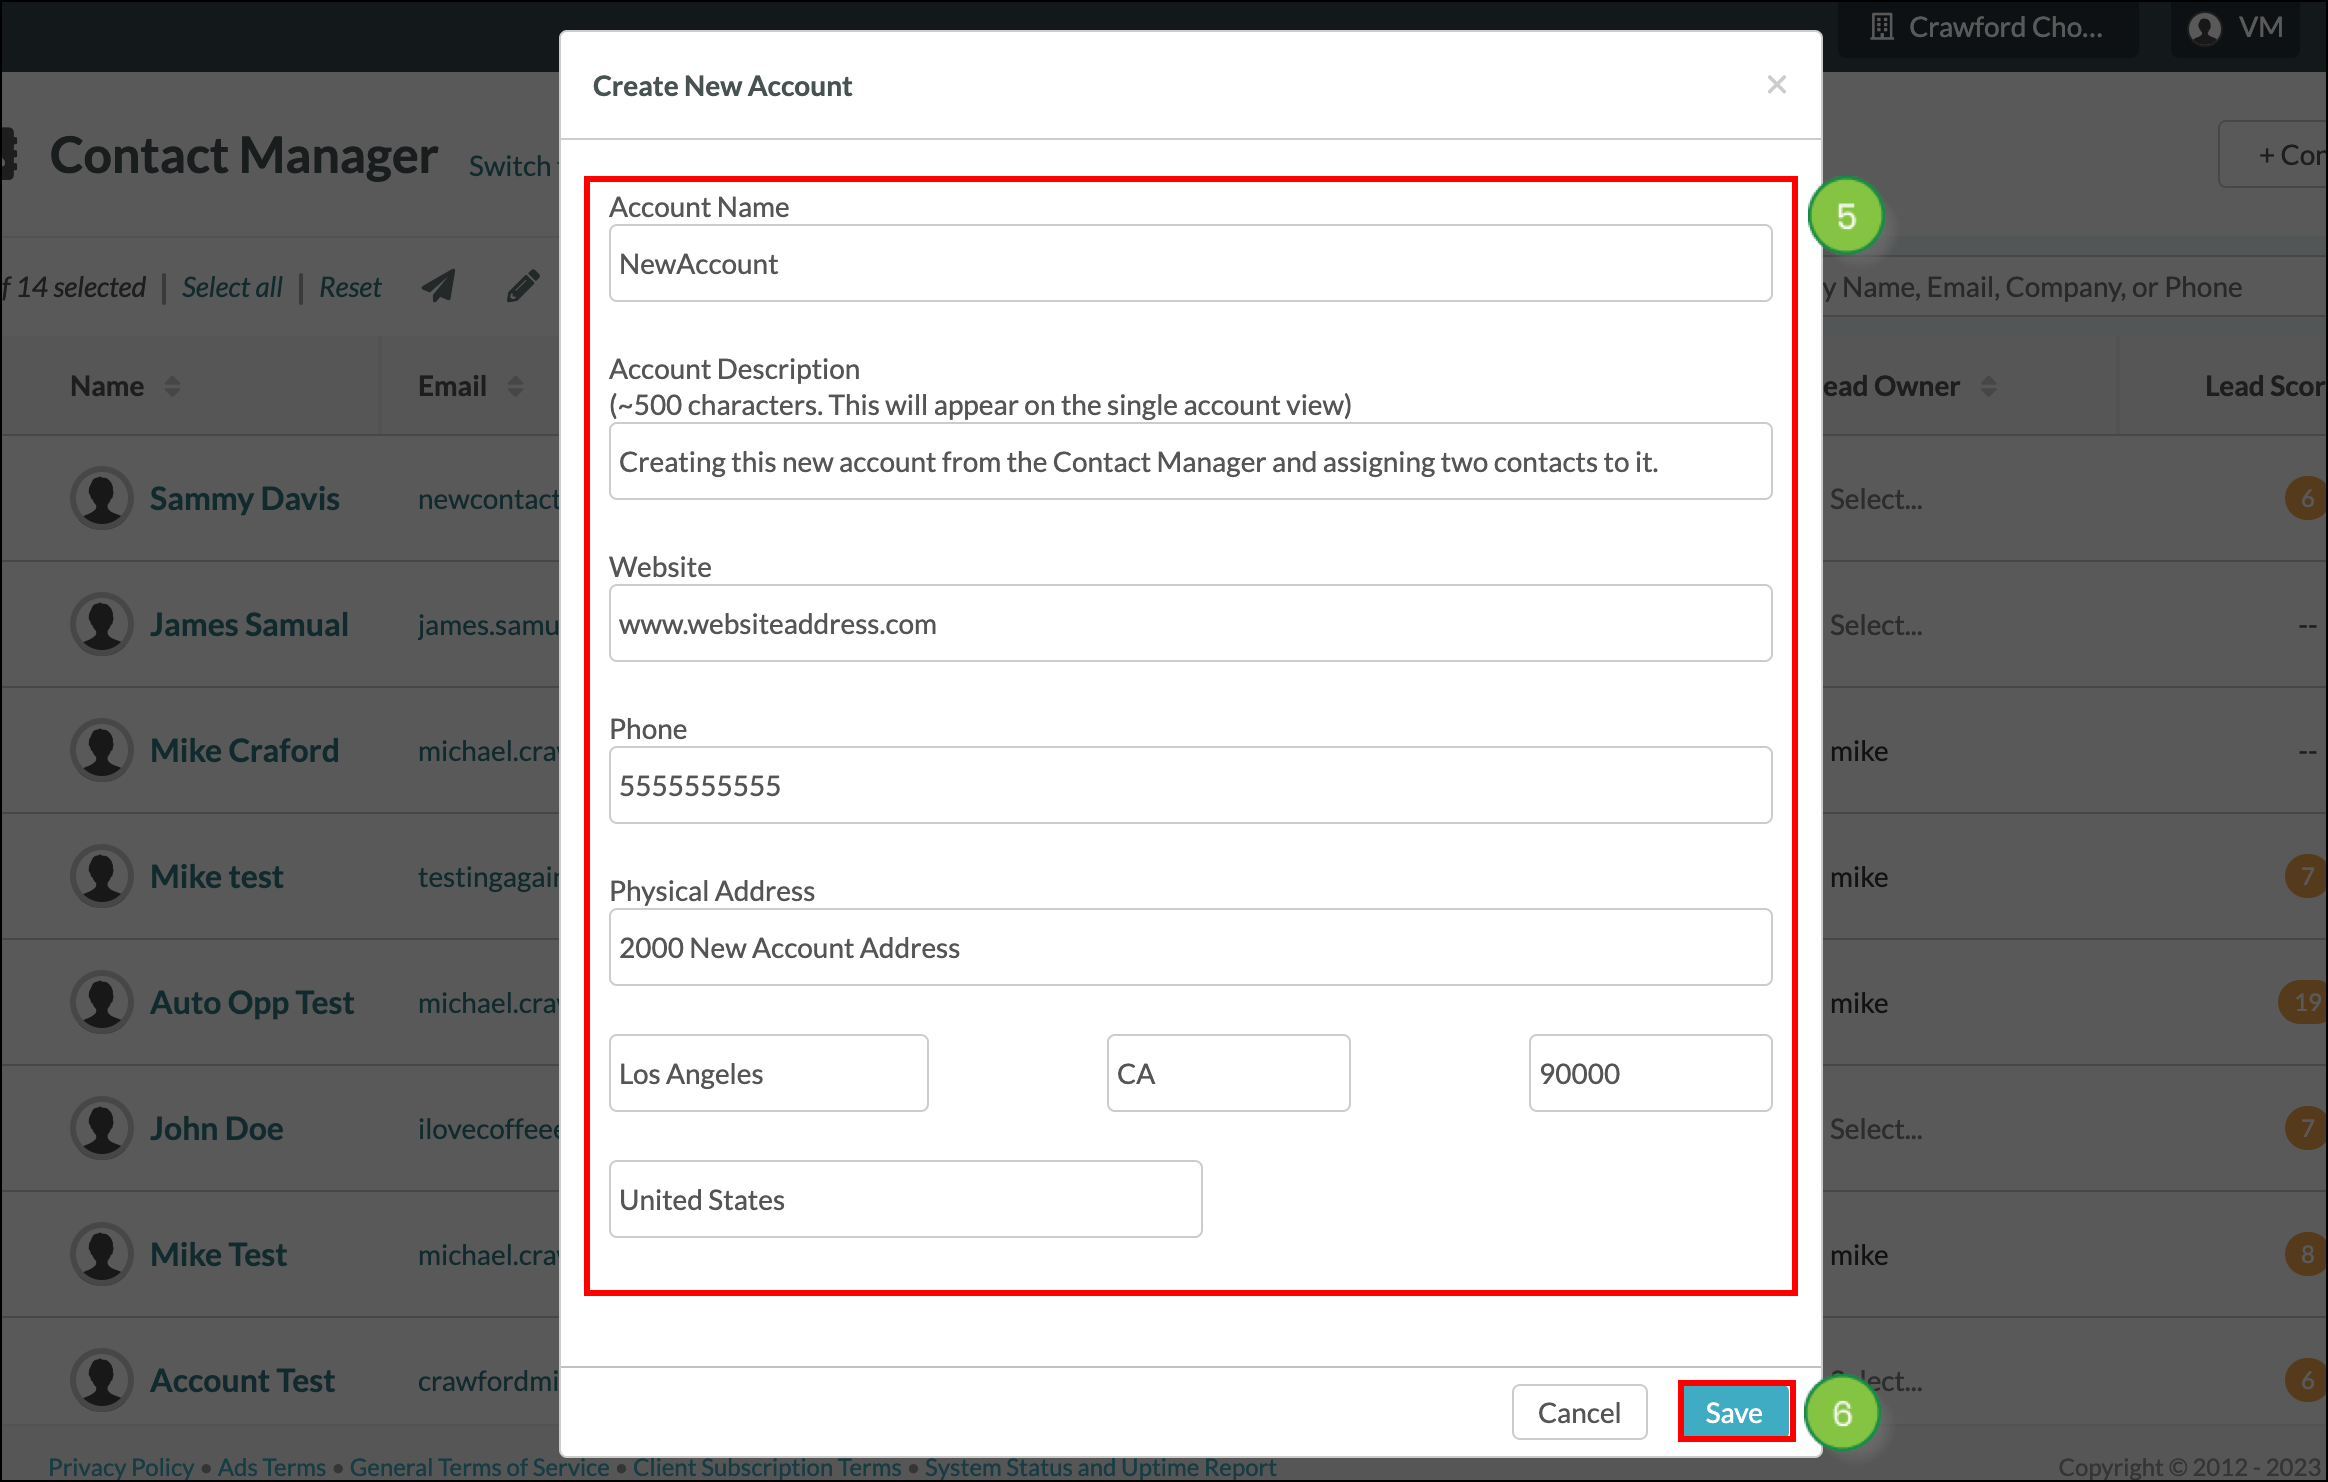
An account can be used to group multiple contacts together under one large company folder and will show all opportunities that are associated with that account, providing you with one location to see all similar sales information. Multiple contacts can be added to one account. You can add multiple contacts to an account at one time by using the Bulk Edit feature in the Contact Manager.
To group contacts together in an account, create an Advanced Search or use a saved search from the Contacts page in the left toolbar.
 selection checkboxes next to two or more contacts.
  More Actions > Assign to Account.
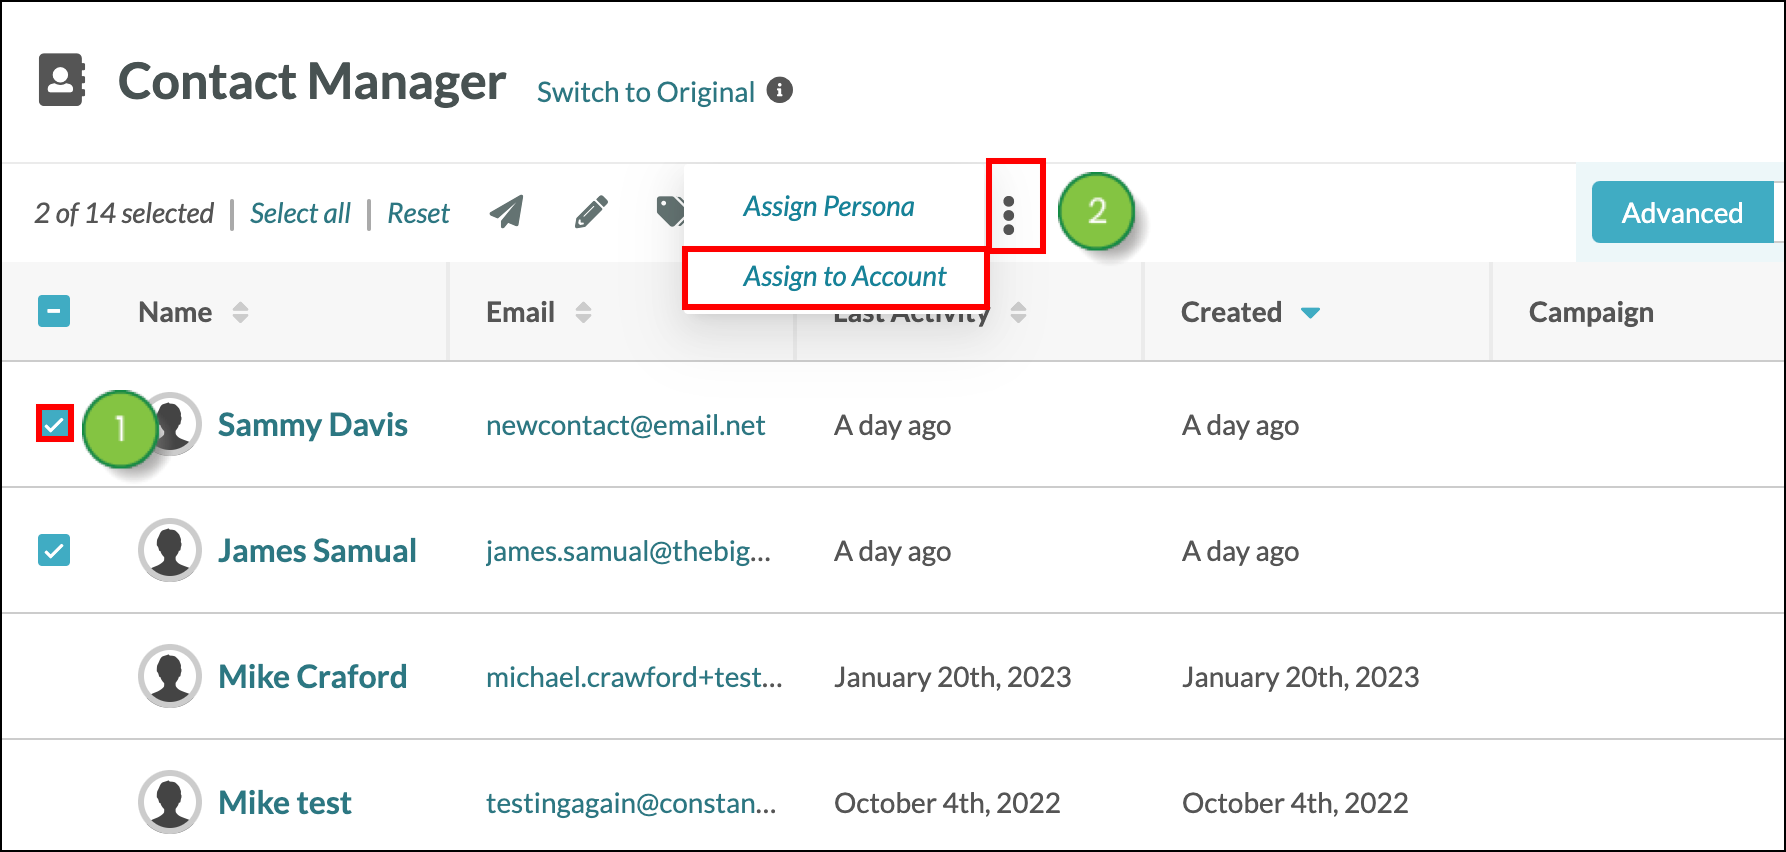
Opportunities become associated with an account once they are created. The account that is associated with the opportunity is the value that is entered into the Account Name field when creating the opportunity.
If an account already exists, it will show up in that field as you begin typing and will add the opportunity to that account once selected. If the contact changes accounts, the opportunity will not reflect this change and the opportunity will still have the account that the contact was originally a part of.
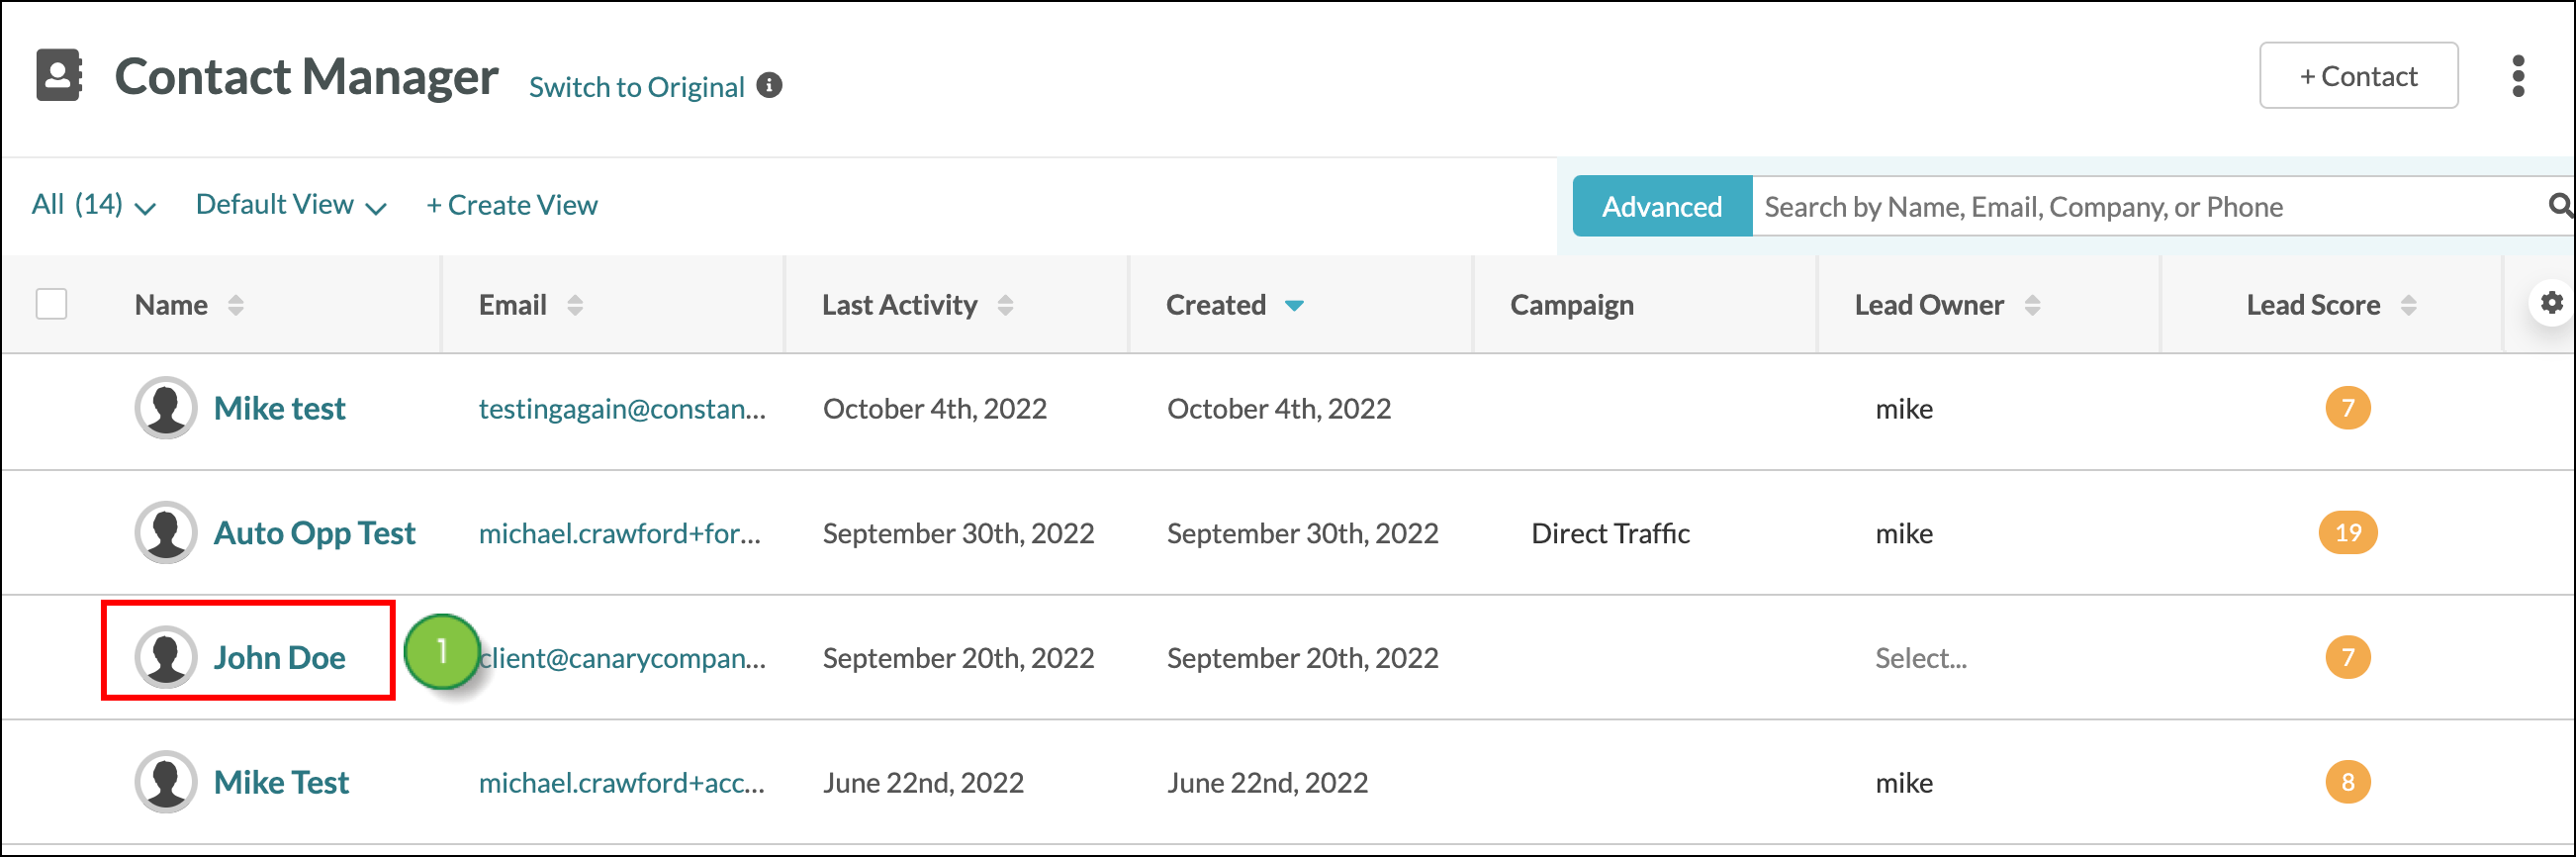
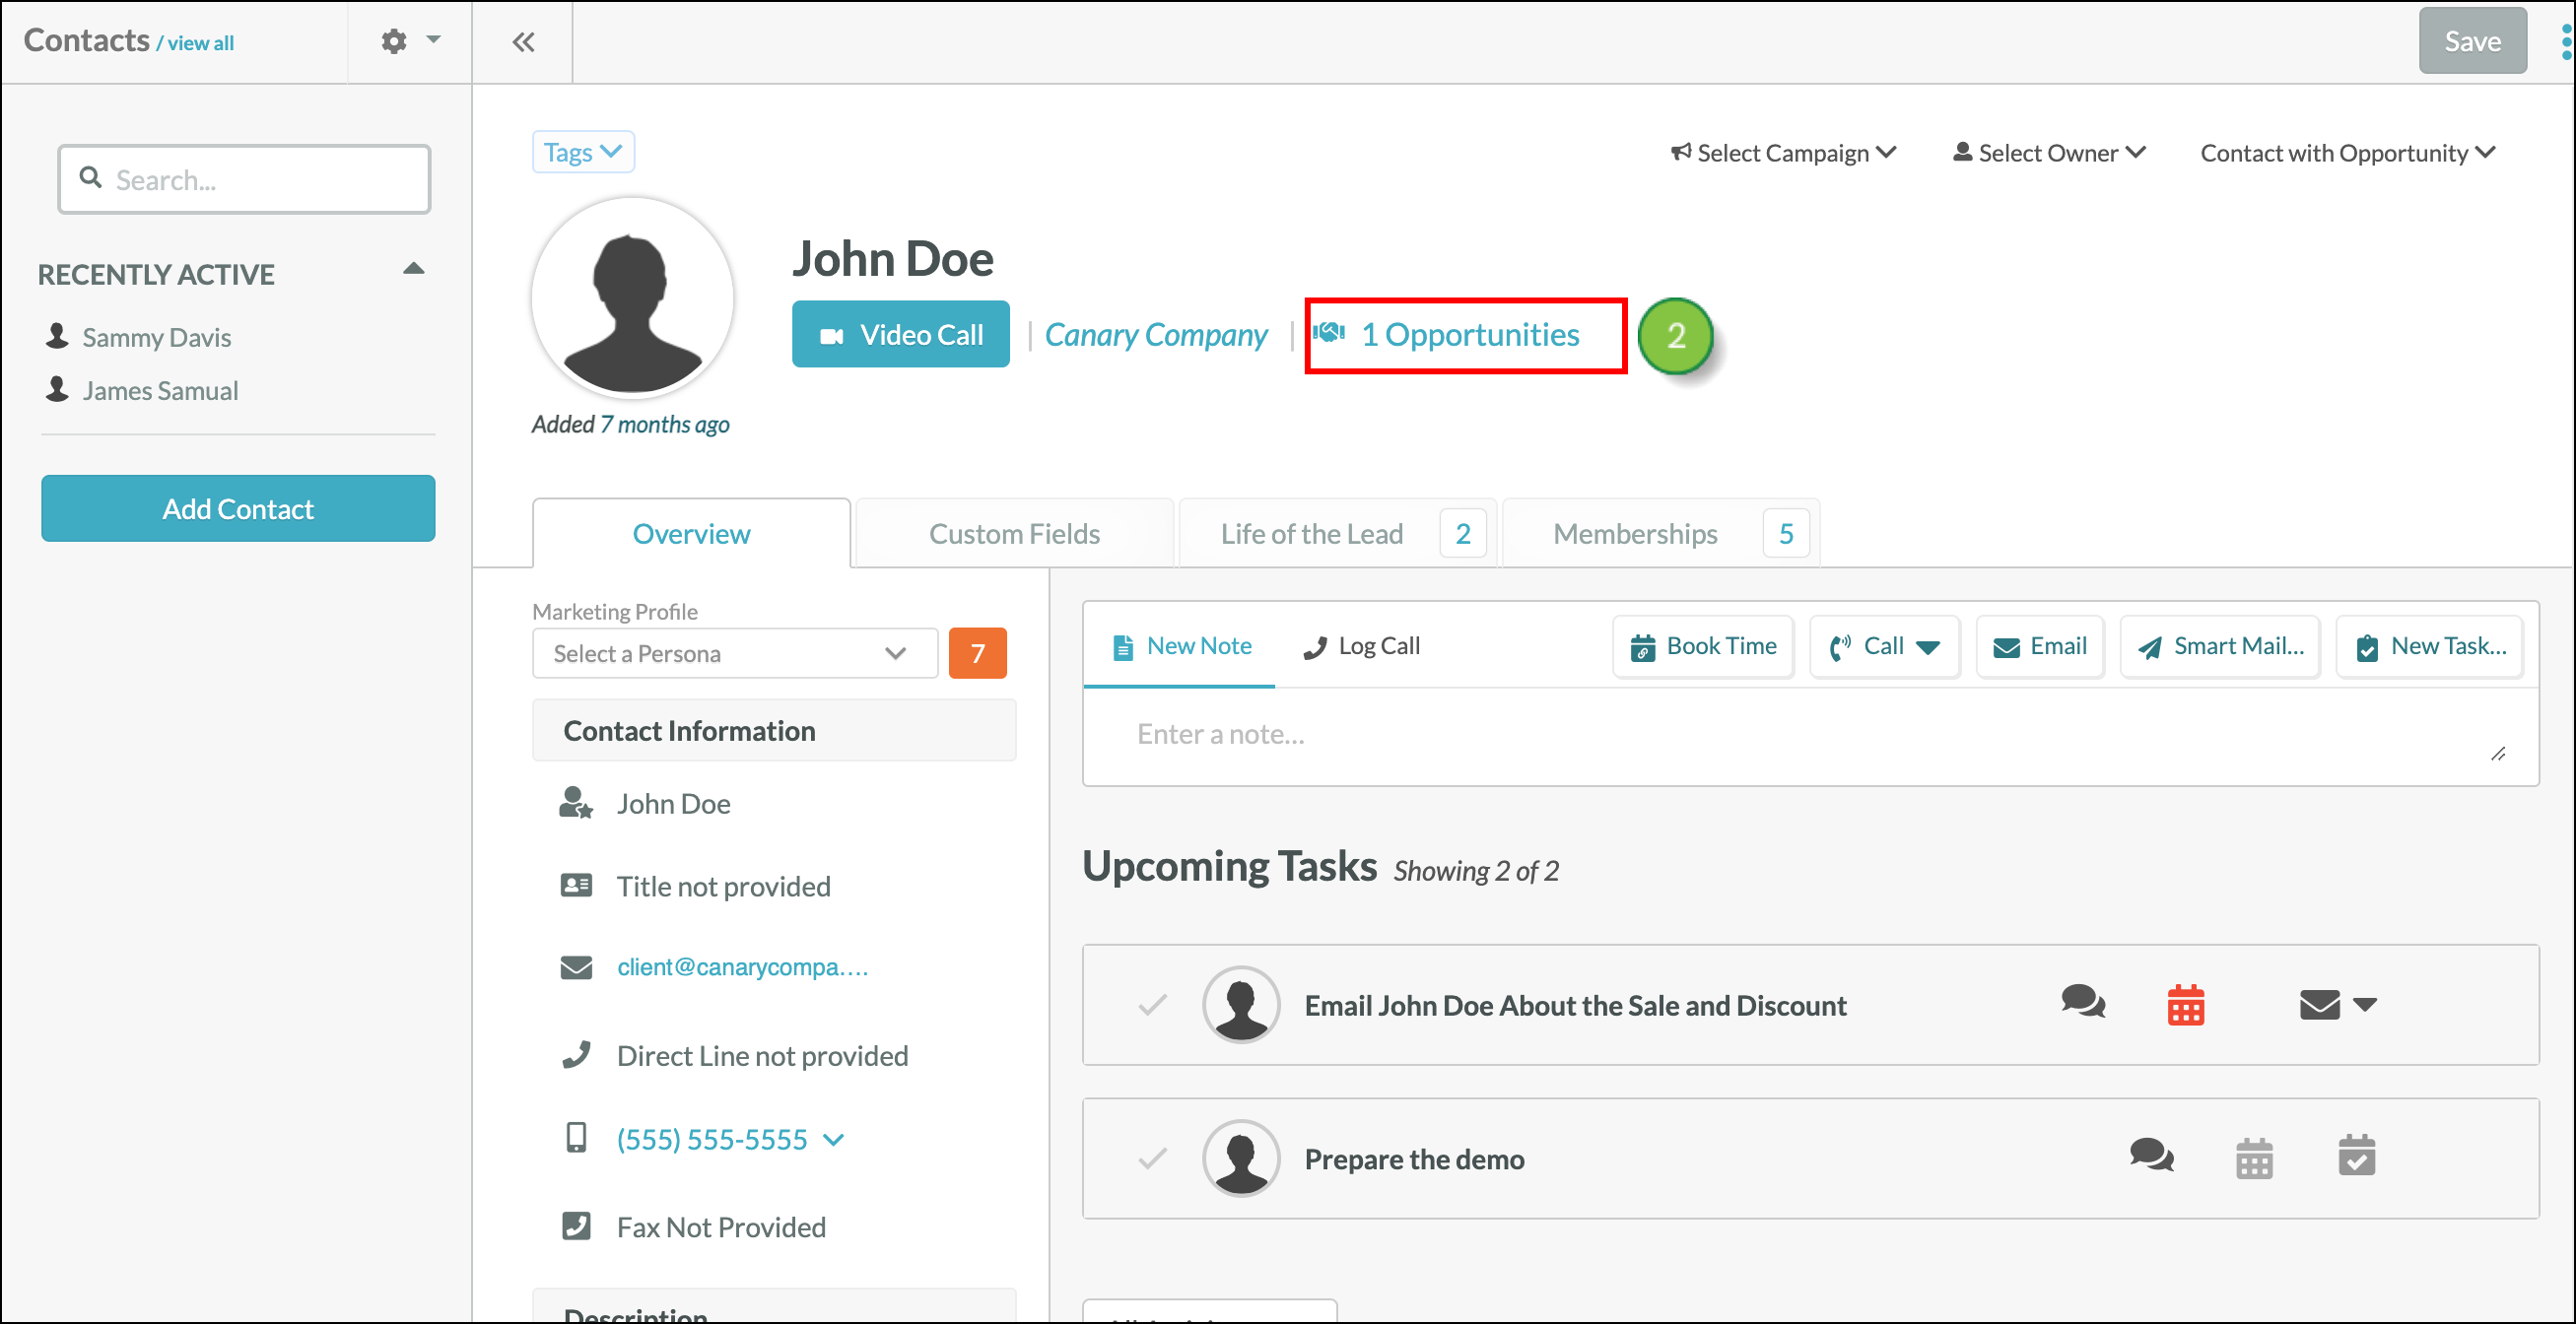
You can access the opportunities associated with your contacts. To access a contact's opportunities, start from Contacts in the left toolbar.
Copyright © 2026 · All Rights Reserved · Constant Contact · Privacy Center