Every new chatbot comes with a premade workflow. These workflows are meant to be used in nearly every circumstance.
However, you may find that you would like to customize the various questions, responses, and lead information capture methods in your chatbot's workflow.
This article will detail how to use and modify chatbot workflows.
| Administrators | ✓ | |
| Company Managers | ✓ | |
| Marketing Managers | ✓ | |
| Sales Managers | ✓ | |
| Salespersons | ||
| Jr. Salespersons |
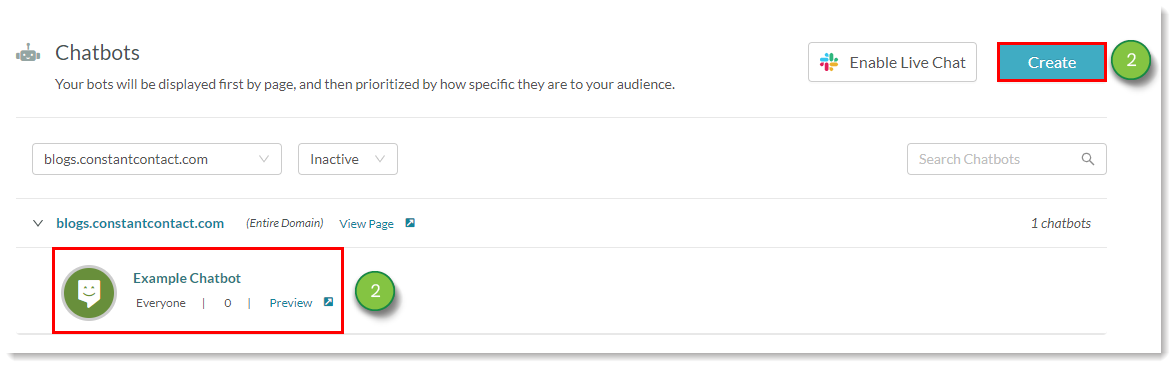
Chatbots are an automated communication service. They allow users to search for answers about your content, and they provide a series of answers and means of collecting data. Whenever you create a new chatbot, Lead Gen & CRM provides a default chatbot workflow. This workflow is made to be a general-purpose chatbot that can be used in nearly every circumstance.
Conversations through chatbots use a specific logic path. A chatbot workflow starts with a welcome message, progresses to an initial question, provides specific answers, allows the user to respond, collects any necessary information, and then displays a message that ends the conversation. This logic path best emulates person-to-person communication.
Though chatbots have a certain amount of customizability available to them, their general structure cannot be changed, and few parts of the workflow can be deleted outright. These limitations are in place to prevent chatbots from suffering from logic breaks in the workflow.
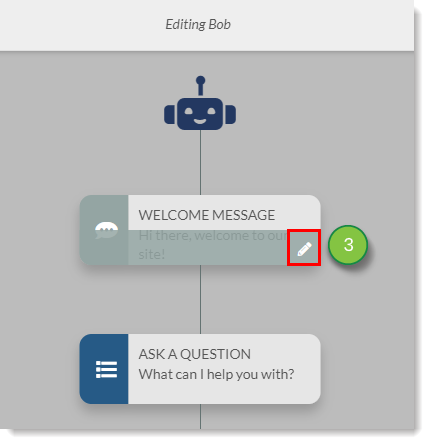
The welcome message is the starting point for all chatbot workflows. As its name implies, it is what stands in as your greeting.
Important: Welcome messages cannot be deleted.
To modify the content of a welcome message, do the following:

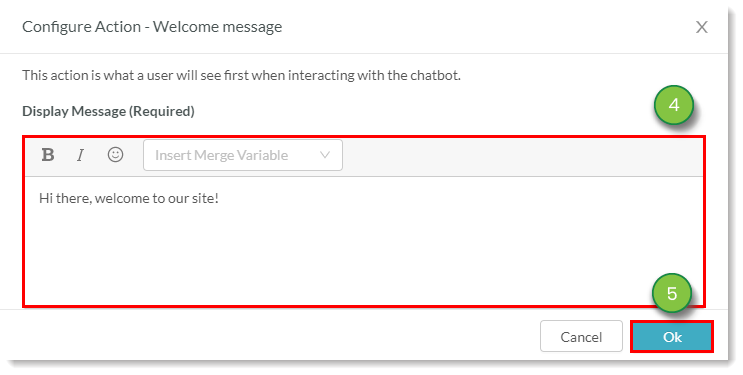
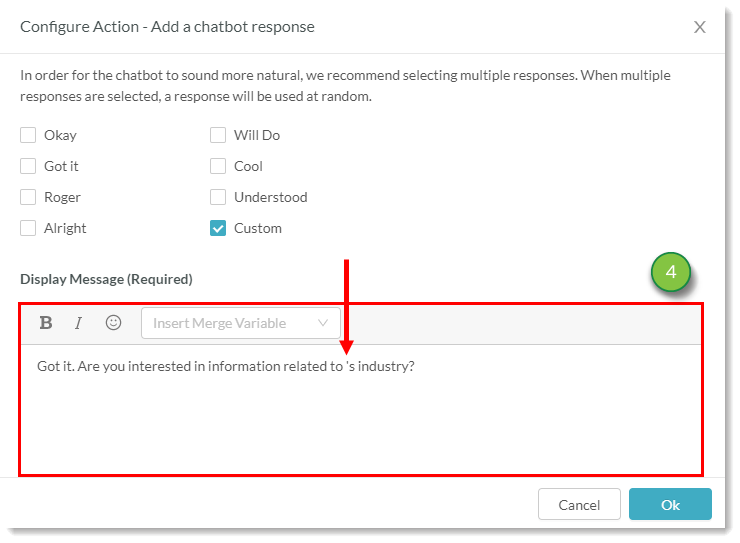
The Text Editor is how you got about customizing the displayed message for each chatbot action in the workflow. It is largely a what-you-see-is-what-you-get editor, and it has been streamlined to prevent potential formatting issues.
To enter messages into the Text Editor, do the following:


The Text Editor has the following available functions:
| Function | Description | ||
| Bold |
Bolds selected text or text after the cursor. | ||
| Italics |
Italicizes selected text or text after the cursor. | ||
| Emojis |
Inserts a Unicode emoji. | ||
|
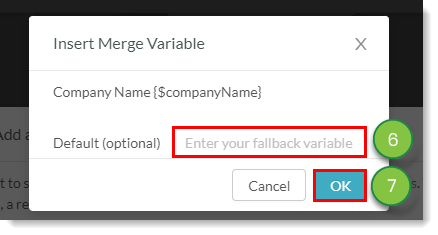
Merge Variables | Inserts a merge variable from a list of available merge variables. | ||
| Text Field |
The field where you enter text and customize the message. |
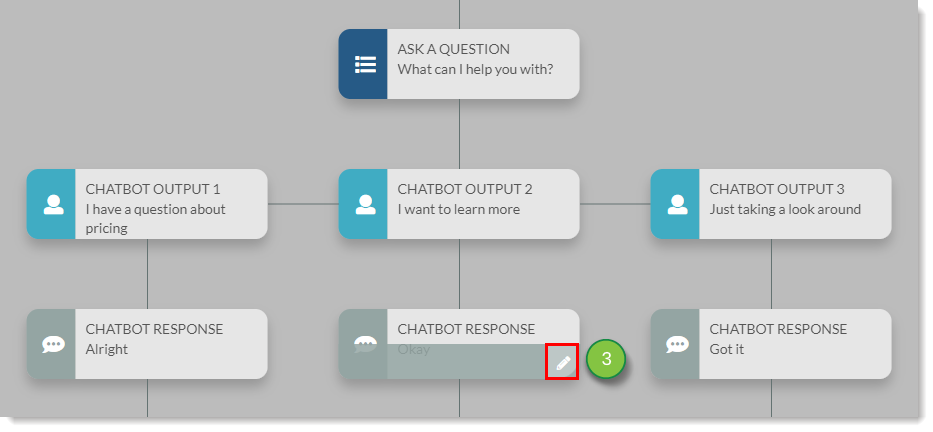
Once a chatbot has properly greeted a site visitor, it will then ask a question. The chatbot, by default, asks what it can do to help the visitor.
Important: Questions cannot be deleted.
To modify the content of a question, do the following:
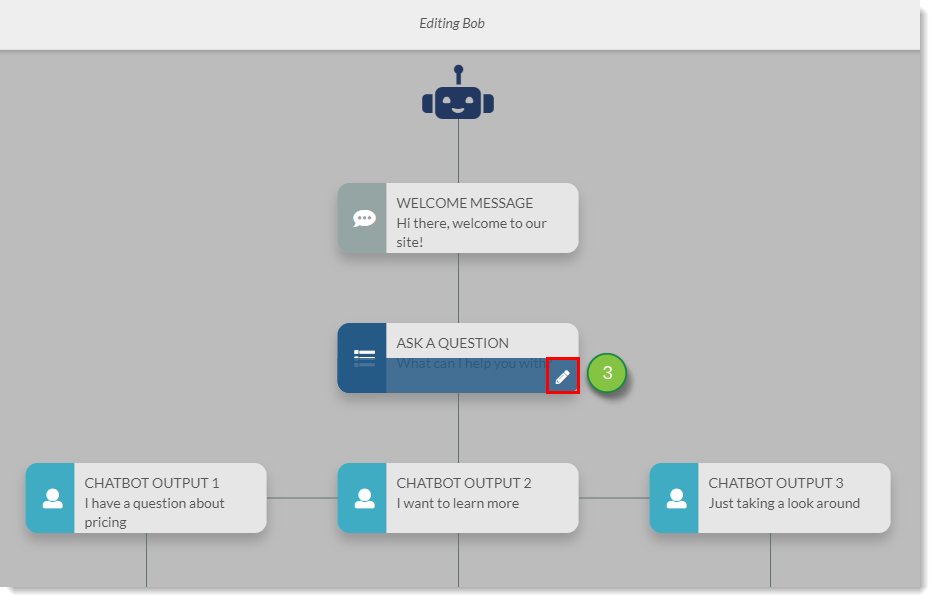
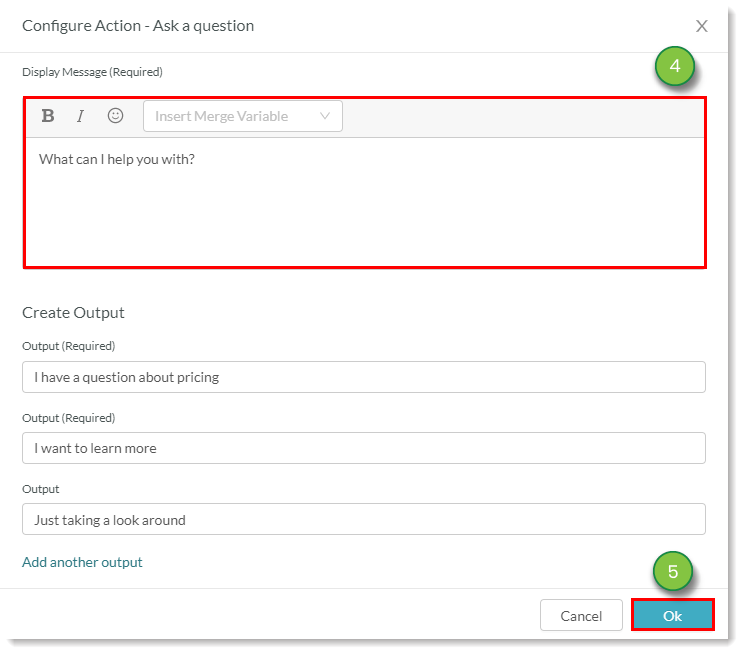
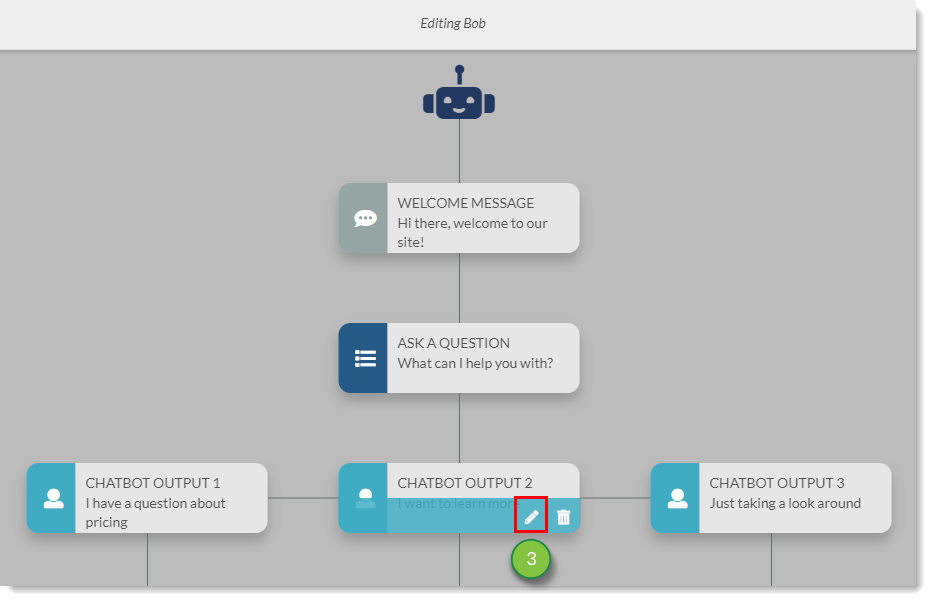
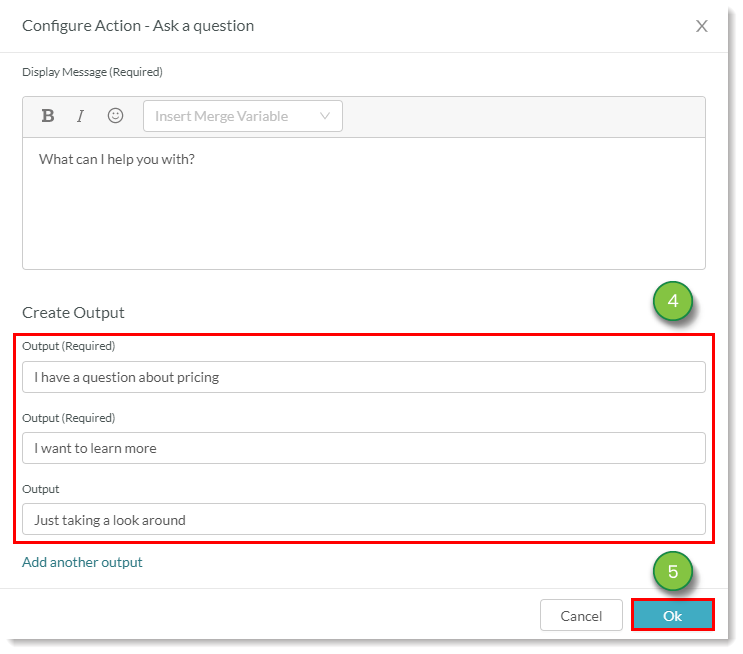
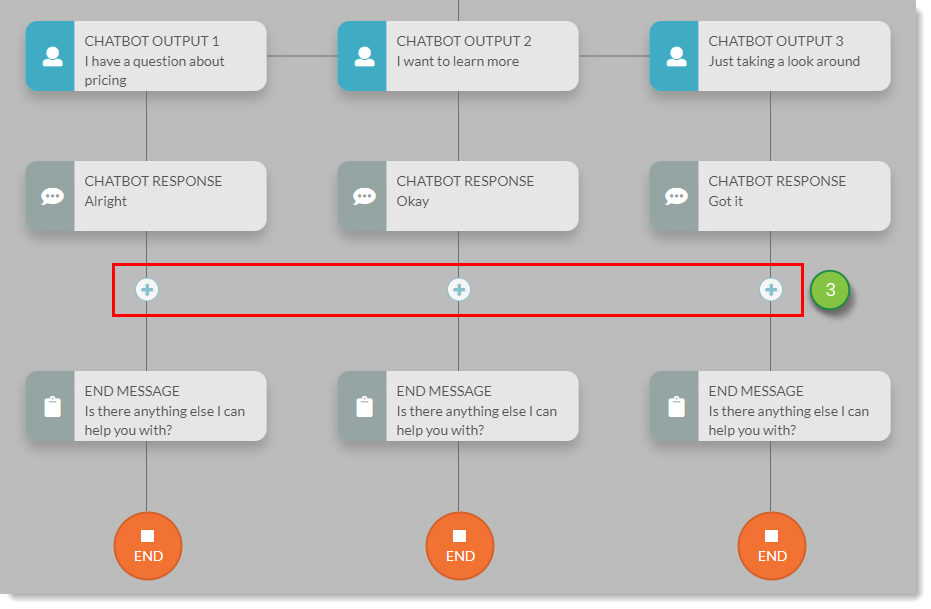
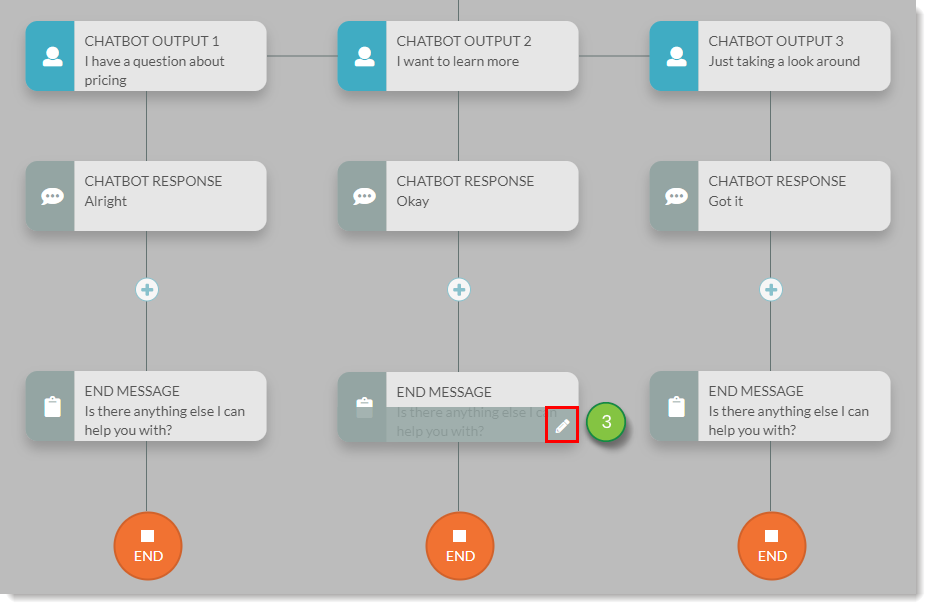
Once the chatbot asks a question, it will display a number of outputs. These outputs are premade answers and act as a sort of multiple-choice answer to the question. All answers are valid, and they will each branch off into a different set of responses and information gathering.
You can add, modify, and delete outputs to better customize answers to a question and provide different ways to continue a conversation.
Chatbot logic can function with as few as two outputs. Lead Gen & CRM provides a three outputs by default.
While these default outputs cover many general responses, you may want to add more. Adding additional outputs allows you to provide more possible answers.
Important: Chatbots can have a maximum of 20 outputs.
To add outputs to a chatbot workflow, do the following:


You can modify the content of your outputs as needed.
This allows for some flexibility, as you may need to update or change an answer that is not as helpful as you expected.
To modify the content of an output, do the following:

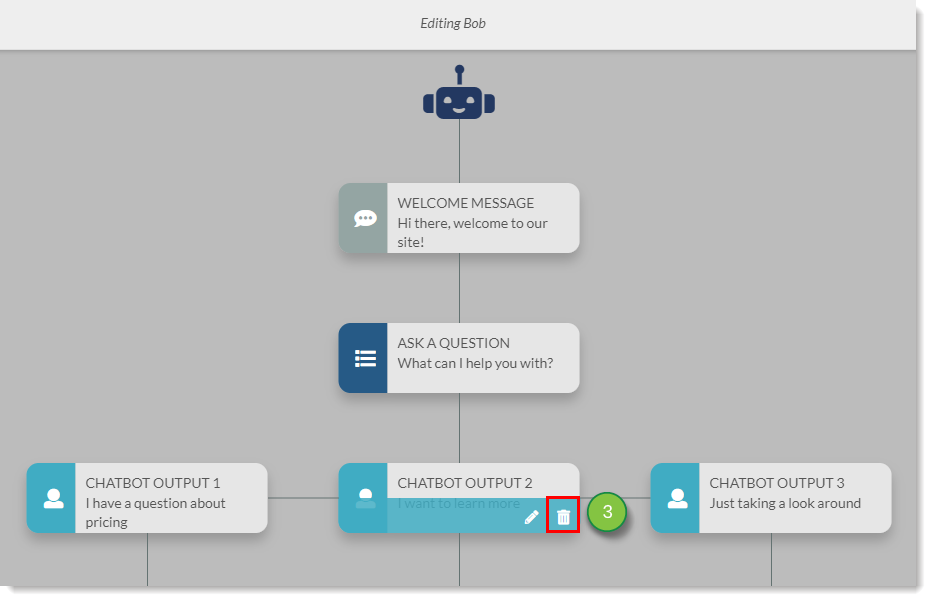
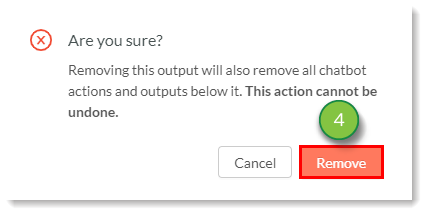
You can delete outputs at any time. Be aware that deleting an output will also delete the response and end messages directly under it.
Important: While outputs can be deleted, a minimum of two are required for the chatbot to function.
To delete chatbot workflow outputs, do the following:

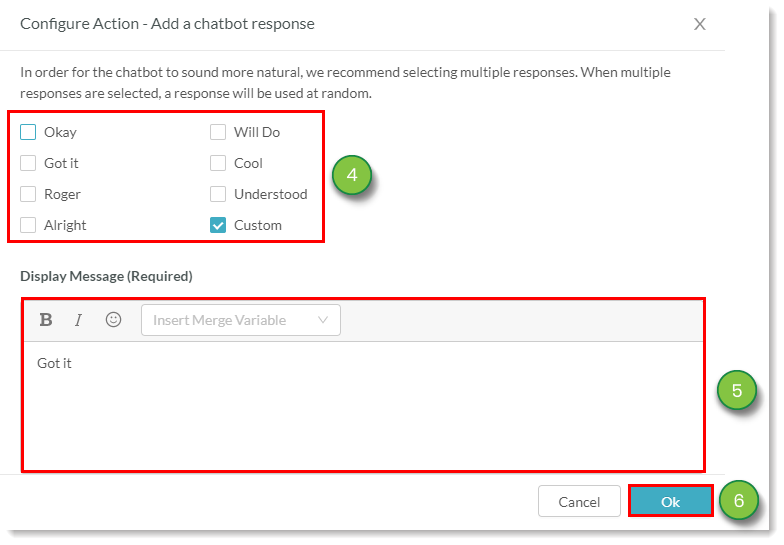
After a site visitor selects an output, the chatbot will respond with a confirmation message. Lead Gen & CRM provides a selection of premade responses. You can also create your own.
There are a few standard words and terms available for use with a response. These responses exclude the custom response. If the standard responses do not suit your needs, you can create your own customized responses.
Important: Responses cannot be deleted by themselves. The entire output branch must be deleted.
To add a response to a chatbot workflow, do the following:


Actions follow a chatbot response. Actions are the core of a chatbot workflow. They are how you provide information, collect visitor data, and otherwise facilitate human interaction with a visitor. While chatbots will function without actions, the majority of your logic branches will need actions to help a visitor with their problem.
To add actions to a chatbot workflow, do the following:

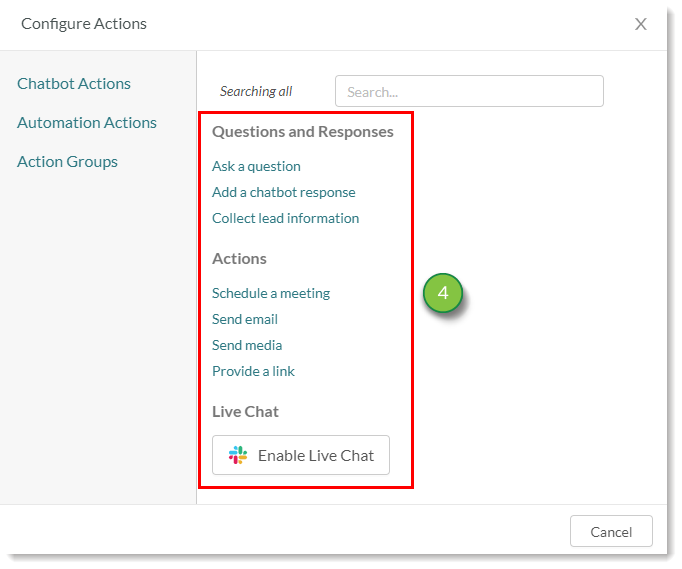
For more information on available actions, including how to configure their parameters, refer to the following help articles:
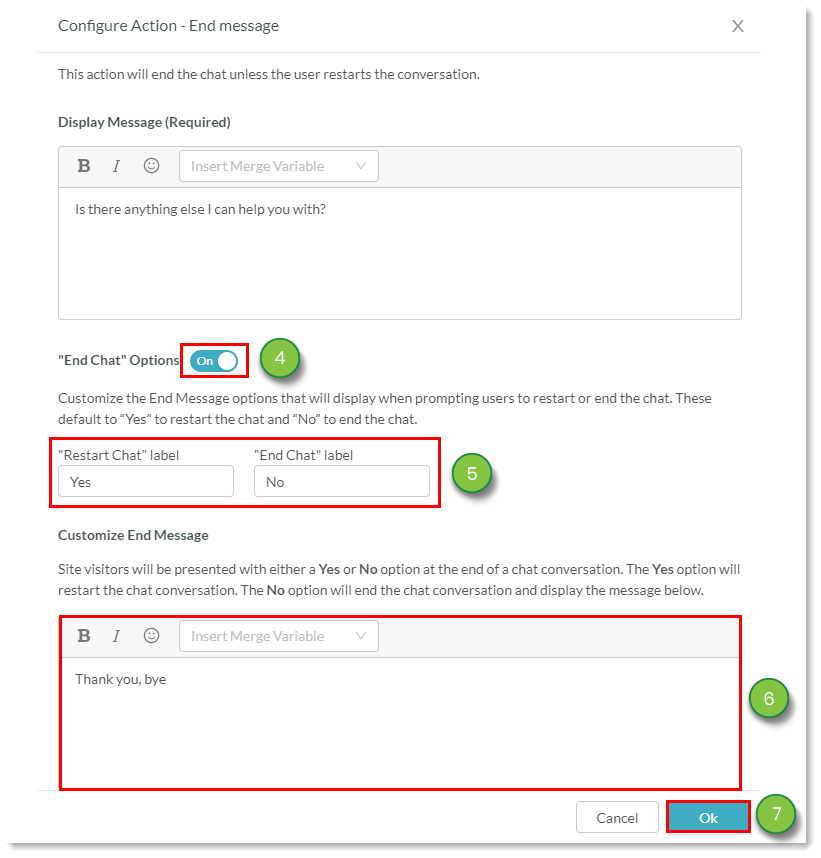
Once a chatbot workflow has received input and information from an action, it will display an end message.
End messages provide a way to inform the user that the conversation is at an end.
Important: End messages cannot be deleted.
To modify the content of an end message, do the following:

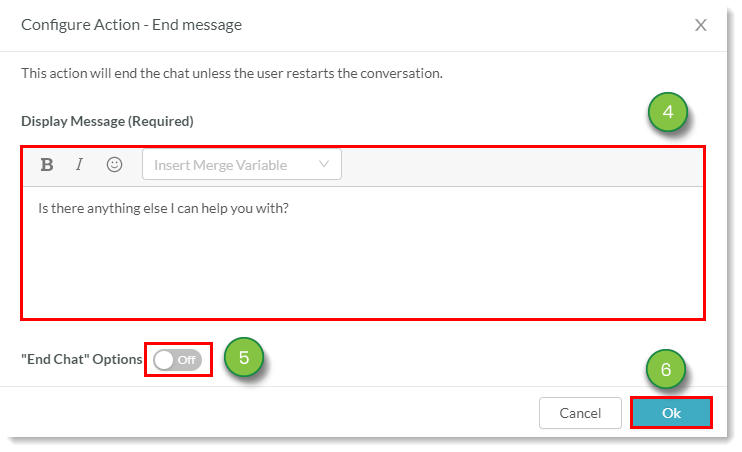
Normally, these end messages signify that the conversation has reached its end and that the visitor no longer needs help. However, visitors can select to restart the workflow from the beginning. When reaching the end of the workflow, visitors can select one of the following conversation options:
Both conversation options can be modified to display different messages.
In addition to ending the conversation, the No option can display a final farewell message. You can customize that message in the chatbot workflow.
To select conversation options and customize end messages, do the following:


In Lead Gen & CRM, a merge variable is a placeholder value that represents a specific contact’s field value. When an email is sent to a lead, the merge variable is dynamically populated with the value of the field in their contact record to add an extra layer of personalization to the communication.
To add merge variables to a message, do the following:
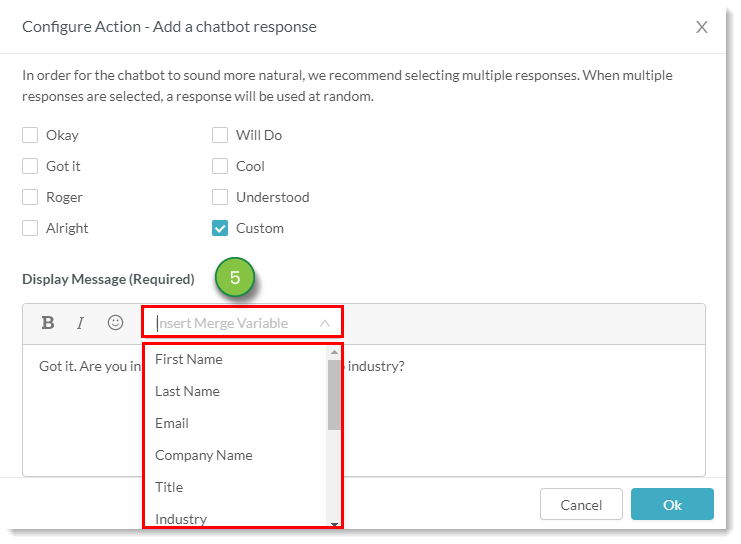
The available merge variables are as follows:
Copyright © 2026 · All Rights Reserved · Constant Contact · Privacy Center