Our Event tool isn't just for physical events! If you're using web conferencing tools, such as Google Meet, GoTo Meeting, MS Teams, Webex, Zoom, etc., you can include the meeting URL in your event to host an online event.
Creating a virtual event
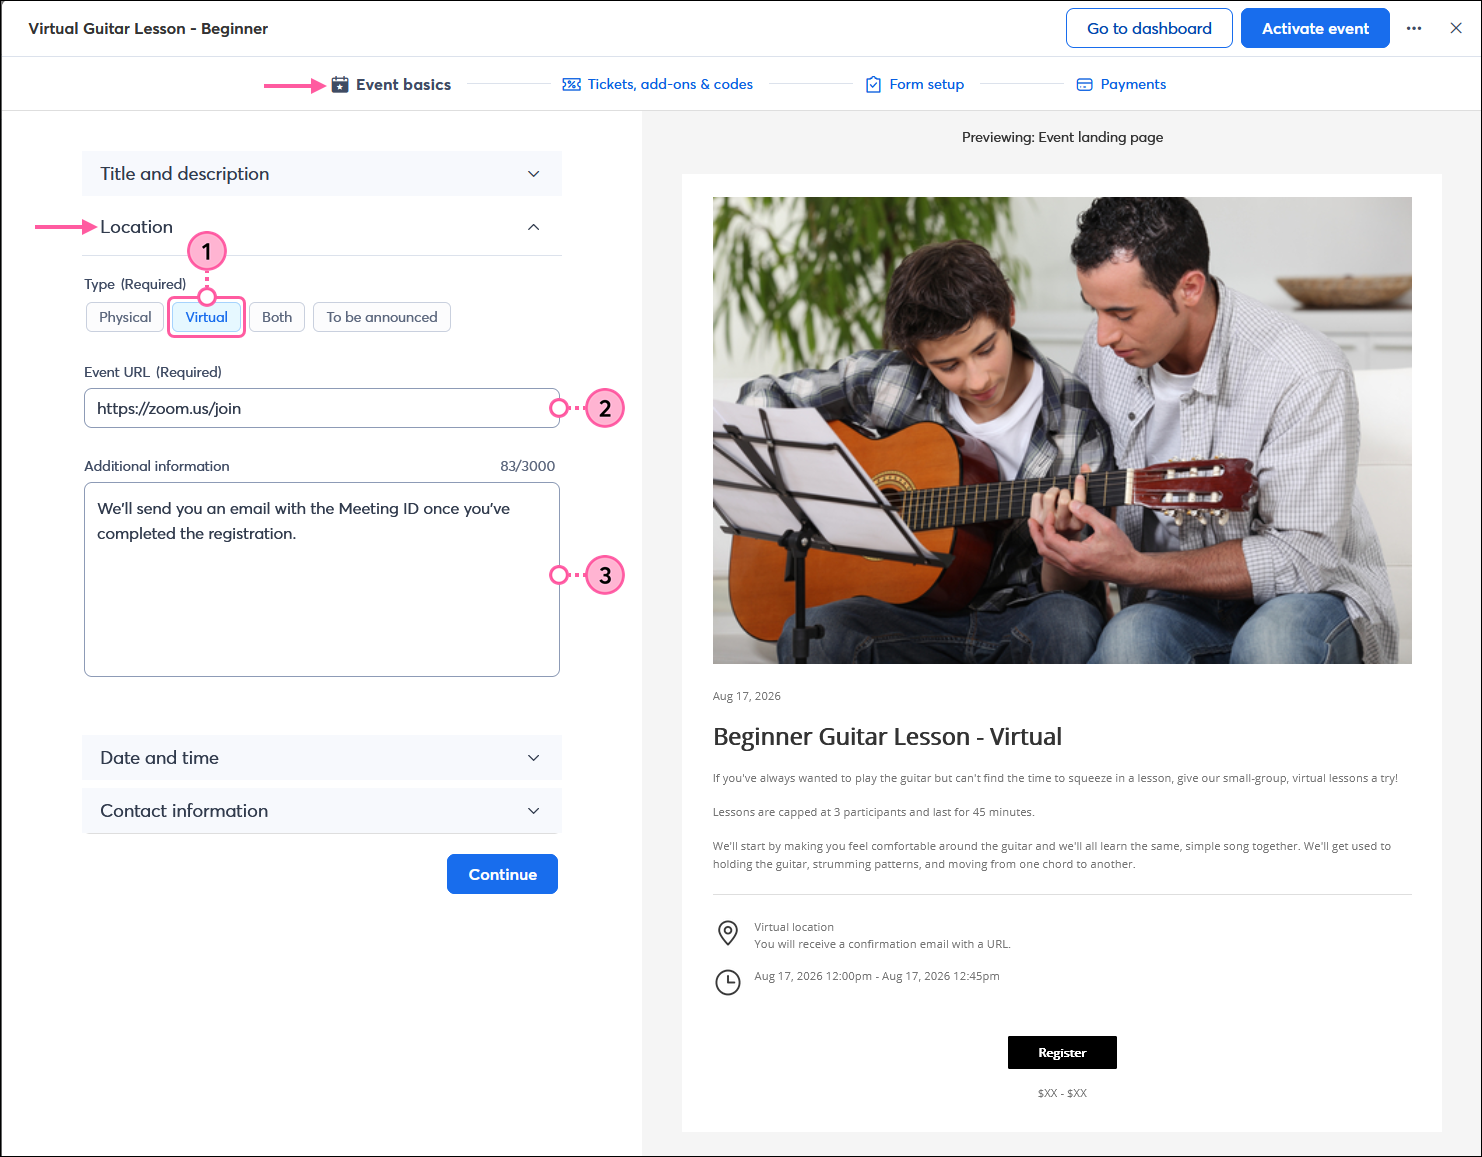
- In the Event basics section, expand the Location section and select "Virtual" from the Type options.
- Paste the access link for your web conferencing platform into the Event URL field.
Tip: It's best to use the "join now" or "direct link" URL from the web conferencing tool so your registrants only have to register for your event and not again for the web conferencing. - (Optional) In the Additional information section, give some information about the event access information, such as the meeting ID and password, or any other information relevant to your event that isn't in the Description field.
Content tip: Edit your registration confirmation message to include the "join now" or "direct link" URL, or the meeting ID and password, so that it automatically sends in an email when someone completes their registration. Alternatively, you can send a follow-up email to your event registrants that includes this information.
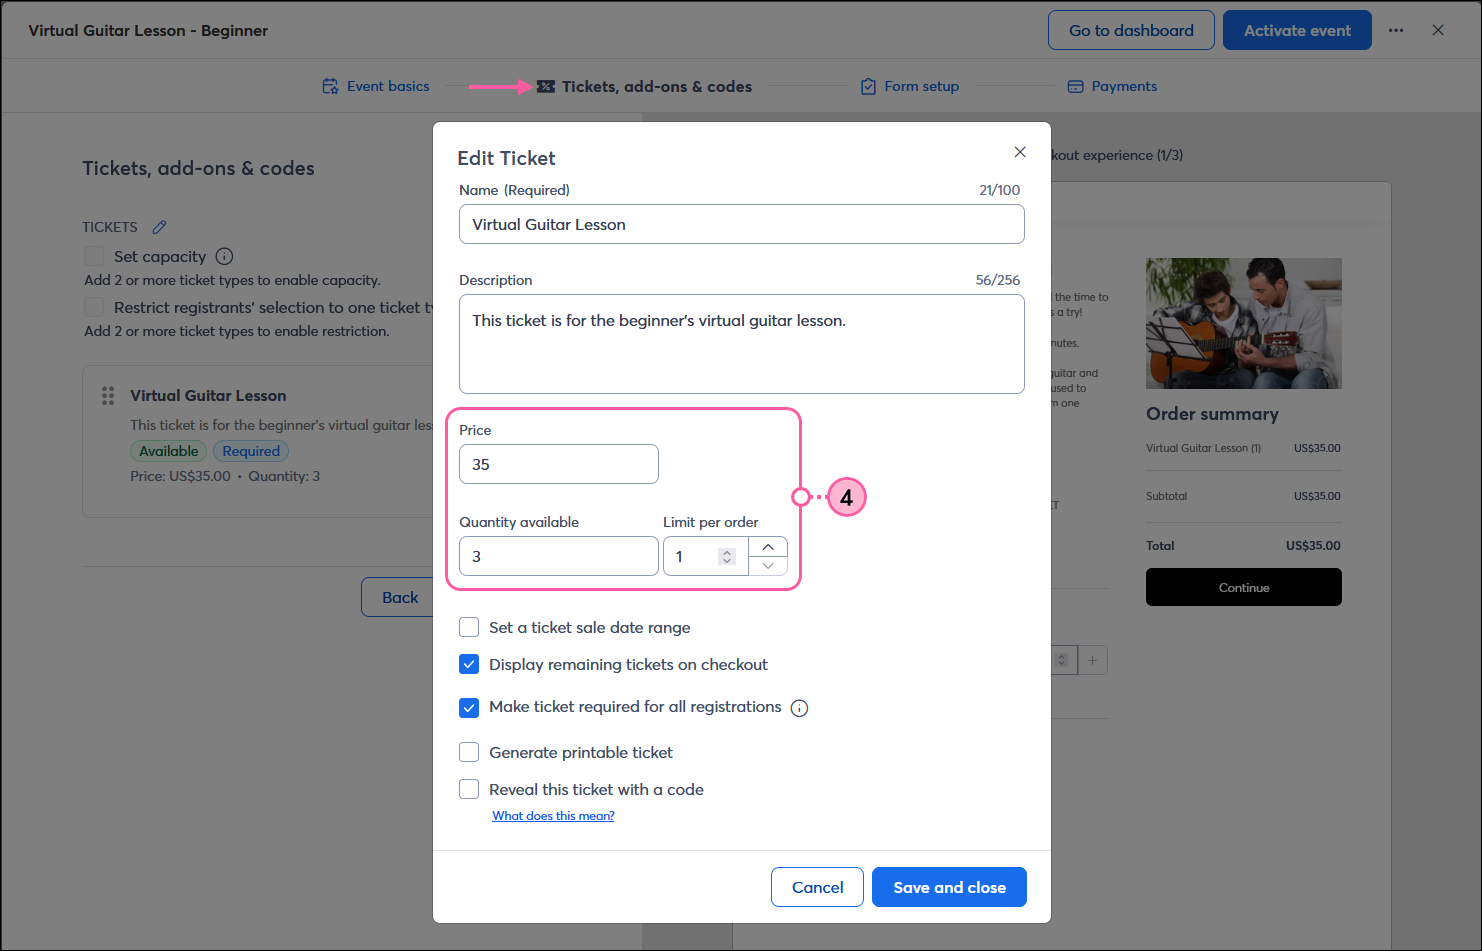
- In the Tickets, add-ons, & codes section, you can set the price for attendance and cap the number of attendees when you create a ticket.
Note: If your event is free, set the Price field to "0", or you can create a ticketless event.
- In the Form setup section, you can select the information you want to collect from your registrants.
Design tip: When you allow registrants to opt into your marketing communications from your registration form, you choose the list to add them to. Consider setting up a welcome path to automatically trigger when new contacts are added to the list. You can even set up automatic tagging within the Automation Path Builder to easily segment your contacts based on the tag later.
Important: If a registrant doesn't opt into email marketing through your registration form, they are only granting you permission to email them within the context of your event. If a registrant opts into email marketing, they're added to the list you specify and can be managed like any other contact within your account.

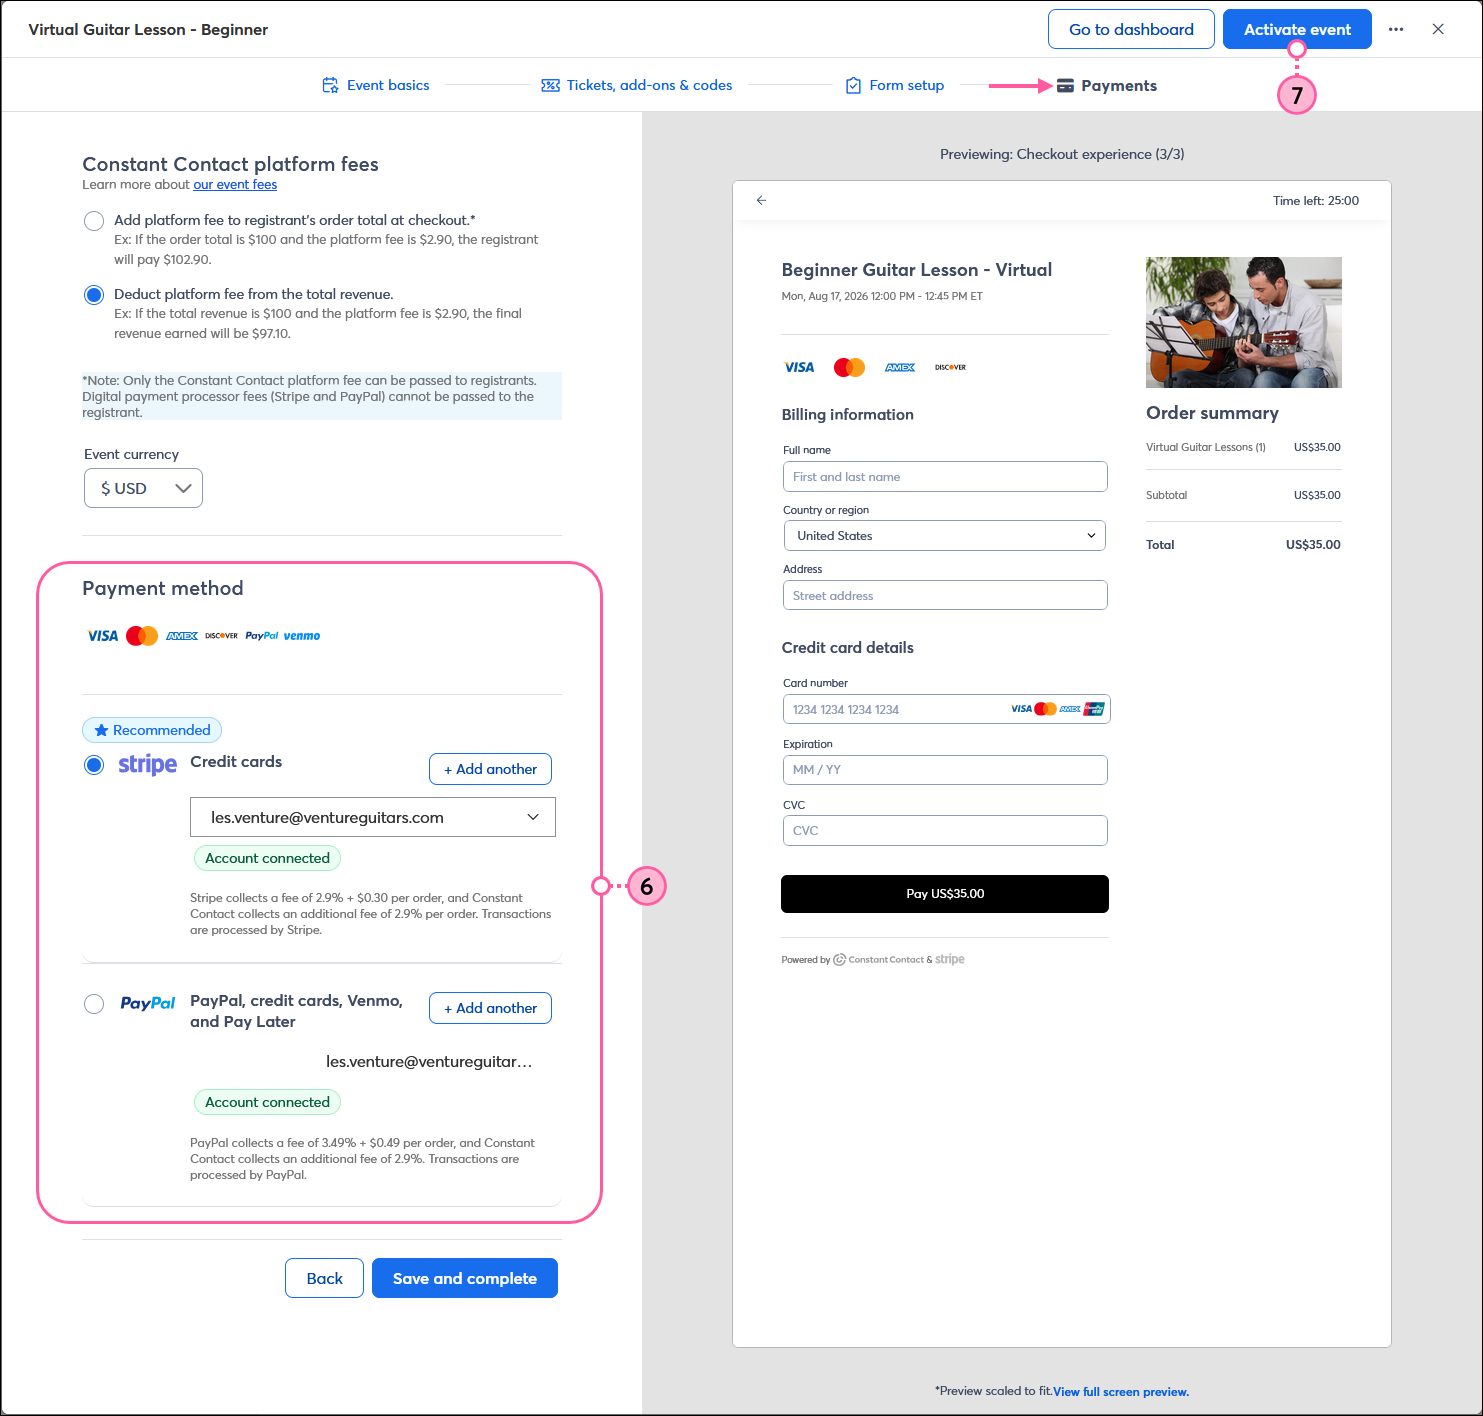
- (Optional) If you're charging fees for your event, select your Constant Contact platform fees option and Payment method in the Payments section.
- When you're ready, click the Activate event button in the upper right-hand corner. Activating the event doesn't automatically share the event information, but it gives you access to the tools you need to start promoting your event.
As you promote your event and registrations start coming in, you can view your reporting and manage registrations to ensure everything runs smoothly on the day of the event.
Tips for promoting a virtual event
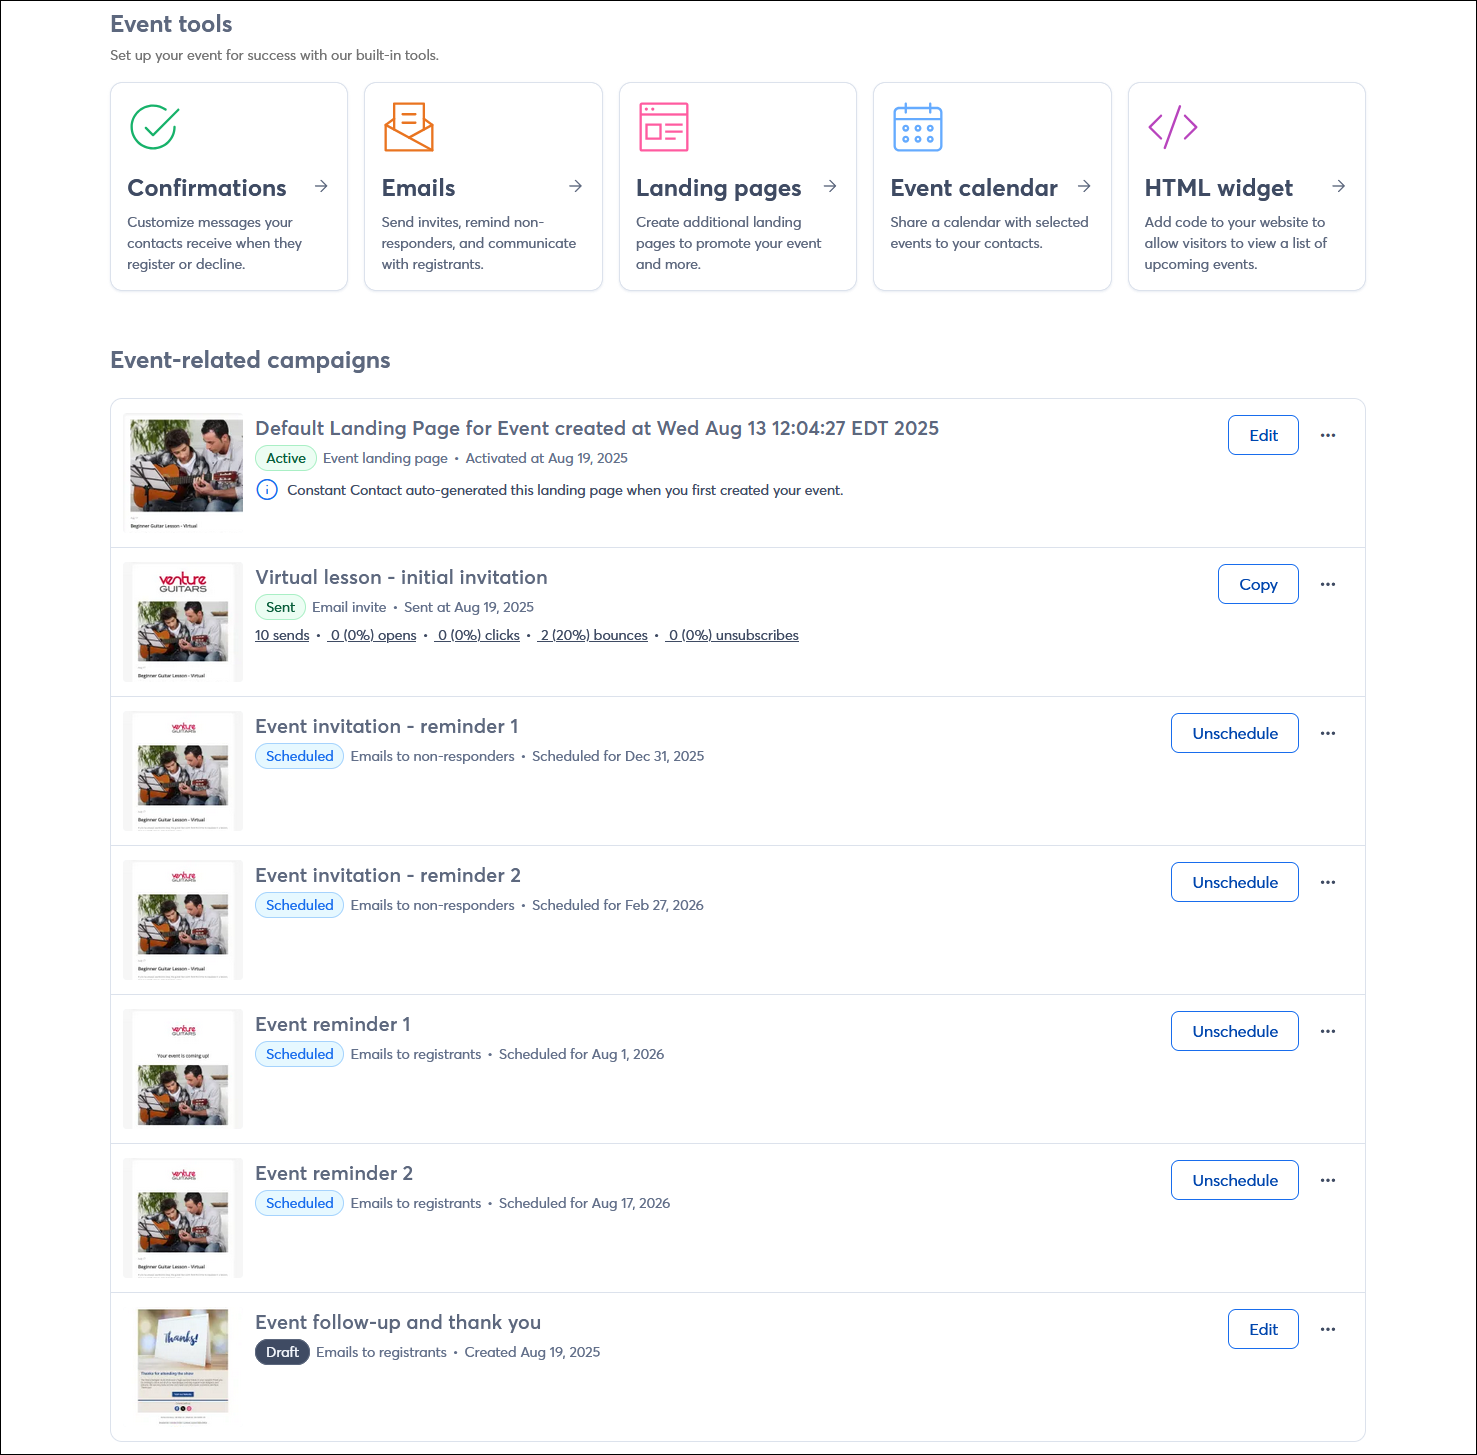
When you want to spread the word for your event, start with three basic emails:
- An announcement - Create a list of the contacts you want to invite, or select several lists and send them invitations to your event.
- A reminder - Send an email to non-responders to remind them of your upcoming event. Switch up the messaging a little from the initial invitation to highlight the benefits of attending.
- A last chance reminder - Send another email to your non-responders. This content should create a greater sense of urgency.
Once you have registrants, you'll want to send them two email reminders with the "join now" or "direct link" URL for your virtual event.
- Send the first reminder a day or so before the event.
- Send the second reminder an hour or so before the start of the event.
 | Design tip: Don't forget to send a follow-up email after the event to say "thank you" to your event participants! It's a great place to include additional follow-up information, like a recording of the event, answers to questions, and next steps. |
Depending on the timeline for your event, you can customize the number of emails and their timing to best suit your needs. If you're not quite ready to send, emails can be created and scheduled in advance or saved as drafts. No one can access your event until you share the event URL, so you have time to plan your communications even after you make the event active.
Any links we provide from non-Constant Contact sites or information about non-Constant Contact products or services are provided as a courtesy and should not be construed as an endorsement by Constant Contact.