Email and Digital Marketing
How can we help you?
Search our help articles, video tutorials, and quickstart guides

You've got this. You've got us. Search our Knowledge Base to quickly find answers to your questions.

Partners: Child account creation

Article: 000044005
Updated: October 3, 2025

Learn how to set up and configure a new child account

Add People IconIn need of multiple accounts? Our multi-account solution is designed for organizations seeking unique accounts for their various locations, departments, or users. Take advantage of bulk pricing, product features for brand control, customized onboarding, and more!


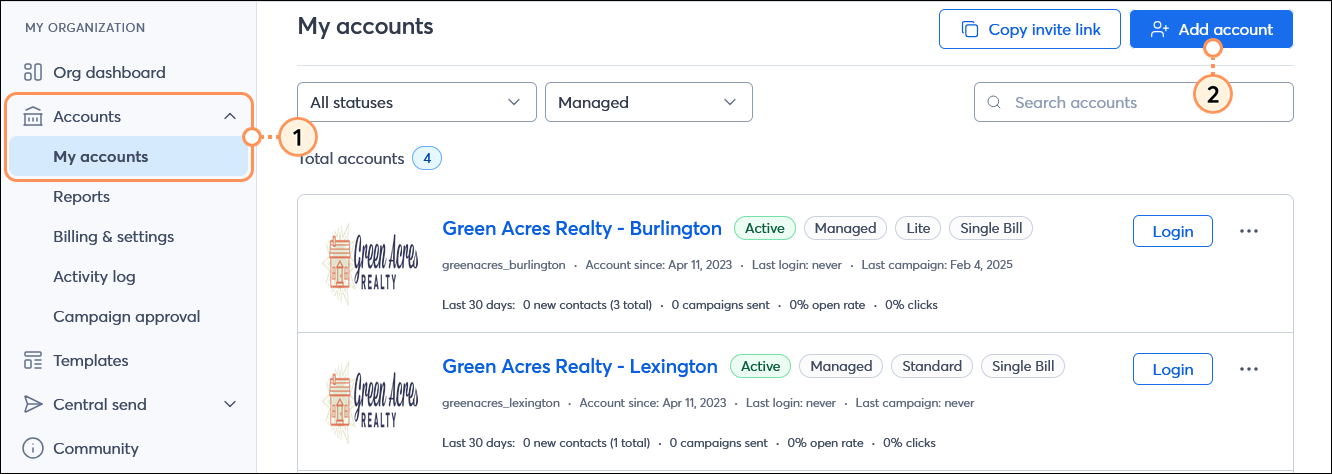
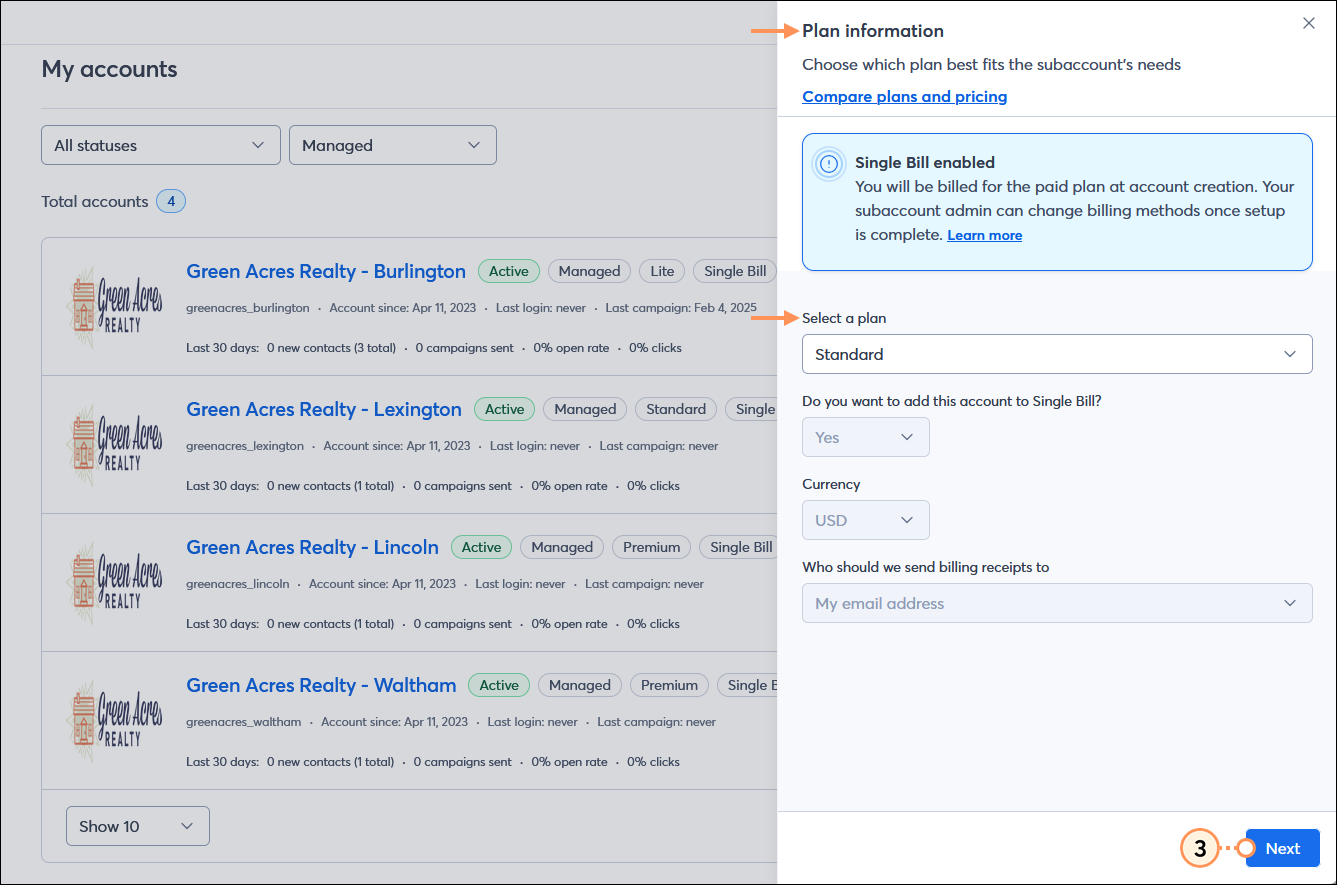
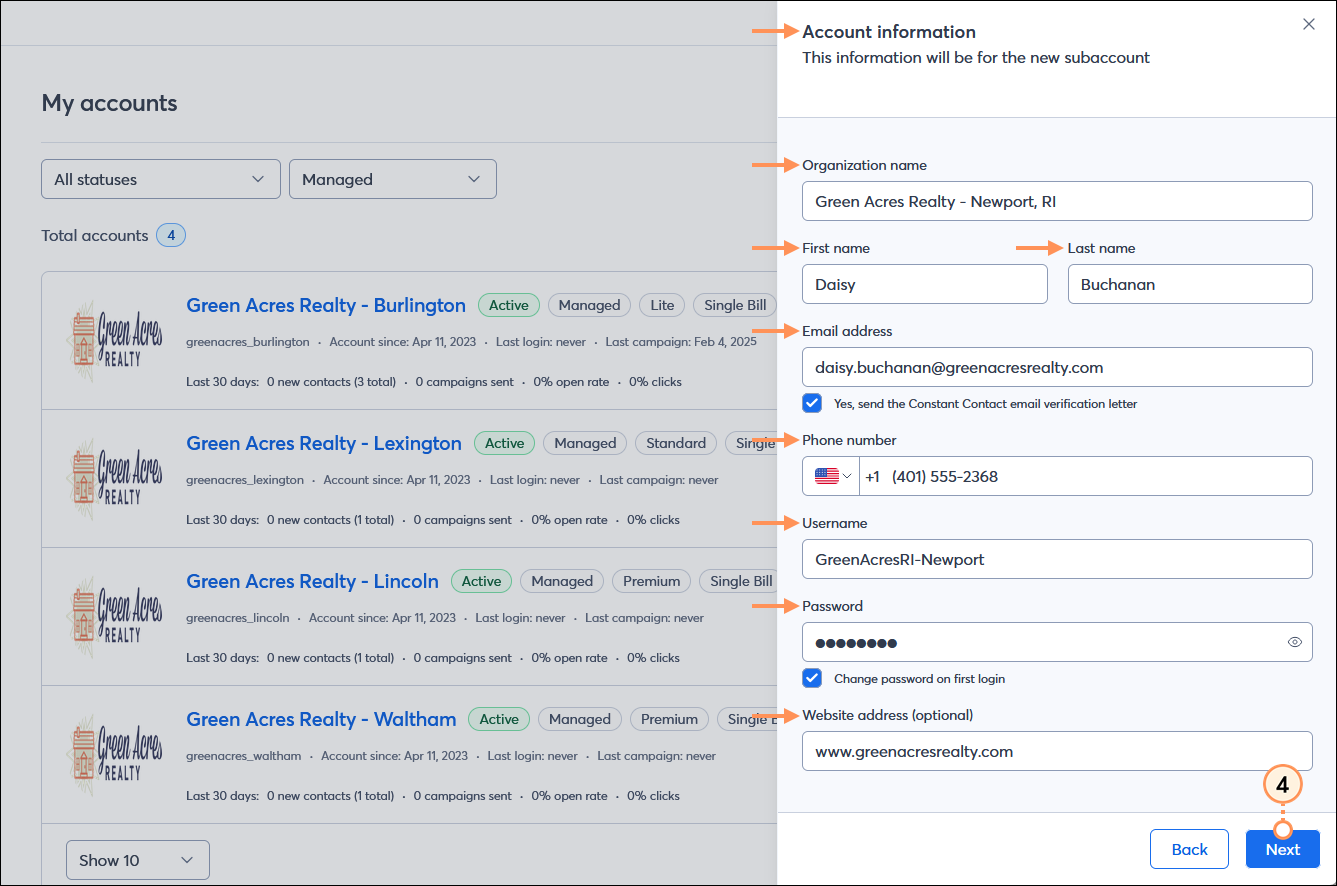
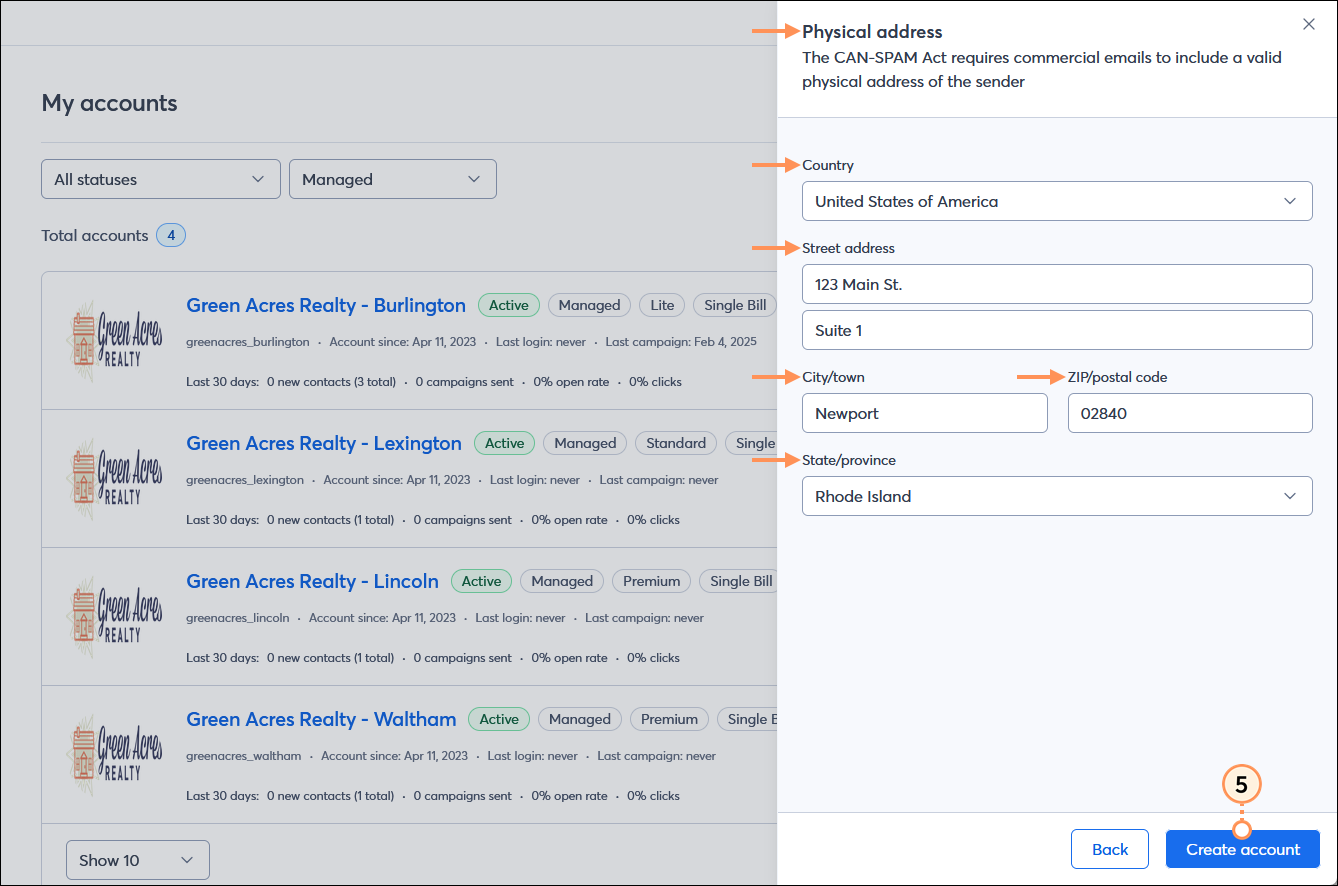
To create a new child account:

  1. In the MY ORGANIZATION menu on the left-hand side, click Accounts > My accounts.
  2. Click the Add Account button in the upper right-hand corner of the page.

    MY ORGANIZATION menu with Accounts menu expanded and My accounts option selected, My accounts dashboard with Add account button

  3. In the Plan information panel, choose a plan type and click the Next button in the bottom right-hand corner of the page.
    Note: If you have Single Bill enabled for your partnership, your new accounts default to Single Bill except if you choose the "Trial" option.

    Plan information panel displayed with Single Bill enabled notification, Select a plan drop-down menu, and Next button

  4. Enter the following information and click the Next button in the bottom right-hand corner of the page:
  • The Organization name.
  • The account owner's First name and Last name.
  • The account owner's Email address. Make sure to check the box to send the email verification to the account owner.
  • The account owner's Phone number.
  • A Username for the account.
  • A Password for the account. You can check the box to prompt the account owner to change the password after they log in for the first time.
  • A Website address for the organization. This field is optional.

    Account information panel displayed with Organization name, First name, Last name, and Email address fields, Yes, send the Constant Contact email verification letter option selected, Phone number, Username, and Password fields, Change password on first login option selected, Website address optional field, and Next button

  1. Enter the following information and click the Next button in the bottom right-hand corner of the page:
  • The Country where the organization is located.
  • The Street address for the organization.
  • The City/town where the organization is located.
  • The ZIP/postal code for the organization.
  • The State/province where the organization is located. Choose an option from the drop-down menu.

    Physical address panel displayed with Country drop-down menu, Street address, City/town, and ZIP/postal code fields, State/province drop-down menu, and Create account button


Questions?

Ask the Community

Did this article answer your question?


Constant Contact Logo

Copyright © 2026 · All Rights Reserved · Constant Contact · Privacy Center