Email and Digital Marketing
How can we help you?
Search our help articles, video tutorials, and quickstart guides

You've got this. You've got us. Search our Knowledge Base to quickly find answers to your questions.

Create a Custom Landing Page

Article: 000039183
Updated: February 12, 2026

Design a standalone webpage with a customized message for a targeted audience


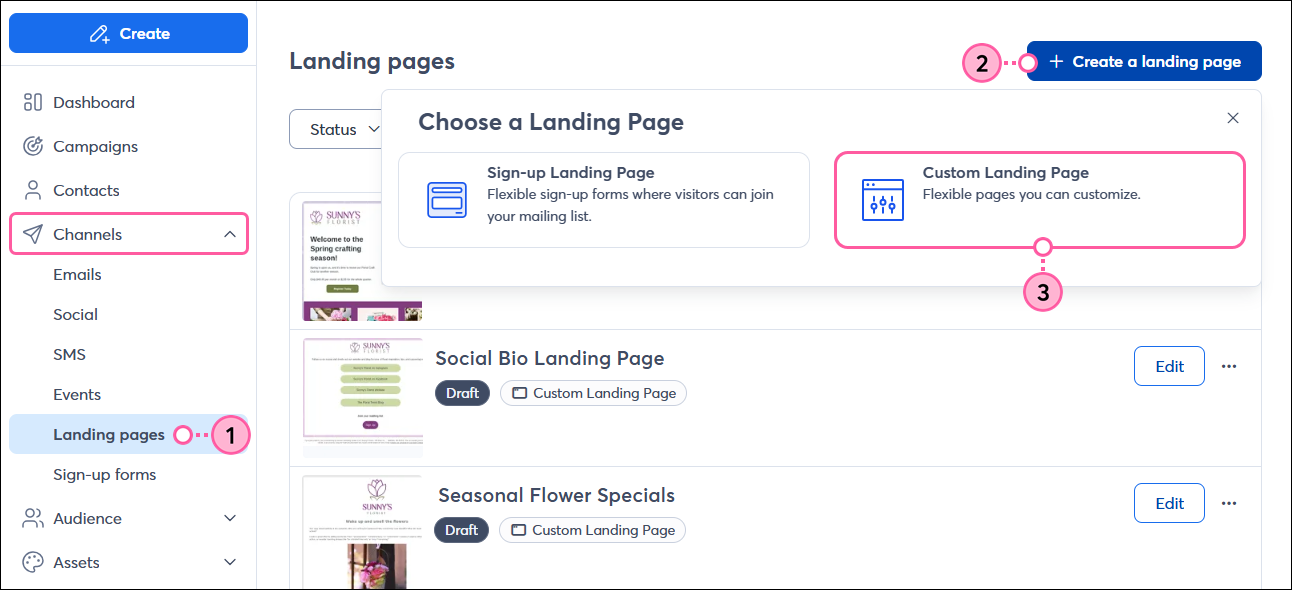
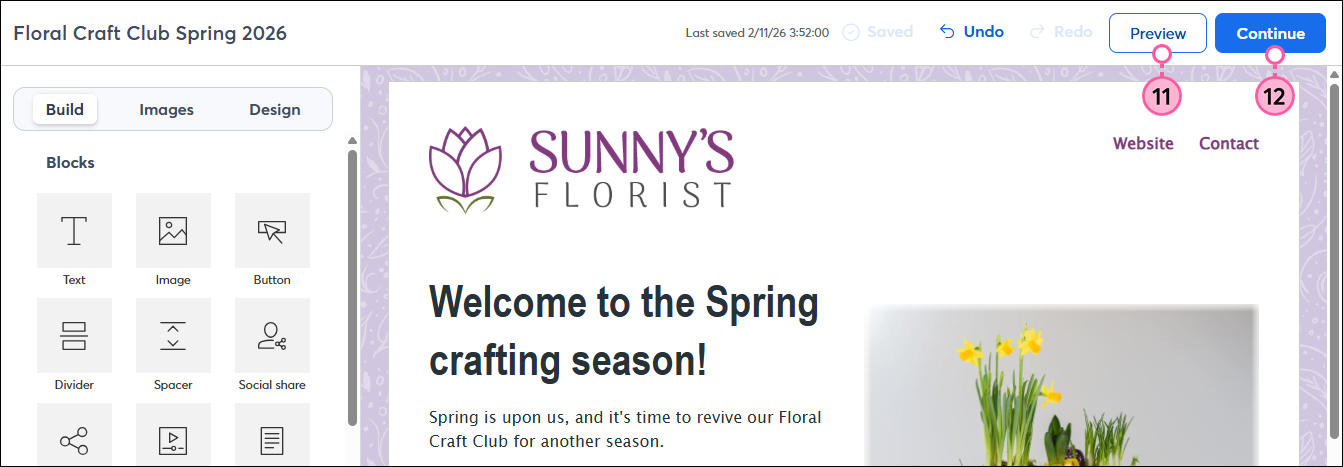
Our Custom Landing Pages give you the freedom to create a single-use webpage, with a clear goal and focused call-to-action, without having to maintain a full website. Use them to share information and make announcements, promote goods and services, and endorse programs, causes, or events. Different audiences require targeted messaging, and you can create multiple landing pages to customize each one with a unique message.


Light Bulb IconDid you know? We have a "link in bio" Custom Landing Page template that lets you promote your entire web presence through a single URL. They're great for linking in your social media profiles or blog!


  1. In the left-hand menu, click Channels > Landing pages.
  2. Click the Create a landing page button.
  3. Select Custom Landing Page.

    Left navigation menu, Channels expanded with Landing pages option selected, Landing pages dashboard with + Create a landing page button and Choose a Landing Page menu with Custom Landing Page option selected

  4. Place your cursor over a template and click Select. Look for a template with a layout that works best for your content—the colors and content can be changed. Use the Blank template to design your landing page from scratch.

    Choose a template page with Blank template option, and template thumbnail with Select button displayed

  5. Click on the landing page name to change it.
  6. In the Campaign name field, enter a unique name that you'll easily recognize in your account later. The name can be up to 80 characters long.
  7. Click Save.

    Landing page title, Rename overlay with Campaign Name field and Save button

  8. From the Build tab, customize your template by adding, rearranging, or removing blocks, layouts, and sections, and don't forget to update any placeholder text and links!

    Landing page editor with Build tab selected

  9. Click the Images tab to insert your logo and other images from your Library. You can also upload new images, as needed.

    Landing page editor with Images tab selected, and logo being dragged and dropped into the template

  10. Click the Design tab to customize the colors and text styles for your entire template. You can also change the background color of an individual block or the color and style of a single button to make it stand out from the rest.
    Note: Some color and font changes may not be apparent unless you have the corresponding block or layout in your landing page.

    Landing page editor with Design tab selected, Backgrounds and Borders options expanded, and colors applied to the template

  11. (Optional) When you’re finished customizing your landing page, click Preview to see how it’ll look when viewed on both desktop and mobile devices.
  12. Click Continue.

    Landing page editor with Preview and Activate buttons

  13. Enter a Page title. When your page is viewed, the browser pulls the text in this field and displays it as the title of the open browser tab. This field is required.
  14. Add a Description. If you share your landing page in a Facebook or Instagram ad, the description for the ad is pulled from this field. This field is required.
  15. (Optional) Click to expand the Customize URL section and add custom text to the end of your URL to make it clear that it belongs to your organization. Special characters, like hyphens and underscores, aren't recognized.
  16. (Optional) Check the Set expiration date box to choose a date to hide your page from visitors. This won't remove the landing page from any webpages, emails, or social media posts where you shared the URL, but if anyone tries to click the link, they won't be able to access the landing page content.
    Note: You can edit the page after it's been activated to add, change, or remove the expiration date at any time. However, once the page has expired and is in the “Ended” status, you won’t be able to adjust the expiration date or reactivate it.
  17. (Optional) Check the Add third-party analytics box to add tracking to your landing page:
  • Include a Google tracking ID so you can track page views in your Google Analytics account and use the resulting information to better target your Google Ads.
  • Include a Meta Pixel ID so you can track page views in your Facebook Ads Manager and use the resulting information to better target your Facebook and Instagram Ads.
  1. If you need to make any additional edits to your landing page, click Edit. When you’re finished, click Activate.

    Landing page settings with Page title field, Description field, Custom URL field, Expiration date checkbox with date field, Third-party analytics checkbox with Meta pixel and Google tracking ID fields, Edit button, and Activate button

  2. Click Activate to confirm you want to make your page live. Even once it’s activated, nobody will see the landing page until you share its URL.

    Activate confirmation with Activate button

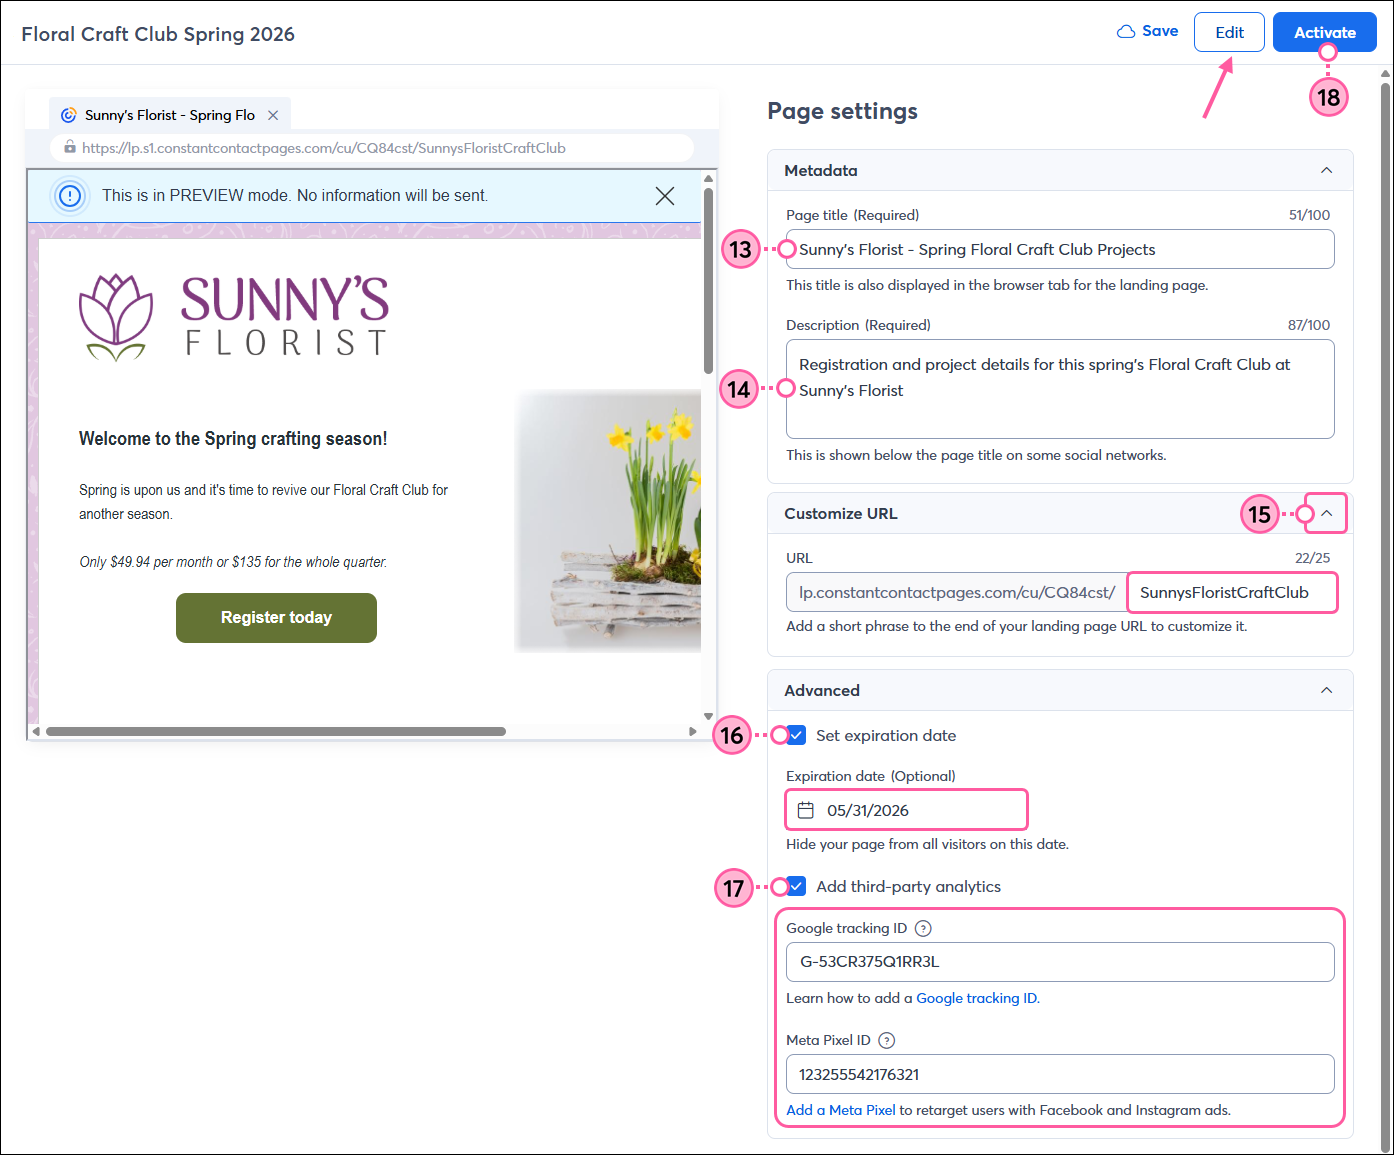
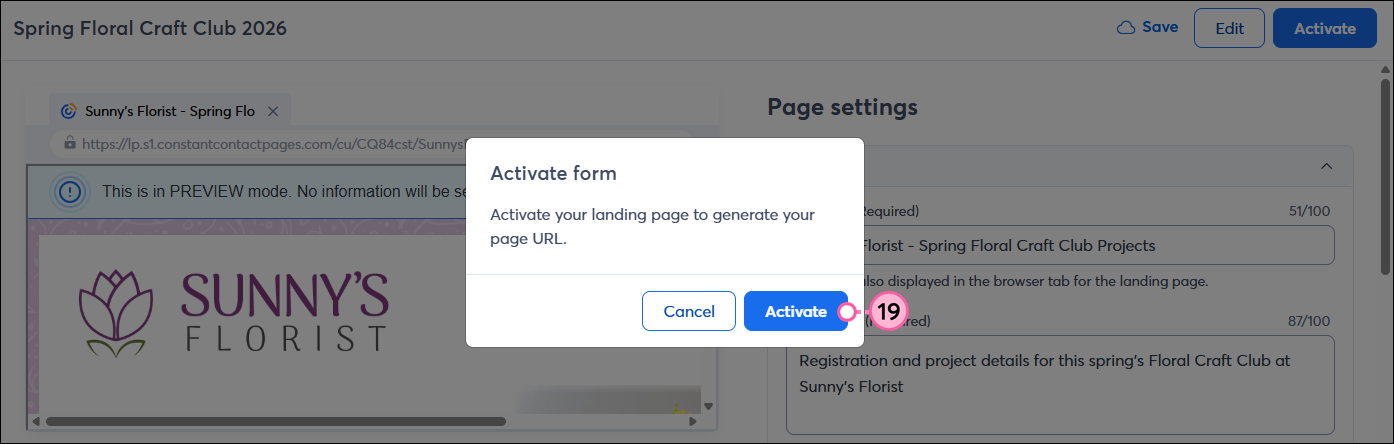
Now that your landing page is activated, it's time to share its URL in an email, on your social media pages, in a Facebook and Instagram Ad, on your website or blog, or anywhere else you can think of to share the link. Once you start getting some traffic, you can check the reporting to see your page views and engagement. If you ever need to edit the landing page, you can make changes and activate the updates at any time.


Questions?

Ask the Community

Did this article answer your question?


Constant Contact Logo

Copyright © 2026 · All Rights Reserved · Constant Contact · Privacy Center