Personas are fictional representations of your customer audiences, designed to produce higher conversions by making personalized messaging simple.
This article provides information on creating personas.
| Administrators | ✓ | |
| Company Managers | ✓ | |
| Marketing Managers | ✓ | |
| Sales Managers | ||
| Salespersons | ||
| Jr. Salespersons |
Personas in Lead Gen & CRM have many uses. Personas can be used for dynamic content in emails and landing pages, and they can be used as list rules for targeted email sends.
Personas can be used by salespeople to shape the way you communicate with your leads during the sales cycle by segmenting your customers and leads based on interests and behavior.
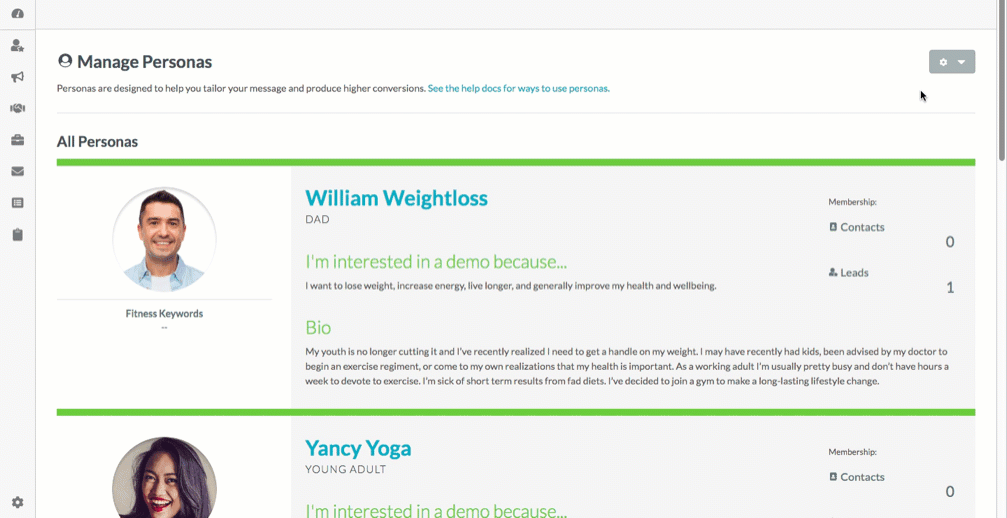
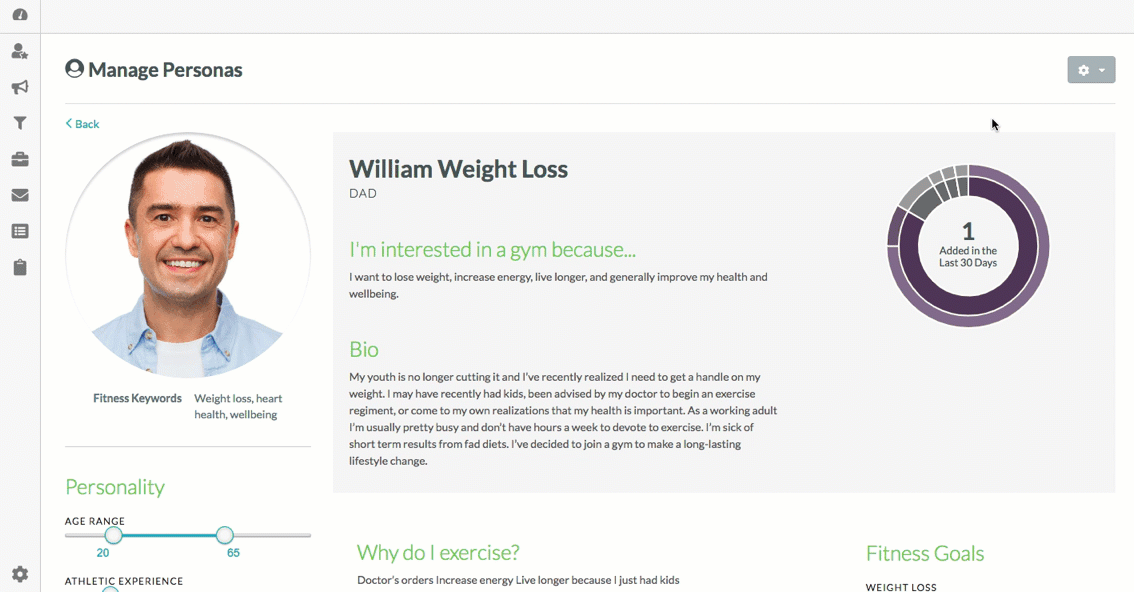
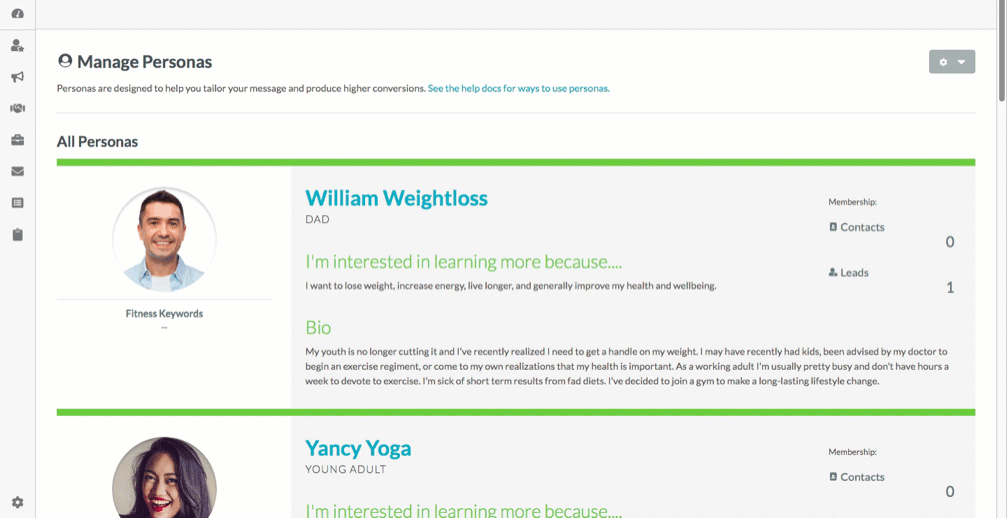
Personas are a combination of information and attributes unique to a specific audience. Every persona is made of a persona card, usage graph, and widgets.

Persona cards contain basic information and represent the persona in an at-a-glance manner. Persona cards contain the following information:
| Information | Description | |
| Persona Name |
The friendly name given to a persona. This name will appear on | |
| Persona Title |
The title for the persona. | |
| Persona Question |
If you are using personas in your forms, this is the question your users will be answering. Updating this question changes it for all personas. | |
| Persona Answer |
When using personas in forms, this is the value that appears in | |
| Avatar |
A profile picture that represents the persona. Comes from a | |
| Bio |
A brief summary of the type of individuals that the persona is |
Persona usage graphs show the following information:
| Information | Description | |
| Totals |
The total number of leads and contacts added to the persona in the | |
| Inner Perimeter |
The inner perimeter has a section for each active persona. | |
| Outer Perimeter |
The outer perimeter shows the distribution of leads and contacts |
Widgets are pre-built blocks of text, graphs, and images. Widgets allow you to customize all information within a persona. There are many types of persona widgets:
| Information | Description | |
| Demographics |
Supplemental information for the persona. Text entry fields only. | |
| Sections |
Intended to capture information unique to your business. Choose | |
| Custom Stories |
Text area fields used to capture any additional information. |
Leads or contacts can be assigned a persona in three ways:
| Information | Description | |
| Form Self- Identification |
Every Lead Gen & CRM Form has the option to add the persona field. | |
| Workflow Action Assignment |
The Lead Edit Event of change lead persona can be used as a | |
| Manual Assignment |
Every lead record has a Marketing Profile section which displays |
Personas need to be attributed to a persona template. Templates are comprised of widgets, which determine metadata, as well as the overall appearance of the template. Templates need to be set with widgets before personas can be created.
To set or edit a template, do the following:
Important: Any field changes made to the template will make the change across all personas. New fields and widgets will be added with default values.
Widgets are pre-built blocks of text, graphs, and images. Widgets allow you to customize all information within a persona.
Persona templates have many widgets available. Templates allow you to configure the following persona information:
| Widget Type | Description | |
| Avatar Widget |
This widget handles the image associated with the persona. The | |
| Demographics Widget |
This widget handles all supplementary information for the | |
| Persona Question Widget |
This widget lists a question for the persona that best associates | |
| Bio Widget |
This widget provides a general biography for the persona that | |
| Custom Stories Widget |
This widget provides a way to add a series of additional questions, | |
| Slider Widget |
This widget adds a slider with multiple available values. The | |
| Range Widget |
This widget adds a customizable data range slider to the template. | |
| Horizontal Bar Widget |
This widget adds a horizontal bar to the template. The bars are |
Once a persona template is set, you can start creating personas.
To create a persona, do the following:
Persona Name
Persona Title
Persona Question
Persona Answer
Note: You can edit the Persona Question here. However, changes made to this field will change the field value for all personas.
Refer to the following articles for more information on using created personas:
You can set personas to contacts through their individual records.
To set personas through the Contact Record, do the following:
You can delete personas you no longer need.
To delete a persona, do the following:
When deleting all personas, the persona functionality will be hidden within the application. This means that you will not see personas in dynamic content, automation, and the like.
Q: How many personas can I create?
A: There are no limits to the number of personas that can be created.
Q: Can I build a dynamic list based on personas?
A: Yes. Persona assignment is available as both a trigger and filter in automation.
Q: What does a lead see on a Lead Gen & CRM form if the persona selection has already been assigned?
A: The Persona Answer for the assigned persona will autofill into the field.
Copyright © 2026 · All Rights Reserved · Constant Contact · Privacy Center