Lead Gen & CRM
How can we help you?
Search our help articles, video tutorials, and quickstart guides

You've got this. You've got us. Search our Knowledge Base to quickly find answers to your questions.

Configuring and Using VisitorID

Article: 000050276
Updated: November 1, 2024

VisitorID uses reverse IP lookup to identify the companies visiting your site and provides you with contact information, including names, emails, and phone numbers.

 
Users:
Administrators 
Company Managers  
Marketing Managers  
Sales Managers  
Salespersons  
Jr. Salespersons  


Configuring Important Contacts

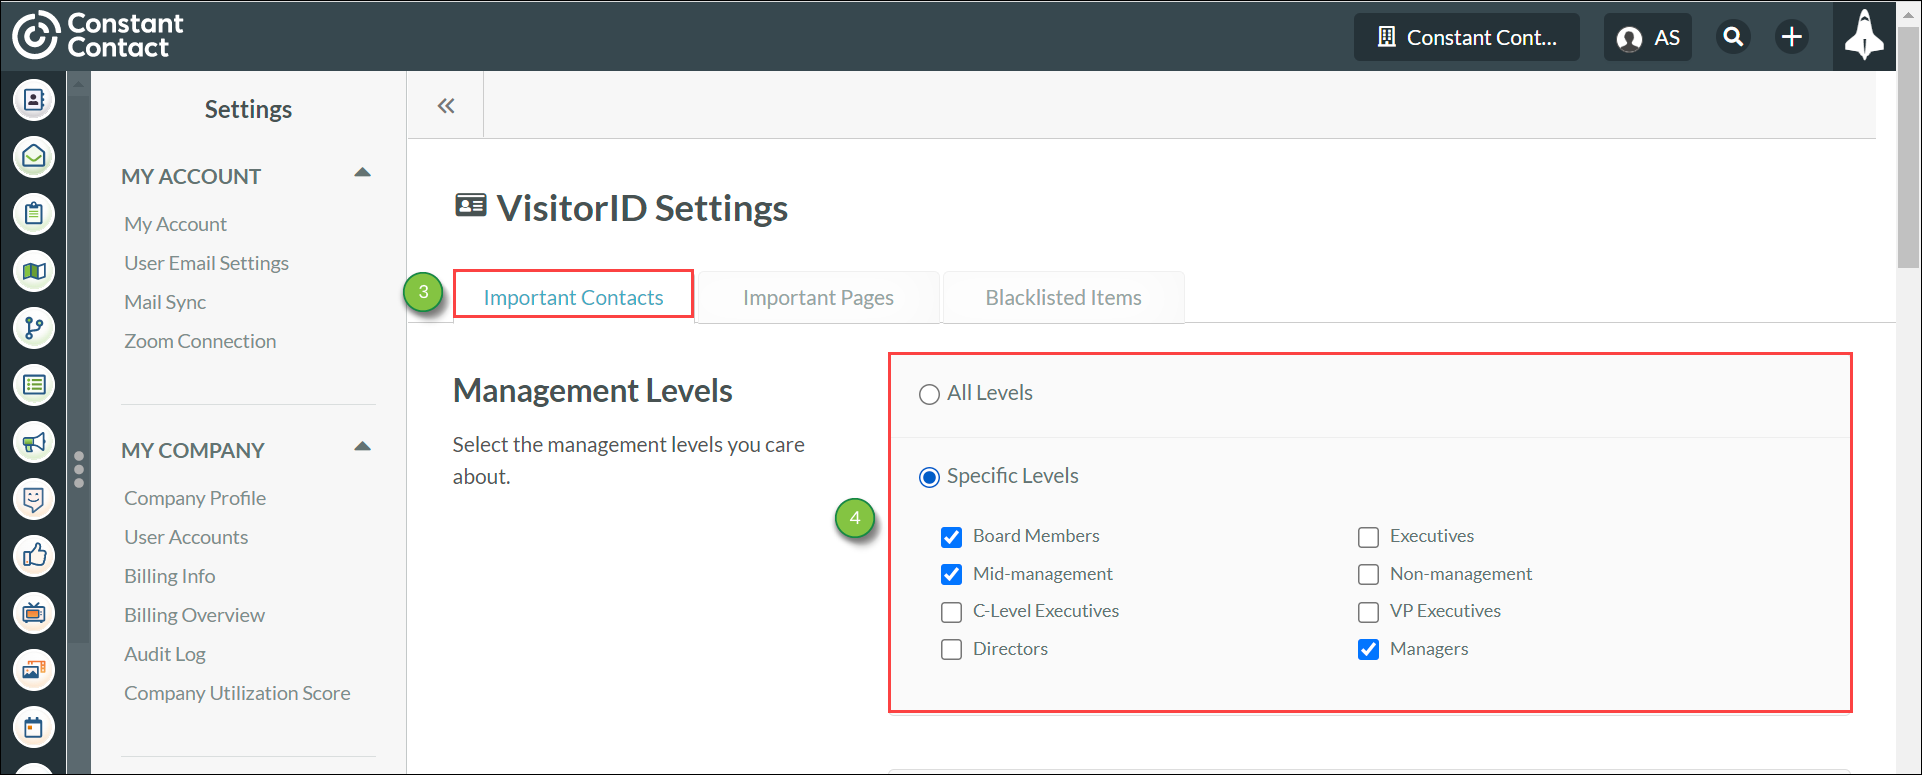
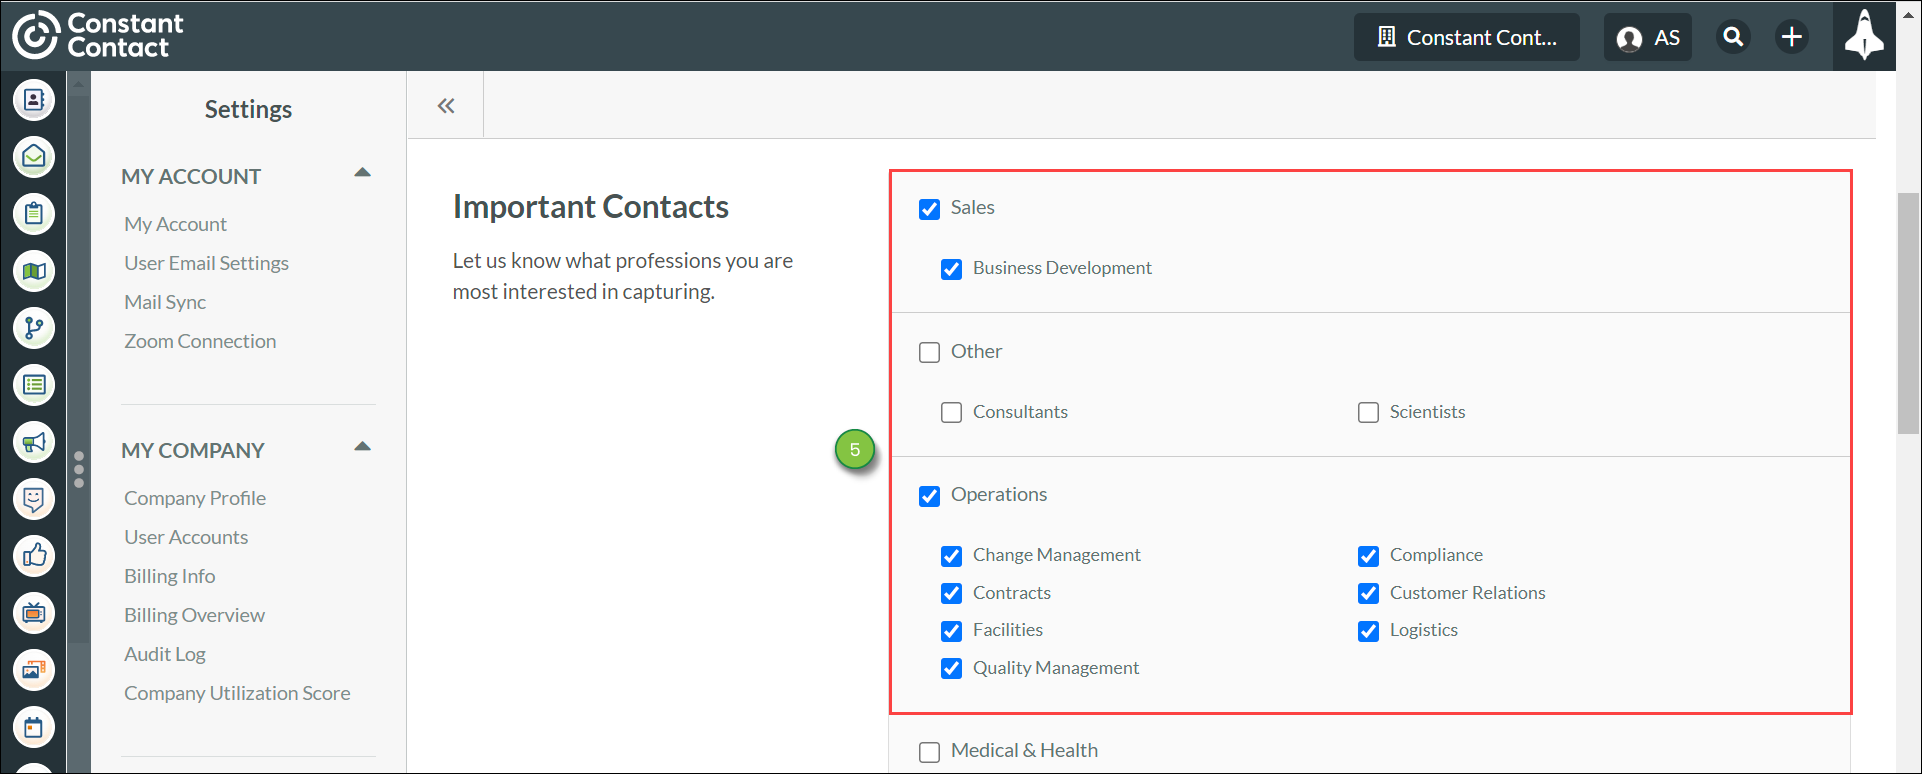
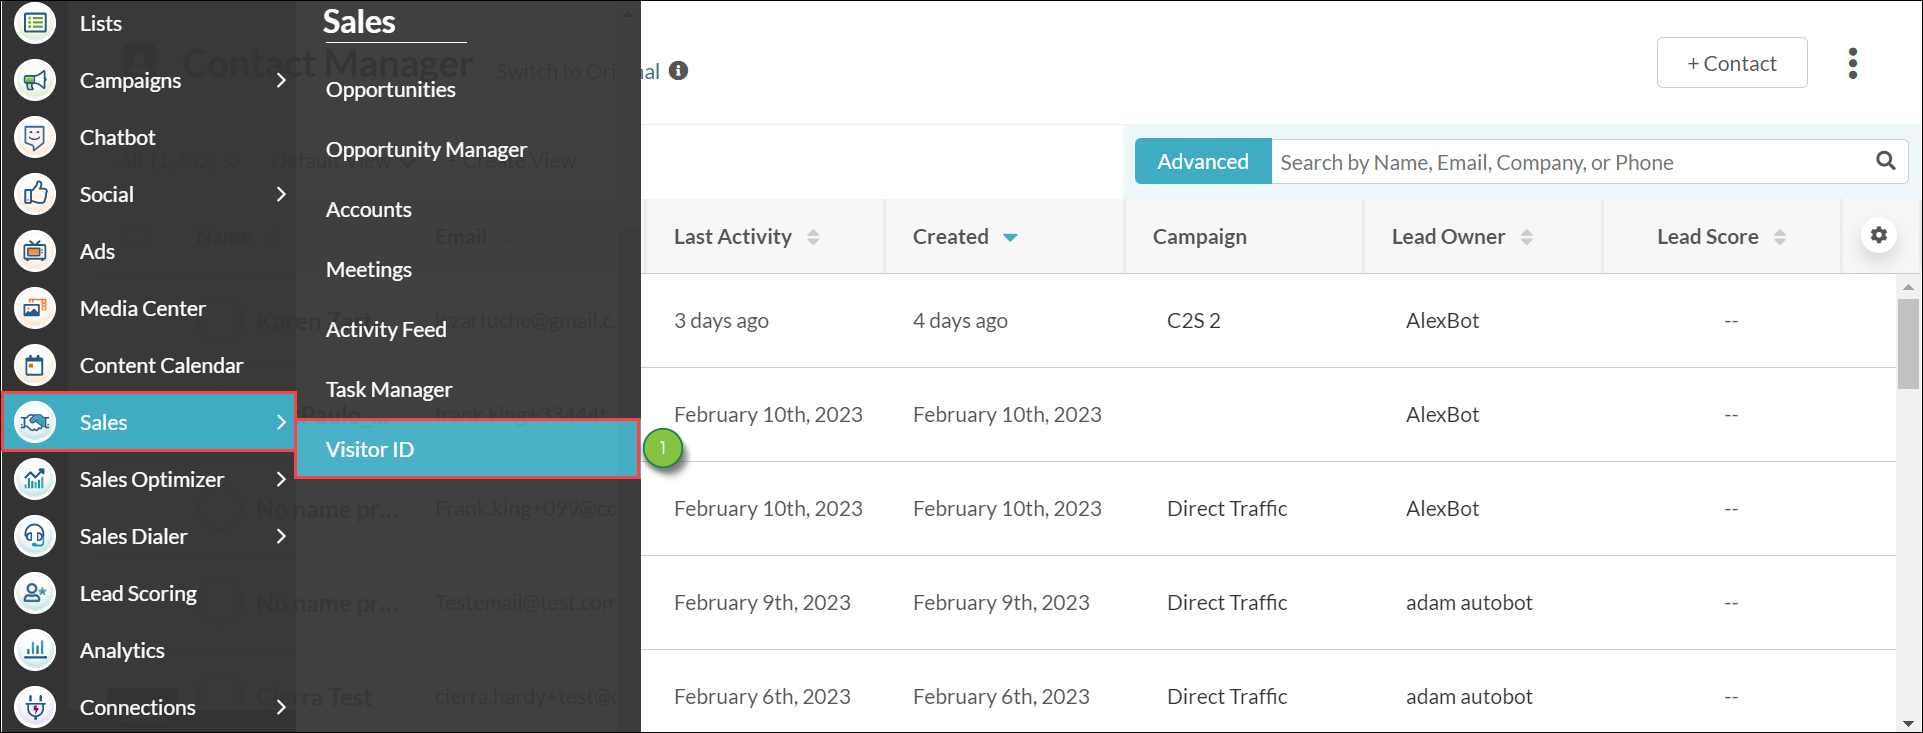
Before you can use VisitorID features, you will need to configure Important Contacts settings.

To configure Important Contacts settings, do the following:

  1. Click Settings in the left toolbar.
  2. Click VisitorID, located under Tracking in the left panel.

    Configuring Visitor ID


  3. Click the Important Contacts tab.
  4. Select the desired management levels and, if necessary, checkboxes in the Management Levels section.

    Configuring Visitor ID


  5. Click any or all of the desired checkboxes in the Important Contacts section.

    Configuring Visitor ID


  6. Scroll down to click Save Settings at the bottom of the page.


Configuring Important Pages

In addition, you will need to configure Important Pages settings. Important Pages are web pages you deem important, and they track leads who visit said webpages.

To configure Important Pages settings, do the following:

  1. Click Settings in the left toolbar.
  2. Click VisitorID, located under Tracking in the left panel.

    Configuring Visitor ID


  3. Click the Important Pages tab. 
  4. Enter the extensions for important pages in the Page text box.
  5. Select a color designation to a lead that identifies the pages they visited in the Color drop-down menu.
  6. Optionally, add notes about the page in the Page Notes text box.
  7. Click + Important Page.

    Configuring Visitor ID


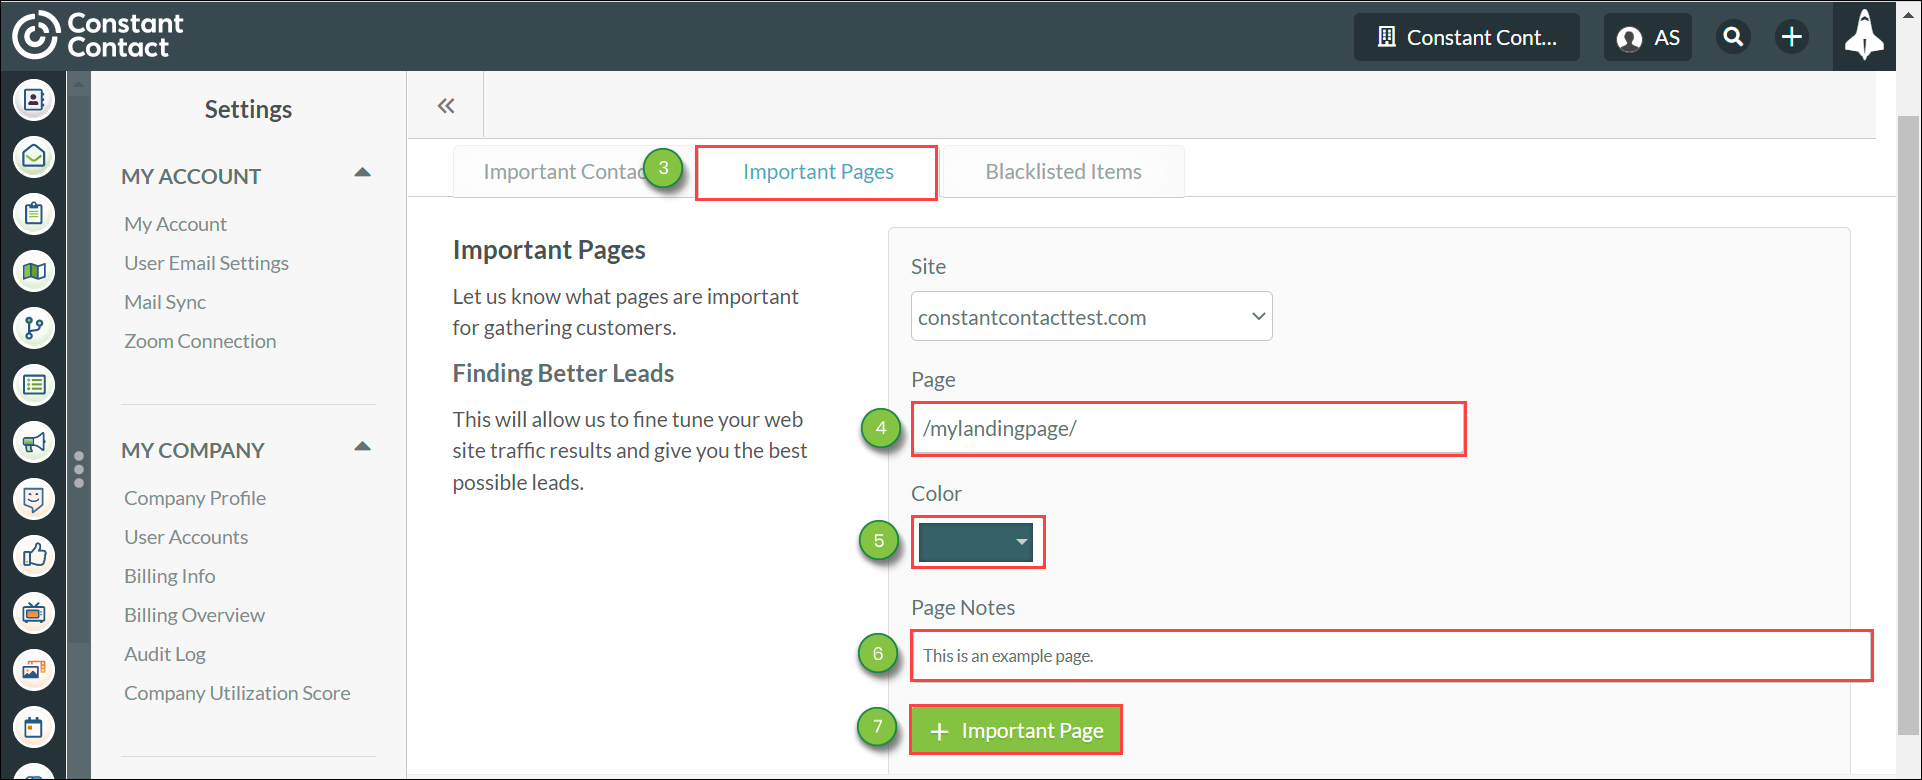
Note: You can enter the desired color's hexadecimal value when selecting a color in the Color drop-down menu. Click  cancel-circle.png  Remove to remove the page from VisitorID tracking.


Configuring Email Settings

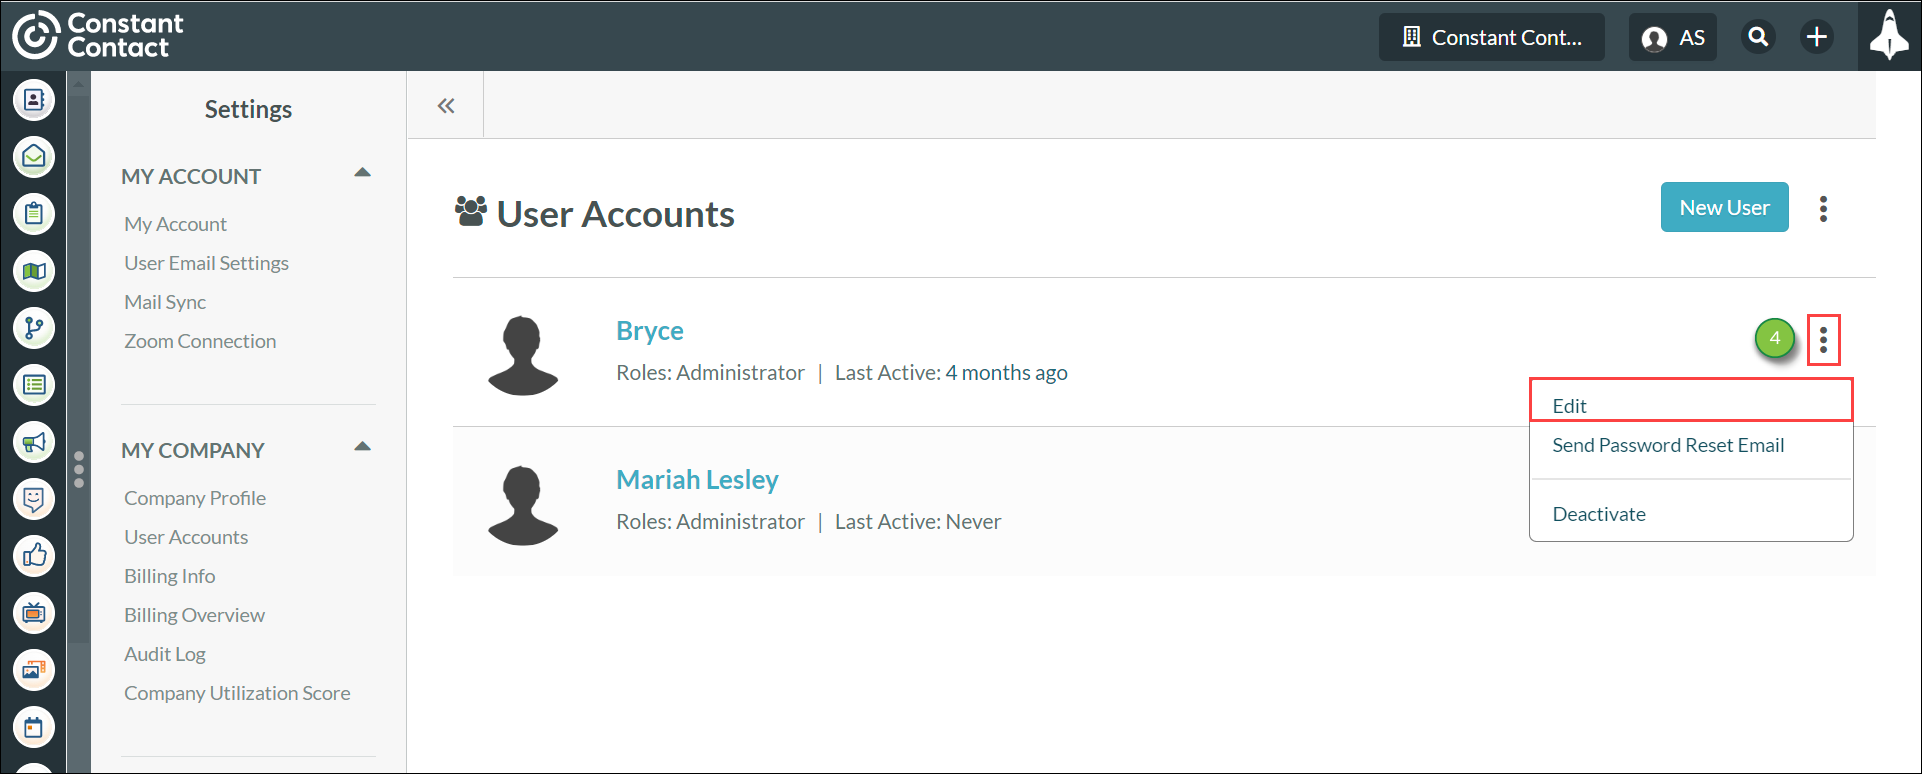
You can configure which user roles can receive email results.

To configure email settings, do the following:

  1. Click Settings in the left toolbar.
  2. Click User Accounts, located under My Company in the left panel.

    ALTTEXT


  3. Locate the user that will be receiving the client's daily VisitorID email results.
  4. Click  12more.png  Options > Edit.

    Configuring Visitor ID


  5. Scroll to the Notification Options section.
  6. Click the Receive emails about web prospects for my company drop-down menu.
    • Choose from one of the following:
         •   Receive No Emails
         •   One Daily
         •   One Weekly
  7. Click the Receive emails about web prospects for my clients drop-down menu.
    • Choose from one of the following:
         •   Receive No Emails
         •   One Daily
         •   One Weekly

    Configuring Visitor ID


  8. Scroll to the bottom of the page. Click Save Changes.

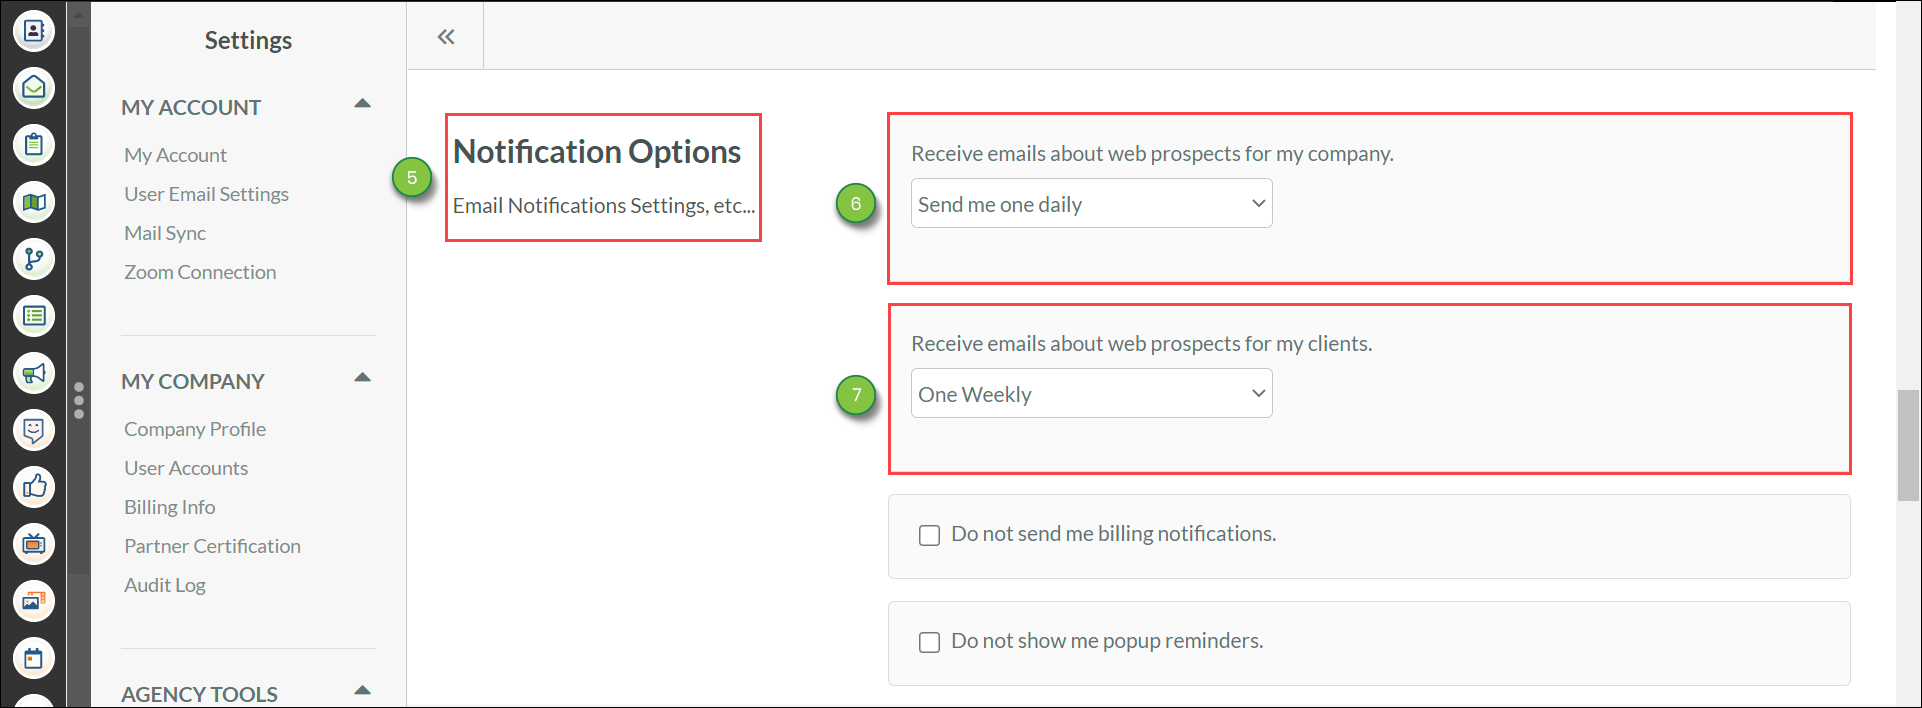
Be aware that you will need to select to receive an email either daily or weekly in order to receive email VisitorID email notifications. This does not affect other automation notifications.

When enabled, these emails detail the following:

  • The Receive emails about web prospects for my company option sends emails at a specific frequency about available prospective tracked leads that you should consider investigating.
     
  • The Receive emails about web prospects for my clients option sends emails at a specific frequency to you about available prospective tracked leads for your clients that both you and your clients should consider investigating.

Note: Lead Gen & CRM users that have not opened an email or logged into the application for 180 days will have their system notifications suppressed. This includes VisitorID, billing, and automation-based notifications.

Important: As the internet evolves, anonymous visitor tracking has become less reliable. Lead Gen & CRM is placing greater emphasis on returning relevant leads by omitting anonymous visitor activity in VisitorID emails. You can still review anonymous visitor activity on the VisitorID page.


Excluding Domains

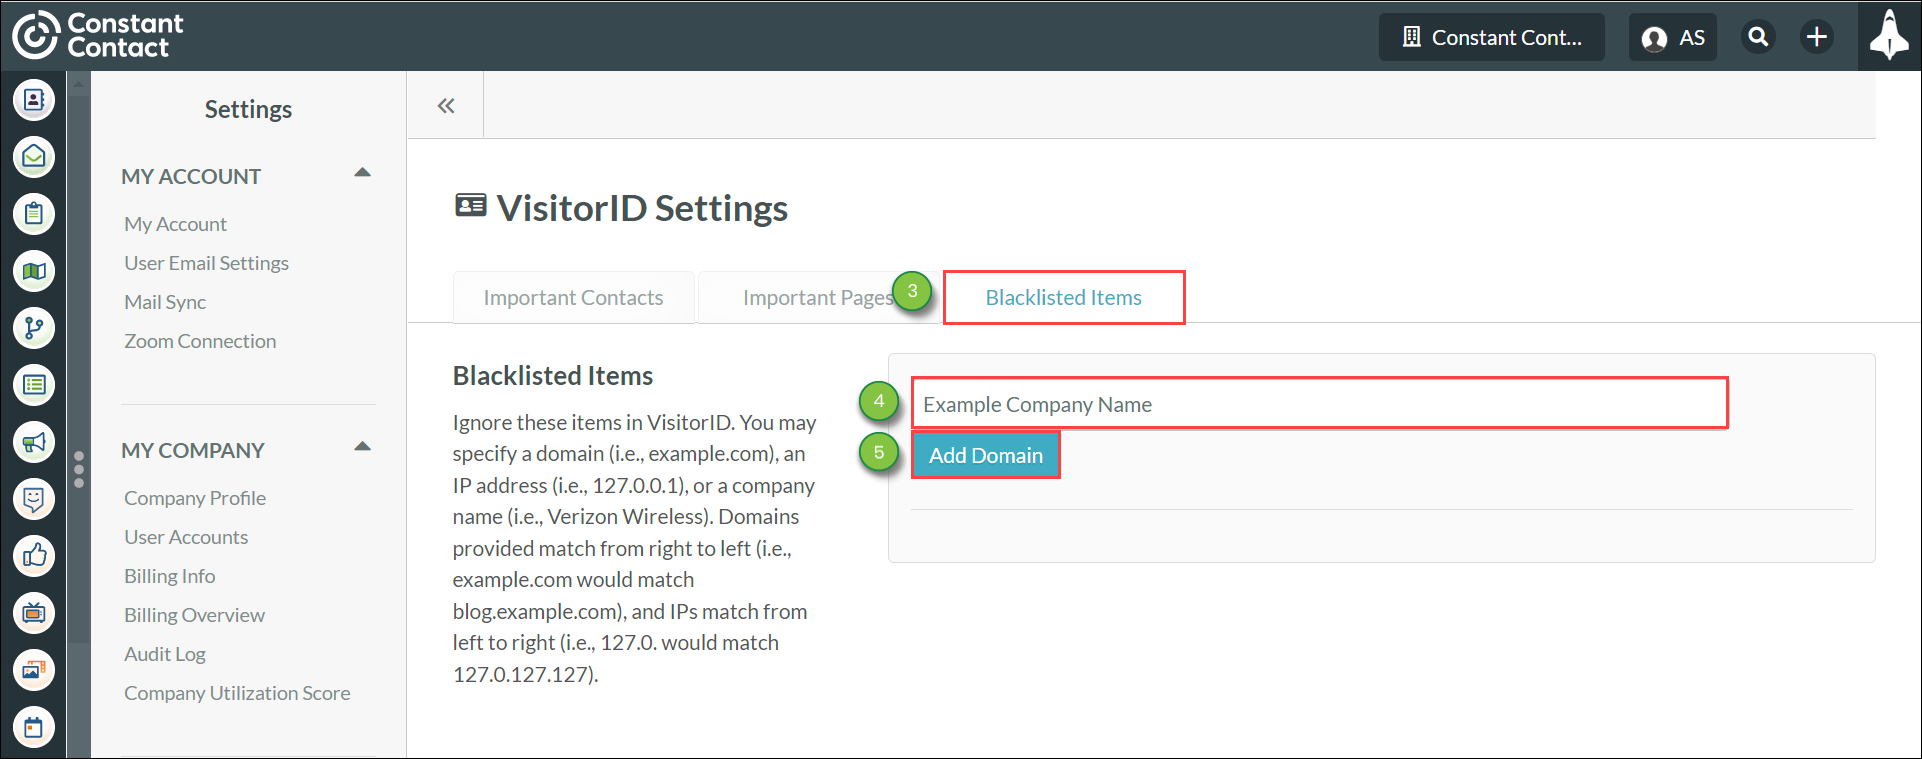
You can enter blocklist information and exclude a domain from VisitorID results.

To exclude domains, do the following:

  1. Click Settings in the left toolbar.
  2. Click VisitorID, located under Tracking in the left panel.

    Configuring Visitor ID


  3. Click the Blacklisted Items tab.
  4. In the text box, enter one of the following:
       •   The domain
       •   The IP address 
       •   The company name
  5. Click Add Domain.

    Configuring Visitor ID


Leads with a tracked device will continue to show in VisitorID when they visit a tracked page of your site.

Unknown leads from the blocklisted domain will not appear until the point at which they become tracked.

Note: Domains match from right to left (example.com would match blog.example.com), and IP addresses match from left to right (127.0 would match 127.0.127.127). Clicking  cancel-circle.png  Delete will remove the item from your list of exclusions.


Segmenting by Site

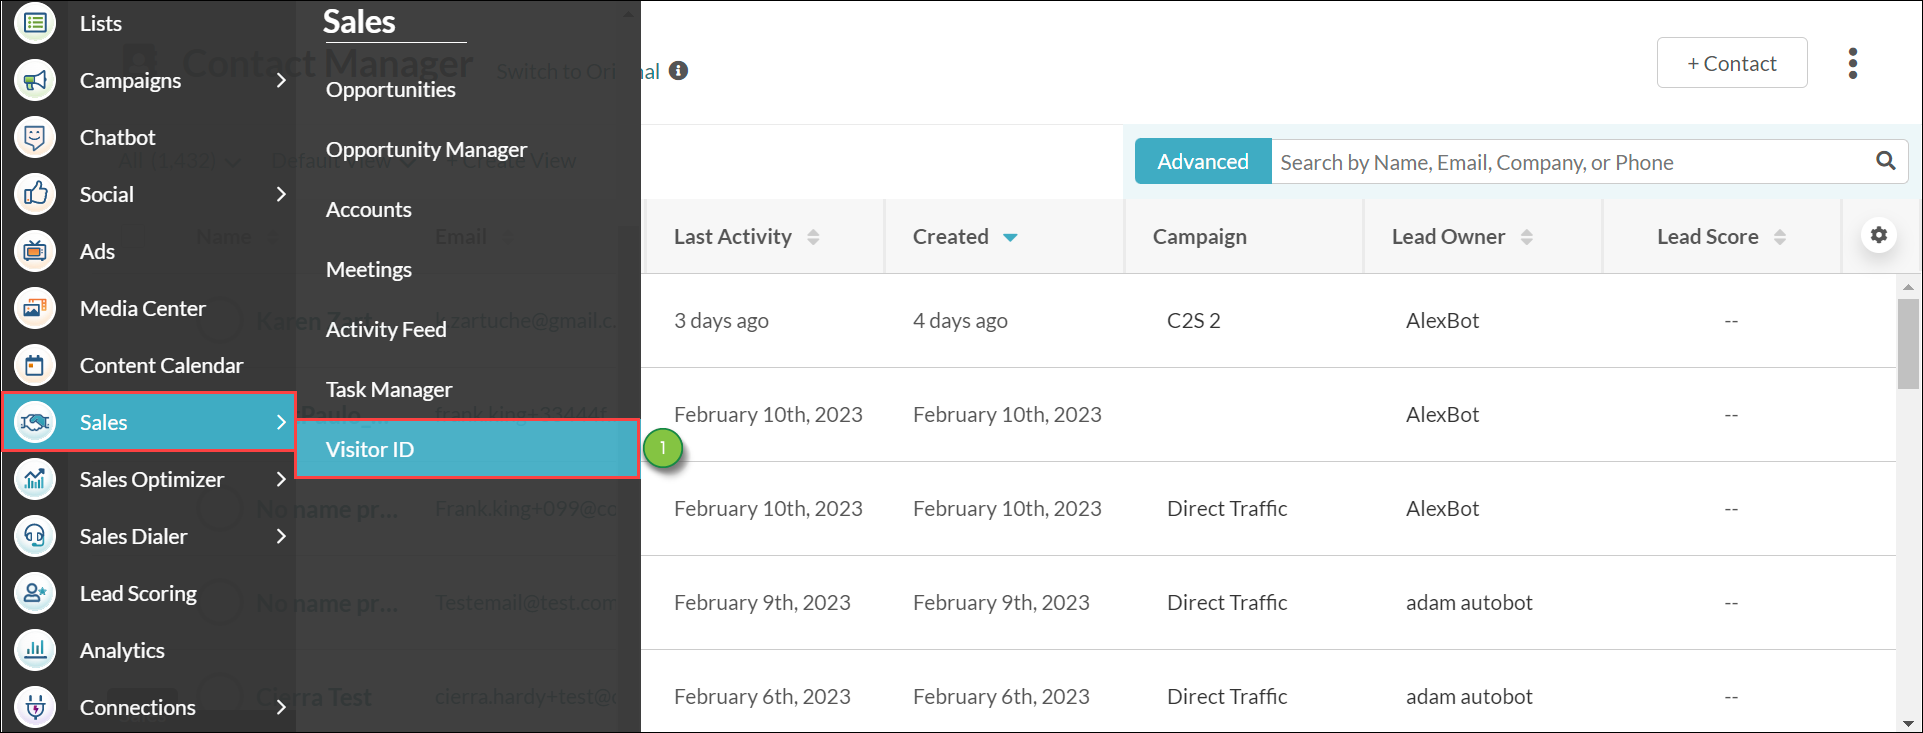
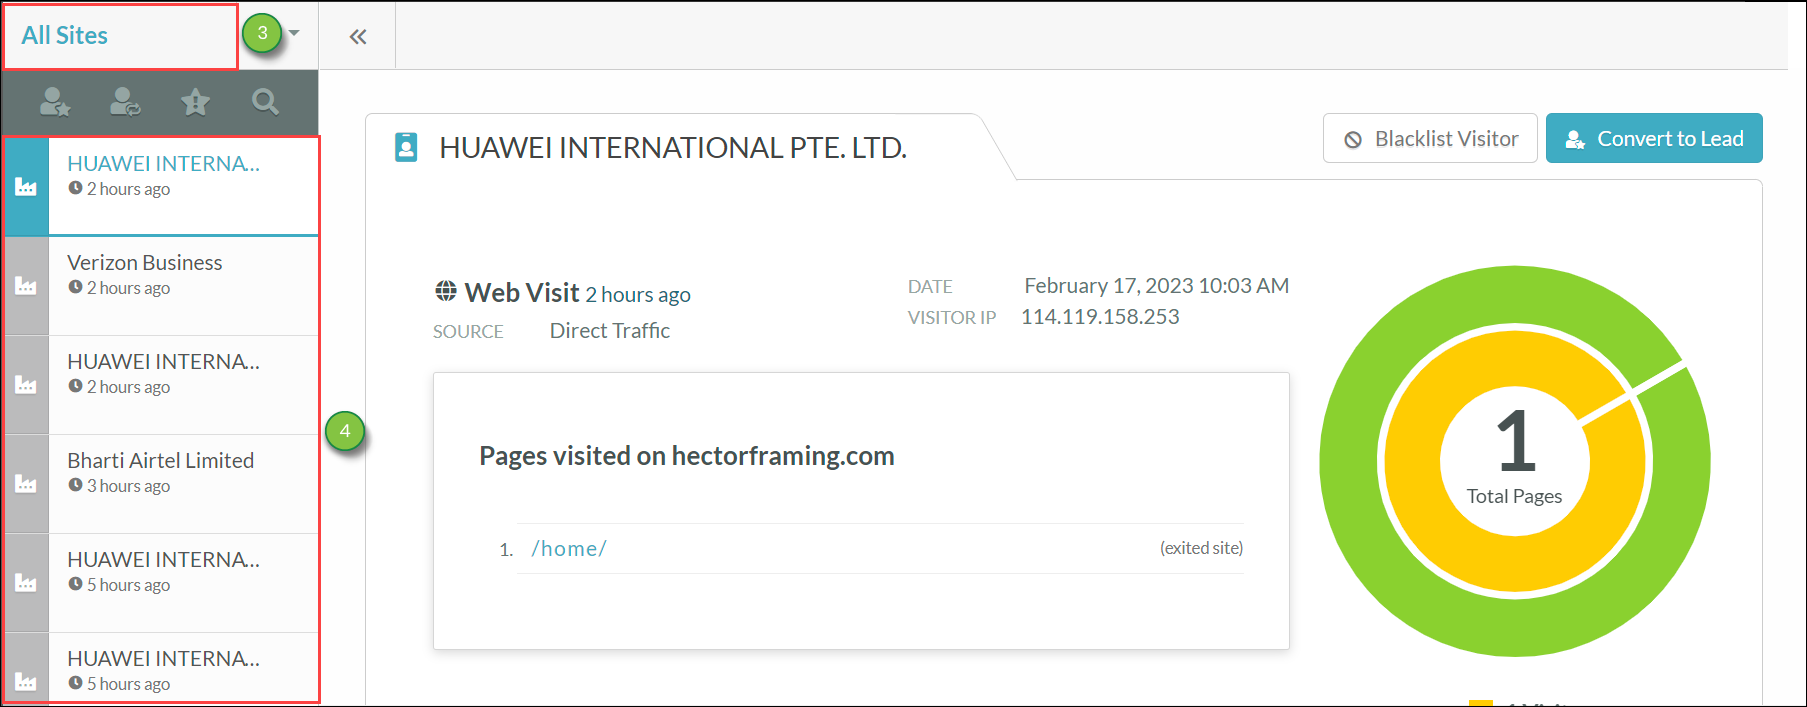
Lead Gen & CRM allows you to see anonymous web visitors on your tracked site through its VisitorID settings. If you have multiple sites in your instance, you might be interested in seeing which anonymous visitors are tied to which site.

To segment VisitorID by individual websites, do the following:

  1. Click Sales > Sales VisitorID in the left toolbar.

    Configuring Visitor ID


  2. Click All Sites in the left column.
  3. Select the desired website from the drop-down menu that appears.

    ALTTEXT


Exporting Results

You can export VisitorID results as a .CSV file.

To export VisitorID results as a .CSV file, do the following: 

  1. Click Sales > VisitorID in the left toolbar.

    Configuring Visitor ID


  2. Click  Settings.png  Settings > Download .CSV in the left panel.

    Configuring Visitor ID


  3. Open the .CSV file.

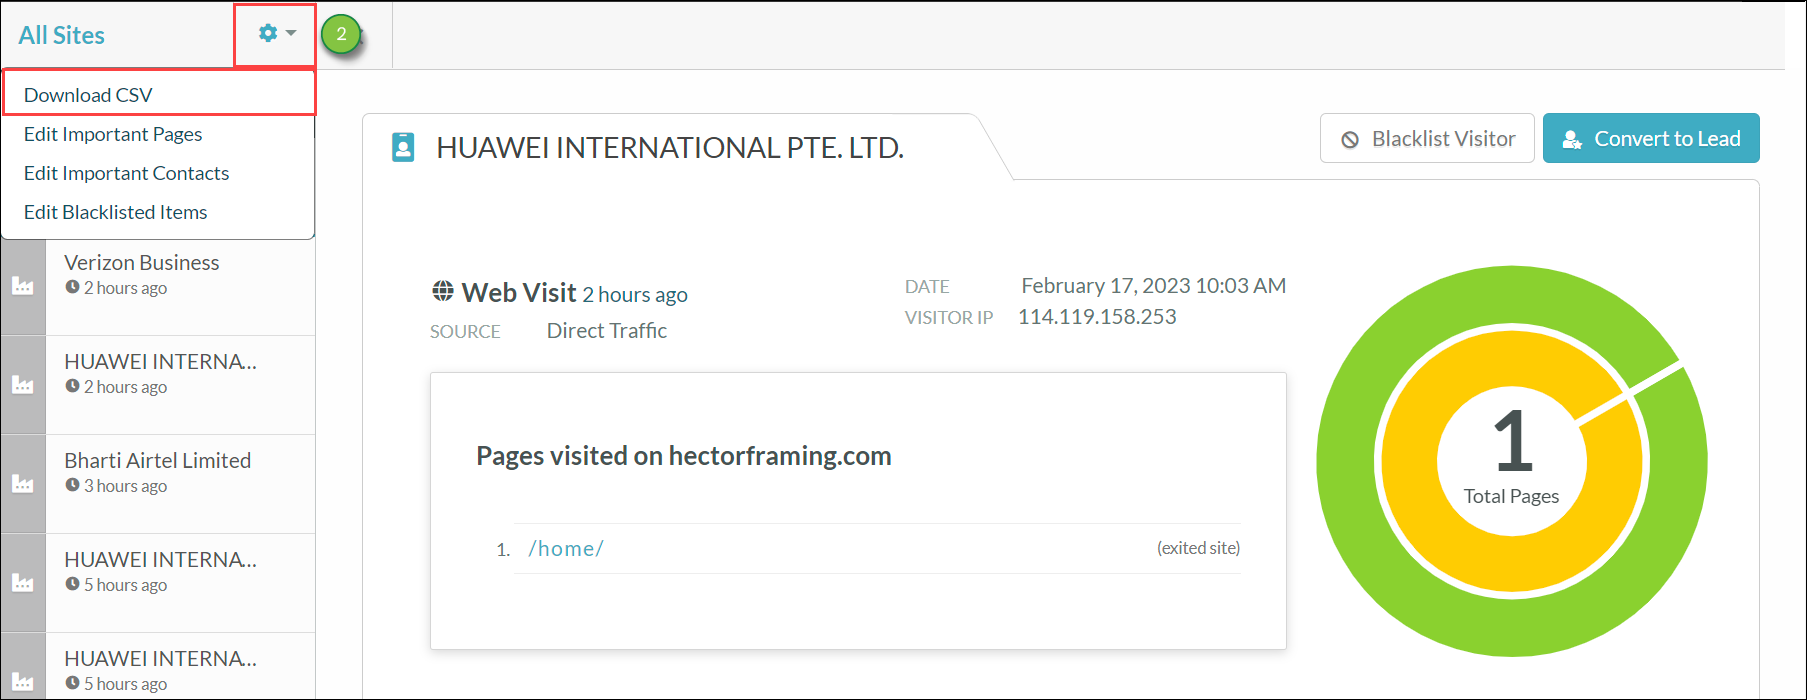
Note: The .CSV file will be downloaded to your web browser's file download location.


Did this article answer your question?


Constant Contact Logo

Copyright © 2025 · All Rights Reserved · Constant Contact · Privacy Center