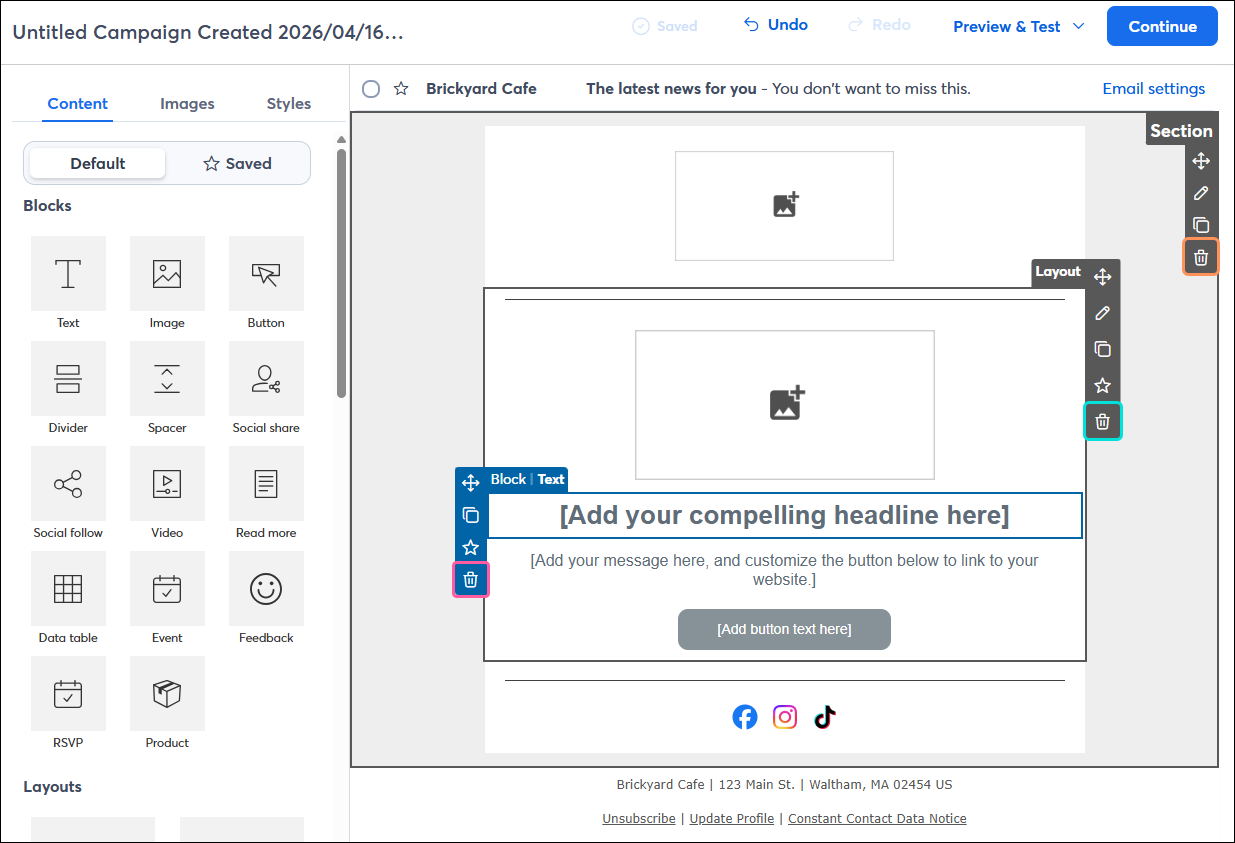
Our flexible templates and drag-and-drop editing make it easy to customize your email design, emphasizing the most important parts while presenting all the necessary information to your readers.
 | Join the conversation: First time designing an email? Our Community can help! Just submit your email to the "Campaign Feedback" forum for some honest feedback before you send it out to your contacts. |
Understanding the different Content elements
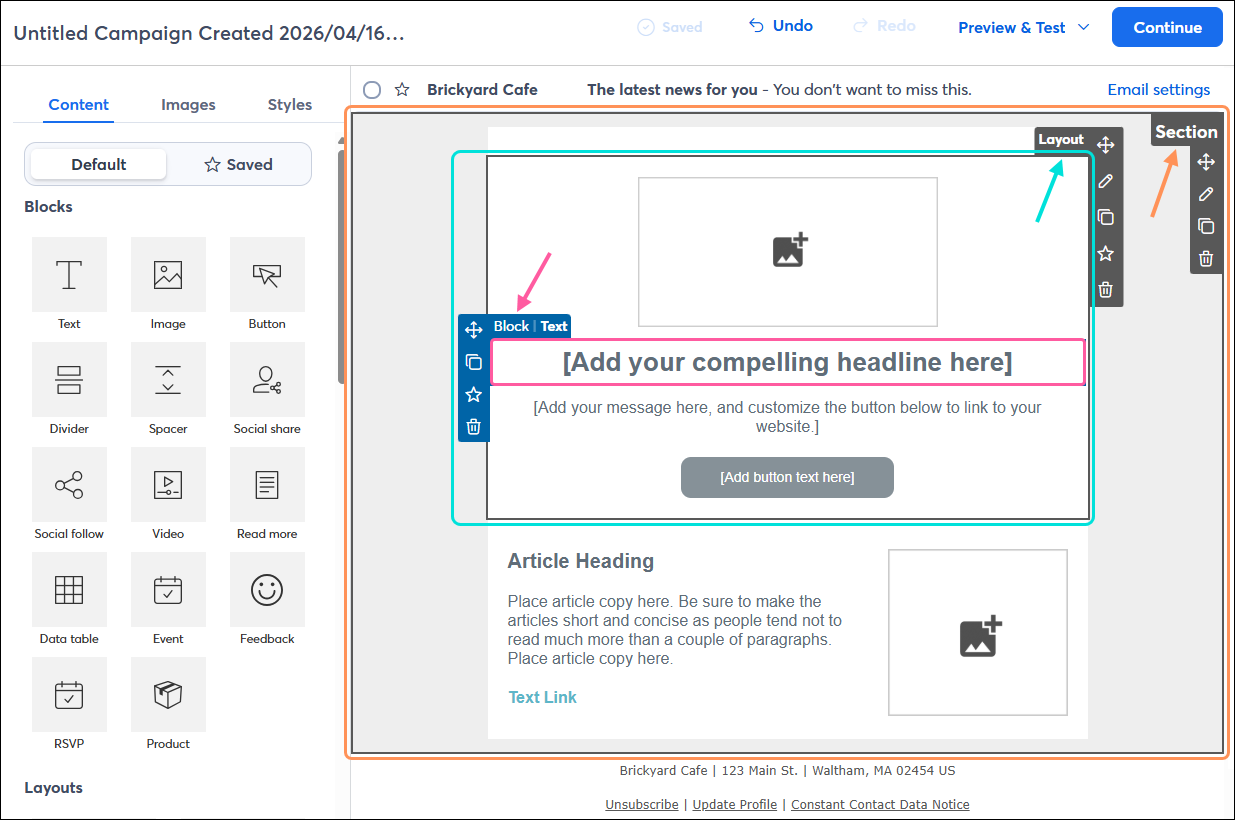
Within an email template, there are three main components for adding and formatting your content, which can be found on the Content tab in the left-hand panel. Each element has its own menu and an outline that appears when you hover your mouse over it. Sometimes the menus all appear at the same time, depending on what you're clicking.
- Blocks - Blocks are the individual pieces of content you can add to your email, like text, images, buttons, etc. Using blocks gives you the freedom to design your email exactly the way you want it. Blocks can be dragged into your template and then dragged around to different locations if you don't like where you put them—you can even use them to create a multi-column layout by placing blocks next to each other.
- Layouts - A layout is a group of blocks that spans the template width and functions as a single unit, allowing you to move multiple blocks together with just one click. A layout can contain any of the different block types stacked on top of each other or arranged side by side as columns. You can also apply background colors to a layout to make it stand out.
- Sections - A section can hold a mix of layouts and individual blocks, which can then be styled, moved, and copied as a single unit. By using multiple sections in your email, you can group related content to keep your email organized. The space between sections provides your readers with a visual clue that they're changing topics.
 | Design tip: A short, well-designed email with a clear call-to-action can help increase engagement. Don't forget to preview your email before sending to see how the content stacks when viewed on mobile devices! |
Adding individual blocks
A block can live anywhere in your template—you can have a section with a single block, use blocks to build your own layout, or add a block to an existing layout. If you don't like where you put them, you can drag them around your template after they're added. They're really flexible to help you create the perfect design!
- From the Content tab, click and drag a block into your template. Use the guideline to help you find the right place to drop the block.
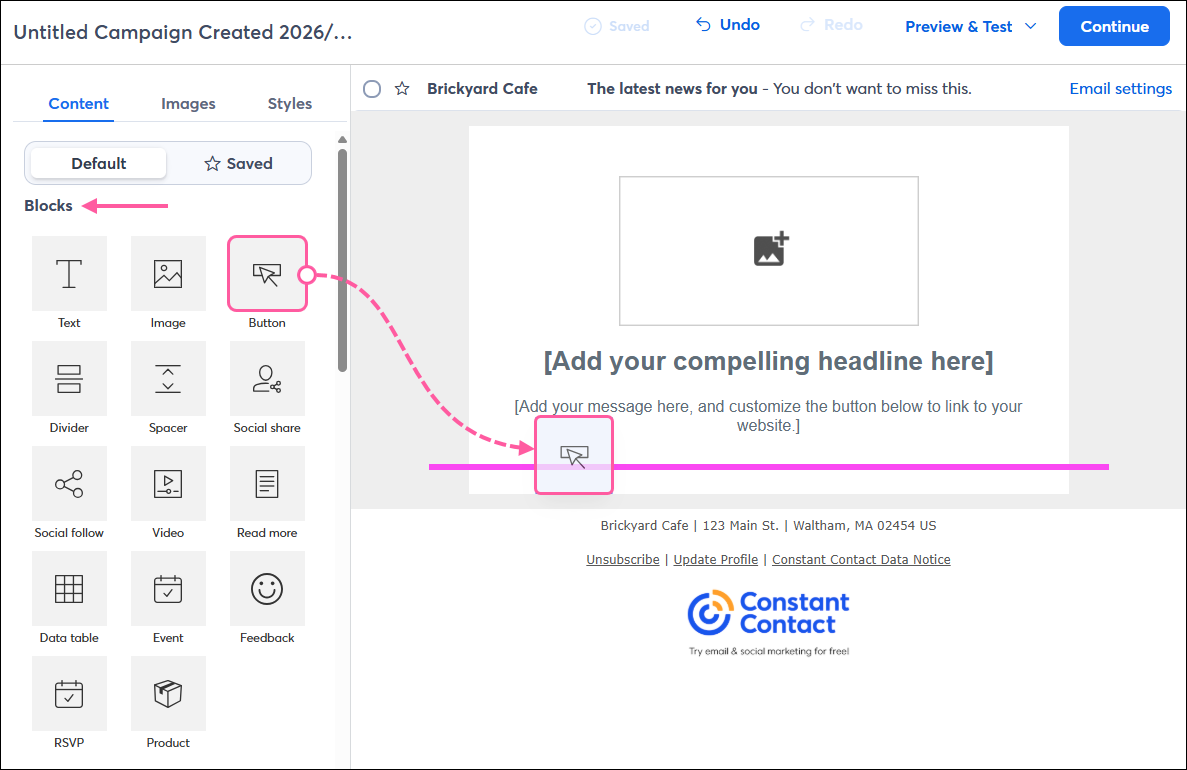
Once the block is added to your template, you can click on it to display its editing controls, which can be used to make customizations depending on the type of block it is:
Adding pre-built layouts
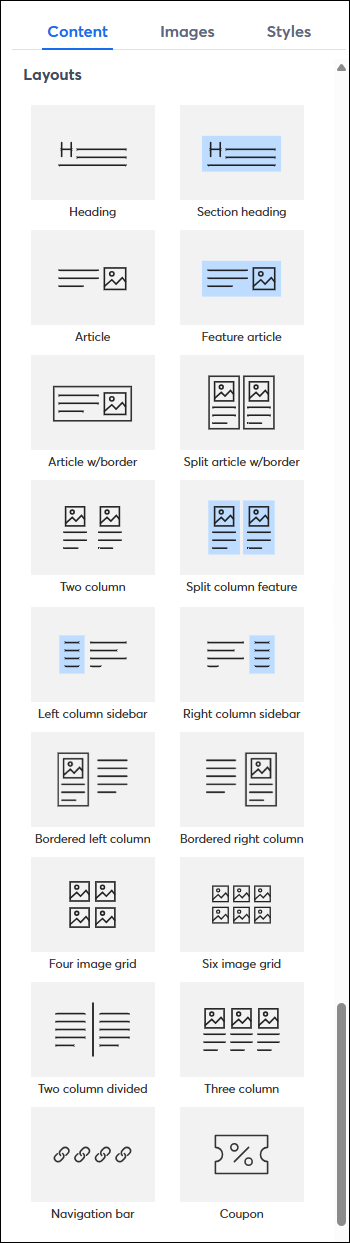
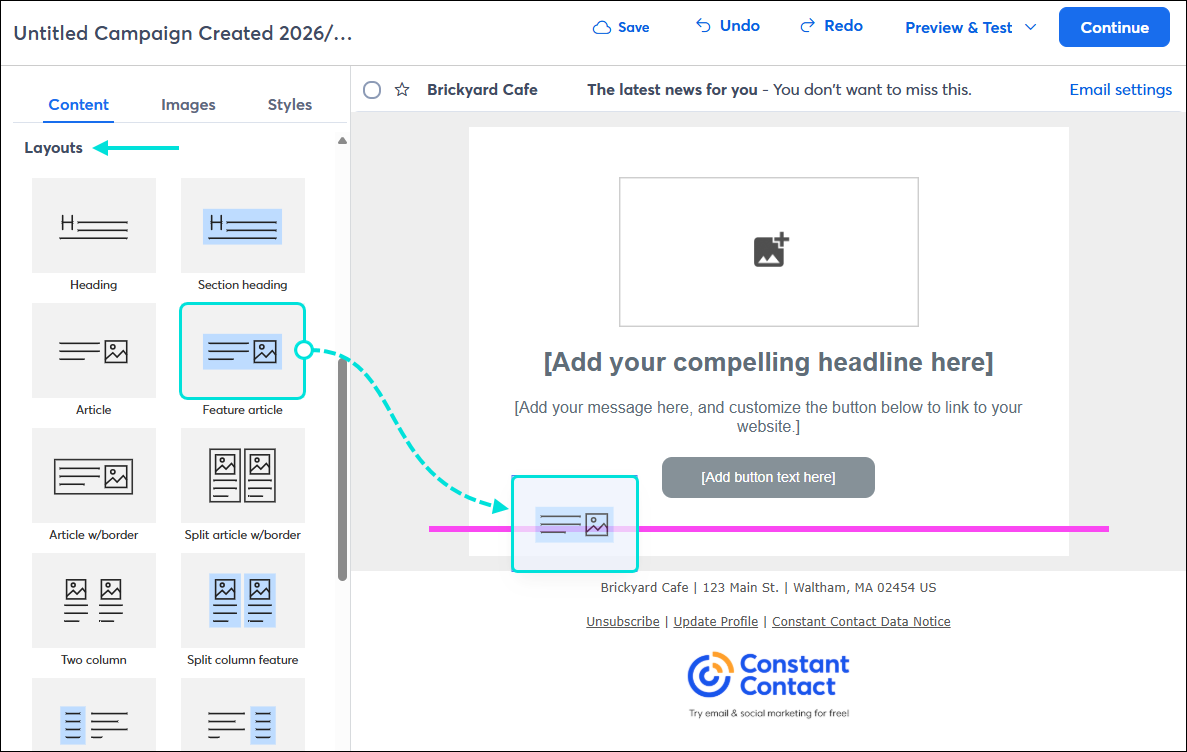
Dragging a pre-built layout into your template makes email design quick and easy. You can customize any of these layouts by dragging additional blocks into them, rearranging the blocks within the layout, or deleting unwanted blocks. Some layouts even have a featured background color that makes them stand out from the rest of your email content.
- From the Content tab, scroll down to the Layouts section and drag a pre-built layout into your template. Use the guideline to help you find the right placement. Layouts must be placed where they can span the width of your template and can't be used to create columns.
Note: The "Heading" and "Section heading" layouts can be added to a column, but they need to be inserted into your template on their own first.
| Available pre-built layouts | Inserting a pre-built layout |
 |  |
| Did you know? You can create your own layouts starting with a single block or by adding, moving, or removing blocks within a pre-built layout. |
Adding sections
Sections help you stay organized and offer even more flexibility in designing your email!
- From the Content tab, scroll down to Sections and drag an "Empty" section into your template, using the guideline to help you place it. You can only insert a section above or below an existing section.
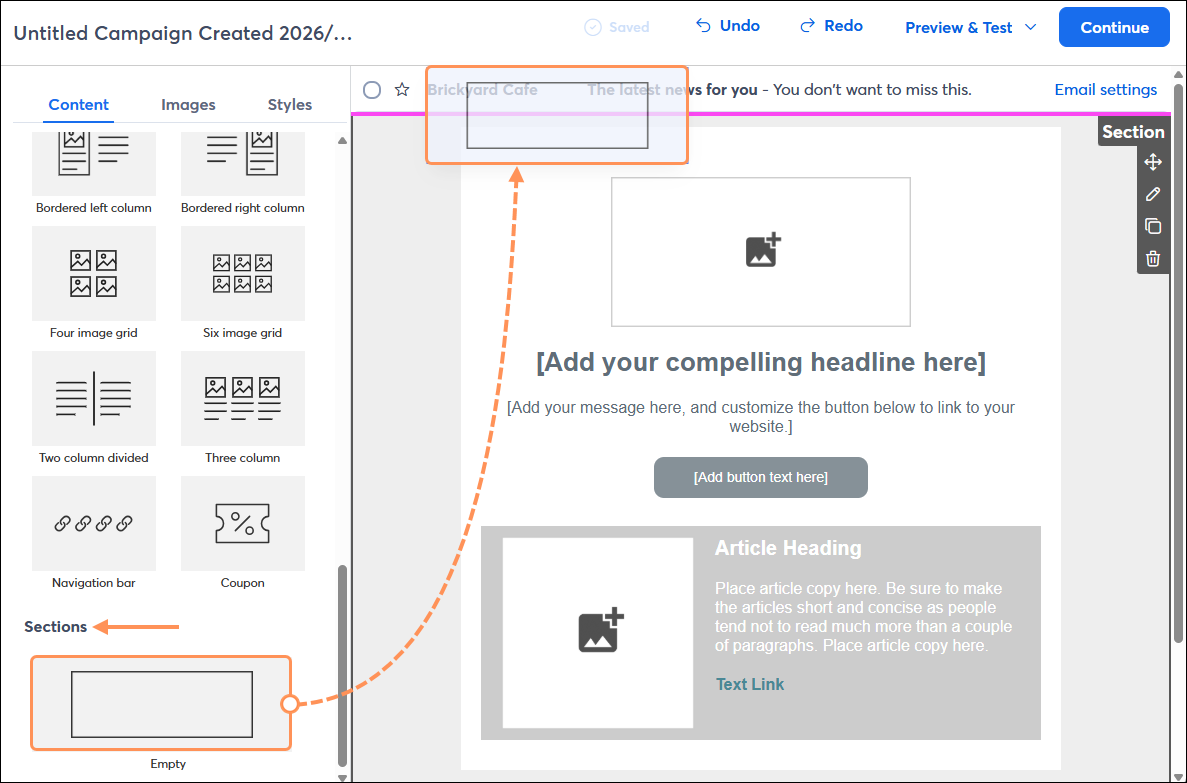
Once the new section has been added to your template, you can insert individual blocks, prebuilt layouts, or a combination of both into it.
 | Design tip: When you add multiple sections, a small gap appears between them, which you can further customize by dragging in a Divider block. |
Adding elements with the "click-and-stick" method
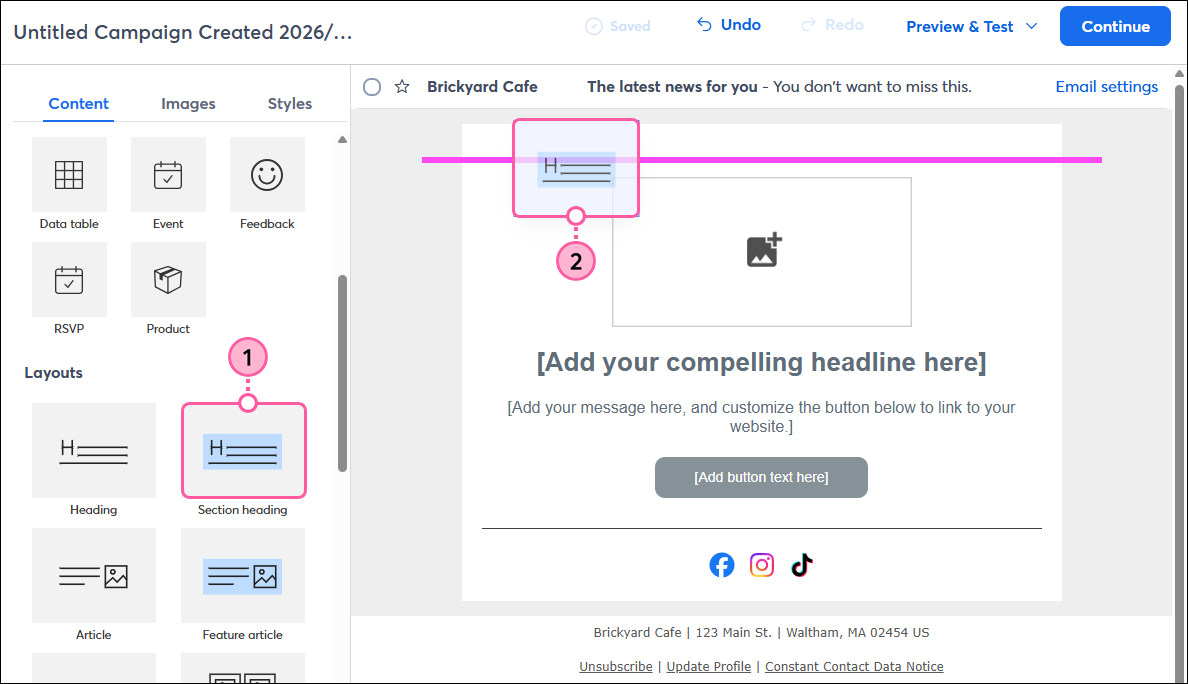
Blocks, layouts, and sections can be added from the Content tab into your template using drag-and-drop editing, or you can use the click-and-stick method. Both are both great options when using a mouse to build your template. If you're using a touchscreen, click-and-stick lets you simply tap on an element, then tap the location in your template where you want to drop it. Try out both methods and use the one that's easiest for you!
To use click-and-stick, open an email template and:
- "Click" on the element:
- Using a mouse - Click on the element you want to add to your template. When you click the element, it's highlighted so you know it's been "clicked," and you can release your finger from the mouse instead of holding it down to drag it. As you move your cursor, the element moves around the screen along with it, like it's stuck.
- Using a touchscreen - Tap on the element you want to add to your template. When you tap the element, it's highlighted so you know it's been "clicked," and you can release your finger from the touchpad. You won't see the element move until you tap in the template to insert it.
- "Stick" the element:
- Using a mouse - Using the guideline to assist you, place your cursor in the spot within the template where you'd like to place your element, then click your mouse again to release the block into that spot.
- Using a touchscreen - Tap the area where you want to add the element—you won't see a guideline. The element is added to the template as close as possible to the area you tapped, which can vary depending on the block, layout, or section. If the element isn't in quite the right place, you can use the "Move" option to drag it into another location.
Moving blocks, layouts, and sections
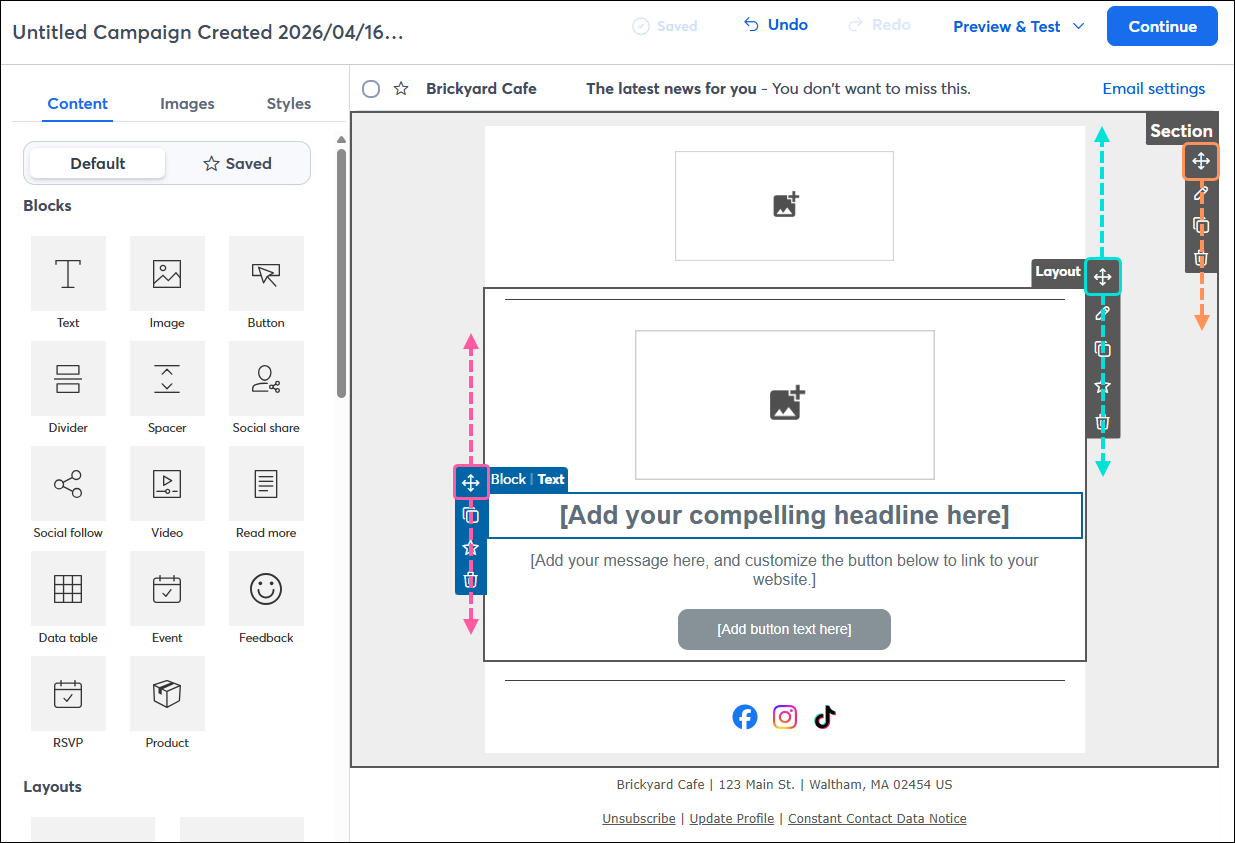
Blocks, layouts, and sections can all be moved by clicking on the directional arrows in their respective menus and dragging them to a different location in the template. The guideline shows you the different places in your template where they can be moved.
- Blocks can be moved practically anywhere within your template.
- Layouts must be moved so that they can stretch across the entire width of your template
- Sections can only be moved above or below other sections.
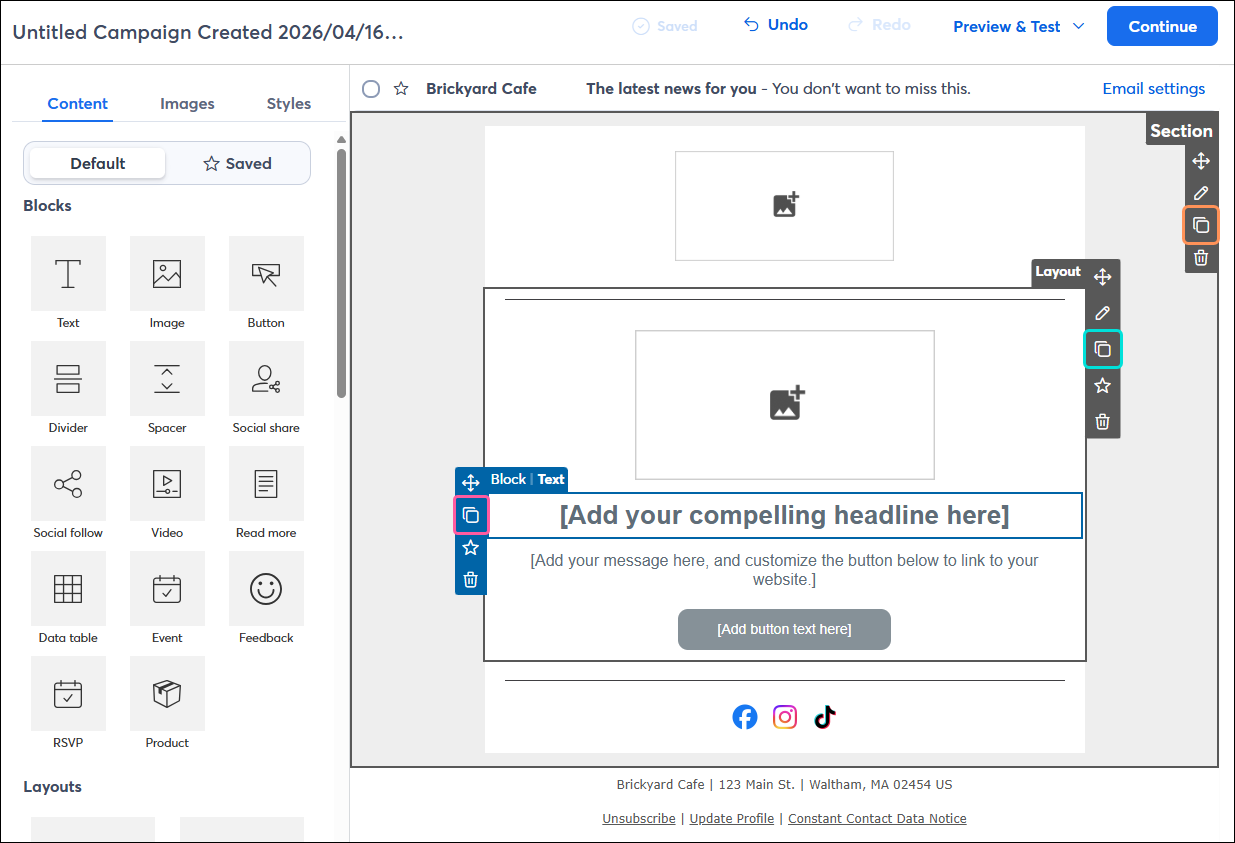
Copying blocks, layouts, and sections
Copying saves you time! Any block, layout, or section can be copied and then moved to a different location within your template.
Deleting blocks, layouts, and sections
To delete a block, layout, or section, just place your cursor over it and click the trash can icon in the side menu.