Email and Digital Marketing
How can we help you?
Search our help articles, video tutorials, and quickstart guides

You've got this. You've got us. Search our Knowledge Base to quickly find answers to your questions.

Insert an ecommerce Product block into an email

Article: 000039844
Updated: October 20, 2025

Use the Product block to promote your goods in an email

Email Plus IconReview your plan: This feature is not available in all Constant Contact plans. If you don’t have full access, you may need to upgrade your plan.


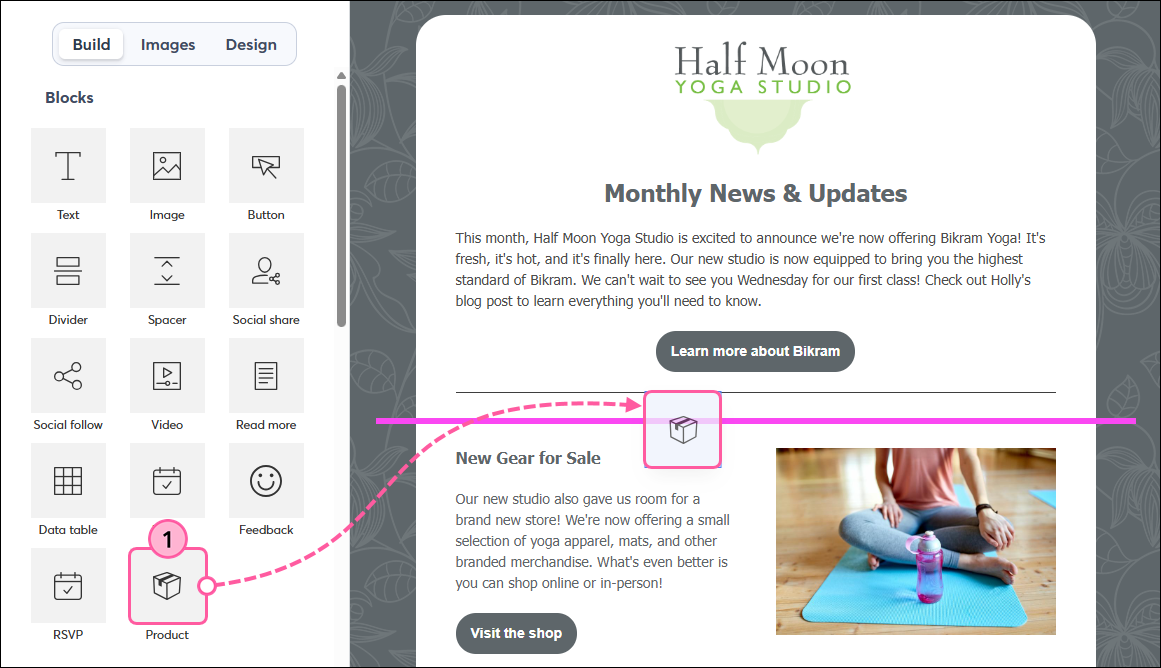
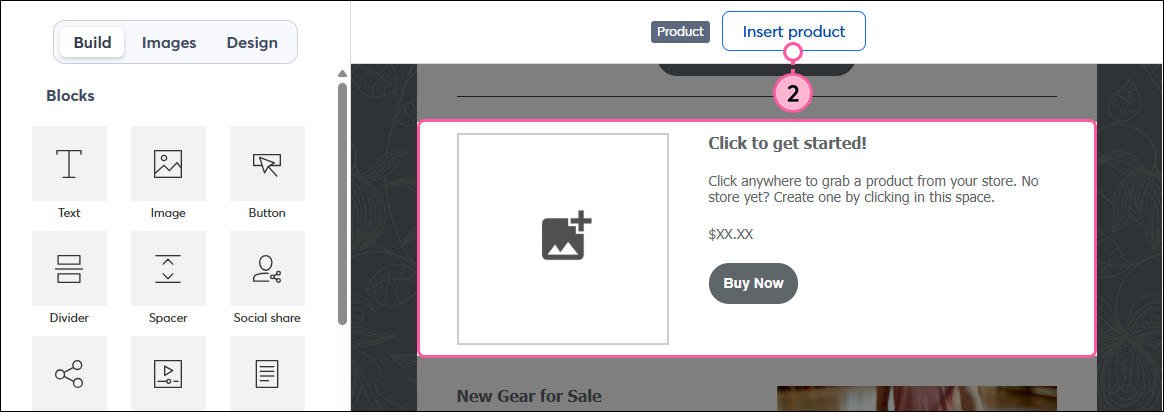
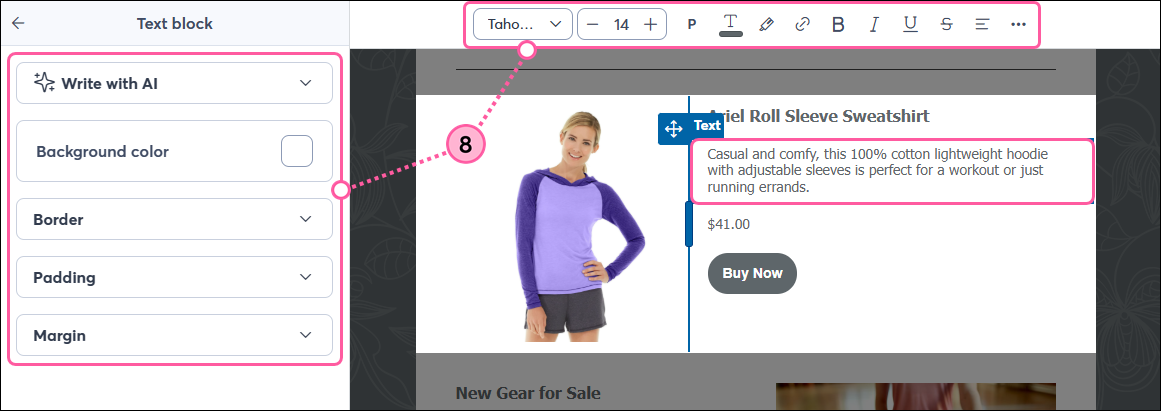
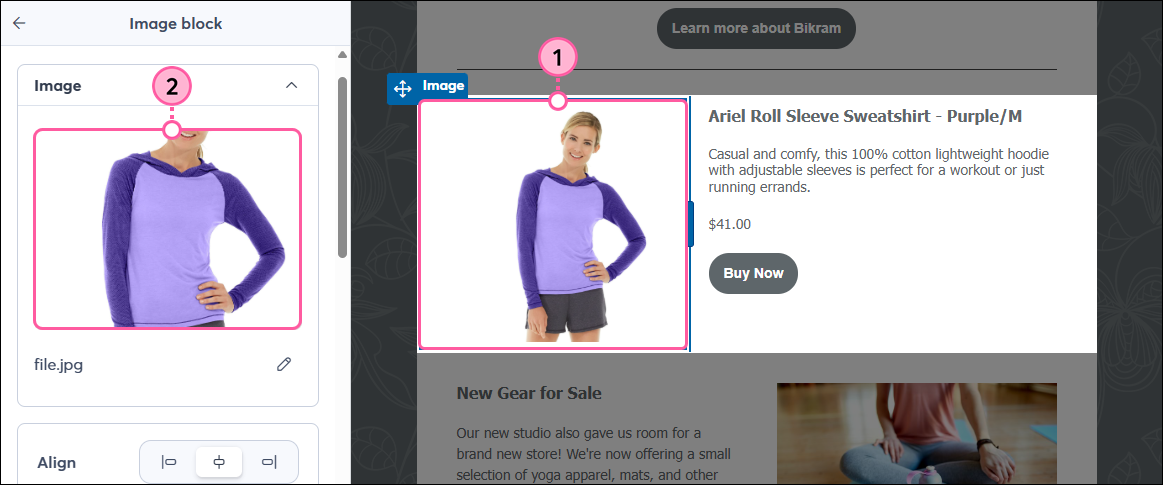
If you sell products through an ecommerce store, you can promote your goods to your contacts by dragging a Product block directly into your email.


Connect an ecommerce platform

Before adding the Product block to your email, make sure to connect your store to Constant Contact, depending on which ecommerce platform(s) you use:

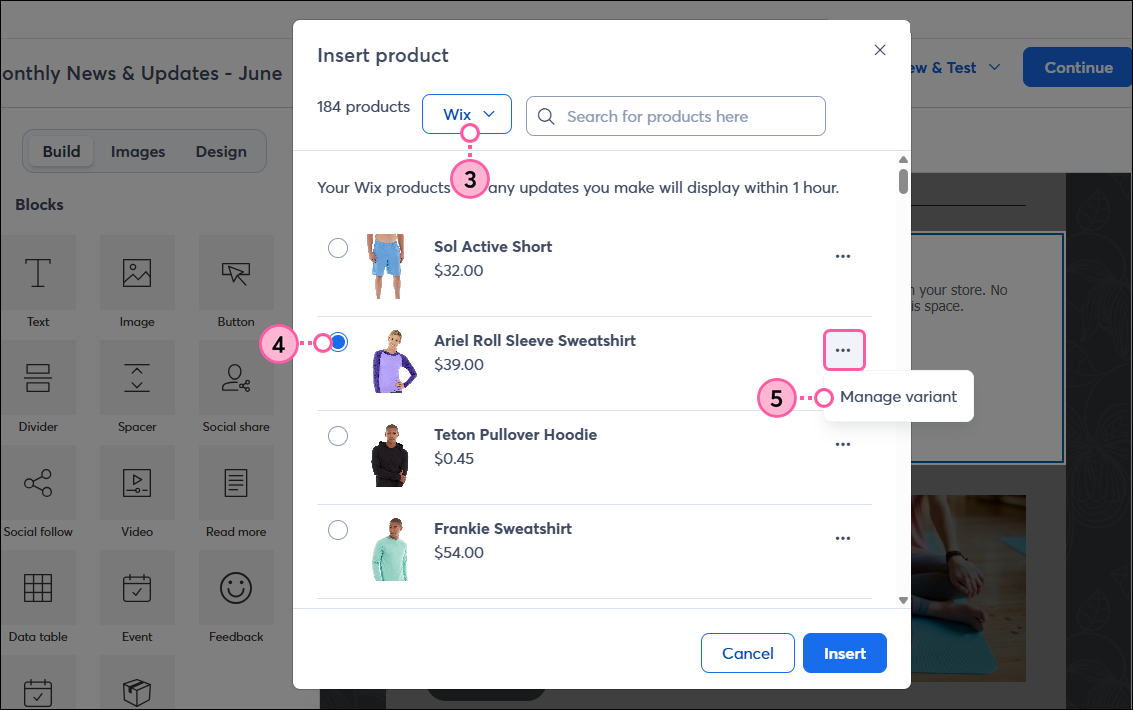
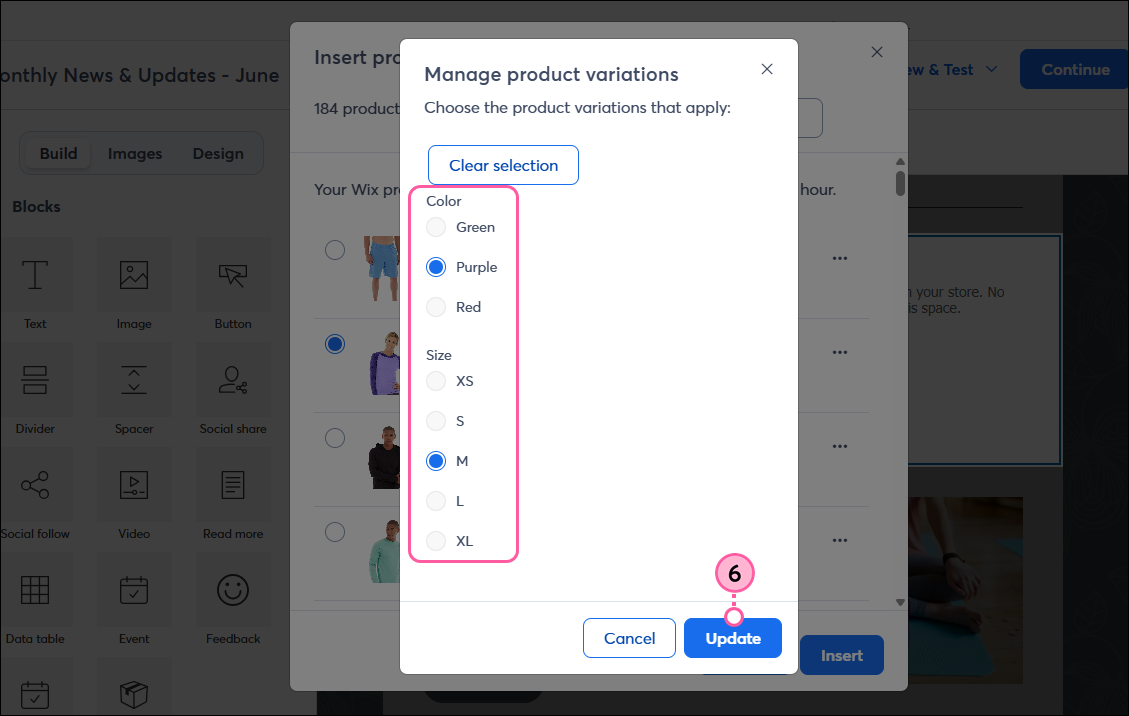
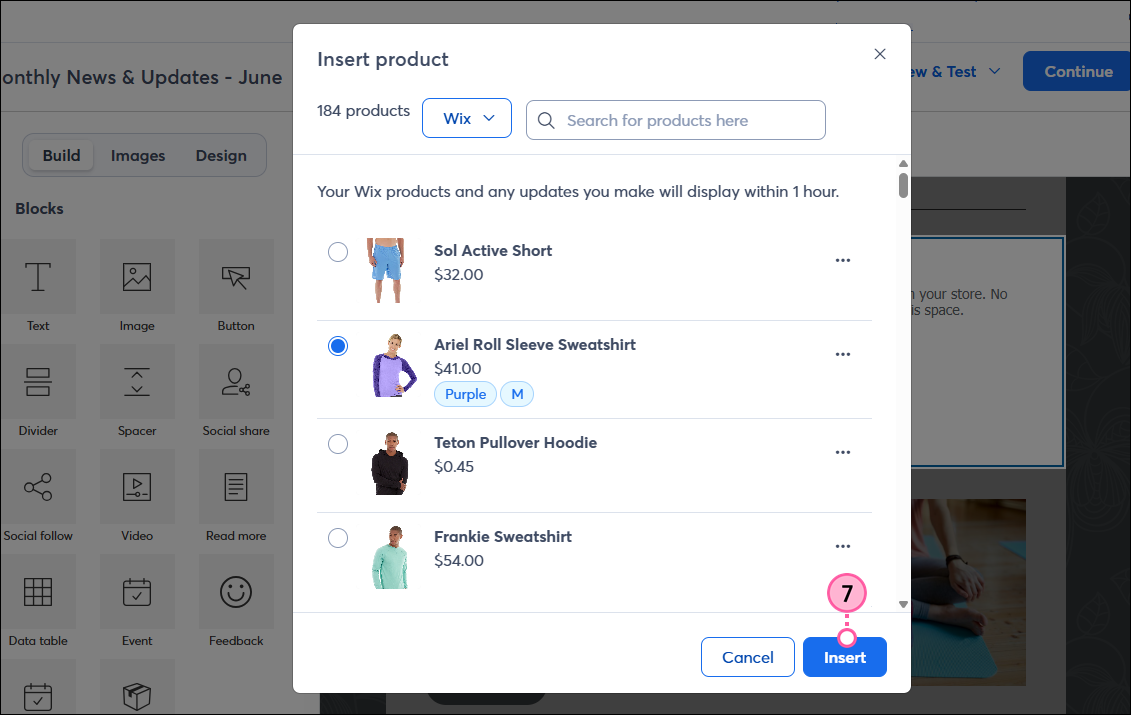
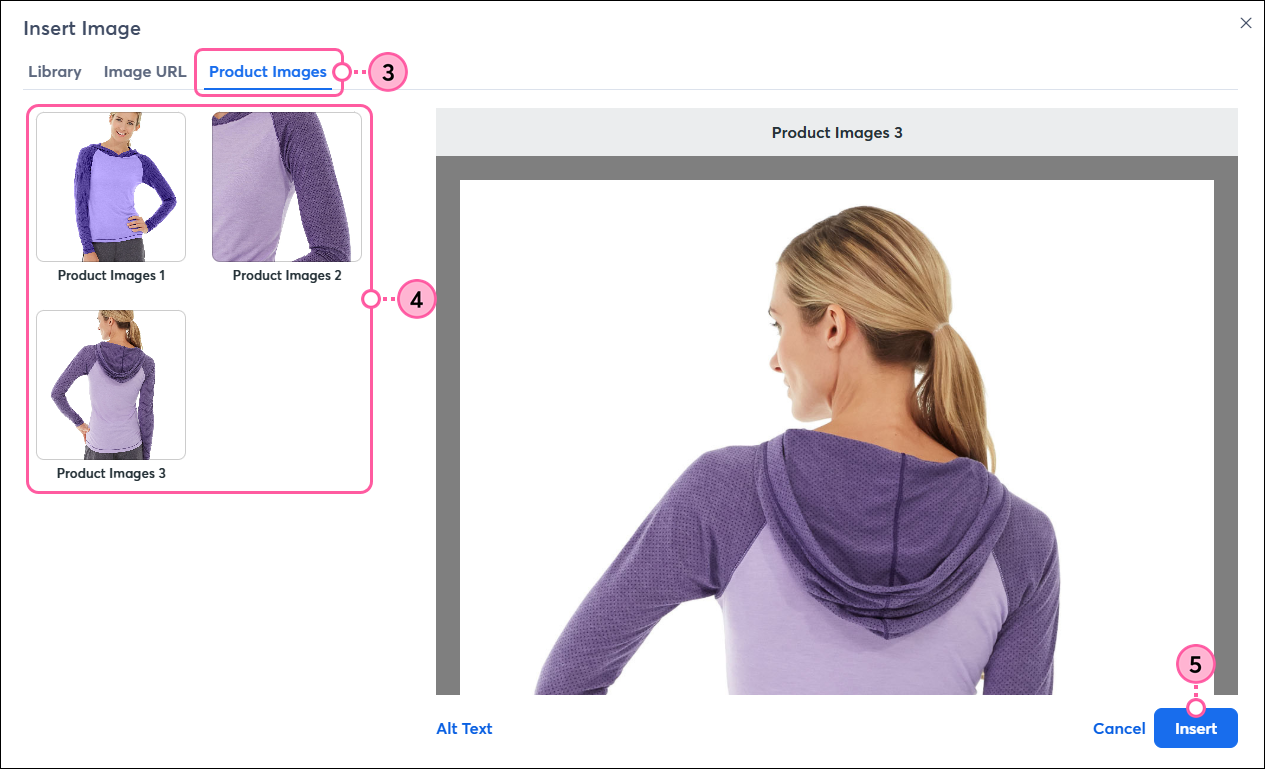
If you have multiple platforms connected to Constant Contact, you can choose to insert a product from any of your stores. When inserting products from a Shopify, BigCommerce, Squarespace, Square, or Wix store, you have the additional ability to include variations of the product.


Add a Product block to an email

  1. Drag the Product block into your template. Use the guidelines to help you find the right spot. 

    Insert Product Block Into Email
     
  2. Click on the block and then click Insert product.

    Product block toolbar and Insert Product button

  3. Make sure the appropriate store is selected from the drop-down.
  4. Select the product you want to add to the email. If you've just connected your store, it may take up to an hour for your products and any updates you make to display.
    Note: For Squarespace stores, only physical products are available to insert.
  5. (Optional) Click the three dots and select Manage variant to choose a specific variation of the product—such as a certain color or size. If you don't have variants, skip to step 7.

    Store dropdown, select product, and Manage Variants button
     
  6. Select the product variations you want to insert and then click the Update button.

    Manage Product Variations
     
  7. Click the Insert button.
    Note: Your variant's thumbnails may not appear in your email the same way you have them set in your integrated ecommerce account. If needed, you can manually change the product image that displays in your email.

    Product and variants selected, Insert button

  8. You can customize the product image, name, description, and button as you like. When you're finished, simply click outside of the block to continue editing the rest of your email.

    Product inserted, Done button


When you're finished customizing your email, click the Continue button to choose the contact lists you want to send to and when. You can select from your existing lists or use one of the segmented contact lists that were automatically created when you connected your store to Constant Contact.


Choose your product thumbnail

  1. Click on the product image in your Product block.
  2. From the panel on the left, click on the image to change it. 


  3. Click the Product Images tab.
  4. Choose an image to use for the product thumbnail in your email. You can also select an image from your Library or from an image URL.
  5. Click Insert.


Questions?

Ask the Community

Did this article answer your question?


Constant Contact Logo

Copyright © 2026 · All Rights Reserved · Constant Contact · Privacy Center