Email and Digital Marketing
How can we help you?
Search our help articles, video tutorials, and quickstart guides

You've got this. You've got us. Search our Knowledge Base to quickly find answers to your questions.

Save your brand assets in your Starter Email account

Article: 000055294
Updated: September 15, 2026

Add your organization’s logo, colors, fonts, images, and voice to the BrandKit to easily apply them to your emails

Exclamation point iconNote: This article pertains to Starter Email customers. If you’re in our Lite, Standard, or Premium plans, please refer to this article instead.


Save time and make sure all your campaigns are consistent and professional by adding your brand colors, logo, fonts, voice, images, and website links to the BrandKit in your account. If you have a website, you can quickly scan it to import your brand assets, or you can add them manually.

With your colors added to the BrandKit, you can create a theme that's applied to any generated templates when creating a new email. Additionally, your logo will automatically appear in newly created emails, and your colors and images will be readily available for choosing when customizing the design.
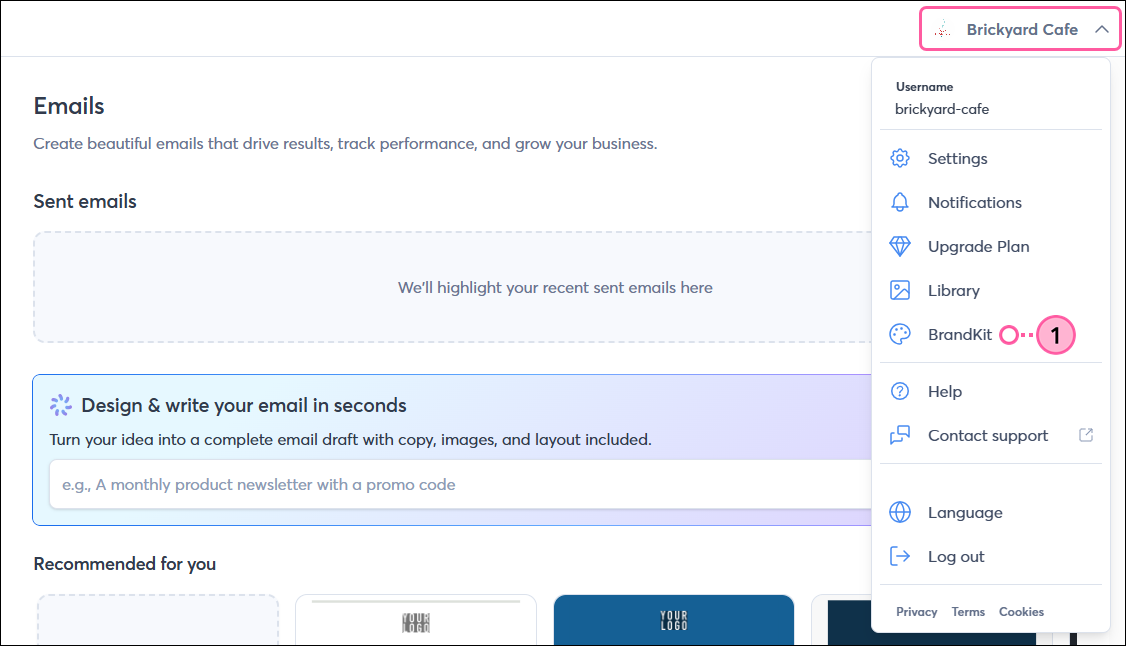
 

  1. Click the profile name in the upper-right and select BrandKit from the drop-down.

    Profile name drop-down with BrandKit option selected

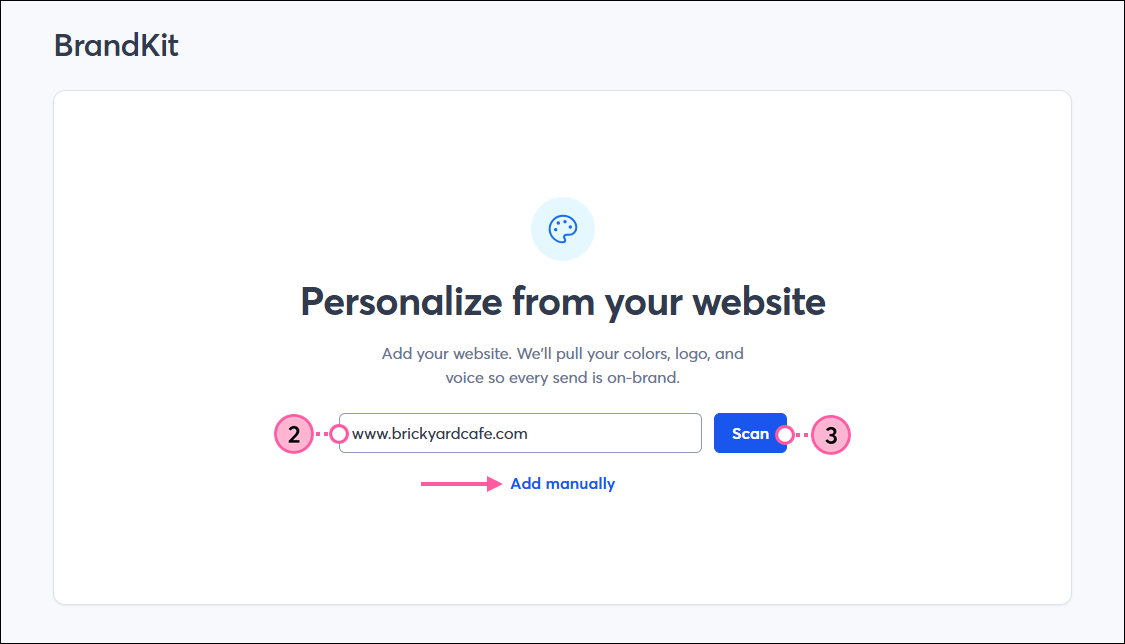
  2. Enter your website's URL into the field. Alternatively, you can click the Add manually link to add your brand assets yourself.
  3. Click the Scan button.

    BrandKit page with website URL field, Save button, and Add Manually link

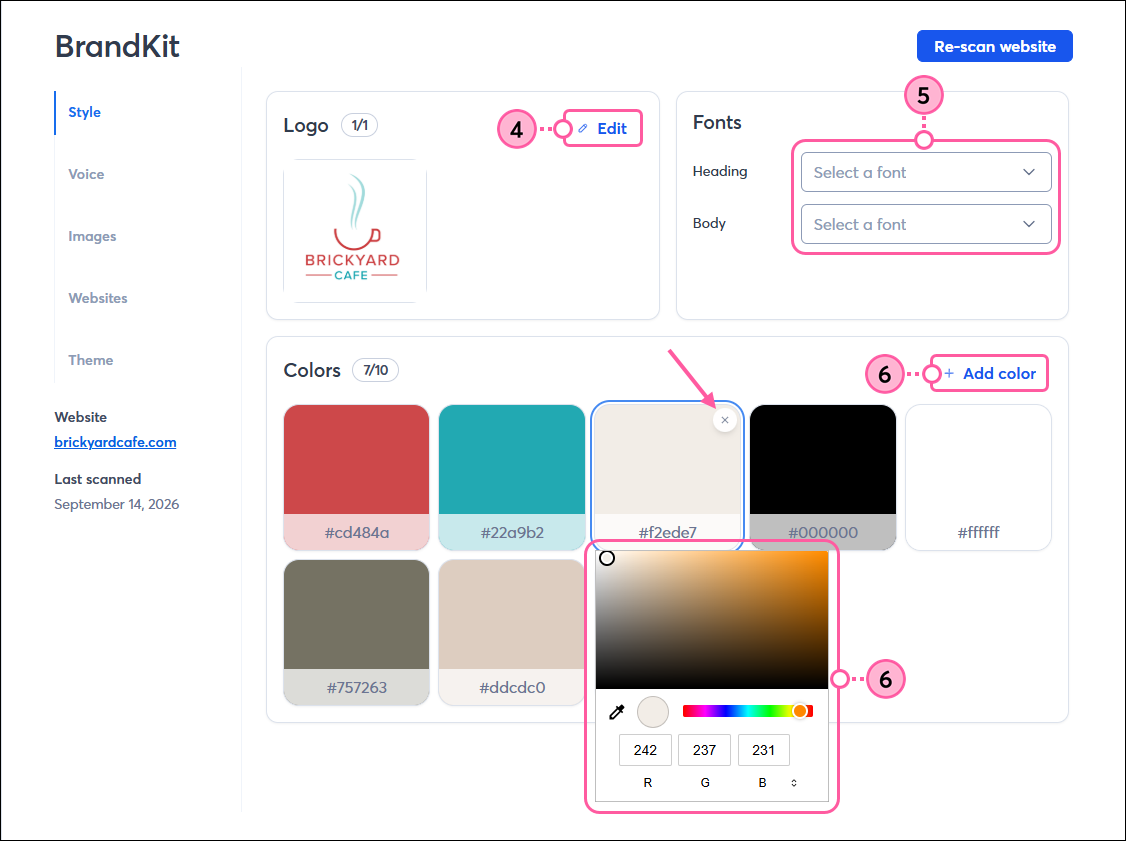
  4. On the Style tab, your logo, colors, and fonts are automatically pulled from your website and added to your BrandKit. In the Logo section, you can click Edit to choose a different logo. 
  5. In the Fonts section, you can use the drop-downs to select or change the default Heading and Body fonts.
  6. In the Colors section, you can click + Add color to enter more colors manually, click on an existing color swatch to edit it, or click the X in the upper-right of a color to remove it from the BrandKit.

    BrandKit, Style tab, Logo section with Edit link, Fonts section with Heading and Body text drop-downs, and Colors section with Add Color link, color palette expanded, and X to remove

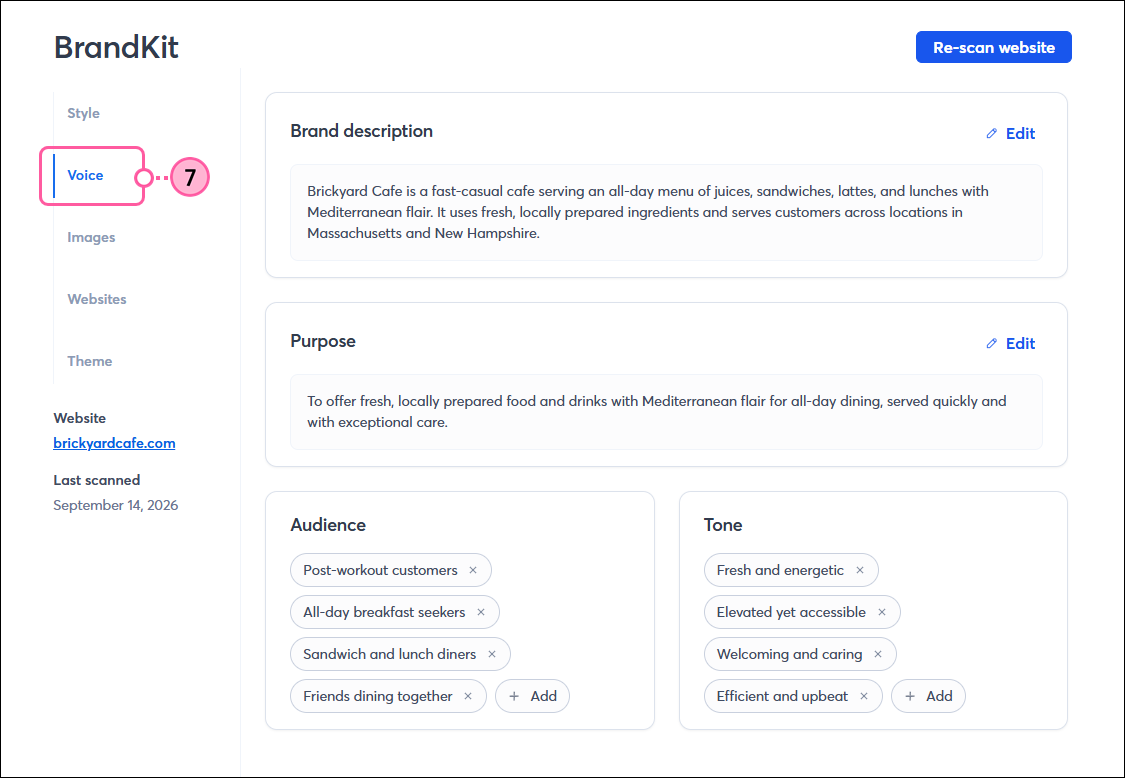
  7. Click the Voice tab to review and edit your brand description, purpose, audience, and tone as needed.

    BrandKit Voice tab with Brand Description and Purpose fields generated, and Audience and Tone sections

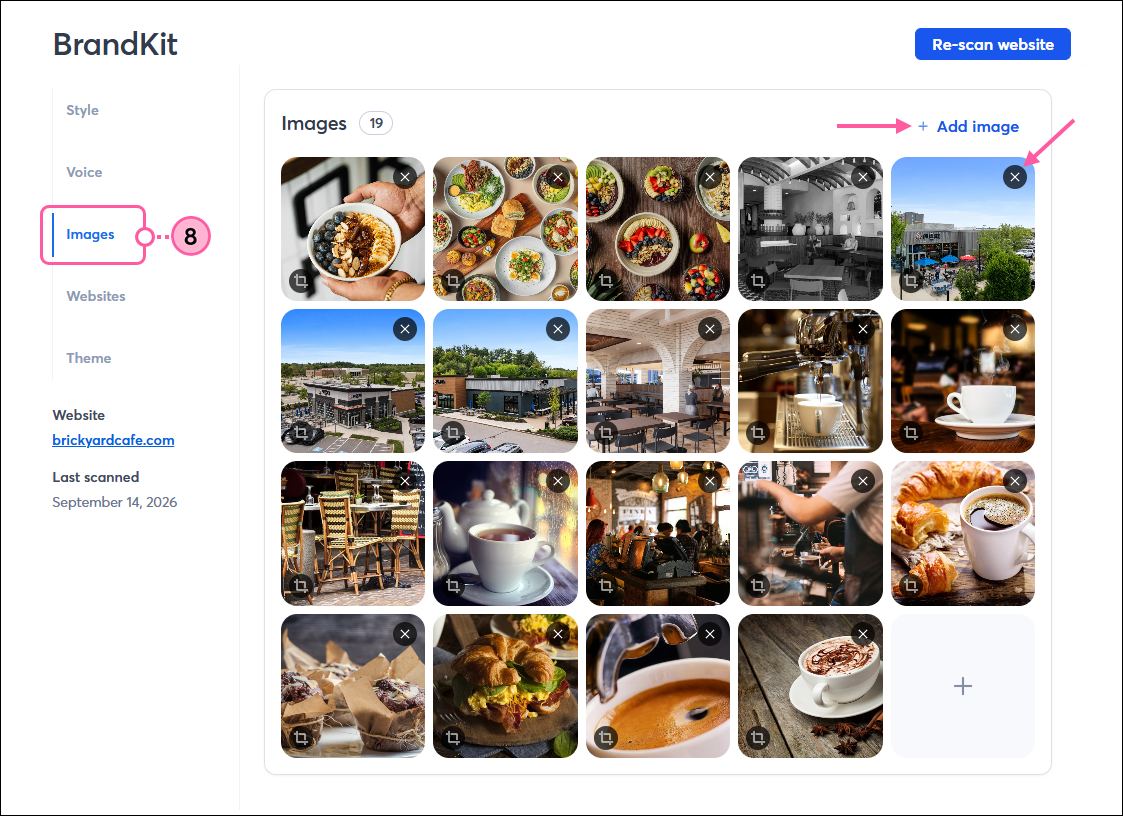
  8. Click the Images tab to review the images pulled from your website. You can add more by clicking +Add image, or remove any by clicking the X in the upper-right corner of an image. The images are automatically added to your Library and can be easily inserted into your emails later.

    BrandKit Images tab with Add Image link and X to remove an image

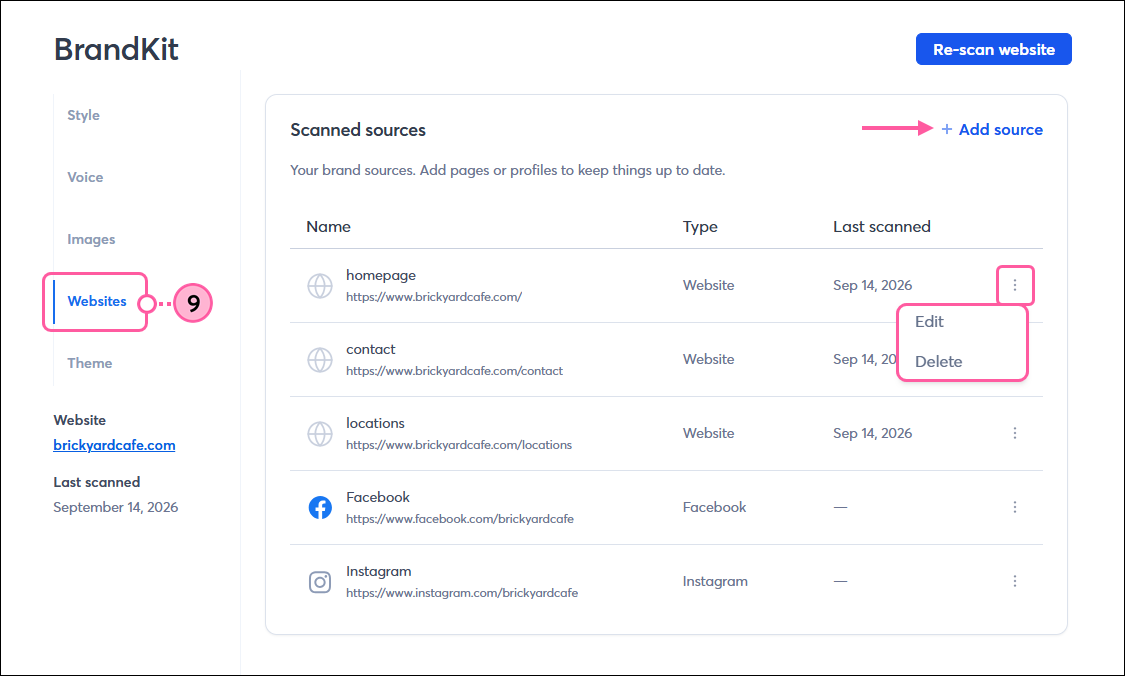
  9. Click the Websites tab to review the links pulled from your website. Click +Add source to add another link for your organization, or click the three dots to the right of an existing link to edit or delete it from the list.

    BrandKit Websites tab with list of website links, Add Source link, and More drop-down with Edit and Delete options

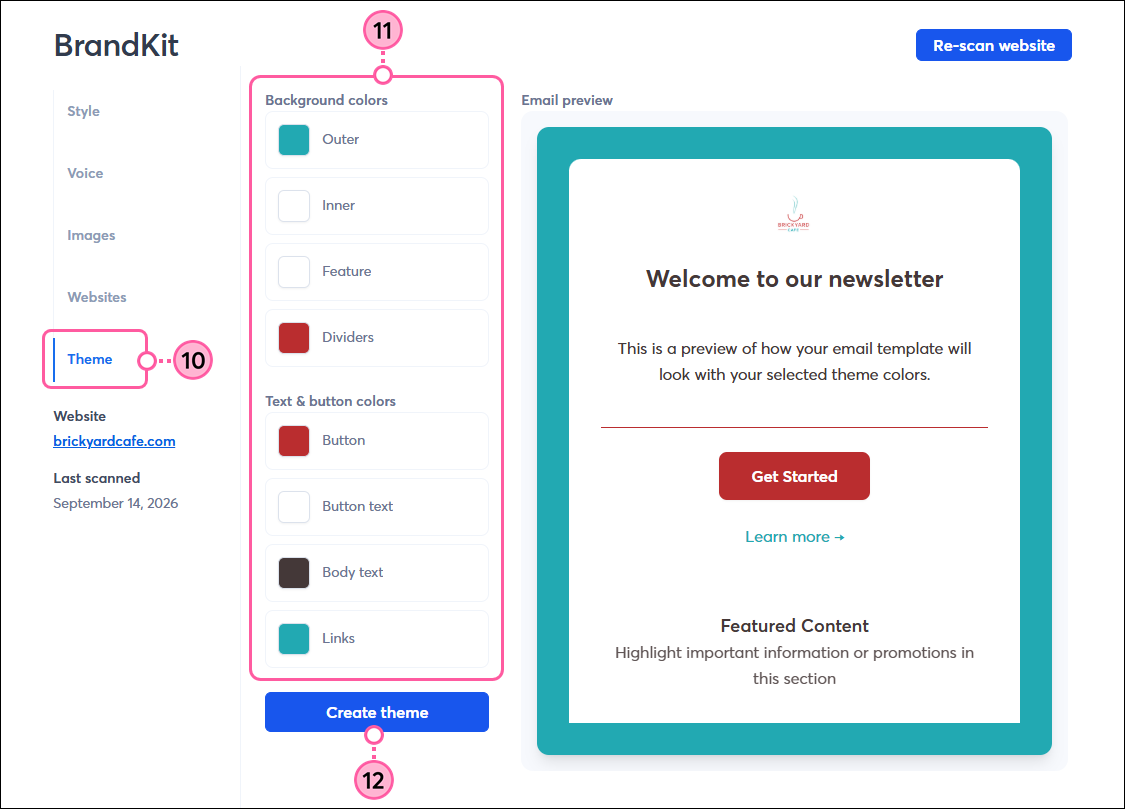
  10. Click the Theme tab to create a template theme with your brand colors.
  11. Click on the color swatch next to each template element to select a color. Your BrandKit colors are at the bottom of the palette for easy access, but you can also enter a specific hex value. 
  12. Click Create theme when you’re finished. You can come back here and make changes to your template theme at any time.

    BrandKit Theme tab, template element color swatches, and Create Theme button


Questions?

Ask the Community

Did this article answer your question?


Constant Contact Logo

Copyright © 2026 · All Rights Reserved · Constant Contact · Privacy Center