Email and Digital Marketing
How can we help you?
Search our help articles, video tutorials, and quickstart guides

You've got this. You've got us. Search our Knowledge Base to quickly find answers to your questions.

Import contacts from a Google Sheet

Article: 000054636
Updated: August 4, 2026

Add or import a list of new contact email addresses from a Google Sheet, or bulk-update existing contacts with new information

Exclamation Point IconImportant: This feature is in not available in all accounts and is in the process of being released to customers.


Light Bulb IconDid you know? If you don't want to connect your Google account at this time, you can convert a Google Sheet into an Excel file or save it as a CSV file before importing it into your Constant Contact account.


Contacts stored in a Google Sheet can be imported as long as you connect your Google account to your Constant Contact account. If you have multiple Google Sheets, each sheet must be imported separately.

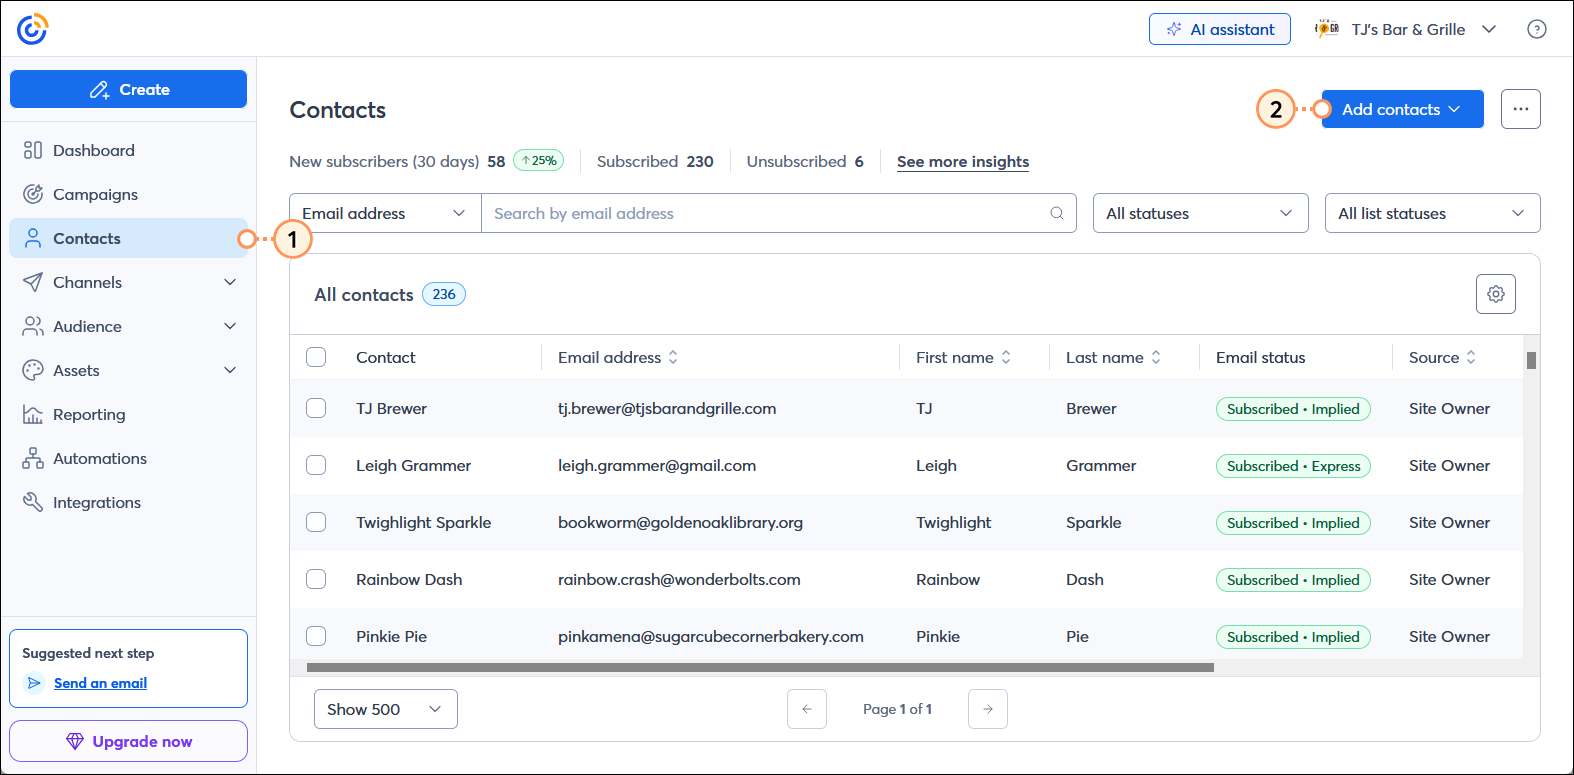
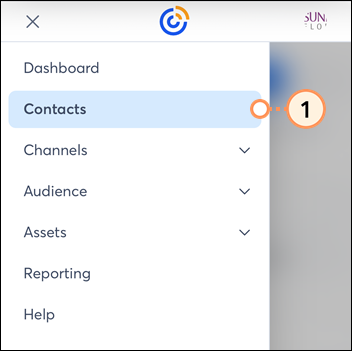
  1. In the left-hand menu, click the Contacts option.
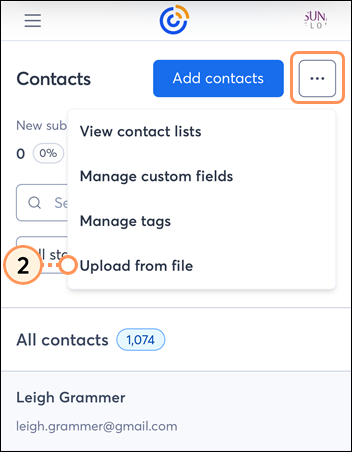
  2. From the Contacts page, click Add contacts > Upload from file.

    Left-hand menu with Contacts option selected, Contacts page with Add contacts drop-down menu expanded and upload from file option selected

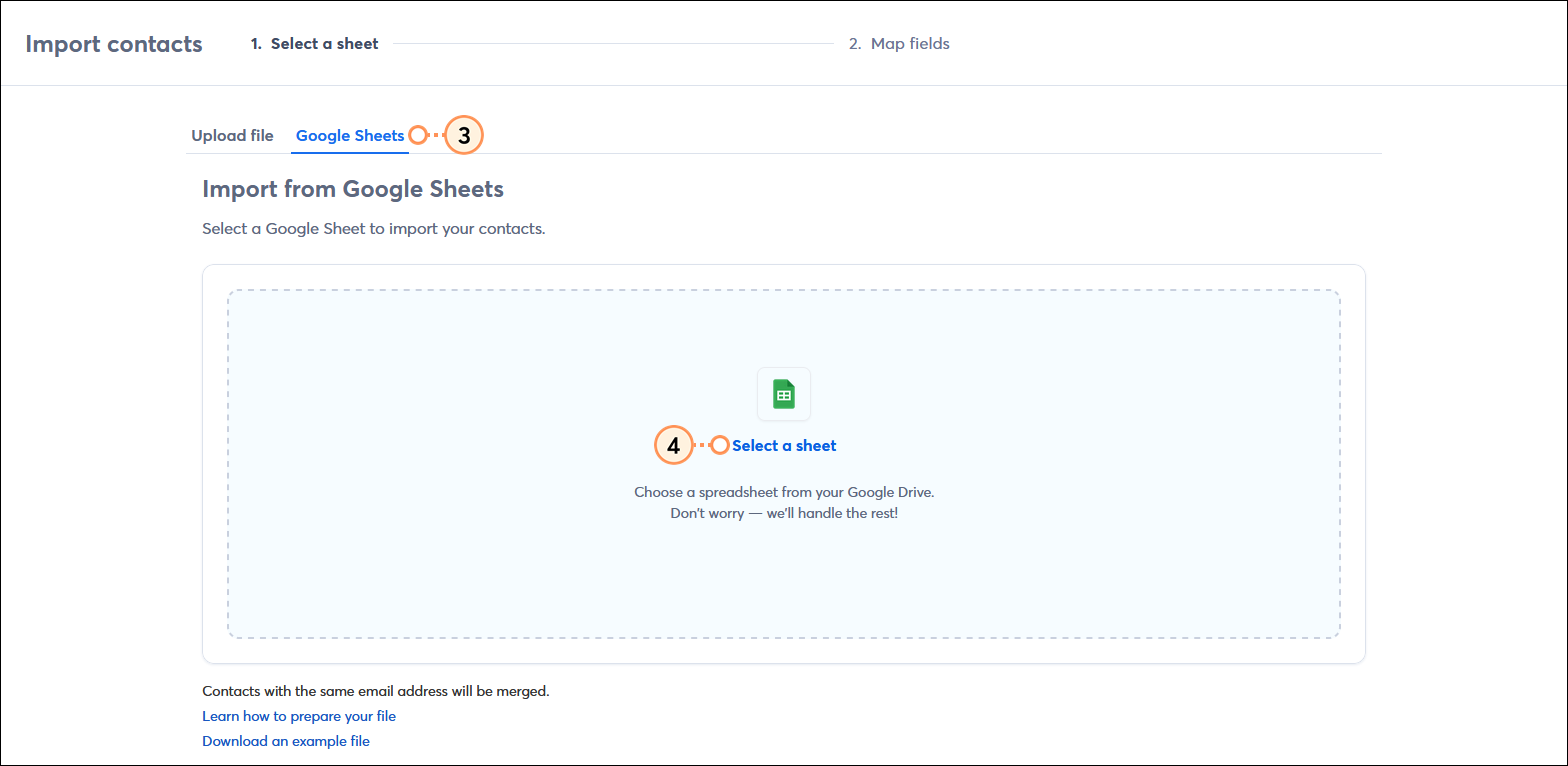
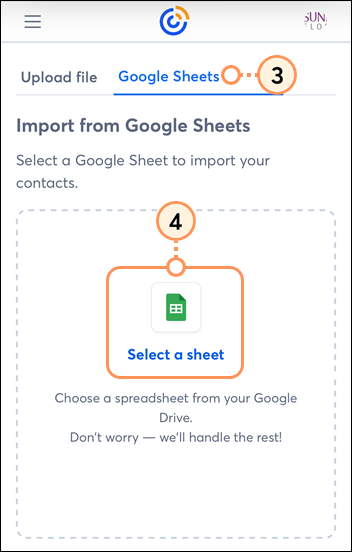
  3. Click the Google Sheets tab.
  4. Click "Select a sheet" to view a list of sheets in your Google Drive.
    Note: If you haven't already connected your Google account, click the Connect button and follow these steps.

    Import contacts page with Google sheets tab selected and Select a sheet option.

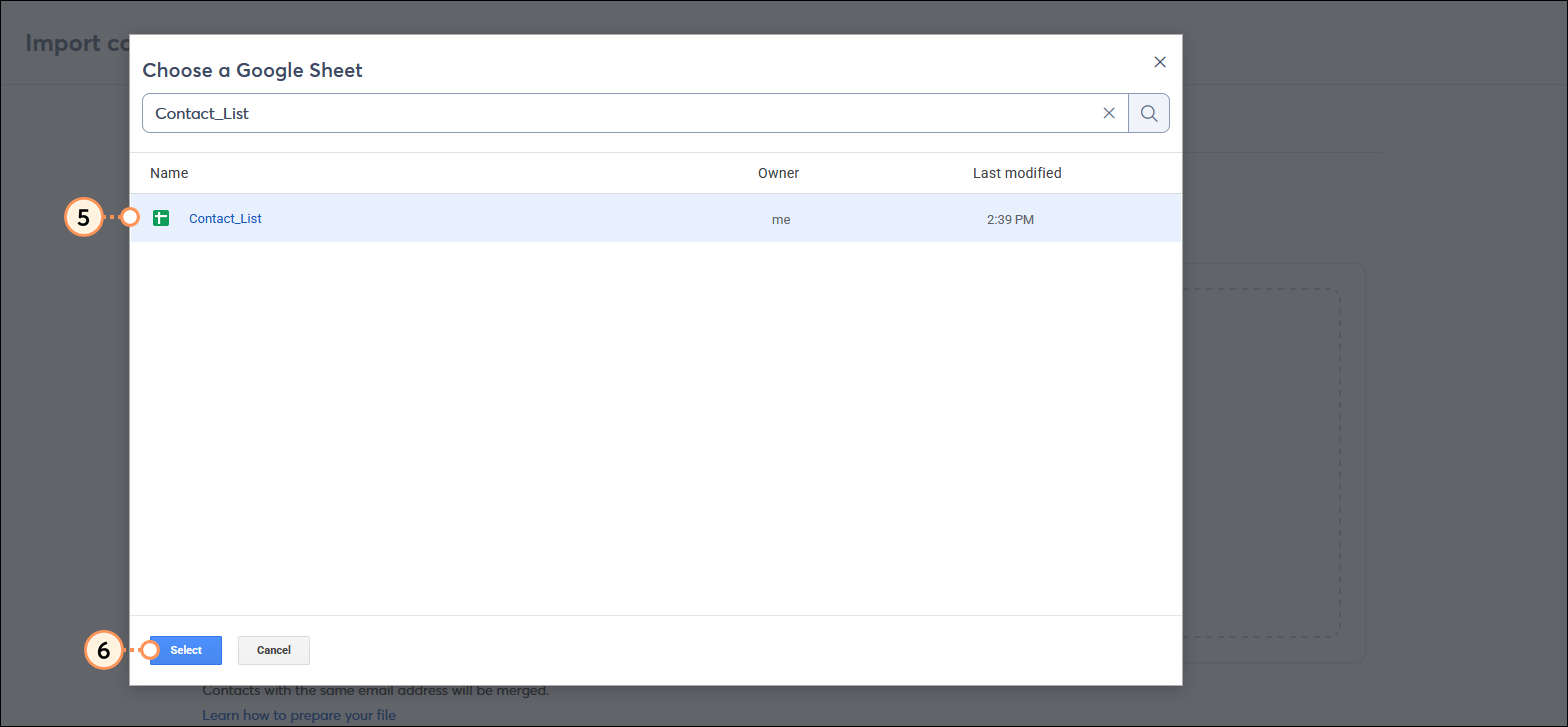
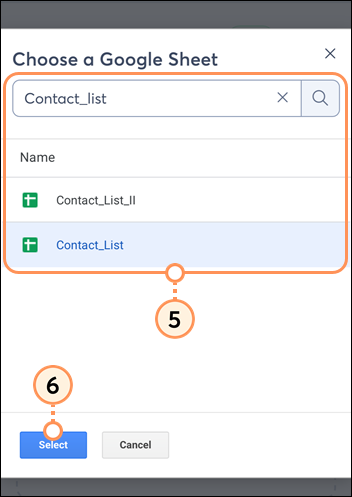
  5. Select the Google Sheet you want to import. If you have lots of sheets, use the Search field to help narrow your results.
  6. Click the Select button.

    Choose a Google Sheet overlay with Search field and search results, Google Sheet selected, and Select button

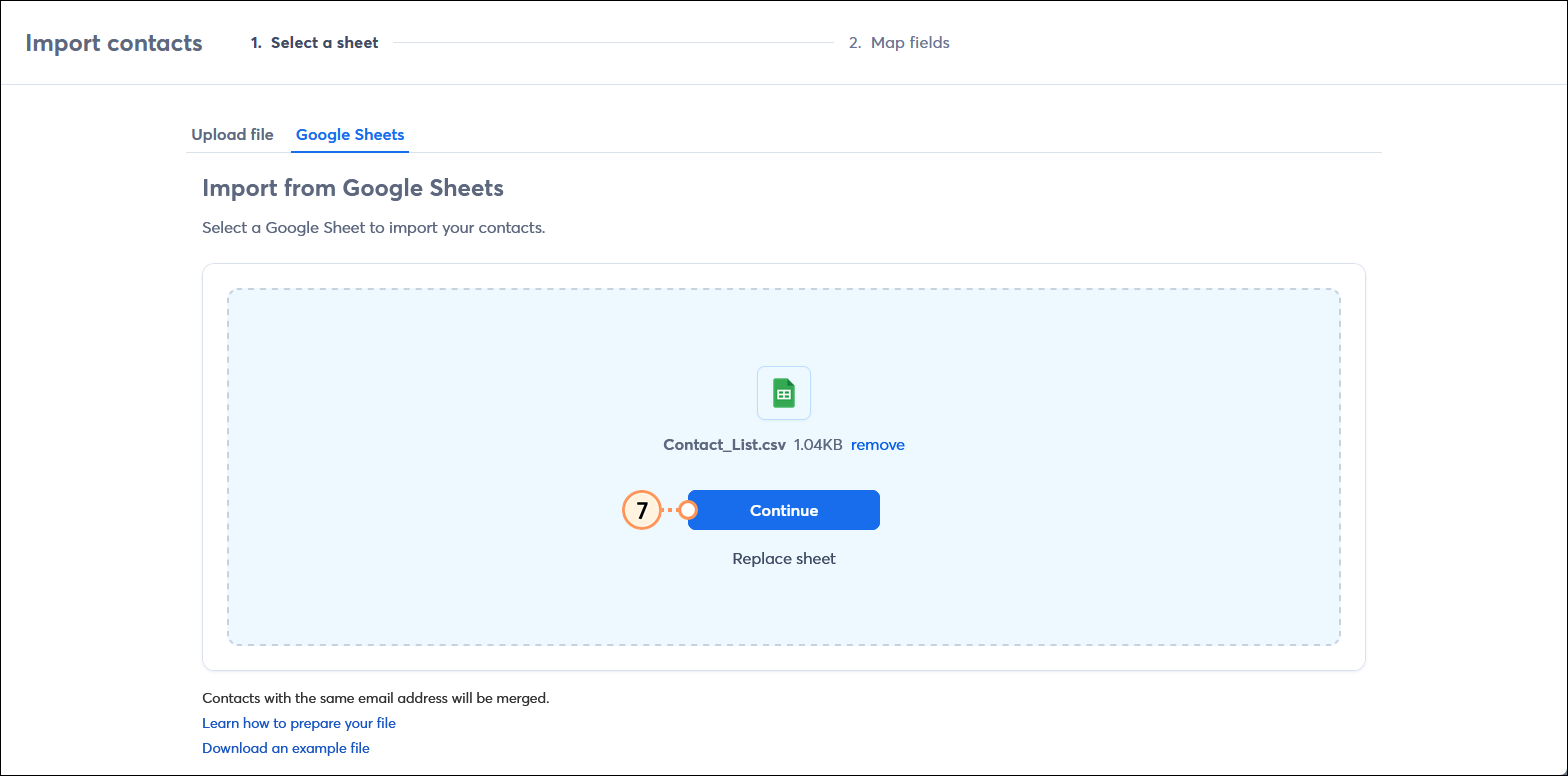
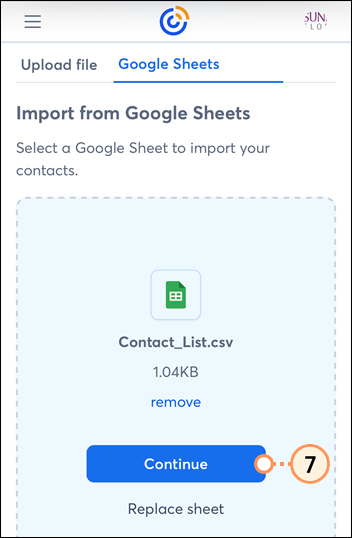
  7. Review your selection and click the Continue button.

    Import contacts page with Google Sheets tab selected, Google Sheet selected, and Continue button

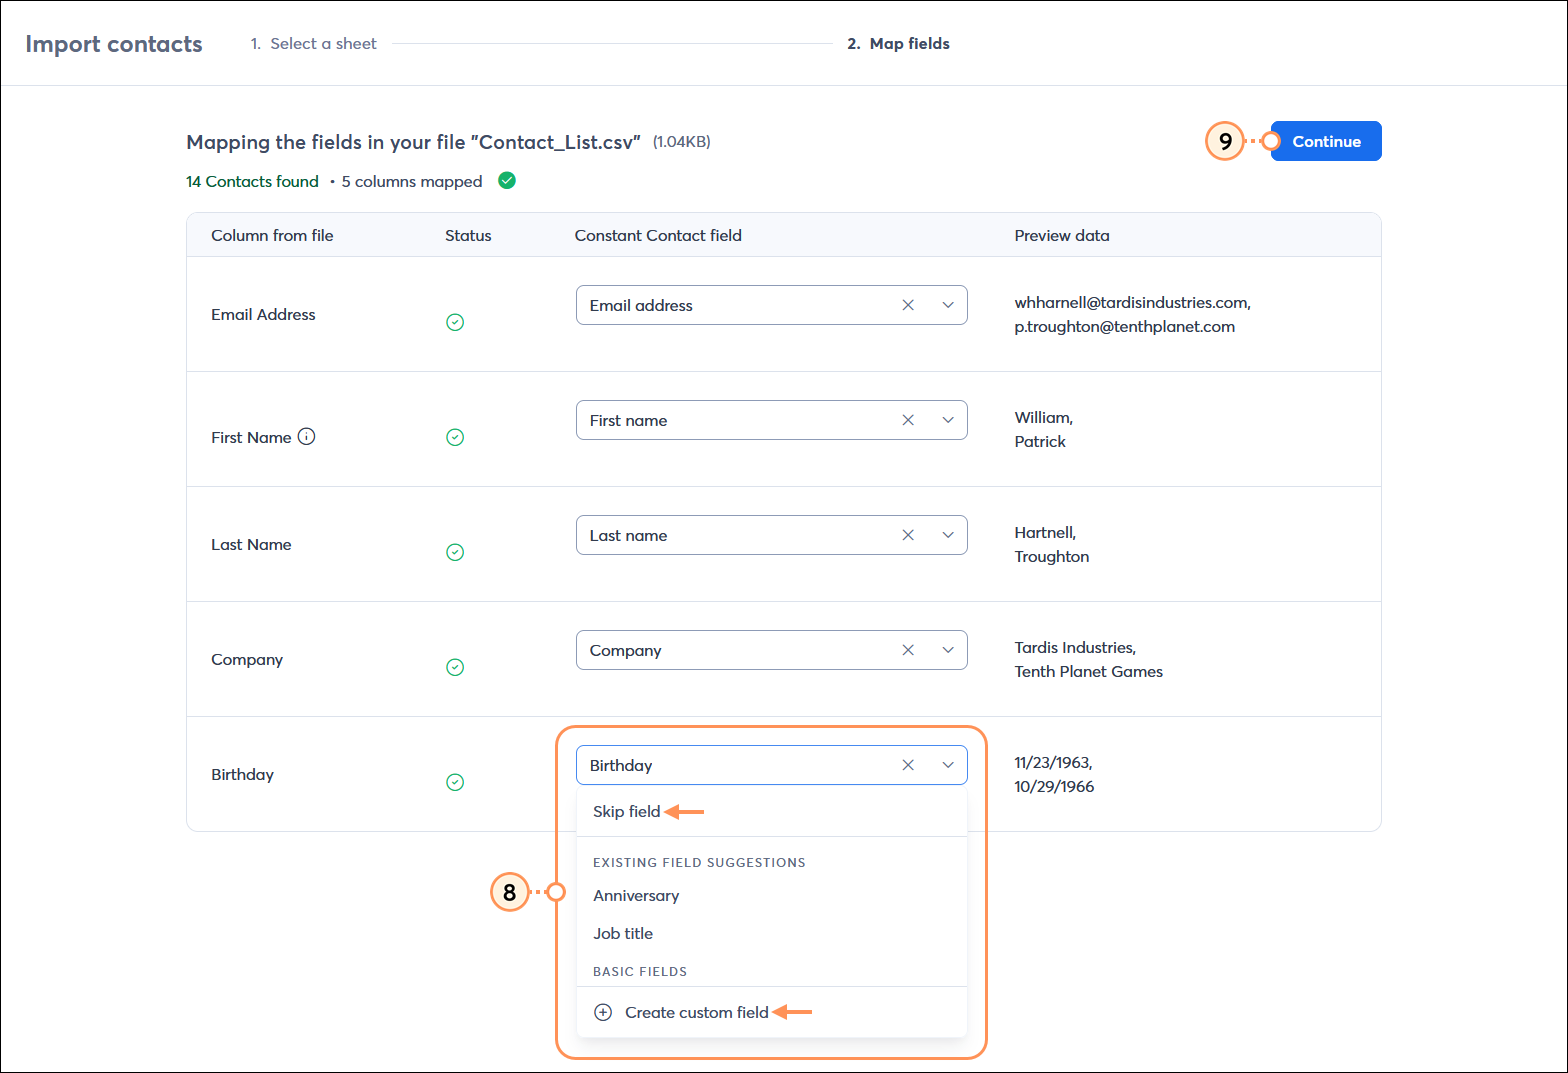
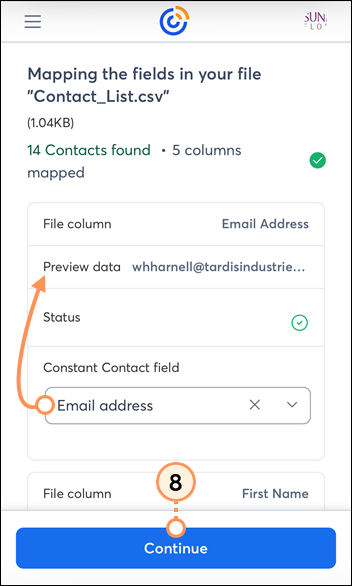
  8. We have a set of standard contact headings that are automatically matched to your spreadsheet using AI. Review your file columns and make sure the headings are correct. Only the first two contacts from your spreadsheet are displayed to show you what kind of data is in each column.
  • If your file column heading is missing a name or if the heading doesn't match the column contents, choose the correct file heading from the drop-down menu.
  • If your file has headings that don't match the standard fields recognizable in Constant Contact, we suggest them for you using AI. If you want to change the suggested field name, click the +Create custom field option from the drop-down menu. 
    Note: Please don't recreate a standard column heading using a custom field. Doing so can cause issues when you try to use it later.
    Important: It's a violation of our Terms of Service to store Sensitive Information in a custom field. For additional information on Sensitive Information, please see our Terms of Service.
  • Select the Skip field option from the drop-down menu if you don't want to import a column of data from your spreadsheet.
  • File formatting errors need to be corrected before you can import your file. Just hit the Back button at the top of the page to re-import your corrected spreadsheet.
    Note: If there are errors with the formatting of an email address, SMS phone number, or SMS consent date for a specific contact, they can be corrected after the file is imported.
  1. Click the Continue button.

    Import contacts page with contact field options and contact field menu expanded with Skip field and Create custom field options, and Continue button

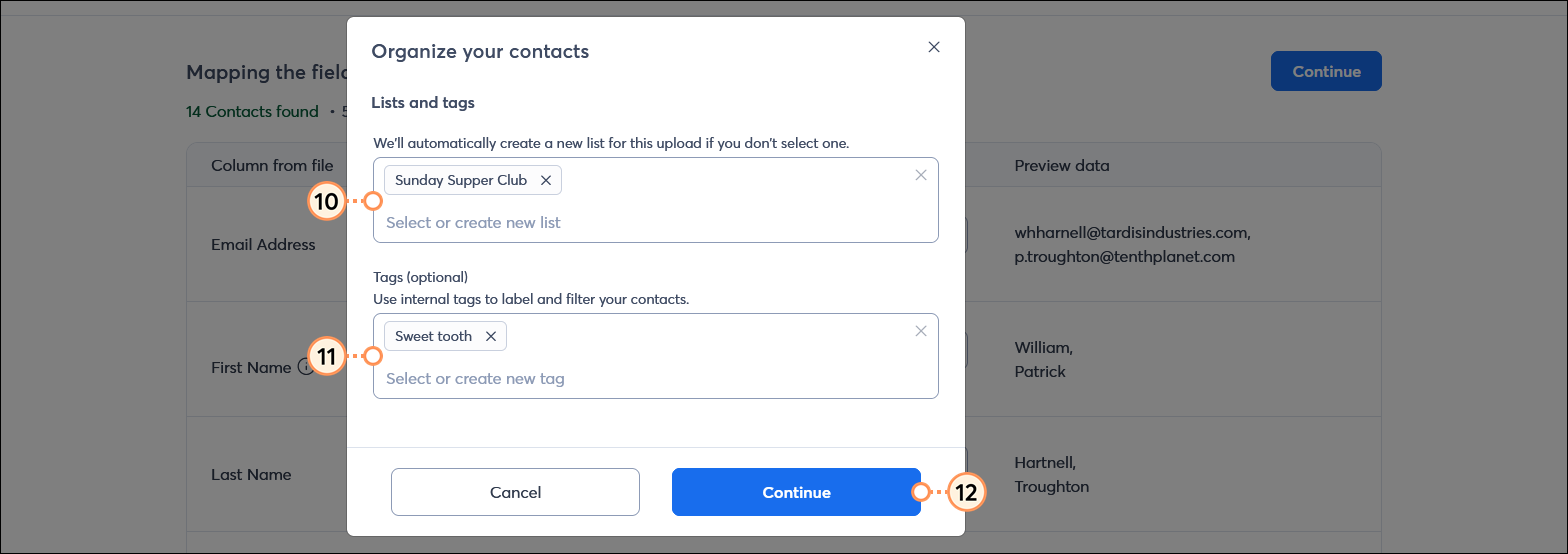
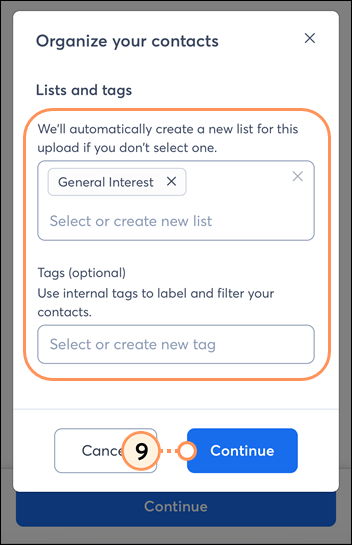
  2. (Optional) Choose the list you want to add your contacts to, or create a new list. You can create and select multiple lists to suit your needs. If you don't select a list, it's totally fine! We'll automatically generate a list for you, and you can rename it later.
  3. (Optional) Select a tag or create a new tag to apply to your contacts.
    Note: Additional tags can be added and managed after your import is complete.
  4. Click the Continue button.

    Organize your contacts overlay with Lists field, Tags (optional) field, and Continue button

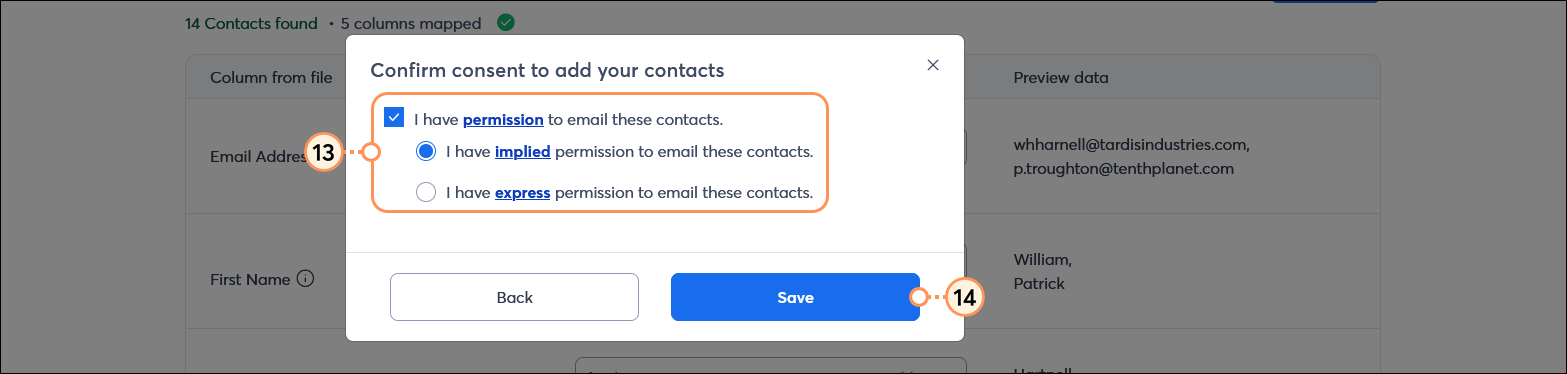
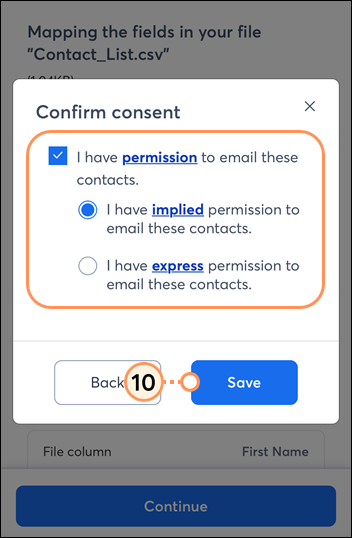
  5. Confirm that you have consent to email these contacts. If you've enabled Advanced Email Permissions for your account, select the type of permission you have to email your new contacts. (This is a great option for those affected by CASL and the GDPR.)
  6. Click theSave button.

    Confirm consent to add your contacts overlay with I have permission to email these contacts option selected, implied and epress permission options, and Save button

If the file you uploaded held a large number of contacts, you're taken directly to your Contacts Activity page to check the progress of the import. If your contacts have any errors that need to be corrected, you can resolve them from the Contacts Activity page. Otherwise, you see a message at the top of the screen indicating that your import was successful. Once your contacts are imported, you're ready to start segmenting them into meaningful audiences to send them an email or an SMS message.


Questions?

Ask the Community

Did this article answer your question?


Constant Contact Logo

Copyright © 2026 · All Rights Reserved · Constant Contact · Privacy Center