| This article applies only to Agency Partners. For Direct accounts, please return to the help center home page and search for another article.. |
| Important: Any references to taxes are for informational purposes only and should not be considered tax advice. Please contact your tax advisor for additional assistance. |
| Tip: Are you looking for information about Constant Contact’s Email and Digital Marketing product? This article is for Constant Contact’s Lead Gen & CRM product. Head on over to the Email and Digital Marketing articles by clicking here. Not sure what the difference is? Read this article. |
Users:
| Administrators | ✓ | |
| Company Managers | ||
| Marketing Managers | ||
| Sales Managers | ||
| Salespersons | ||
| Jr. Salespersons |
This documentation is meant to show how to configure payout account, payment method, and other billing settings on your Agency Partner account.
This documentation does not contain information on the many aspects and inner workings of Lead Gen & CRM's billing system. Refer to other articles on other parts of the billing system, or contact Lead Gen & CRM Billing Support at crm-billing@constantcontact.com for more information.
If you are in an area where the Lead Gen & CRM platform supports it, you are able to bill your clients through our payment processor. All charges to your clients are 100% on behalf of your agency, and will be paid out to you directly. Your clients are billed in the same currency that Constant Contact bills you in.
In order to start billing your clients in Lead Gen & CRM, you will need to designate a bank account into which the payments from clients will be deposited.
Be aware that this connection is only for the payments from your Lead Gen & CRM clients, and this information will not be used to charge your agency. The payment method information for your agency to pay Constant Contact is entered as a separate step, even if you wish to use the same account.
To designate bank accounts and set up billing of your clients, you will need to integrate your Lead Gen & CRM account with our 3rd-party payment processor (Stripe). You will be establishing an account directly with Stripe for them to process those charges on your behalf.
To enter payout account information, do the following:
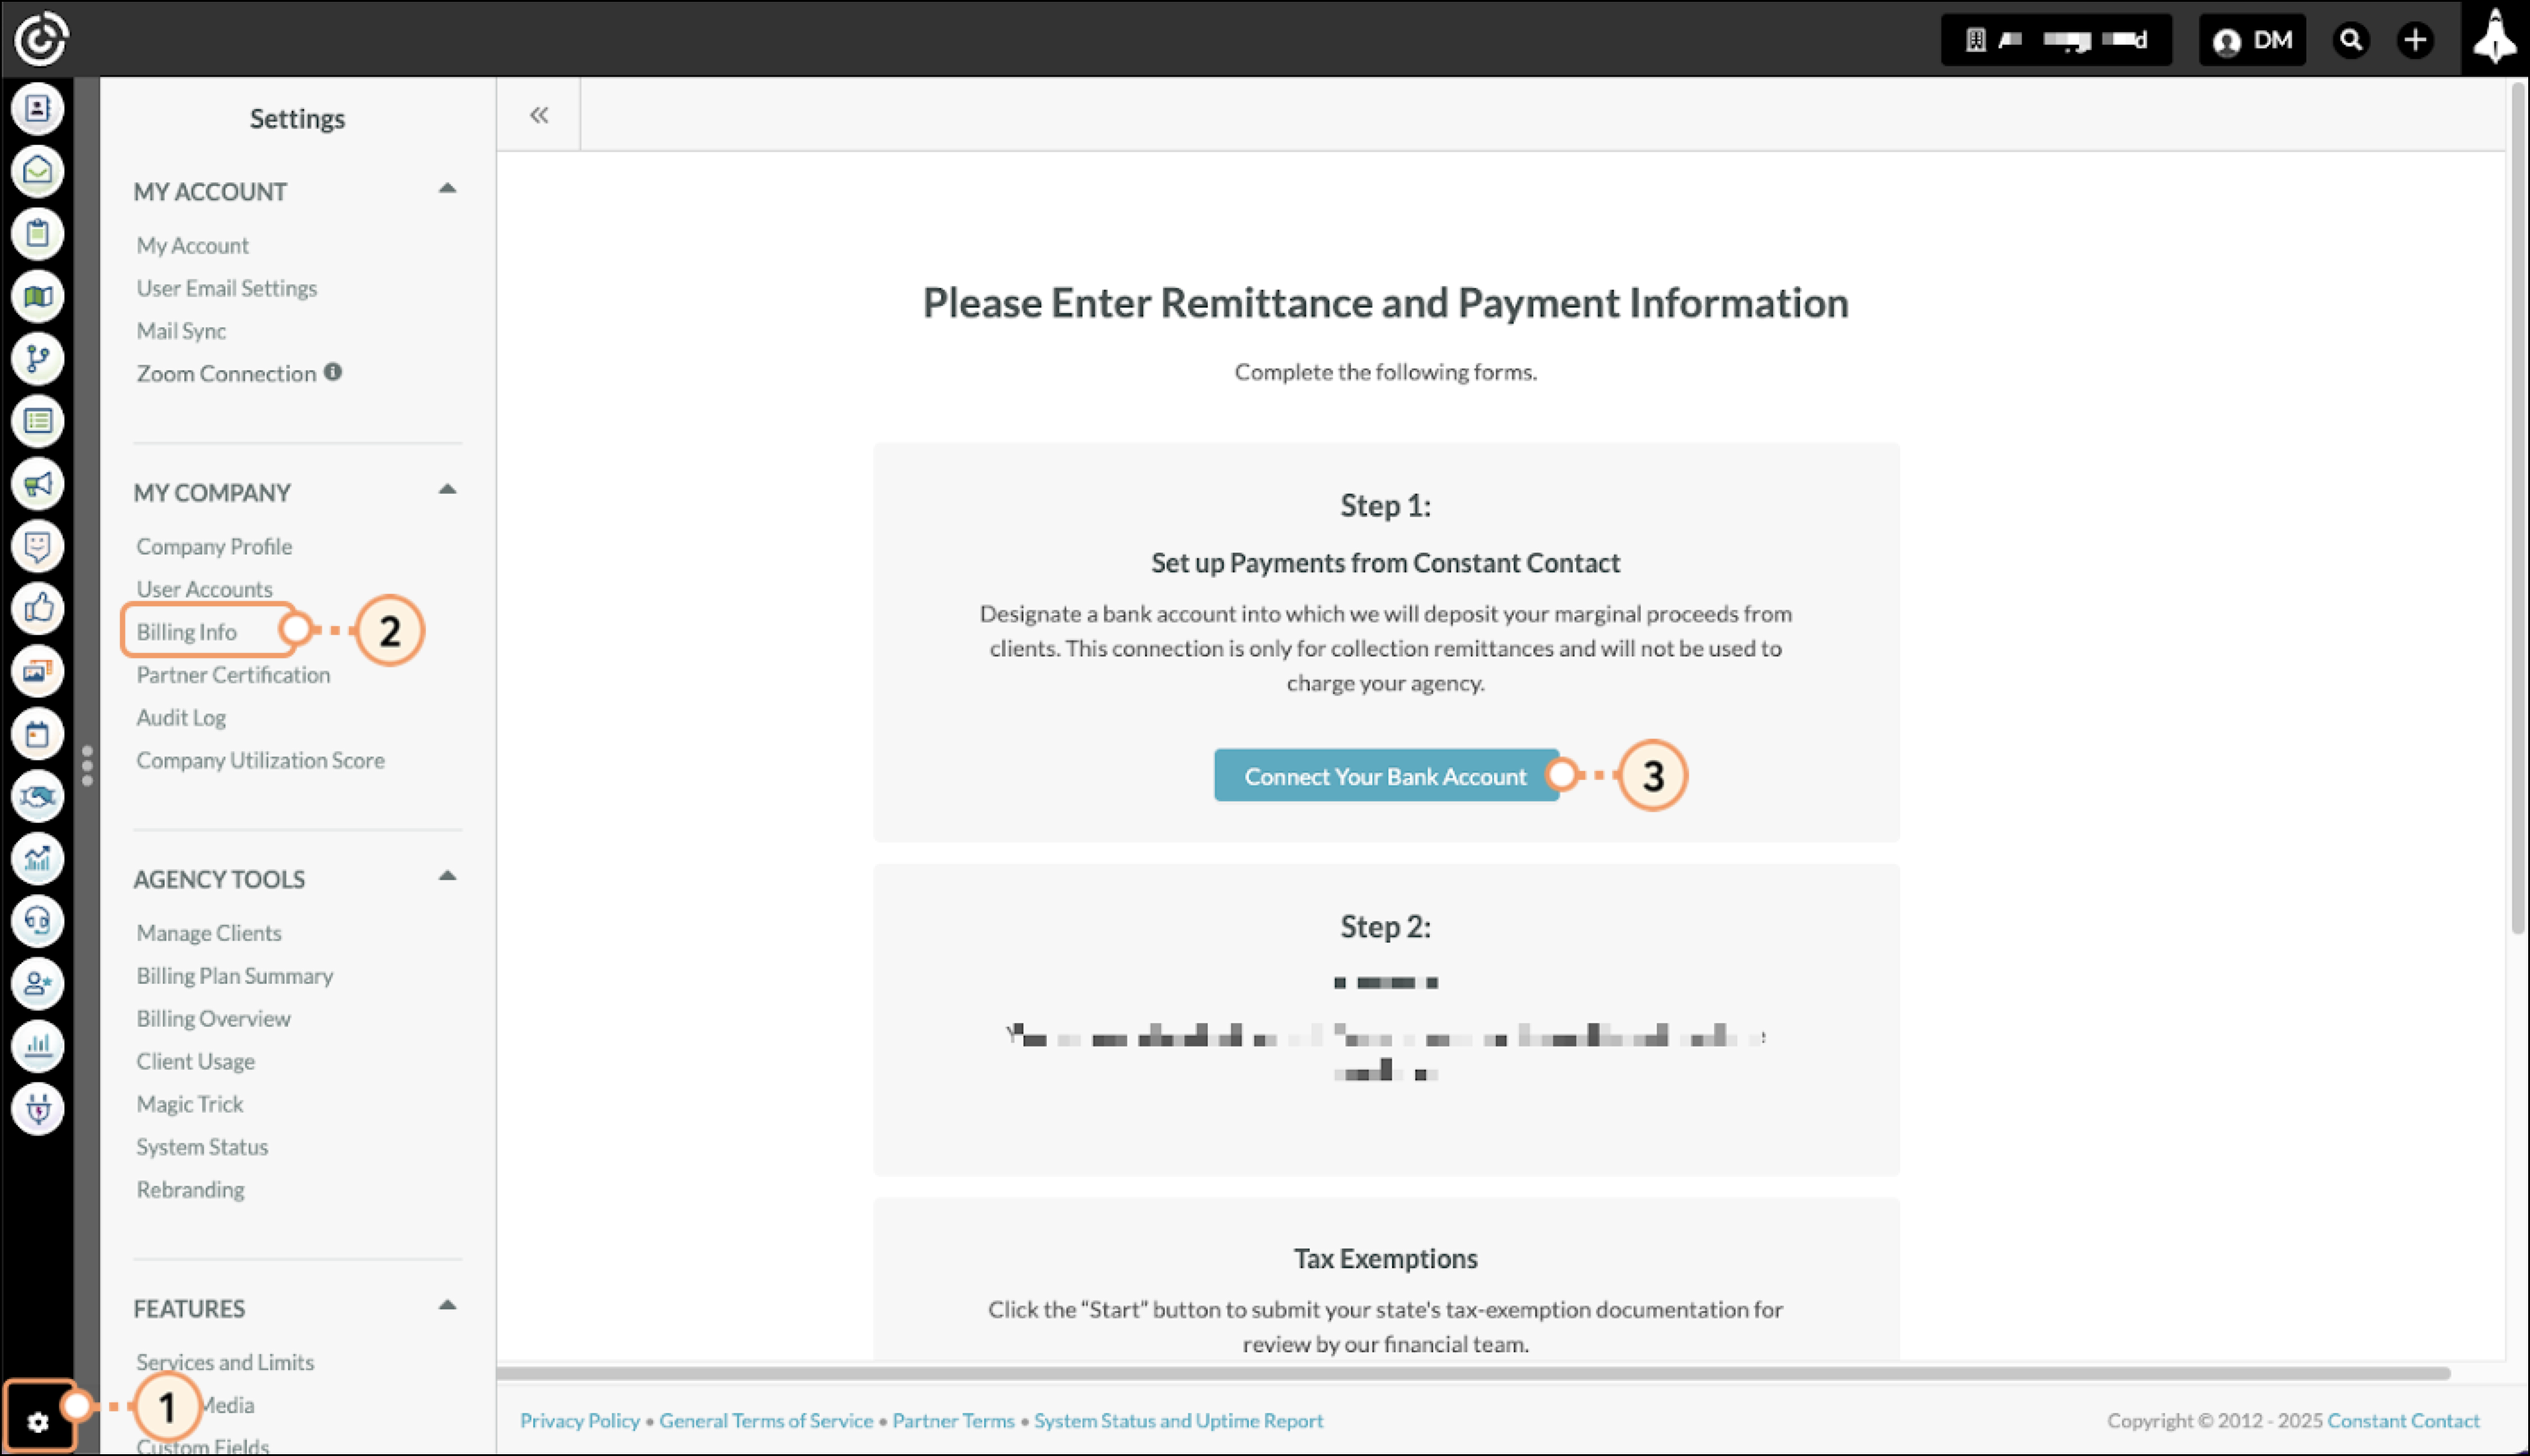
You will be prompted to create a Stripe account for your Lead Gen & CRM account. Make note of the credentials you use to create your Stripe account, in case you need to update this information in the future.
Complete the process to configure your Stripe connected account and enter your payout account. You can use either a bank account or debit card for payouts.
Refer to Stripe's external documentation for additional information on entering information into Stripe.
Note: If you go Back in your web browser, you will need to start the integration process from the beginning.
There may be a time when you need to edit your designated payout account. To edit previously saved bank account and payout information, do the following:
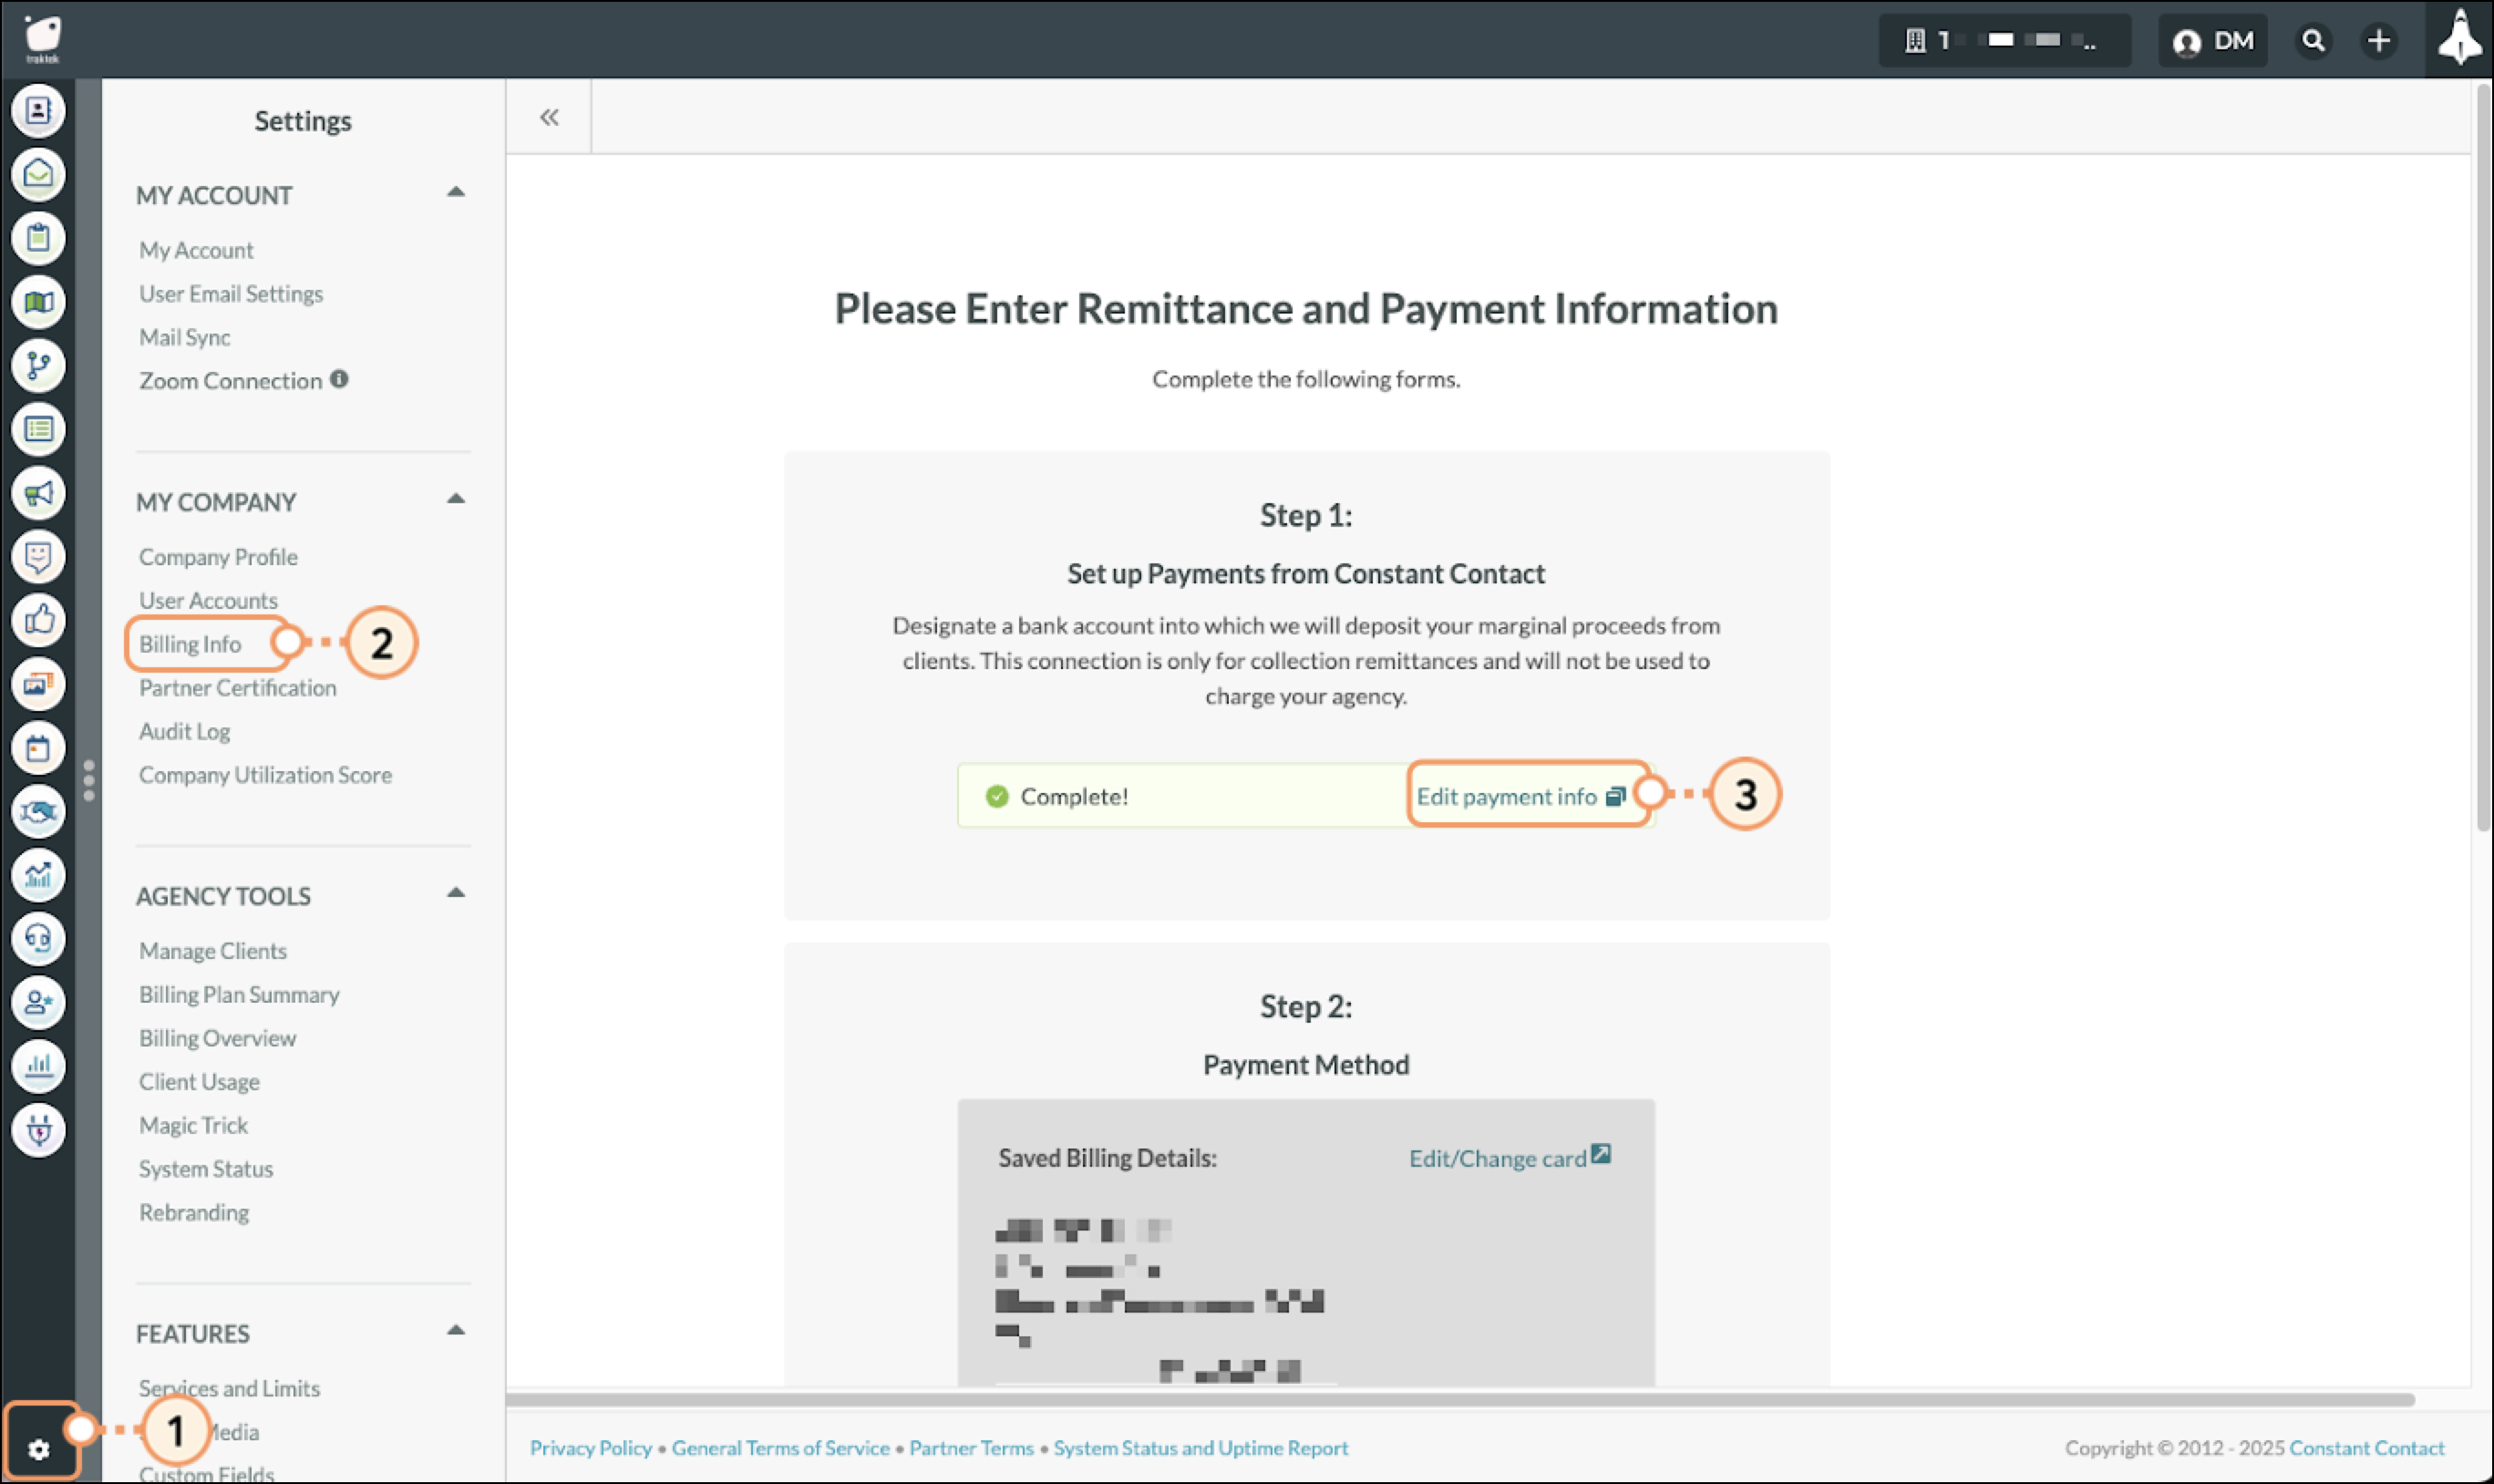
Complete the sign-on process, using the credentials and phone number you used when establishing your Stripe account, to access the Stripe website. Or use the appropriate link or contact Stripe Support if you cannot complete the sign-on (contact Constant Contact Billing Support at crm-billing@constantcontact.com for assistance if needed).
You can exit the Stripe browser tab once you have configured your information. Refer to Stripe's external documentation for additional information on editing information in Stripe.
You will need to enter valid payment method information in order to pay license and service fees to Constant Contact for Lead Gen & CRM.
Depending on your location, you may be able to enter payment information that utilizes either a bank account or a credit or debit card as a primary payment method. Lead Gen & CRM strongly recommends using the bank account payment method if available, as it typically does not require as many updates to the associated account or billing information.
You will have 30 days to enter your payment information once you have created an agency account in Lead Gen & CRM. If you do not enter payment information before your first payment is due, your account will be suspended until that information is provided.
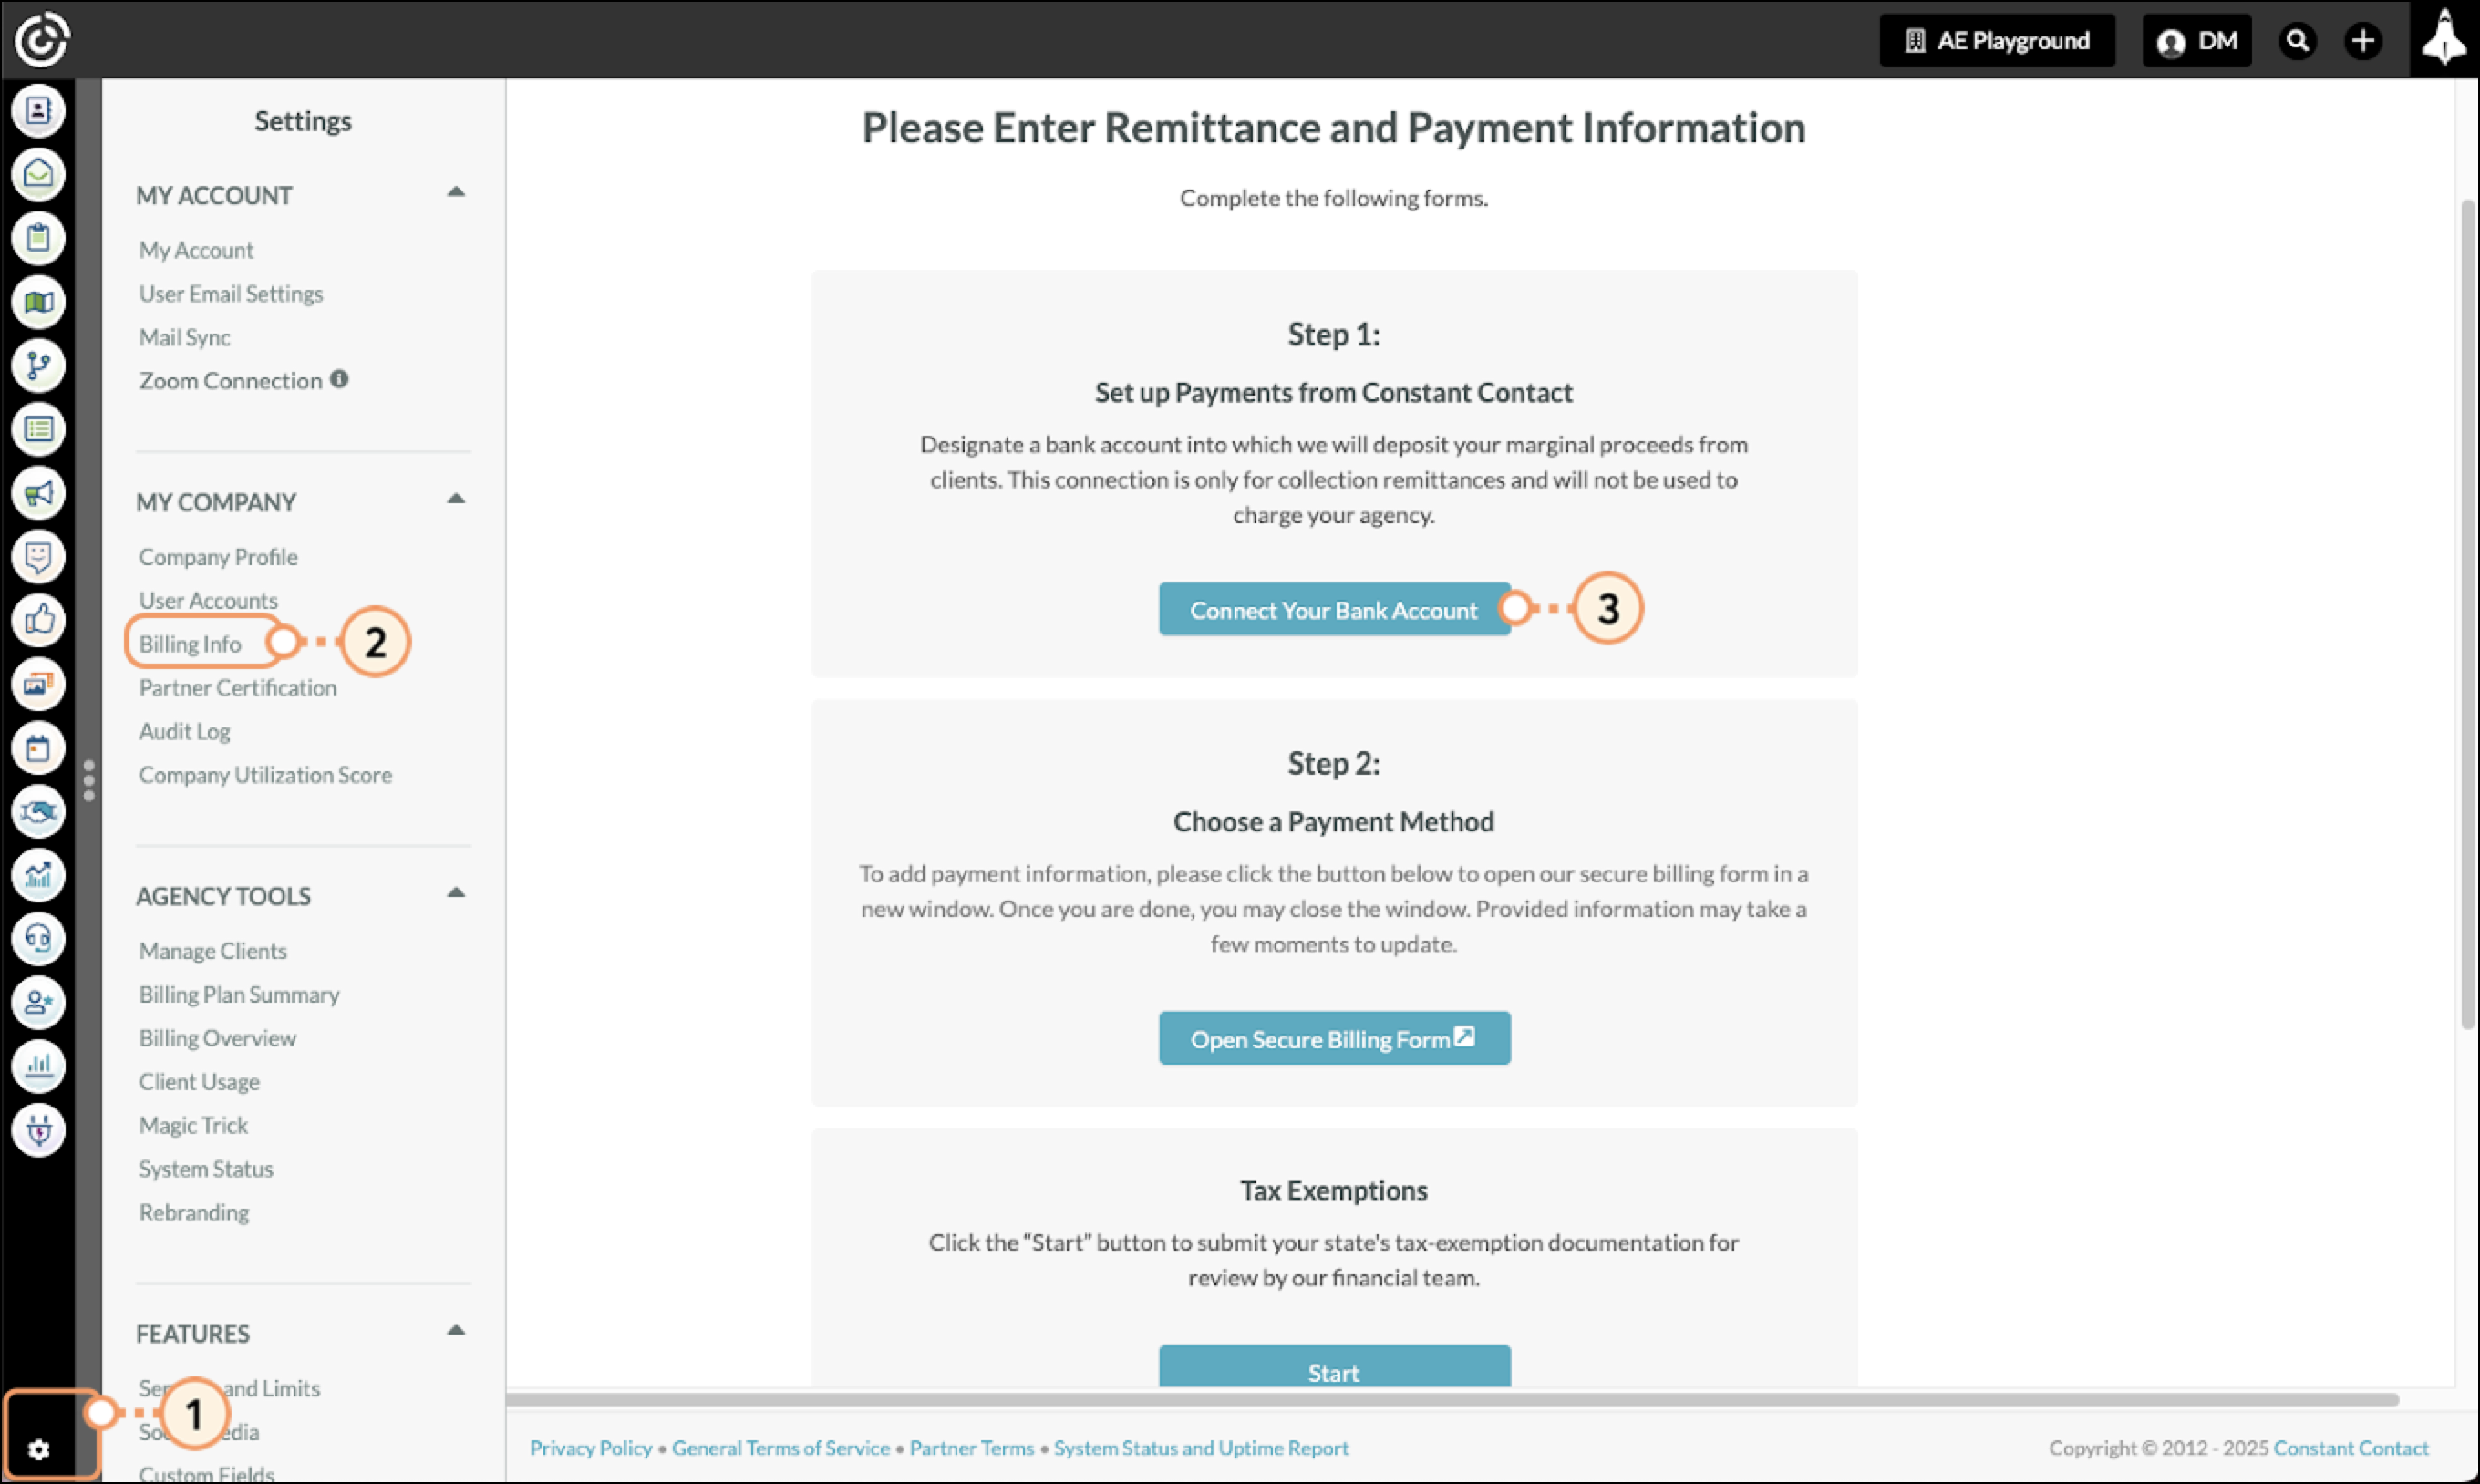
On the page that comes up, enter your email address, select the payment method needed, and complete the associated form.
If you wish to be able to use this payment method across other Stripe-enabled websites, you can enroll the associated email in Stripe’s Link service, but it is not required in order to save the payment method for charges through Constant Contact. If you want to use Stripe’s Link service, enter your desired phone number to proceed with that enrollment. Otherwise, uncheck the “Save my information” box.
Click Save to save your changes. You will receive either a confirmation or error message regarding the validation of the payment method.
Note:
To use an ACH-enabled bank account to make payments to your agency, you will need to have access to the credentials to log into your bank's website to complete the account verification.
When entering a credit or debit card to be used as a payment method, a temporary charge of $1 (or equivalent) is made to verify that the card is valid. Please make sure that the card provider will accept the validation charge without further authorization requirements.
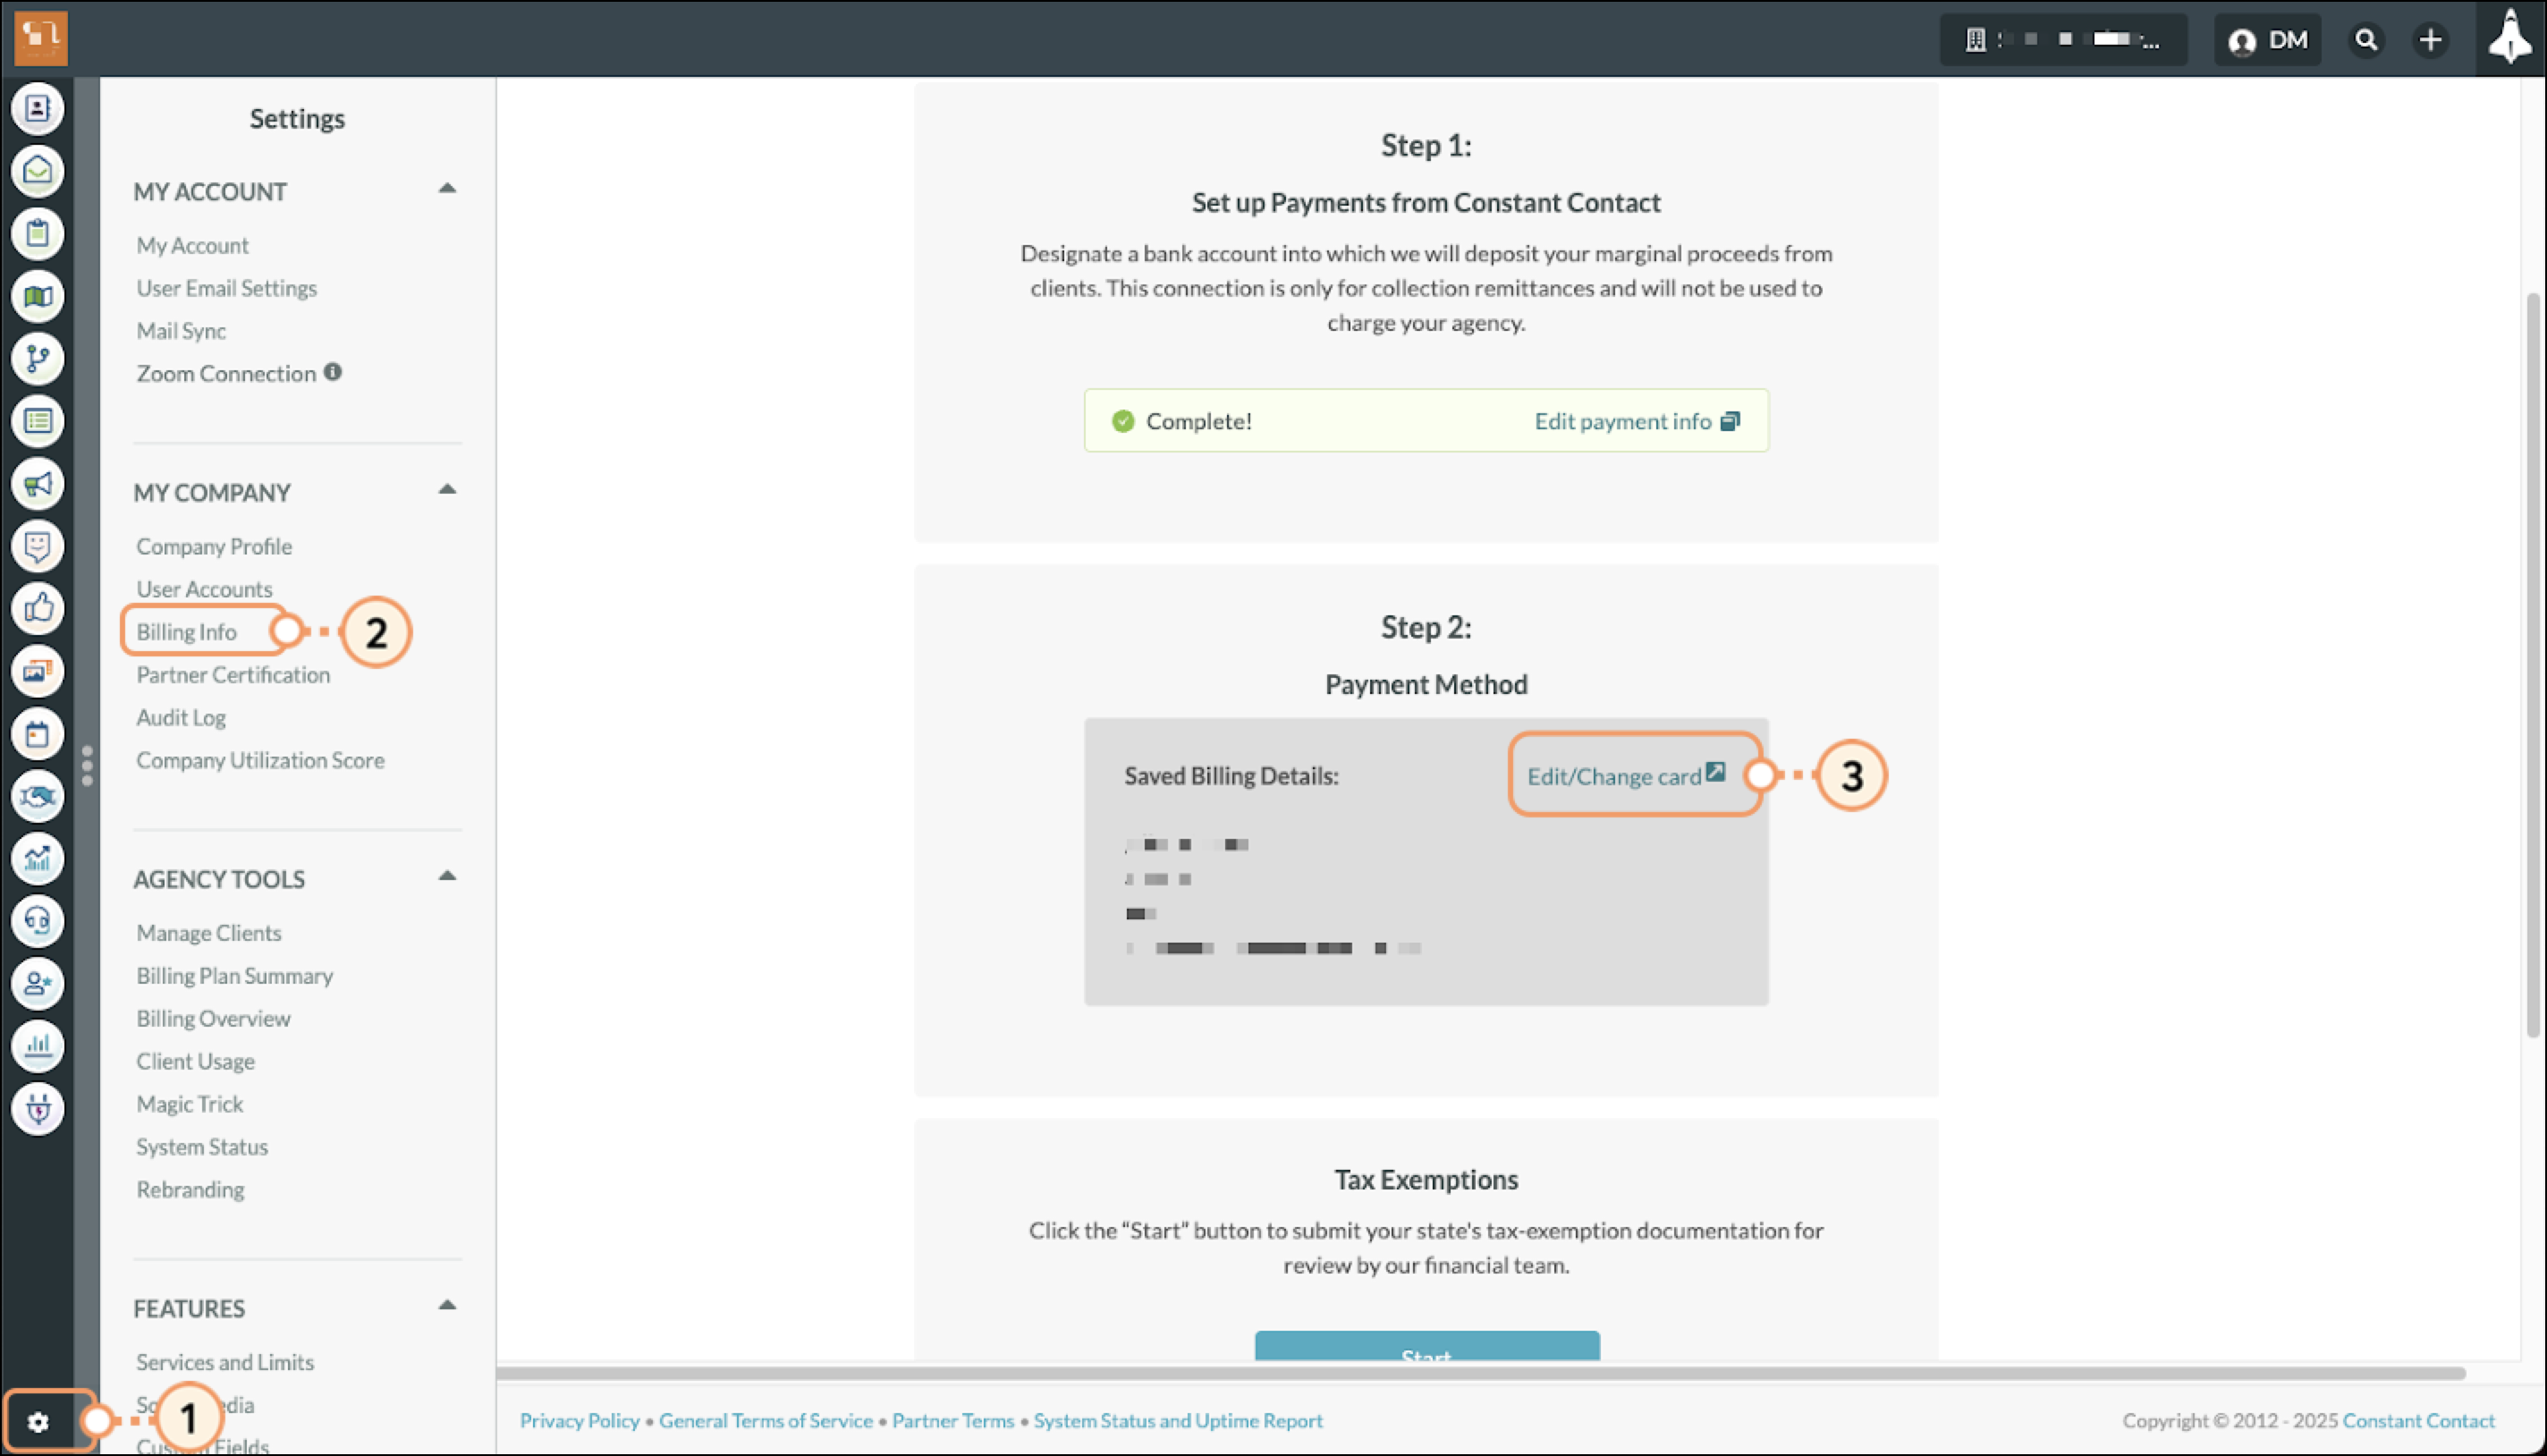
There may be a time when you need to update or edit your payment method information. To update your saved payment information, do the following:
If you have already enrolled in Link, you will first see a screen asking you to confirm the code that Stripe has sent you to log into your Link account. If you do not wish to use a payment method saved to your Link account (or cannot complete the identity verification), click the “Pay Without Link” option.
Click Save to save your changes. You will receive either a confirmation or error message regarding the validation of the payment method.
Note:
To use an ACH-enabled bank account to make payments to your agency, you will need to have access to the credentials to log into your bank's website to complete the account verification.
When entering a credit card to be used as a payment method, a temporary charge of $1 (or equivalent) is made to verify that the card is valid. Please make sure that the card provider will accept the validation charge without further authorization requirements.
When saving new payment method information, your newly saved payment method will replace your previous payment method.
This verification process is normally instant, though it can take a few minutes to complete.
If your company is in a state that requires taxation of Software-as-a-Service (SaaS) services, we are required to bill you the applicable sales taxes. We've partnered with Avalara, a leading Sales Tax Management Service, to handle the taxing of applicable line items within the platform. Avalara will verify if taxes should be paid in your state, and charge them accordingly.
If you hold a tax exemption certificate that would affect your taxable rate, you have the option to upload it to the platform to offset your taxes.
To upload your tax exemption certificate:
We are not required to charge sales tax to your clients, so Constant Contact will only be charging sales tax to your agency if applicable. However, we've also provided the option on the client configuration page for you to charge your clients sales tax if needed, but it is not a system requirement. If you do decide to charge your clients sales tax through the billing system, keep in mind that you will still retain 100% of the amount collected from the client (sales tax included). So it will be your responsibility to pay the collected sales tax directly to the tax authority. We are unable to provide any tax advice or guidance regarding your clients. Please contact your tax advisor for additional assistance.
See Managing Client Configuration Settings for Clients in the United States for further information on collecting sales tax from your clients.
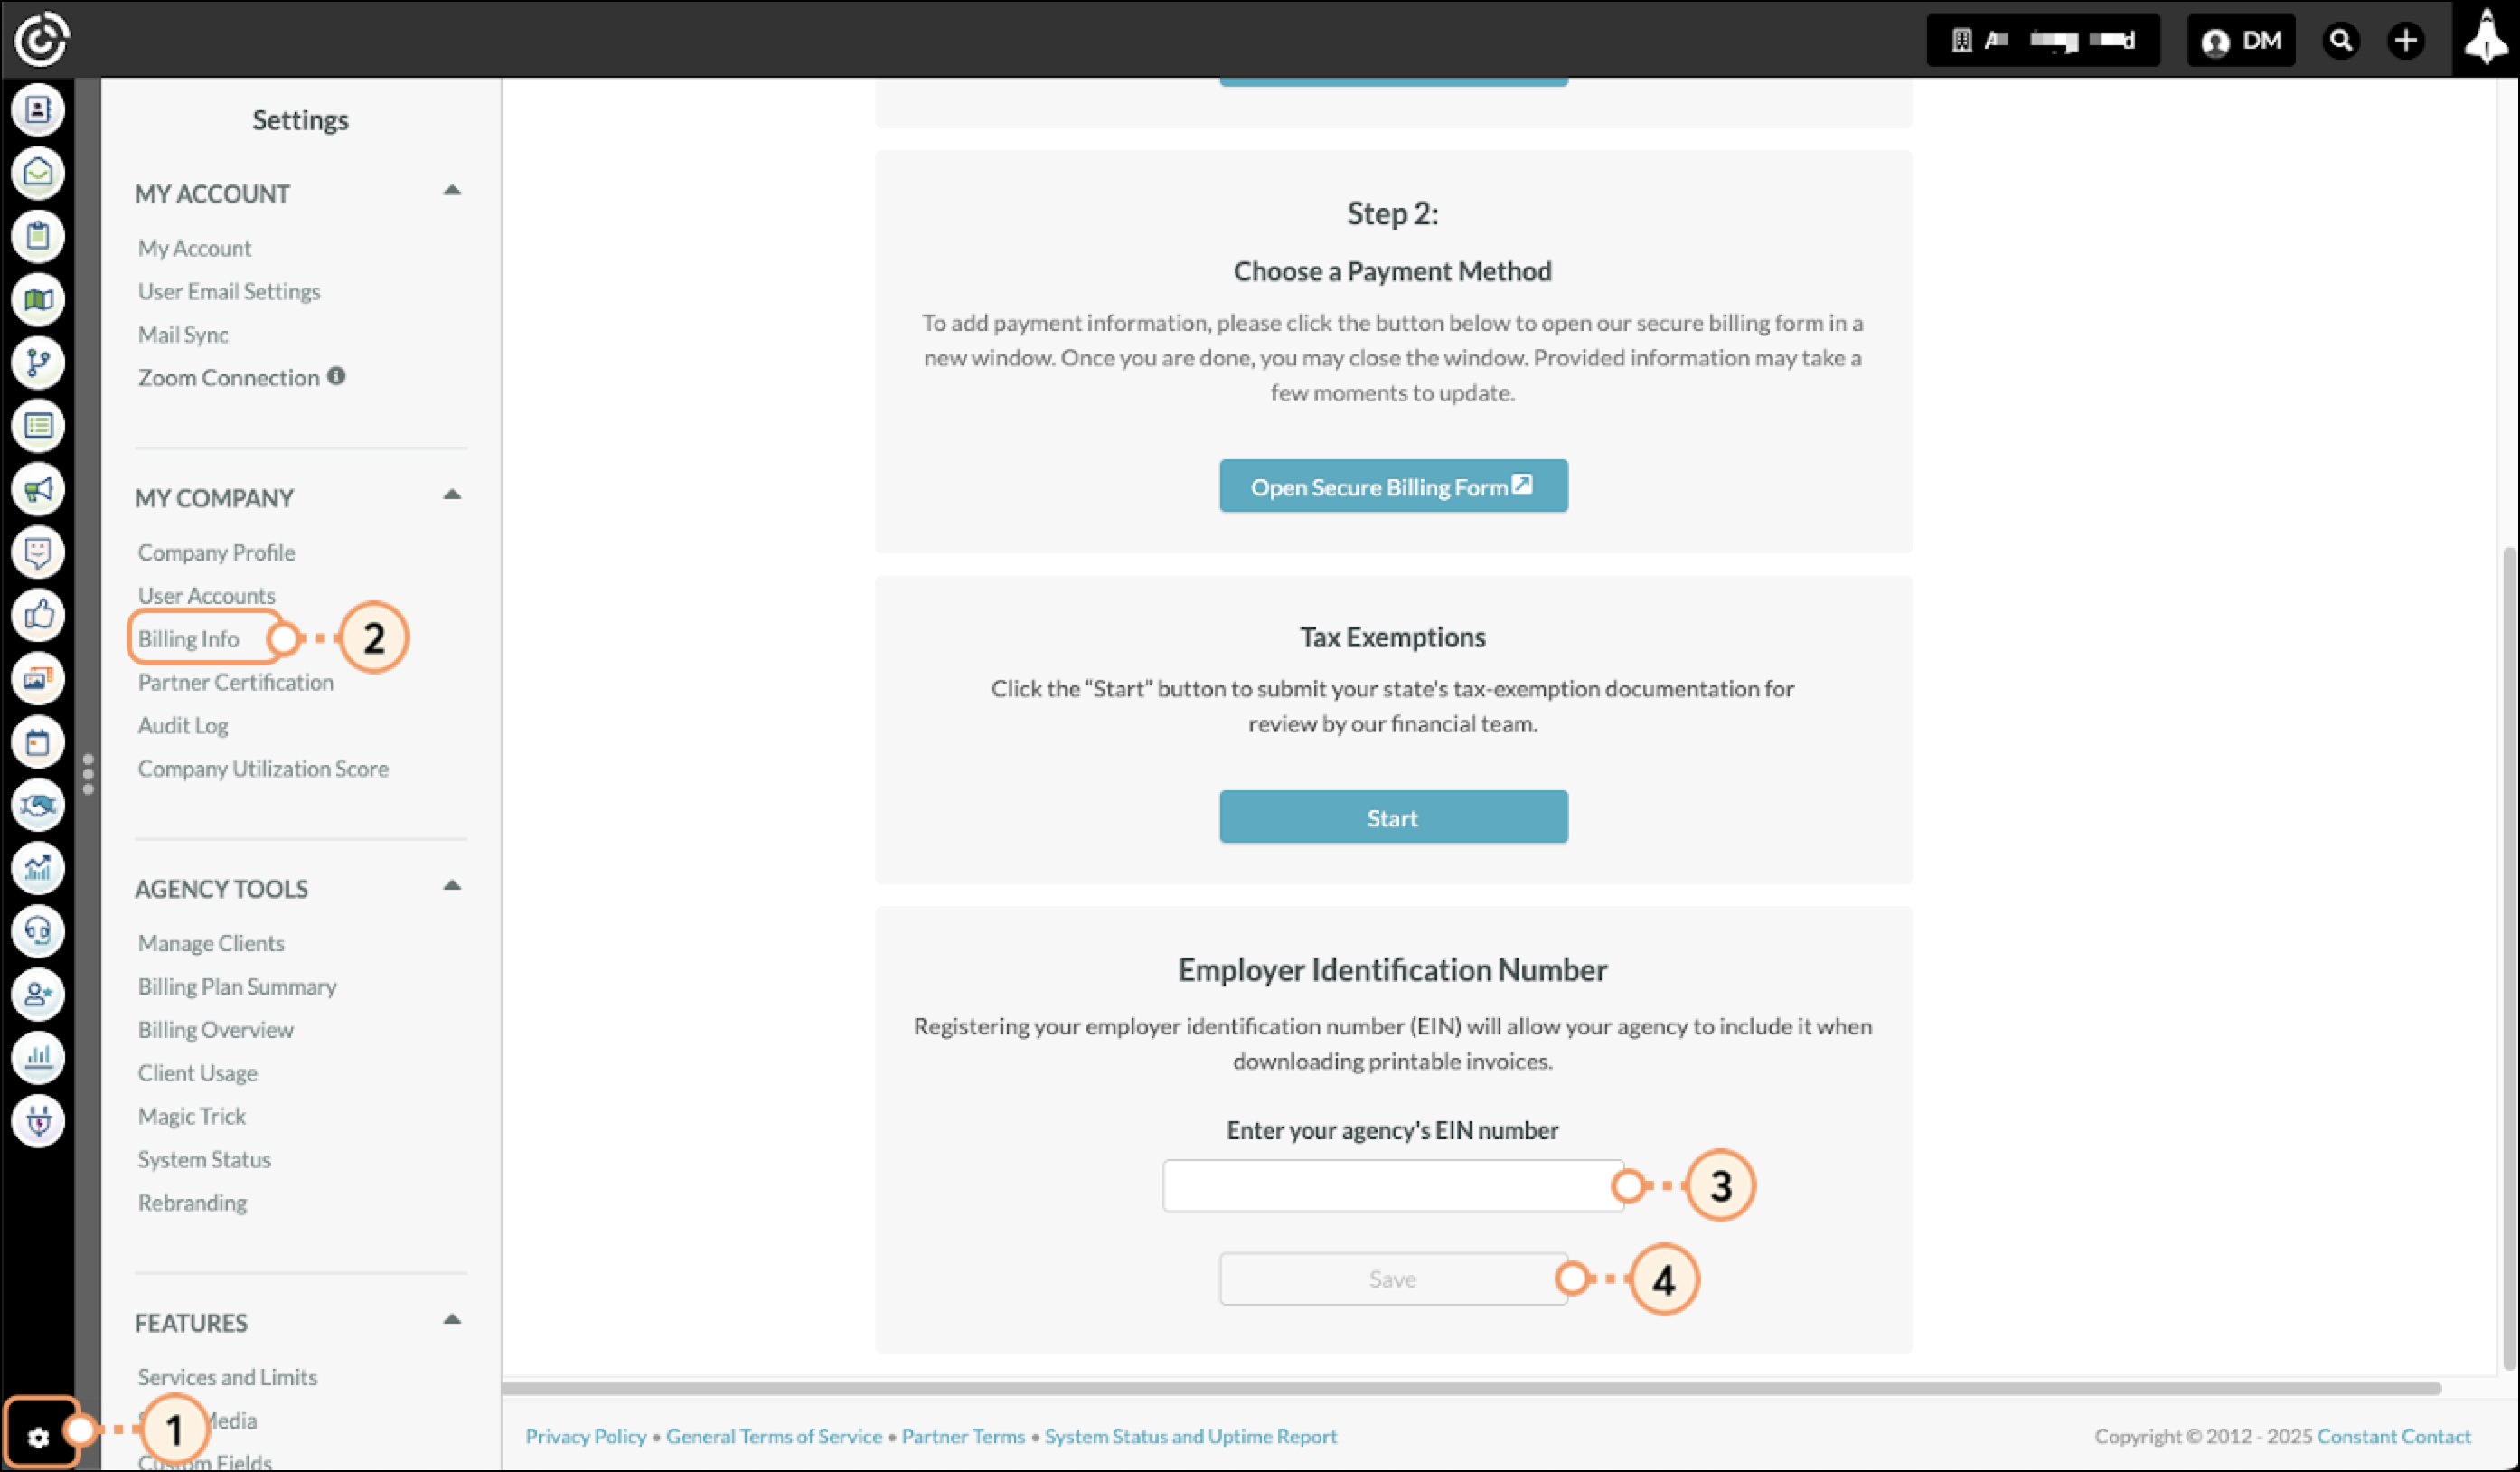
Businesses in the United States have individual employer identification numbers (EIN). Registering your EIN will allow your agency to include it when downloading printable invoices, and it is used to accurately report the revenue collected from your clients to the IRS. To enter EIN information, do the following:
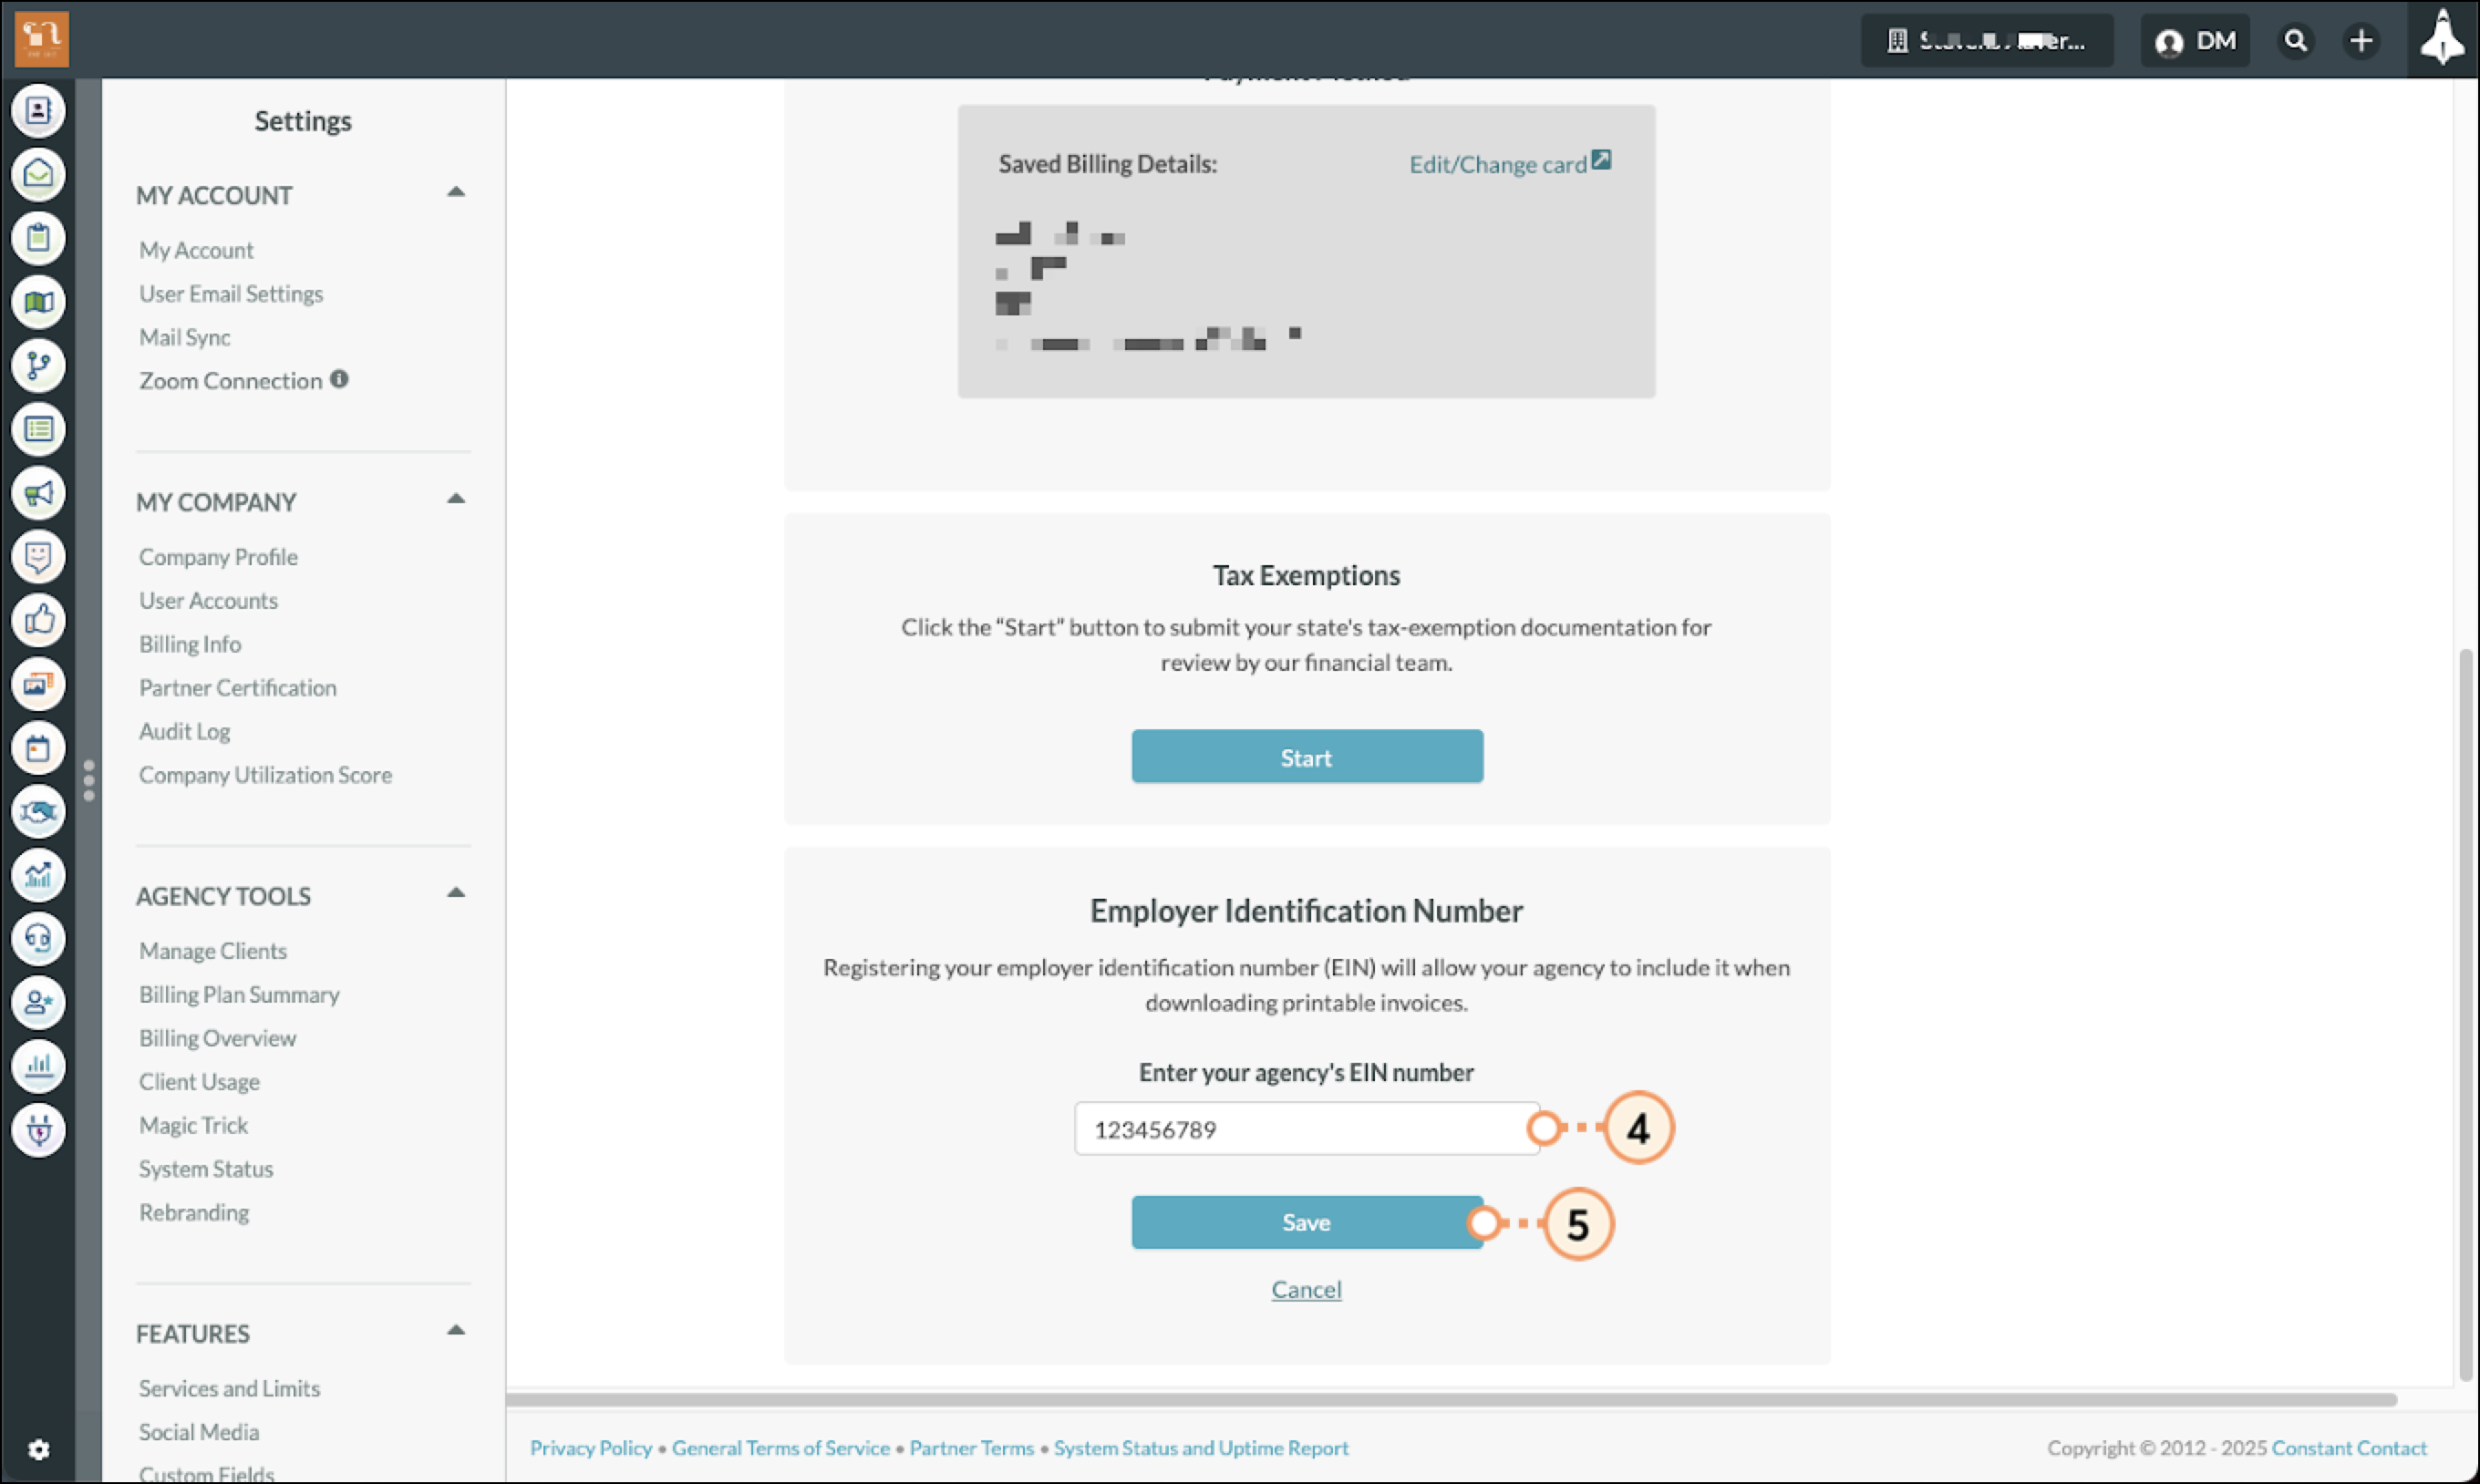
You can edit your EIN information as necessary. To edit EIN information, do the following:
Copyright © 2026 · All Rights Reserved · Constant Contact · Privacy Center