| Important: Any references to taxes are for informational purposes only and should not be considered tax advice. Please contact your tax advisor for additional assistance. |
| This article applies only to Agency clients. For individual clients, please return to the help center home page and search for another article. |
| Tip: Are you looking for information about Constant Contact’s Email and Digital Marketing product? This article is for Constant Contact’s Lead Gen & CRM product. Head on over to the Email and Digital Marketing articles by clicking here. Not sure what the difference is? Read this article. |
| Administrators | ✓ | |
| Company Managers | ||
| Marketing Managers | ||
| Sales Managers | ||
| Salespersons | ||
| Jr. Salespersons |
This documentation is meant to show how to configure payment settings.
Aside from the associated content, it does not contain all the information available on the many aspects and inner workings of Lead Gen & CRM's billing system.
Refer to other Knowledge Base articles for Lead Gen & CRM, or contact Lead Gen & CRM Support for more information.
An agency client in the US can use an ACH-enabled bank account or a credit card (or a debit card with a major credit card logo) for payment to their agency.
To initially enter your payment method into your account, do the following:
In your account, click ![]() User Menu > Settings in the top toolbar or click the Settings gear icon (
User Menu > Settings in the top toolbar or click the Settings gear icon (![]() ) in the bottom of the left-hand menu.
) in the bottom of the left-hand menu.
You may also be prompted to click on a popup to enter your billing information when you log into your account.
Click Billing Info, located under My Company in the left panel.
Click the Open Secure Billing Form button (make sure any pop-up blockers in your browser are turned off).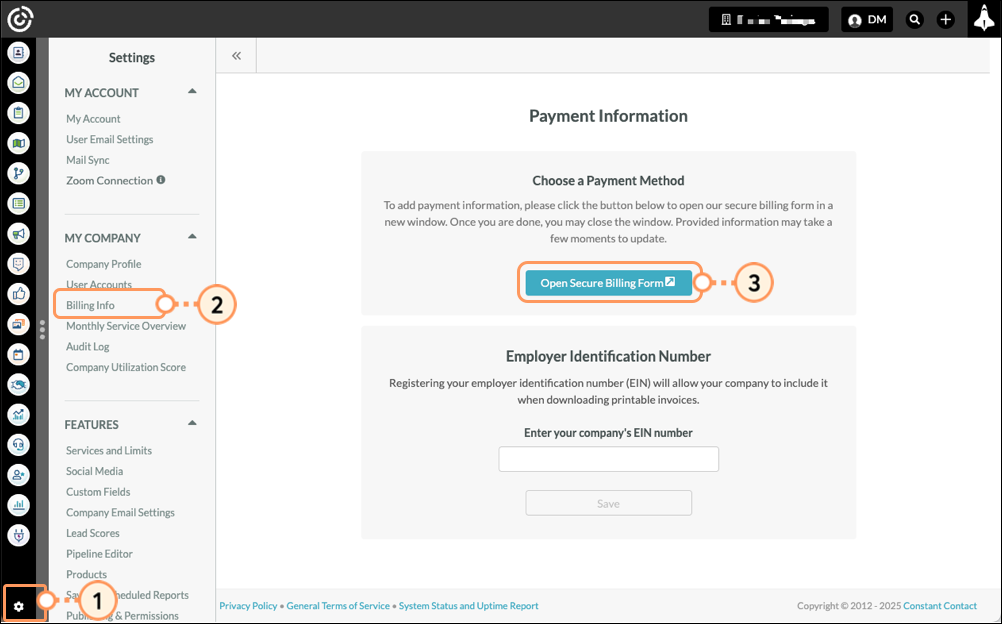
On the page that comes up, enter your email address, select the payment method needed, and complete the associated form.
If you wish to be able to use this payment method across other Stripe-enabled websites, you can enroll the associated email in Stripe’s Link service, but it is not required in order to save the payment method for charges through Constant Contact. If you want to use Stripe’s Link service, enter your desired phone number to proceed with that enrollment. Otherwise, uncheck the “Save my information” box.
Click Save to save your changes. You will receive either a confirmation or error message regarding the validation of the payment method.
Note:
To use an ACH-enabled bank account to make payments to your agency, you will need to have access to the credentials to log into your bank's website to complete the account verification.
When entering a credit card to be used as a payment method, a temporary charge of $1 (or equivalent) is made to verify that the card is valid. Please make sure that the card provider will accept the validation charge without further authorization requirements.
There may be a time when you need to update or edit your payment information. To edit your saved payment method information, do the following:
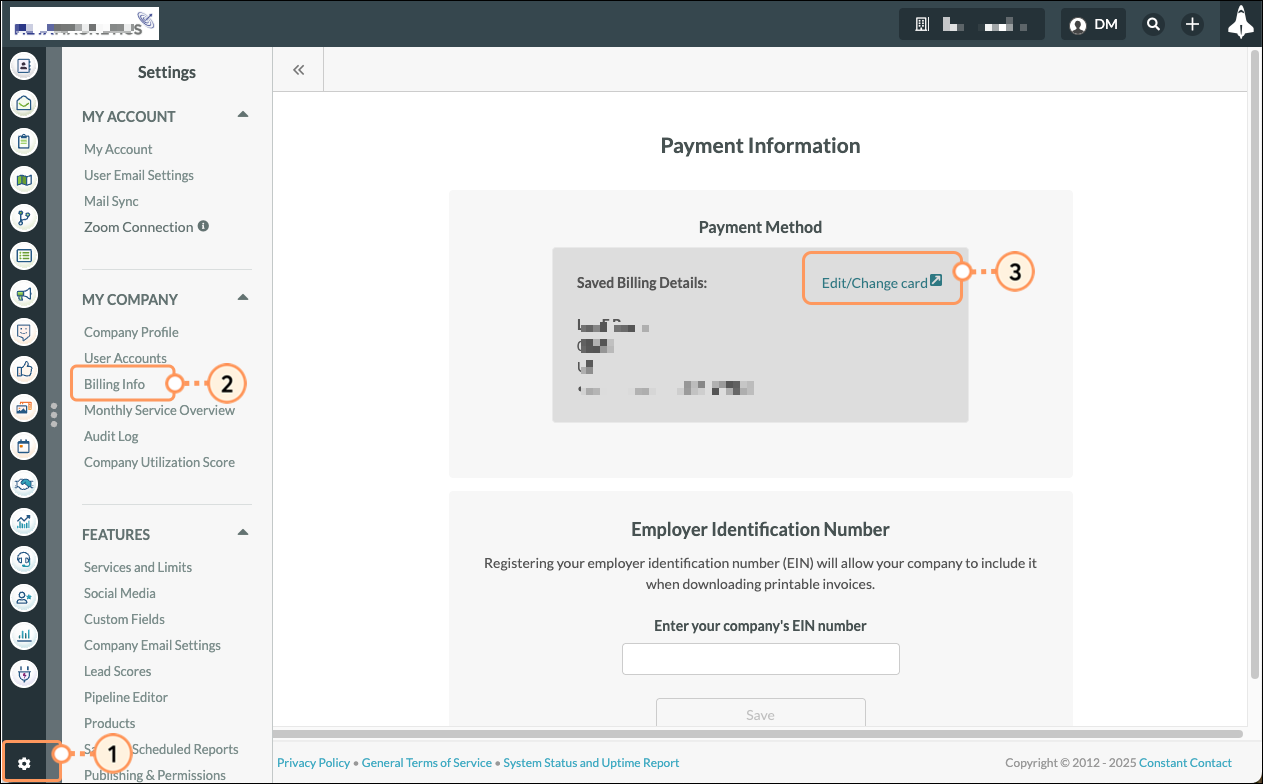
On the page that comes up, select the payment method needed, and complete the associated form.
If you wish to be able to use this payment method across other Stripe-enabled websites, you can enroll the associated email in Stripe’s Link service, but it is not required in order to save the payment method for charges through Constant Contact. If you want to use Stripe’s Link service, enter your desired phone number to proceed with that enrollment. Otherwise, uncheck the “Save my information” box.
If you have already enrolled in Link, you will first see a screen asking you to confirm the code that Stripe has sent you to log into your Link account. If you do not wish to use a payment method saved to your Link account, click the “Pay Without Link” option.
Note:
To use an ACH-enabled bank account to make payments to your agency, you will need to have access to the credentials to log into your bank's website to complete the account verification.
When entering a credit card to be used as a payment method, a temporary charge of $1 (or equivalent) is made to verify that the card is valid. Please make sure that the card provider will accept the validation charge without further authorization requirements.
When saving new payment method information, your newly saved payment method will replace your previous payment method.
This verification process is normally instant, though it can take a few minutes to complete.
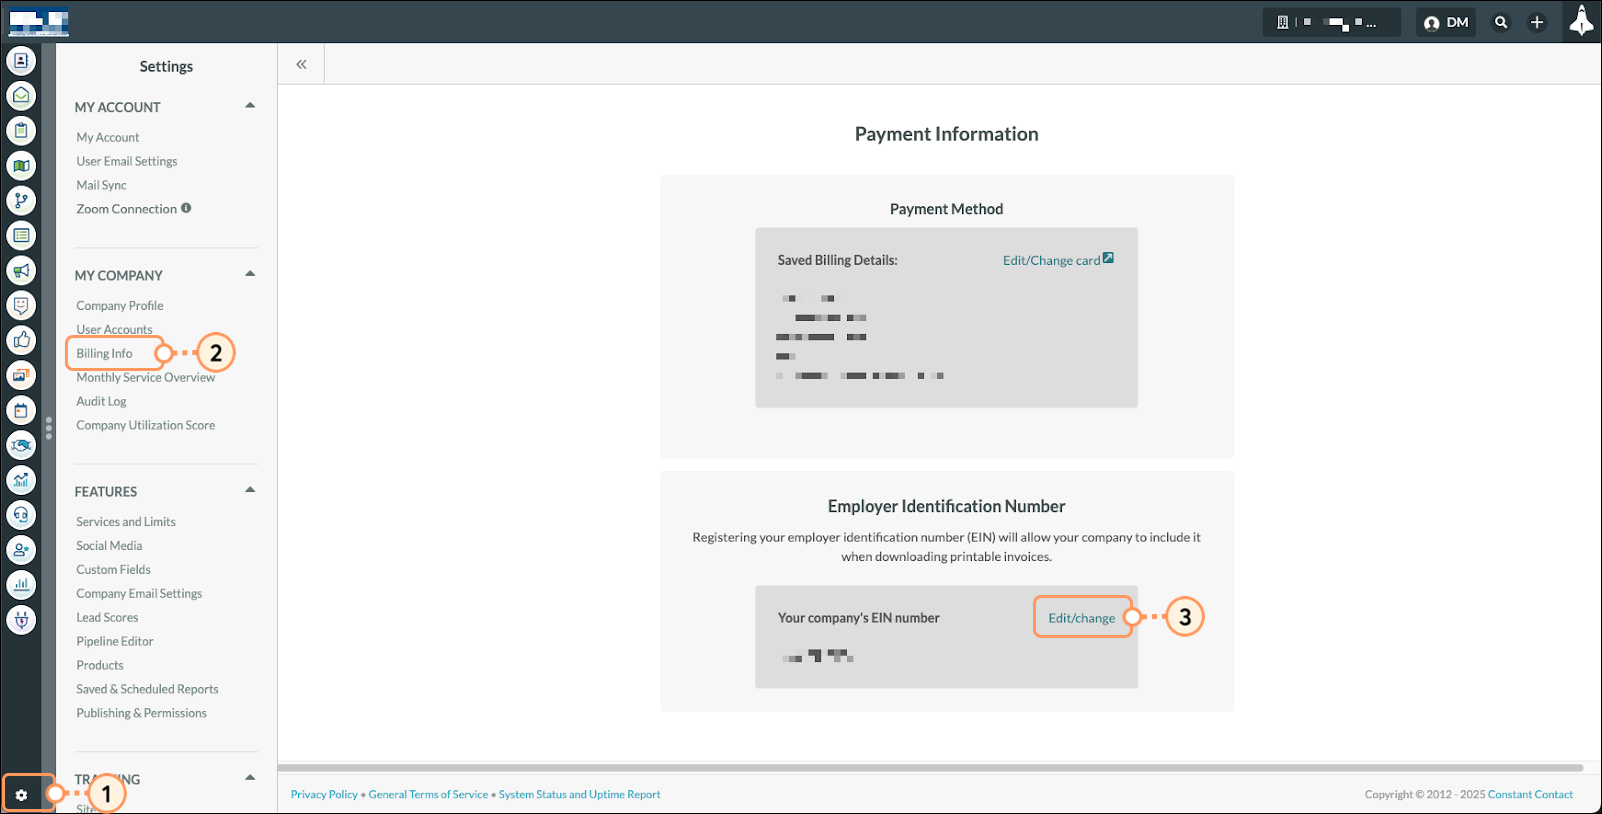
Businesses in the United States have individual employer identification numbers (EIN). Registering your EIN will allow your agency to include it when downloading printable invoices. To enter EIN information, do the following:

You can edit your EIN information as necessary. To edit EIN information, do the following:

Copyright © 2026 · All Rights Reserved · Constant Contact · Privacy Center