Lead Gen & CRM
How can we help you?
Search our help articles, video tutorials, and quickstart guides

You've got this. You've got us. Search our Knowledge Base to quickly find answers to your questions.

Configuring Sales Dialer Settings

Article: 000050550
Updated: July 10, 2024

The Lead Gen & CRM Sales Dialer provides you with a way to place, record, transcribe, and analyze outbound calls from within the platform. The Sales Dialer will need to have certain aspects configured prior to taking advantage of its features.


Users:
Administrators 
Company Managers 
Marketing Managers 
Sales Managers 
Salespersons 
Jr. Salespersons 
 

Important Information Regarding Billing

The Sales Dialer requires that you use Lead Gen & CRM's billing platform. This feature will be disabled and inaccessible if you are not using the billing platform.

Refer to the following help articles for more information regarding enabling and using the billing platform:


Configuring User Seat Settings

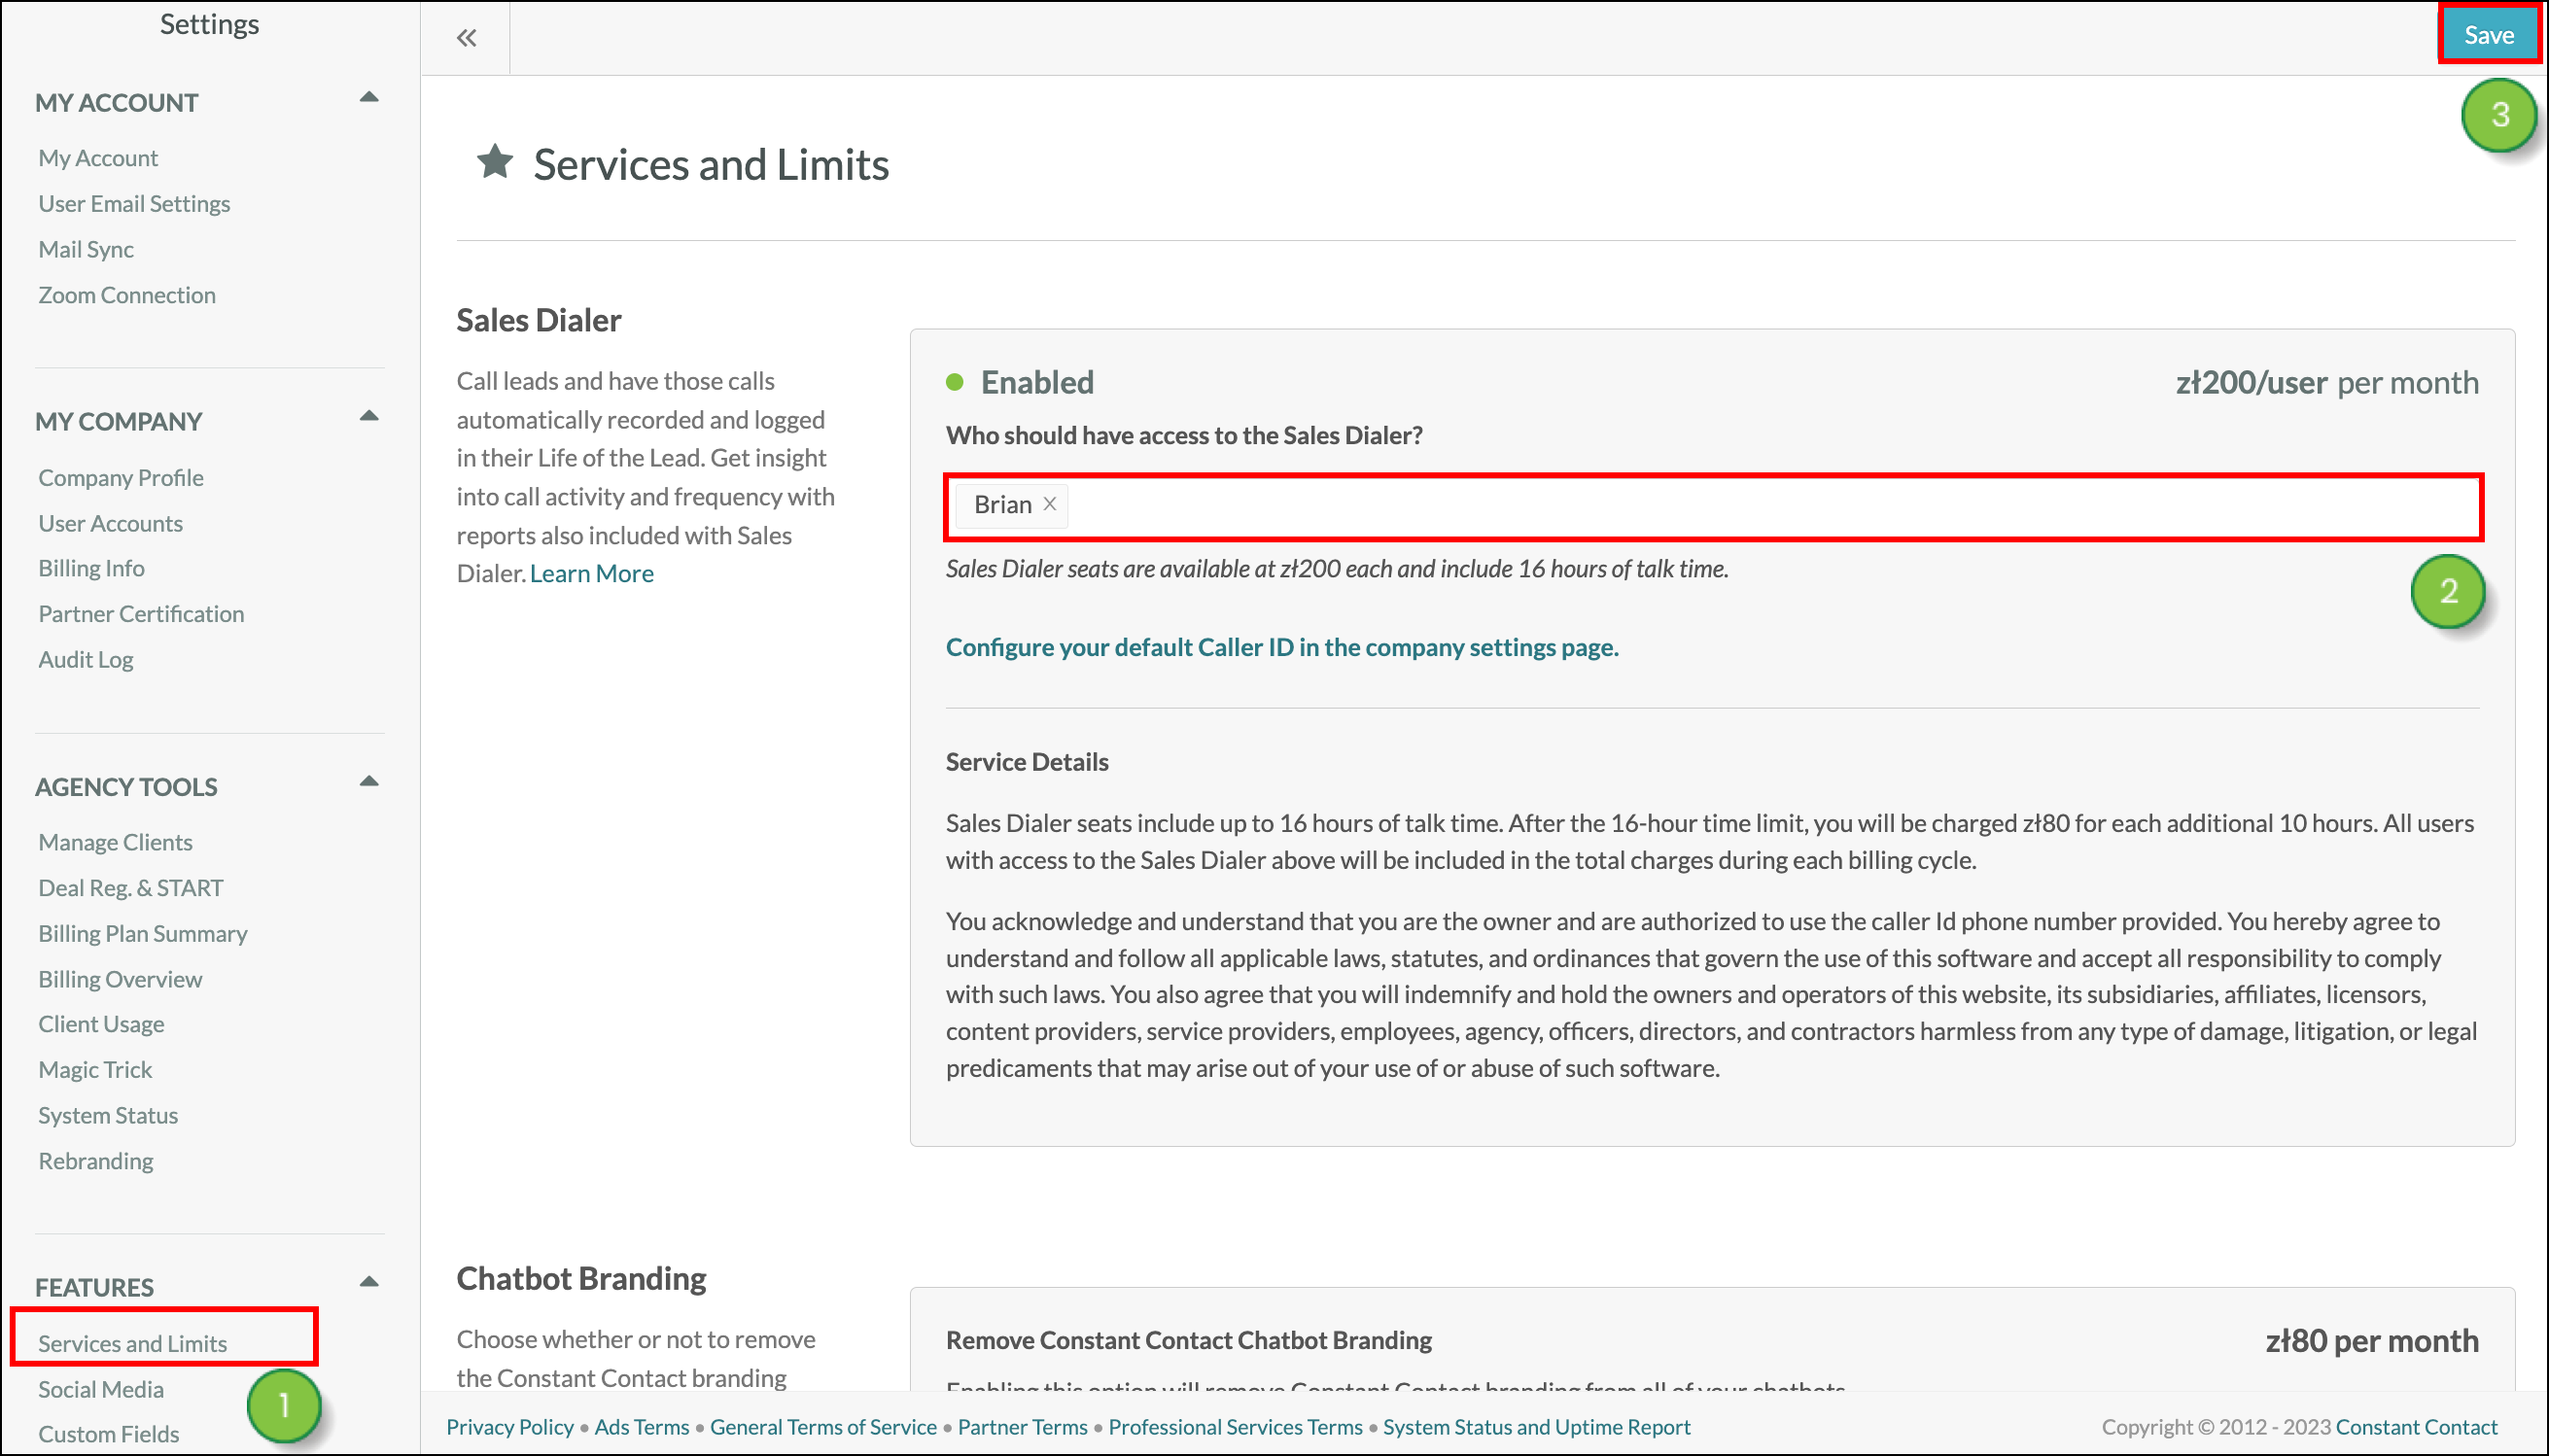
Sales Dialer is not enabled by default, but you can enable Sales Dialer for users by visiting the Services and Limits Settings. To configure who has access to the Sales Dialer and can use its various features, start from   13personas.png  User Menu > Settings in the top toolbar (Admin Access only).

  1. Click Services and Limits, located under Features in the left panel.
  2. Scroll to the Sales Dialer section and enter or remove the names of desired users in the Who should have access to the Sales Dialer? field.
  3. Click Save.

    Click Save


Modifying Caller ID Settings

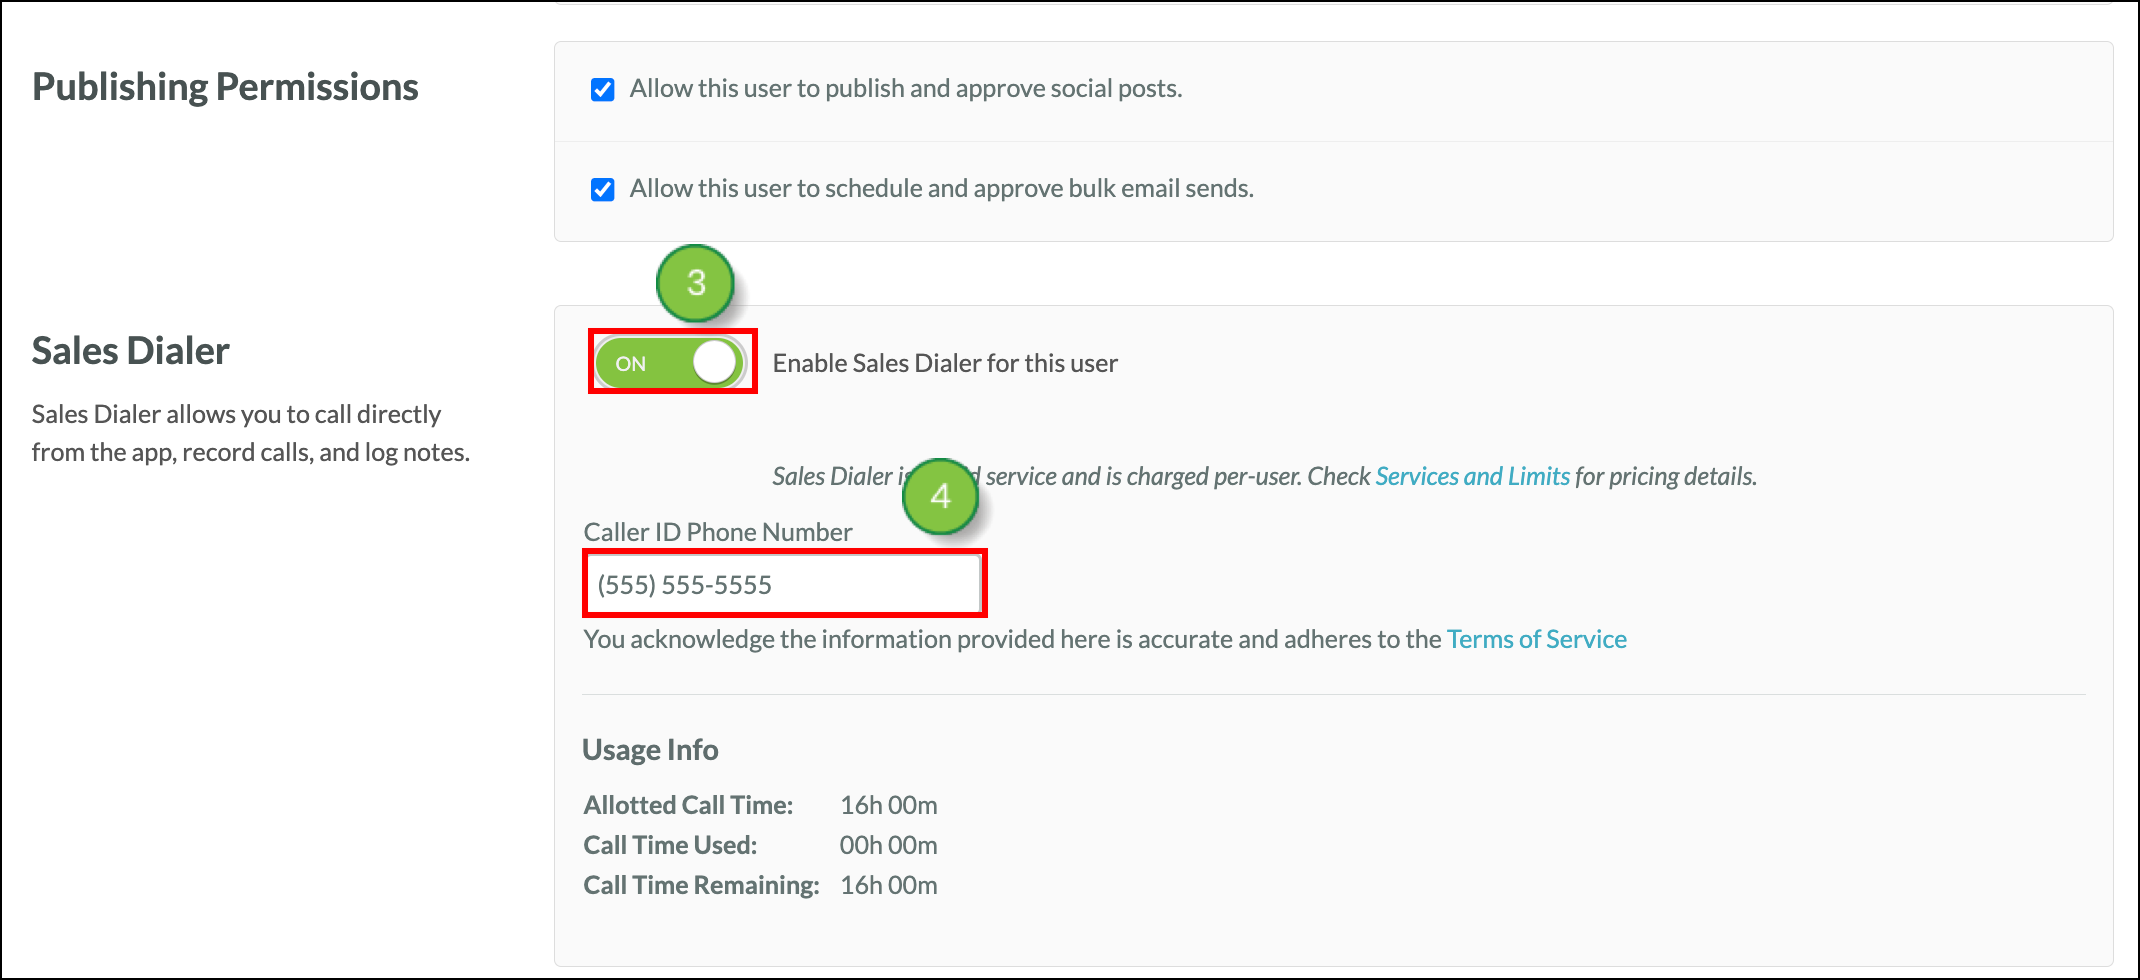
When using the Sales Dialer, outbound calls will require a phone number. This is your calling party phone number that will be displayed when the called party answers their phone. This number is known as Caller ID. Caller ID settings are found in a company's profile settings. 

To modify Caller ID settings in the Company Profile, click  13personas.png  User Menu > Settings in the top toolbar or press the Settings button in the bottom of the left toolbar.  

  1. Click Company Profile, located under My Company in the left panel.
  2. Scroll to the Office Information section and enter a valid telephone number in the Default Caller ID text field.
     
    Important: When setting Caller ID numbers, be aware that using false information or otherwise obfuscating the phone number will violate the Terms of Service. Violating the Terms of Service in this manner puts your account at risk for termination.
  3. Optionally, click the Allow Salespeople to customize their own caller ID number checkbox.

    Allow Salespeople to customize their caller ID number


  4. Scroll down to the bottom of the page and click Save Settings.

    Save Settings


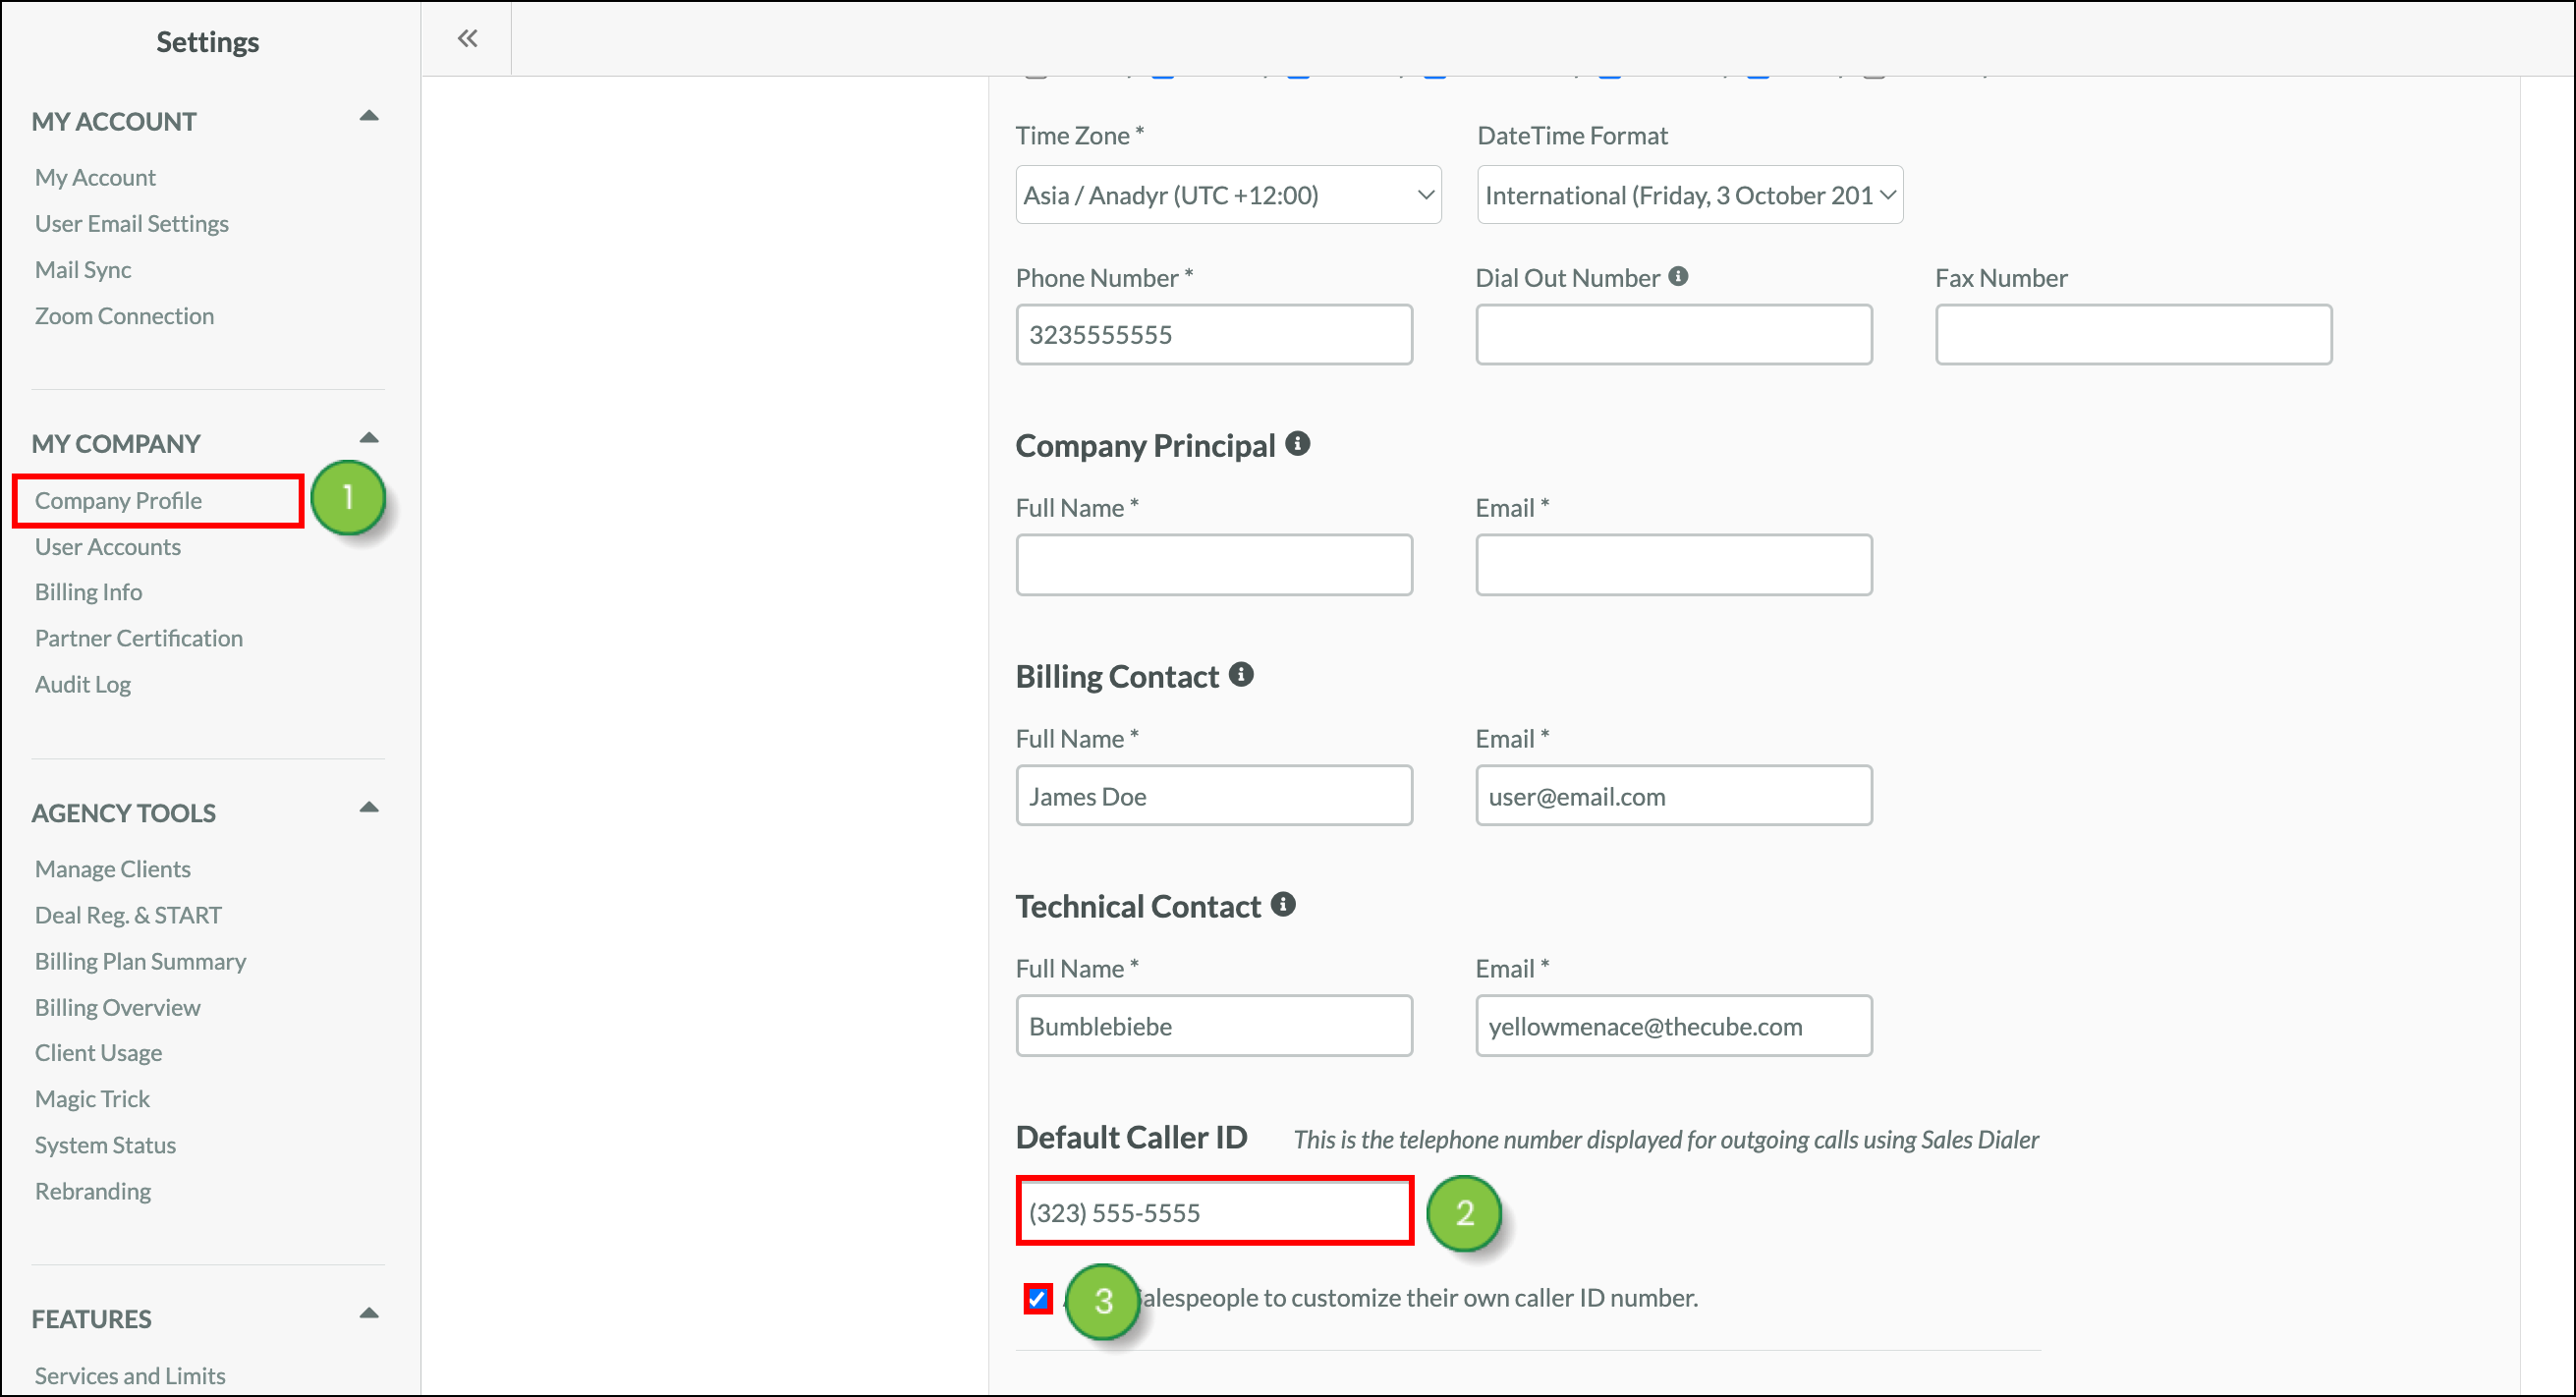
Once set, all outgoing calls made from the Sales Dialer will, by default, display this Caller ID number. If the setting is enabled for salespeople to enter their own custom Caller IDs when they make calls through the Sales Dialer, those Caller IDs will display in place of this default number. Be aware that Caller ID displays will vary based on individual phone carriers.

Regardless of your choice, be sure that the number—and the manner in which you use the Sales Dialer— adheres to the Constant Contact Terms of Service.


User Caller ID Phone Numbers 


Note: Administrators also have the option to modify company Caller ID settings when placing calls through the Sales Dialer.

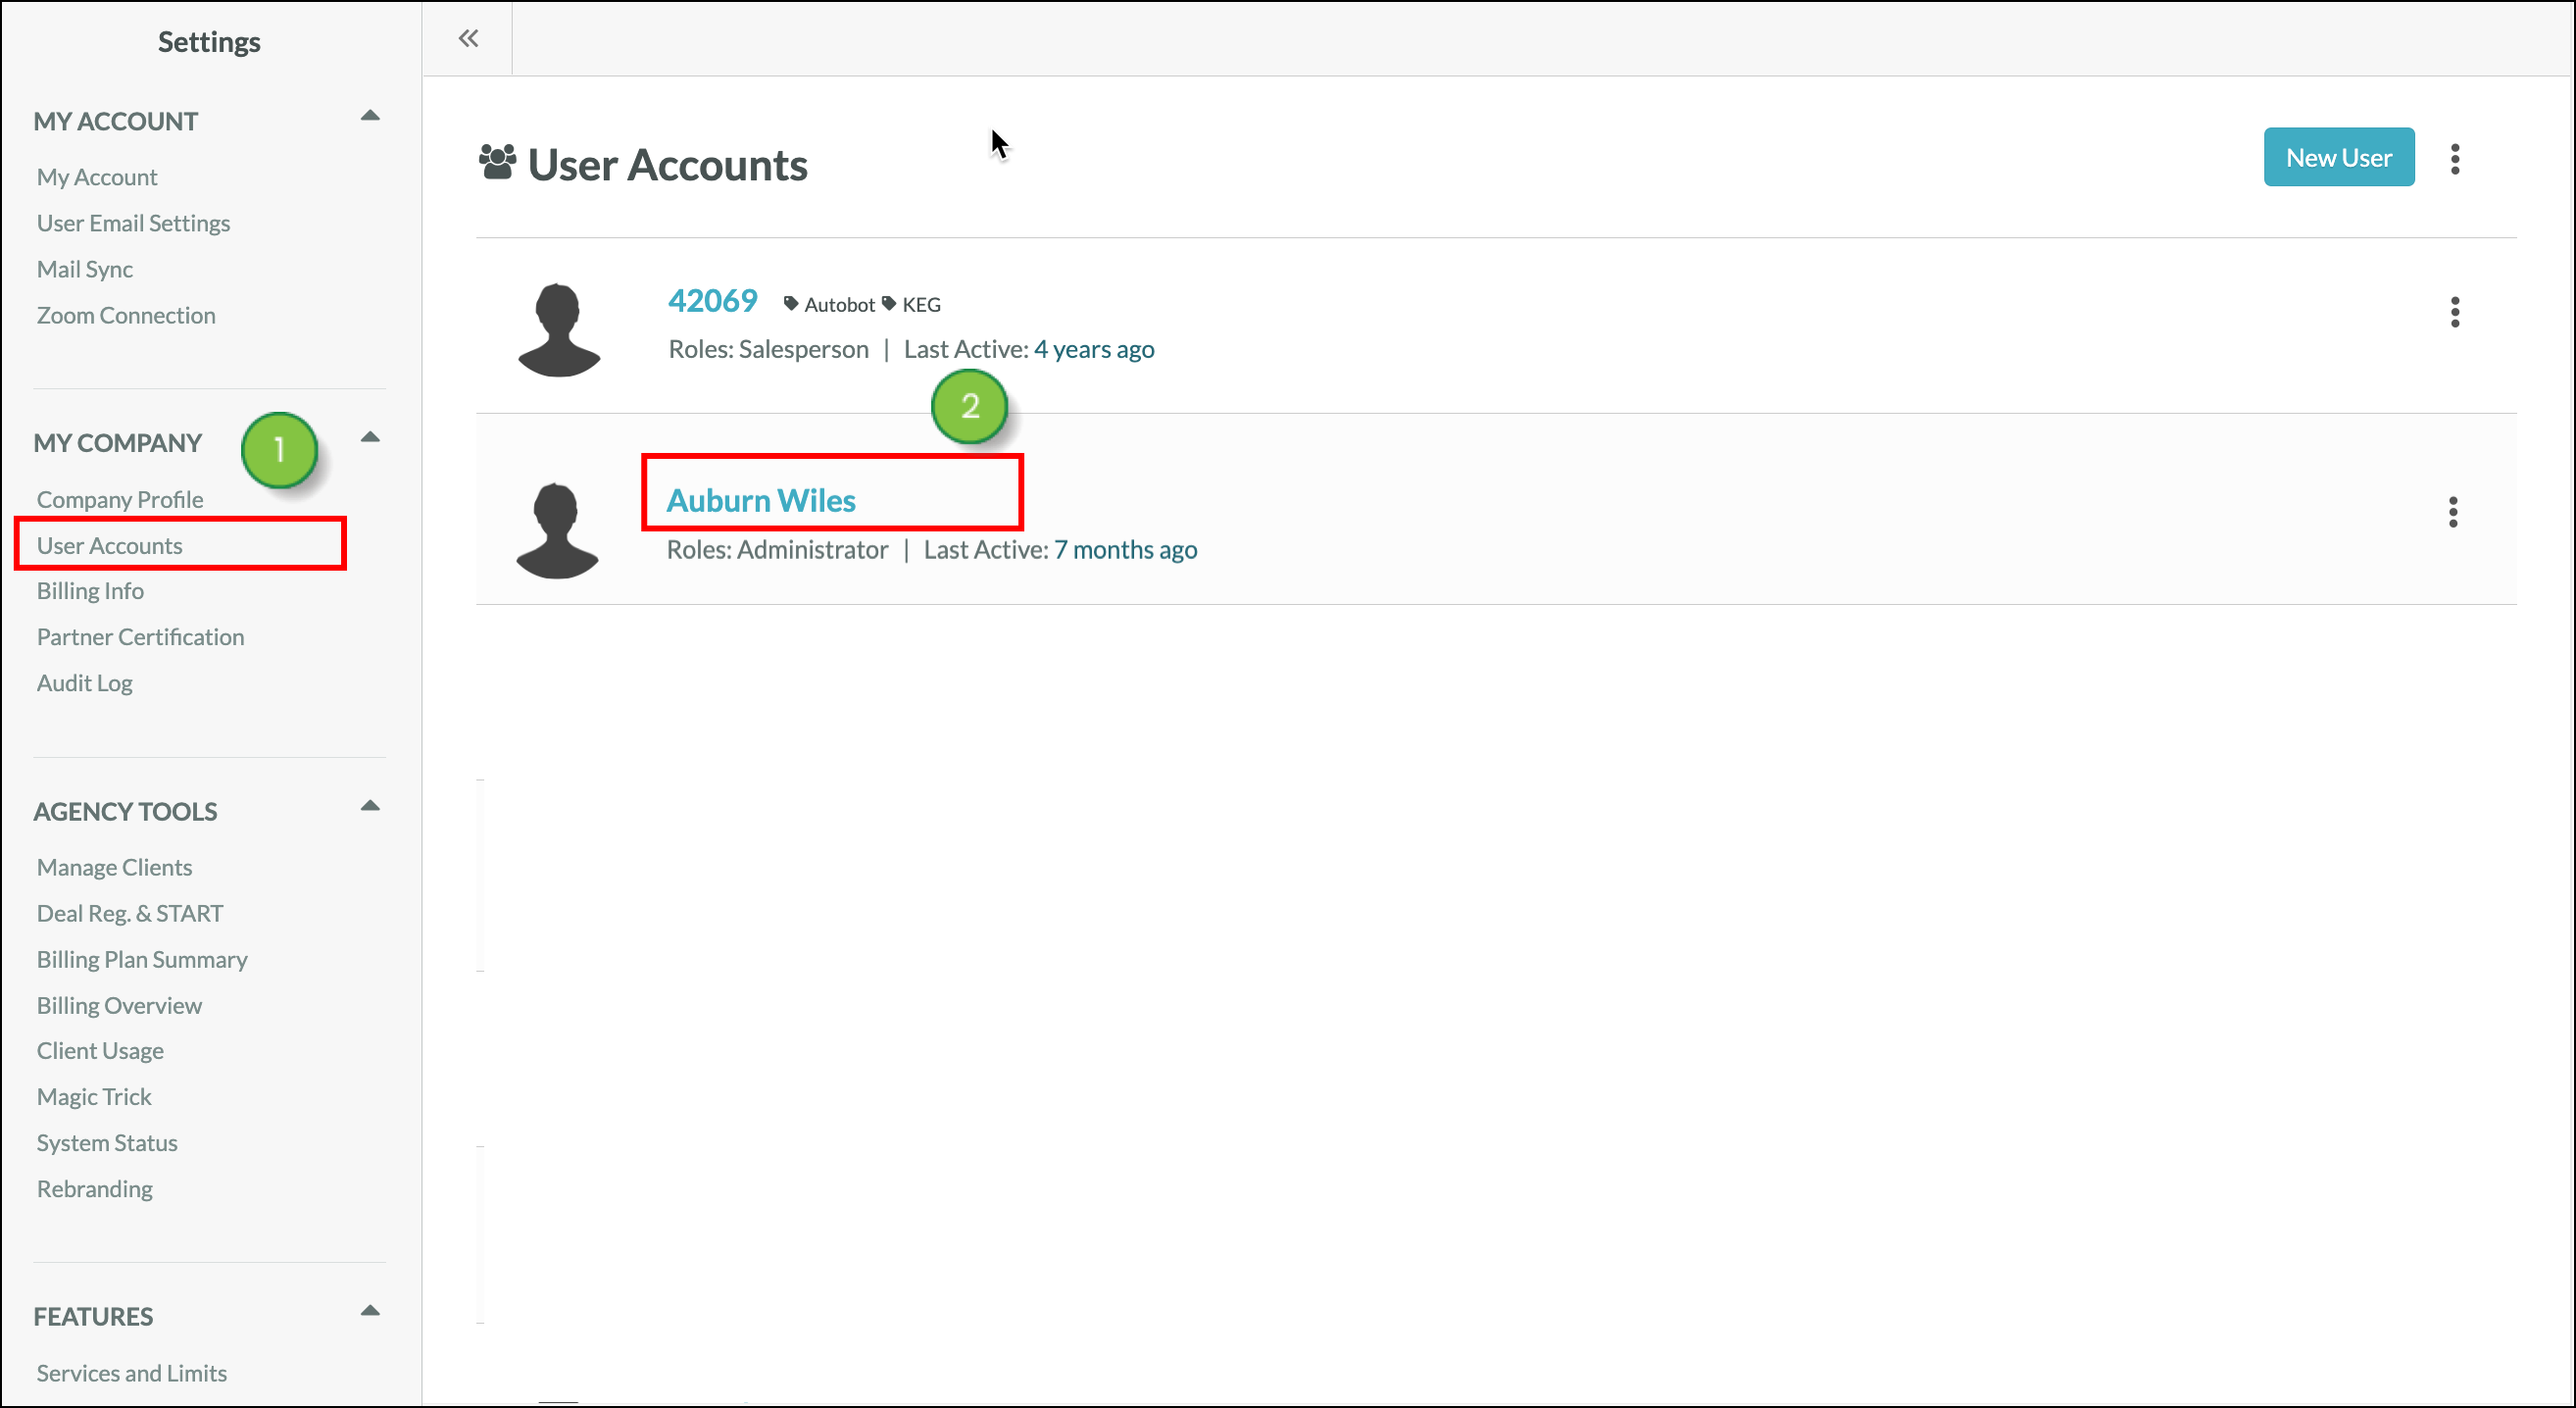
To modify Caller ID number settings for individual users, click  13personas.png  User Menu > Settings in the top toolbar or press the Settings button in the bottom of the left toolbar. 

  1. Click User Accounts, located under My Company in the left panel.
  2. Click the user's Name.

    Click the user's name


  3. Scroll to the Sales Dialer section and make sure Enable Sales Dialer for this user is set to the ON position.
     
    Note: If Sales Dialer needs to be enabled for this user, turn it on and then scroll down to the bottom of the page to save your changes, before you proceed.
  4. Enter a valid telephone number in the Caller ID Phone Number text field.
     
    Important: When setting Caller ID numbers, be aware that using false information or otherwise obfuscating the phone number will violate the Constant Contact Terms of Service. Violating the Terms of Service in this manner puts your account at risk for termination.


    Enter a telephone number


  5. Scroll down to the bottom of the page and click Save Changes.

    Save Changes


Did this article answer your question?


Constant Contact Logo

Copyright © 2025 · All Rights Reserved · Constant Contact · Privacy Center