Email and Digital Marketing
How can we help you?
Search our help articles, video tutorials, and quickstart guides

You've got this. You've got us. Search our Knowledge Base to quickly find answers to your questions.

Partners: Connect your Coldwell Banker Commercial account with Constant Contact

Article: 000055181
Updated: April 7, 2026

Activate a Constant Contact account directly within your Coldwell Banker Commercial account

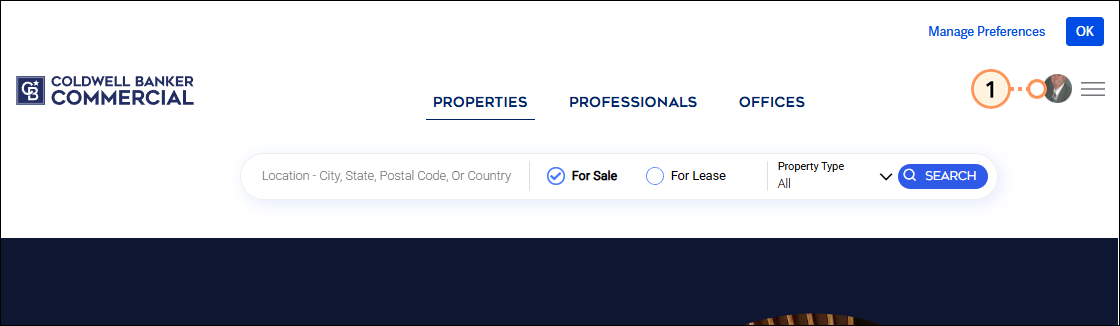
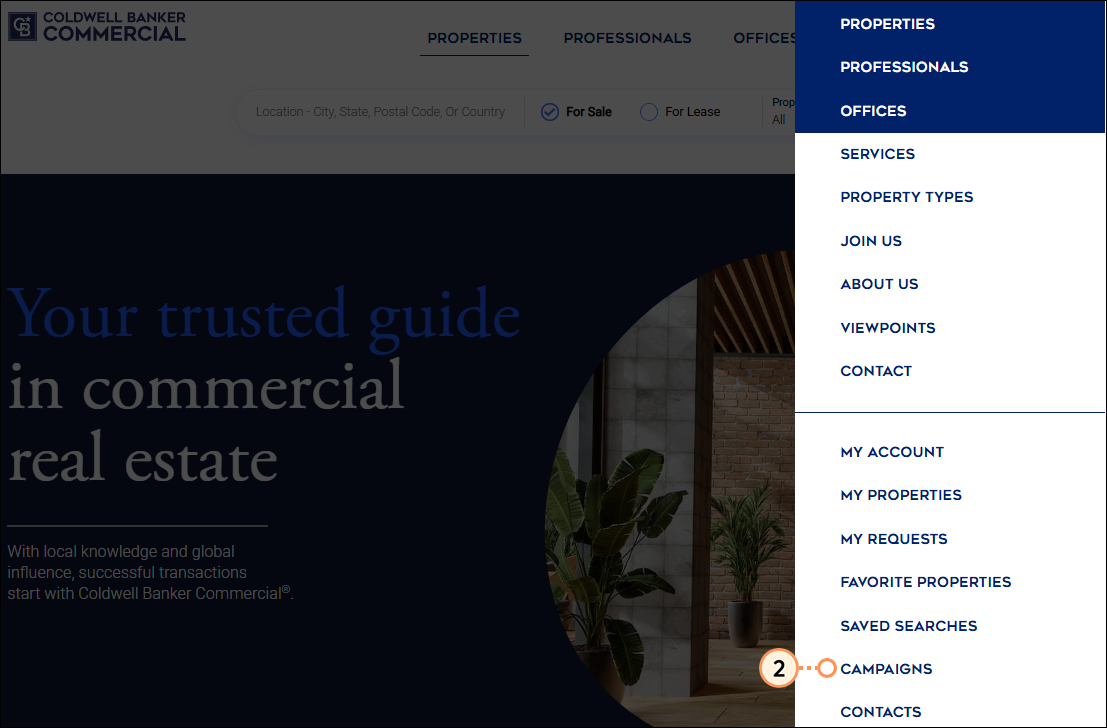
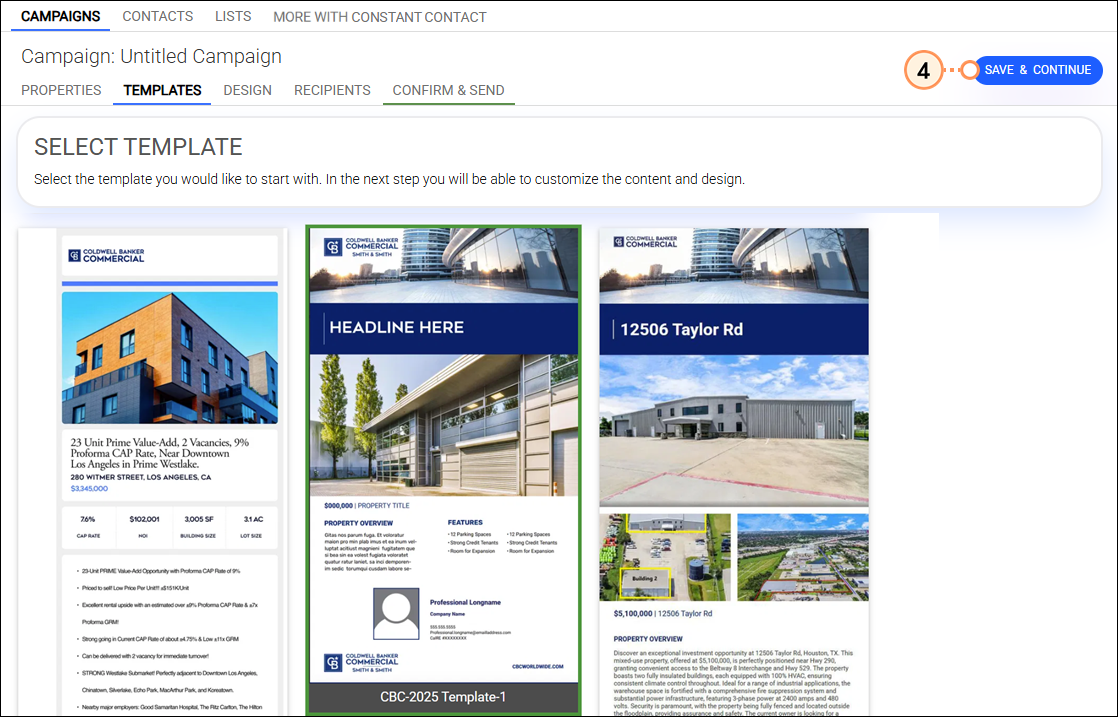
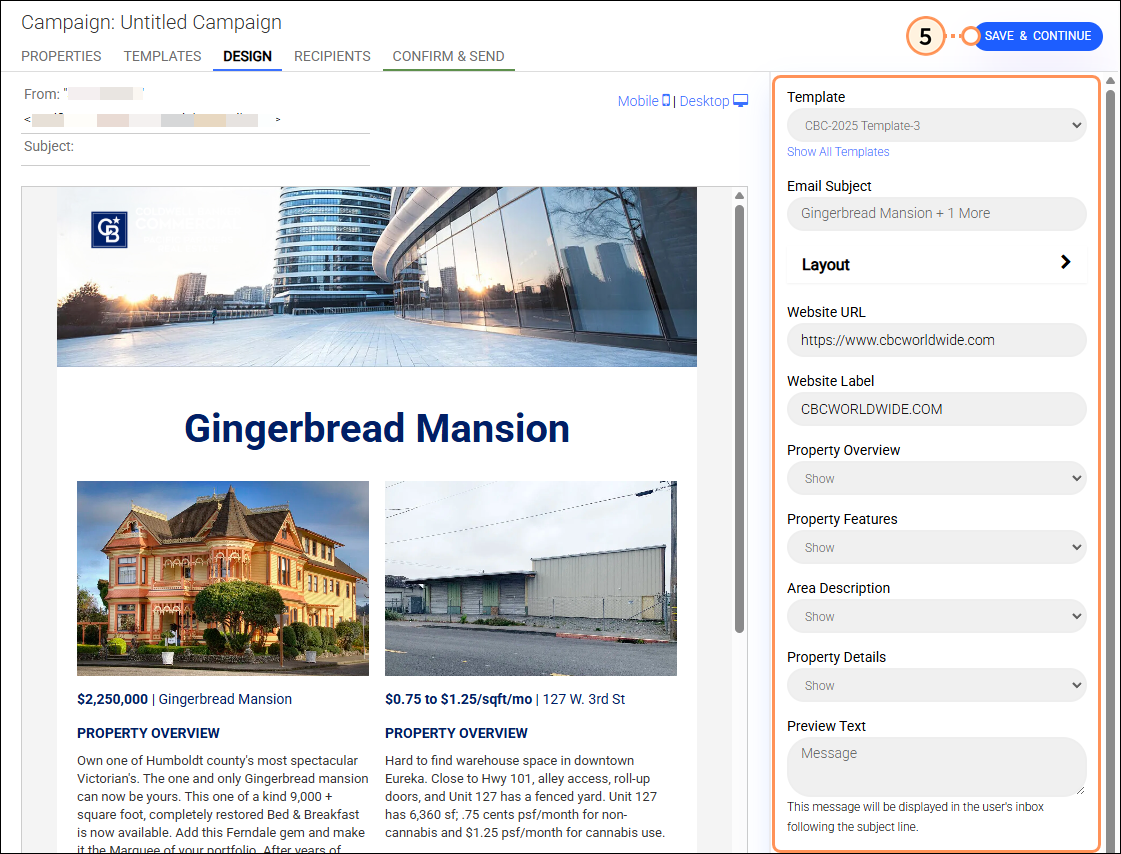
Activate and link Constant Contact to your Coldwell Banker Commercial account and easily send out campaigns to your contact lists property listings of your choosing. Select your desired template, edit the email design, and then preview before you send out your campaign.


Exclamation point icon
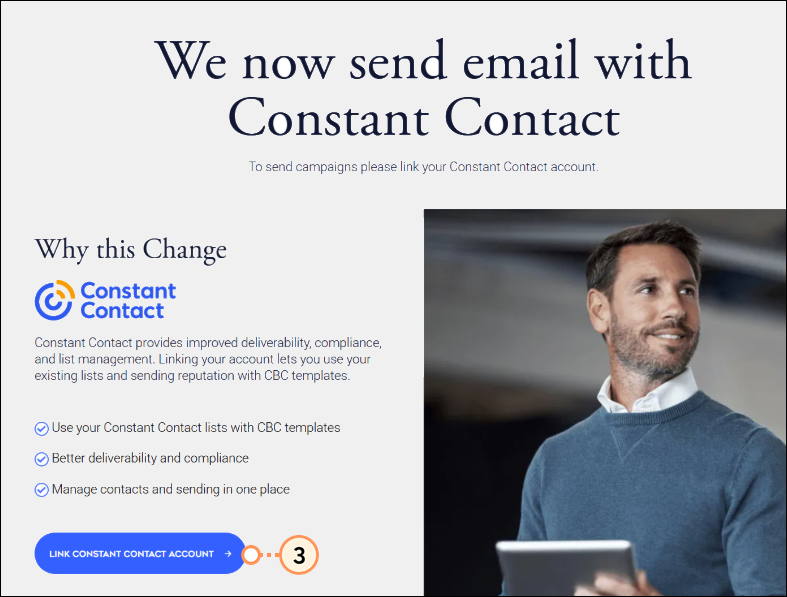
Important: If you have an existing Constant Contact account, and would like to set up this integration, please contact solutionshub@cbhomeoffice.com and request to move in your existing account into the partnership.


Activate your Constant Contact account

  1. Click on your profile icon in the upper right-hand corner of your Coldwell Banker Commercial account.

    Profile Icon

  2. Click the "Campaigns" option at the bottom of the drop-down menu.

    Dropdown campaigns option

  3. Click the Link Constant Contact Account button.

    Link Constant Contact account button

  4. You're prompted to enter your email address to create a Constant Contact account. Check you email and click the Verify Email button to complete the process. The link in the verification email is valid for 72 hours.

    Example of Constant Contact email verification email with Verify Email button


Email Verification

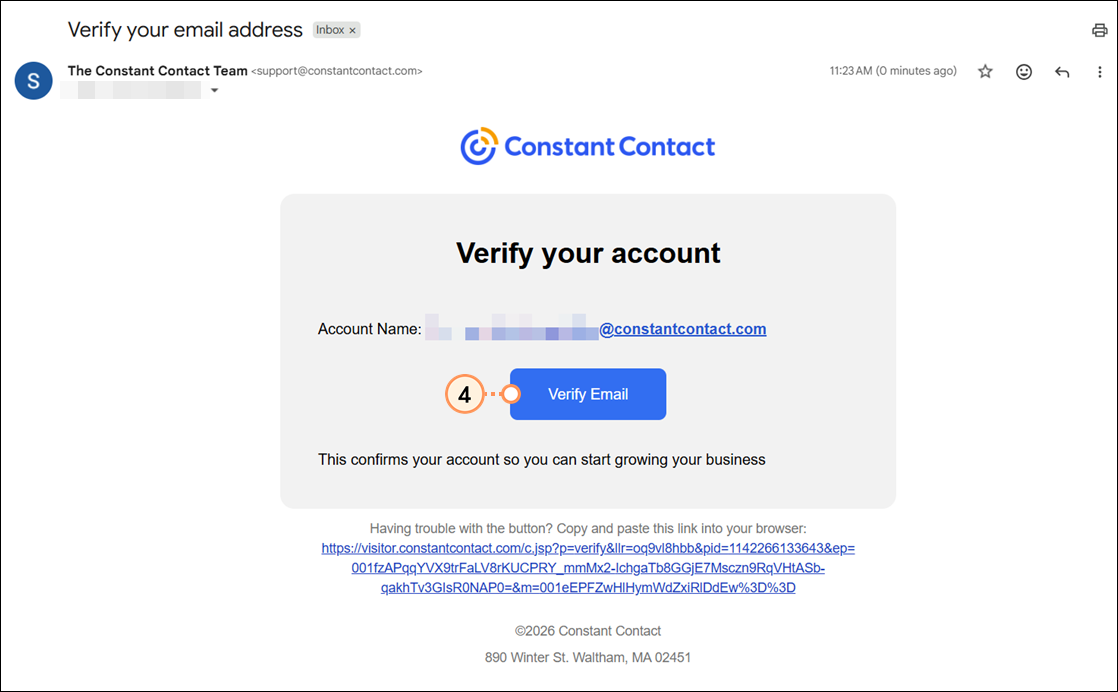
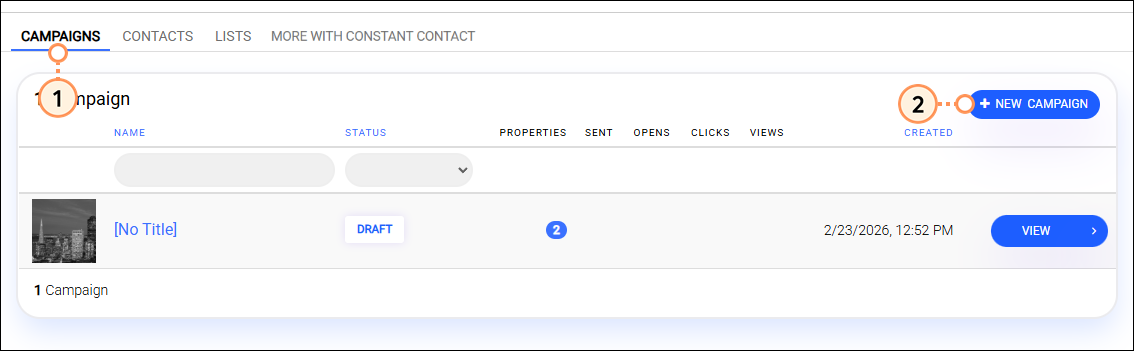
An alert is present on the Campaigns tab of you Coldwell Banker Commercial account until your email is verified. If your email address isn't verified within the first 72 hours, you can resend the verification email.

Coldwell Banker Comercial account, Campaigns tab with Constant Contact pending email verification banner

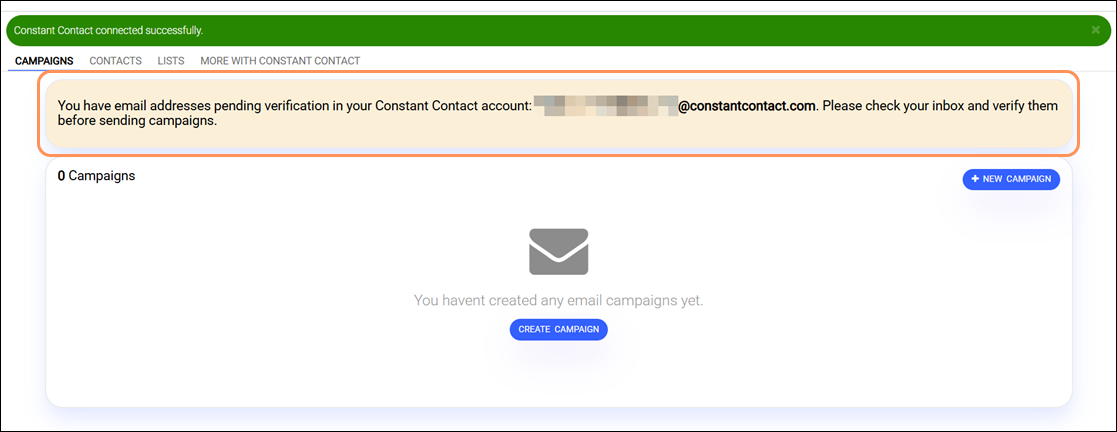
To resend the Constant Contact email verification email:

  1. Click the More with Constant Contact tab.
  2. Click on your name in the top right-hand corner.
  3. Select Settings > Account Emails.
  4. Click the three dots to the right of your email address and select the "Resend Verification Email" option.


Add contacts

  1. Click the Contacts tab.
  2. Click the Add Contacts button.

    Contacts tab Add Contacts button

  3. Click Upload CSV to upload a file of contacts or Add Contact to manually add contacts one at a time.

    Upload file or add contacts manually options

  4. If you chose to:
  • Upload a CSV - Select your file, choose the list(s) contacts should be added to, checkmark the agreement box, and then click Upload.

    Select file choose lists agreement checkbox and upload button

  • Add contacts manually - Enter the contact details, choose the list(s) the contact should be added to, checkmark the agreement box, and then click Save Contact.

    Contact detail fields choose lists agreement checkbox and save contact button


Create a new list

Exclamation Point Icon
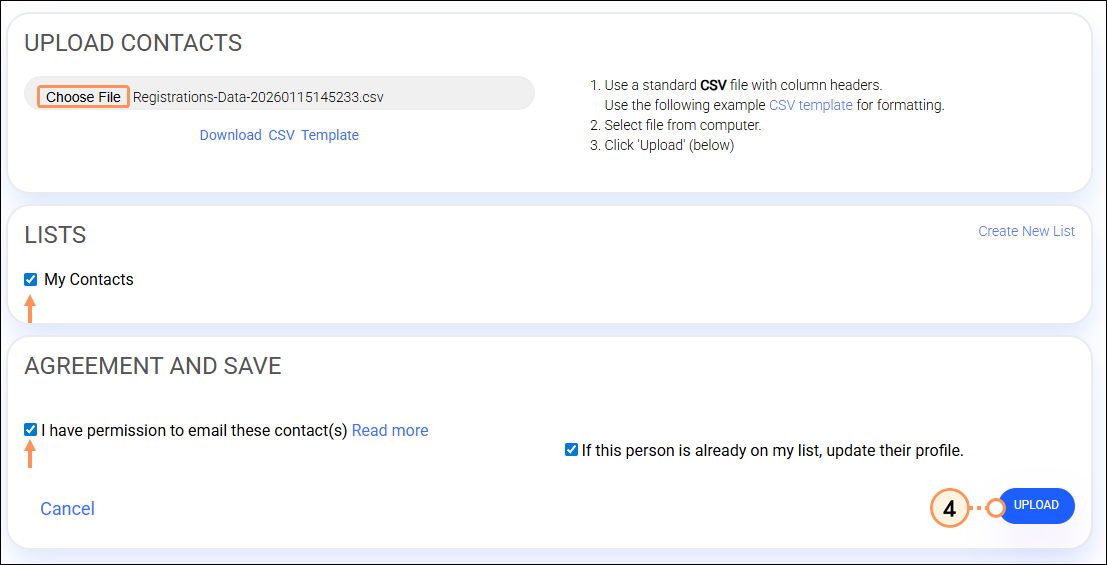
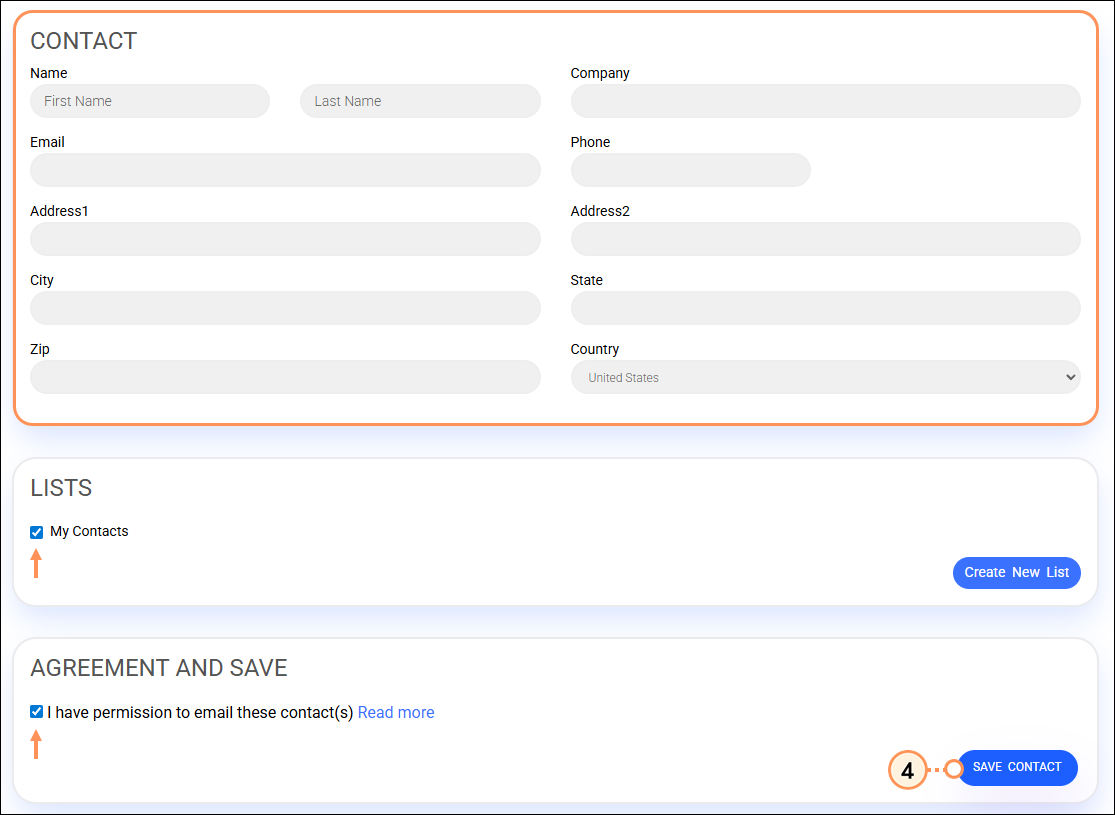
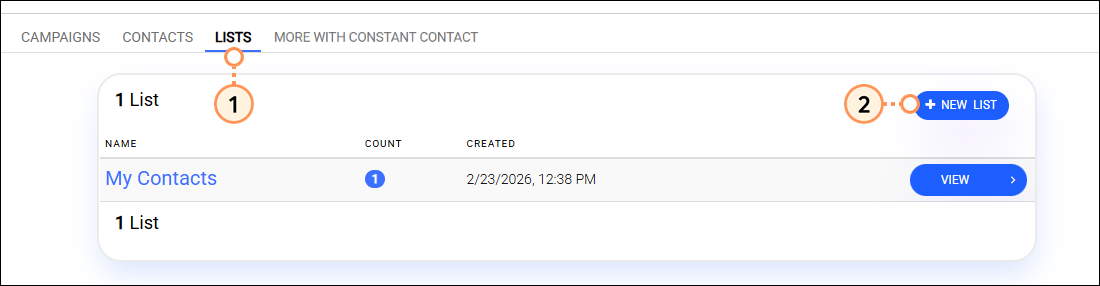
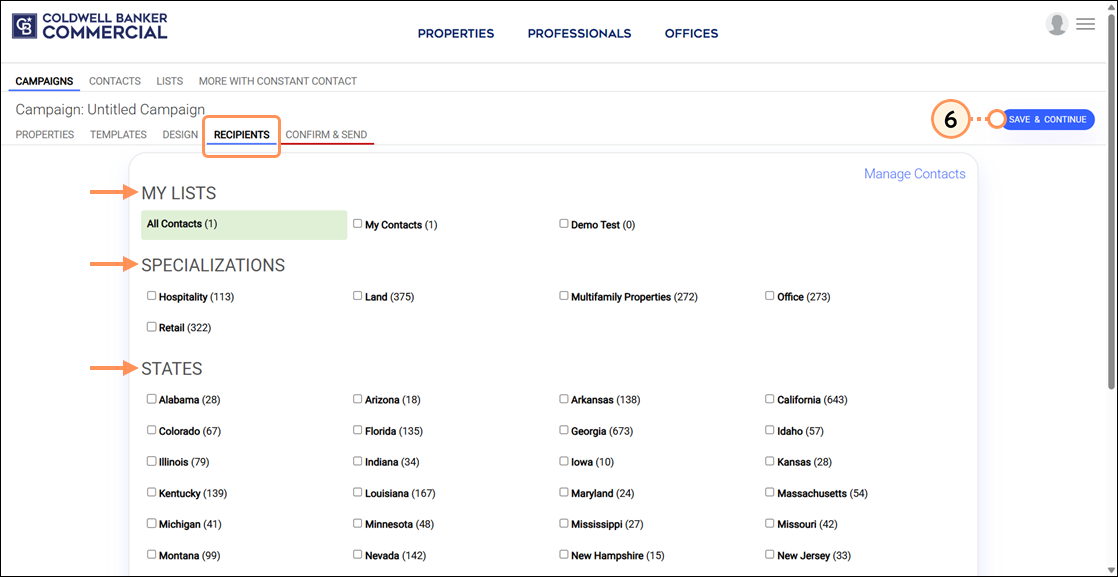
Important: Each list can hold a maximum of 5,000 people.


  1. Click on the Lists tab.
  2. Click the New List button.

    Lists tab and New List button

  3. Enter a list name and then click the Save List button.

    List name field and Save List button


Create and schedule a campaign

  1. Click the Campaigns tab.
  2. Click the +New Campaign button.

    Campaigns tab Create Campaigns button

  3. Select the listing you'd like to include in the campaign and then click the Save & Continue button.

    Property selecting Save and continue button

  4. Select a template and then click the Save & Continue button.

    Template selectiong save and continue button

  5. Review and update your details in the panel on the right-hand side, as desired. Then click the Save & Continue button.

    Edit Details save and continue button

  6. From the Recipients tab, check the lists, specializations, and/or states you want to send to and then click the Save & Continue button.

    Recipients tab, My Lists section, Specializations section, and State section, and SAVE AND CONTINUE button

  7. Select the date and time you'd like to send your campaign, or leave the field blank to send immediately.
  8. To send a preview of the email to yourself before sending out to your contacts, click the Send Preview button.
  9. When you're ready to send out your campaign, click the Send With Constant Contact button.

    Delivery date field Preview and send buttons


Conversation iconNeed assistance? Our Partner Support Team is ready to help you with technical or product-related questions. Get help from Constant Contact here.


Questions?

Ask the Community

Did this article answer your question?


Constant Contact Logo

Copyright © 2026 · All Rights Reserved · Constant Contact · Privacy Center