A Banner Sign-up Form is embedded into the HTML code of a website, and stretches across the top or bottom of the page, so that you can collect sign-ups as people view your website.
 | Design tip: The banner, pop-up, and flyout website sign-up forms are all added to your website using "universal code." To prevent multiple forms from displaying at the same time, we recommend only having one active form on your website at a time. |
Create a Banner Sign-up Form
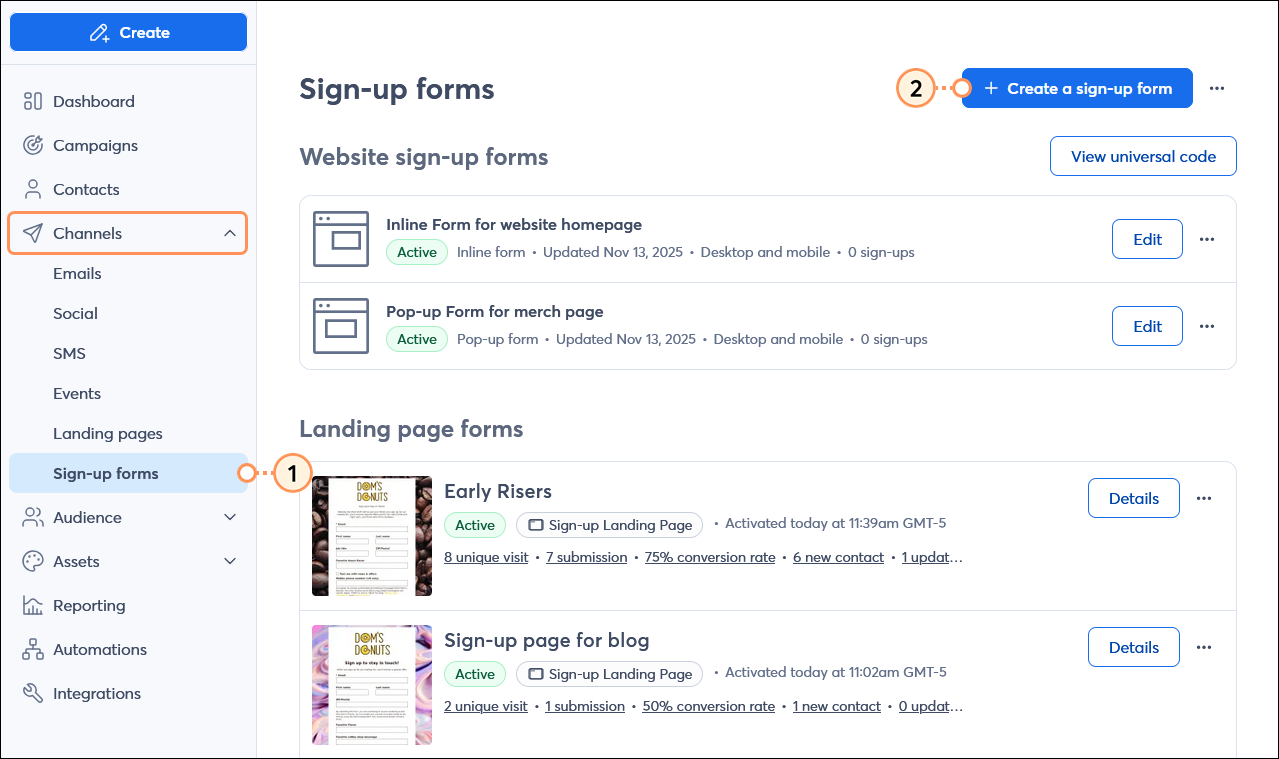
- From the menu on the left-hand side, click Channels > Sign-up forms.
- Click the Create a sign-up form button.
- Click Banner.

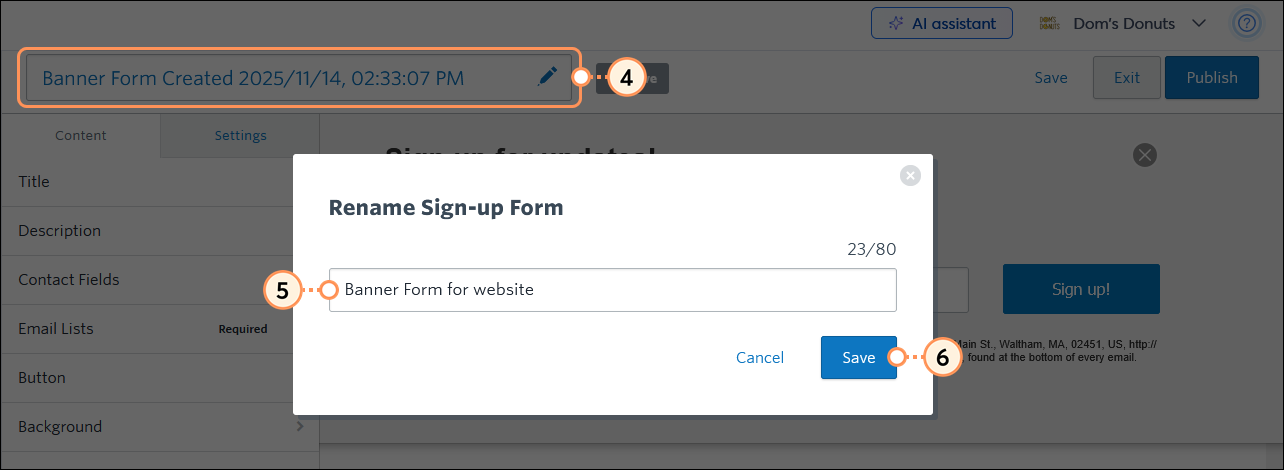
- Click on the sign-up form's name in the upper left-hand corner of the editor.
- Give your sign-up form a unique name so you can easily identify it in your account later. Your website visitors never see this name. The name has an 80 character limit.
- Click the Save button.
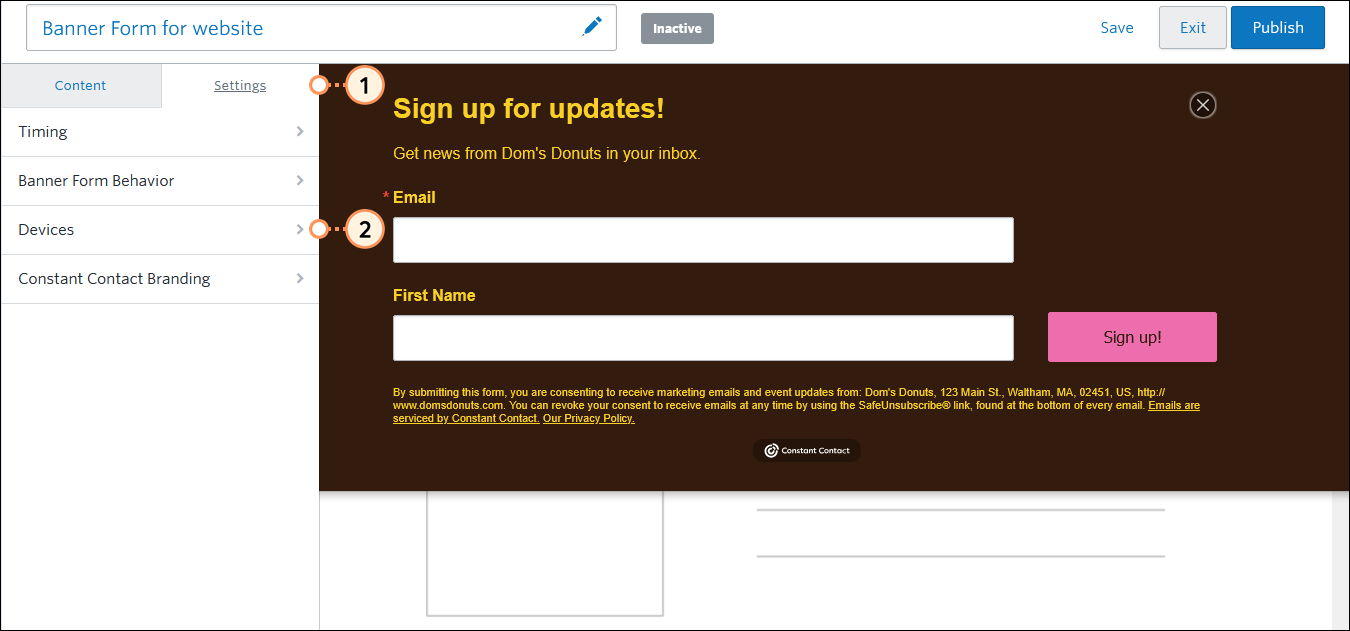
Customize the form's content
- Click the Content tab to customize what appears on your sign-up form:
- Title - From here you can change the title and the title text color. Your headline should be short and make it clear what your form is for. When choosing a color, you can select one quickly from the color palette or add a specific hex value.
Tip: If you want to exactly match your brand colors, but aren't sure of the hex value, use a color picker, such as Color Cop to find them. - Description - Use the description as an opportunity to tell your contacts about the type of content they can expect and how often they'll be contacted. Choose from the color palette or add a specific hex value.
- Contact Fields - Choose the fields you want your contacts to fill out when they sign up. An email address is always required by default. To require additional contact details and custom fields, check the box to select a field and then click the toggle switch next to it to make it a required field. Lots of required fields can scare people away from signing up. Stick to the essentials to keep the banner within the recommended height; you can always ask for more info later.
- Email Lists - From here you can select the list you want to let your contacts add themselves to when they sign up. If only one list is selected, it won't show up on the form. We recommend using a single list to keep the banner within the recommended height.
- Button - From here you can edit the text and change the text color and background color of the button to make it grab attention. Choose from the palette or add a specific hex value.
- Background - From here you can change the background color of the form to make it stand out on your website, but still be consistent with your branding. Choose from the color palette or add a specific hex value.
- When finished, click Save in the upper right-hand corner.

To change the appearance of the sign-up form beyond the background and button color, you have to edit your theme settings, choose a new theme, or update the CSS in your website after the form is installed on your website. Your webmaster or the support for your website builder can help you with this.
Set the timing for displaying your form
Want to catch new contacts once they enter your website? Maybe you want to wait a few seconds until they're invested in your content, or maybe you'd rather grab their attention when they're about to leave. You've got control over when your sign-up form displays and how often returning visitors see the form.
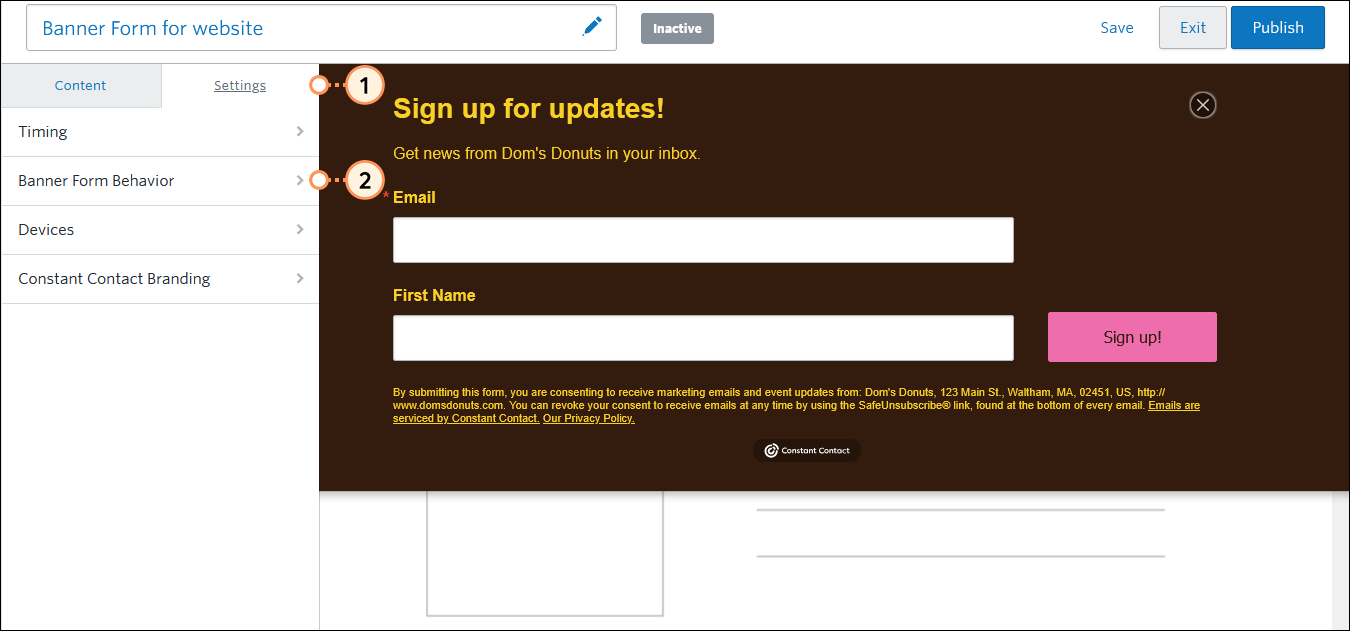
- While editing your form, click the Settings tab.
- Click Timing.

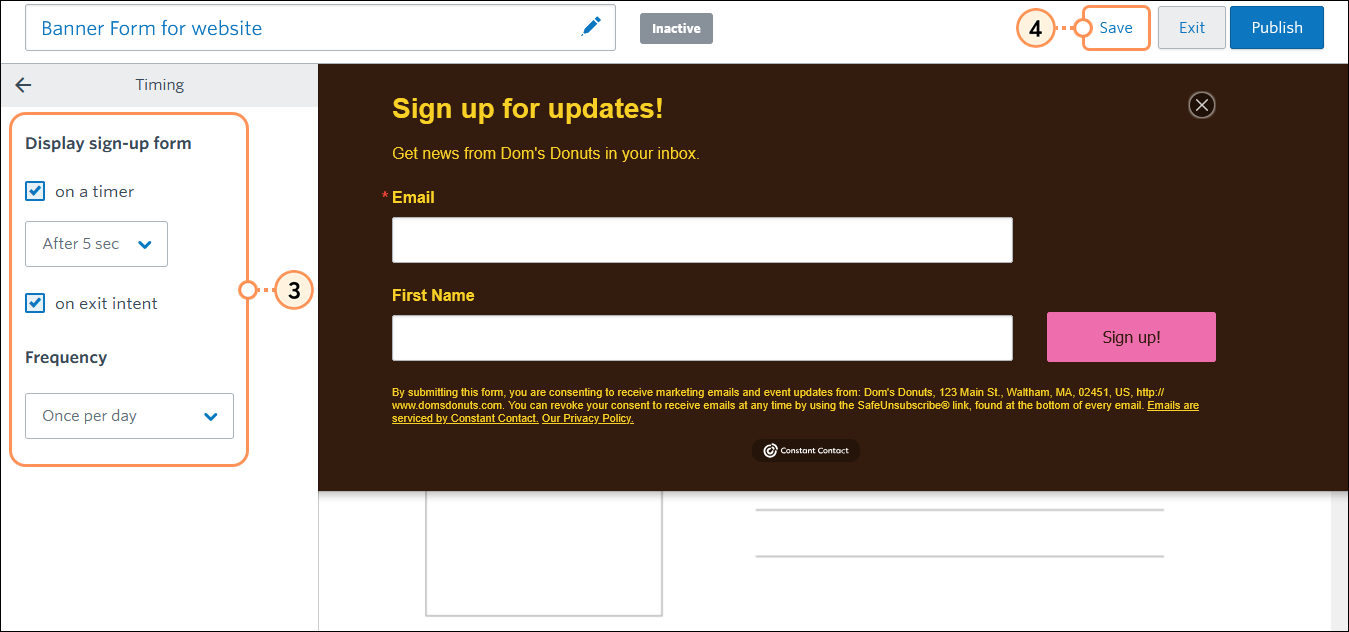
- Select the display options for your form. You can choose a single option or use them both together:
- On a timer - Choose the number of seconds, between 1 and 15, before the form initially presents itself.
- On exit intent - Enable the form to display as a visitor moves their cursor towards the X in the upper right-hand corner to close their browser.
- Choose a frequency from the drop-down menu. Each visitor to your website sees the form the first time based on the timer you select in Step 3, and only sees the form a second time based on the frequency you choose, even if the visitor leaves your site and returns later, or stays on your website for the whole duration.
- Click Save.
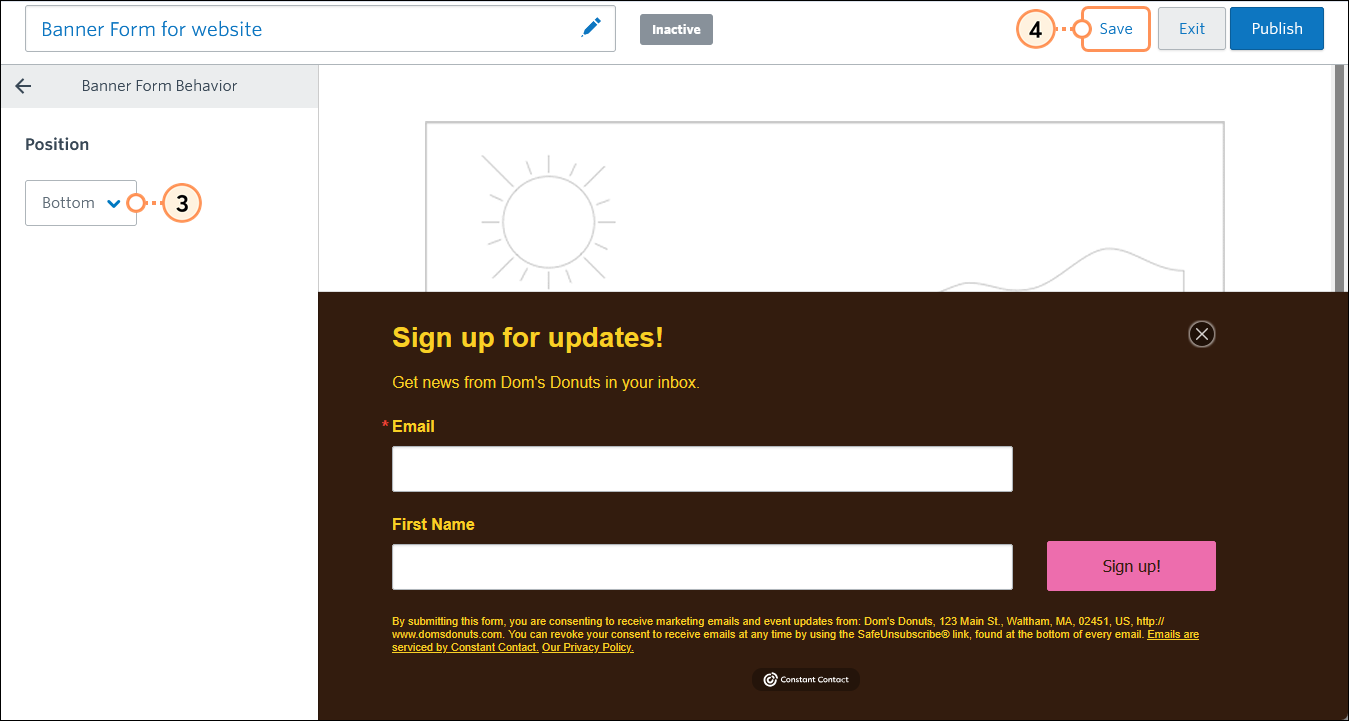
Adjust the position of your banner
Your banner can either be placed at the top or bottom of your website. You can edit your form and change the position at any time.
- While editing your form, click the Settings tab.
- Click Banner Form Behavior.
- Choose to position your banner at the top or bottom of your webpage by selecting an option from the drop-down menu.
- Click Save.
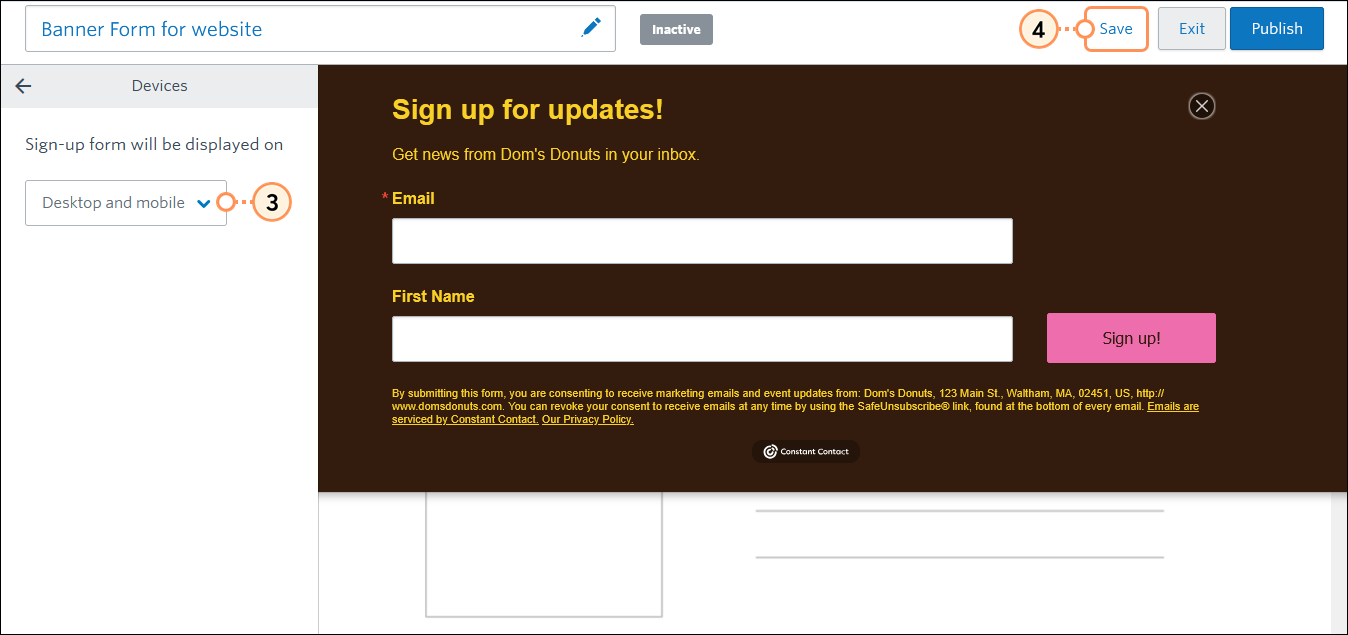
Choose the types of devices you want to display your form on
You can create custom forms to display to your website visitors based on the device they're viewing from.
- While editing your form, click the Settings tab.
- Click Devices.
- From the drop-down menu, select:
- Desktop and mobile - This shows your sign-up form to everyone no matter what type of computer or mobile device they're viewing your website from.
- Desktop only - This only shows your sign-up form to people viewing your website on desktop or laptop computers.
- Mobile only - This only shows your sign-up form to people viewing your website on mobile devices, such as smartphones.
- Click Save.
(Optional) Remove Constant Contact branding
Your email plan determines if you're able to remove the branding. If you see the option but can't select it, you need to upgrade your email plan.
- While editing your form, click Settings.
- Click Constant Contact Branding.
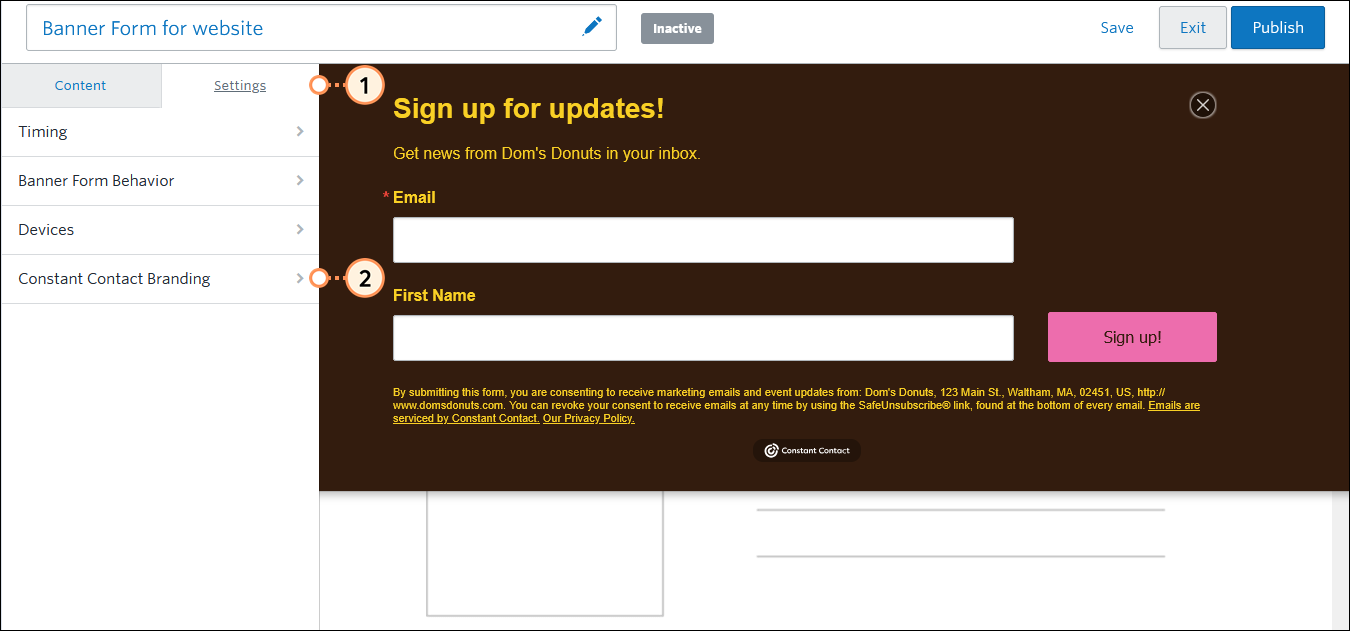
- Select "Hide Constant Contact Branding" to remove the logo at the bottom of your form. This doesn't affect the consent disclaimer above the button, which can't be removed or altered.
- Click Save.

Removing the logo only applies to the unique sign-up form you're working on and doesn't remove it from all of your sign-up forms or emails. It is possible to remove the logo from the email footer in all of your emails and invitations by following these steps.
Install the Banner Sign-up Form
 | Important: You will need to be comfortable with editing the HTML code for your website, but if you aren't, your webmaster can help you with the code. If you're using a website builder, their support can also help you. |
When you're done customizing your Banner Sign-up Form, the next steps are to activate it, and then install the Universal Code on your website.
- Universal Code - The Universal Code connects your Banner Sign-up Form to your Constant Contact account and is typically added to your website's footer.
Please see these detailed instructions for activating and installing your sign-up form. Installing the Inline Sign-up Form adds cookies to your website.
| Did you know? If you're not comfortable with adding code to your website, our Lead Generation Landing Pages are HTML-free! The URL for the landing page can be linked to buttons, images, and text very easily in most website builders. |
Any links we provide from non-Constant Contact sites or information about non-Constant Contact products or services are provided as a courtesy and should not be construed as an endorsement by Constant Contact.