This means that you can create an action group that, on a given date, will schedule and send birthday emails, subscription reminders, and other recurring events.
This article will detail how to create and use recurring action groups.
| Administrators | ✓ | |
| Company Managers | ✓ | |
| Marketing Managers | ✓ | |
| Sales Managers | ||
| Salespersons | ||
| Jr. Salespersons |
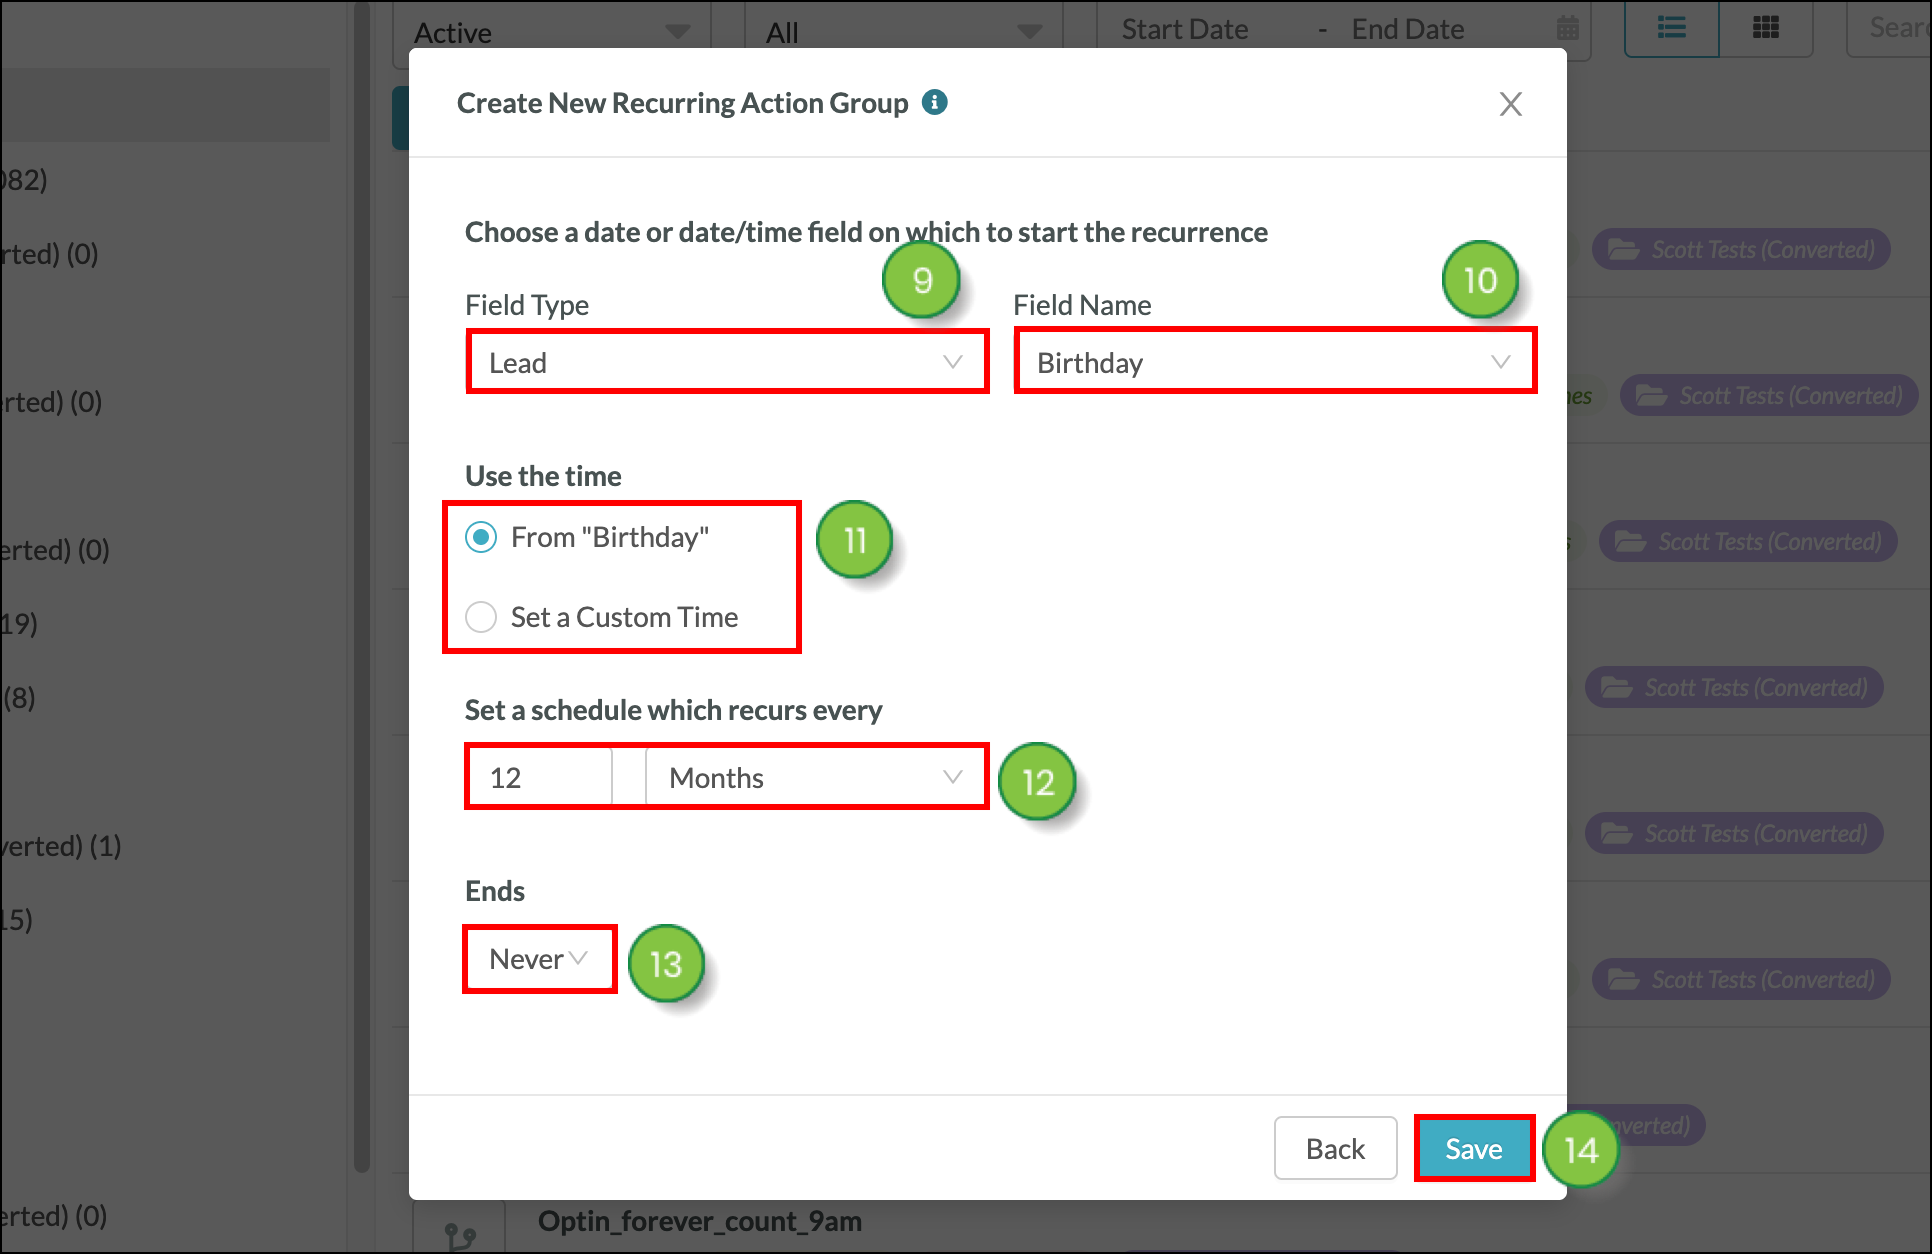
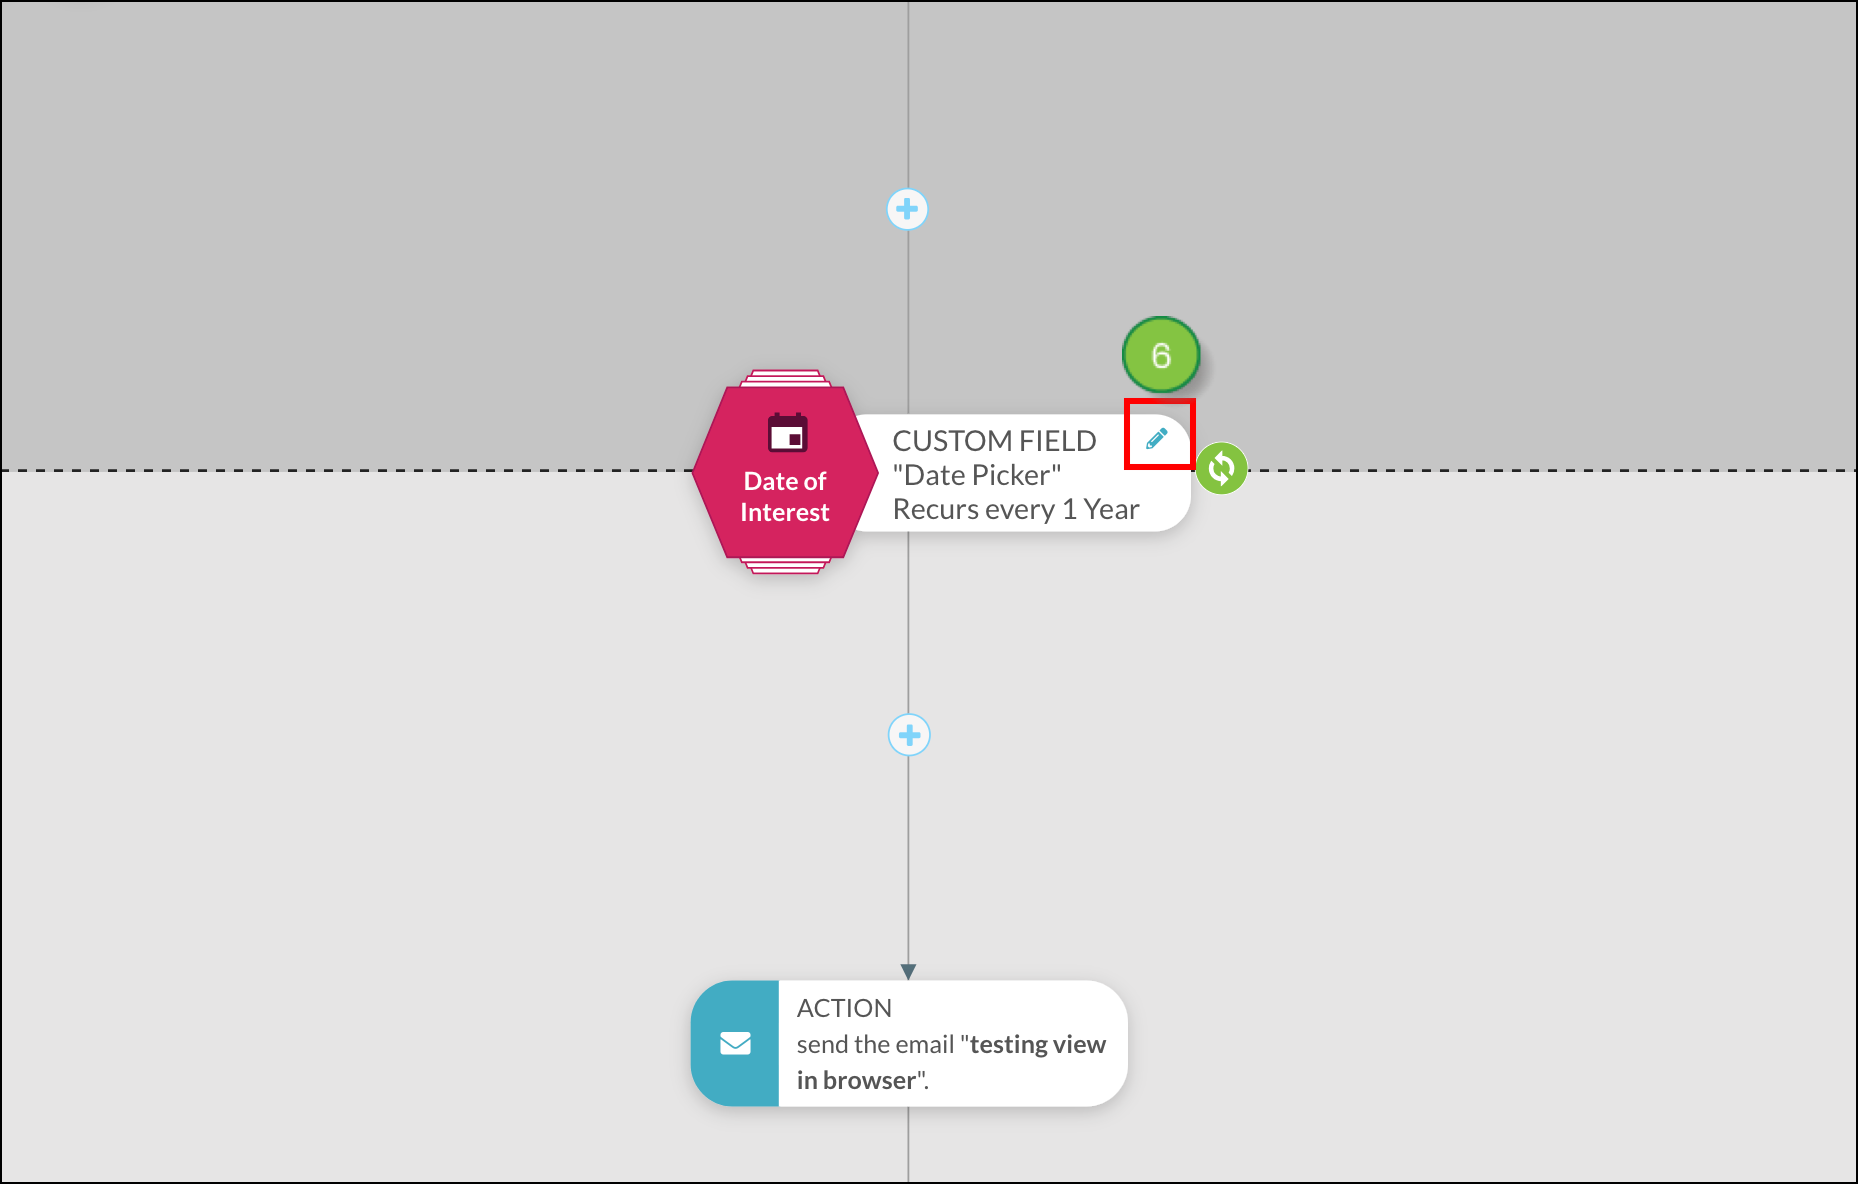
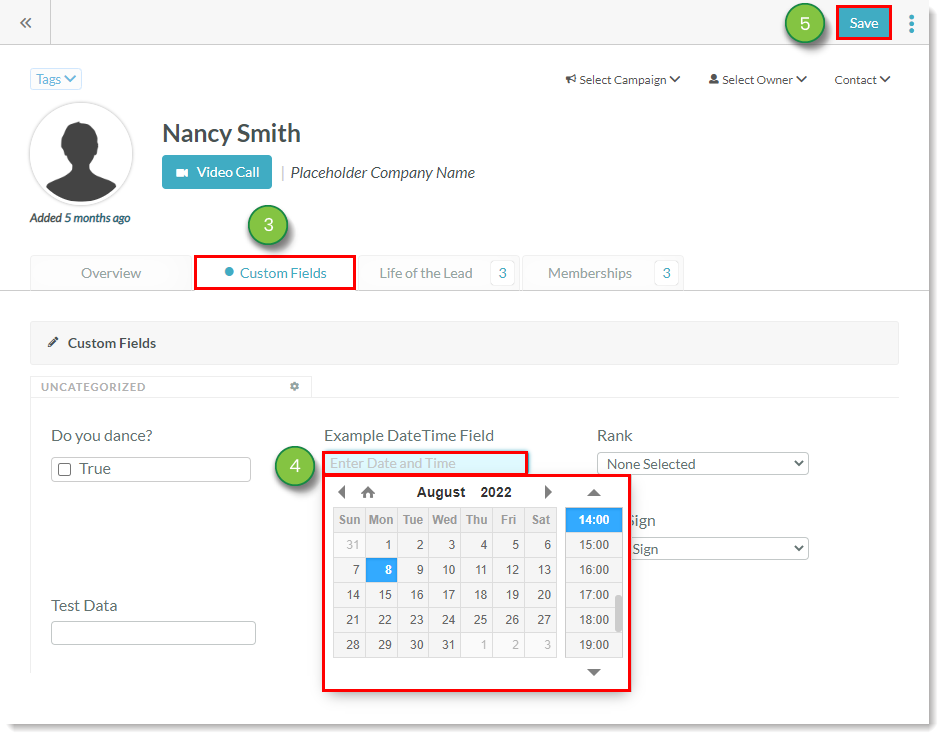
Recurring action groups require a custom Date or DateTime field to function. Date and Date/Time fields are usable as reference points for certain action groups and workflows that utilize a custom field. This is due to how the field references a specific date or both a date and time. These fields are useful, as they are meant to dynamically schedule and send reminder emails.
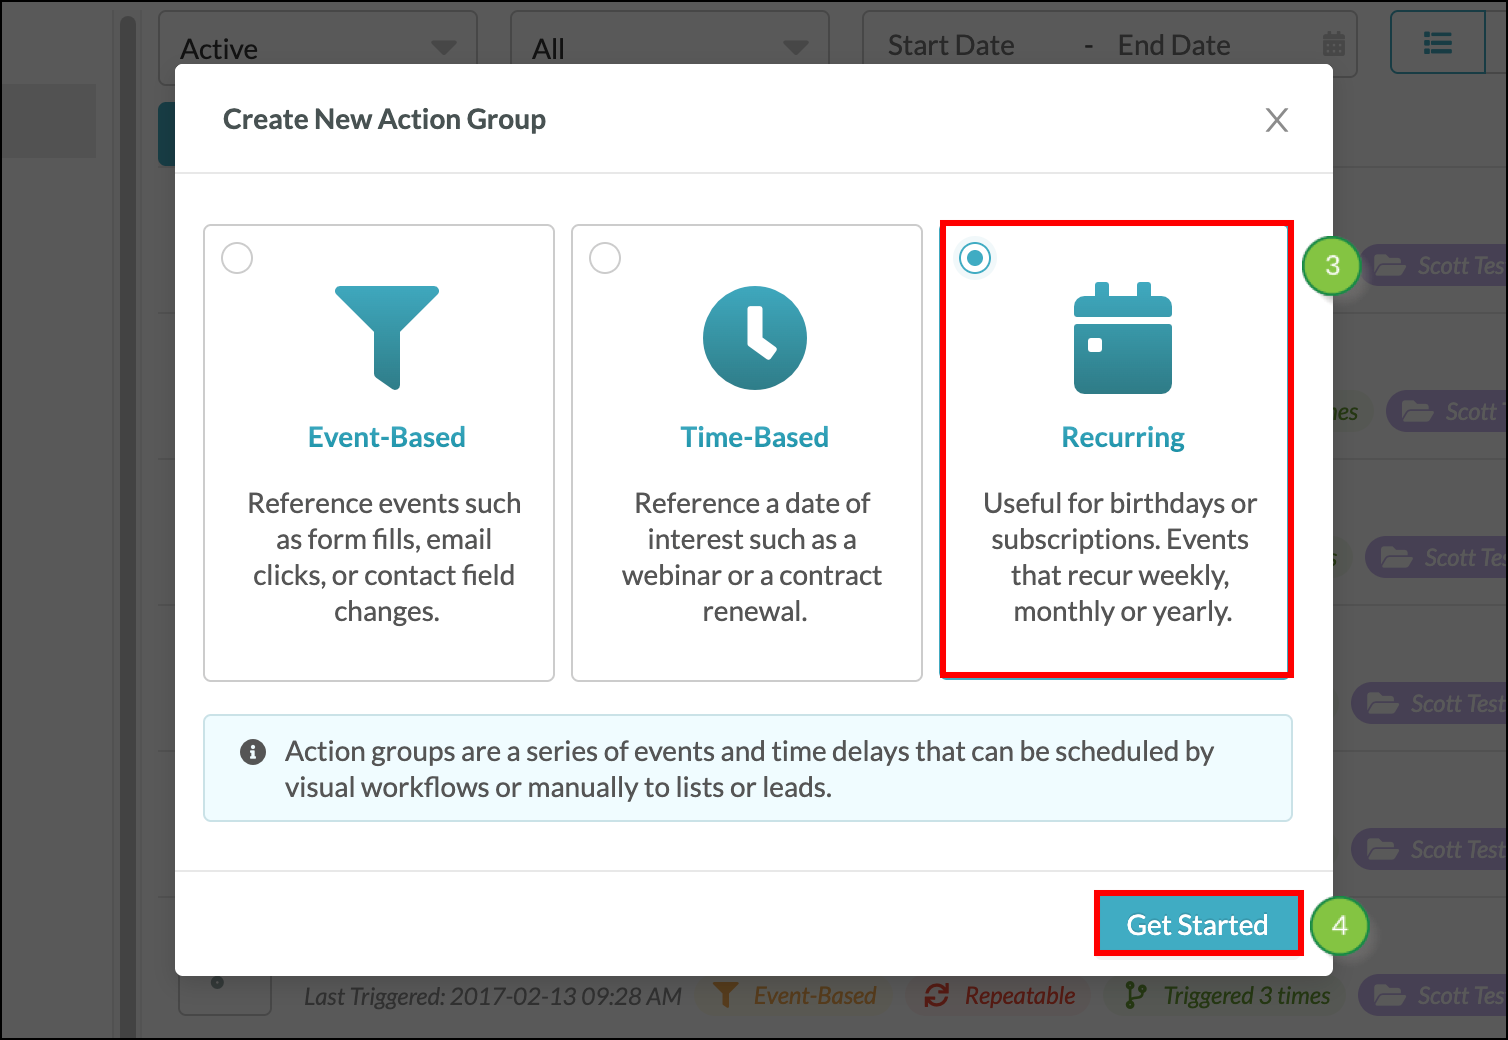
Note: Standard action groups are available on the Trial and the Essential plan. Standard, time-based, and Recurring action groups are available on the Advanced and Ultimate plans.
Refer to Creating DateTime Fields for more information on creating custom Date and DateTime fields.
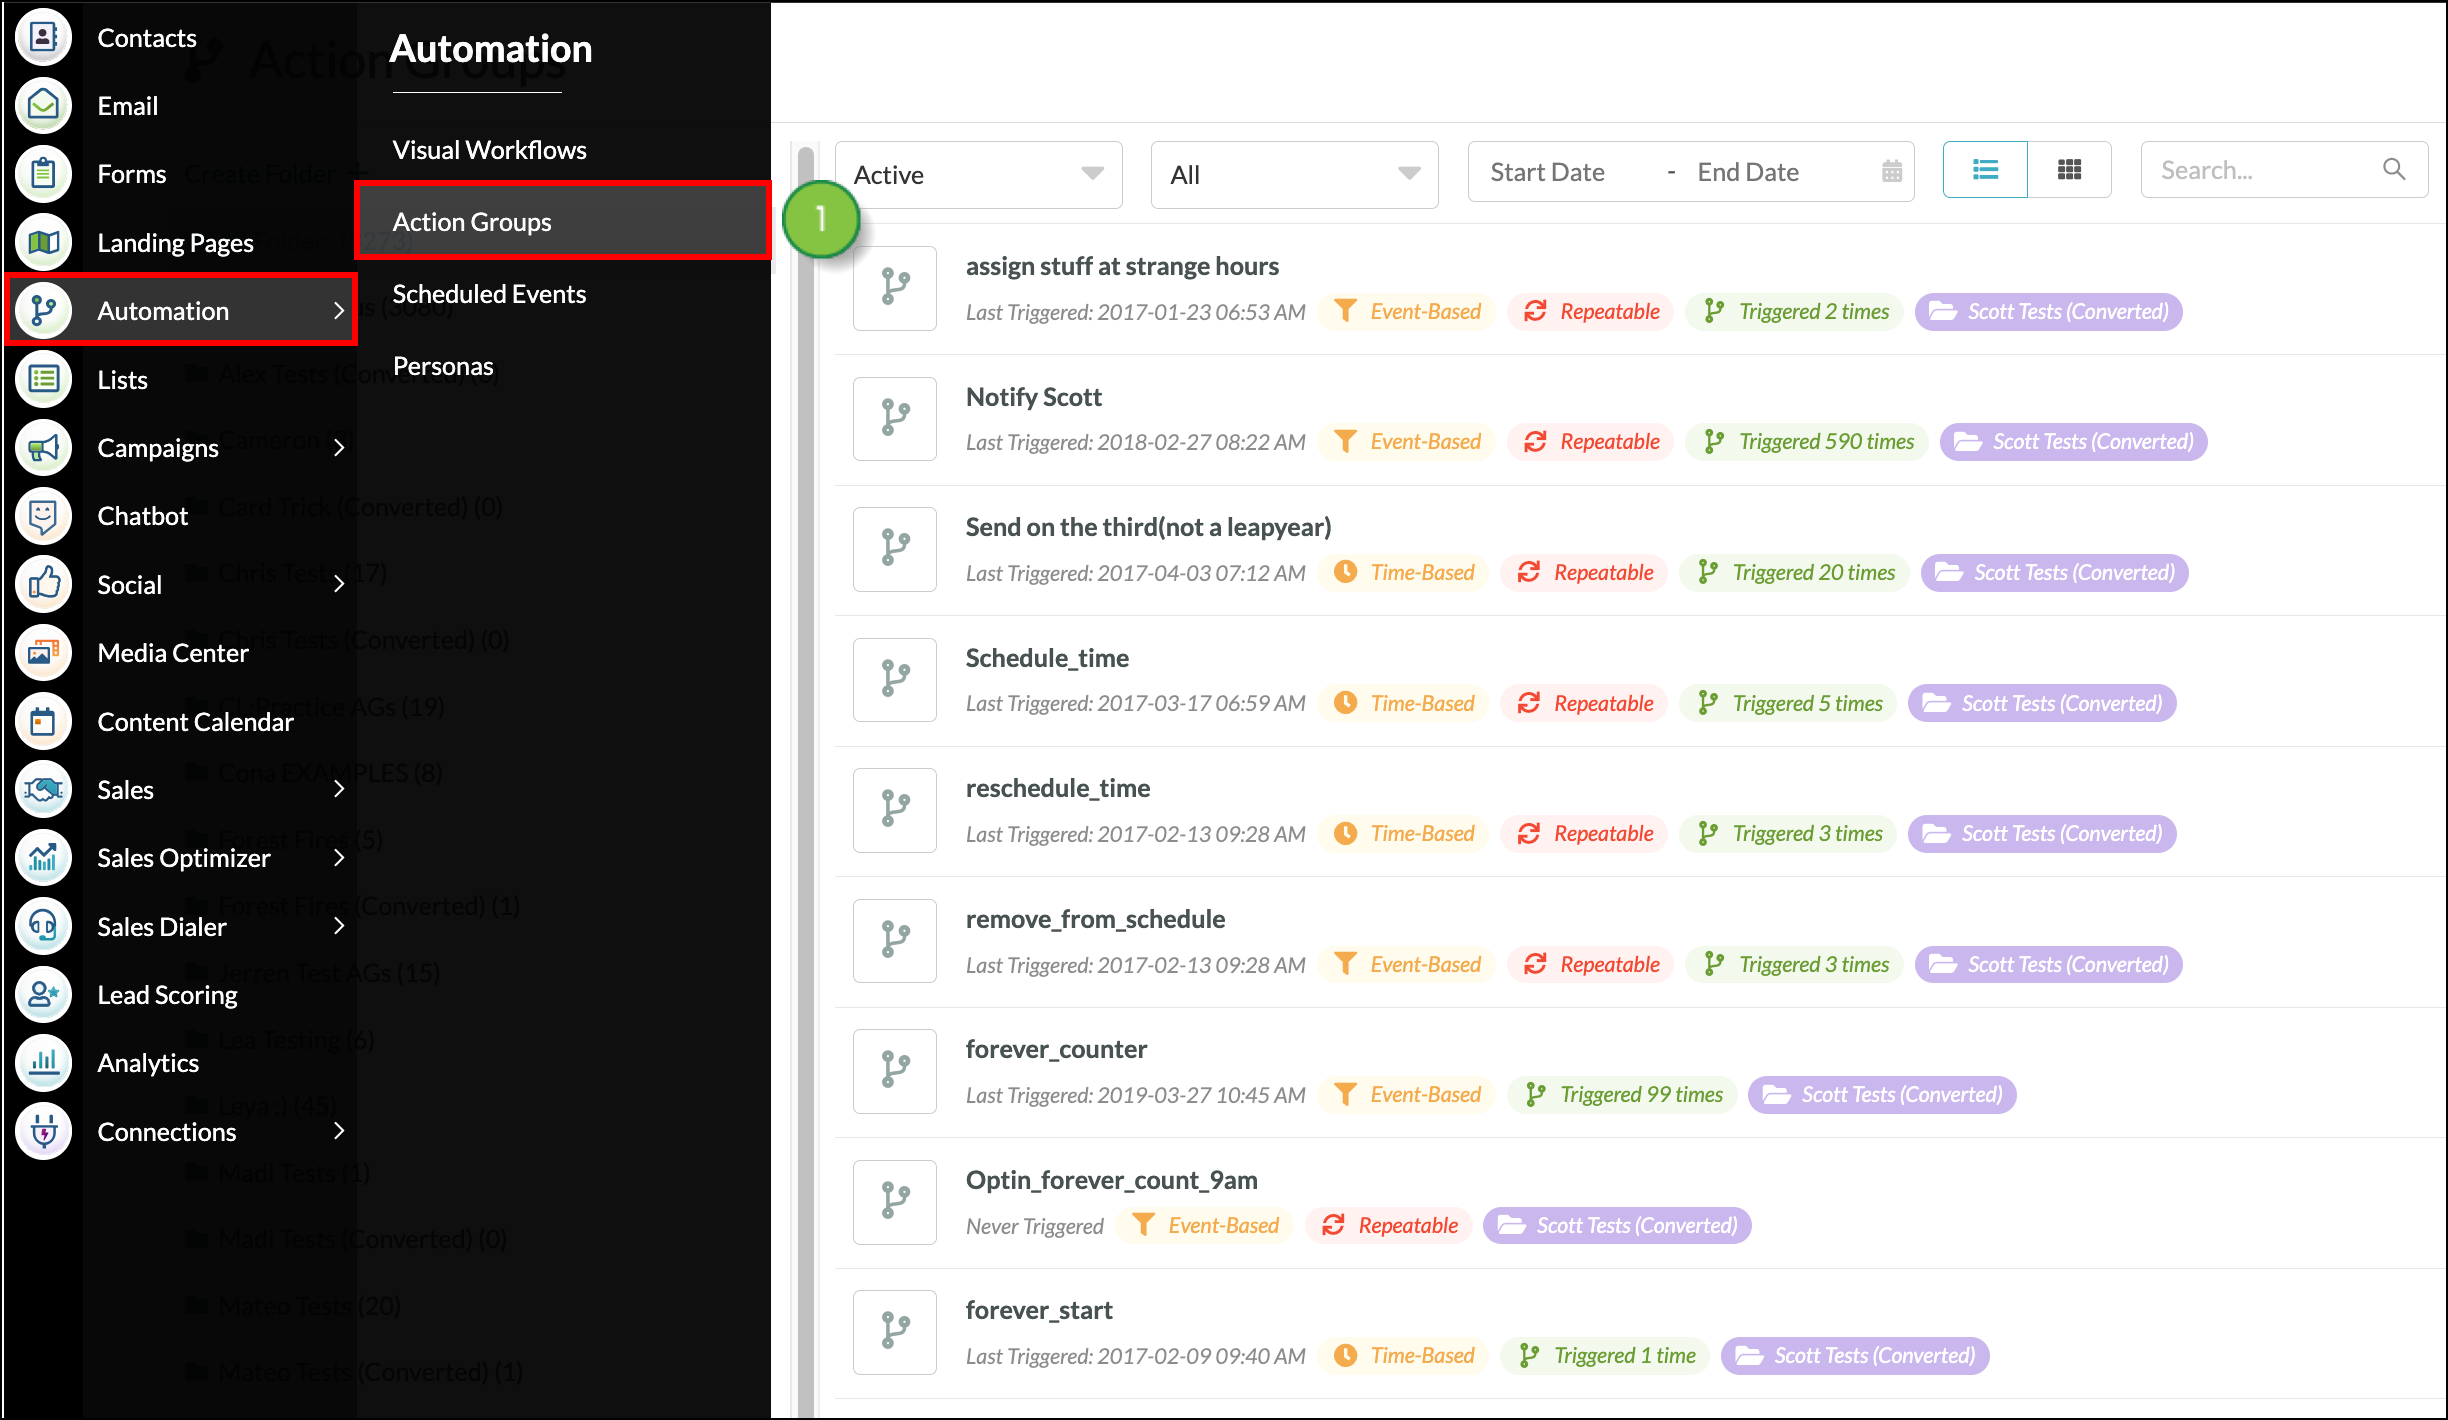
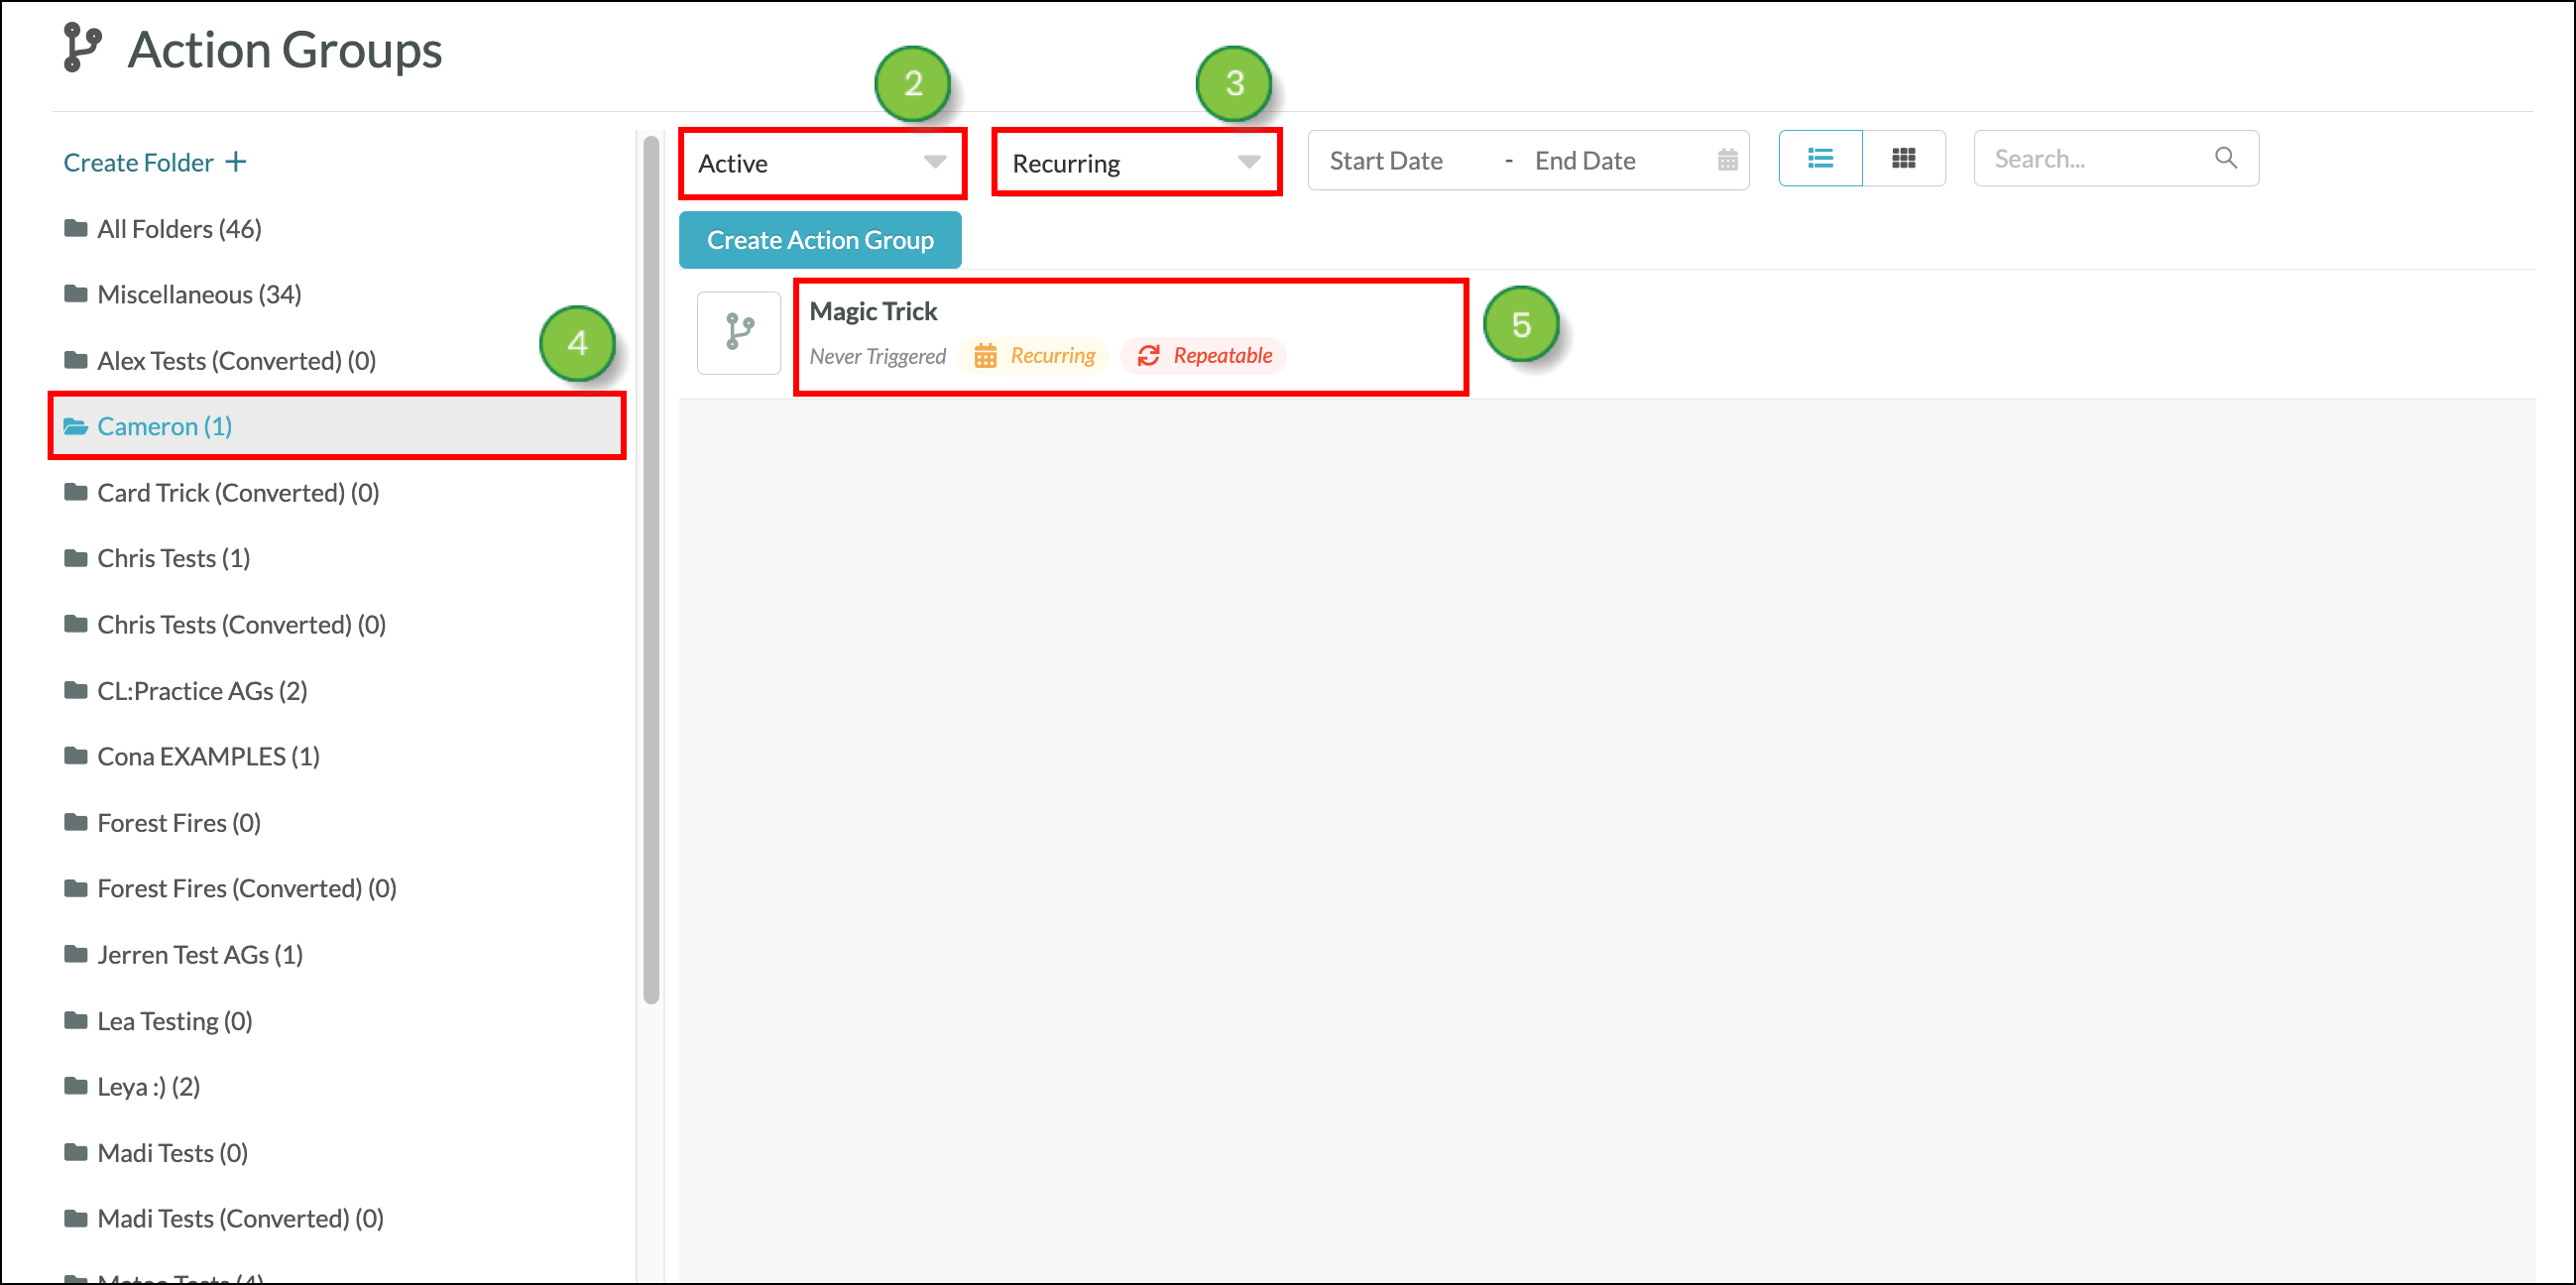
Action groups are collections of standalone events that can be referenced within a visual workflow or manually scheduled to a list or lead. Recurring action groups differ slightly from standard action groups, as they act based on the frequency of the recurring action, the date and time when the action will occur, and the number of times the action will recur.
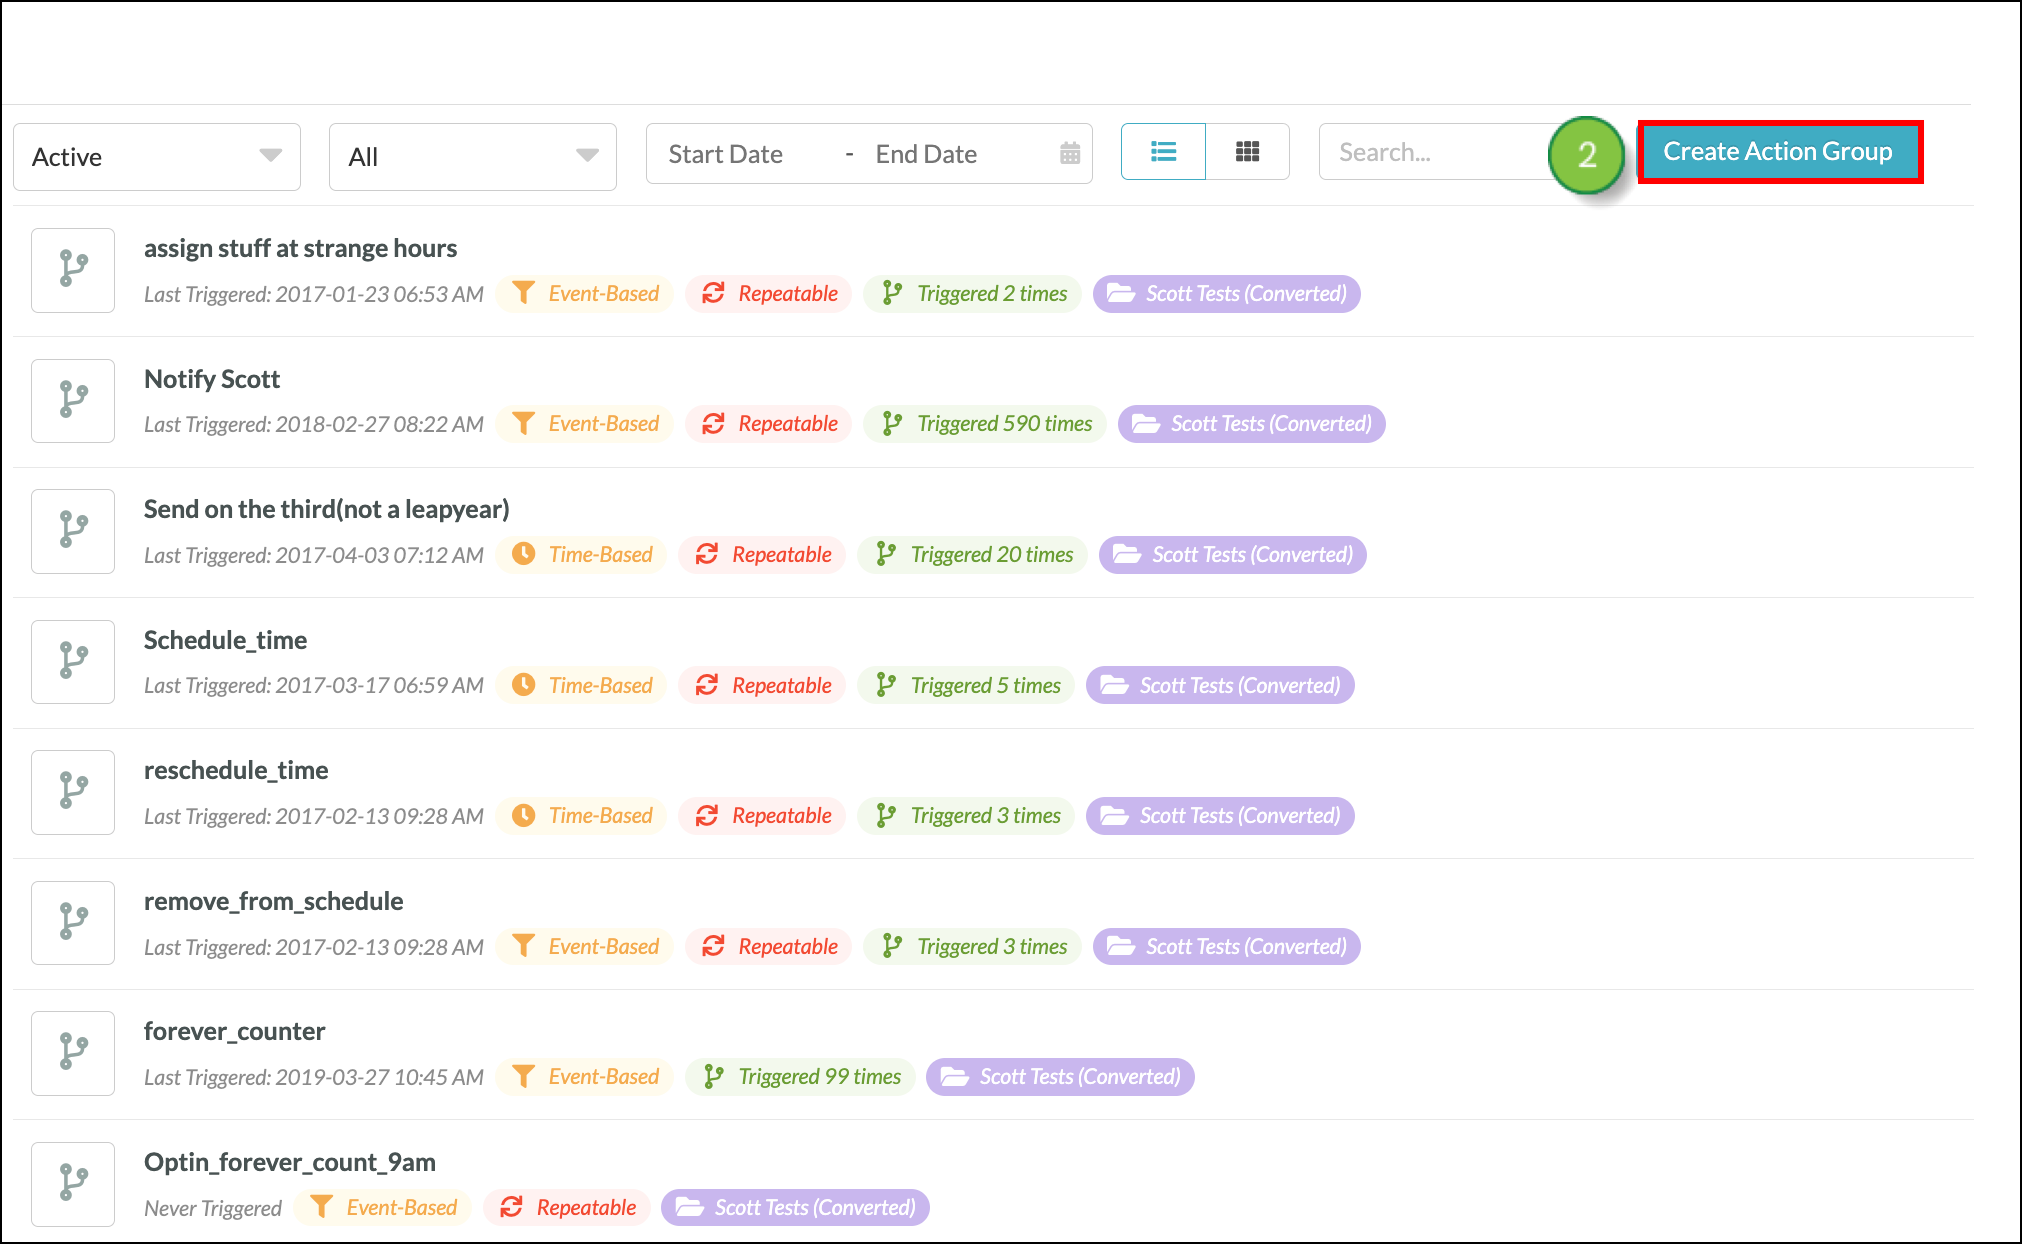
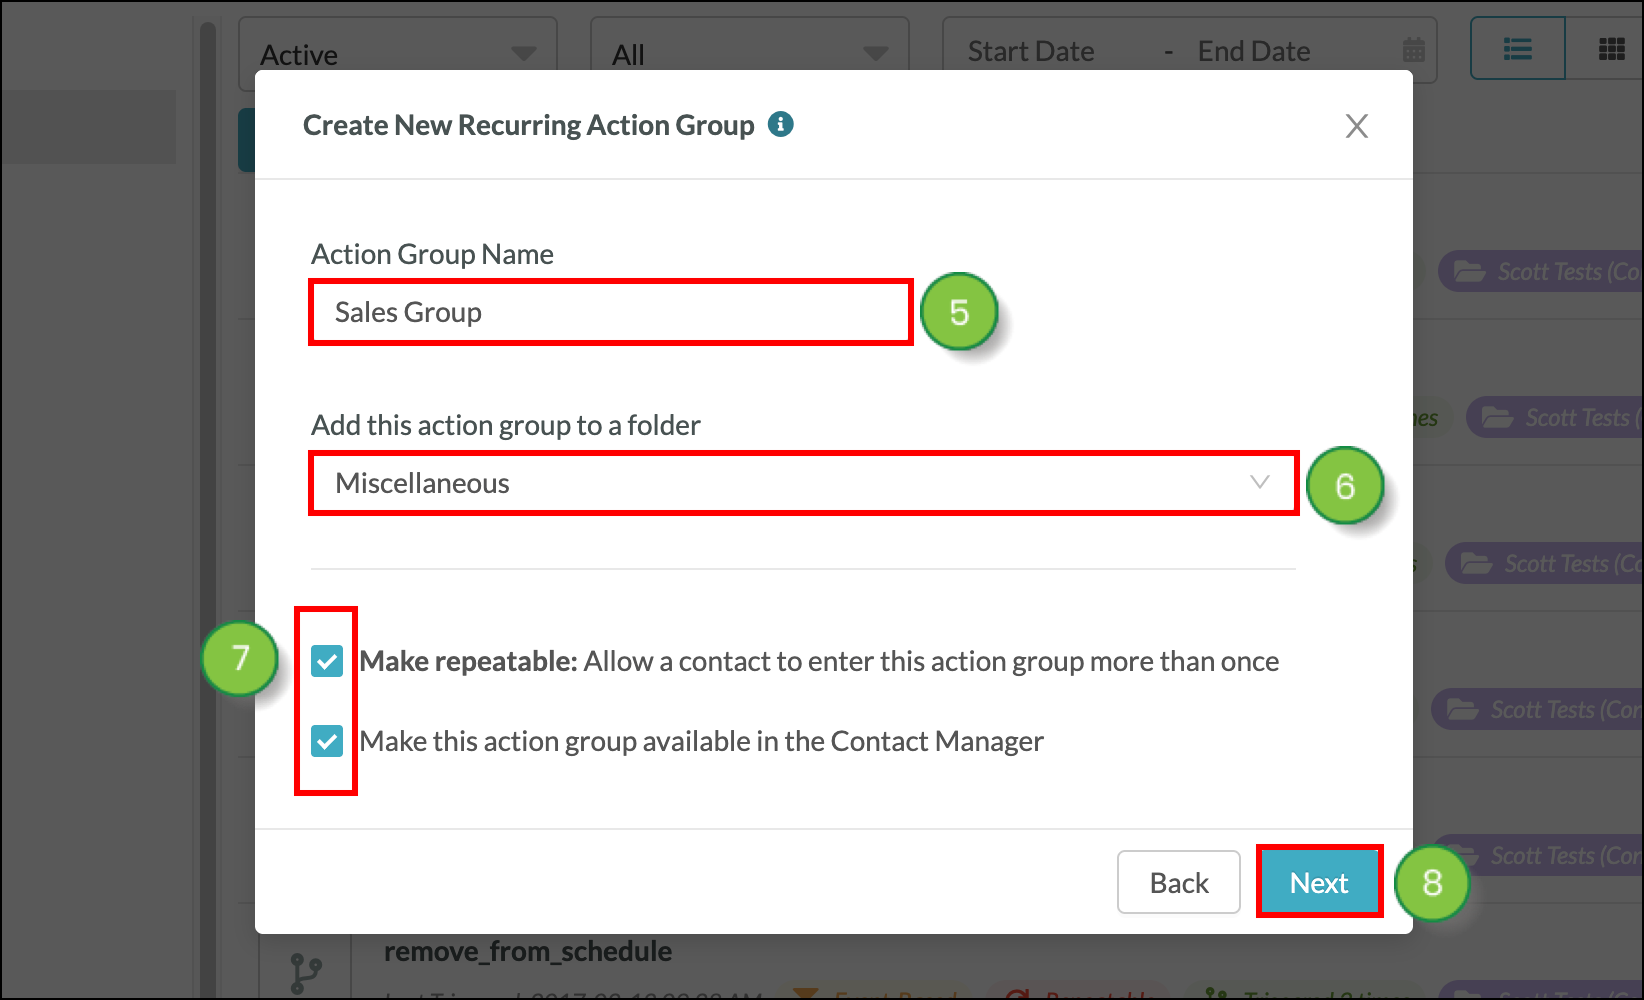
To create recurring action groups, do the following:
Refer to the Action Groups Overview for more information on setting actions after the core recurring action group has been created, as well as additional action group features.
You can edit previously created recurring action groups at any time. To edit a recurring action group, do the following:
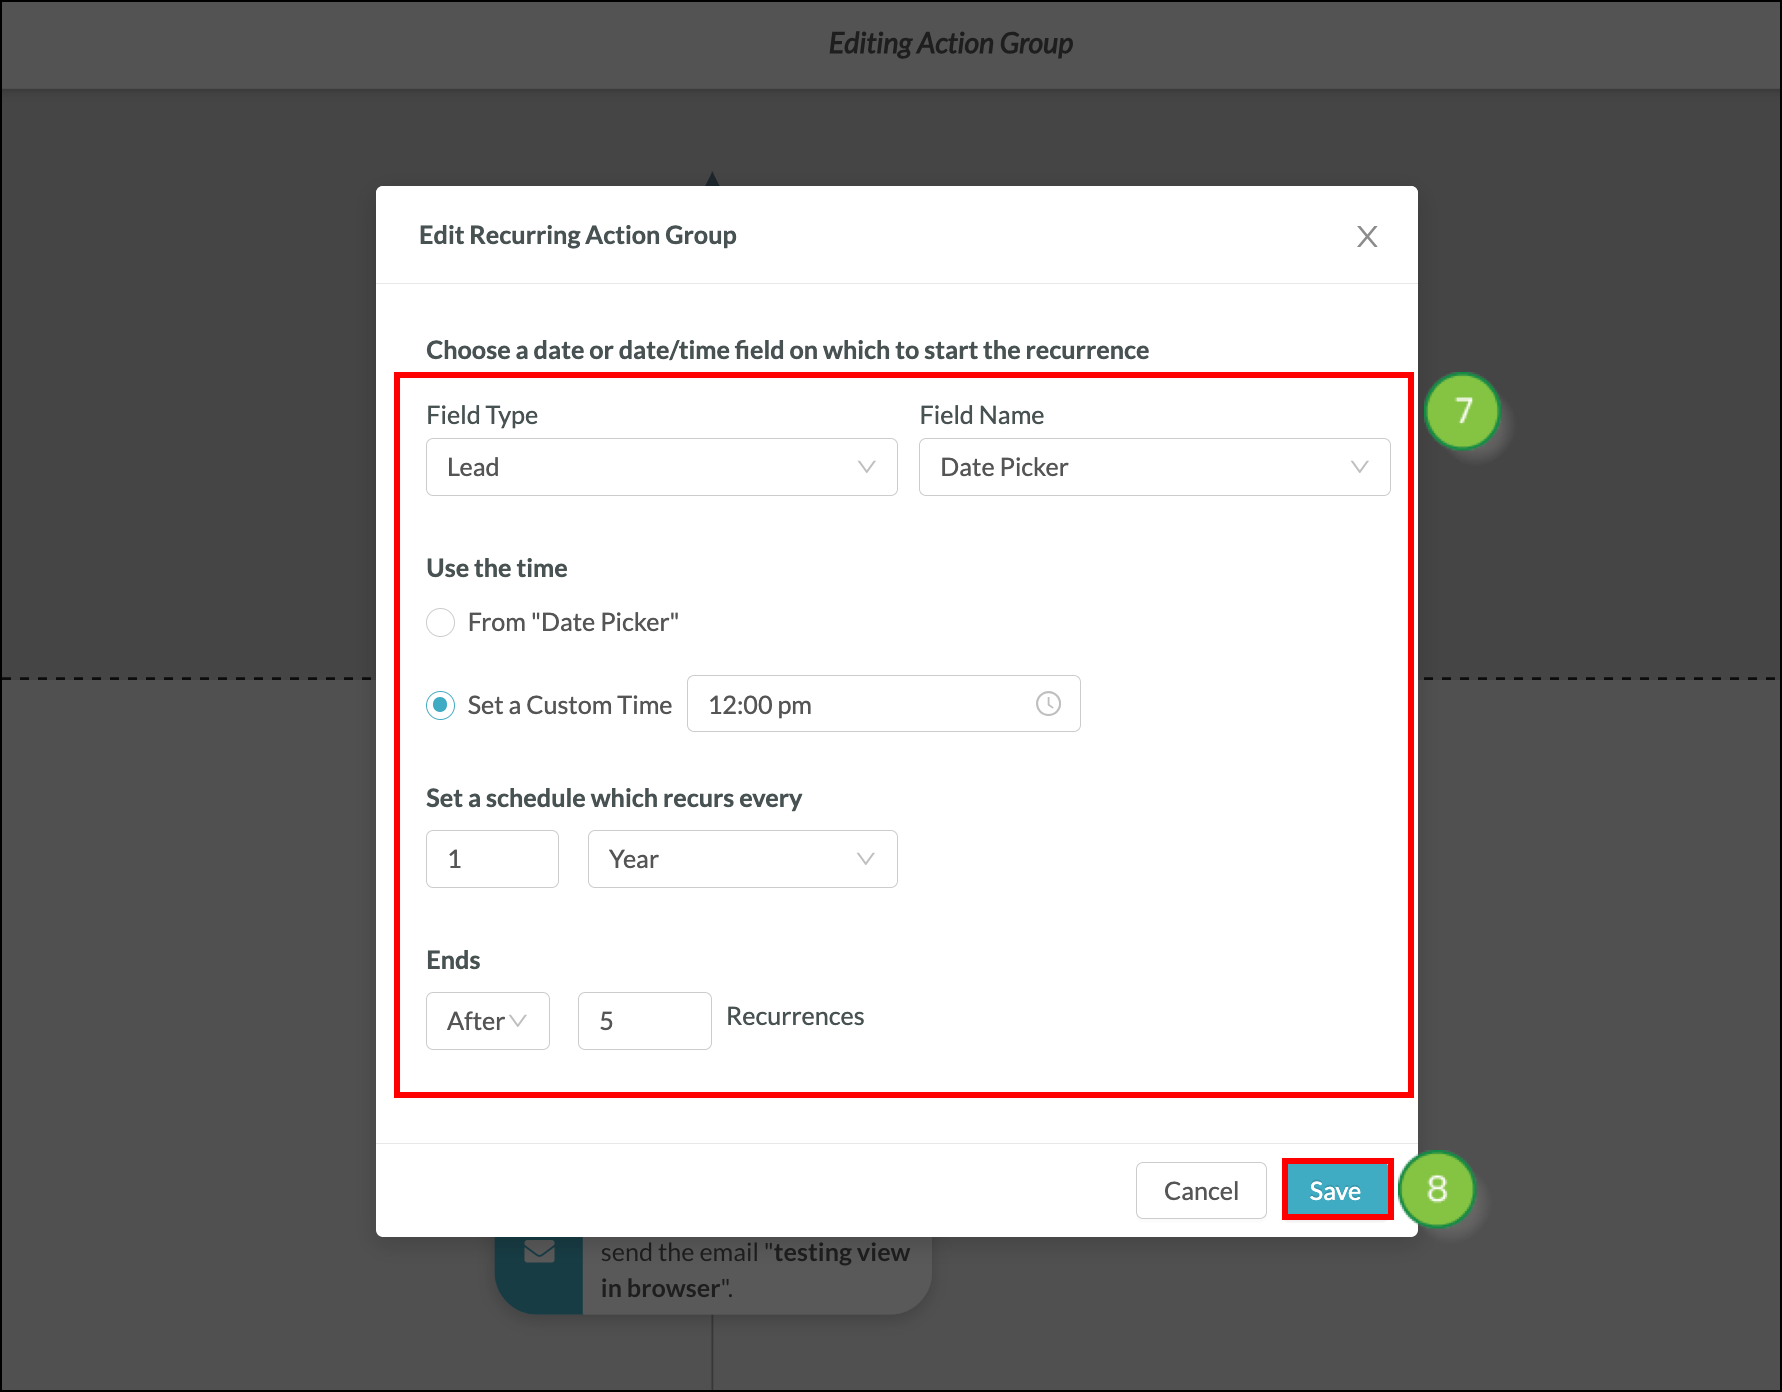
Be aware that when a recurring action group is rescheduled to activate on a new date, all currently scheduled events will remain as scheduled, and all new events will be scheduled for the new date.
In addition, if the recurring action group is edited and has no value for a scheduled lead, the lead will continue to be scheduled to the recurring action group without any actions being scheduled.
Date and Date/Time fields will need their time data paired with respective dates to correctly function when set to a recurring action group. This is done on a contact-by-contact basis.
To update custom Date or Date/Time field data for contacts, do the following:

You can view whether or not contacts are members of a recurring action group.
To view contact memberships, do the following:

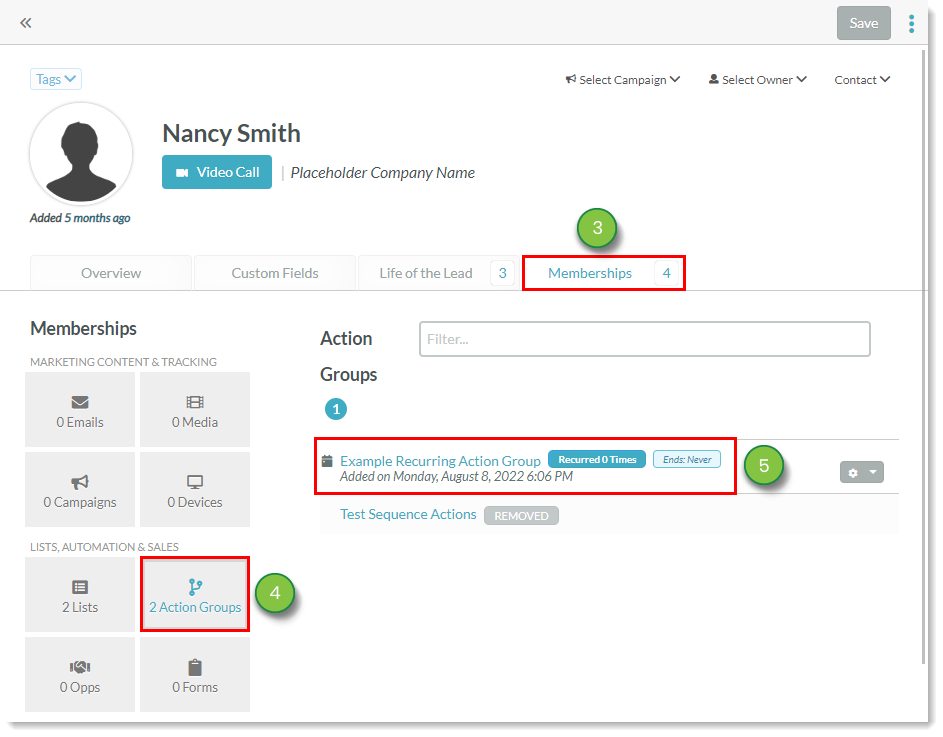
A contact who has been scheduled to a recurring action group will have a label next to the respective entry.
Ongoing recurrences will display the following label:Recurred X Times / Next: <Date> / End: <End Setting>
Completed recurrences display the following label:Recurred X Times / Status: Completed on <Date and Time>
For these labels, the Next date is when the action group will be rescheduled. The End date is when the action group recurrences are scheduled to end.
Copyright © 2026 · All Rights Reserved · Constant Contact · Privacy Center