| Note: This article pertains to Starter Email customers. If you’re in our Lite, Standard, or Premium plans, please refer to this article instead. |
Give your audience an easy way to subscribe to your mailing list by creating a Sign-up Landing Page and sharing it anywhere using a link or QR code. A Sign-up Landing Page is a customizable page, sort of like a standalone website that we host for you, that lets you collect new contacts online. You can customize the page design and choose which details you want to collect from subscribers. You can even give your landing page a custom URL and create multiple landing pages to target different audiences.
Create a Sign-up Landing Page
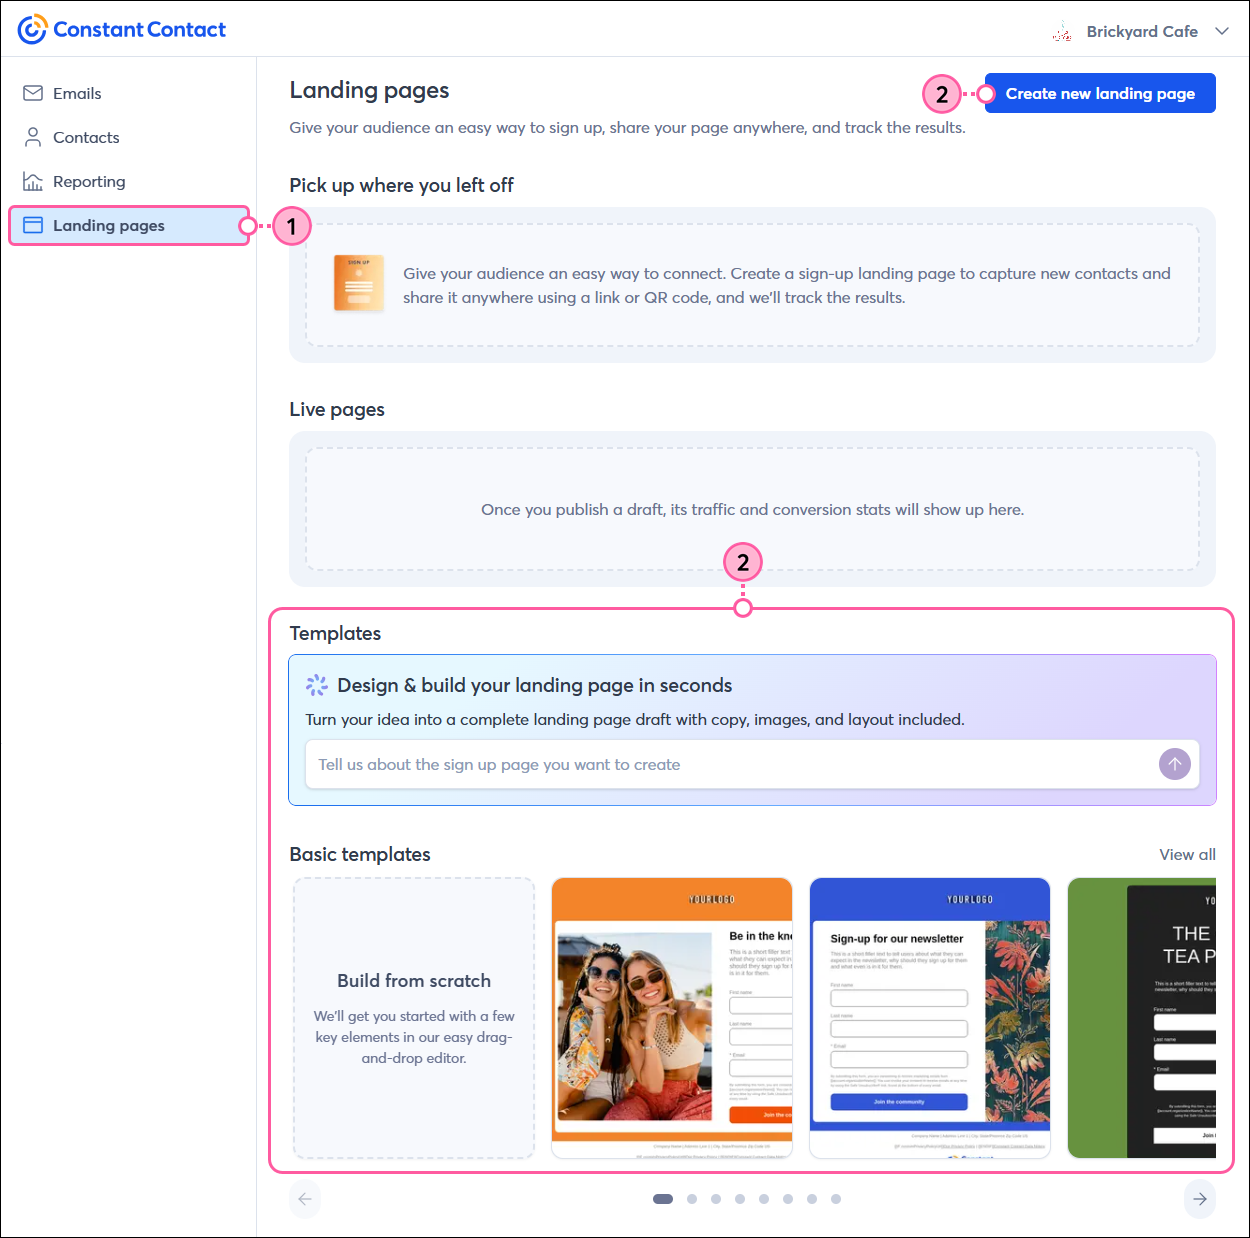
- From the left-hand navigation, click Landing pages.
- Click the Create new landing page button or scroll down to browse the available templates, including starting from a blank template, or enter a description of what you'd like to create in the field, and we'll generate landing page options for you.
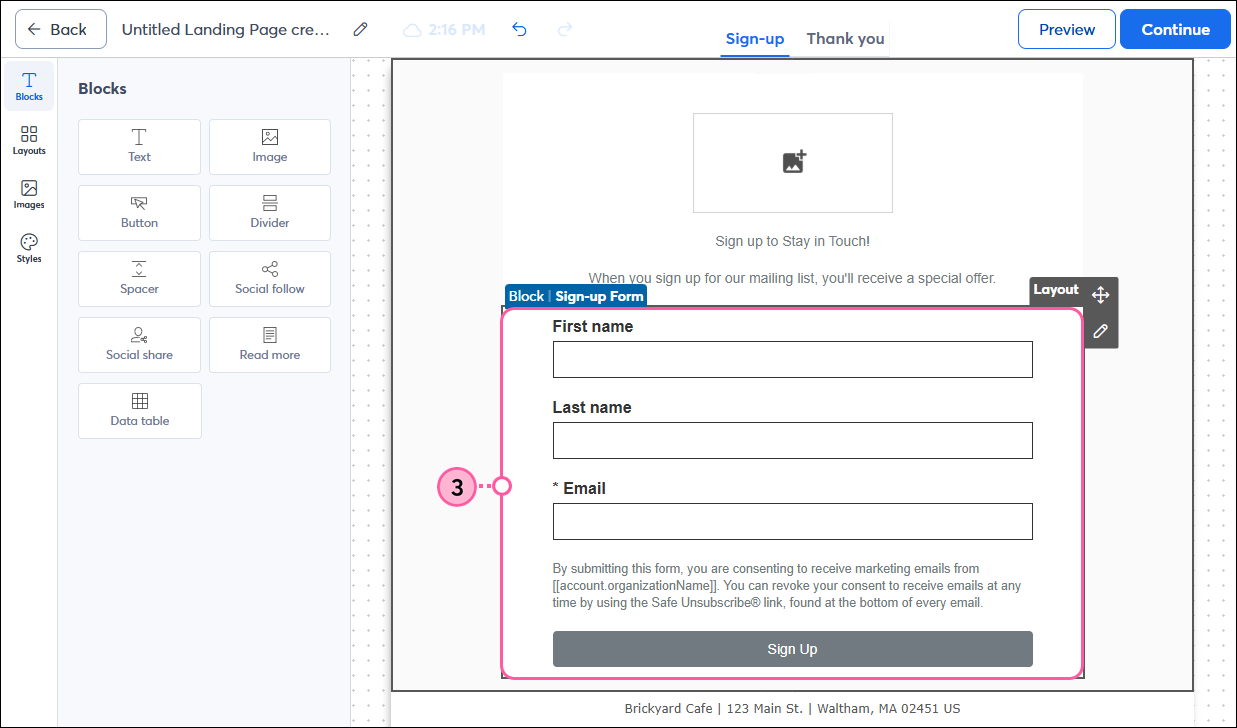
- Within the editor, click on the Sign-up Form block to choose the fields you want to include on your form.
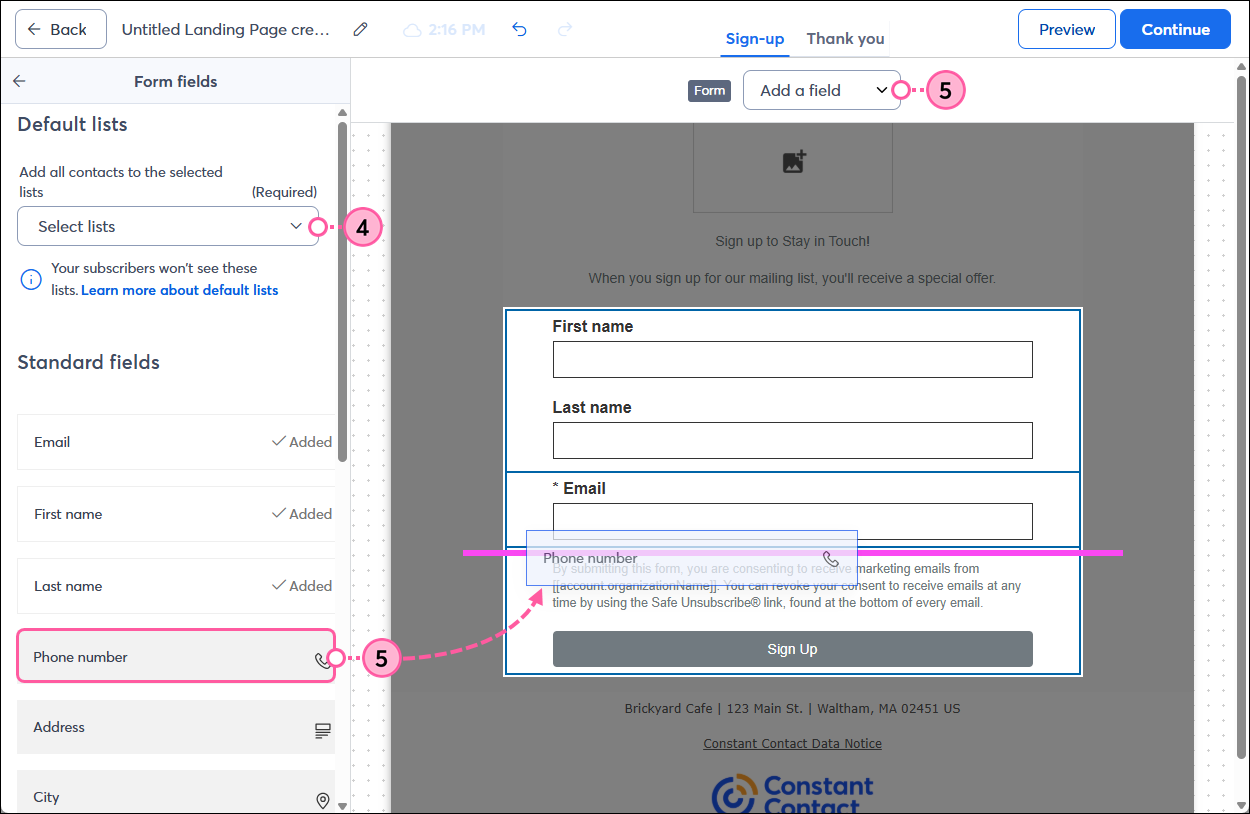
- From the Default lists drop-down in the Form fields panel on the left, select the list or lists you want to add the new contacts to. Your contacts don't see the list options when they sign up.
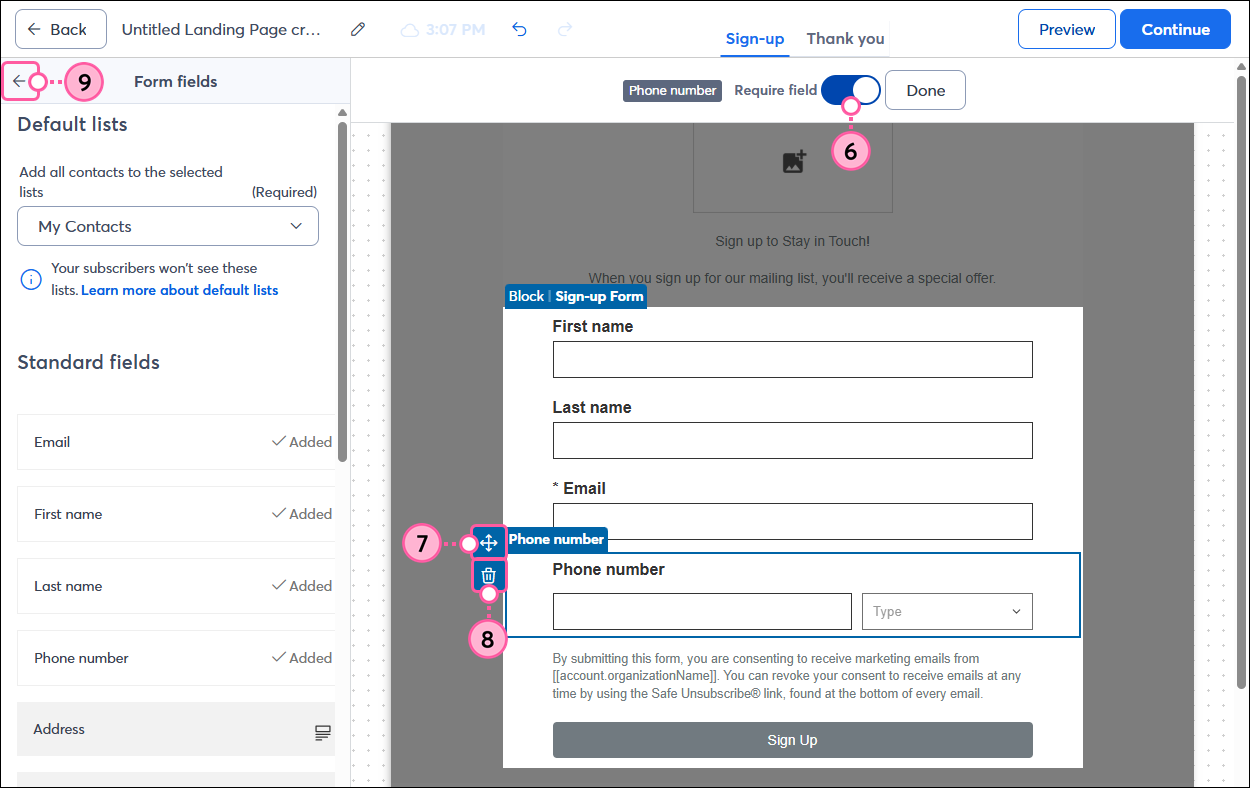
- To collect additional details from your new contacts, either drag-and-drop a Standard or Custom field from the left-hand panel into the template or select it from the Add a field drop-down at the top of the editor. The fields can span the width of the template or sit side by side.
- To require new sign-ups to fill out a field before they can submit your form, click on the field and then click the Require field toggle at the top of the editor.
Tip: Keep required fields to a minimum because the more required fields you have, the less likely someone is to complete your form. - You can rearrange the order of the fields on your form by using the Move icon on the left to drag them up or down in the template.
- To remove a field from your sign-up form, click the trash can icon to the left of the field.
- Once you've finished selecting the fields you want to collect from your contacts, simply click outside of the Sign-up Form block or click the back arrow in the Form fields panel to continue designing your landing page.
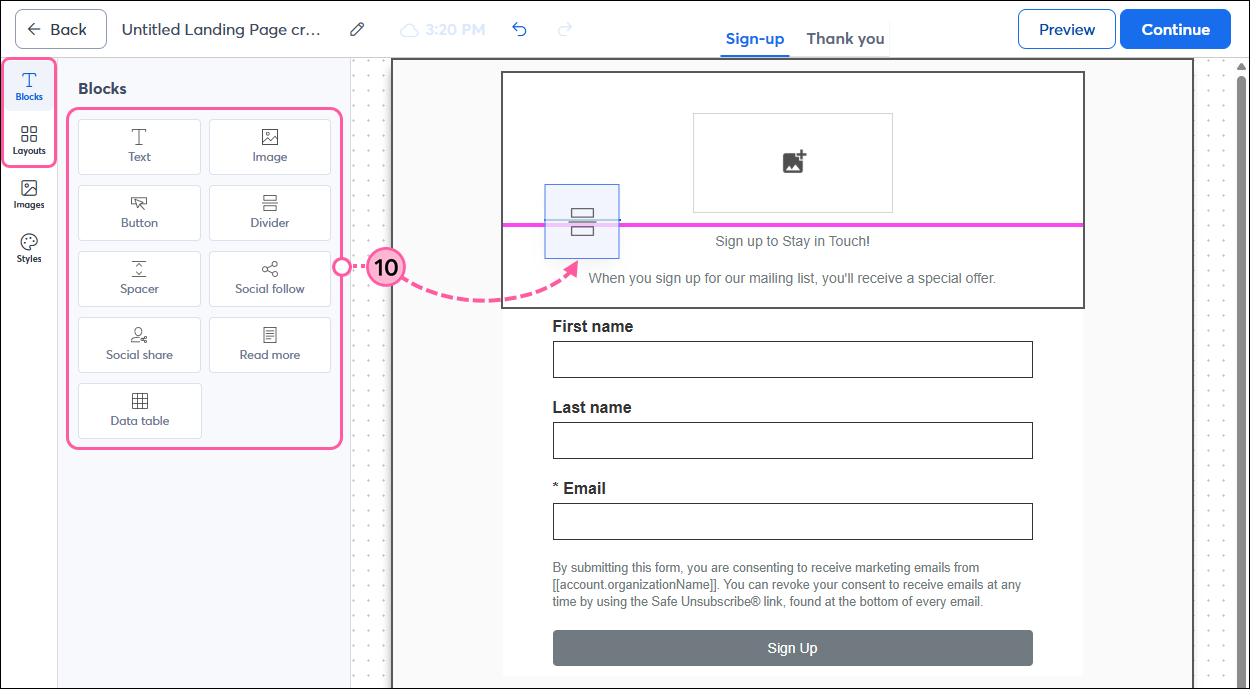
- Use the Blocks and Layouts panels to drag and drop elements into your template, such as text blocks, buttons, or pre-built layouts. Use the pink guideline to help you find the right spot.
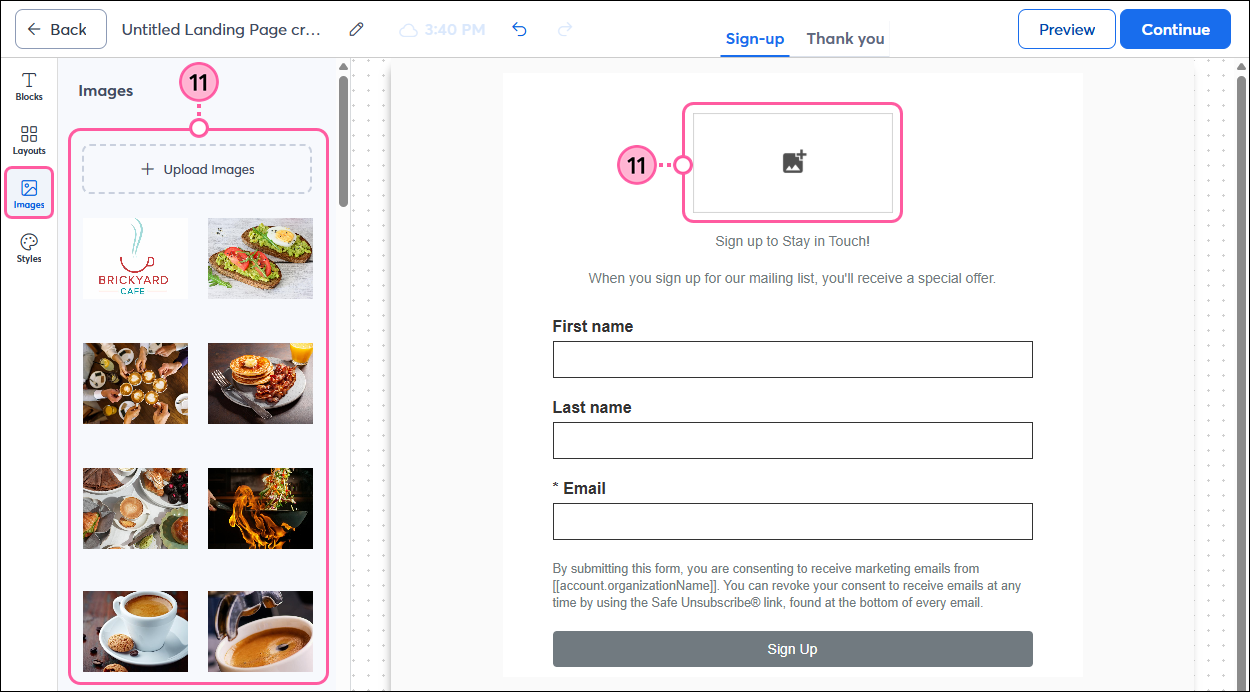
- From the Images panel, you can upload images to your Library and insert them into your template. You can also click on an image placeholder in your template to change it.
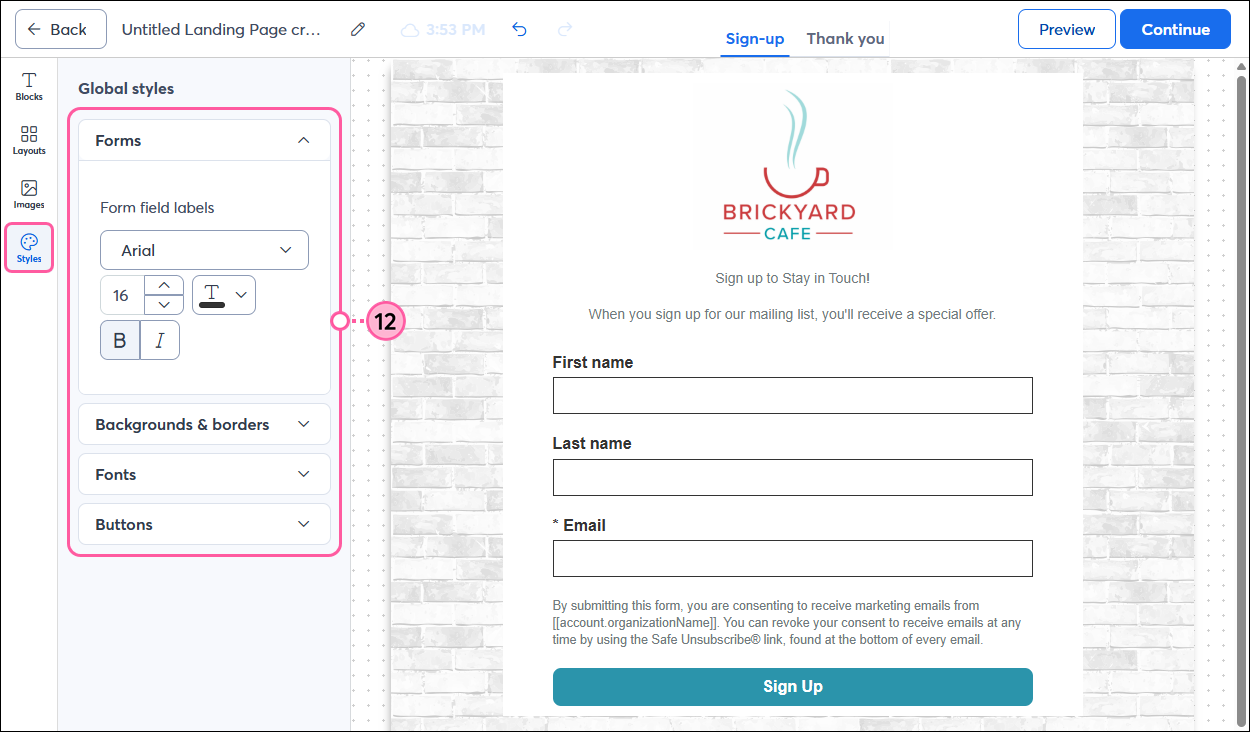
- From the Styles panel, you can customize the form field labels, backgrounds, borders, fonts, and button styles for your entire template.
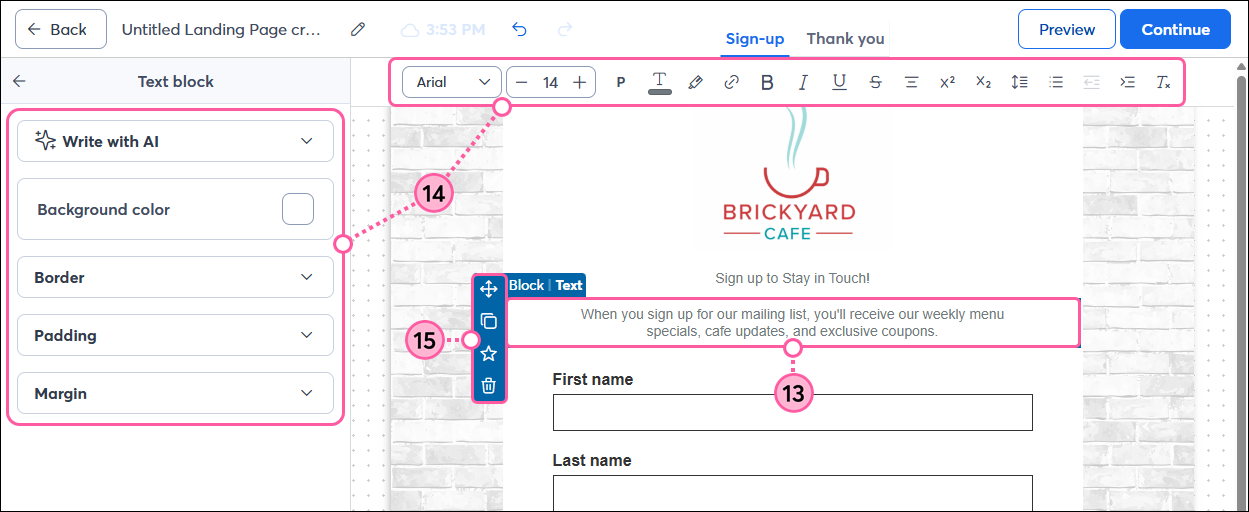
- Click on a block to update any placeholder text with your content.
- Use the options in the left-hand panel or toolbar at the top of the editor to customize the text and block's appearance.
- Use the controls on the left to:
- Move an element to a new location in your template by clicking and dragging the directional arrows up or down.
- Copy an element by clicking the Copy icon.
- Delete an element by clicking the trash can icon.
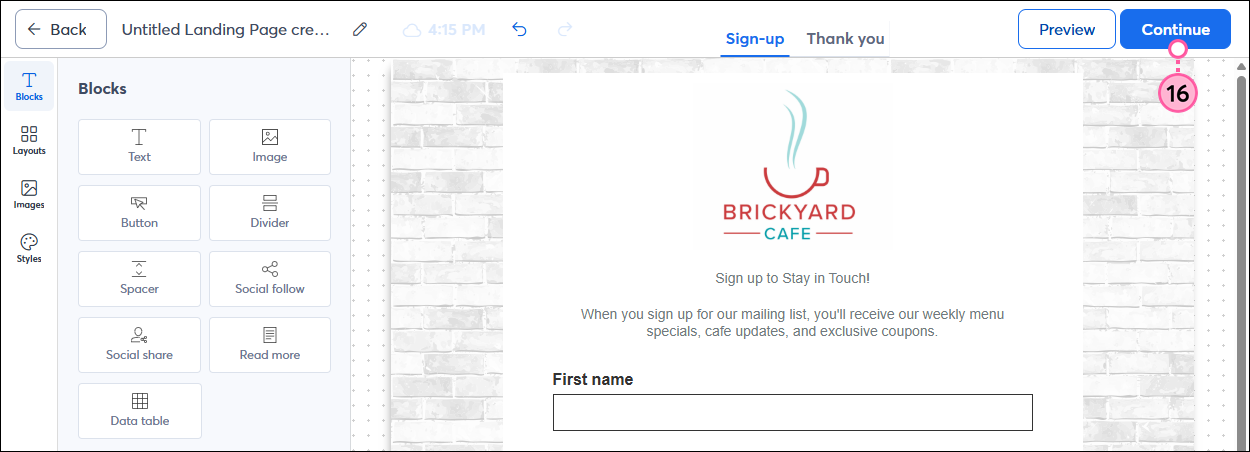
- When you’re finished designing your landing page, click Continue to customize the “Thank you” page.
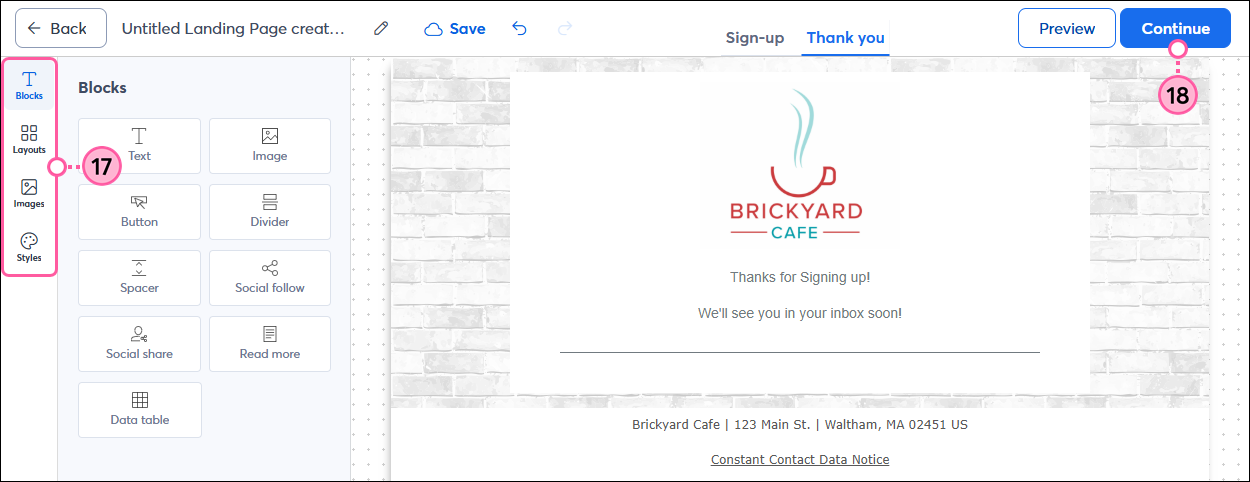
- Use the Blocks, Layouts, Images, and Styles panels to customize the "Thank You" page that your new contacts see after they successfully submit their information through your landing page.
- When you’re finished, click Continue to review the page settings.
- Review and update the page settings:
- Page title - When your page is viewed, the browser pulls the text in this field and displays it as the title of the open browser tab.
- Description - If you share your landing page in a Facebook or Instagram ad, the description for the ad is pulled from this field.
- (Optional) Customize URL - Click the arrow to expand this section and add custom text to the end of your URL to make it clear that it belongs to your organization. Special characters, like hyphens and underscores, aren't recognized.
- (Optional) Set expiration date - Check the box to choose a date to hide your page from visitors. This won't remove the landing page from any webpages, emails, or social media posts where you shared the URL, but if anyone tries to click the link, they won't be able to access the landing page content.
Note: You can edit the page after it's been activated to add, change, or remove the expiration date at any time. However, once the page has expired and is in the “Ended” status, you won’t be able to adjust the expiration date or reactivate it. - (Optional) Add third-party analytics - Check the box to add a Google tracking ID or Meta Pixel ID to your landing page so you can track the page views in your Google Analytics account or Facebook Ads Manager.
- (Optional) Hide page from search engine results - Check the box to prevent your page from being indexed by search engines like Google, Bing, or Yahoo.
- (Optional) Send me an email when someone signs up - Check the box to get notified when someone opts in to your mailing list.
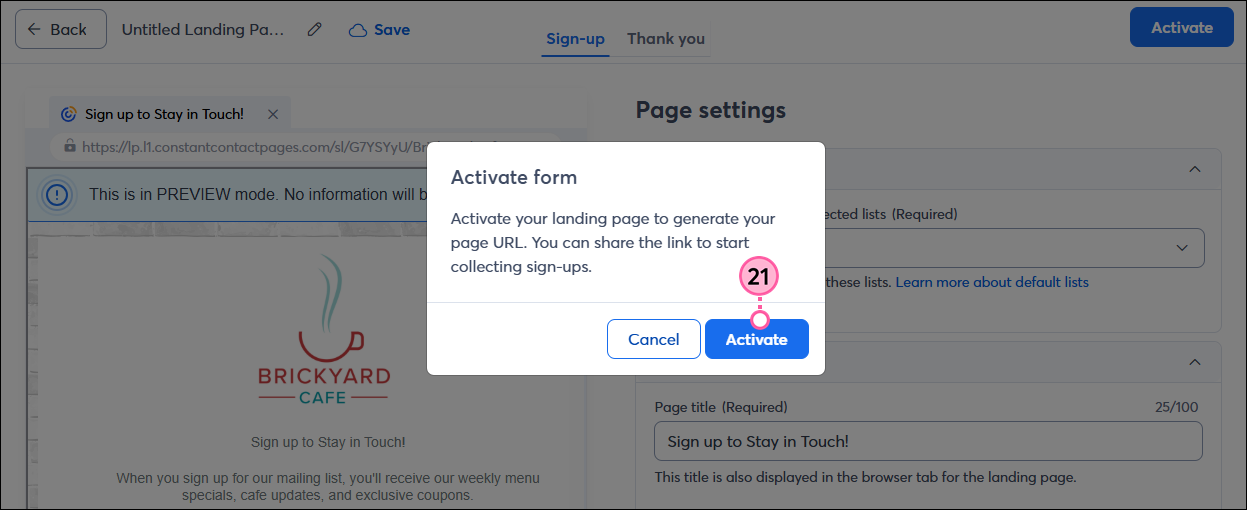
- When you’re finished, click Activate in the upper-right.
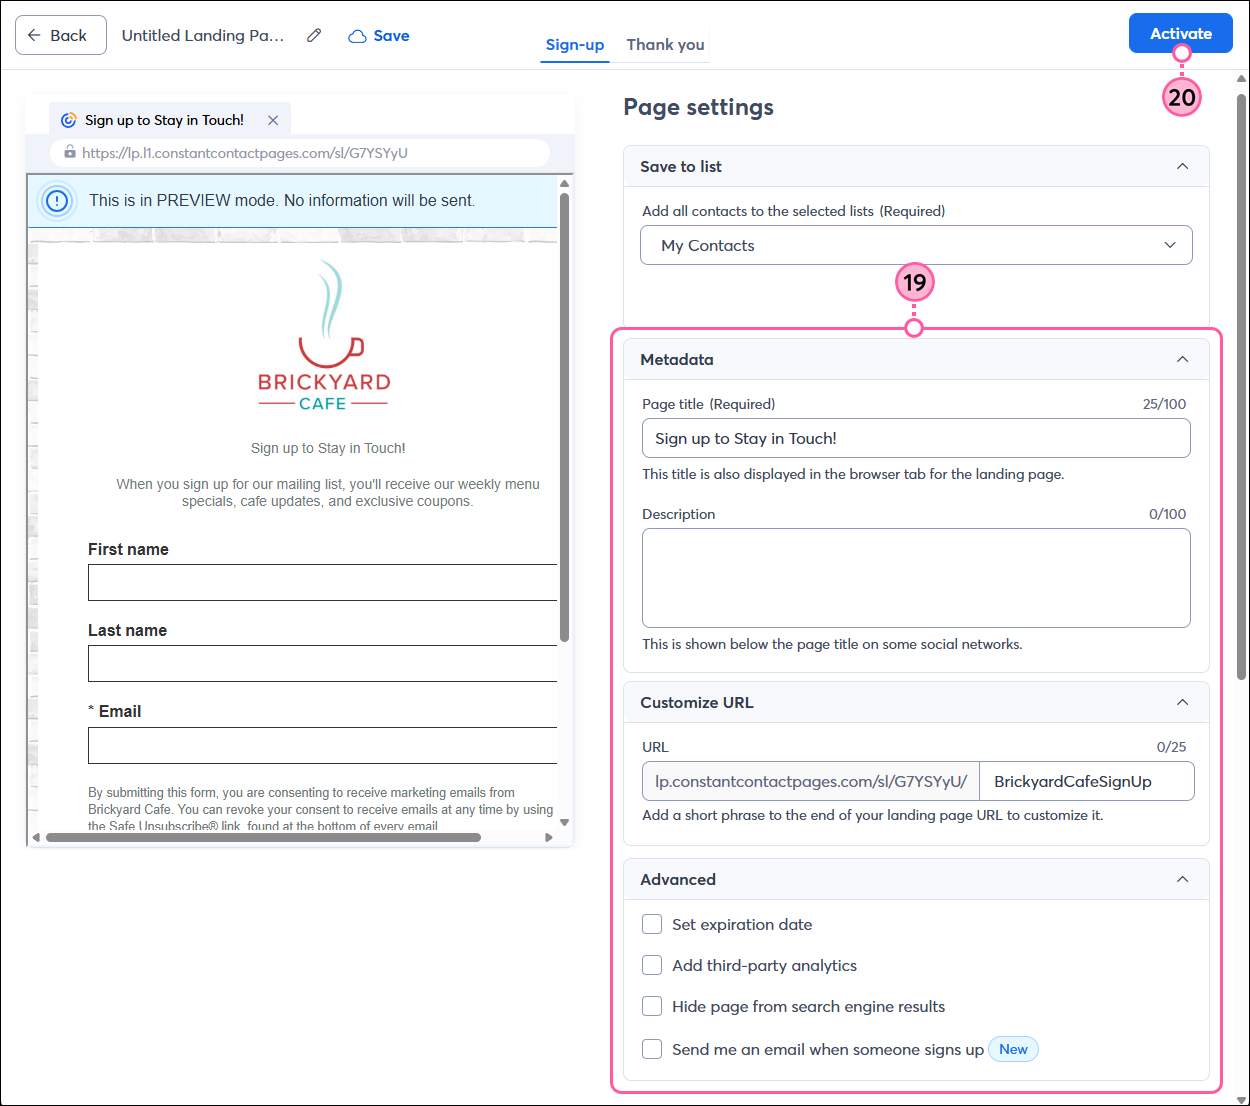
- Click Activate to make your page live and generate the page URL. No one will see your landing page until you share its URL.
Share your landing page
Now that your Sign-up Landing Page is created and activated, it’s time to share it so you can start collecting new subscribers! You can share the URL or QR code for your landing page on your website, on social media, in an ad, in a blog post, or anywhere you can think of to share a link.
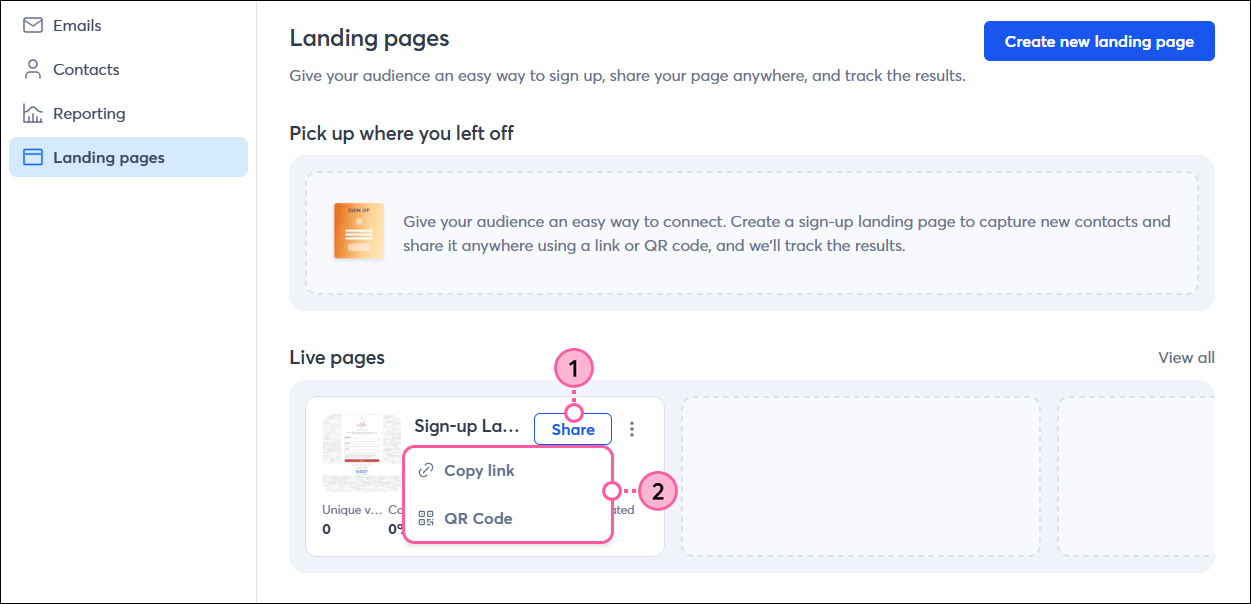
- From the Landing pages page, click Share next to your live Sign-up Landing Page.
- From the drop-down, select:
- Copy link - To copy the URL for your landing page, so you can paste it wherever you want.
- QR code - To download a QR code image to the device you're currently working on. You can use it in print media or share it elsewhere online. When your audience scans it, they're brought right to your Sign-up Landing Page.
View your landing page reporting
After you've activated your Sign-up Landing Page and shared its URL, it's time to check how it's performing and see how many visitors to your page converted into contacts.
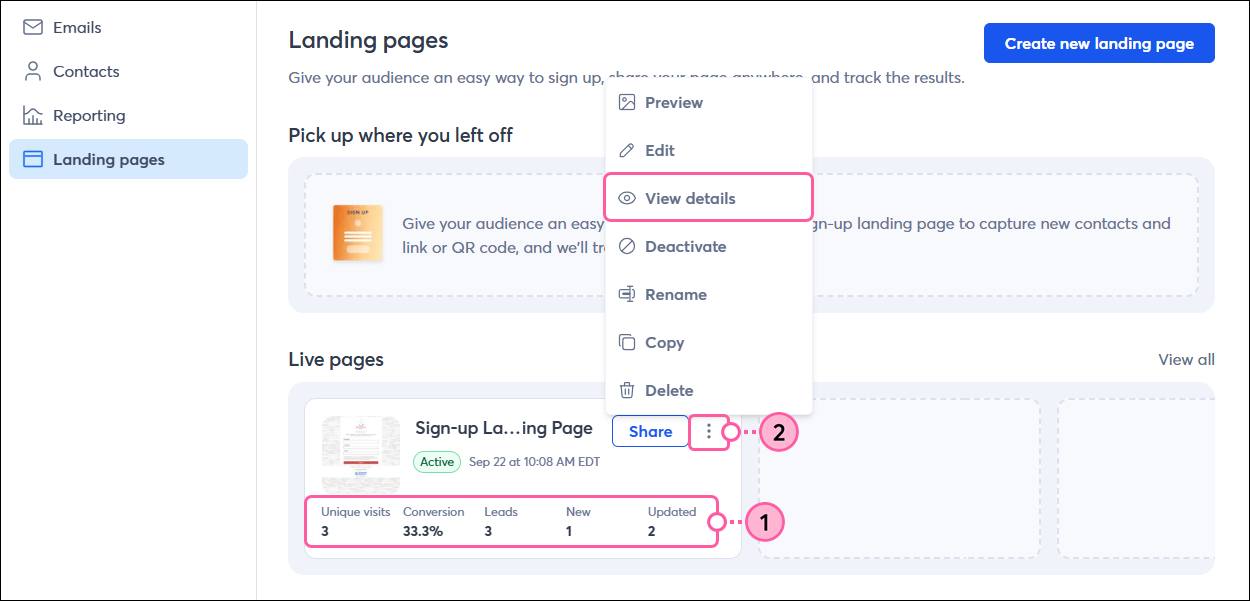
- On the Landing pages page, you can see a quick view of your live page’s performance.
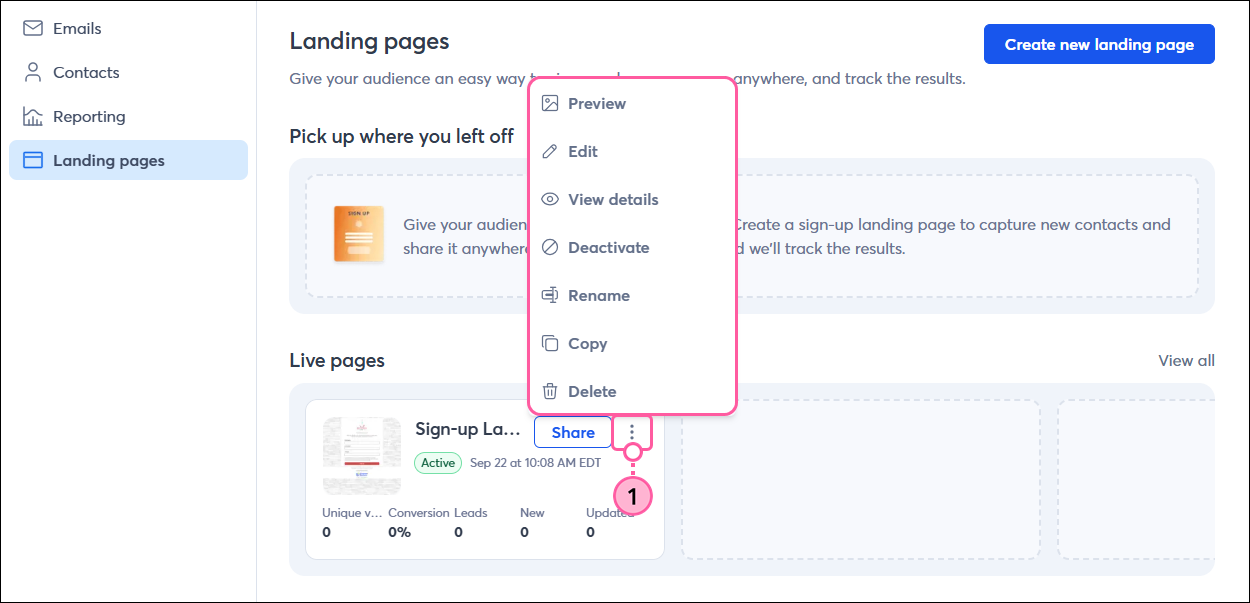
- To drill down further, click the three dots next to your active landing page and select View details from the drop-down.
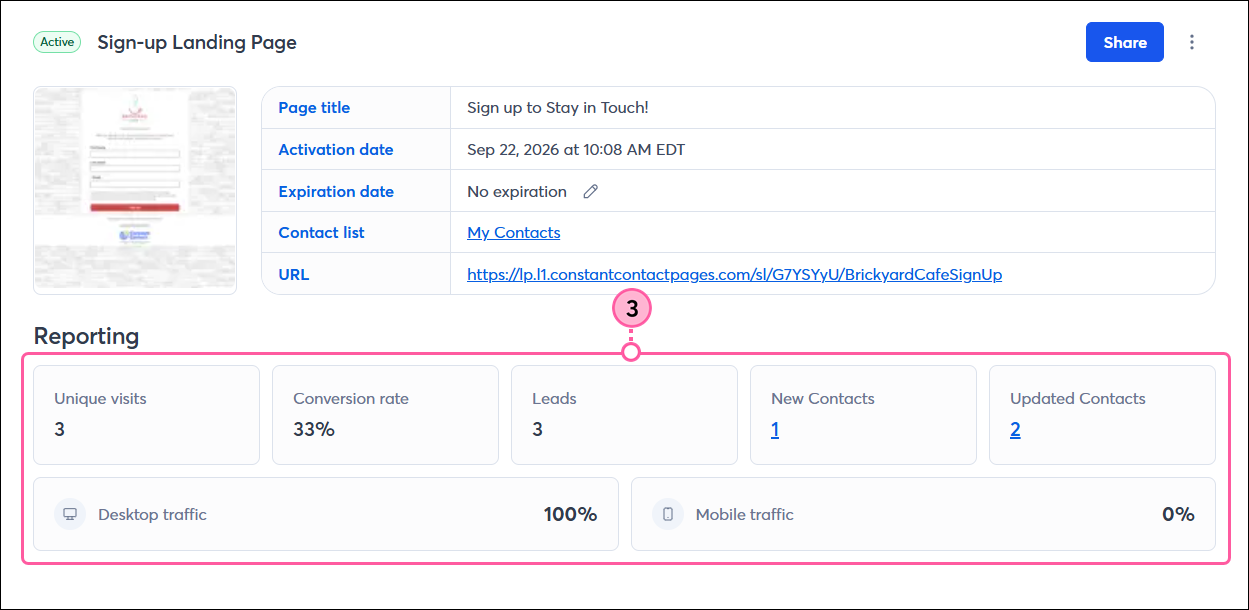
- In the Reporting section, you can see:
- Unique visits - The number of unique visitors to your landing page based on the visitor's IP address.
- Conversion rate - The rate at which the unique visitors to your landing page complete the sign-up process and become contacts. Updated contacts are not included in the rate.
- Leads - The number of visitors who complete the sign-up form and click the button to submit the form.
- New contacts - The total number of new contacts added through your landing page. Click the hyperlinked number to see the complete list of contacts.
- Updated contacts - These contacts were already on your contact list, but submitted their information through your landing page again. Click the hyperlinked number to see the complete list of contacts.
- Desktop vs. Mobile traffic - Based on the total number of visits to your landing page, desktop views include views on traditional desktop and laptop computers, while mobile views include views on mobile phones and tablets.
Edit, copy, activate/deactivate, or delete a landing page
From the Landing Pages page, you can also make any edits needed to your draft or active landing page content and settings, rename it, make a copy of it to reuse for another landing page, preview it, activate or deactivate it, or delete it from your account.
- Click the three dots next to the page you want to manage and select an option from the drop-down:
- Preview
- Edit
- View details
- Activate/Deactivate (depending on your landing page status)
- Rename
- Copy
- Delete