Email and Digital Marketing
How can we help you?
Search our help articles, video tutorials, and quickstart guides

You've got this. You've got us. Search our Knowledge Base to quickly find answers to your questions.

Connect your Constant Contact account with Calendly

Article: 000055233
Updated: June 6, 2026

Sync contacts and leads from your Clendly calender with Constant Contact

Our integration with Calendly lets you automatically sync lead data from your meetings into Constant Contact, saving you time and allowing you to send more targeted emails. 

Note: Manually created Calendly contacts will not be imported into Constant Contact. This integration will help you to import your Meeting data. 


The sync is one-way, and data, including unsubscribes and contact activity, is not sent back to your Calendly account. 


Connect your Calendly account

  1. Click Integrations.
  2. Under the "All Integrations" tab, either search for Calendly or scroll through the list to locate it. Then click on the block.

    Calendly integration card in the Integrations section in Constant Contact 
  3. Click Connect.

    Blue Connect button on Calendly overview popup 
  4. Log in to your Calendly account. 

    Email address field and blue Continue button on the Calendly log in page 
  5. Click Approve to grant Constant Contact permission to access your Calendly account.  

    Blue Approve button on connection permissions page 
  6. Once connected, click Import contacts

    Blue Import contacts button 
  7. In the pop-up that appears, manage which fields you'd like to import. Click the Add a new field dropdown to add a new Constant Contact field, if needed.
  8. Make sure that each Calendly field corresponds with the appropriate Constant Contact field. Click the X to remove a field, if needed. When ready, click Continue

    Add New Data field, rows of fields for Calendly and Constant Contact, and a blue Continue button 
  9. Select a Calendly meeting to import from. 
  10. Select the Constant Contact list to import your meeting data into. 
  11. Choose how often the import should run. 
  12. Select an Import Type:
    • Overwrite - Overwrite any existing contacts
    • Merge - Merge new contacts with existing contacts
  13. Create a name for the import. 
  14. Click Continue.

    Fields to setup the import and a blue Continue button  
  15. Check the box to confirm that you have permission to send email to these contacts.
  16. Review the summary and then click Import.

    Checkbox for confirming permission to email contacts and blue Import button  

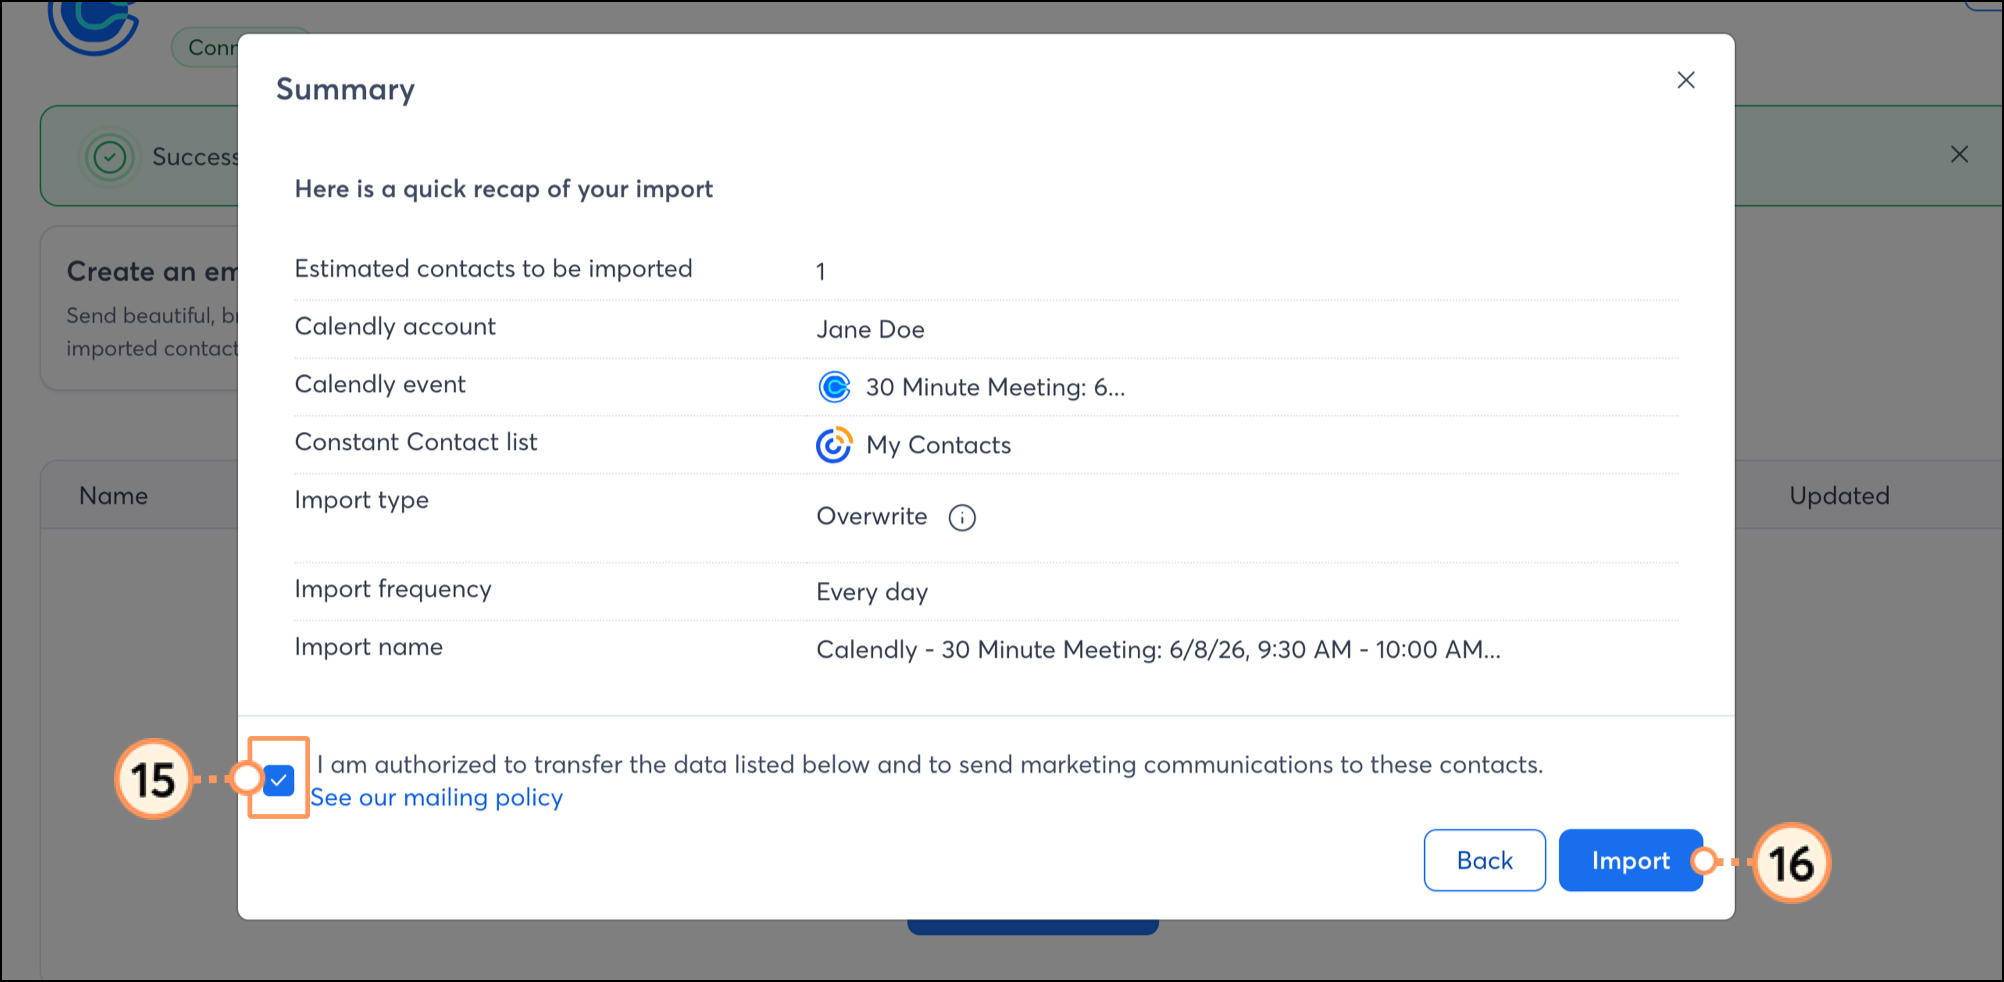
You'll then be brought to your Calendly integration dashboard, where you can see a list of all your imports, along with the status and details of each. When you create a new import, it will initially appear in the In process status. 

Once the import is complete, the status will update to Completed.


Import entry with green Completed status


Boost your marketing with the Calendly integration

Once you've set up your imports and your Calendly contacts are successfully syncing into Constant Contact, there are several ways to target them with customized messaging.


Create a customized contact segment

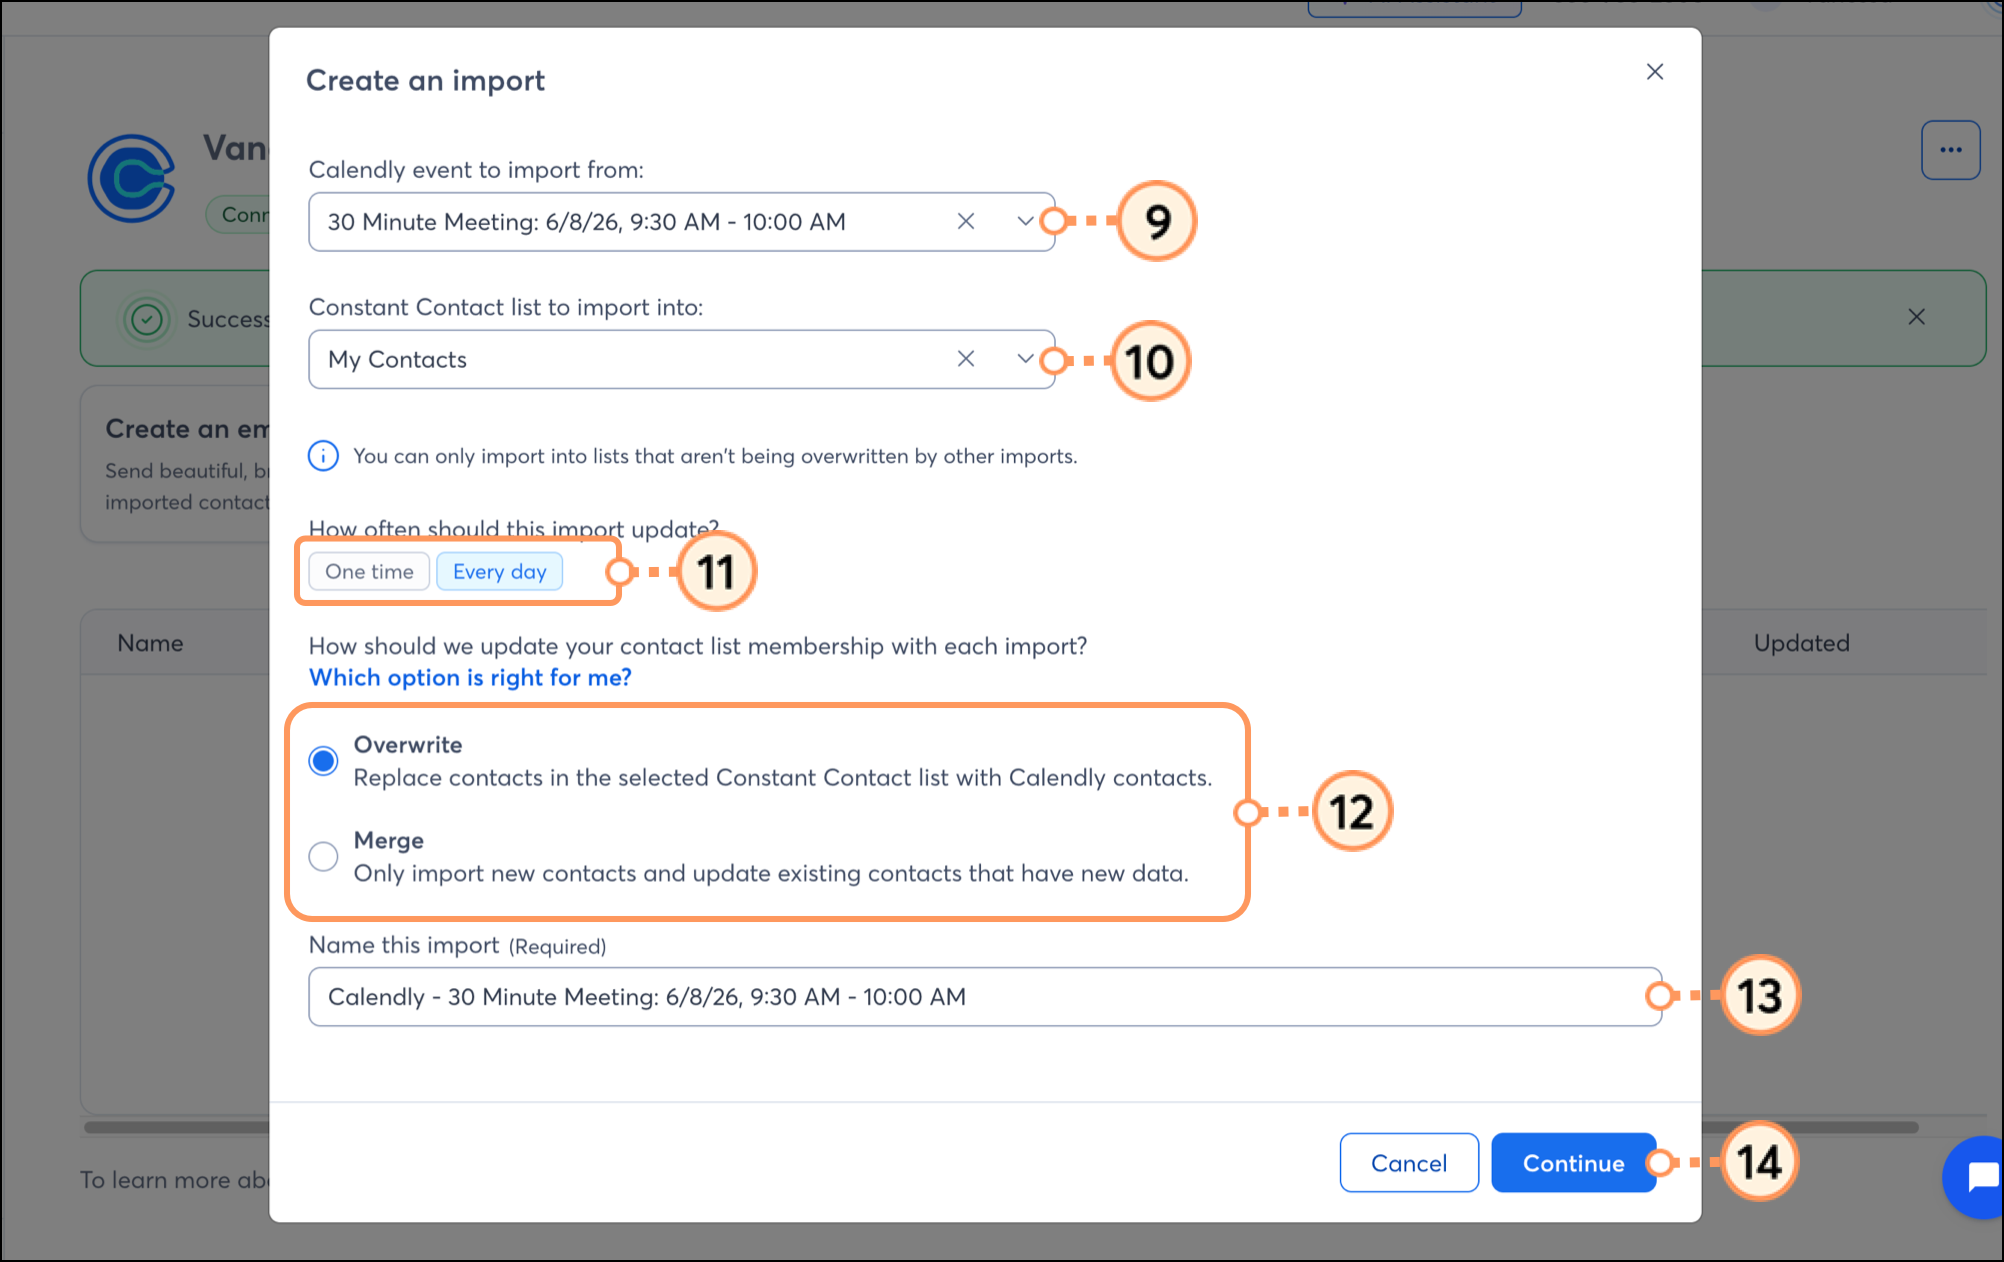
When importing from Calendly, you can choose which leads you'd like to sync into a Constant Contact list. But maybe you want to segment these contacts even further, to send specific, targeted messaging. You can do so by creating a custom segment of contacts.


Send automated communications

Create personalized automated communications via email and SMS for your customers based on their actions, including welcome emails, thank-you series, review requests, and more.


Disconnect your Calendly account

If you disconnect the Calendly integration, your imported contacts will remain in your Constant Contact account. New Calendly data will no longer be imported into Constant Contact:


  1. Click Integrations.
  2. Search for the Calendly integration, click the three dots, and click Disconnect.

    Disconnect button under the expanded three dots menu in Integrations 
  3. Click Disconnect again to confirm the disconnection.

    Blue Disconnect button on confirmation popup 


Any links we provide from non-Constant Contact sites or information about non-Constant Contact products or services are provided as a courtesy and should not be construed as an endorsement by Constant Contact.


Questions?

Ask the Community

Did this article answer your question?


Constant Contact Logo

Copyright © 2026 · All Rights Reserved · Constant Contact · Privacy Center