
When you create your Event, the second step in the process is creating free or paid tickets that contacts will select when registering for your event. Your tickets can be customized to fit the style of your particular event. For example, you can rename the "ticket" label, which displays on the registration form, to be anything, such as "passes" or "fees". You can also choose whether to generate a printable ticket or not. In our event tool, tickets represent more than paid admission to an event and are used broadly to track event attendance.
| Hosting a free event? Tickets are still required even when hosting a free event. Learn how to set up your free event, and how the registration flow and event dashboard differs for free events specifically. |
Because our event tool is a ticket-based model, you are required to build at least one ticket to activate your event. However, there's plenty of flexibility, allowing you to build tickets that are versatile and meet your needs. Tickets can be paid or free and can serve a variety of purposes, such as meal service sign-up, volunteer registration, and more.
Additionally, if a physical ticket is not necessary for your event, you can choose not to generate a printable ticket during creation.
Below are example ticket types based on industry:
|
Non-profit |
|
|
Education |
|
|
Consulting Services |
|
|
Civic/Social/Membership-Based |
|
|
Faith-Based Organizations |
|
|
Family & Social Services |
|
|
Retail (Brick and Mortar) |
|
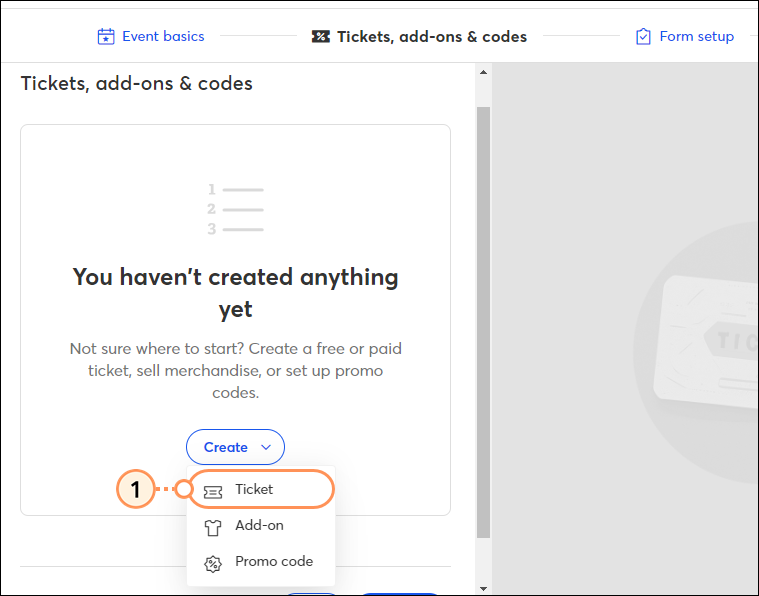
On the "Tickets" page of the event editor, you have the options to:
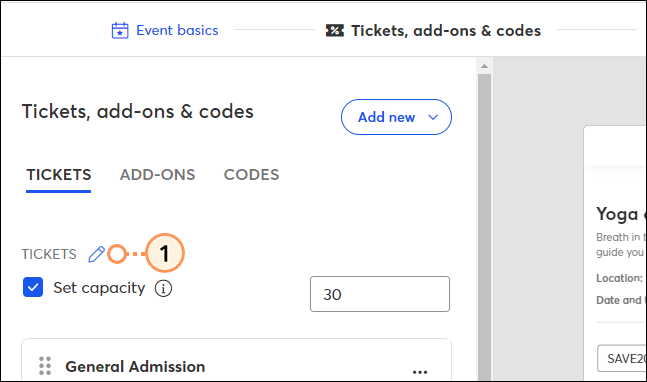
By default, a "tickets" label will appear on the registration form above the available ticket options:
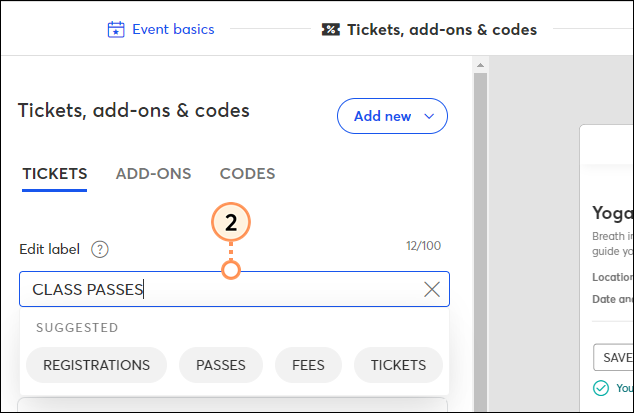
To rename this label:
In addition to setting a quantity available for an individual ticket type, if you have two or more ticket types available for your event, you can set a maximum number of people who can attend. Once the total number of tickets registered for—across all ticket types—meets this maximum, registration is closed. If you set a quantity available for an individual ticket, it must be less than or equal to the maximum event capacity.
Example:
You're hosting an event for your donors and can host a maximum of 100 people. You're offering two tickets types: a general admission ticket, and a deluxe ticket that includes a meet-and-great with a celebrity guest. The celebrity guest has agreed to meet with a group of 30 people. In that scenario, you'd set the maximum event capacity to 100, the general admission quantity to 100, and the deluxe ticket quantity to 30. Even though 130 individual tickets are available, because you've set the maximum to 100, registration will close once 100 tickets total are registered for.
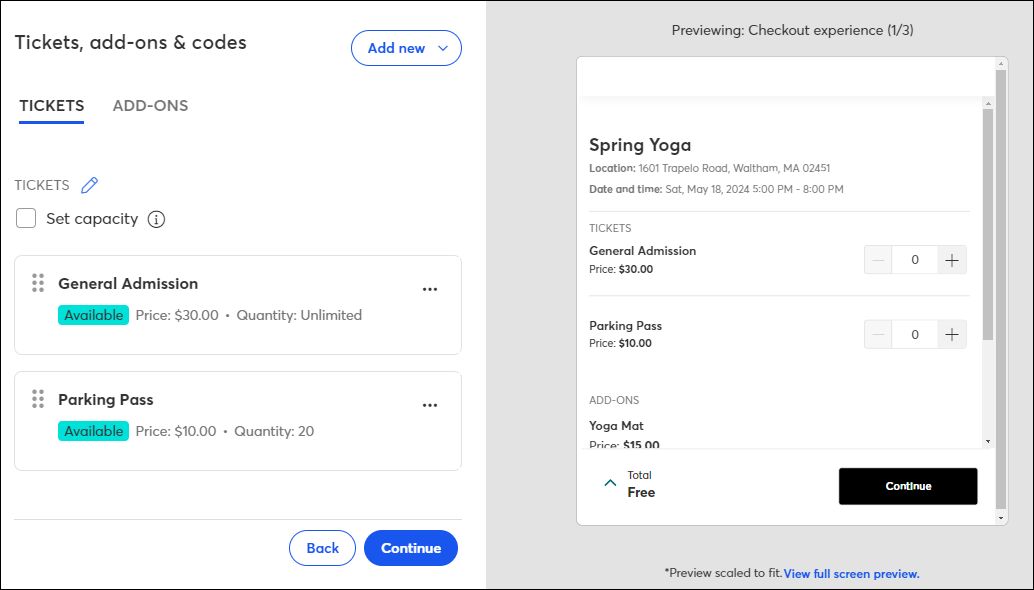
To set the maximum event capacity, checkmark the "Set capacity" box and then enter a quantity:

If you built multiple tickets but you want your registrants to only be able to select one ticket type during registration, checkmark the "Restrict registrants' selection to one ticket type" box:
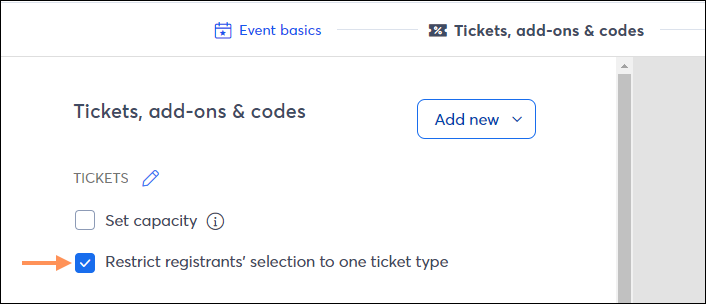
This prevents them from making a selection from multiple ticket types.
Example:
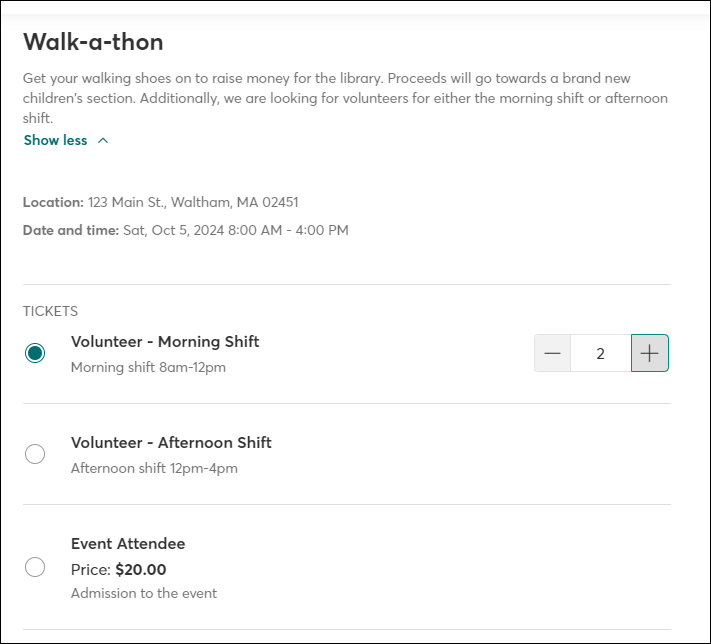
You're hosting an event that is looking for both attendees and volunteers, and you have the ticket types "Event attendee", "Volunteer - morning shift", and "Volunteer - afternoon shift". If you only want registrants to be able to select one of these options, checking this box would achieve that.
When this option is selected, on the ticket selection page of registration, each ticket type will appear with radio buttons. Once a ticket type is selected, the registrant will be able to select the ticket quantity.
Please note that if you've set a particular ticket as required—meaning the registrant has to select it during registration—you cannot restrict them to selecting only one ticket type.


Your ticket will appear in the list of tickets on the left side of the event editor, and a preview of your registrant's checkout experience will appear on the right side.
| Tip: Do you want to allow registrants to bring guests or register for multiple tickets on behalf of a group? Learn about the various ticket configurations you can set up to accommodate this. |
Tickets can be edited, copied, paused, or deleted at any time.
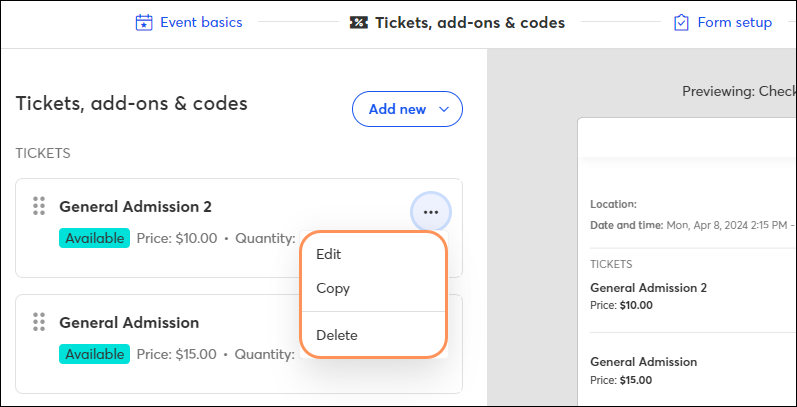
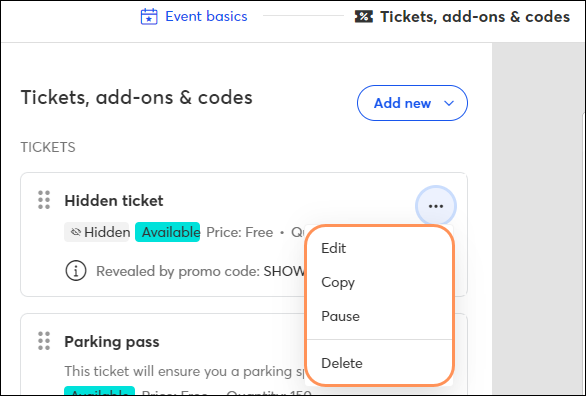
If your event is in a draft status:
Access the "Tickets, add-ons, and codes" page within the event editor. Click the three dots, and select Edit, Copy, or Delete from the dropdown.
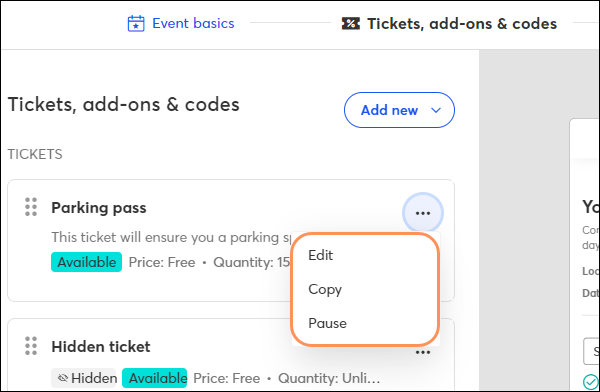
If your event is in an active status:
Access the "Tickets, add-ons, and codes" page within the event editor. Click the three dots, and select Edit, Copy, or Pause from the dropdown. Pausing a ticket prevents it from being visible with the registration flow. Make the ticket available again by clicking Resume. If there are no registrations associated with the ticket, you'll have the additional option to delete the ticket entirely.
| Ticket with registrations | Ticket without registrations |
 |  |
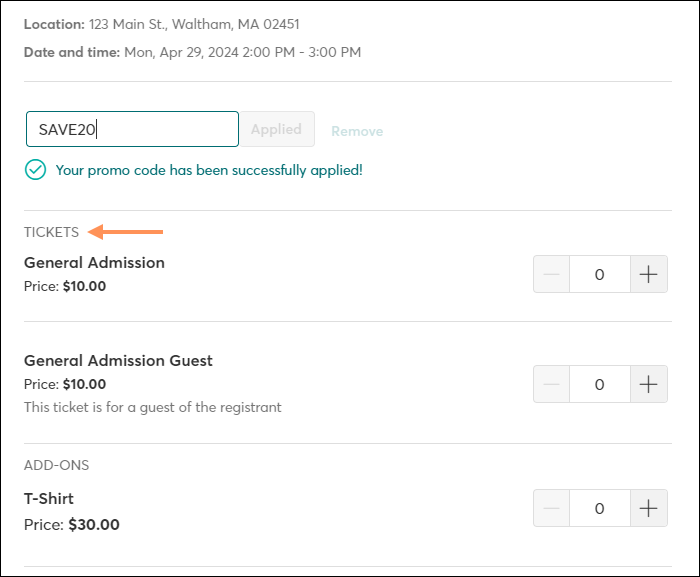
When registrants access the event's registration flow, all available ticket options will be shown: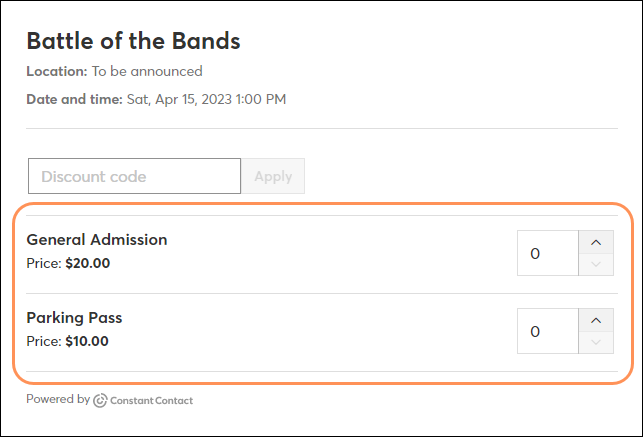
Tickets that are unavailable for any reason (hidden, sold out, outside date range, etc.) will not appear in the list of ticket options. However, if the registrant enters a valid promo code associated with a hidden ticket, that ticket will appear in the list of ticket options once the code is entered.
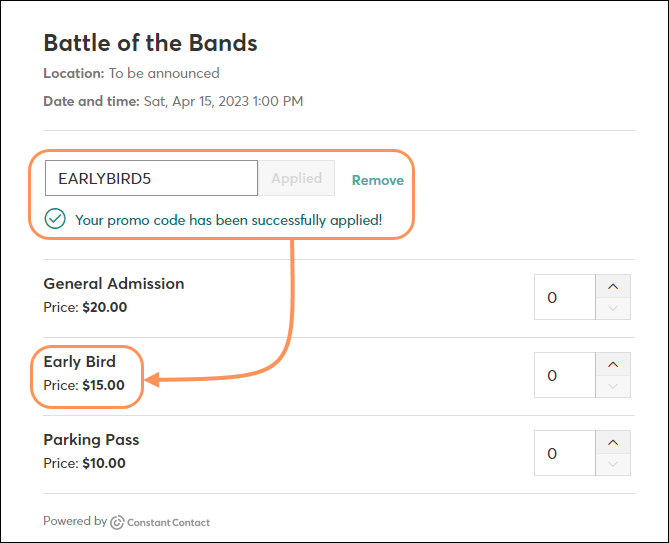
Promo codes that provide a discount can be entered the same way, and the registrant will see the code applied within the order summary.
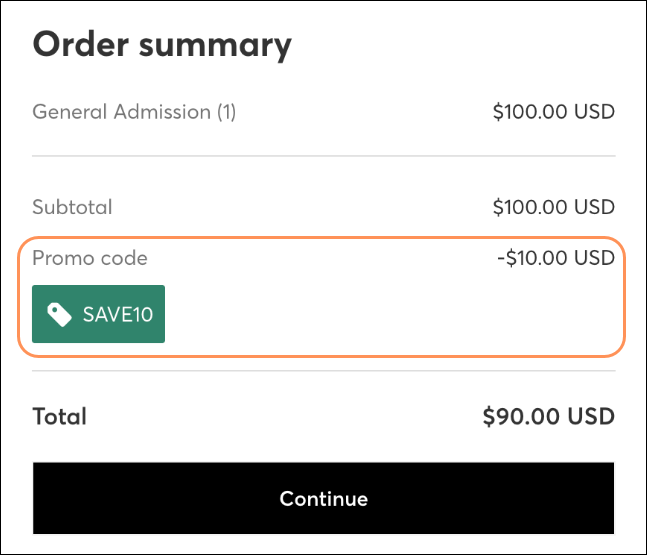
Registrants can enter the ticket quantity they'd like to purchase and then proceed through the rest of the checkout process.
If you've opted to generate a printable ticket, registrants can access and print their tickets once they complete their registration. You also have the ability to print tickets yourself, if needed.
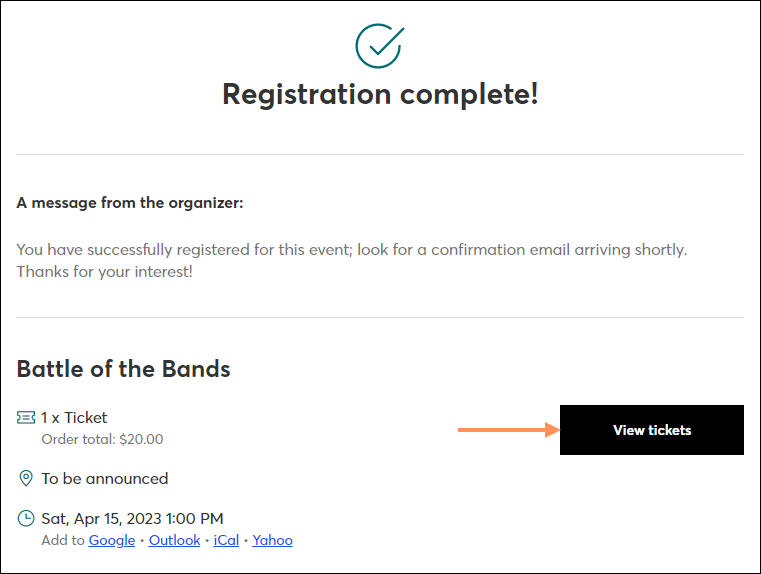
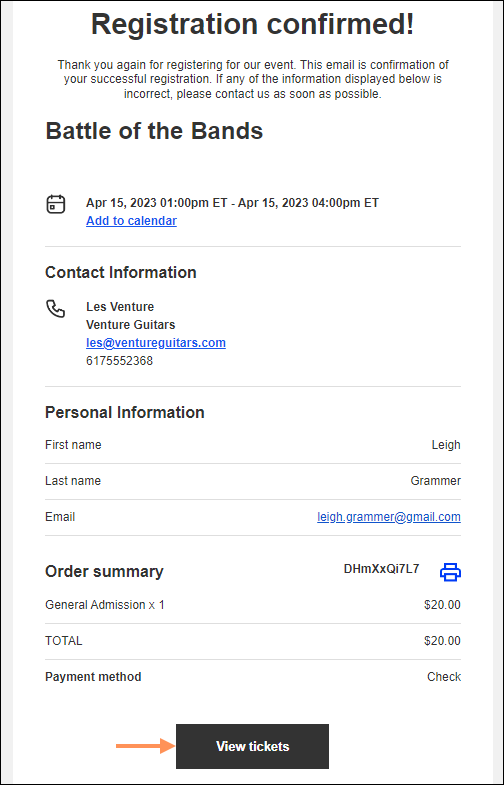
Once your registrant completes the checkout process, they will have access to their event tickets. On the "Registration Complete" page, they can click the View tickets button. Additionally, the registrant will receive a confirmation email where they can view their tickets as well.
| Registration Complete Page | Confirmation Email |
 |  |
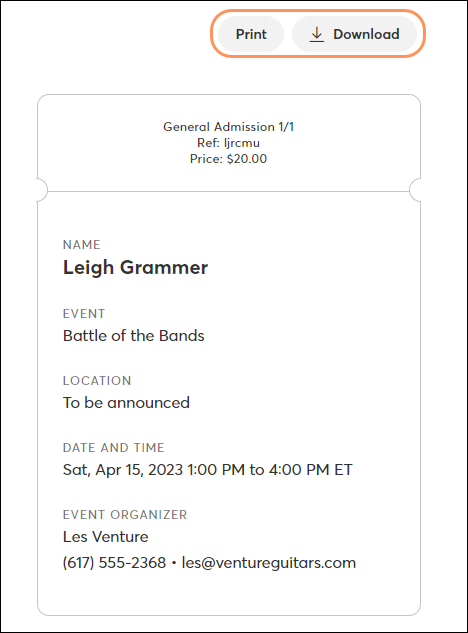
Clicking "View tickets" will bring up an additional tab with the tickets, where your registrant can choose to print or download their tickets.
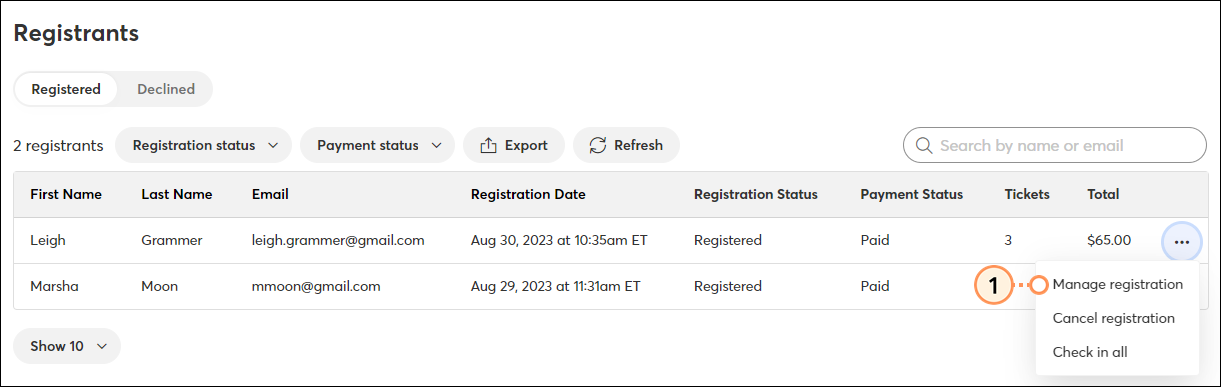
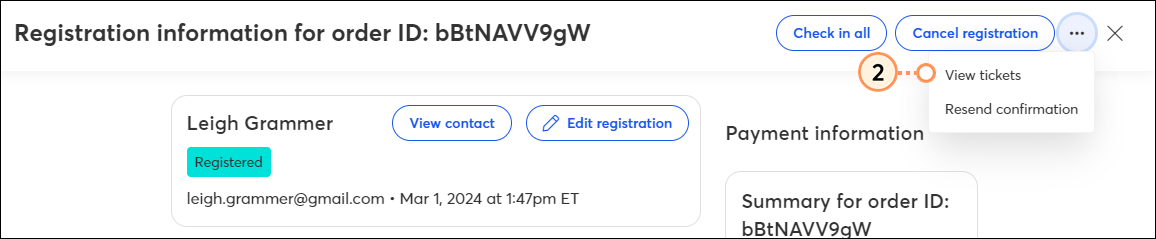
If you have printable tickets enabled, and you'd like to print a ticket for a registrant, you can do so from within the Manage Registrant screen:

I don't want tickets for my event, but when I try to activate it, I get the error "at least one ticket is required per event."
Our event tool is a ticket-based model, which means that at least one ticket is required to activate an event. Our ticket model is flexible and can represent anything, from volunteer sign-up to a board meeting entry. Tickets can be either free or paid. Use ticket registrations to track attendance so you can be better prepared for your event.
How do I allow my registrants to bring guests or order multiple tickets on behalf of a group?
There are several ticket configurations to allow for this. You can also set up your registration form to collect information from each attendee in addition to the primary registrant.
I created a ticket and activated my event but the ticket isn't visible on the registration page.
Check the ticket settings. Did you enter a ticket date range, and if so, is it currently outside of this date range? Did you make the ticket hidden, meaning it can only be revealed with a code? If you entered a quantity limit, has that limit been reached?
Copyright © 2025 · All Rights Reserved · Constant Contact · Privacy Center