Save time and make sure your campaign design is consistent and professional-looking by adding your brand colors, logo, and images to the BrandKit within your account. If you have a website, you can quickly scan it, or you can choose to manually add your brand assets.
With your colors added to the BrandKit, you can create a theme to automatically apply them to templates when creating a new email. Additionally, your brand colors are automatically added as "Saved colors" to all color palettes, allowing for quick selection within an email or landing page editor. Your logo is also automatically applied to your campaigns to save you time.
 | Did you know? Adding your logo to the Business details section of your account settings is an easy way to ensure your logo is automatically pulled into your campaigns! |
Automatically add your brand elements from your website
If you have a website, you can easily scan it to automatically import your logo, colors, and images into your BrandKit. You have the choice of which assets you want to import, and you can always add new assets later.
- In the left-hand menu, click Assets > BrandKit.
Note: If you already added your logo to your account settings, it's automatically added to the BrandKit. You can keep it or replace it with the logo from your website (see step 5). - Click the Scan my website button.
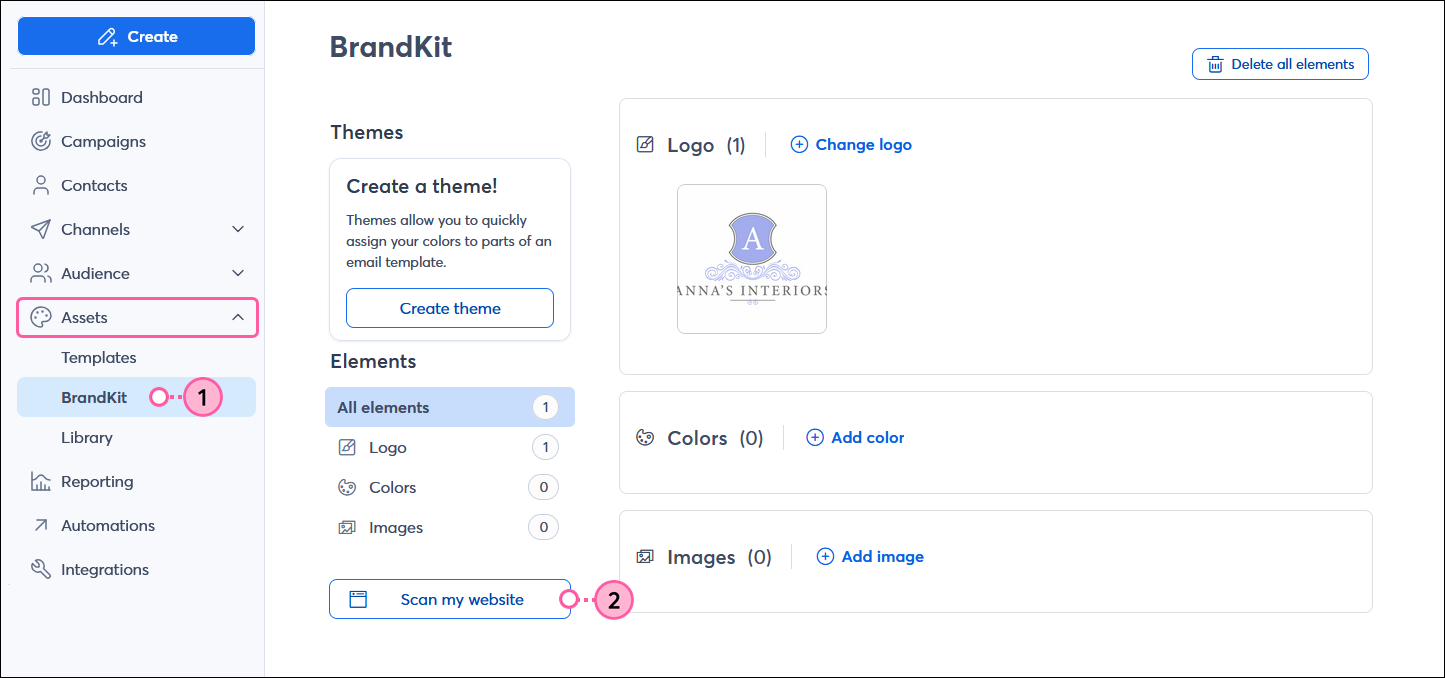
- Enter your website's URL into the field.
- Click the Scan for branding button.
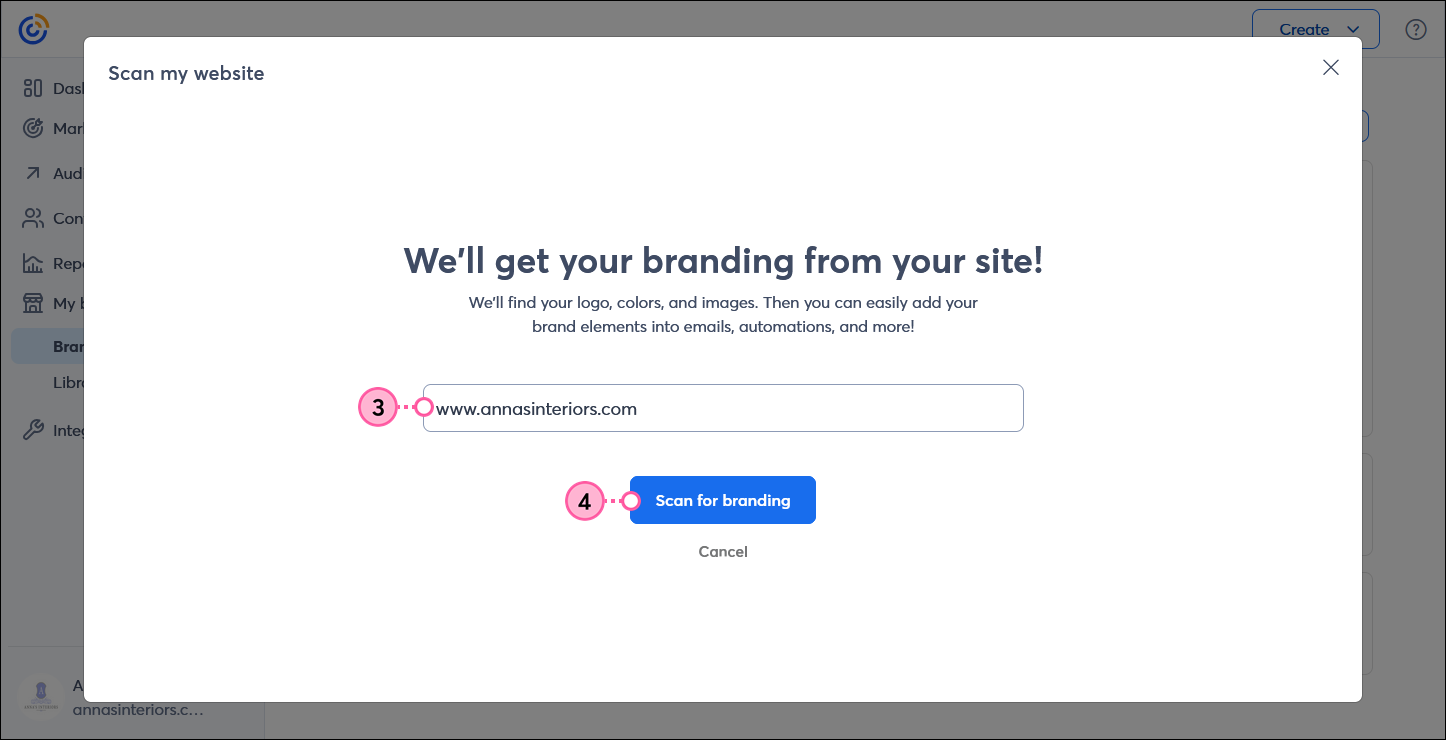
- Review the Logo, Colors, and Images results and deselect any of the assets you don’t want to import. If you don't want to use any of the results, click the No, don't use these button, and you can add your logo, colors, and images manually.
- BrandKit includes a theme that can be applied to an email template the next time you create a new email. Customize your template theme by clicking on the color swatches and selecting from any of the colors found in your website scan. Your theme can be adjusted later.
- Click the Continue button.
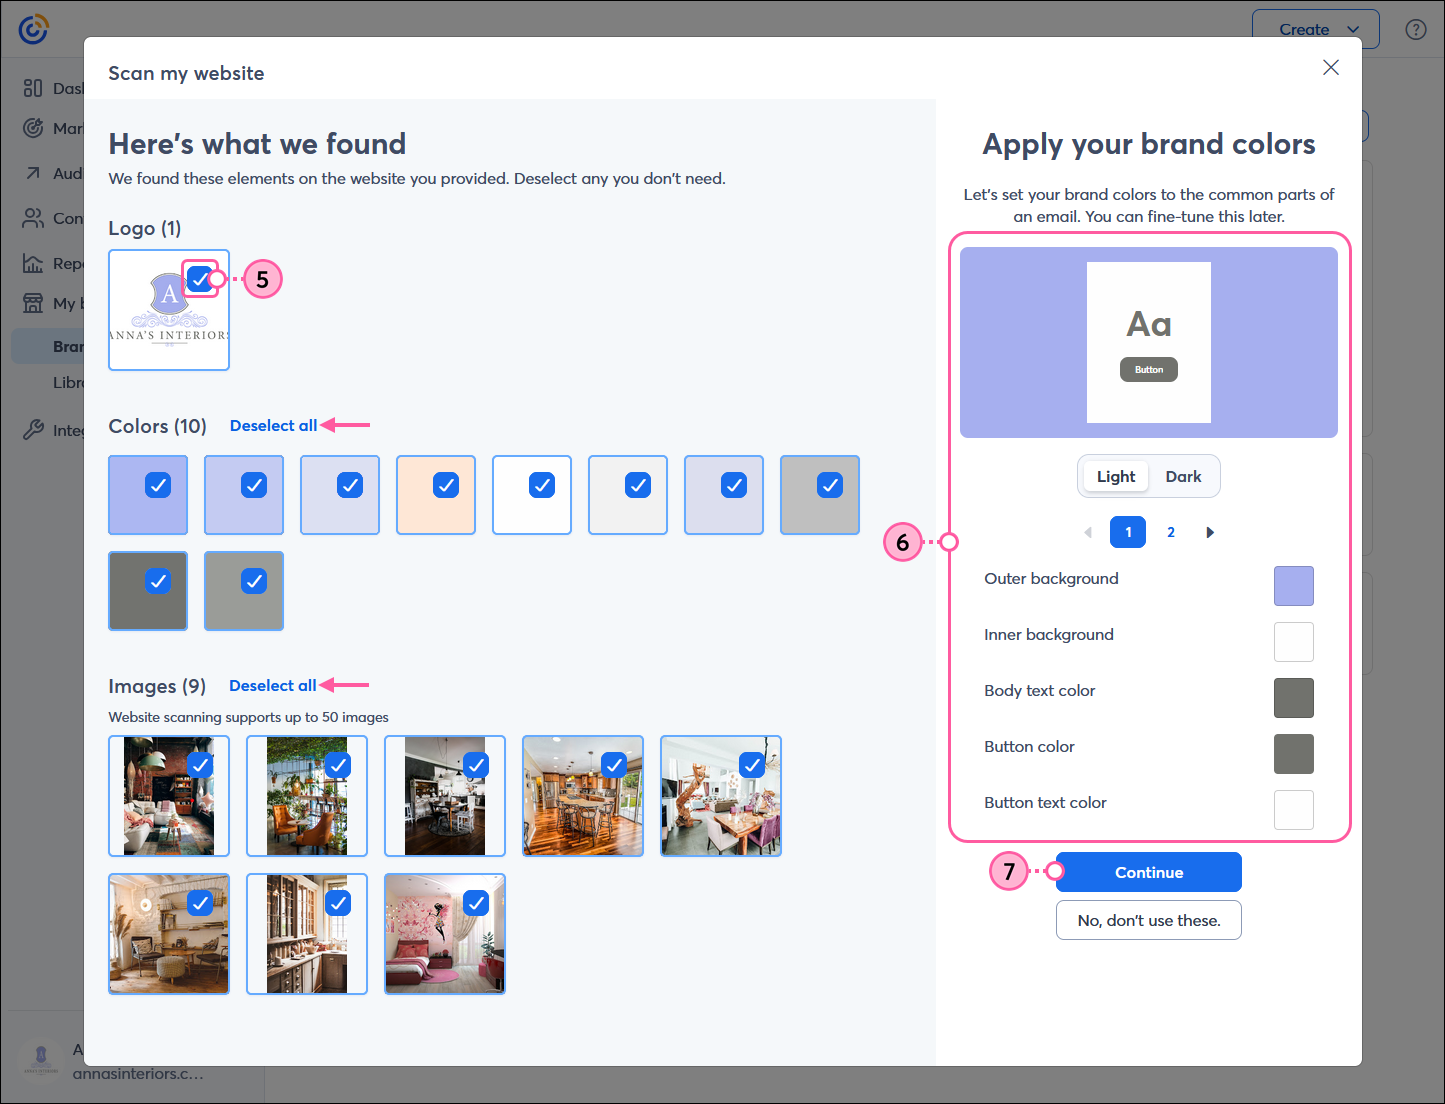
- Double-check that all the assets you want to import are selected and then click the Continue button to confirm your import.

With your brand assets added, you can now manually add additional brand colors and images or make changes to your theme.
Manually add your brand elements
If you don’t have a website or prefer to choose the specific brand assets you want to use in your BrandKit, you can add them manually.
- In the left-hand menu, click Assets > BrandKit.
- In the Logo section, click the + Change logo button.
Note: If you already added your logo to your account settings, it's automatically added to the BrandKit for you.
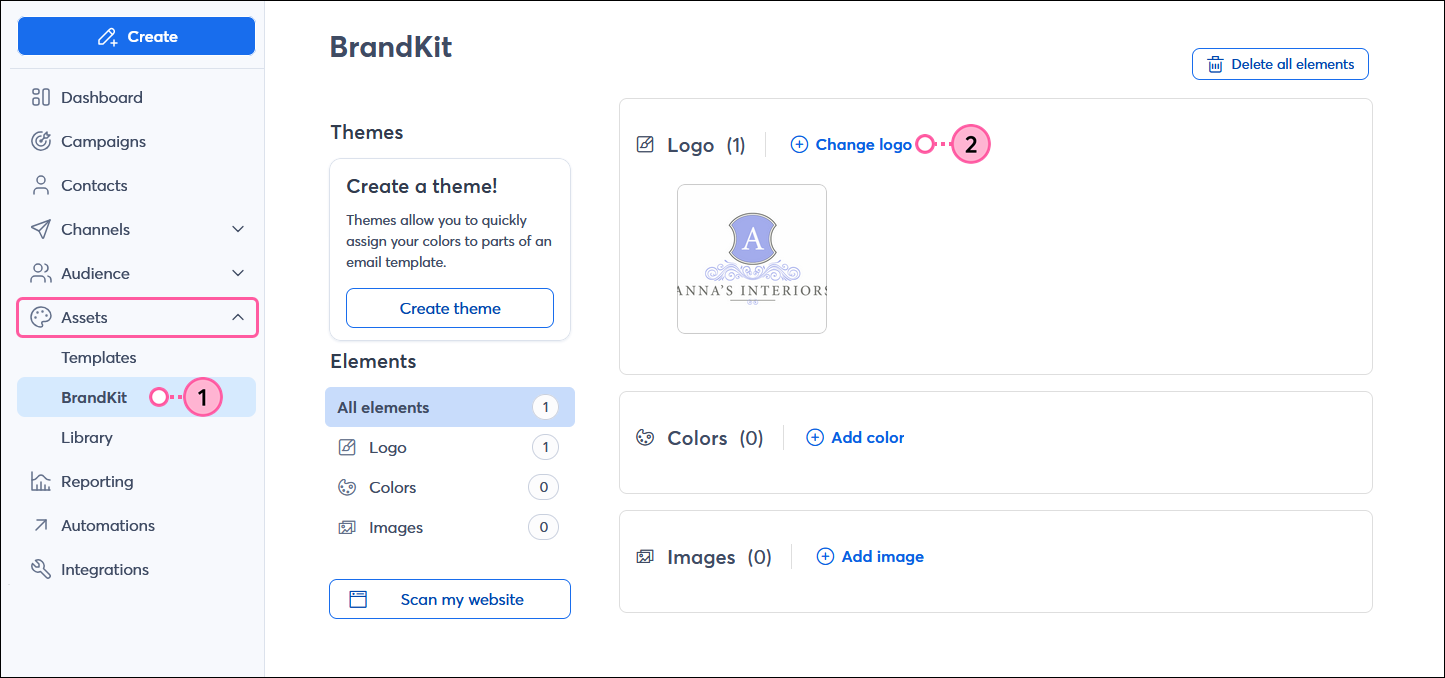
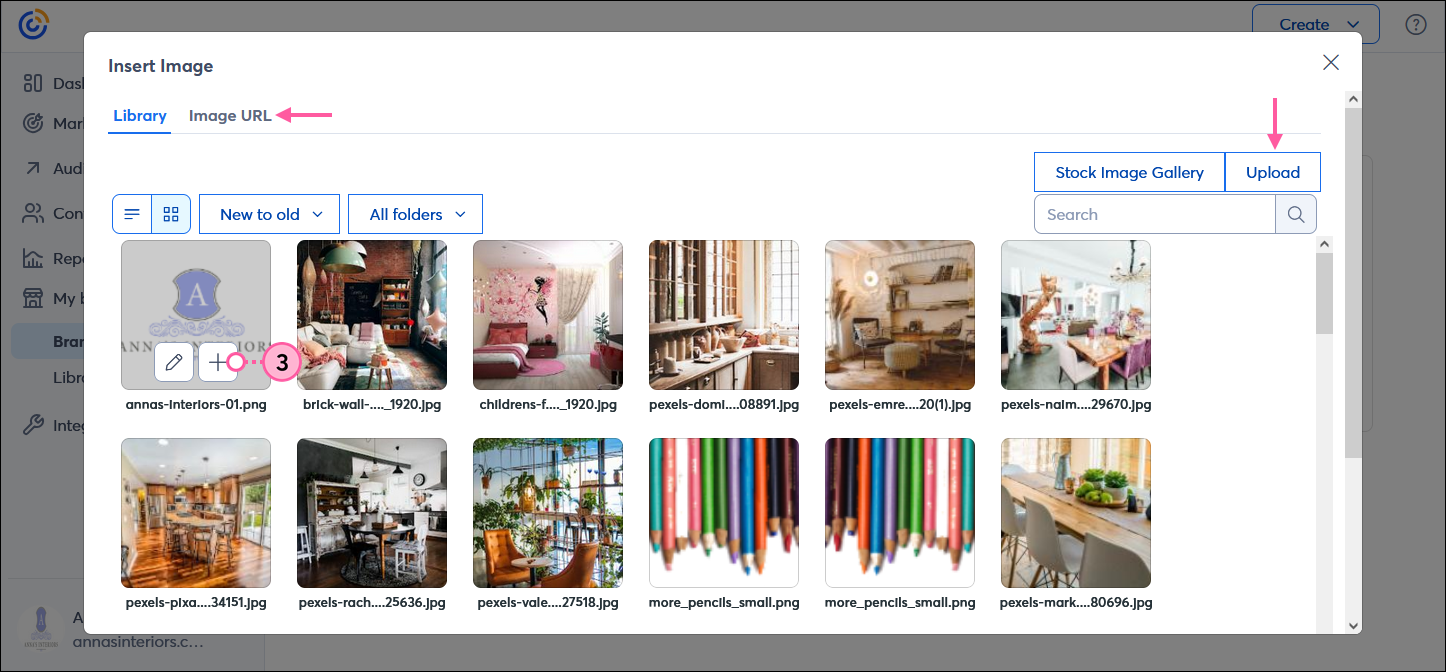
- Place your cursor over your logo image and click the + button to add it to BrandKit. Alternatively, you can also import a new logo by clicking the Upload button, or add the URL for an image that's hosted elsewhere online by clicking the Image URL tab.
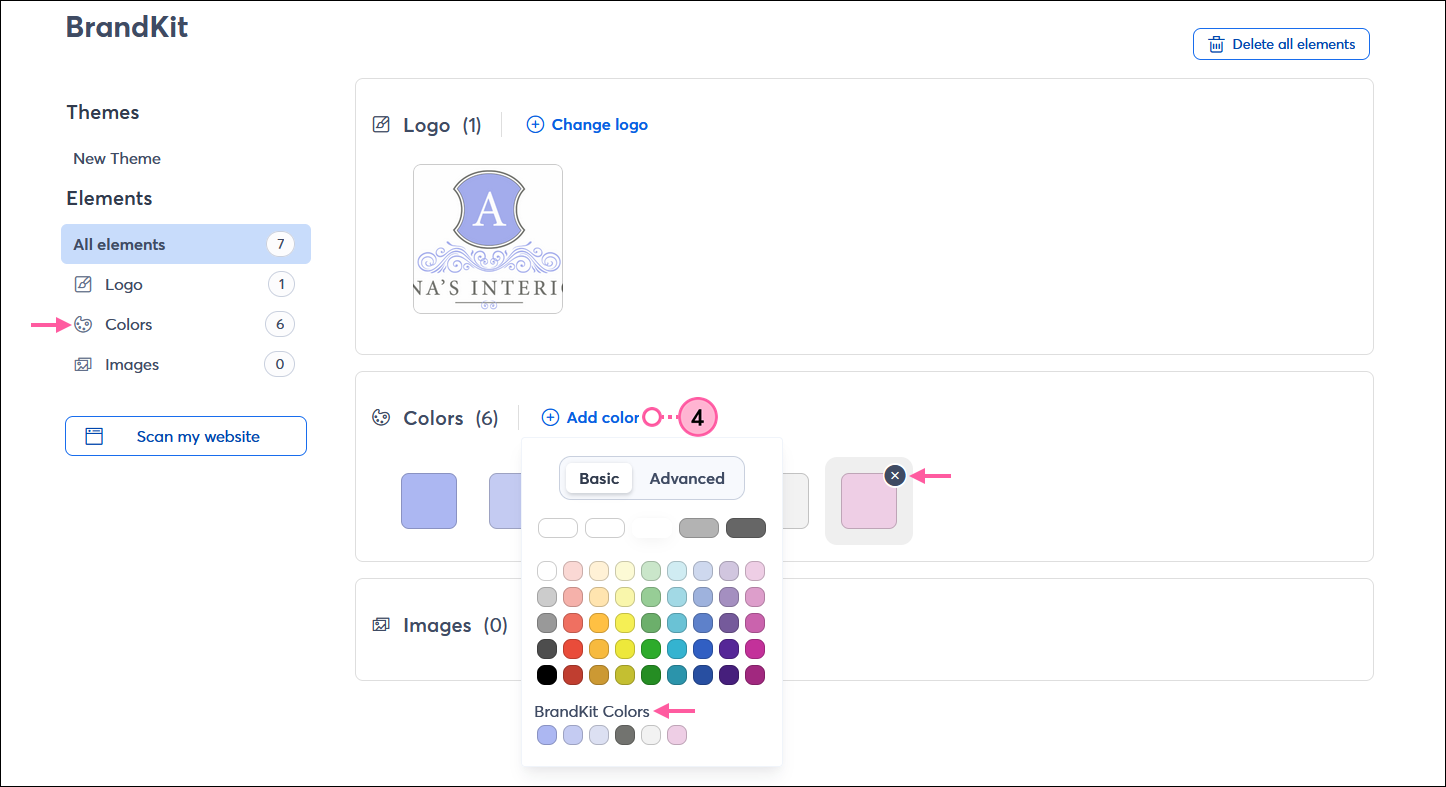
- In the Colors section, click the + Add color button. You can select from the Basic color palette or click Advanced to enter a specific hex value. You can save up to 10 colors in your BrandKit. If you change your mind about a color, place your cursor over its swatch and click the X to delete it.
Note: Clicking the Colors tab in the Elements section lets you see the hex values for each color swatch.
Design tip: If you want to match your brand colors exactly, but aren't sure of the hex value, use a color picker, such as Color Cop or Color Schemer Online, to find them.
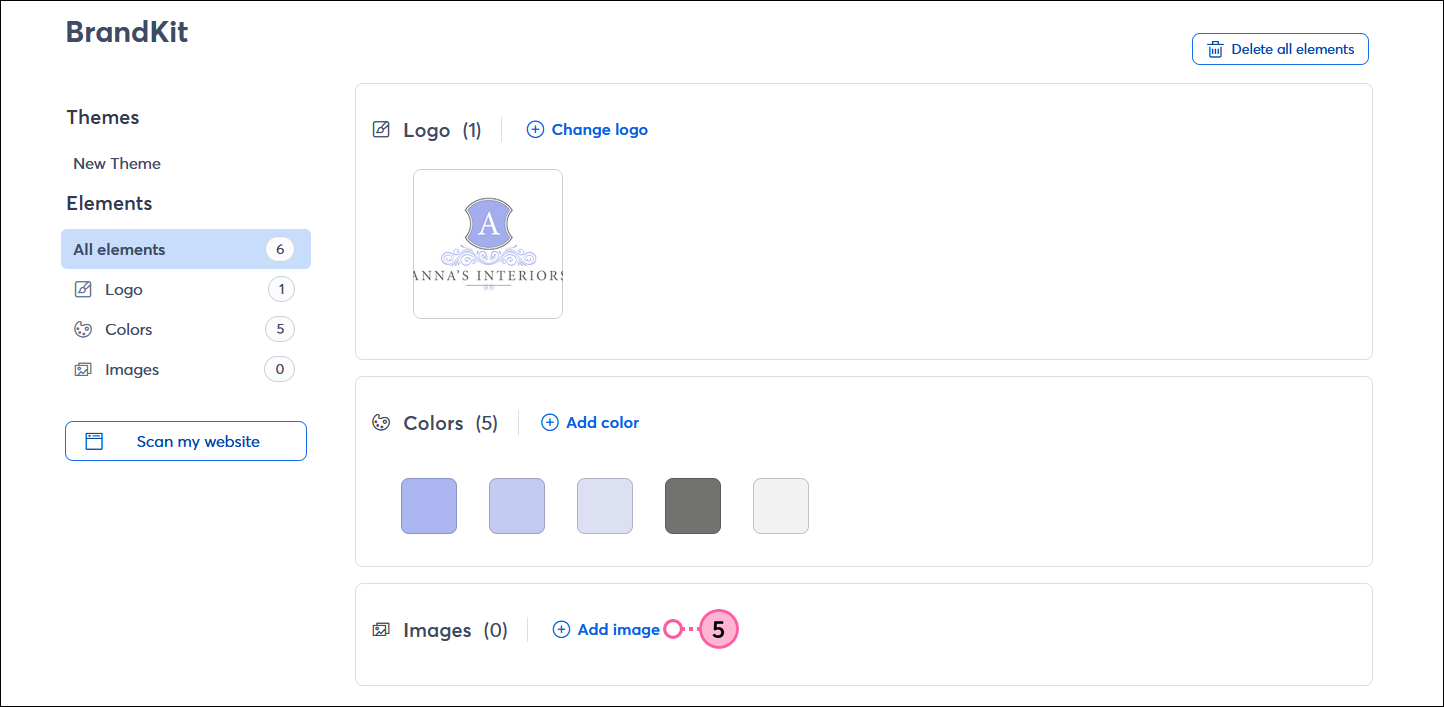
- In the Images section, click the + Add image button. You can include up to 50 images within BrandKit.
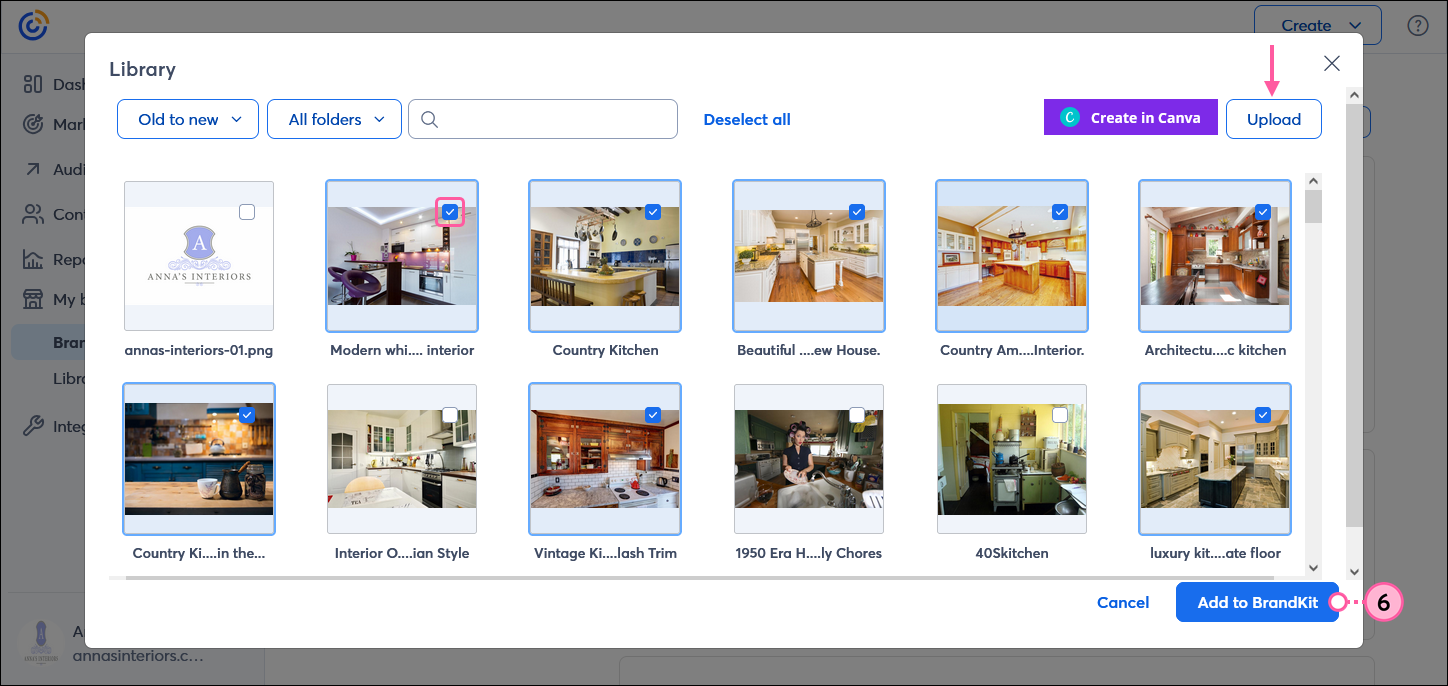
- From your Library, choose the images you want to add to your BrandKit and click the Add to BrandKit button. To add new images to your Library, click the Upload button.
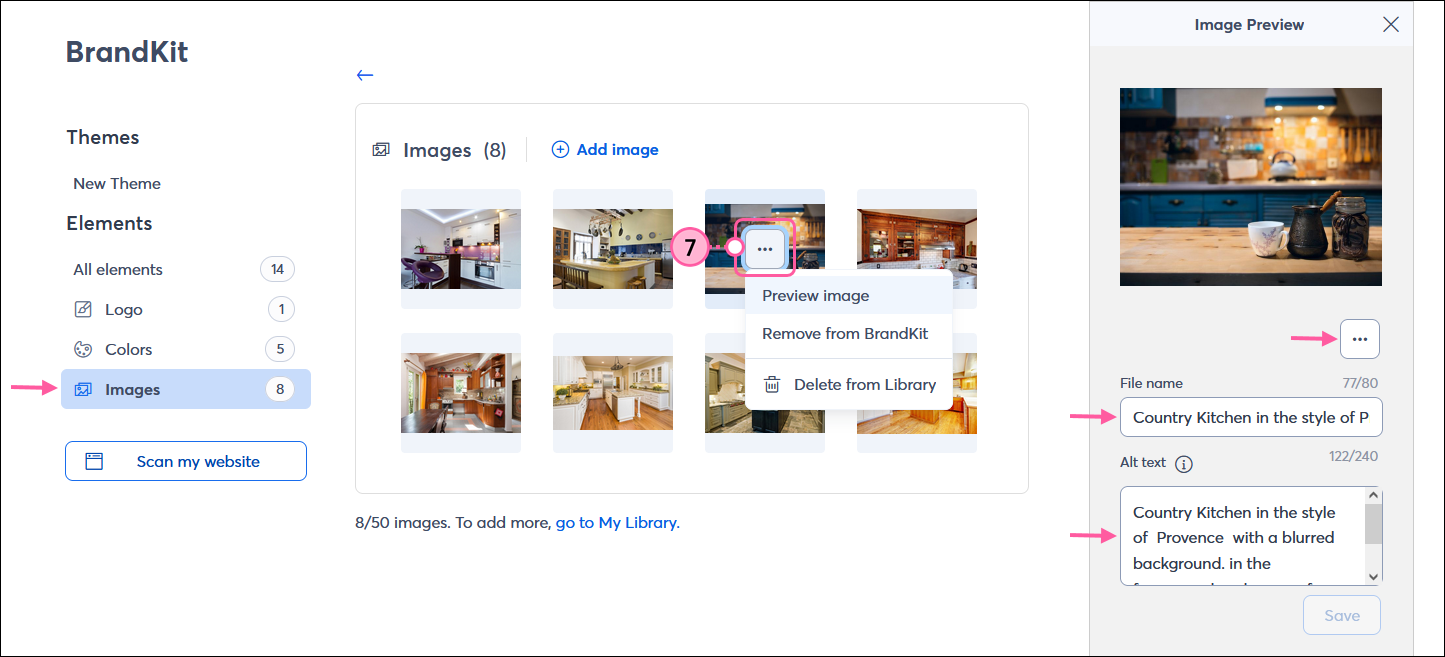
- Place your cursor over any image and click the . . . button to preview the image, remove it from BrandKit, or delete it from your Library. Selecting "Preview image" lets you change the File name and Alt text, and you can also edit the image using the tools found in the Library.
Note: If you have a lot of images, clicking the Images tab in the Elements section gives you more space to see them all.
With your brand assets added, you can now create a theme to apply to your templates the next time you go to create an email.
Any links we provide from non-Constant Contact sites or information about non-Constant Contact products or services are provided as a courtesy and should not be construed as an endorsement by Constant Contact.


