Email and Digital Marketing
How can we help you?
Search our help articles, video tutorials, and quickstart guides

You've got this. You've got us. Search our Knowledge Base to quickly find answers to your questions.

Find and remove duplicate contacts in an Excel Spreadsheet

Article: 000039748
Updated: January 2, 2026

Use the filter features in Excel to find and remove duplicate contacts

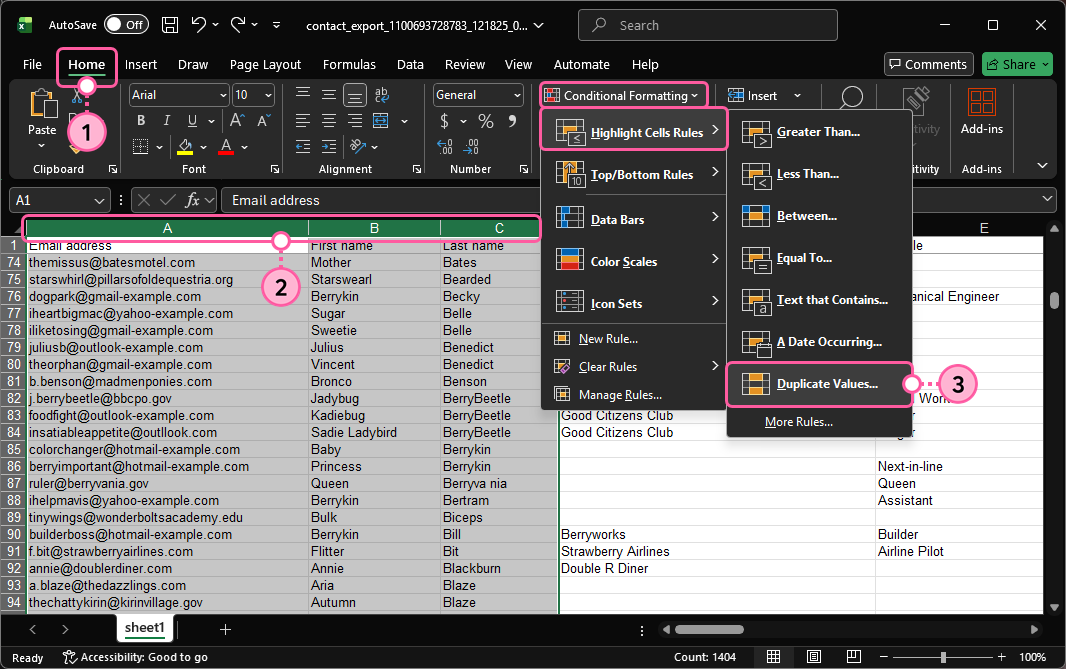
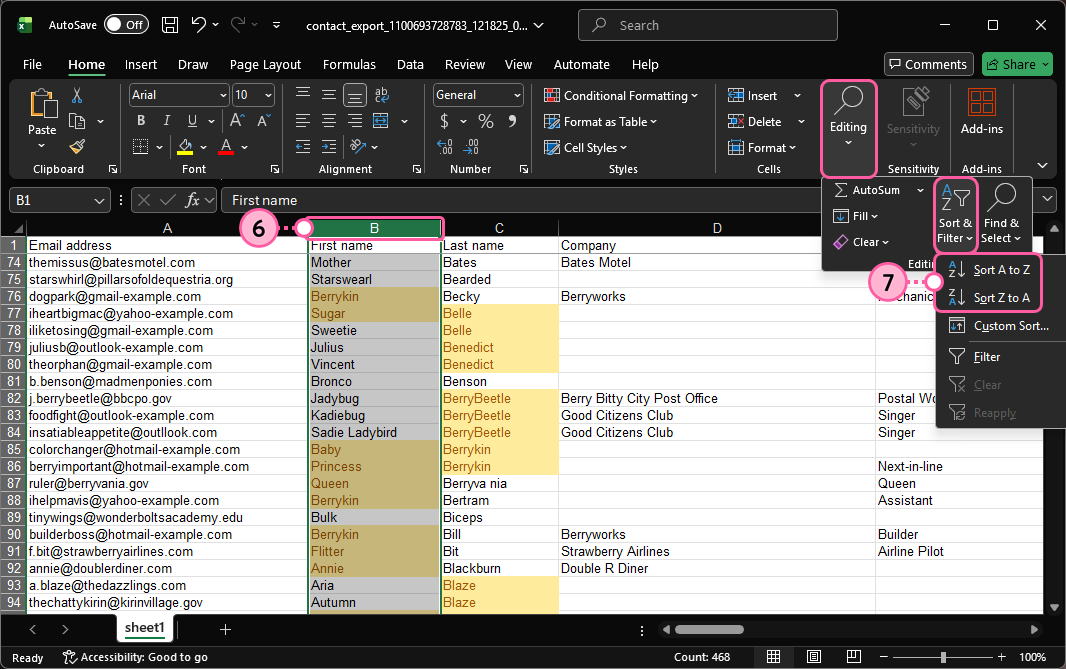
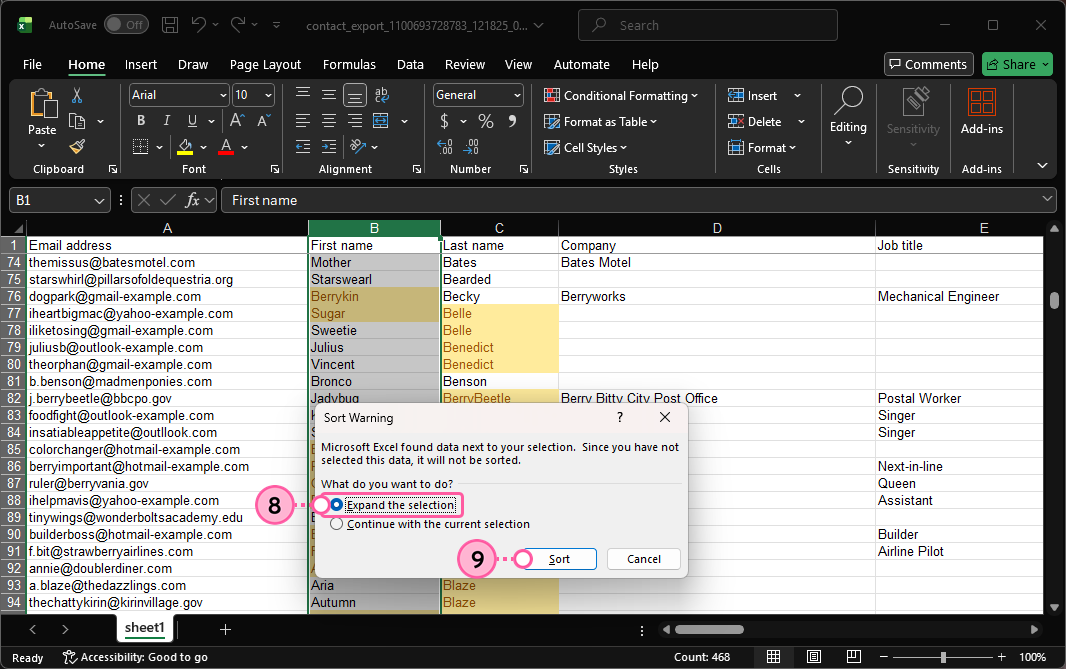
Sometimes contacts get duplicated and need to be cleaned up. You can review an Excel file before you import your contacts into your account, or you can merge contact information together by exporting all of your contacts into a single Excel spreadsheet and then use the filtering tools in Excel to find duplicate contacts before importing the updated contacts back into your account.


  1. In Excel, open your spreadsheet and click Home.
  2. Click on the letter above the column you want to search for duplicate content to highlight it. You can also select multiple columns to highlight them at the same time.
    Tip: Highlighting the email address, first name, and last name fields will help you find the most duplicates at one time.
  3. Click Conditional Formatting > Highlight Cells Rules > Duplicate Values.

    Excel Home tab, email address, first name, and last name columns selected, Conditional Formatting menu expanded, Highlight Cell Rules menu expanded and Duplicate Values option

  4. Select the color option you want to use to highlight the duplicate content.
  5. Click the OK button.

    Duplicate option selected, Yellow Fill with Dark Yellow text option selected, and OK button

  6. Highlight the column you want to sort.
  7. Click Editing > Sort & Filter > Sort A to Z or Sort Z to A.

    First name column highlighted, Sort & Filter menu expanded with Sort A to Z and Sort Z to A options

  8. Click "Expand the selection." This sorts all of the content in the other columns together instead of just re-ordering the selected column.
  9. Click the Sort button.

    Expand the selection option selected and Sort button

  10. Review the highlighted content to ensure they are truly duplicate contacts and not simply contacts with similar names. If necessary, combine the information you want to keep for the contact into a single row, and then select the row you want to delete.
  11. Click Delete > Delete Sheet Rows to remove the duplicate content. Repeat for each row with a duplicate contact.
    Note: If you are using the spreadsheet to merge duplicate contacts, add a "Delete" column to the spreadsheet and then add a "Yes" to the column next to each of the duplicate contacts you want to remove. When you import your spreadsheet, you can create a custom field for the "Delete" column, and then manage your custom fields and select all of the contacts associated with the "Delete" field to delete them all at once. Any information that you combined into a single contact row on your spreadsheet is automatically updated for the remaining contacts in your account.

    Row with duplicate contact selected, right-click menu expanded, and Delete option

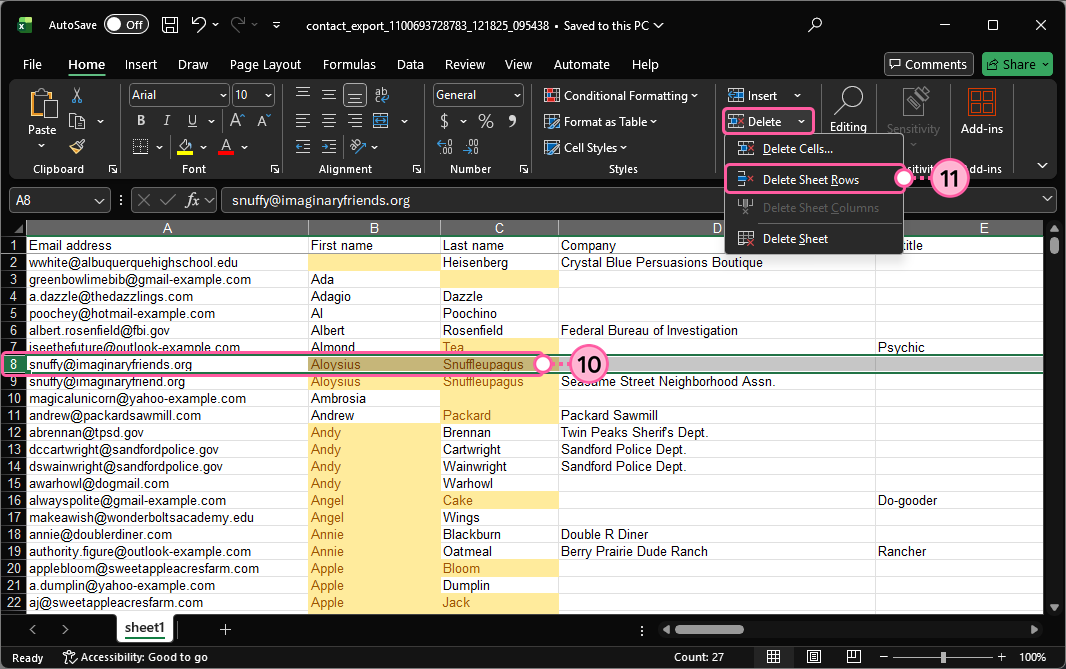
Now that the duplicate contacts have been removed, you're ready to upload your spreadsheet to your account. 


Questions?

Ask the Community

Did this article answer your question?


Constant Contact Logo

Copyright © 2026 · All Rights Reserved · Constant Contact · Privacy Center