Email and Digital Marketing
How can we help you?
Search our help articles, video tutorials, and quickstart guides

You've got this. You've got us. Search our Knowledge Base to quickly find answers to your questions.

Change the background color, pattern, or image in an email

Article: 000014522
Updated: April 30, 2026

Choose your email's background colors, add or remove a background pattern, or use a custom background image


Changing the background color and pattern is an easy way to brand and style your email. If your background pattern is transparent, your background color shows too, so don't be afraid to experiment with different combinations to find one you really like!

Note: The outer background isn't always displayed when viewing your email on a mobile device. Make sure to preview the mobile view of your email to make sure it reflects the branding you intend.


Change the background colors in your template

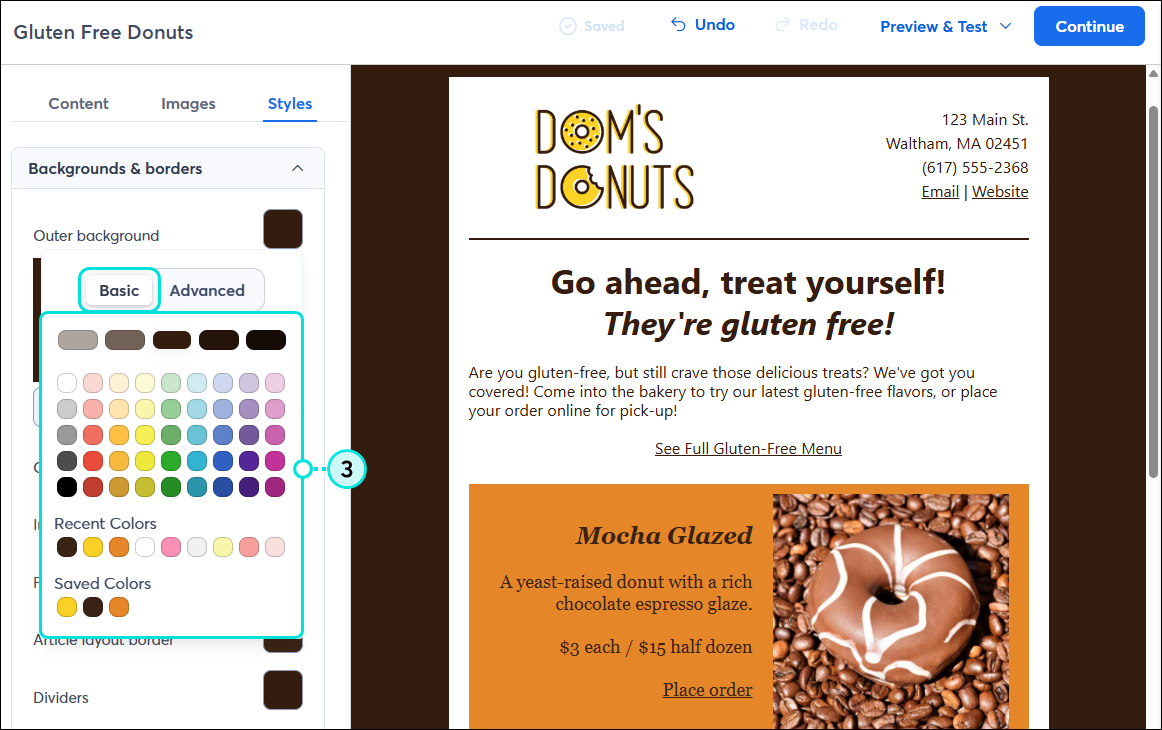
The background colors of your email can be changed to match your branding and help the main content really pop.

  1. Click the Styles tab.
  2. In the Backgrounds & borders section, click on a color swatch to change the color of each background type. Placing your cursor over a color in the palette lets you preview it in your template:
  • Outer background - Surrounds the entire email and includes the background pattern, if you choose to use one.
  • Inner background - Sits within the outer background and contains all your email content. Whatever color you choose will show through any transparent images you have in your email.
    Light Bulb IconDesign tip: You can access additional customization options and choose to use an image for the inner background of your email!
  • Feature layout background - Applies to any pre-built layout that includes a background color in its design.

    Email Styles tab, Backgrounds and Borders menu expanded, Outer Background, Inner Background, and Feature Layout Background color swatches
     
  1. Click either: 
  • Basic - Click on a color from the Basic palette, your Recent Colors, or your Saved Colors to apply it to your template.

    Email Styles tab, Backgrounds and Borders menu expanded, Basic color palette options
     
  • Advanced - Enter a specific HEX color value and click Apply.

    Email Styles tab, Backgrounds and Borders menu expanded, Advanced color palette options and Apply button


lightbulb icon
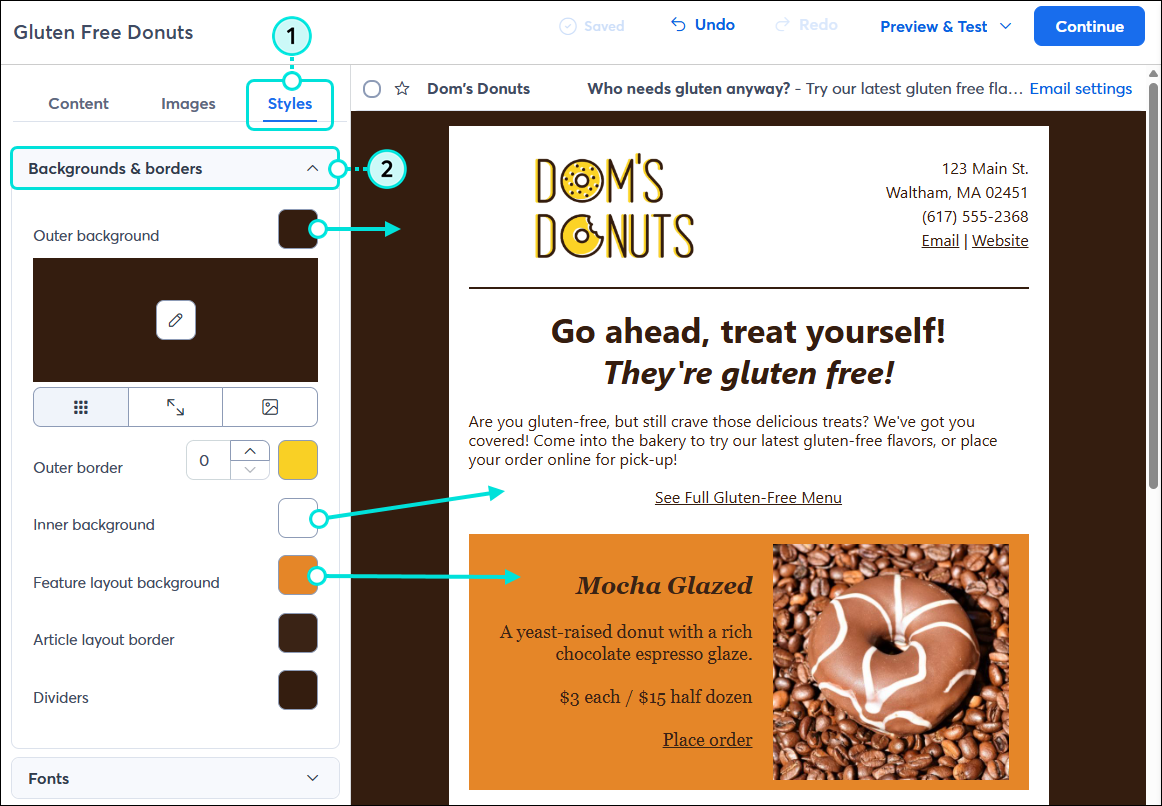
Design tip: You can make certain content in your email stand out by changing the background color of an individual block. If you make changes later through the Styles tab, the block keeps its custom color.


Change the background pattern

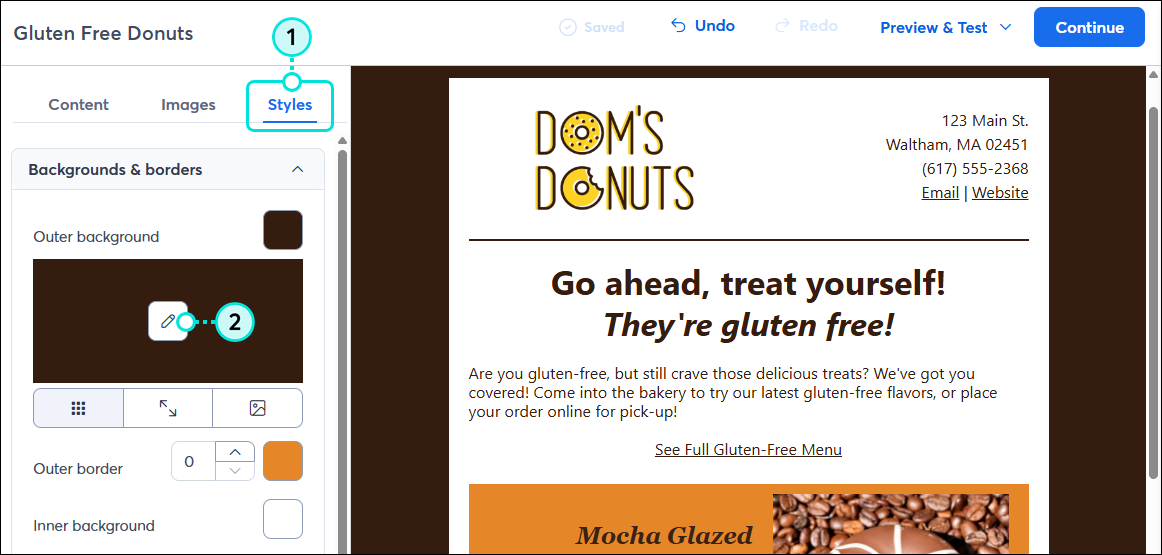
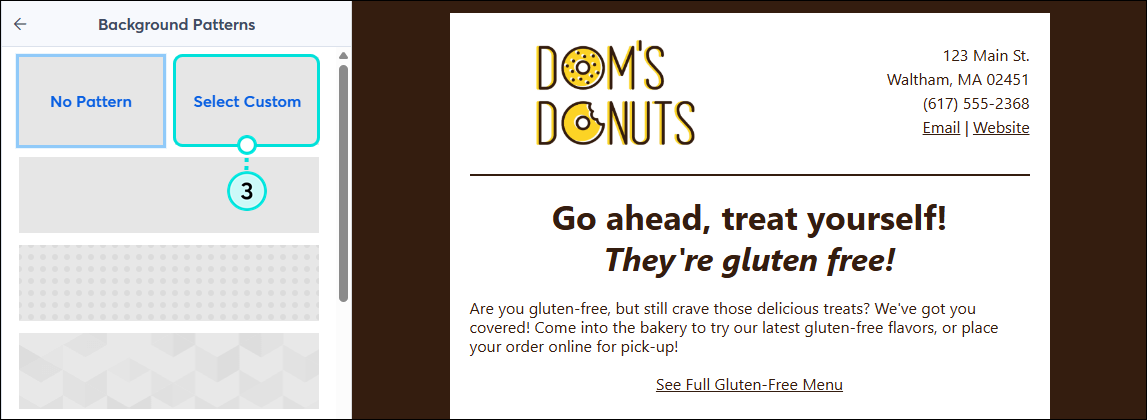
If you want to add some more interest to your email background, it's easy to add a pattern or custom background, change it, or remove it:

  1. Click the Styles tab.
  2. In the Borders & backgrounds, click the pencil icon to change the outer background pattern.

    Email Styles tab, Backgrounds and Borders menu expanded, and Outer Background option with Edit Image icon
     
  3. Scroll through the options and select a pattern for your email background.
    Note: If the background you choose is an image, like the wood planks or grass, you won't be able to change its color.
  4. (Optional) If you change your mind about using a pattern, click No Pattern to remove it. This leaves only the background color showing.
  5. Click the back arrow to return to the Styles tab.

    Background Patterns menu expanded with pattern selected


Use a custom image for your background

In addition to the pre-designed background patterns available, you can choose to use an image from your Library for your email background.

When you use a custom image, it tiles behind your email content. The "seam" runs vertically down the middle of the template, but isn't noticeable since it's covered by the body of the email. The size of your image and the length of your email can affect how the tiles render. For example, longer emails with smaller images have more tiling than shorter emails with larger images.


Light Bulb IconDesign tip: The best background images appear seamless, so you can't tell where one tile ends and the next begins. If you're looking for a subtle image that tiles correctly, there are hundreds of open-source images available at www.toptal.com/designers/subtlepatterns/.


Background image size guidelines

  • Images used for the outer background should be:
  • No more than 2,000 pixels wide
  • No more than 5,000 pixels in height
  • A maximum of 20MB in size

If you plan to tile the background image, the recommended image size is 100 x 100px and less than 100KB.

If you plan to center your background image, it should be twice the inner width of your email template. For example, if the body of your email is 600px wide, the background image should be at least 1,200px wide.

If you plan to have your background image span the full background, the image should be no more than 2,000px wide. The image height will depend on the length of your email; longer emails require larger images.


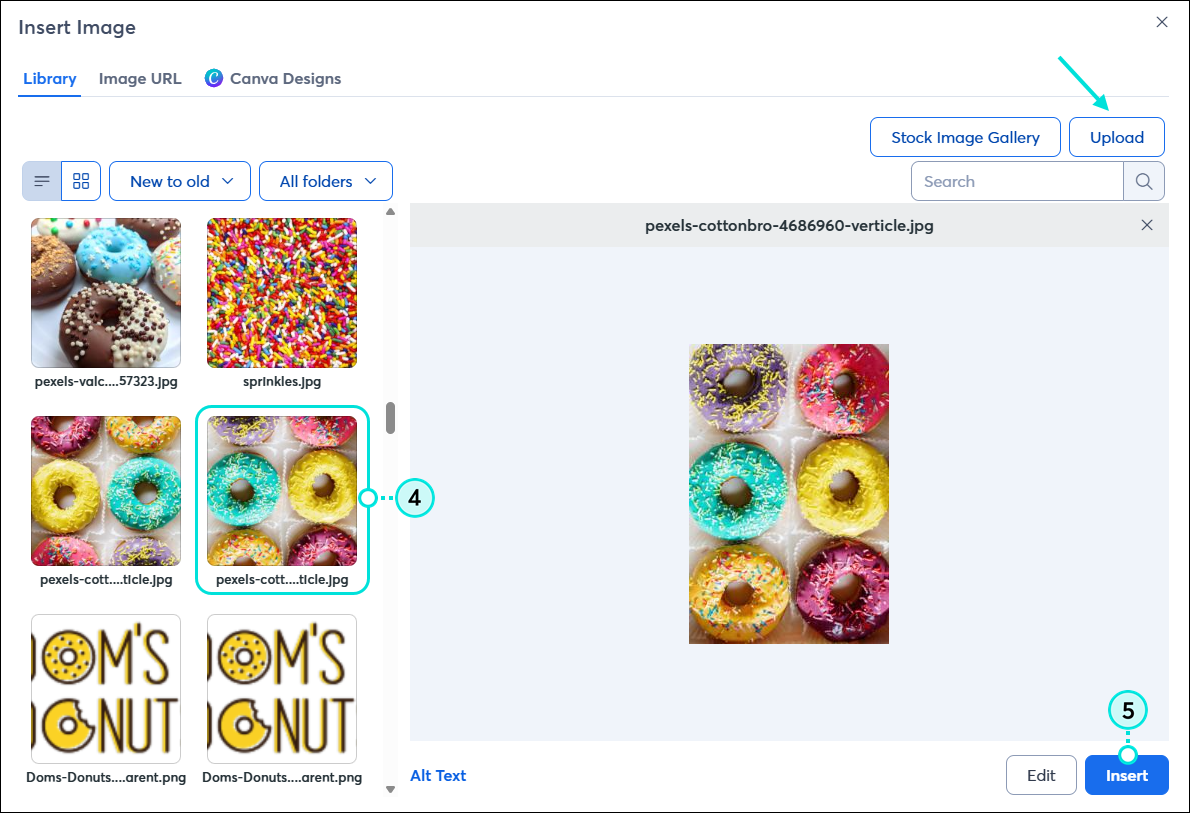
To use an image for your background:

  1. Click the Styles tab.
  2. Click the pencil icon to change the outer background pattern

    Email Styles tab, Backgrounds and Borders menu expanded, and Outer Background option with Edit Image icon
     
  3. Click Select Custom.

    Background Patterns menu expanded, and Select Custom option selected
     
  4. Select an image from your Library, or click Upload to add a new image. You can also choose an image from your Canva account, use an image URL, or browse our stock image gallery.
  5. Click Insert.

    Insert Image overlay, Library tab selected, background image selected, and Insert button

  6. Click the back arrow to return to the Styles tab.

    Background Patterns menu expanded with custom image selected, and Back button
     
  7. (Optional) To customize how the image fills the background:
  • Click the tile icon to have the image tile horizontally and vertically. This option keeps your image at or near its original size and is good for patterns.

    Email Styles tab, Backgrounds and Borders section expanded, custom outer background selected, and Tile icon
     
  • Click the center icon to disable tiling and have the image centered and aligned to the top of the email.

    Email Styles tab, Backgrounds and Borders section expanded, custom outer background selected, and Center icon
     
  • Click the image icon to disable tiling and have your image span the full width of the background.

    Email Styles tab, Backgrounds and Borders section expanded, custom outer background selected, and Image icon
     

If your background image is transparent, you can further customize your email design by changing the background color.
 
If you've added sections to your email template, you can also add a background image to a specific section.


Any links we provide from non-Constant Contact sites or information about non-Constant Contact products or services are provided as a courtesy and should not be construed as an endorsement by Constant Contact.


Questions?

Ask the Community

Did this article answer your question?


Constant Contact Logo

Copyright © 2026 · All Rights Reserved · Constant Contact · Privacy Center