We're making it easier to get around Constant Contact with a brand new left navigation. Not all accounts have that change yet, so if your navigation looks different from our articles, that's why–but everything from the top can now be found on the left!

Email and Digital Marketing
How can we help you?
Search our help articles, video tutorials, and quickstart guides

You've got this. You've got us. Search our Knowledge Base to quickly find answers to your questions.

Create and manage an automated Welcome Email

Article: 000006498
Updated: February 28, 2025

Make a lasting impression with a Welcome Email that automatically sends to new contacts when they join your mailing list

Exclamation Point IconNote: This article is for our legacy automated email series feature. If you’re in our Lite, Standard, or Premium plan using our Automation Path Builder, please reference this article instead.


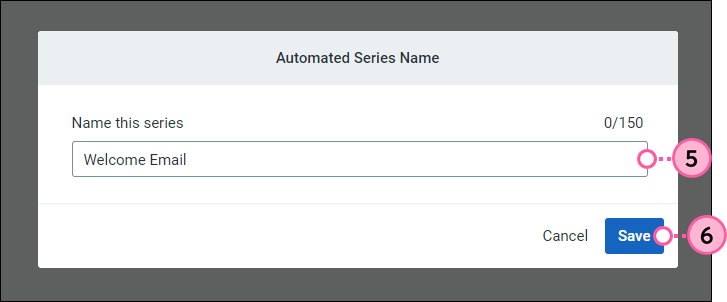
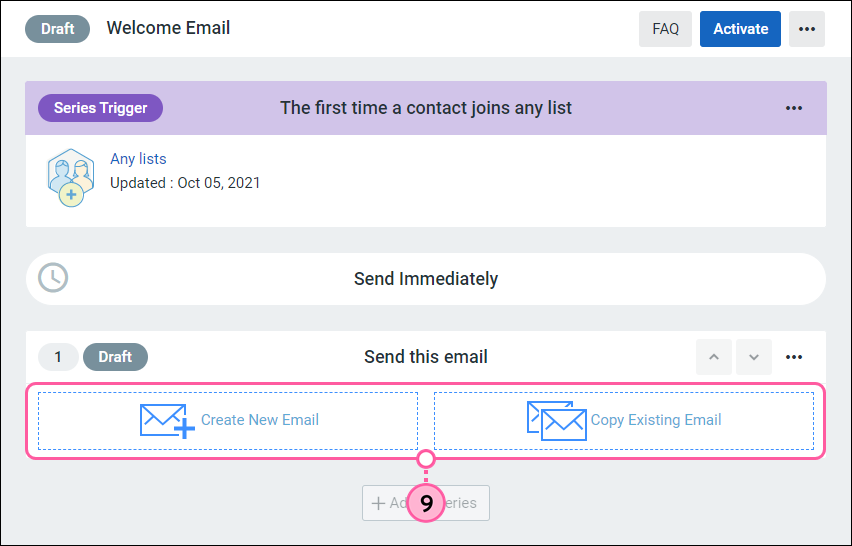
First impressions count! Save time by setting up an automated Welcome Email to help cement the relationship with your contacts from the very start and when their engagement level is at its highest — right after they join your mailing list through a sign-up tool. Most new subscribers expect to receive a Welcome Email these days, so take the opportunity to thank them for subscribing, send a coupon, and let them know what content they can expect to receive from you in the future. You can create and activate as many Welcome Emails as you want, giving you the option to customize the content for your different contact lists.


Note: A Welcome Email is not created by default when you create a Constant Contact account. If you want to automatically welcome your new subscribers, you’ll need to create a Welcome Email and activate it.

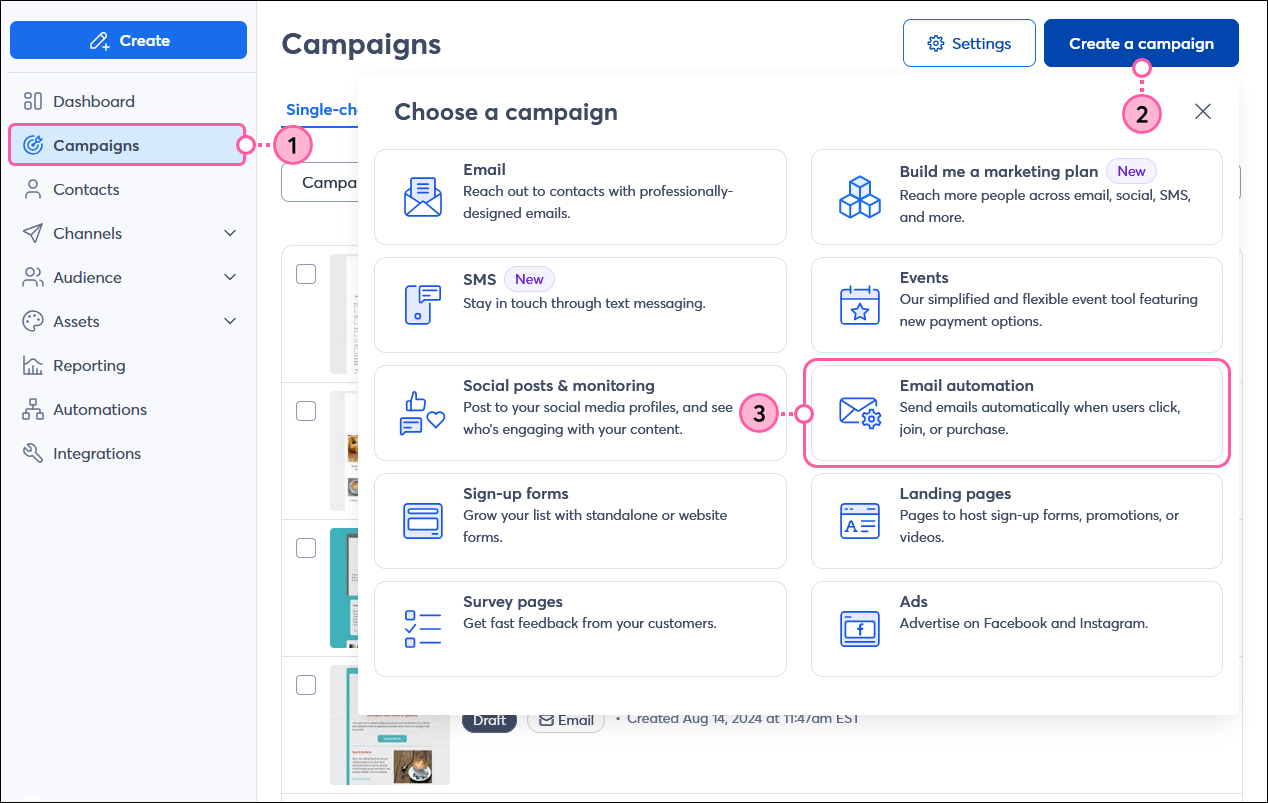
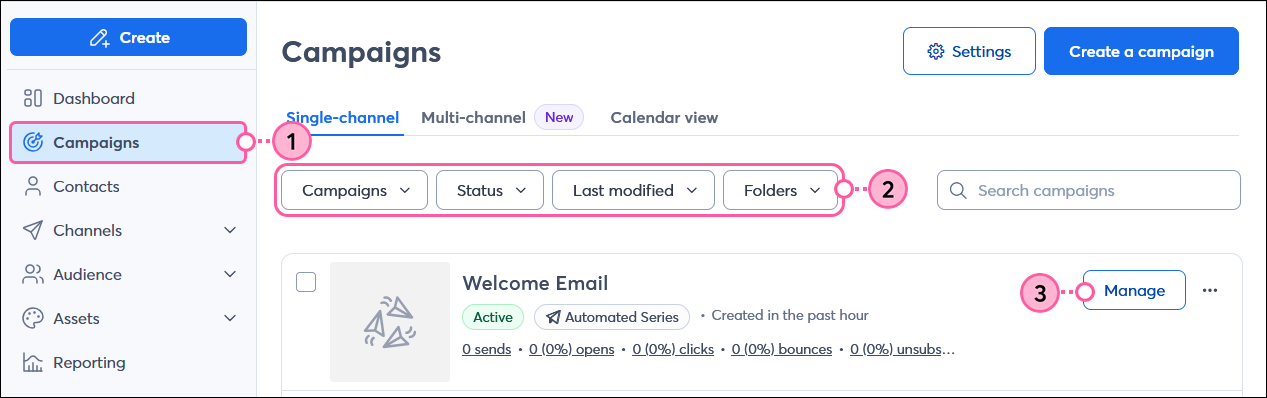
Not sure if you already have a Welcome Email set up? Go to Marketing channels > All campaigns and filter by Automations. The campaign type will display as “Automated Series” just like any other automated email series. If the campaign name doesn’t indicate what it is, you may need to open the campaign to determine if it’s a Welcome Email or other automated email series.

Campaigns page with Automations filter and Automated Series campaign type


Create a Welcome Email

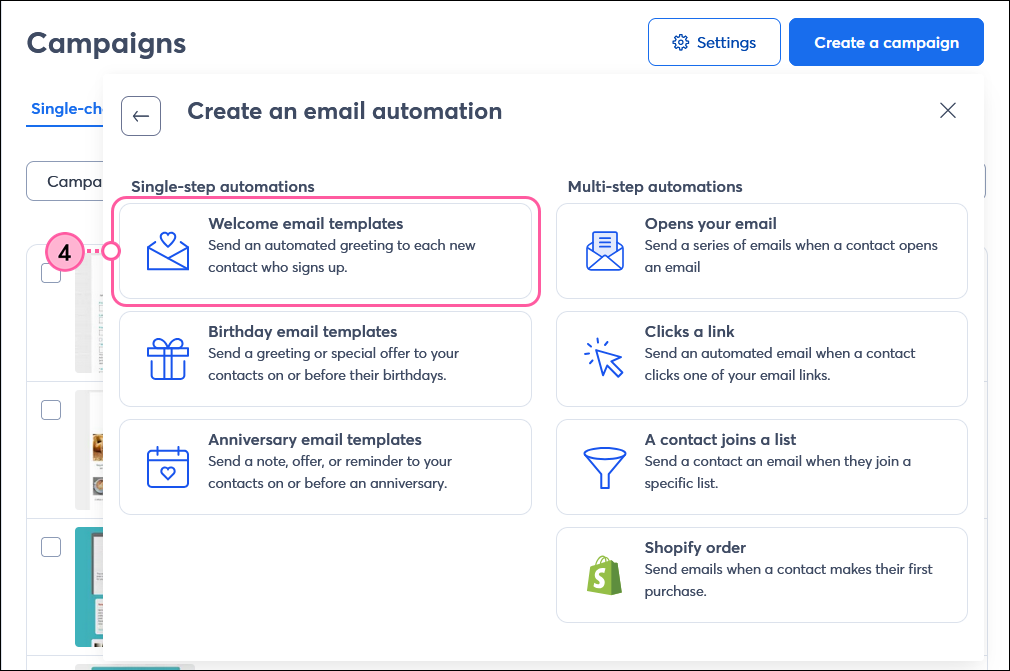
You have the ultimate control over the content each of your contacts sees from the beginning! You can keep it simple and have the same Welcome Email sent to all of your new contacts, or customize multiple Welcome Emails that trigger to send to specific lists. We have several email templates to choose from to help you get started quickly!
 

  1. Click Marketing channels > All campaigns.
  2. Click Create a campaign.
  3. Select Email automation.
     
    Exclamation Point IconNote: If you see “Automations” instead of “Email automation,” please reference this article instead.

    Choose a campaign overlay and Email Automation option selected
     
  4. Select Welcome email templates.

    Choose an Email Automation overlay with Single-step automations section, and Welcome Email Templates option

    Note: Contacts acquired through accounts, through Integrations, will not receive welcome emails from the Welcome Email automation. Use the A contact joins a list automaton instead. Read this section to learn more. 

  5. Give your series a unique name that you’ll recognize in your account later. Your contacts won't see this name — they instead see the email subject line.
  6. Click Save.

    Automated Series Name overlay with Name this series field and Save button
     
  7. Choose the list(s) you want contacts to join in order to trigger the Welcome Email:
  • Any lists - Your Welcome Email is sent to every new contact who joins any of your contact lists through a sign-up tool. This option lets you keep your email content more general for a broader audience.
  • Send to selected lists - Your Welcome Email is only sent to new contacts who join a specific list of your choosing. This option lets you customize your email content for a specific audience based on their interest.
    Note: If you set up multiple Welcome Emails and a contact joins multiple lists at sign-up, they'll receive the Welcome Email for each list that has a unique Welcome Email assigned to it. If none of the lists they join have a unique Welcome Email assigned to it, they'll receive the Welcome Email you have assigned to send to "any lists," if you have one set up.

    Exclamation Point IconImportant:  If you have an automated email series triggered to send to contacts who join the same list, they won't receive the Welcome Email.
  1. Click Save.

    Automated Campaign Settings with Welcome Email trigger type, Send to Any Lists or Selected Lists options, and Save button
     
  2. Select how you want to create the email:
  • Create New Email - Select a template to create a new email from scratch.
  • Copy Existing Email - Select one of your previous emails from the drop-down to make a copy of, and then click Save.

    Welcome Email draft with series trigger set to "The first time a contact joins this list" option, and Send this email section with Create New Email option, and Copy Existing Email option


Why didn't my contact receive the Welcome Email?

Contacts added to Constant Contact through an integration, like Spotify,  Squarespace, or any other integration, typically have two sources: the contacts themselves or an account. If your contact source was an integration account, those contacts will not receive the welcome email. 

Use the Joins A List automation instead of the Welcome Email automation to reach these contacts. 


Customize your Welcome Email

What do you want your contacts to know about you? Think of your Welcome Email as your "elevator pitch" to concisely introduce who you are, what you do, and what your contacts can expect from you. When your email looks like it came from you, it inspires trust in your recipients too.
 

  1. Click to give your email a unique name that you'll easily recognize in your account later. Your contacts never see this — they only see your subject line.
  2. Click "Email settings"  to update your subject line, preheader, From Name, and From email address.
  3. If you added your logo to your account settings, it's automatically added to most templates. If it’s not already in your template, be sure to insert it.
  4. Click the Design tab to change the template colors to match your branding.
  5. Customize the messaging of your email:
  • Add personalization - A warm, personalized "hello" goes a long way! Collect your contacts' names by including the first name field on your sign up forms. Then, put that information to use by displaying it in your email.
  • Give thanks - Your contacts take time out of their day to join your list, so a quick acknowledgement makes you look considerate. Most of our Welcome Email templates include a brief message by default that you can further customize.
  • Set expectations - Let your contacts know how often you plan to send emails and what kind of content you plan to cover.
  • Go social - Add icons for your social media profiles so that your new contacts can like or follow you.
  • Offer an incentive - Offer a coupon to say “thanks” or include an exclusive "first look" at a product or service to generate buzz.

    Welcome Email draft in editor, email name, email settings, logo, design tab, and email content
     

The rest of your Welcome Email content is up to you! There is plenty of space to explain the perks of joining your mailing list or to provide additional resources before your contacts have to ask for them.


Blue Ribbon IconBe a better marketer: Want more tips and to see some real customer examples? Check out how to write a winning welcome email!


Activate your Welcome Email

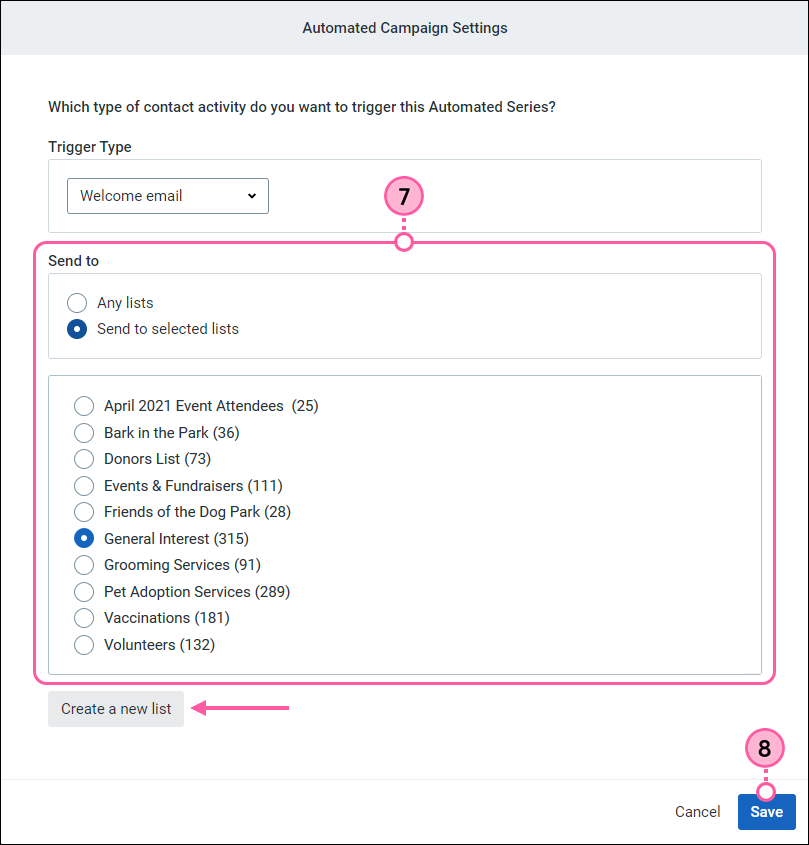
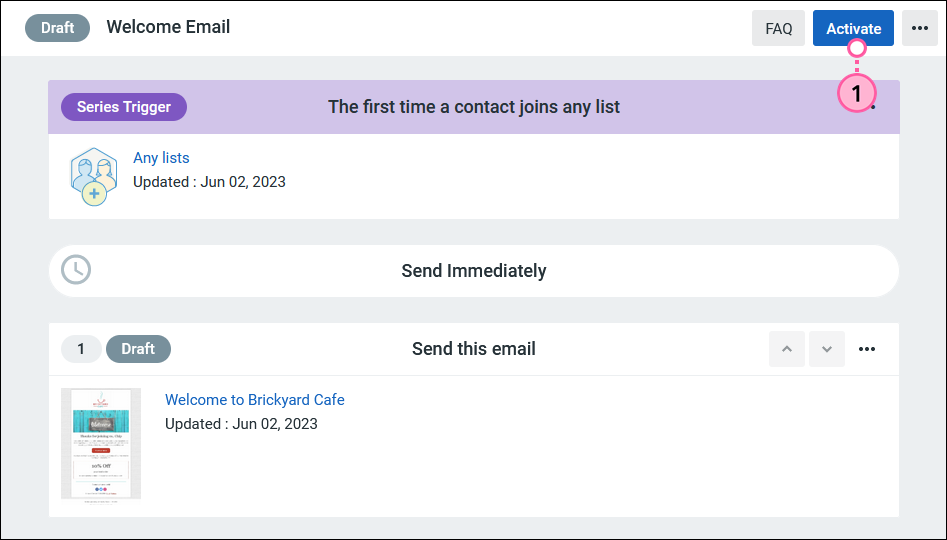
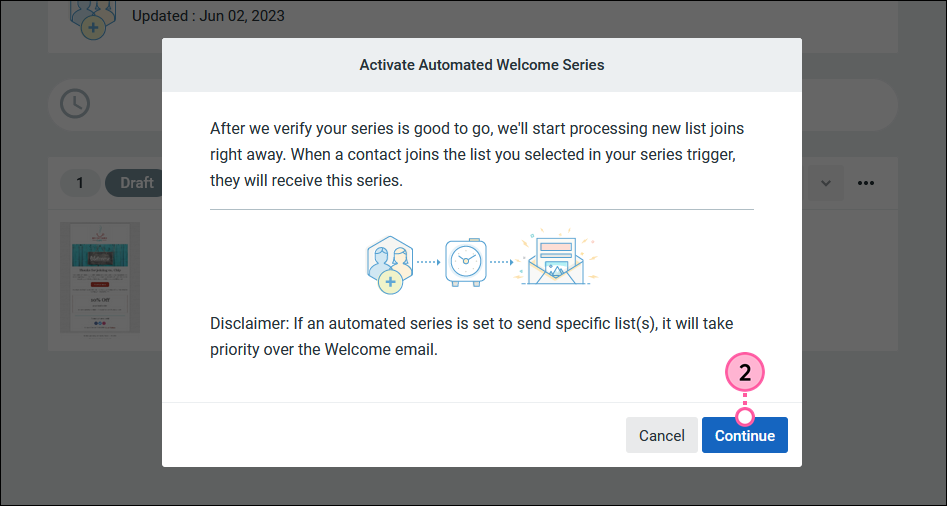
When you activate your Welcome Email, it's automatically sent to any new contacts who join the list assigned to the Welcome Email. The email won't send to contacts who you add to the list manually, or to contacts who are already on the selected list before you created the Welcome Email.

Note: If you have Confirm Opt-in enabled, your contacts won’t receive the Welcome Email until they confirm their subscription by clicking the link in the Confirm Opt-in Email.
 

  1. Within your draft Welcome Email, click Activate.

    Welcome Email draft with series trigger set to "The first time a contact joins this list" option, and Activate button
     
  2. Click Continue.

    Welcome Email draft, Activate Automated Welcome Series overlay, and Continue button
     

Once your Welcome Email is active, you’ll be able to see the Sent, Opened, and Clicked information. Click on any of the hyperlinked numbers to see the specific contacts who were sent your email, those who opened your email, and those who clicked any of the links or buttons in your email.

Welcome Email in Active status, Send this email section with Sent count, and Opened and Clicked statistics


Edit an active Welcome Email

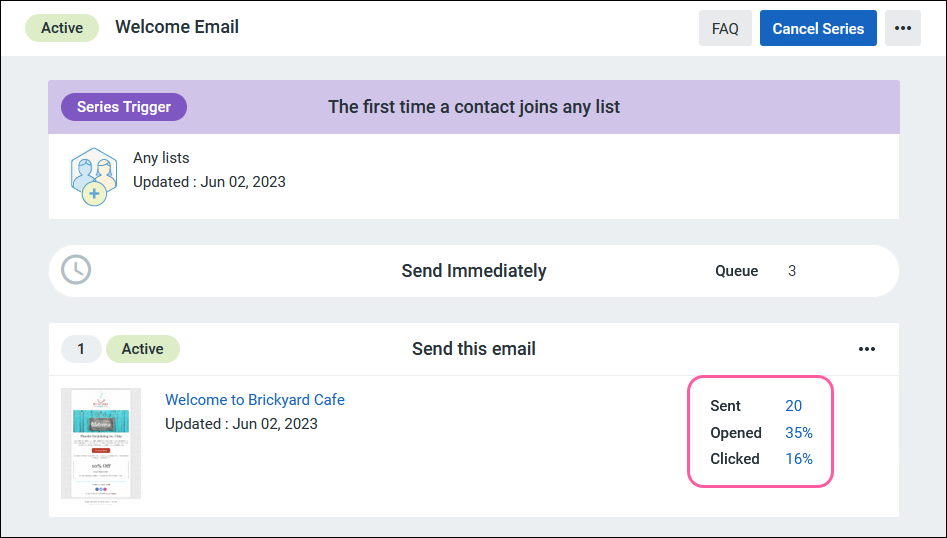
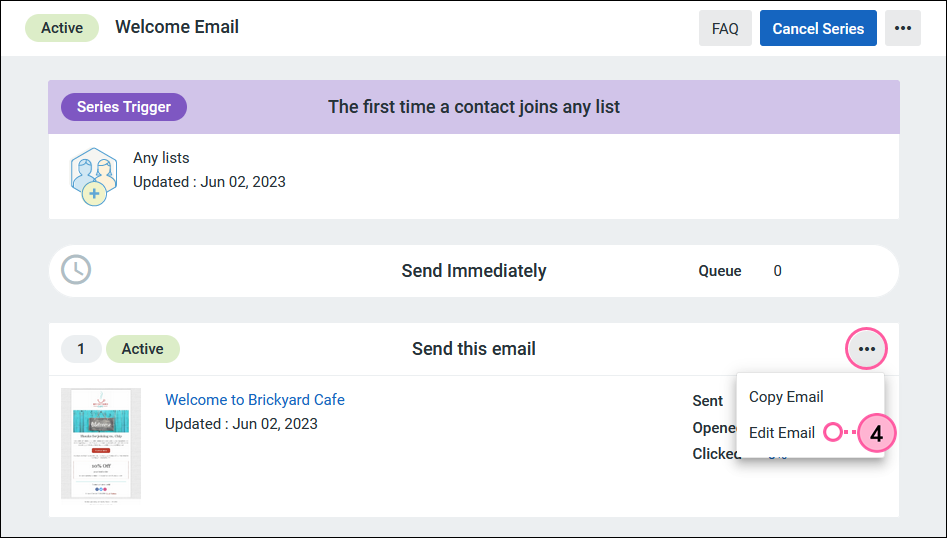
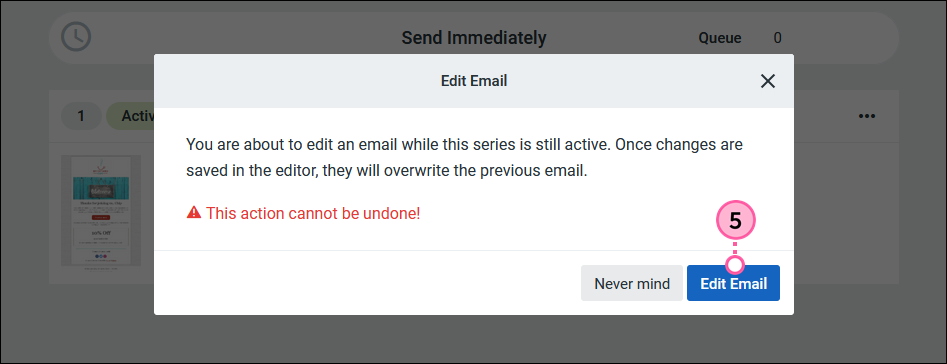
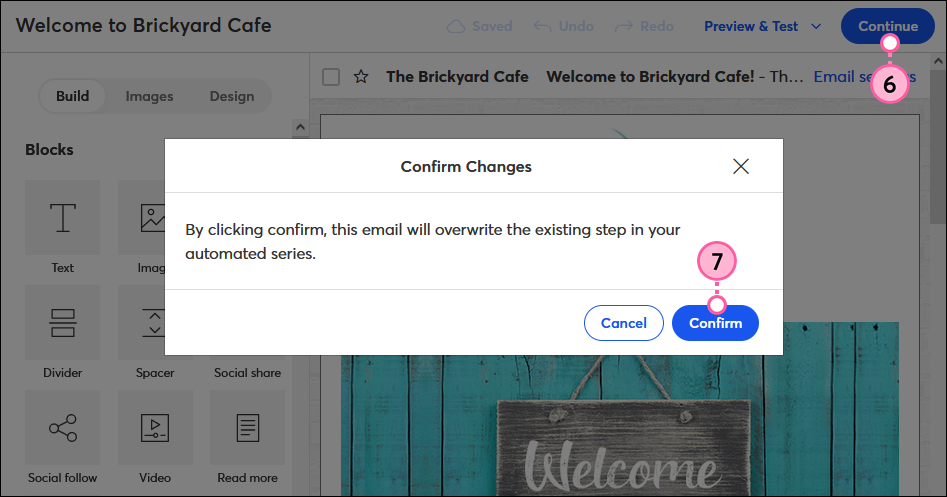
If you want to make any changes to the email after it's already been activated, you can edit the email while it continues to send to new contacts. Once you save your changes, the updated email will overwrite the previous version. Contacts who already received the Welcome Email won't receive an updated version, but new contacts see the new version.
 

  1. Click Marketing channels > All campaigns.
  2. (Optional) Use the filters to help narrow your search.
  3. Next to your active Welcome Email, click Manage.

    Campaigns page, filters, active welcome email and Manage button
     
  4. Click . . . > Edit Email.

    Welcome Email in Active status, Send this email section menu expanded, and Edit Email option
     
  5. Click Edit Email.

    Edit Email overlay with Edit Email button
     
  6. Make your edits to the email and click Continue when you’re finished. 
  7. Click Confirm to save your changes and overwrite the existing email. Until you save your changes, the previous version of the email continues to send.
    Important: Once you click Confirm, any changes made are permanent and you aren't able to revert back to the previous email version. You can edit your Welcome Email again to make additional changes at any time, as long as it's active.

    Welcome Email editor with Continue button and Confirm Changes overlay with Confirm button


Deactivate a Welcome Email

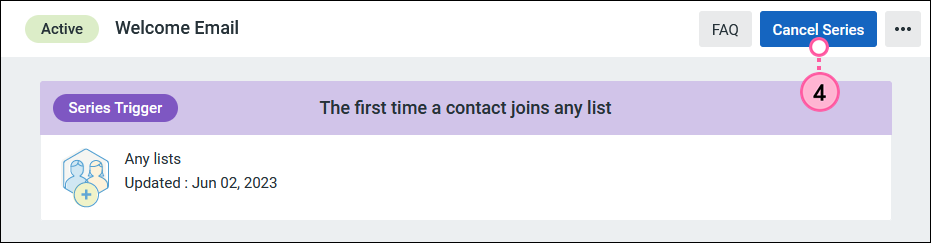
If you want to stop the Welcome Email from sending to new contacts joining your list, you can cancel it.

Exclamation Point IconImportant: You can't reactivate the Welcome Email once it's canceled, but you can copy the email and activate the copy.


  1. Click Marketing channels > All campaigns.
  2. (Optional) Use the filters to help narrow your search.
  3. Click Manage next to your active Welcome Email.

    Campaigns page, filters, active welcome email and Manage button
     
  4. Click Cancel Series in the upper right-hand corner.

    Welcome Email in Active status, and Cancel Series button
     
  5. Click Cancel Series again to confirm.

    Cancel Automated Series overlay with Cancel Series button
     

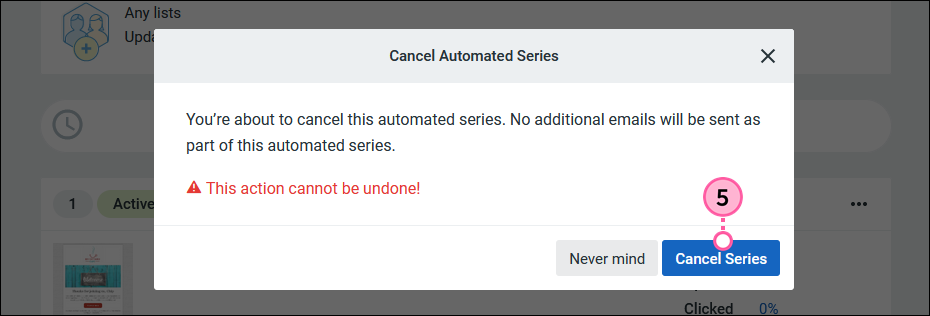
Your Welcome Email is moved into the "Ended" status and no new contacts receive it.


Questions?

Ask the Community

Did this article answer your question?


Constant Contact Logo

Copyright © 2025 · All Rights Reserved · Constant Contact · Privacy Center