We're making it easier to get around Constant Contact with a brand new left navigation. Not all accounts have that change yet, so if your navigation looks different from our articles, that's why–but everything from the top can now be found on the left!

Email and Digital Marketing
How can we help you?
Search our help articles, video tutorials, and quickstart guides

You've got this. You've got us. Search our Knowledge Base to quickly find answers to your questions.

Using the Campaign Calendar View

Article: 000037844
Updated: January 14, 2025

Keep track of your marketing efforts and see your campaigns by month using the Calendar View


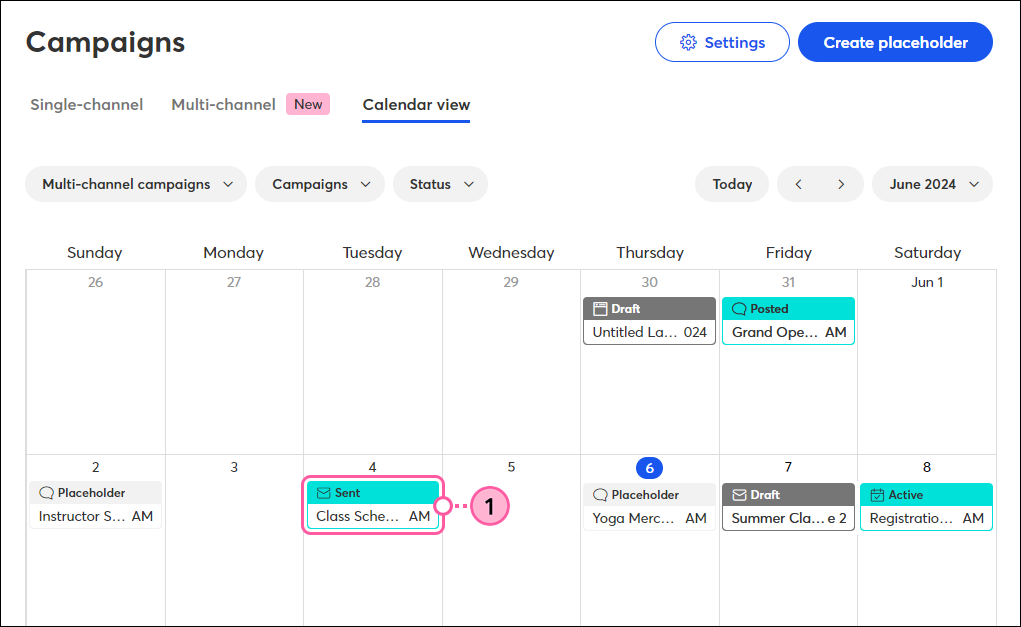
The Calendar View lets you easily map out your marketing efforts and see all your campaigns at-a-glance on a monthly basis. Manage your existing emails, social posts, ads, events, surveys, landing pages, SMS, and multi-channel campaigns, plus create new campaigns, all from within the calendar.

Note: Draft automated emails don't display on the calendar. Active automations display on the date they were activated.
 

save timeSave time: Setting aside some time to create a marketing plan saves you more time in the long run and makes it easier to come up with campaign ideas. Download our free online marketing calendar to help you create a plan that you'll stick to!


Switch to the Calendar View

To view your campaigns on a calendar instead of in a list:

  1. On the All campaigns page, click the Calendar view tab.

    All Campaign page Calendar button 
     
  2. Use the Multi-channel campaigns drop-down to show or hide the activities associated with a specific multi-channel campaign.
  3. Use the Campaigns drop-down to show or hide campaigns based on the campaign type.
  4. Use the Status drop-down to show or hide campaigns based on their status.
  5. Click Today to return to the current month if you’re viewing a different month.
  6. Use the arrows to scroll through different months, or use the drop-down to select a specific month and year.

    Campaigns Calendar View with filters
     

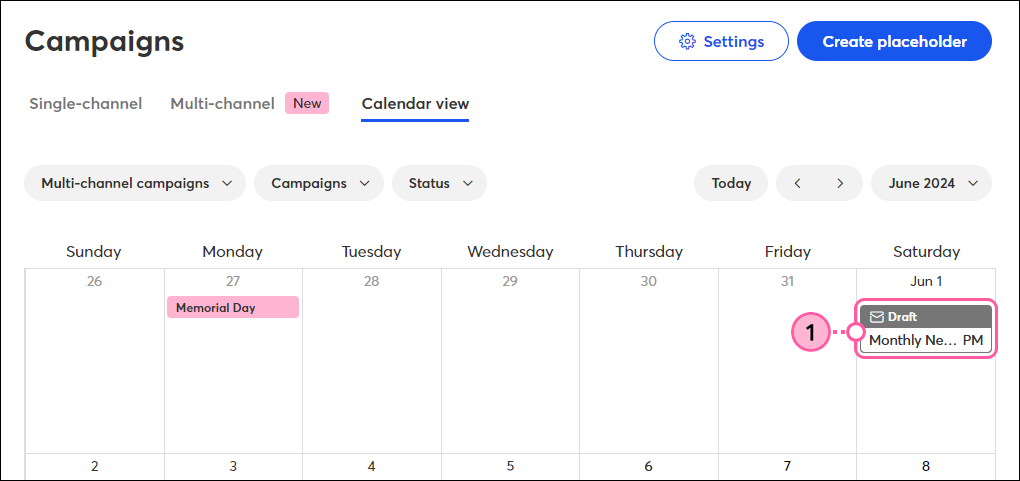
From this view, you can easily see which campaigns are done and ready to go, and which ones still need to be scheduled. Draft campaigns created from the List View display on the calendar date they were created, while campaigns created from the Calendar View display on the date you specify. Once campaigns are sent or activated, they move to that date on the calendar. Ad Campaigns span across the dates they’re scheduled to run.
 

Light Bulb IconTip: Be sure to keep an eye on the timing and frequency of your different campaign types to ensure you’re communicating with your audience on a regular basis, but not enough to overwhelm them.


Create a new campaign from the calendar

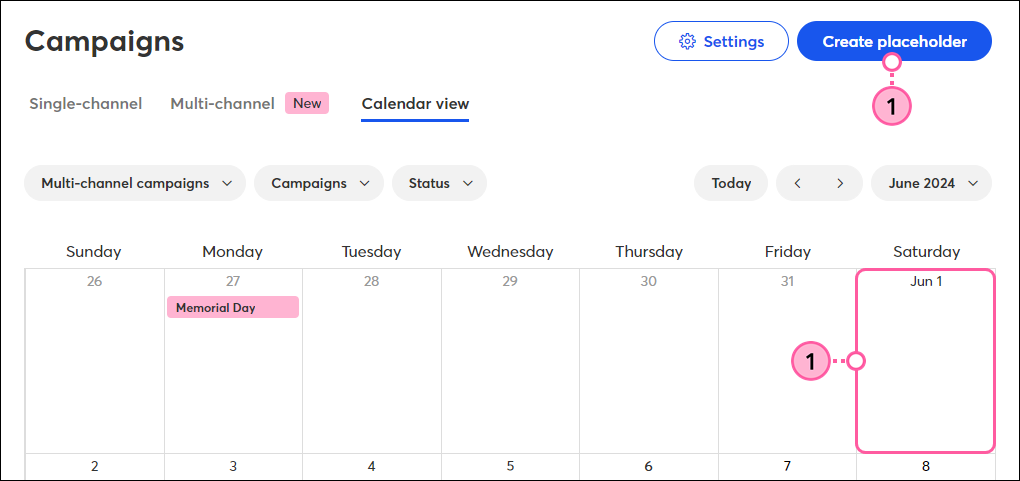
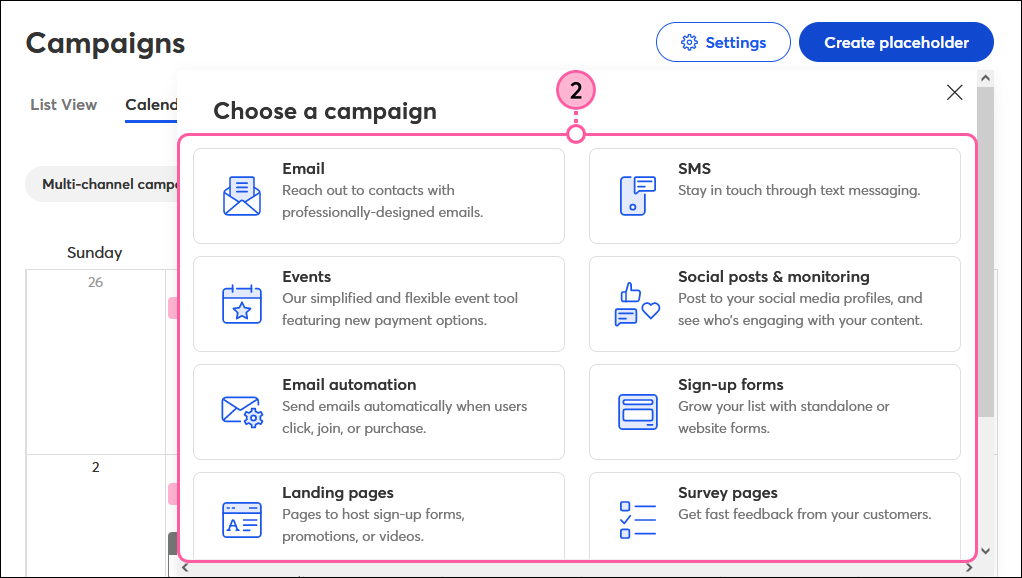
To start a new campaign directly from the calendar:

  1. Click on a specific day or click the Create placeholder button.

    Day selected and Create button
     
  2. Select a campaign type.

    Campaign picker with campaign type options
     
  3. Give your new campaign a name that you’ll easily recognize later.
  4. Choose a date and time for the campaign to appear on the calendar. You can change this date at any time later.
  5. Click:
  • Open in editor - to begin customizing your campaign.
  • Save as placeholder - to add a placeholder for this campaign on the calendar and return to the Calendar View. 

    Create a Campaign overlay with Campaign Name, Date and Time options, and Save on Calendar and Open in Editor buttons


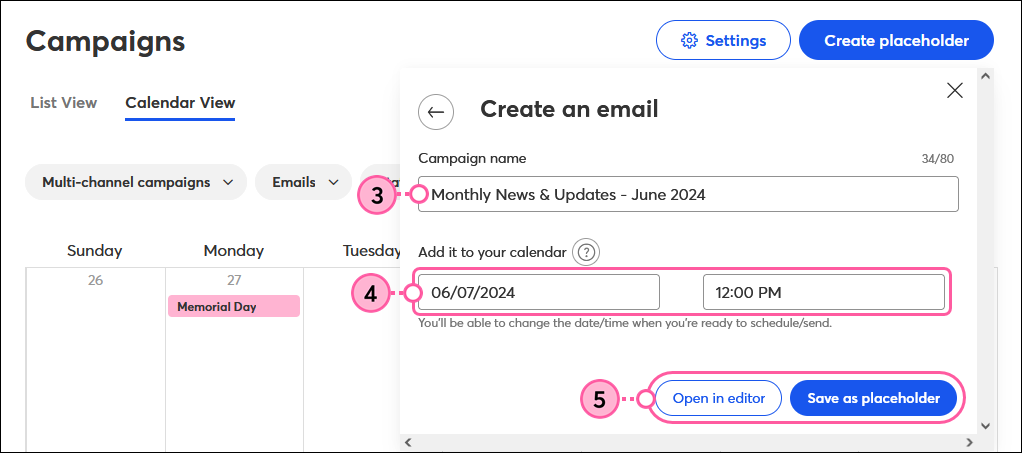
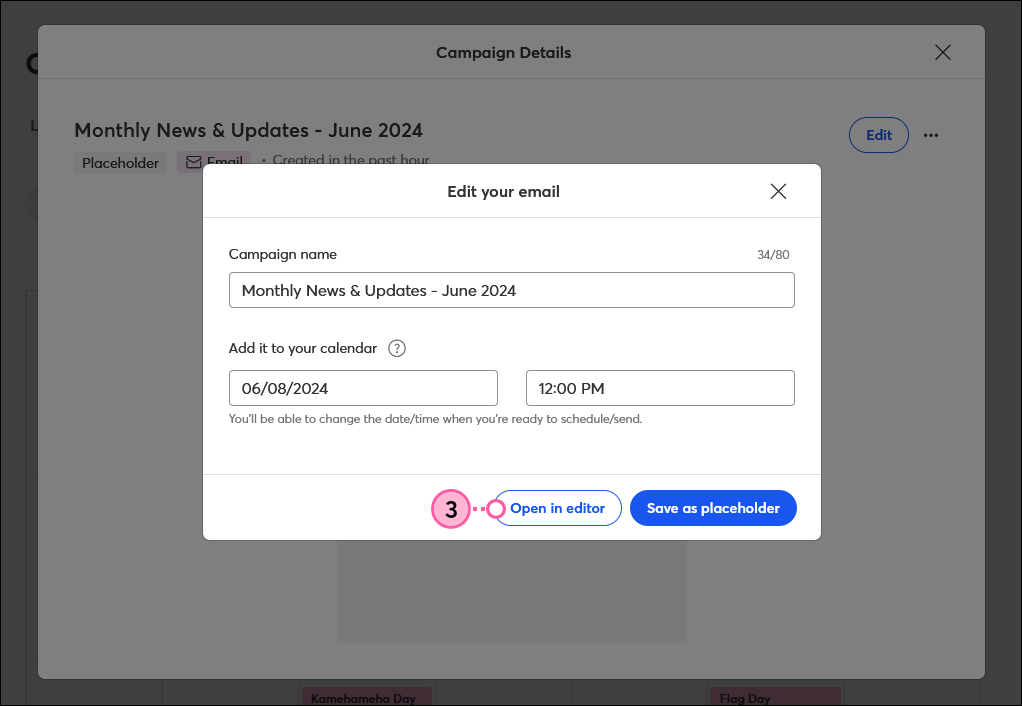
When you’re ready to schedule your campaign, the date and time you selected is automatically populated and you can edit it as needed.


Edit a draft campaign from the calendar

To continue working on a Placeholder or Draft campaign from the Calendar View:

  1. Click the name of the campaign on the calendar.

    Campaign Calendar View with Draft Email selected
     
  2. Click Edit. If you want to delete the draft, click the three dots and select “Delete” from the drop-down.

    Draft Email overlay with Edit button and More drop-down icon
     
  3. Make changes to the campaign name or send date and time as needed, then click Open in editor.
    Note: If you’ve already chosen an email template or begun designing your campaign, you’ll be brought straight to the editor.

    Edit Campaign overlay with Continue to Editor button


View a campaign’s details from the calendar

To see the details and performance of a Sent, Active, Posted, or Ended campaign:

  1. Click the name of the campaign on the calendar.

    Campaign Calendar View with Sent Email selected
     
  2. Here, you’ll see the top-level reporting stats for your campaign.
  3. Click . . . > Reporting or Details to see more campaign details and reporting.

    Sent Email overlay, More drop-down with Reporting and Details options selected


Want to learn more about planning out your email campaigns? Watch our webinar:

Learn more about marketing and Constant Contact through our free, live webinars.


Questions?

Ask the Community

Did this article answer your question?


Constant Contact Logo

Copyright © 2025 · All Rights Reserved · Constant Contact · Privacy Center