We're making it easier to get around Constant Contact with a brand new left navigation. Not all accounts have that change yet, so if your navigation looks different from our articles, that's why–but everything from the top can now be found on the left!

Email and Digital Marketing
How can we help you?
Search our help articles, video tutorials, and quickstart guides

You've got this. You've got us. Search our Knowledge Base to quickly find answers to your questions.

Collect new sign-ups with a Lead Generation Landing Page

Article: 000032012
Updated: January 28, 2025

Entice new contacts to join your email or SMS list through a standalone landing page that's hosted through Constant Contact and shareable anywhere on the web

Exclamation Point IconImportant: The article is for our legacy Lead Generation Landing Page. If you're using our new Sign-up Landing Page, please see this article instead.


Our Lead Generation Landing Pages help you capture new contacts online, through a standalone webpage, that we host for you. The page features a single call-to-action to sign up for your mailing list. The content and branding are customizable. The landing page also includes a "Thank You" page so that you can share a simple message, a link to another webpage, downloadable content, or Nift gift certificate with your new subscribers.


The Lead Generation Landing Page sign-up form also includes an invisible Google reCAPTCHA to make sure all of your sign-ups are genuinely human!


Light Bulb IconDesign tip: You can create a single landing page to share everywhere, or if you want to better segment your contacts, create multiple landing pages that are customized for different audiences. The contacts generated from each landing page can be added to unique lists.


Create your landing page

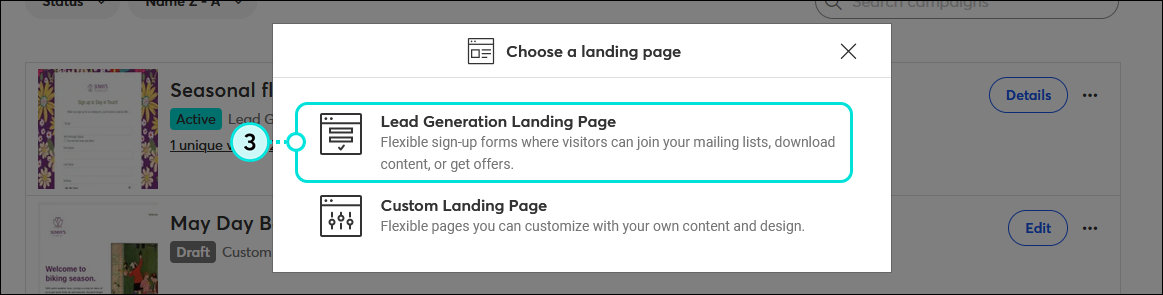
Create your landing page and name it so you can find it in your account again later.

  1. Click the Audience Growth > Landing pages.
  2. Click  + Create a landing page button.

    Audience Growth drop-down menu expanded with Landing pages option selected, and Create a landing page button 
     
  3. Select Landing Pages.

    Choose a landing page overlay and Lead Generation Landing Page option
     
  4. Click on the "Untitled" name of your Lead Generation Landing Page.

    Lead Generation Landing Page editor and name field with untitled name
     
  5. Give your sign-up forma a name so you can find it in your account later. Your contacts won't ever see it.
  6. Click Save.

    Lead Generation Landing Page Rename overlay with Name field and Save button
     

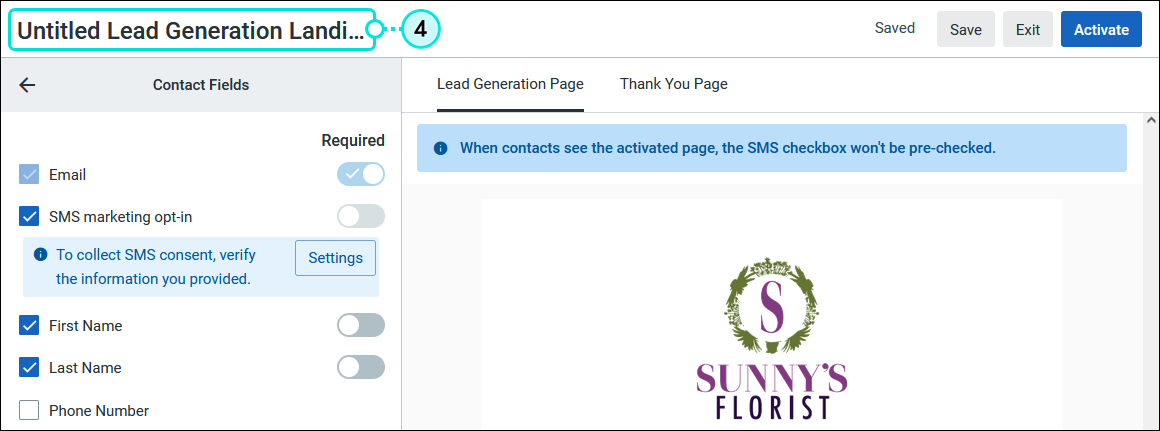
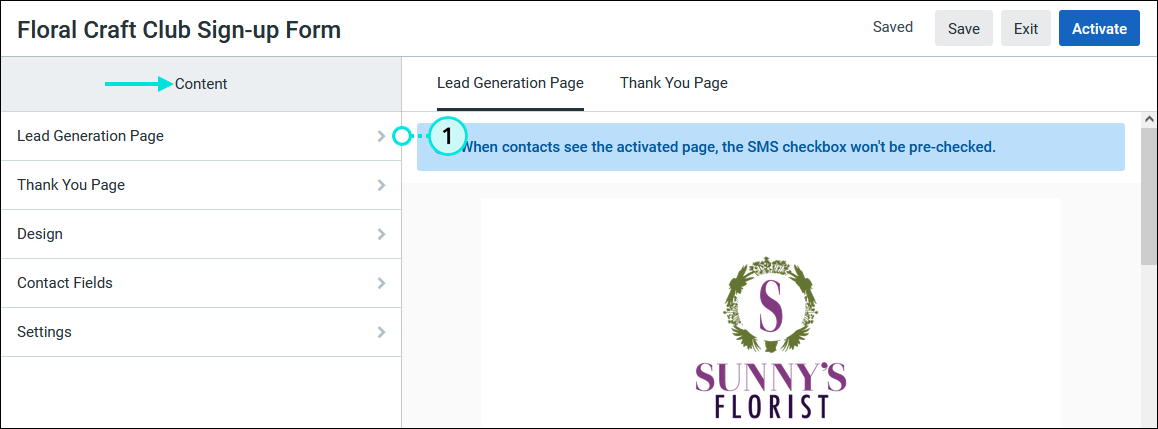
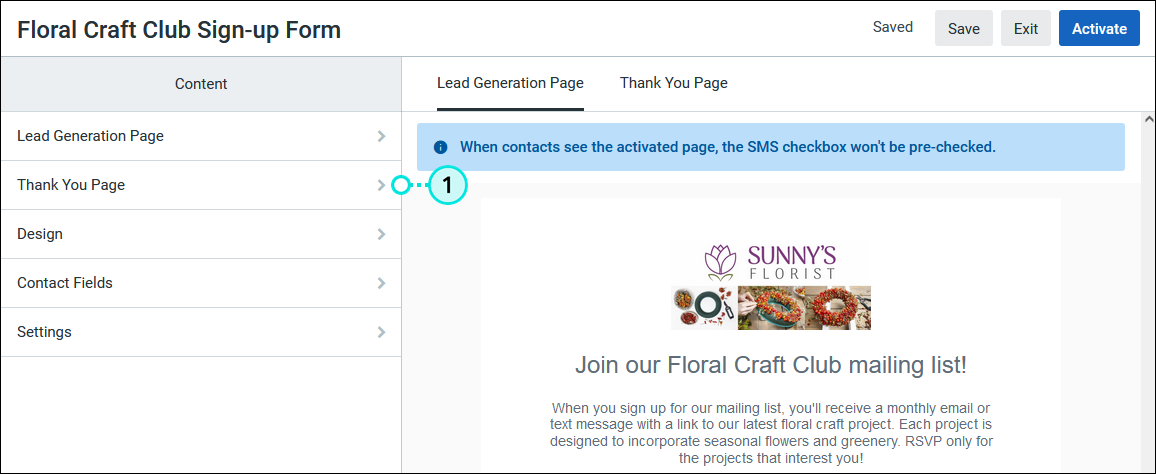
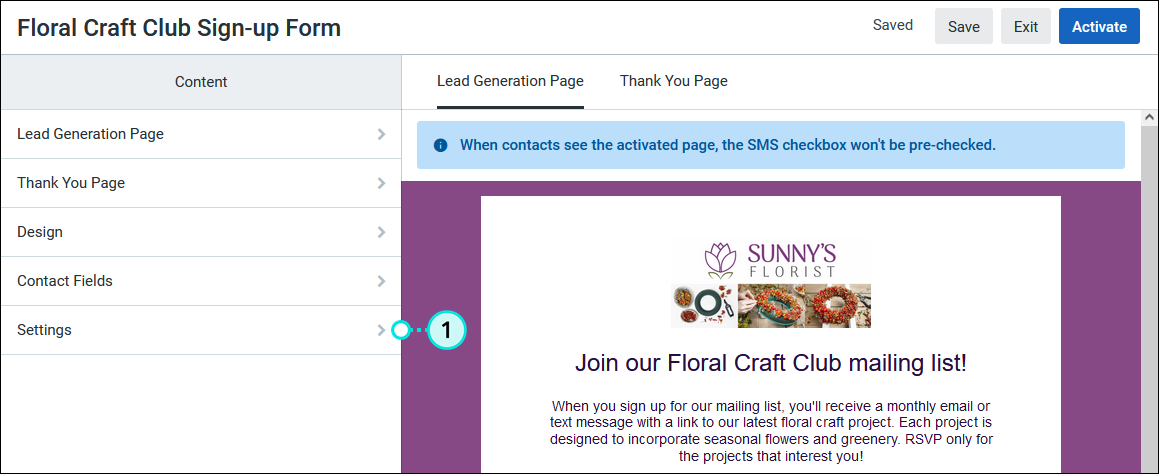
By default the Lead Generation Landing Page opens up to the Contact Fields editor. Clicking the back arrow next to the Contact Fields title takes you to the main Content menu and you can update the options in any order.


Add content to your landing page

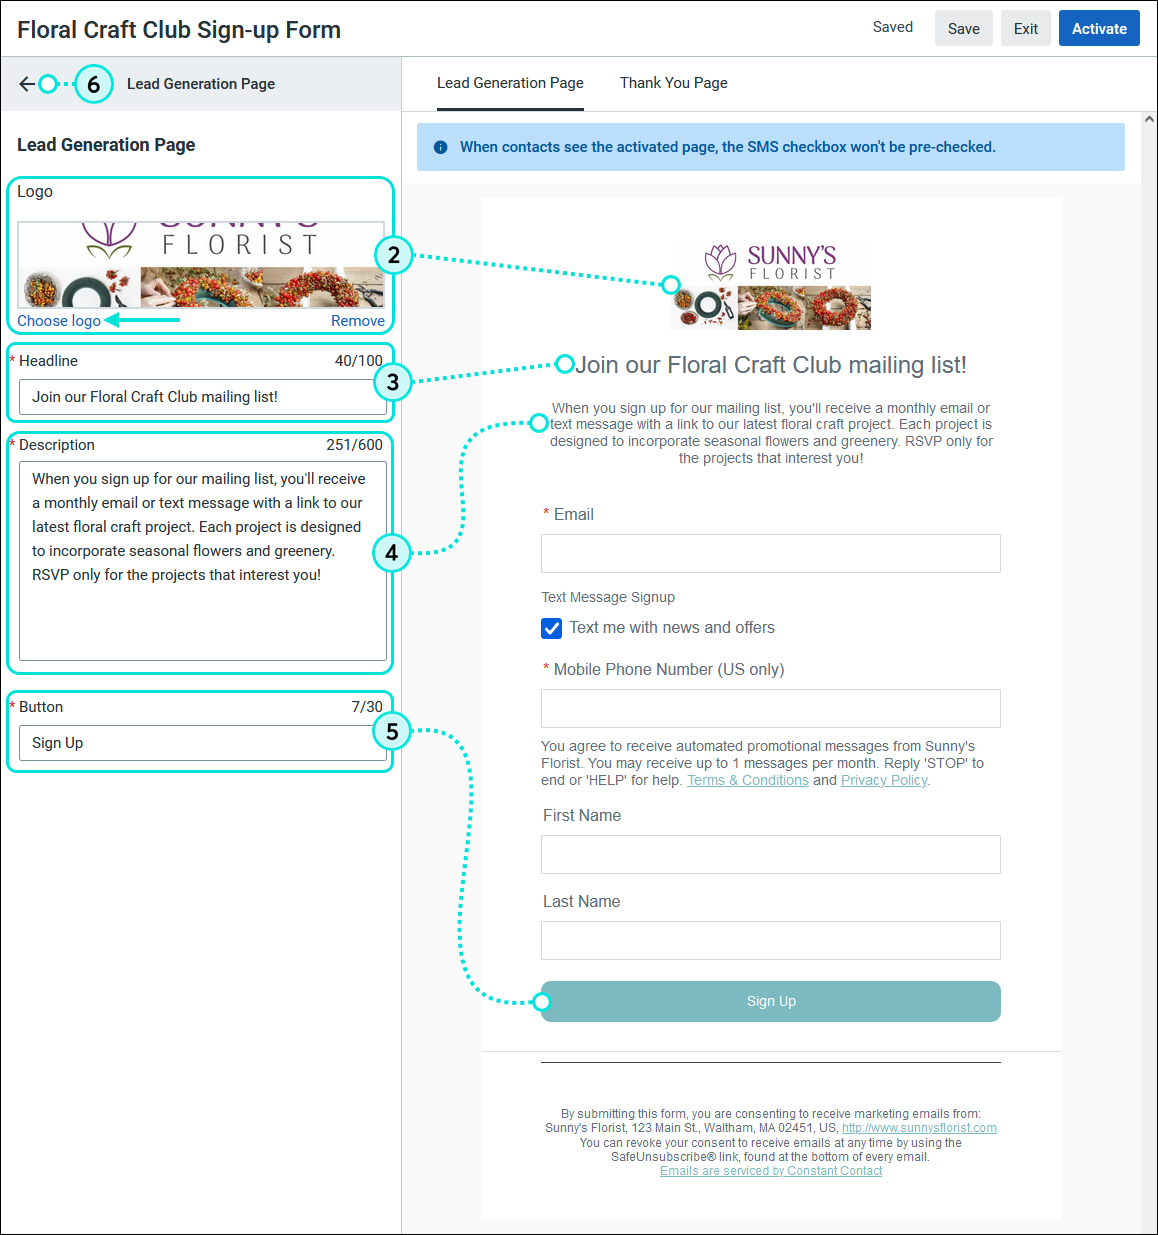
It's time to add your logo and customize the messaging on your landing page. This is where you can tell your sign-ups the benefits of being a part of your list, your mailing frequency, and what kind of content they can expect.

  1. From the Content menu, click Lead Generation Page.

    Content menu and Lead Generation Landing Page option
     
  2. Click Choose Logo to select an image from your Library or upload a new one.
  • If you already added a logo through My Account, it's automatically pulled into your landing page for you, but you can always change it.
  • Though we recommend a logo to make your branding recognizable, you can use any image you want.
  1. Update the Headline. This is the main call-to-action that helps drive your new sign-ups to fill out your form and click your button, so make it catchy!
  2. Include a Description. Let your contacts know how often you send your emails and what kinds of content they can expect from you. Don't forget to mention your incentive if you're using one!
  3. Customize the Button text. Let your new contacts know exactly what happens when they click the button. Short but descriptive commands, like "Join Our Mailing List," or "Sign Up for Monthly Emails," are great to use.
  4. Click the back arrow to return to the Content menu. 

    Content menu options and Lead Generation Page tab, Choose Logo link, and Headline, Description, and Button fields


Add content to your Thank You page

The "Thank You" page gives you a chance to customize your messaging and include an optional button so that your new contacts can download a file or visit a webpage of your choosing. You can even offer a Nift gift card as a reward for signing up.

  1. Click Thank You Page.

    Lead Generation Landing Page Content menu and Thank You Page option
     
  2. (Optional) Update the Headline.
  3. Update the Description field to customize your thank you message and explain your reward or incentive if you're offering one.
    Important: The Description field includes default text indicating there's a special offer. Make sure you review and update the content to avoid confusion when your new contacts see it.
  4. Add a button:
  • No button - Select this option when your thank you message is enough.
  • Offer a file download - Choose a document from your Library, or upload a new one, and then customize the button text.
  • Link to a webpage - Add the URL for a website you want your new sign-ups to visit, and then customize the button text.
  • Give a Nift card - Create or connect your Nift account, and then customize the button text. Nift helps you give an incentive for signing up for your list and helps other organizations in your area too! When new contacts sign up for your list, they can choose a gift card for another local business. Learn more.
  1. Click the back arrow to return to the Content menu.

    Lead Generation Landing Page Thank You Page tab, Headline and Description fields, Add a button options, and Back button


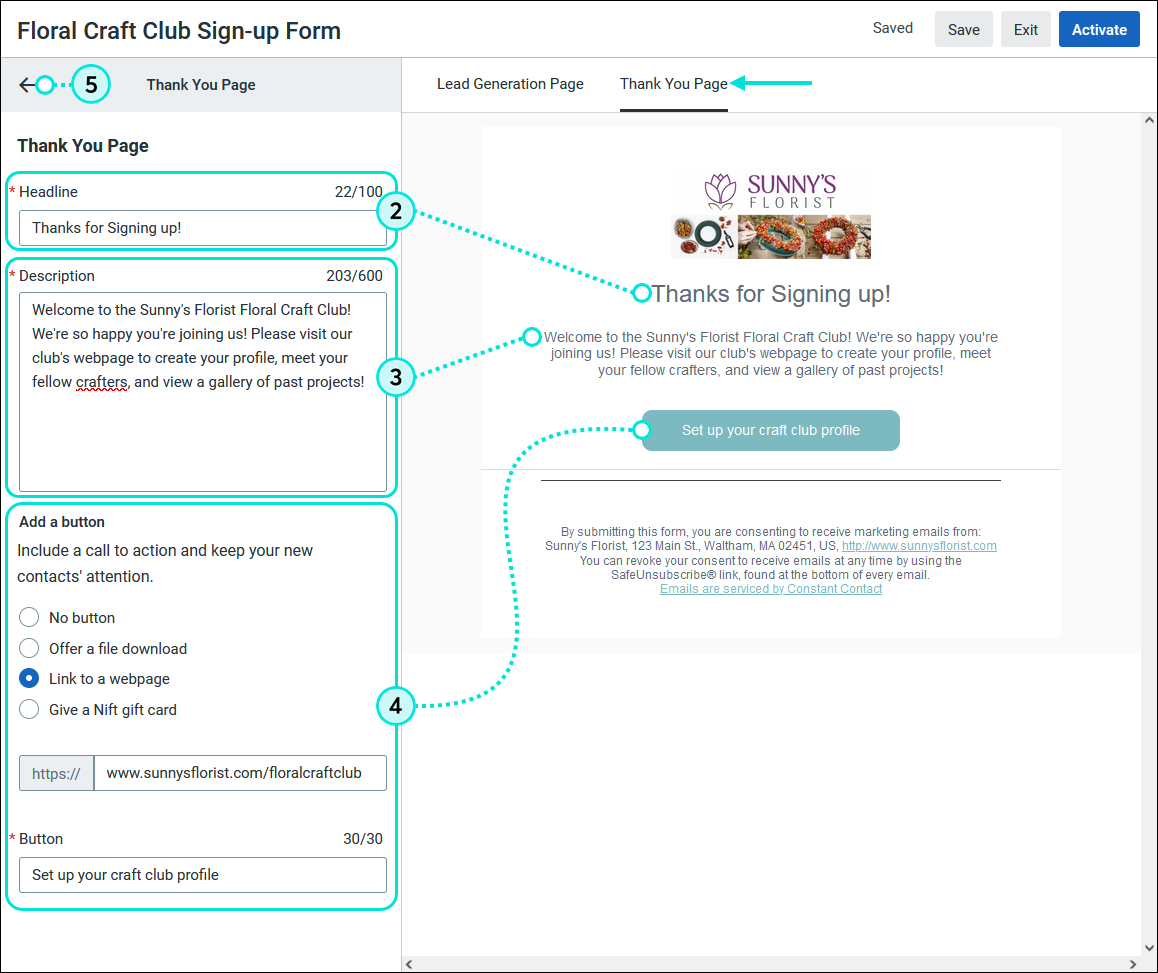
Your "thank you" incentive can be a coupon, exclusive content that shows off your knowledge, like guides and white papers, or even a handy tool, like a checklist or calculator. The best incentives are those that provide immediate value because they're more likely to be used and reinforce the good feelings and trust your subscribers have in you. If your incentive is disappointing, your sign-ups will remember that too!

Once your page is live, you can check your reporting on the Details page to see how many of your new subscribers are clicking on the button for your "Thank You" content.


Choose colors and fonts for your landing page and Thank You page

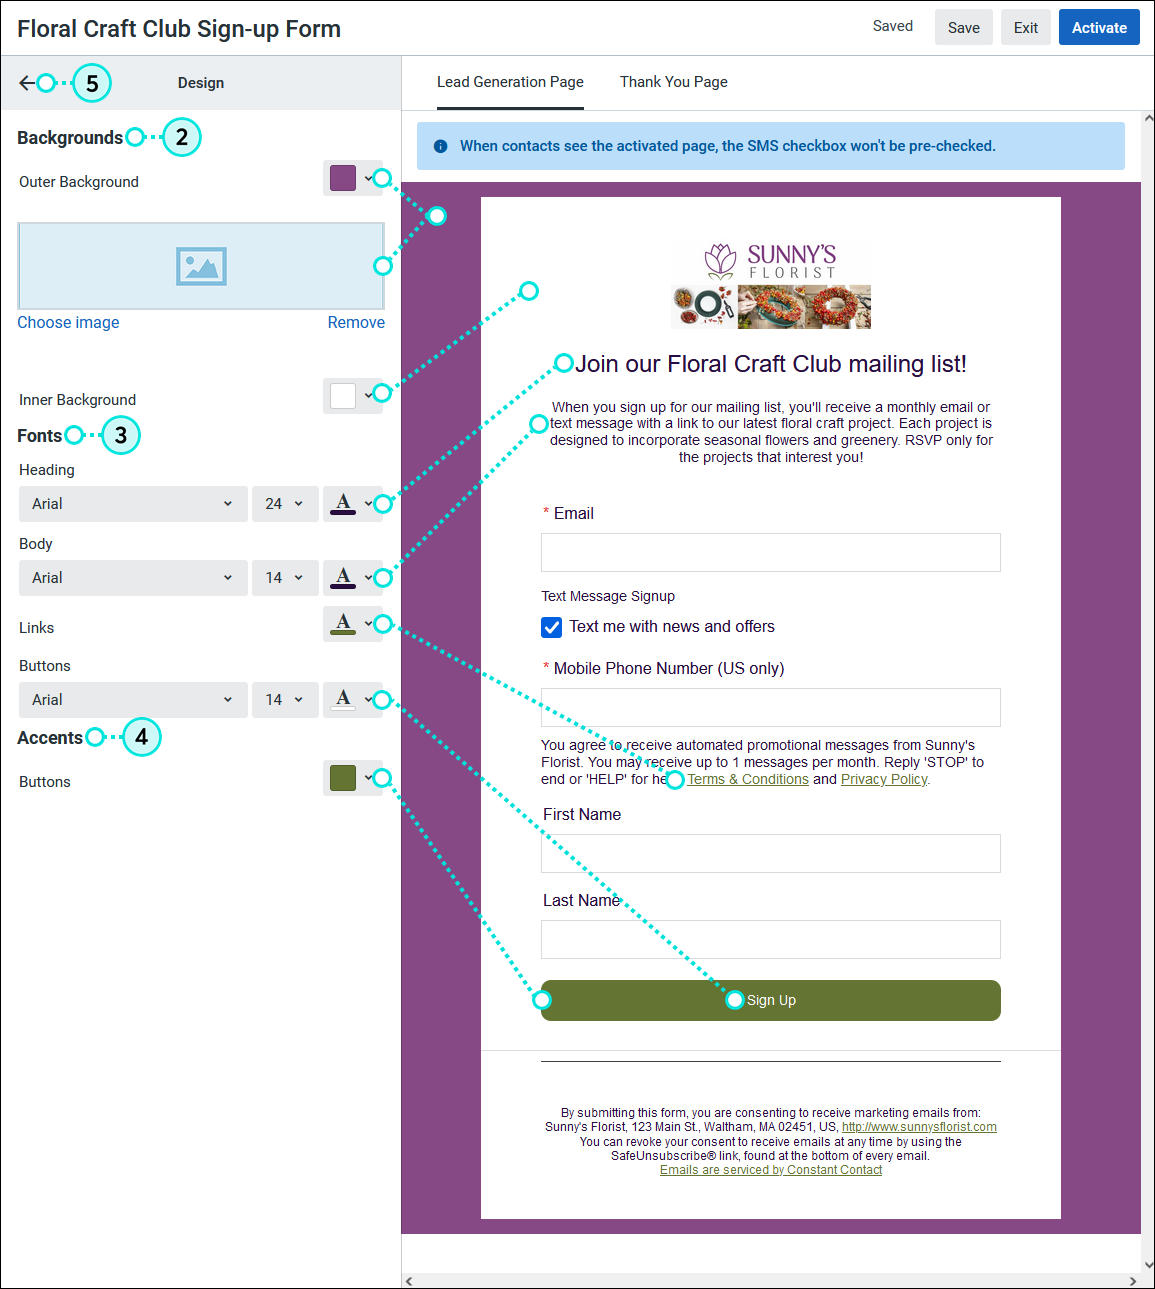
Choose the colors and fonts to match your branding. Your choices apply to both the landing page and "Thank You" page - just click the corresponding tabs at the top of the preview to see what each page looks like.

  1. Click Design.

    Lead Generation Landing Page Content menu and Design option
     
  2. Update the Backgrounds section. Your form has both an outer and inner background. You can choose colors that match your branding for both, or select an image from your Library to use for the outer background.
  3. Update the Fonts section. Select the font and font color for the Heading, Body, Links, and Buttons in your landing page. Your company's name and website are pulled into the form's footer from the information in your account settings.
  4. Update the Accents section. Choose a color for your button. Make sure the font color and the button color have a nice contrast that makes the text easy to read.
  5. Click the back arrow to return to the Content menu.

    Outer and Inner Background Options, Headline, Body, and Button Font Options, Button Color Option, and Back Arrow


Choose the contact information you want to collect

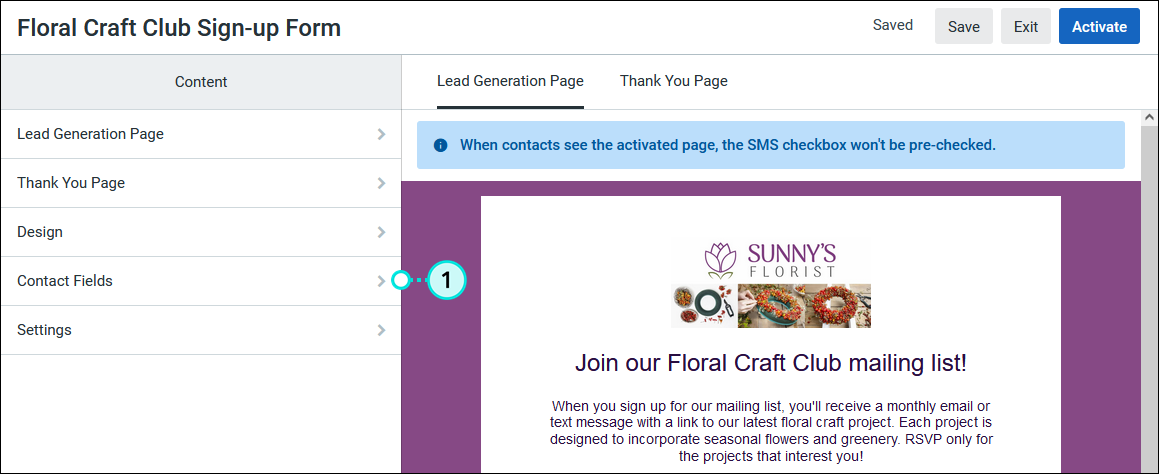
Enable your landing page for SMS marketing and collect the contact information that makes sense for your organization. You can select as many fields as you want and make fields required, so that the form can't be submitted unless the field is completed. Remember that asking for too many details or making too many fields mandatory can scare people from filling out your sign-up form, so it's a best practice to only include the ones that are absolutely necessary. You can always ask for more later.

  1. Click Contact Fields.

    Lead Generation Landing Page Content menu and Contact Fields option
     
  2. (Optional) Enable your landing page to collect SMS consent and mobile phone numbers for SMS messages. When enabled, the Text Message Signup section is added to your landing page. The "Text me with news and offers" box is checked for preview purposes only. Once your form is active, your new contacts must check the box on their own to provide SMS consent. Learn more.
  3. Choose the different contact details you want to capture - an email address is always required. 
    Tip: Asking for too many details? Consider creating multiple Lead Generation Landing Pages so that you can target more specific audiences with a landing page that's designed specifically for them.
  4. (Optional) Click the toggle switch next to any contact details you want to make required fields. The toggle switch doesn't appear until you select the contact detail. Required fields are noted on your landing page with asterisks.
  5. Click the back arrow to return to the Content menu.

    Lead Generation Landing Page SMS option enabled, Contact Detail Options, Required Field Toggles, and Back Arrow
     

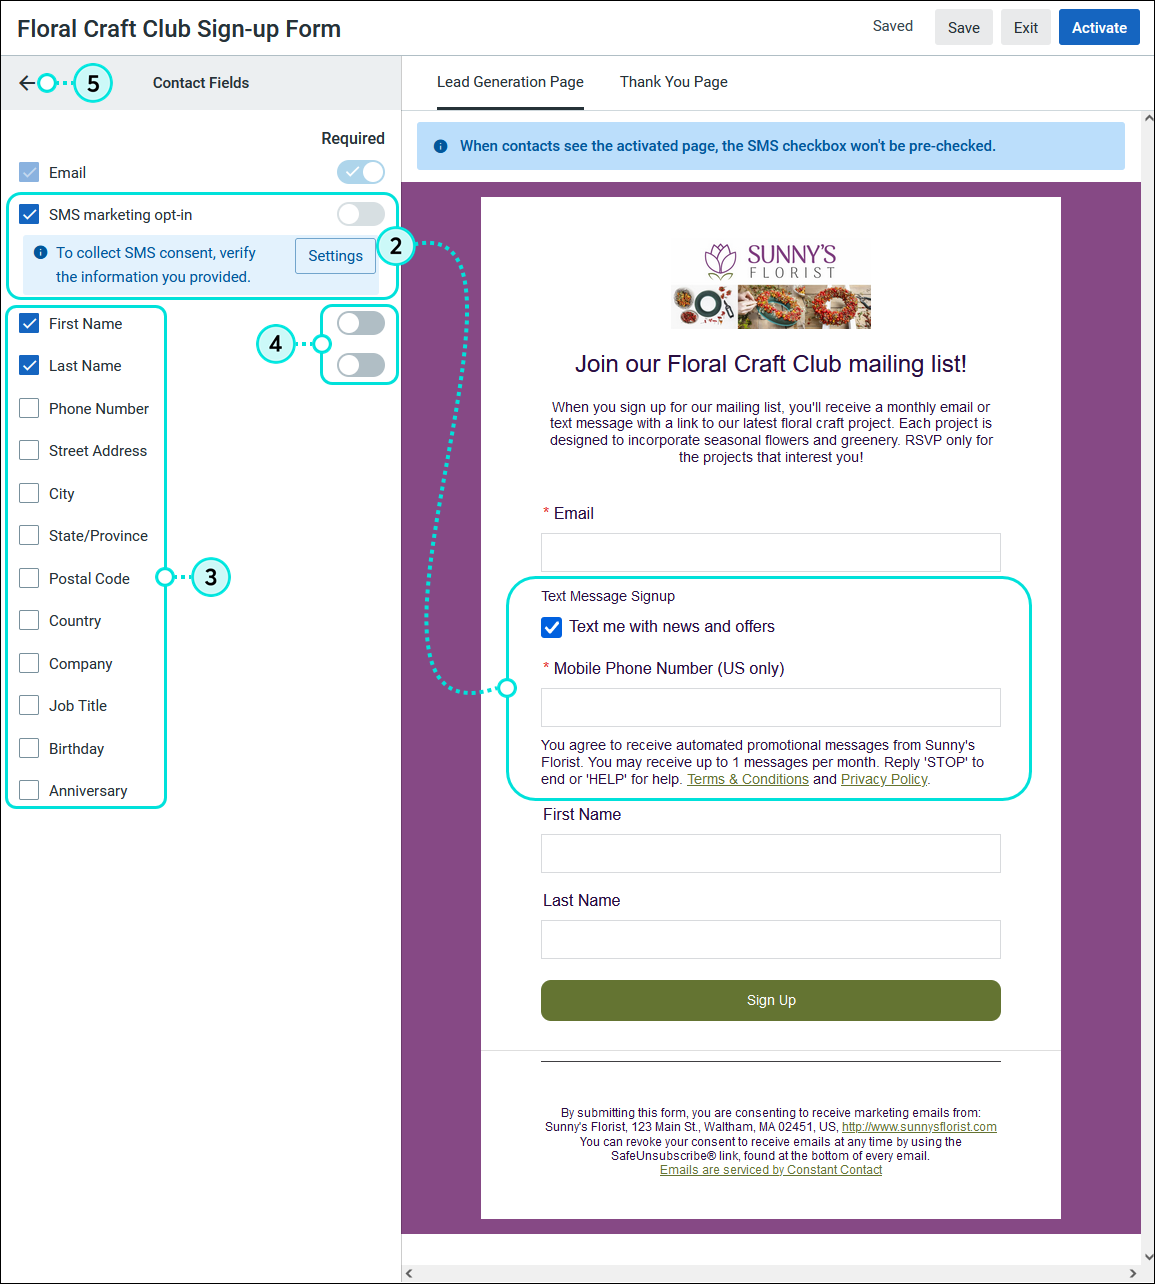
Contact details can be used to create custom segments to send targeted messages to the right audience. Combine contact details with email engagement activity, list affiliation, and ecommerce habits. Learn more.


Get permission to send tip.Get permission: Using this sign-up form ensures that you receive and document express consent from your contacts, which satisfies Constant Contact's email permission policy and  GDPR and CASL regulations as well.


Select a contact list and customize the URL for your landing page

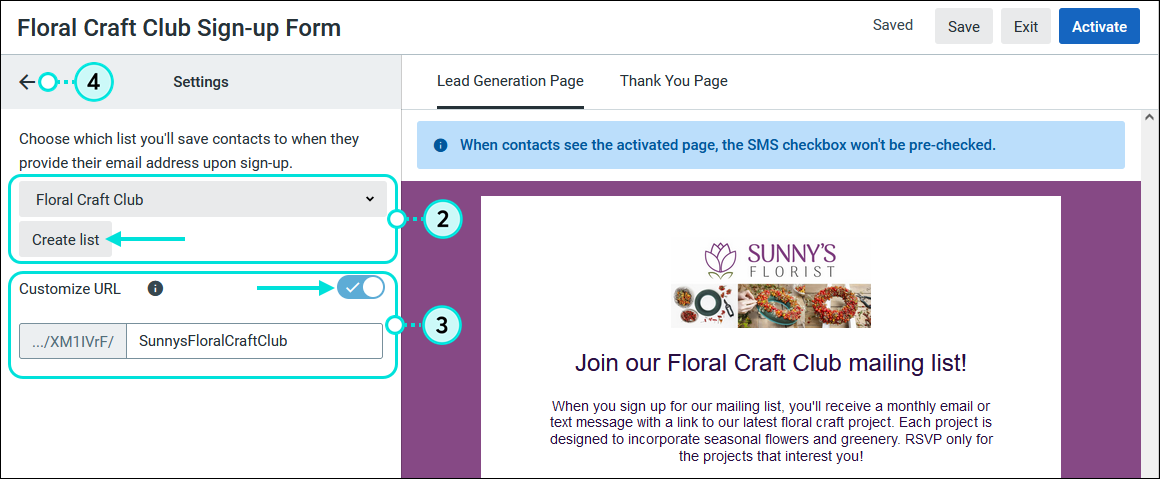
Choose the list you want to add new contacts to so you can send them targeted content later. You can only select a single list, but you can create as many landing pages as you need to segment your leads. Next, customize the URL to add your organization's name or branding to make it clear that it's your landing page.

  1. Click Settings.

    Lead Generationt Landing Page Content menu and Settings option
     
  2. Choose the list you want to add new contacts to or create a new list. Your new contacts won't see the name of the list they're being added to.
    Tip: Is your landing page enabled for SMS? Consider creating a unique list just for your SMS contacts and creating a separate landing page for other segments of your audience.
  3. (Optional) Click the toggle to customize the landing page URL. By branding your URL, it's clear that your landing page belongs to you! The full URL is available on the Details page after you activate your landing page for sharing.
  4. Click the back arrow to return to the Content menu.

    User-added image

When new contacts start to join your list, you don't have to keep them on the list you're using with your landing page. You can move them to a different list or add them to multiple lists to better segment your audience. Learn more.


Activate and share your landing page

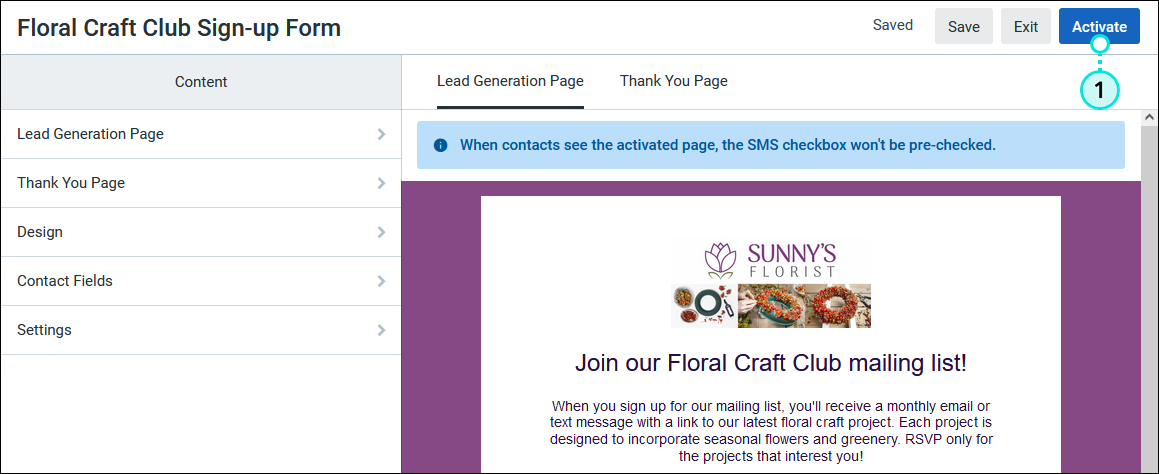
Make your landing page live. Don't worry - your page won't be seen until you start to share the URL.

  1. Click the Activate button. The button is visible in the upper right-hand corner no matter where you are in the landing page editor.

    Lead Generation Landing Page Content Menu and Activate button
     

Now that you've created and activated your landing page, it's time to view the Details page and share the URL:

After you've shared your landing page, you can check how it's performing and see the number of new sign-ups you've generated on the Details page. If you ever need to edit the landing page, you can make changes and activate the updates at any time.


Light Bulb IconDesign tip: Need to shorten the URL? From the Details page click Share this page > Share on social and use the built in URL shortener. Then just copy the shortened URL and paste it anywhere you need.


Any links we provide from non-Constant Contact sites or information about non-Constant Contact products or services are provided as a courtesy and should not be construed as an endorsement by Constant Contact.


Questions?

Ask the Community

Did this article answer your question?


Constant Contact Logo

Copyright © 2025 · All Rights Reserved · Constant Contact · Privacy Center