This article will provide information on how to use view and catalog Sales Dialer report data.
| Administrators | ✓ | |
| Company Managers | ||
| Marketing Managers | ||
| Sales Managers | ||
| Salespersons | ||
| Jr. Salespersons |
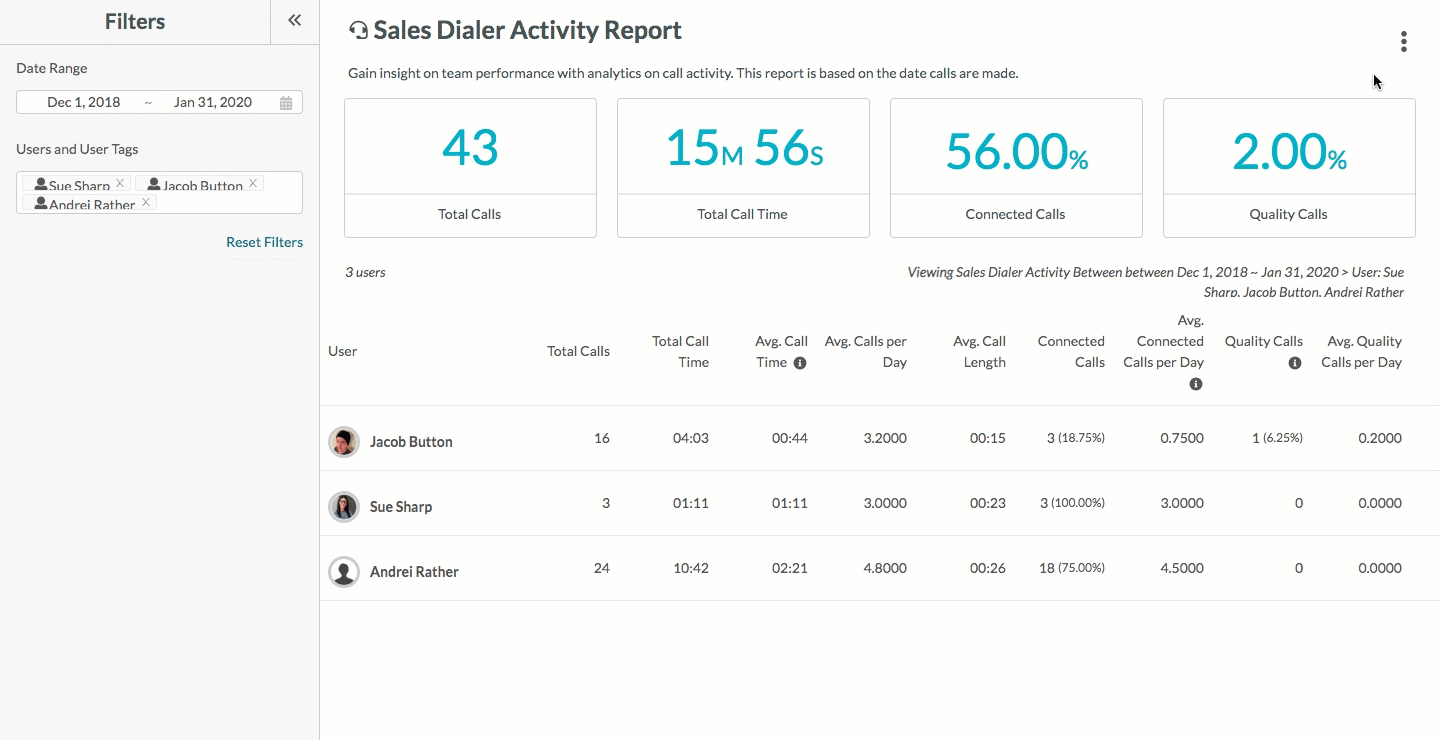
The Sales Dialer Activity report is one of many available sales reports. It provides an in-depth explanation of who is most effectively using the Sales Dialer feature.
The Sales Dialer Activity report is housed with Lead Gen & CRM's other sales reports. Click Sales Dialer > Sales Dialer Activity to access the Sales Dialer Activity report from the left toolbar.
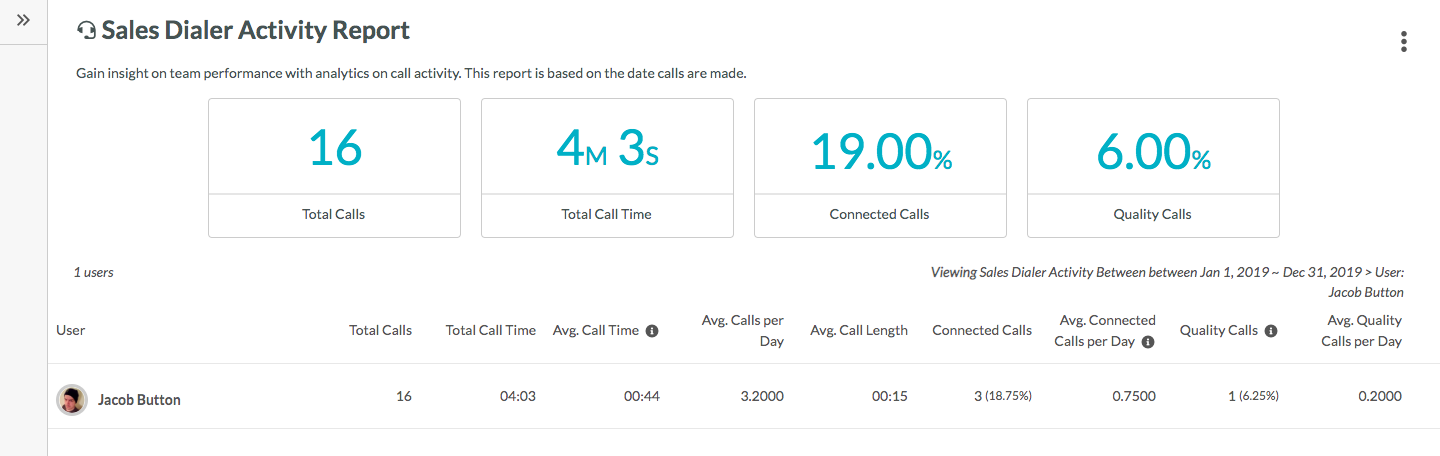
The Sales Dialer Activity report provides an at-a-glance view of all outbound phone calling activity by your team. When viewing the available information, click the ![]()
![]() Sort carets to sort by alphabetical, ascending, or descending order. The displayed order depends upon the particular information column.
Sort carets to sort by alphabetical, ascending, or descending order. The displayed order depends upon the particular information column.
This information changes based upon the selected timeframes and users. The Sales Dialer Activity report displays the following information: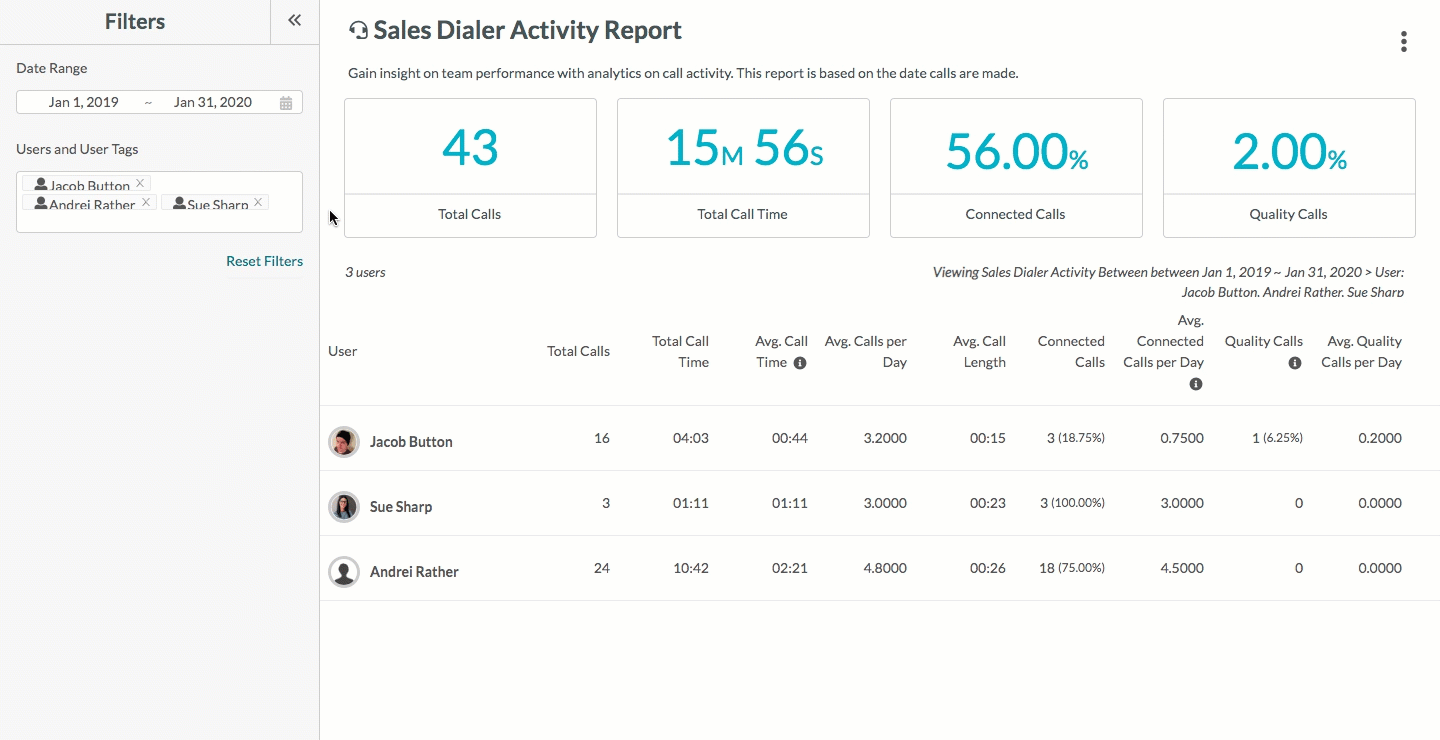
| Column | Description | |||
|
User |
The users that have made outbound calls via the Sales Dialer. | |||
|
Total Calls |
The total number of calls that were made by the user. | |||
|
Total Call Time |
The total amount of time that the user spent making calls. | |||
|
Average |
The average amount of time that the user spent on calls. This is based on business hours. | |||
|
Average |
The daily average of the total number of calls a user made. | |||
|
Connected Calls |
The total number of calls that were answered by the contact. | |||
|
Average Connected |
The daily average number of calls that were answered by the contact. This is based on business hours. | |||
|
Quality Calls | The total number of calls that were longer than two minutes. | |||
|
Average Quality | The daily average number of calls that were longer than two minutes. |
There may come a time when you have many different users assigned to Sales Dialer seats, each making their own calls. This will most likely result in a wealth of information—but it may be too much to review all at once.
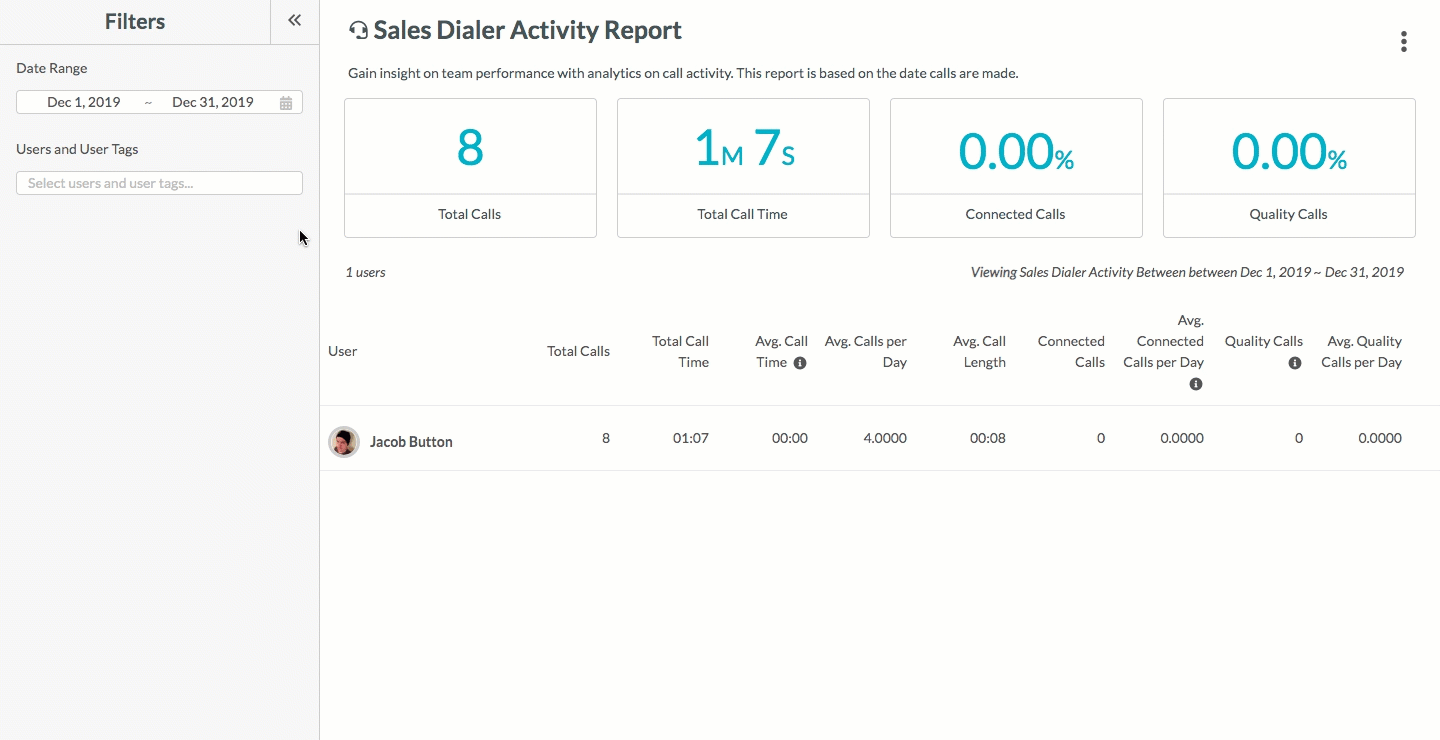
To better find the information you are looking for, consider using filters to show only the information you need. With filters, you can display information by:
To configure displayed report information, do the following:
Once you have configured your desired filters, filtered results will display in main report pane.
Note: When selecting starting and ending dates, click any of the available preset date periods to display call data for those periods of time.
Note: When selecting users or user tags, type the name of a user or user tag to quickly find that information.
Note: Clear your entered filters by clicking Reset Filters.
To save configured Sales Dialer Activity reports, do the following:
Saved files will appear in the Manage Reports page in your settings.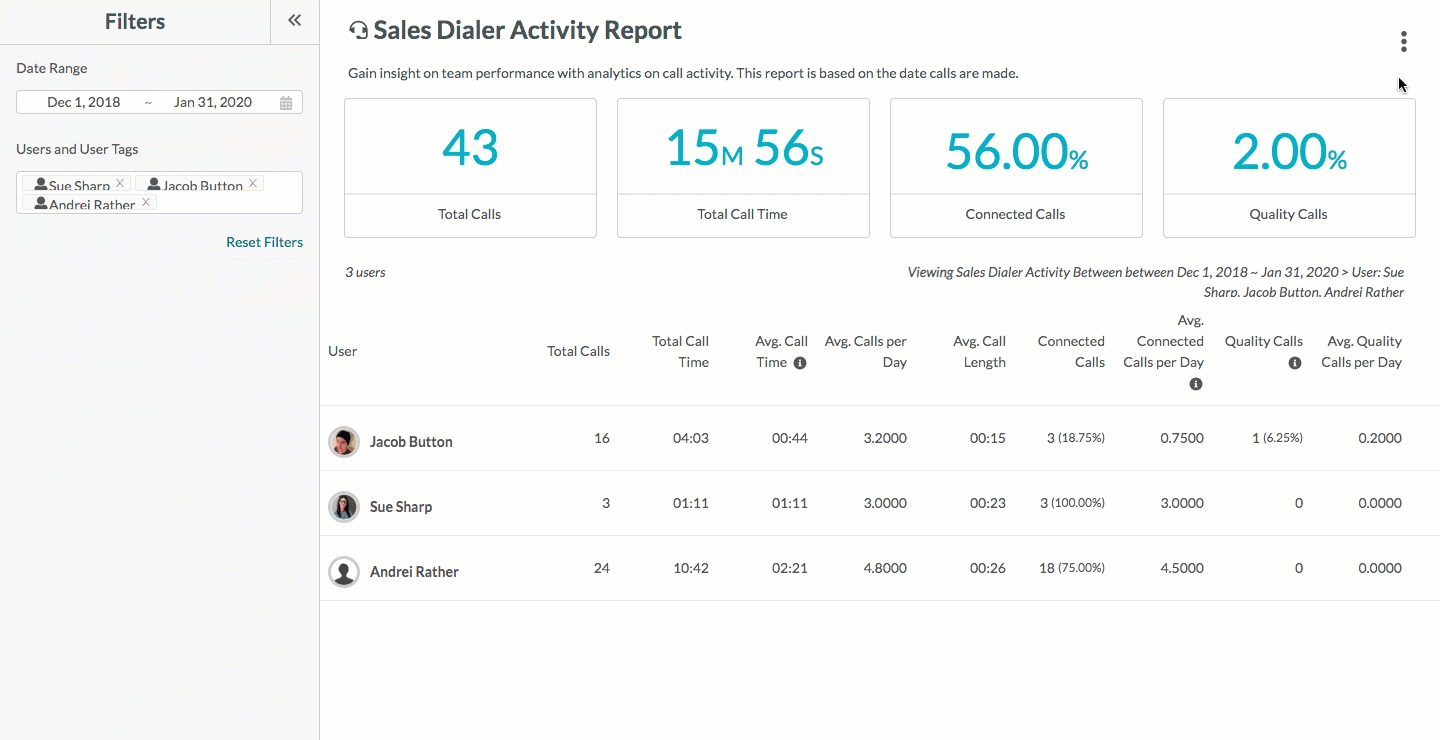
To schedule Sales Dialer Activity reports and send them via email, do the following:
|
|
Note: By default, the Select a report to send drop-down menu will display the report you just saved.
To export Sales Dialer Activity reports as data files, do the following:
Downloaded .PDF and .CSV files will download automatically to where your computer saves files downloaded from the Internet. Refer to your web browser's external help documentation for more information on configuring file download settings for web browsers supported by Lead Gen & CRM.
Copyright © 2026 · All Rights Reserved · Constant Contact · Privacy Center