Email and Digital Marketing
How can we help you?
Search our help articles, video tutorials, and quickstart guides

You've got this. You've got us. Search our Knowledge Base to quickly find answers to your questions.

Guide: Add contacts to your account

Article: 000006854
Updated: April 21, 2026

Getting your contacts added to your Constant Contact account is as important as designing and sending your emails

Whether you have an organized spreadsheet or a bowl full of business cards, it’s easy to add your contacts to an email list! This guide will go over all the ways you can add contacts to your Constant Contact account:

Once you've added your contacts, you'll update and create lists as you develop your email marketing campaigns. Be sure to download our Segmenting and Managing Your Contacts guide to keep your engagement high and your account clean and manageable.


Light Bulb IconDownload our guide: Want to be able to reference this later? You can download the guide to view and save it as a PDF.
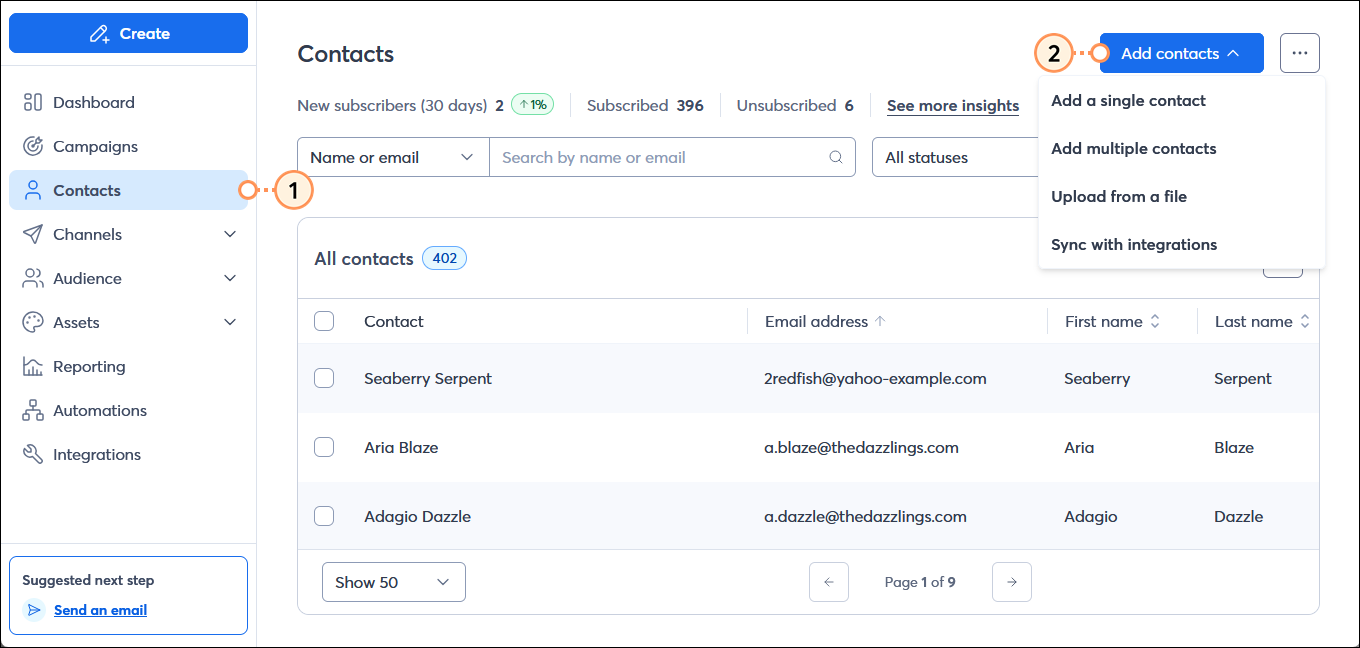
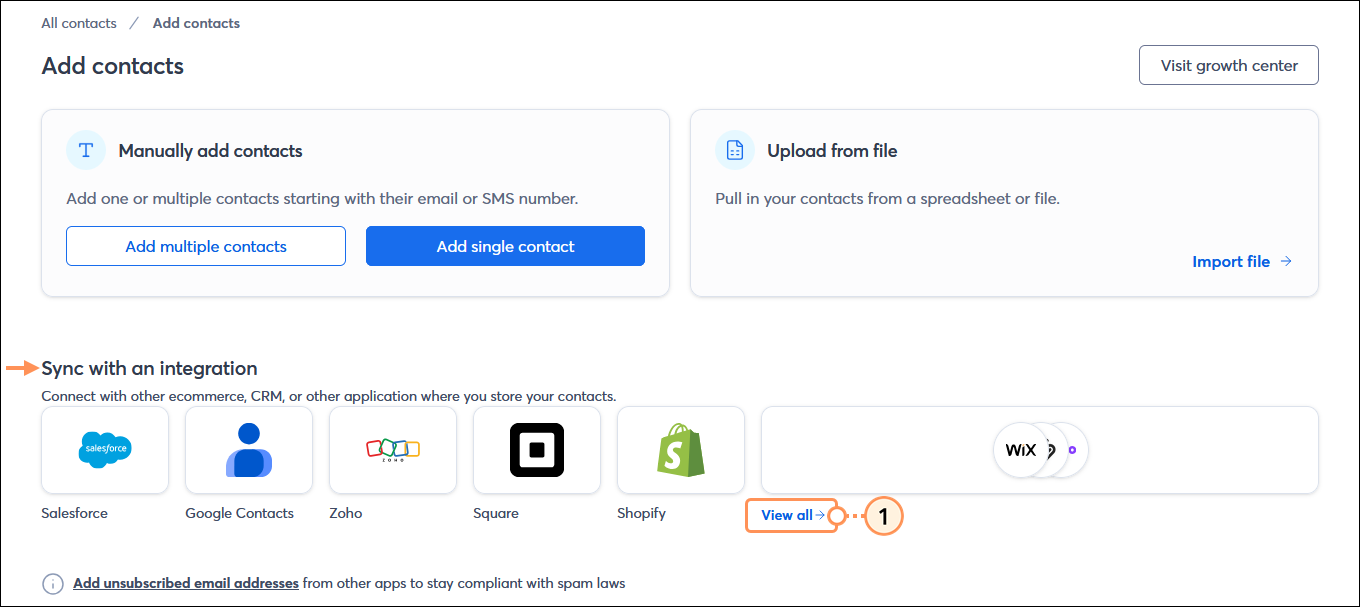


Get to your contacts dashboard

From your contacts dashboard you can add your contacts and do so much more!

  1. Click the Contacts option in the left-hand menu.
  2. Click the Add contacts button in the upper right-hand corner to expand the menu.

    Contacts option selected with Contacts dashboard displayed and Add contacts menu expanded


Permission to Send Icon
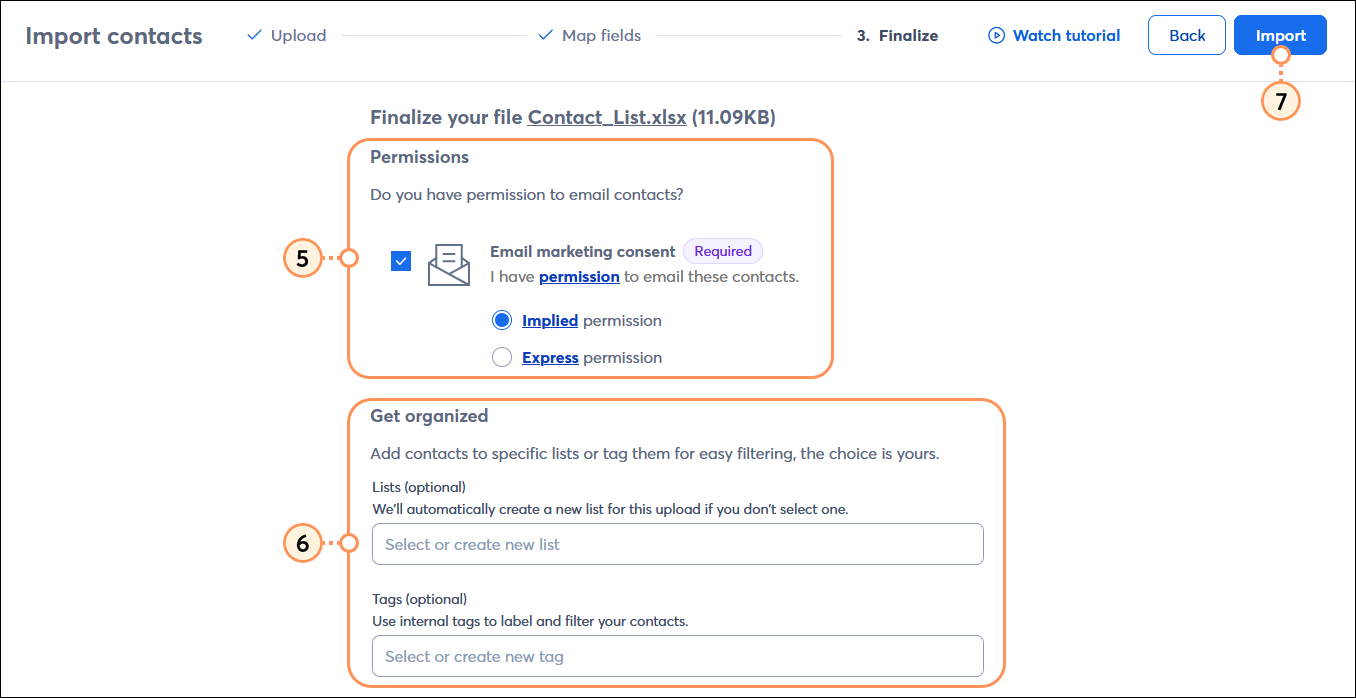
Get permission: In order to be compliant with Constant Contact's email permission policy as well as CAN-Spam, and GDPR and CASL regulations, you need to have permission to send email to your contacts.


Add a single contact

If you have just a single contact to add to your account, you can easily enter the new contact’s details manually.

  1. After choosing the "Add a single contact" option from the Add contacts drop-down menu, enter the contact's email address and confirm that you have permission to email the contact.
  2. Enter any other details you've collected. You can click:
  • Add SMS number - To add and SMS number for SMS marketing.
  • Manage fields - To select additional contact fields and create custom fields for your contact.
  • Advanced settings - To assign your contact to a list and apply tags to them.
  1. Click the Save button to add the contact.

    Add single contact overlay with email address field and permission option, Add SMS number option, First name field, Last name field, Manage fields option, Advanced settings option, and Save and Save and add another buttons


Type or paste multiple contacts

Clock Icon
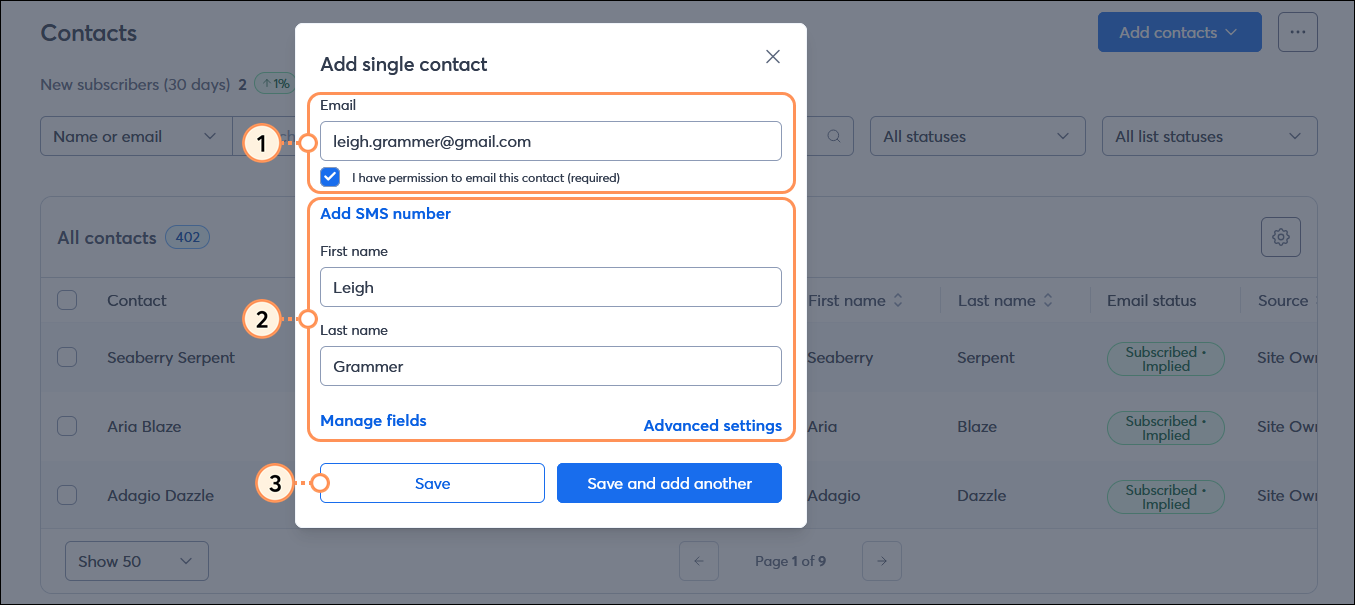
Save time: If you have more than 20 contacts to add, or you collect more than just contact names and email addresses, we recommend using a spreadsheet and uploading them from a file instead.


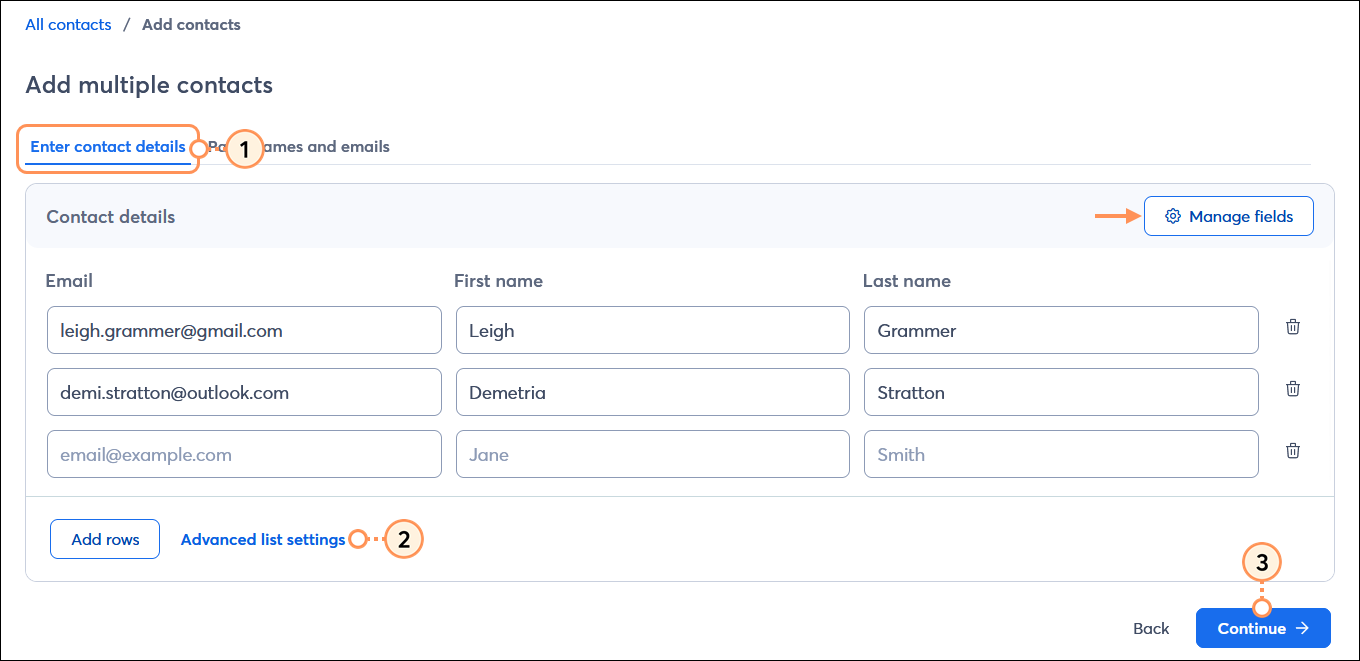
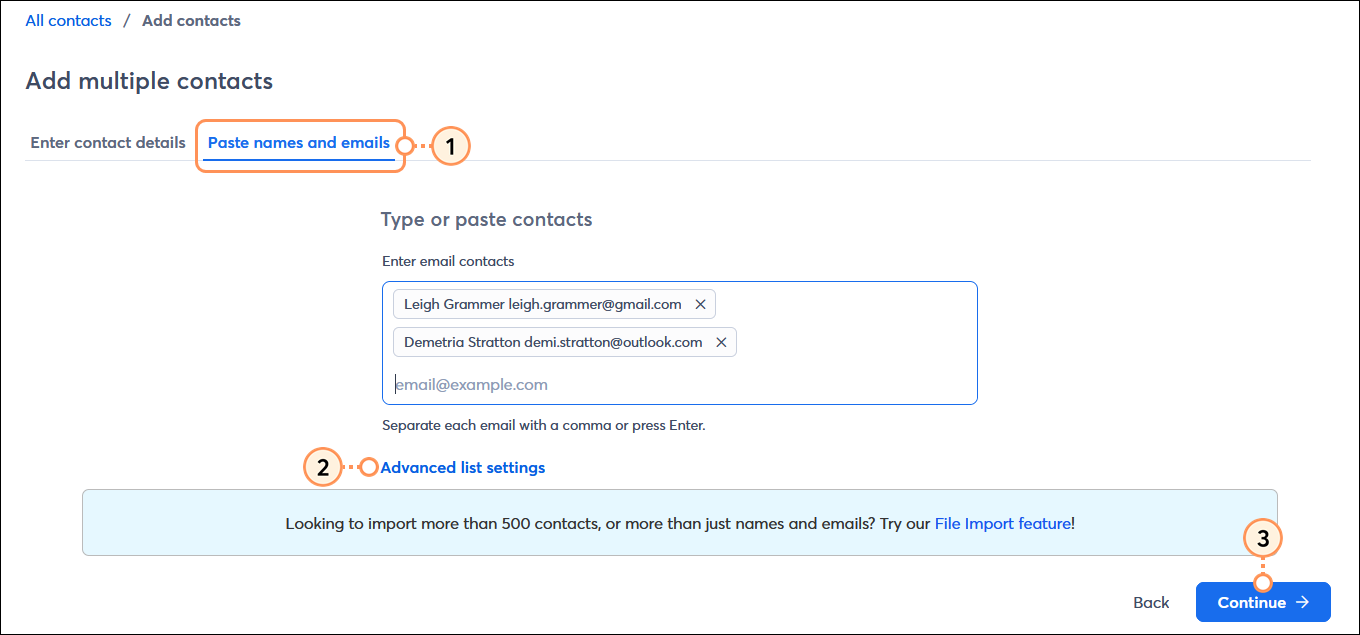
You can add a small group of contacts to your account by typing them in individually or pasting them all at once.

  1. After choosing the "Add multiple contacts option, you have the choice to:
  • Enter contact details - Click the Manage fields button to select the different contact information you want to apply to your contact and then fill in the fields. Add additional rows for each contact you want to add at one time.

    Add multiple contacts page with Enter contact details page selected, Contact details fields, Manage fields button, and Advanced list settings option, and Continue button

  • Paste names and emails - Start with a first and last name or just enter an email address. Separate each contact with a comma.

    Add multiple contacts page with Paste names and emails tab selected, Enter email contacts field, Advanced list settings option, and Continue button

  1. Click the "Advanced list settings" option to apply lists and tags to your contacts.
  2. Click the Continue button.


Upload a file of contacts

Clock IconSave time: Before you upload, make sure that your file is formatted properly. Don’t worry about any duplicates in your spreadsheet because we take care of those for you!


If your contacts are stored in an .XLS, .XLSX, .CSV, .VCF, or plain text file, you can easily import them.

  1. After choosing the "Upload from a file" option, drag and drop your file into the field or click the Upload button to select the file.
  2. Click the Continue button.

    Import contacts page with Upload your file section with file selected, and Continue button

  3. Map the information in your file to a field within Constant Contact. You can create custom fields for information that is unique to your organization and remove fields that aren't necessary.
  4. Click the Continue button.

    Import contacts page and Map fields table with File column, Preview data, Status, and Constant Contact field options with menu expanded and Skip field and Create custom field options displayed

  5. In the Permissions section, confirm that you have permission to email these contacts.
  6. In the Get organized section, apply lists and tags to these contacts.
  7. Click the Import button.

    Import contacts page with Finalize options, Permissions option showing advanced email permission options, Get organized section with Lists and Tags options, and Import button


Light Bulb Icon
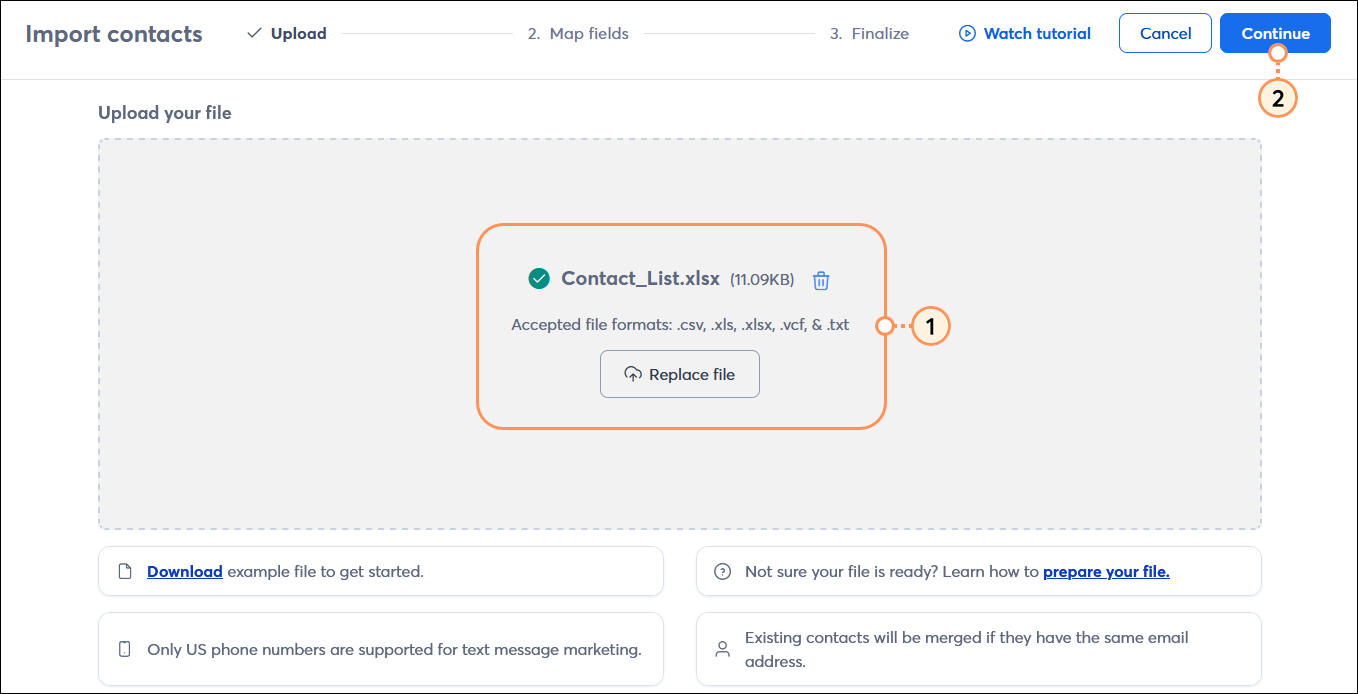
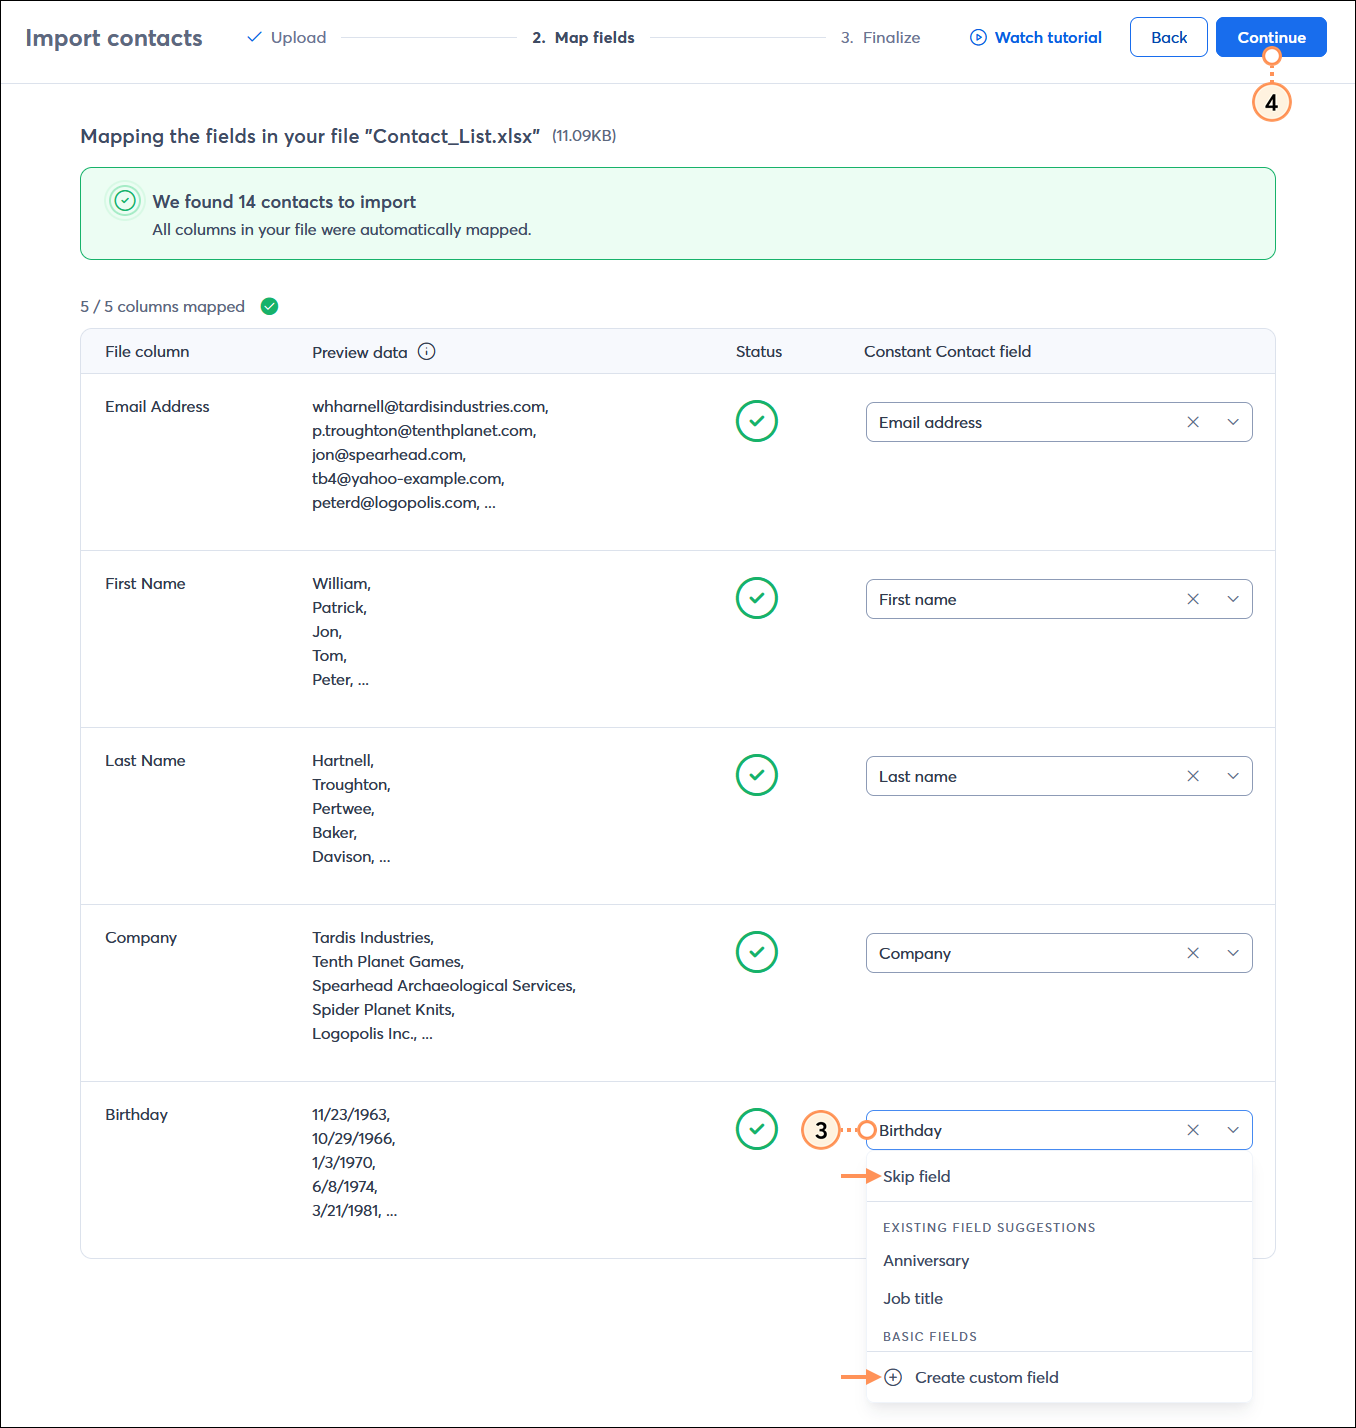
Did you know? As you're getting ready to upload your file, make sure to review the common questions and issues people run into to make sure your import goes as smoothly as possible!


Import contacts from other applications

If you’ve been collecting contacts in an email client, email marketing service, or another business or marketing platform, you can easily sync your lists and keep them up-to-date in your Constant Contact account with an integration.

  1. After selecting the "Sync with integrations" option, click the "View all" option.

    Add contacts page with Sync with an integration section and View all option

  2. Choose an integration to connect to your account and sync your contacts. You can filter integrations by categories or search by name too!

    Apps & integrations page with All integrations tab selected, Categories menu expanded with All integrations option selected, and Searh for an integration field


Questions?

Ask the Community

Did this article answer your question?


Constant Contact Logo

Copyright © 2026 · All Rights Reserved · Constant Contact · Privacy Center