Email and Digital Marketing
How can we help you?
Search our help articles, video tutorials, and quickstart guides

You've got this. You've got us. Search our Knowledge Base to quickly find answers to your questions.

Add a caption to an image in an email

Article: 000017772
Updated: June 25, 2026

Tips for creating useful image captions that make your email accessible for your recipients with screen readers

Image captions are useful for identifying who's in a photo or elaborating on what's happening in the image, but they're also very helpful for contacts using a screen reader to view your email.


Light Bulb IconDid you know? Some screen readers can be configured to pick up image file names. Using a combination of the file name, image description, and a caption ensures your images are truly accessible to everyone who receives your emails.

Tips for writing and styling image captions

The best image captions get to the point, include essential information, and don't simply restate the text content in your email.

  • Image captions should be formatted differently from the rest of your text, and the style should be used consistently for each image.
  • If you have text embedded in your image, consider also including a caption with the same text; screen readers can't distinguish the text when it's layered over the image.
  • Image captions should only be a sentence or two. If you need to provide more information about the contents of an image, you can incorporate it in the body of your email.
  • When you have an image that doesn't need a caption or doesn't add anything to your email besides visual appeal, include an image description instead.


Add a caption above or below an image

Adding a caption above or below an image is easy to do with a Text block. It doesn't matter if your image is in a column or spans the width of your template.
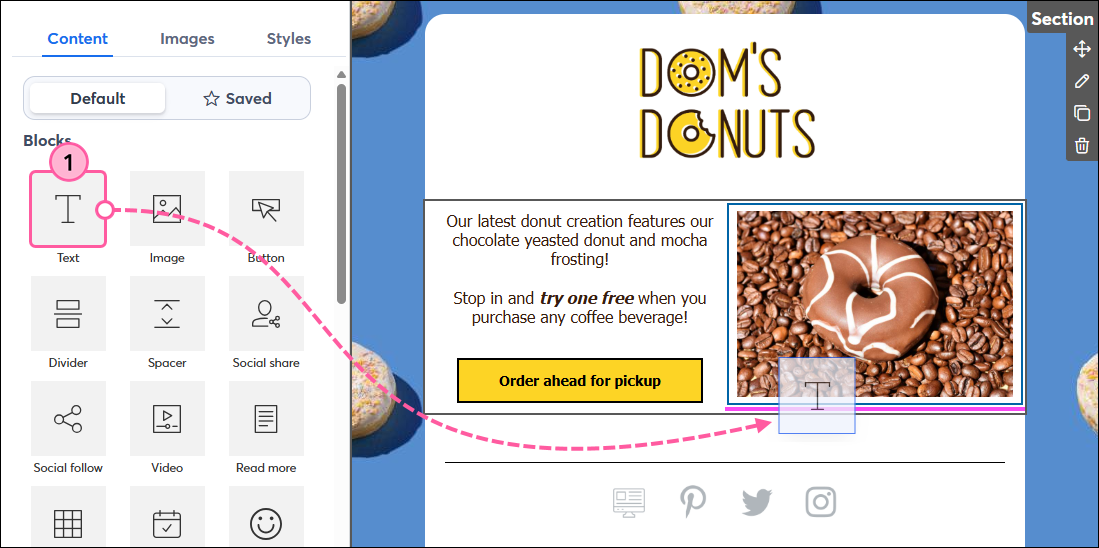
  1. Drag a Text block into your template. Use the pink guideline to help you place it above or below your image.

    Drag-and-drop a Text block under an image
     
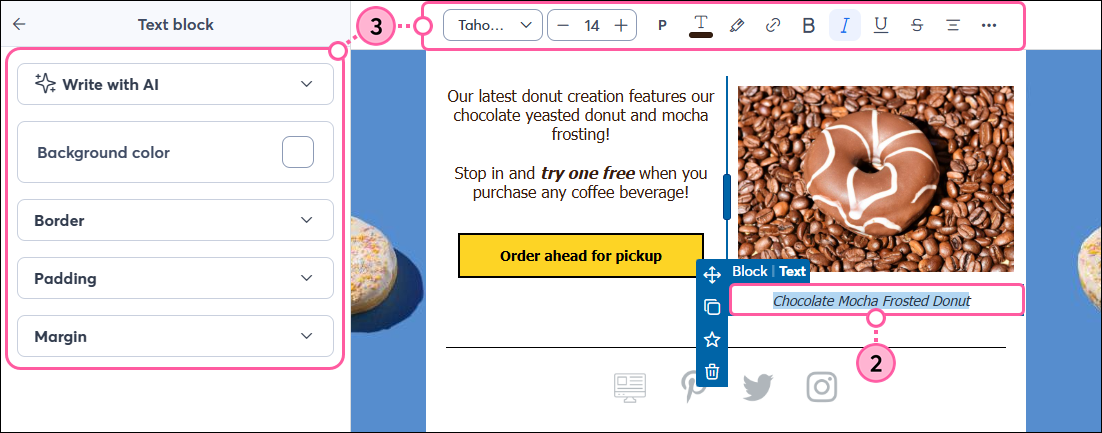
  2. Add your caption text
  3. Use the toolbar and left-hand panel to style your caption text.

    Image caption text under an image with Text toolbar


Add a caption to the left or right of an image

You can also insert a Text block to the left or right of an image in your template, or use one of the Article blocks in the Layouts section of the Content tab to add an image caption on the side of an image. 
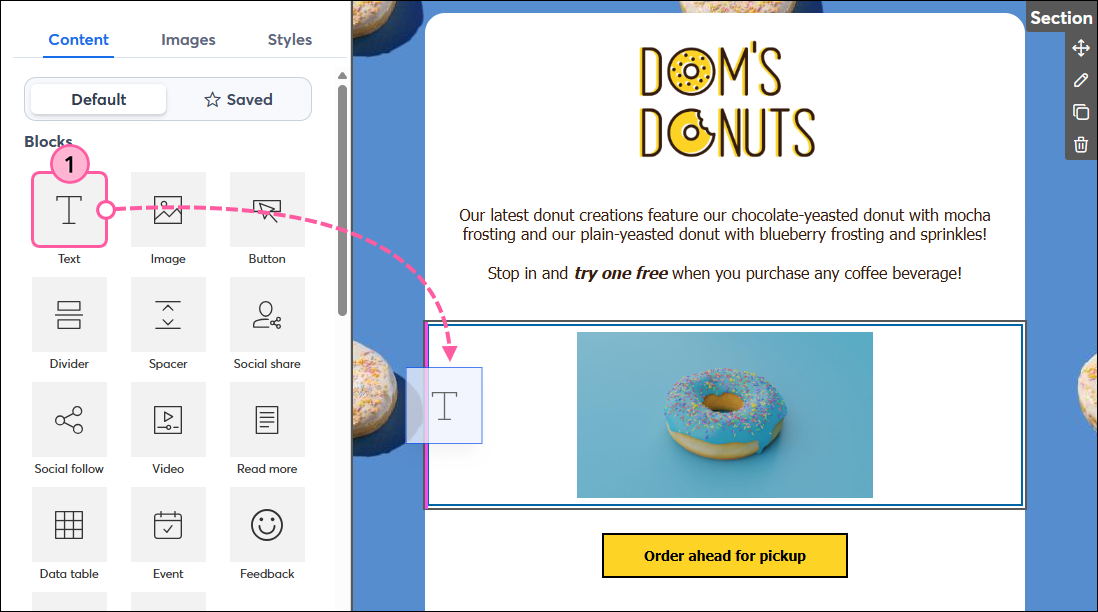
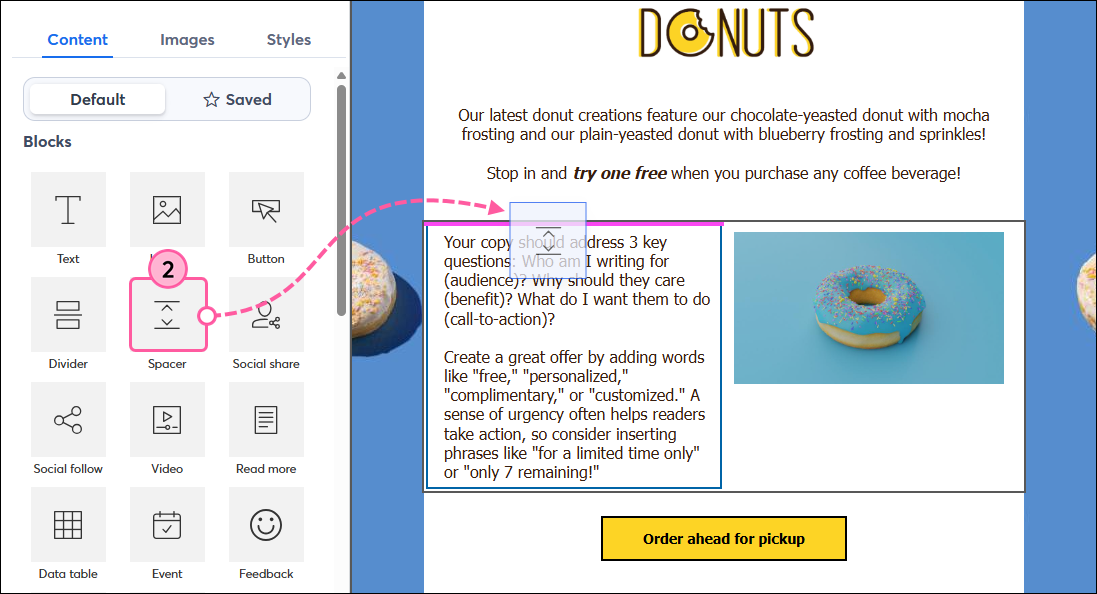
  1. Drag a Text block into your template. Use the pink guideline to help you place it to the left or right of your image.

    Drag-and-drop a Text block next to an image
     
  2. Insert a Spacer block above the text. It’s easier to do this now before the placeholder text is replaced. 

    Drag-and-drop Spacer block above Text block in a column
     
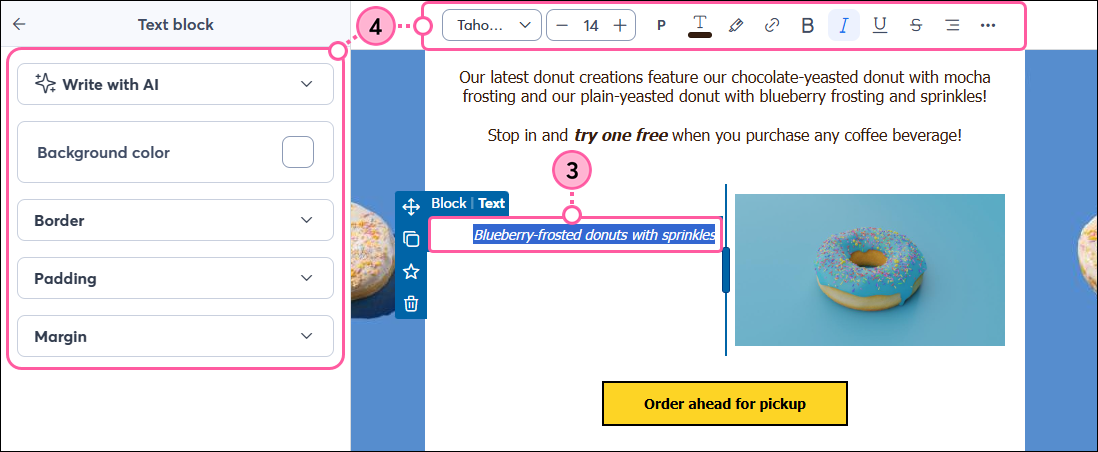
  3. Replace the default text with your caption.
  4. Use the toolbar and left-hand panel to style your caption text.

    Image caption text with text toolbar expanded
     
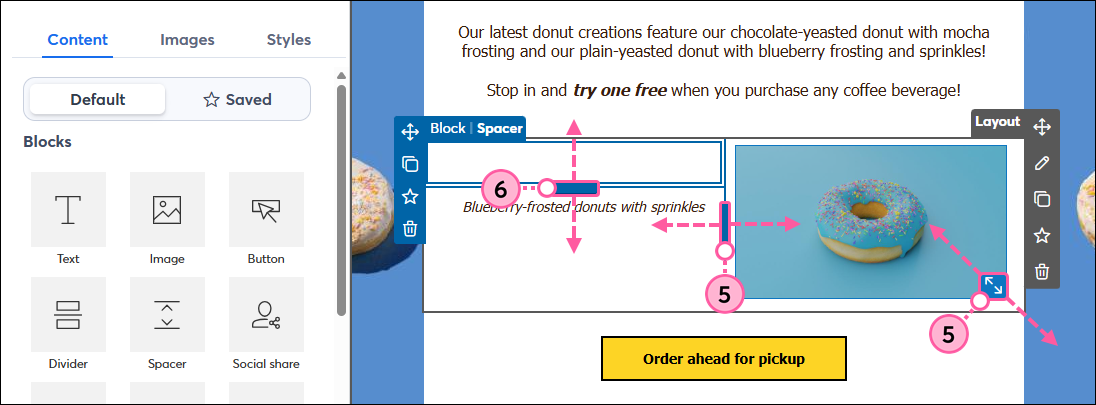
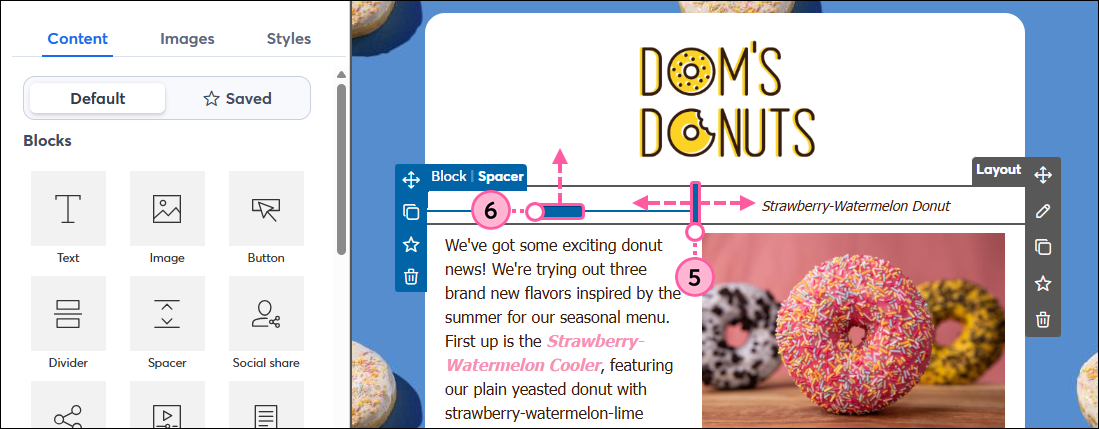
  5. Adjust the image size and column width to find the right balance. 
  6. Increase or decrease the spacer thickness to center your caption.

    Drag handles to resize column width, spacer height, and image size


Add a caption to an image wrapped with text

When you wrap text around an image, it's a little trickier to add a caption, but you can do so with a Text block and Spacer block above the image.
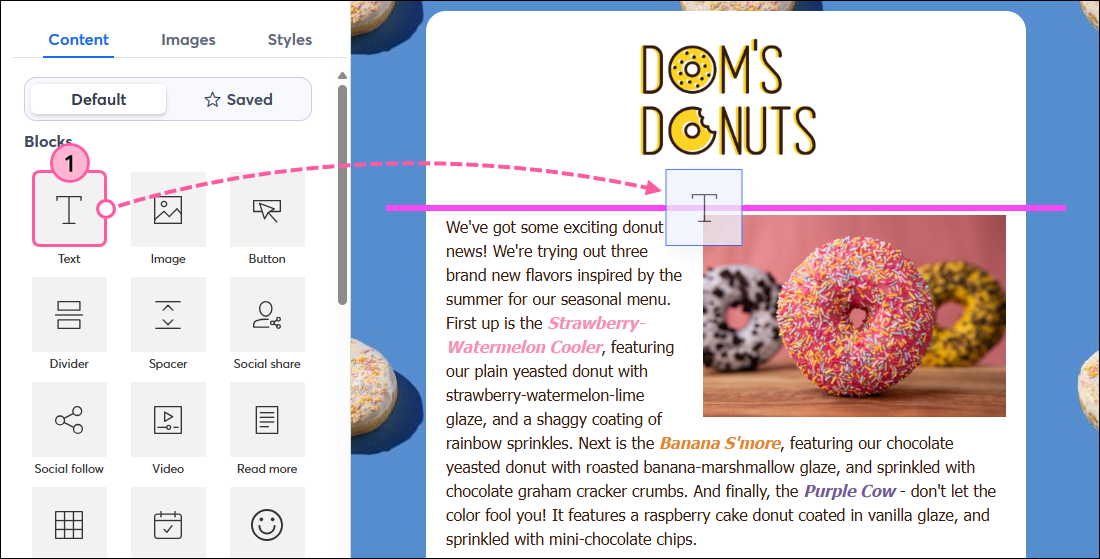
  1. Add a Text block above the image. Use the pink guideline to ensure it spans the entire template width.

    Drag-and-drop Text block into email template
     
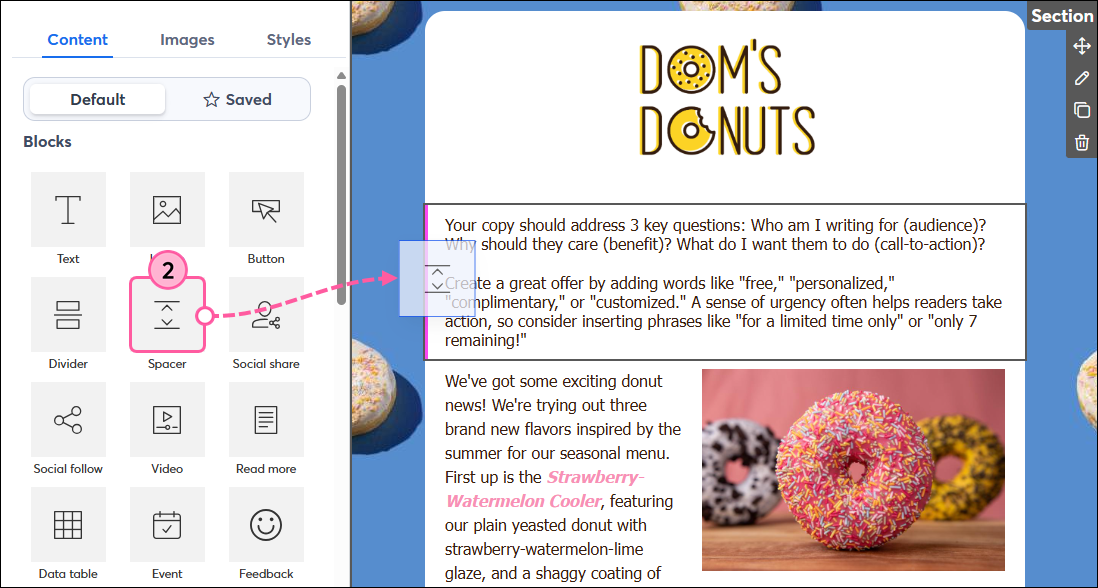
  2. Add a Spacer block next to the Text block to create a new column.

    Drag-and-drop Spacer block into template next to Text block
     
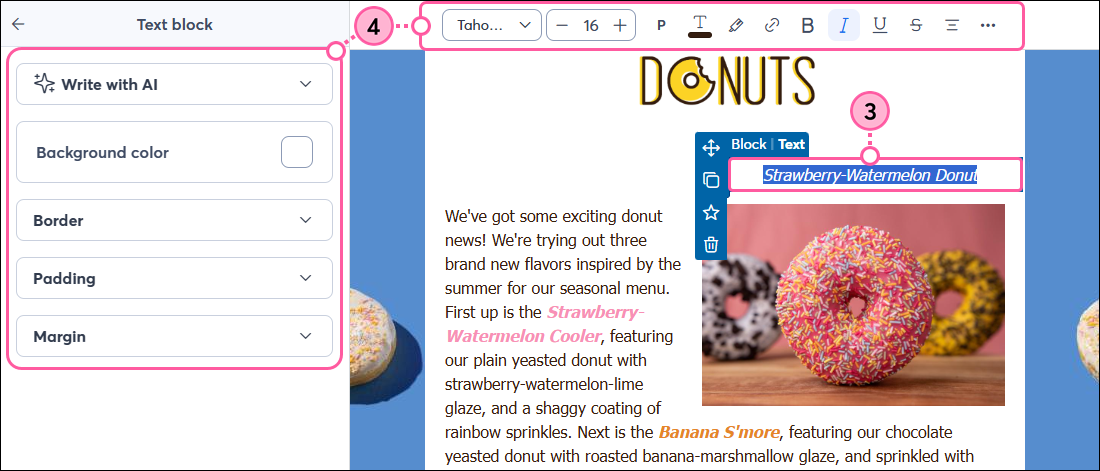
  3. Replace the default text with your caption.
  4. Use the toolbar and left-hand panel to style the text.

    Image caption with text toolbar options
     
  5. Adjust the width of the Text block so the caption is aligned with your image.
  6. Reduce the thickness of your Spacer to prevent gaps when your content stacks on a mobile device.

    Column width drag handle and Spacer thickness drag handle
     
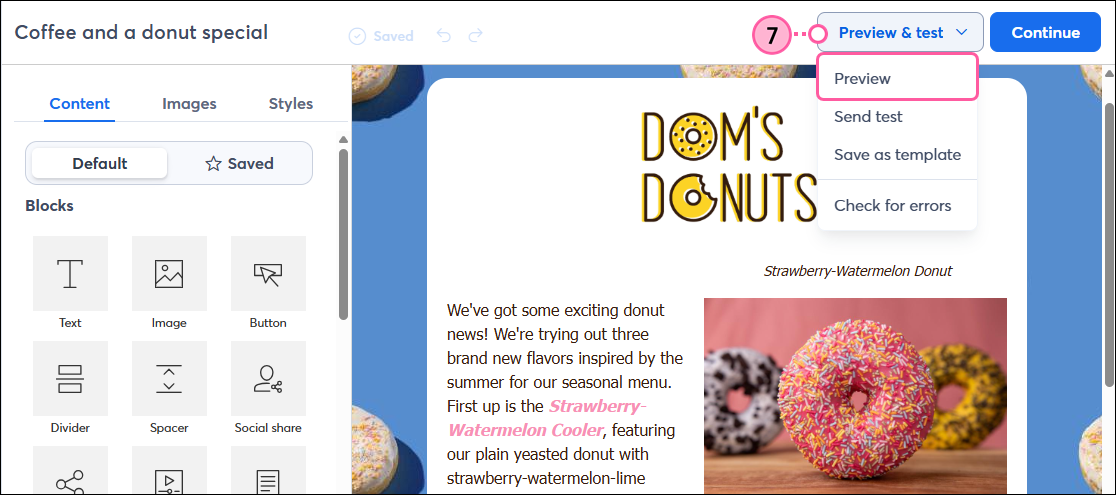
  7. Click Preview & test > Preview.

    Preview and Test Drop-down menu expanded and Preview option
     
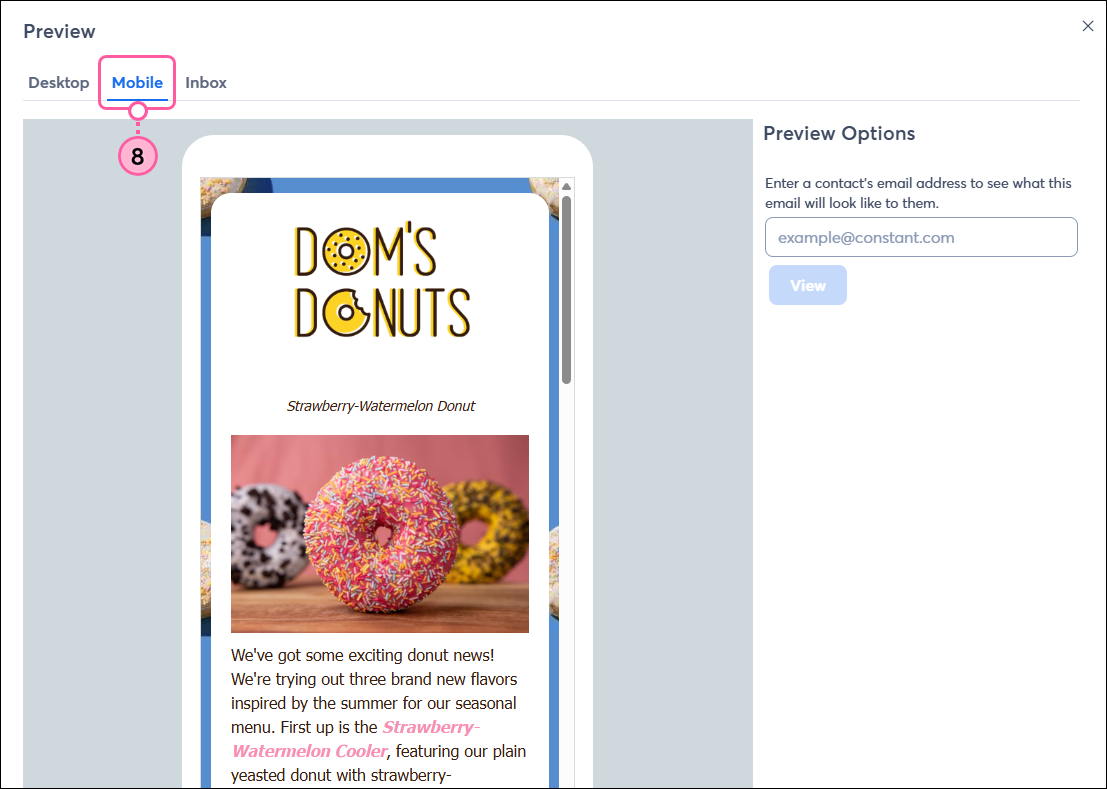
  8. Click the Mobile tab to make sure things line up the way you intend. Columns stack from left to right, so if your image is on the left side of your template, the spacer stacks on top of the caption, while the caption stacks on top of the spacer when the image is on the right side.

    Preview overlay, Mobile tab, and email content with spacer over caption, and text


Any links we provide from non-Constant Contact sites or information about non-Constant Contact products or services are provided as a courtesy and should not be construed as an endorsement by Constant Contact.


Questions?

Ask the Community

Did this article answer your question?


Constant Contact Logo

Copyright © 2026 · All Rights Reserved · Constant Contact · Privacy Center