When you import a file of contacts, we recognize characters and special characters that are common to email addresses, such as:
- Capital letters (A - Z)
- Lower-case letters (a - z)
- Numbers (0 - 9)
- At symbol ( @ )
- Dash ( - )
- Period ( . )
- Plus sign ( + )
- Underscore ( _ )
However, extra spaces, carriage or paragraph returns, hidden fields, special characters, or symbols that can't be recognized sometimes find their way into an email address. You can check you file before importing it to make sure your email addresses are compatible by using "Find and Replace":
Outside of the email address, accented and foreign language alphabet characters (Â â, Č č, É é, Ģ ģ, Ñ ñ, Ø ø, Ü ü, etc.) can be used in names, company names, and physical addresses.
 | Did You Know? Not all errors prevent your file from being imported. After you upload a spreadsheet of contacts, you can check for errors that are keeping contacts from being added to your list, and correct them if you have any. |
Microsoft Notepad
To check the formatting of your email addresses, open your TXT or CSV file in Notepad.
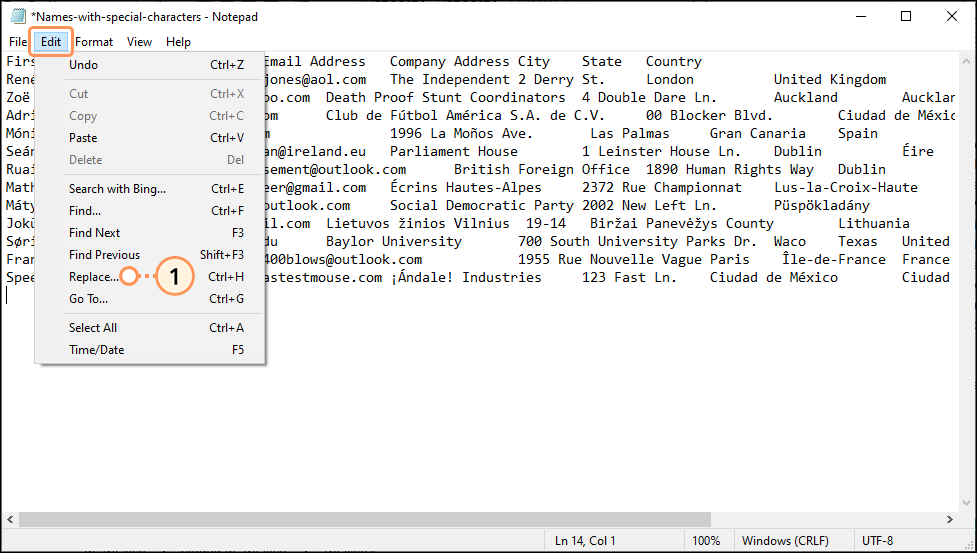
- Click Edit > Replace.
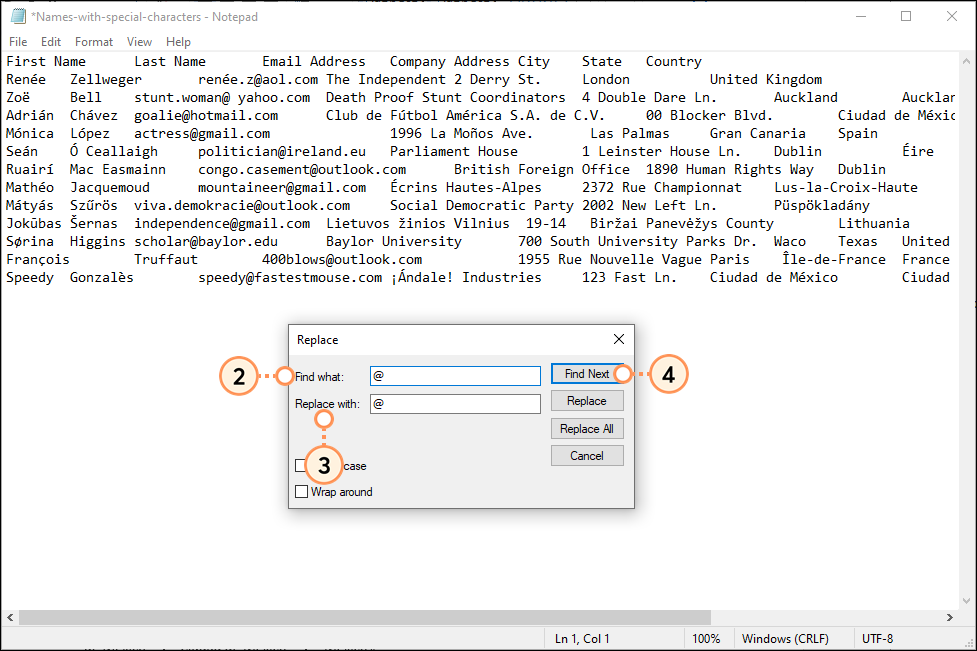
- In the Find what field, enter the character you want to search for. You can search for spaces before or after the "@" in an email address by entering either "@ " with a space following it or " @" with a space preceding it.
- In the Replace with field, enter the correct character. For example, enter "@" without any spaces.
Note: Leaving the Replace with field blank deletes whatever is in the Find what field from your file in step 6. - Click Find Next.
Note: The search begins from the point where your cursor is in the file. Clicking somewhere in the upper left-hand corner prevents your from missing any potential results.
- Review the highlighted result. To:
- Replace All Instances in the File - Click Replace All. Only use Replace all if you're certain it won't affect other areas of your file. In the below image, the "@" only appears within the email addresses.

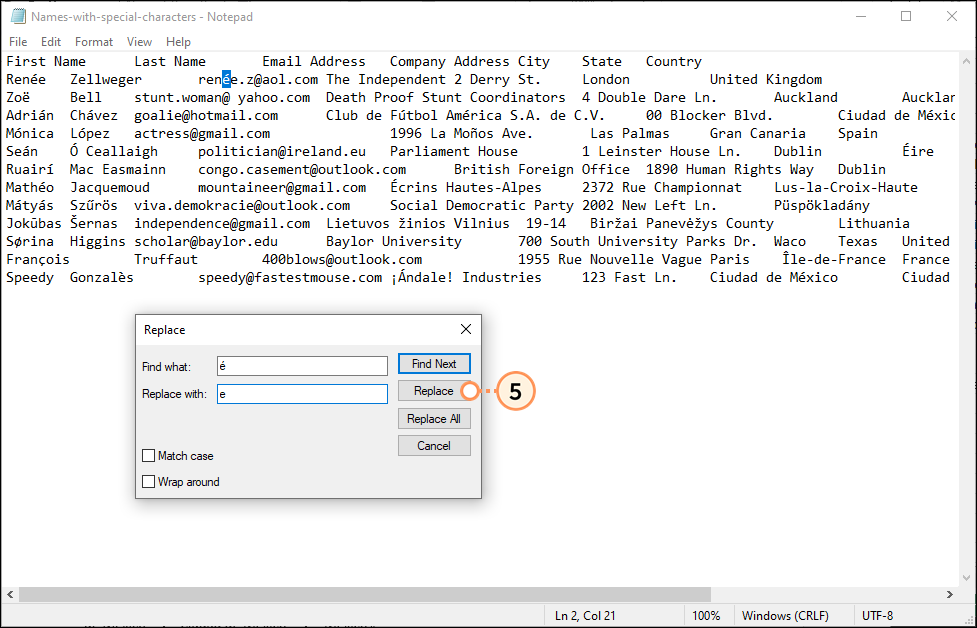
- Change Only the Highlighted Result - Click Replace and repeat to review each result individually. In the image below, the accented character is in an email address and needs to be removed. Since the accented character appears in other areas outside of the email address, Replace All isn't used.
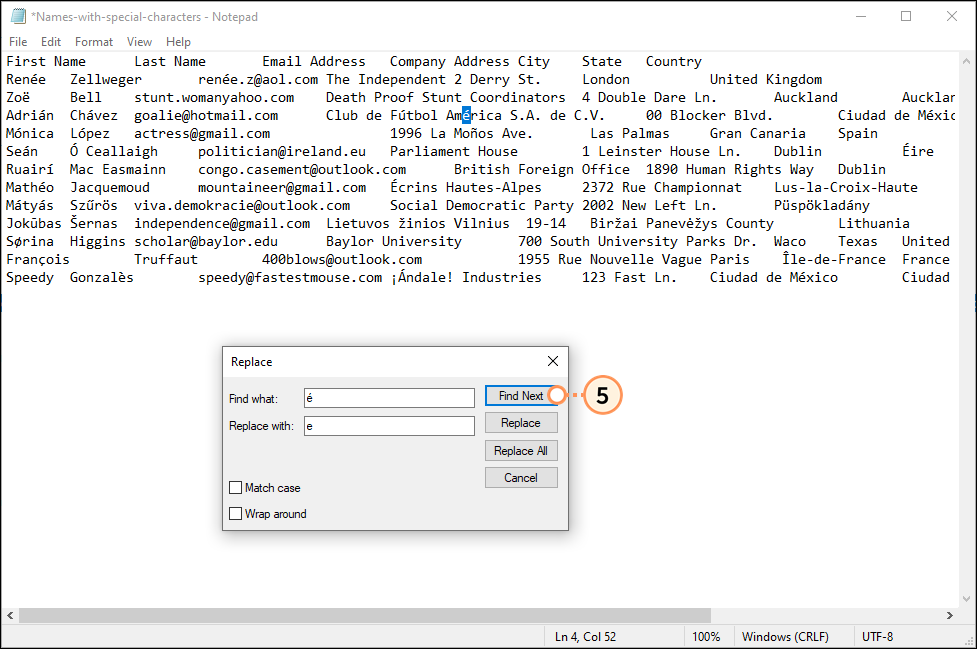
- Leave the Highlighted Result As-is - Click Find Next to skip the current result and move on to the next result. In the image below, the accented character is in a company name and can be left alone.
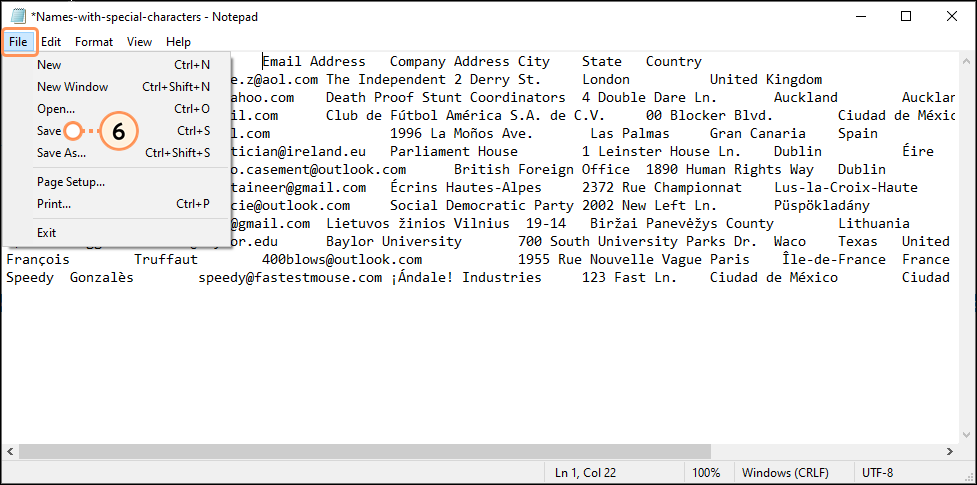
- Click File > Save.
Repeat as necessary for each special character or spacing that you want to check for. Once your text characters are in good shape, make sure your file is formatted so that it's compatible with Constant Contact before uploading your contacts.
For more help using Search and Replace in Word, please see Microsoft's support.
Microsoft Word
Microsoft Word is especially helpful for finding line breaks/carriage returns or paragraph breaks, and other hidden formatting, but you can also use it to find special characters too. To begin, copy the information you want to review and paste it into a blank Word document.
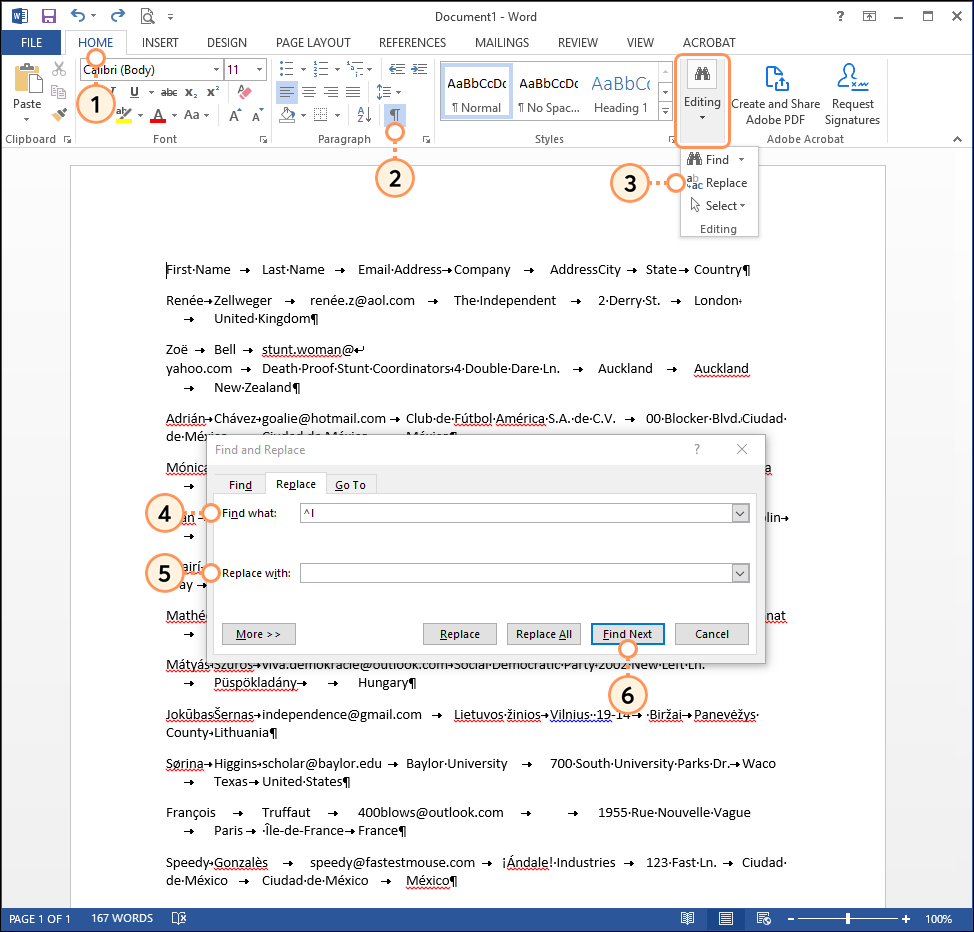
- Click Home.
- (Optional) Click Show/Hide to reveal hidden formatting in your email addresses.
- Click Editing > Replace.
- On the Replace tab, enter the character you want to search for in the Find what field. You can also search for:
- Line Breaks/Carriage Returns - Search for "^l".
- Paragraph Breaks - Search for "^p".
- In the Replace with field, enter the correct character. Leaving the Replace with field blank deletes whatever is in the Find what field from your file in step 5.
- Click Find Next.
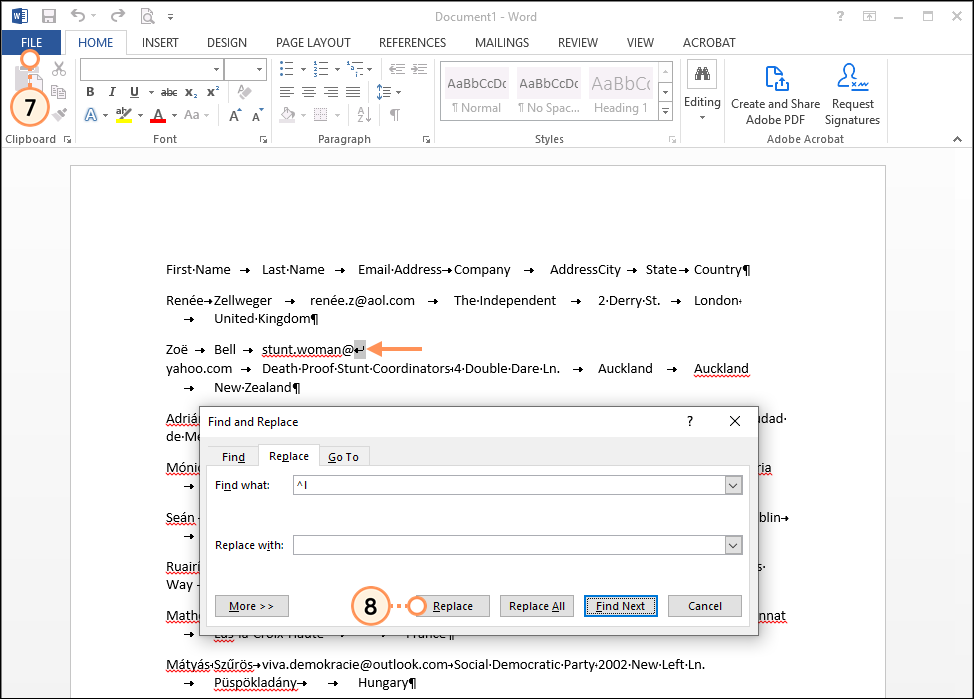
- Review the highlighted result and click Replace.
- Click File.
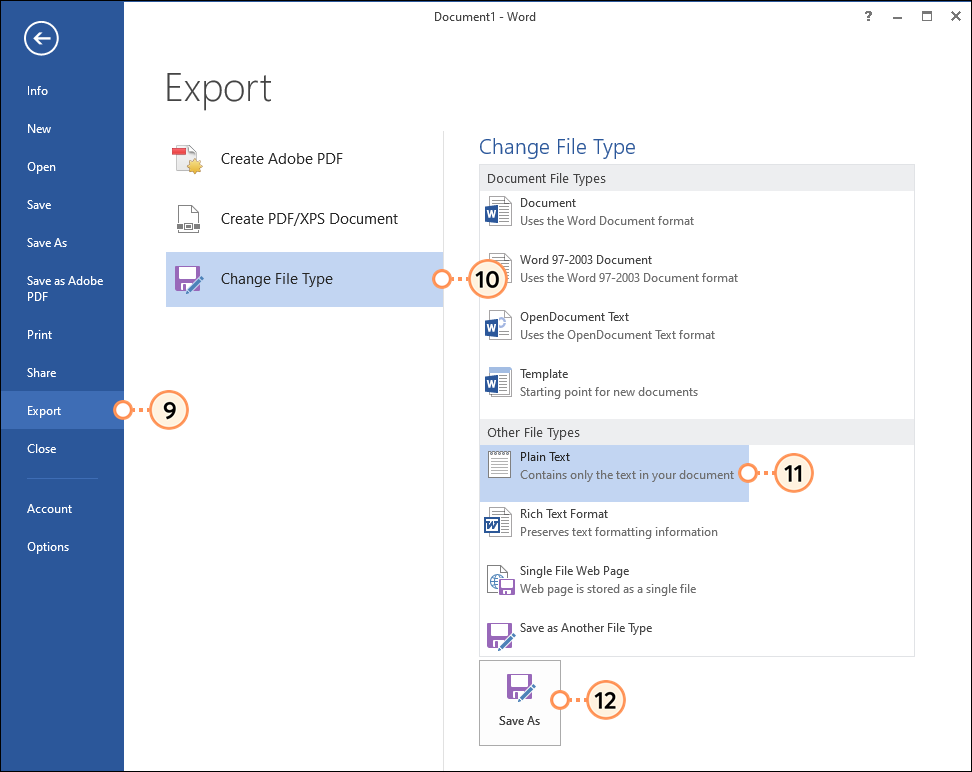
- Click Export.
- Click Change File Type.
- Click Plain Text.
- Click Save As. This lets you save a TXT file that you can either import or convert into an Excel spreadsheet.
Repeat as necessary for each special character or spacing that you want to check for. Once your text characters are in good shape, make sure your file is formatted so that it's compatible with Constant Contact before uploading your contacts.
For more help using Search and Replace in Notepad, please see Microsoft's support.
Microsoft Excel
To check the formatting of your email addresses, open your XLS, XLSX, or CSV file in Excel.
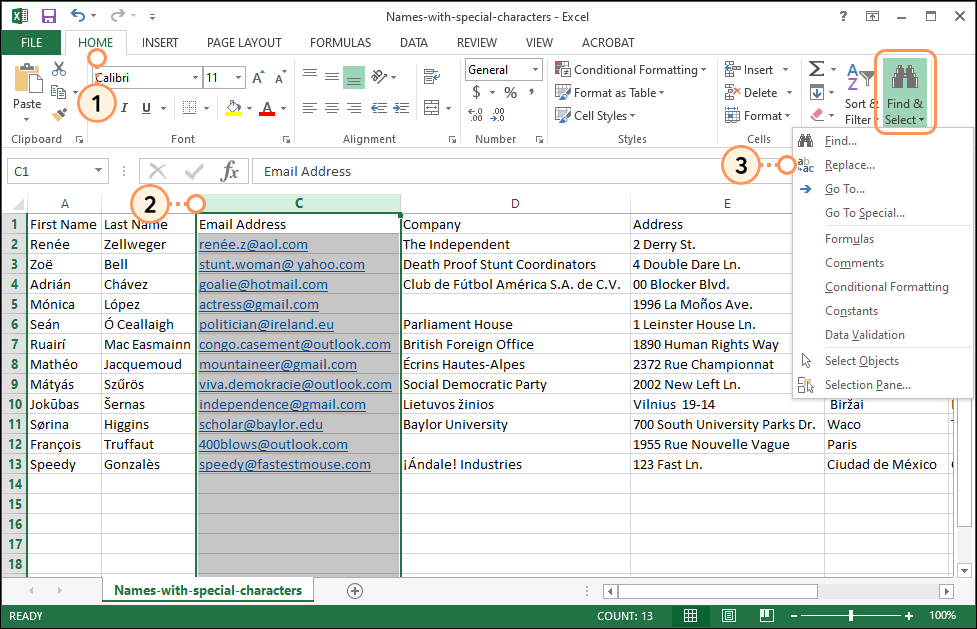
- Click Home.
- Select the column of email addresses by clicking on the letter about the column header. This restricts the search to the column and leaves the rest of your data in the other columns as-is.
- Click Find & Select > Replace.
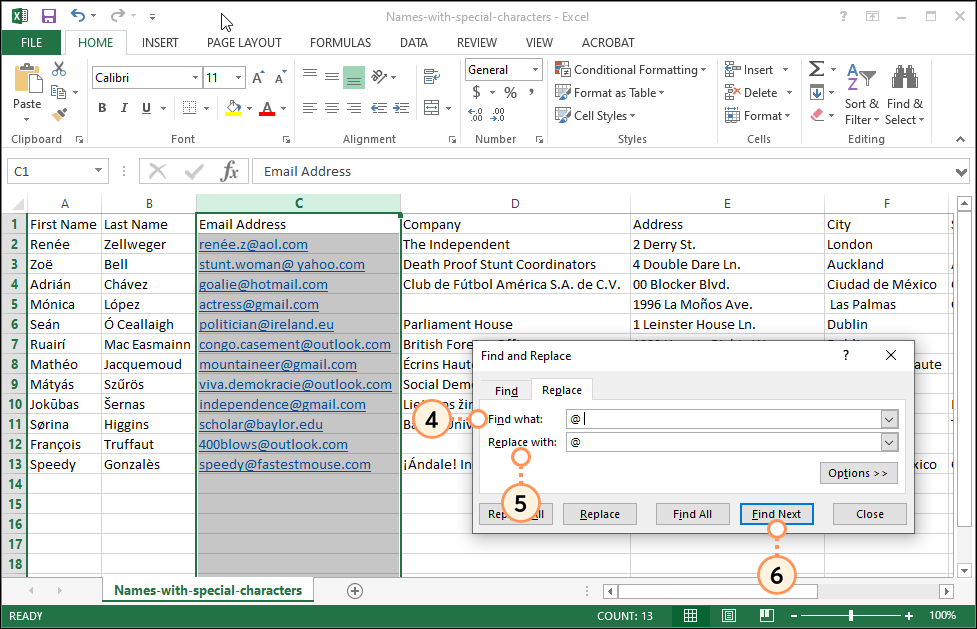
- On the Replace tab, enter the character you want to search for in the Find what field. You can search for spaces before or after the "@" in an email address by entering either "@ " with a space following it or " @" with a space preceding it.
- In the Replace with field, enter the correct character. For example, enter "@" without any spaces.
Note: Leaving the Replace with field blank deletes whatever is in the Find what field from your file in step 7. - Click Find Next.
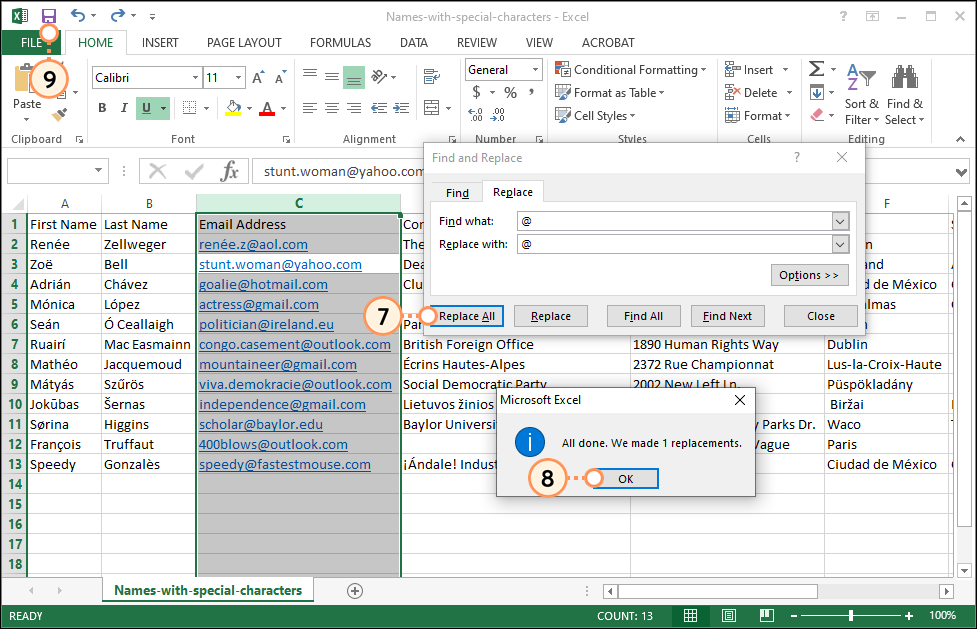
- Review the highlighted result and click Replace All.
- Click OK.
- Click Save.
Repeat as necessary for each special character or spacing that you want to check for. Once your text characters are in good shape, make sure your file is formatted so that it's compatible with Constant Contact before uploading your contacts.
For more help using Search and Replace in Excel, please see Microsoft's support.
Any links we provide from non-Constant Contact sites or information about non-Constant Contact products or services are provided as a courtesy and should not be construed as an endorsement by Constant Contact.