We're making it easier to get around Constant Contact with a brand new left navigation. Not all accounts have that change yet, so if your navigation looks different from our articles, that's why–but everything from the top can now be found on the left!

Email and Digital Marketing
How can we help you?
Search our help articles, video tutorials, and quickstart guides

You've got this. You've got us. Search our Knowledge Base to quickly find answers to your questions.

Age a contact list using date added information

Article: 000006368
Updated: March 7, 2025

Use segmentation to filter your contacts by the date they were added to help ensure your longest contact relationships are healthy

"Aging your list" means periodically looking through your contact list for contacts that have been on your list for a long time, and making sure they're still engaged with your email and SMS message content. This helps you to keep your list current, reduces spam complaints, and helps improve your open rate too.

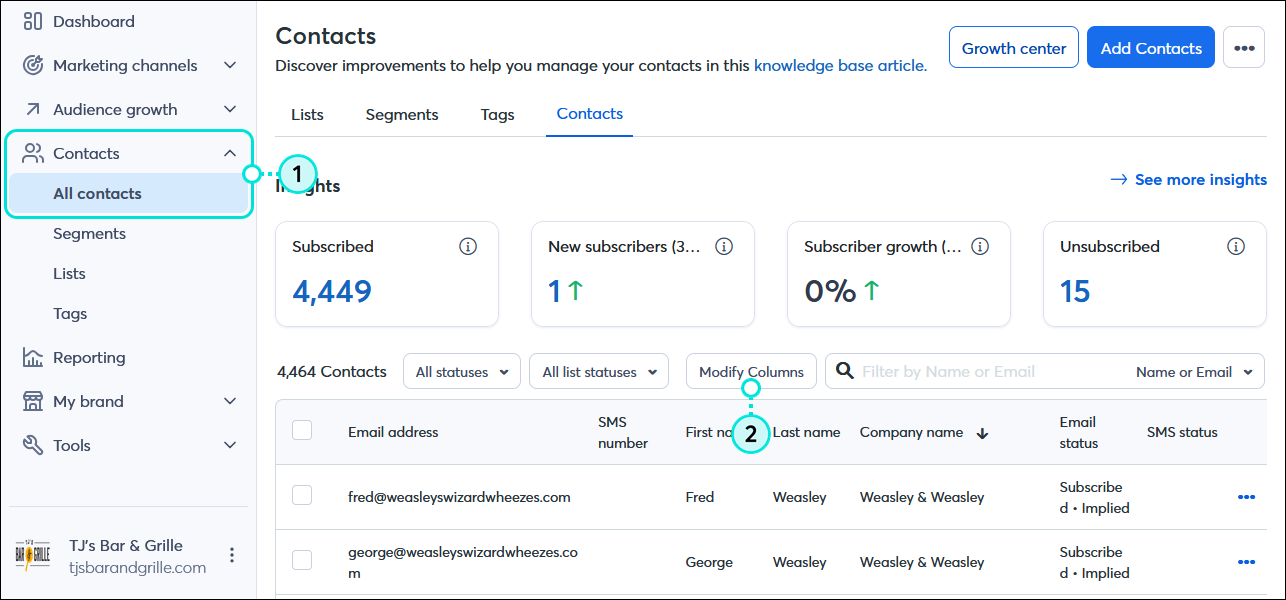
Here's how to find your oldest contacts:


Bar chart iconThe data shows: It's easier to re-engage contacts that aren't reading your emails with targeted content that is short and personalized, than it is to add new contacts to your list!


Create a segment based on Date Added

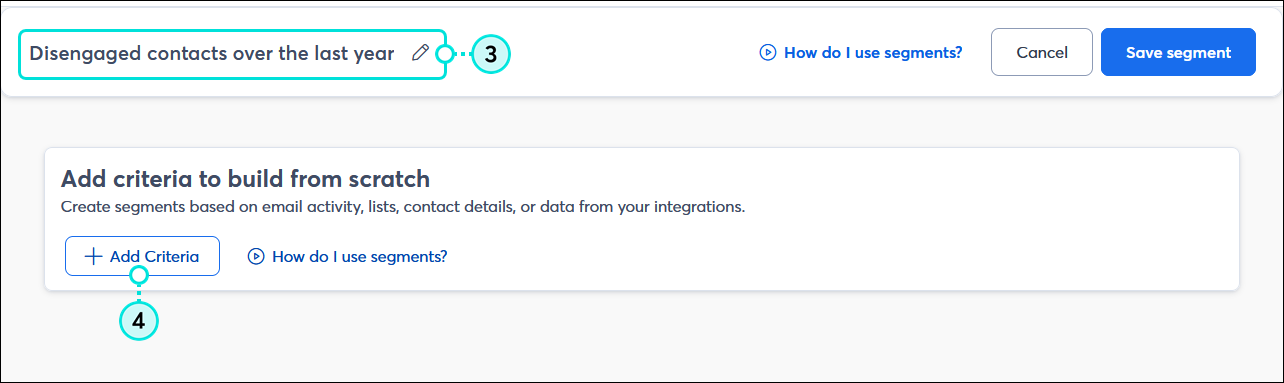
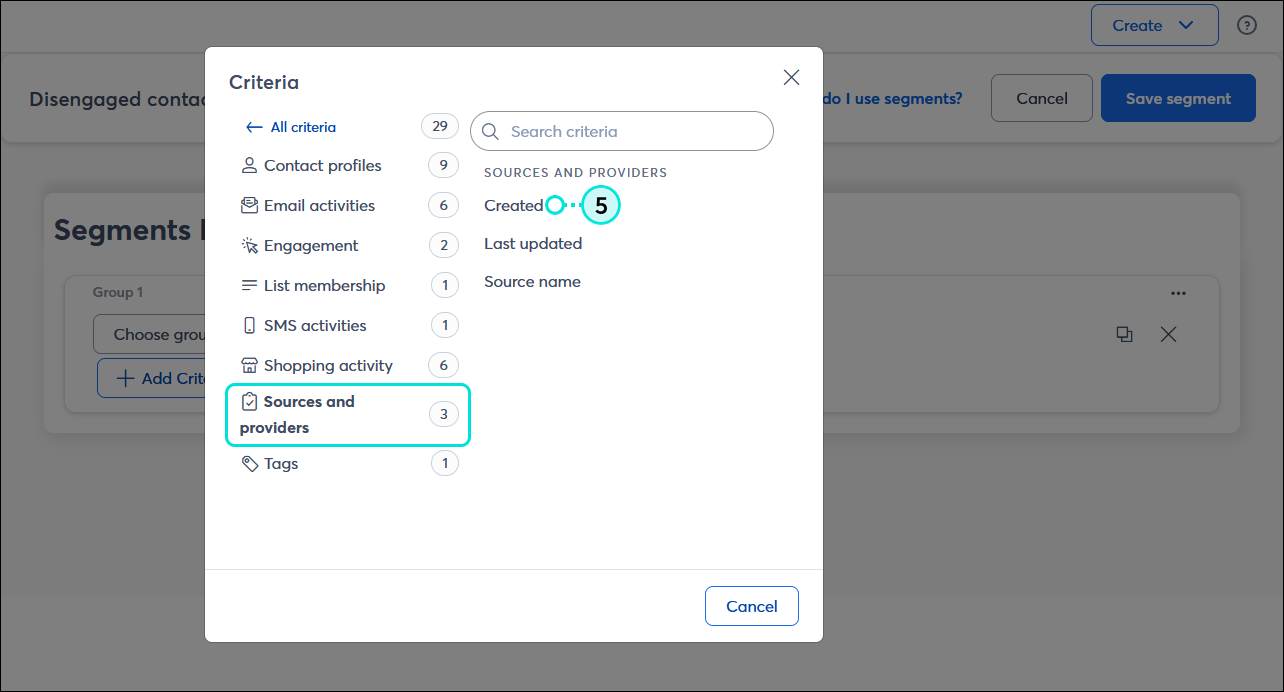
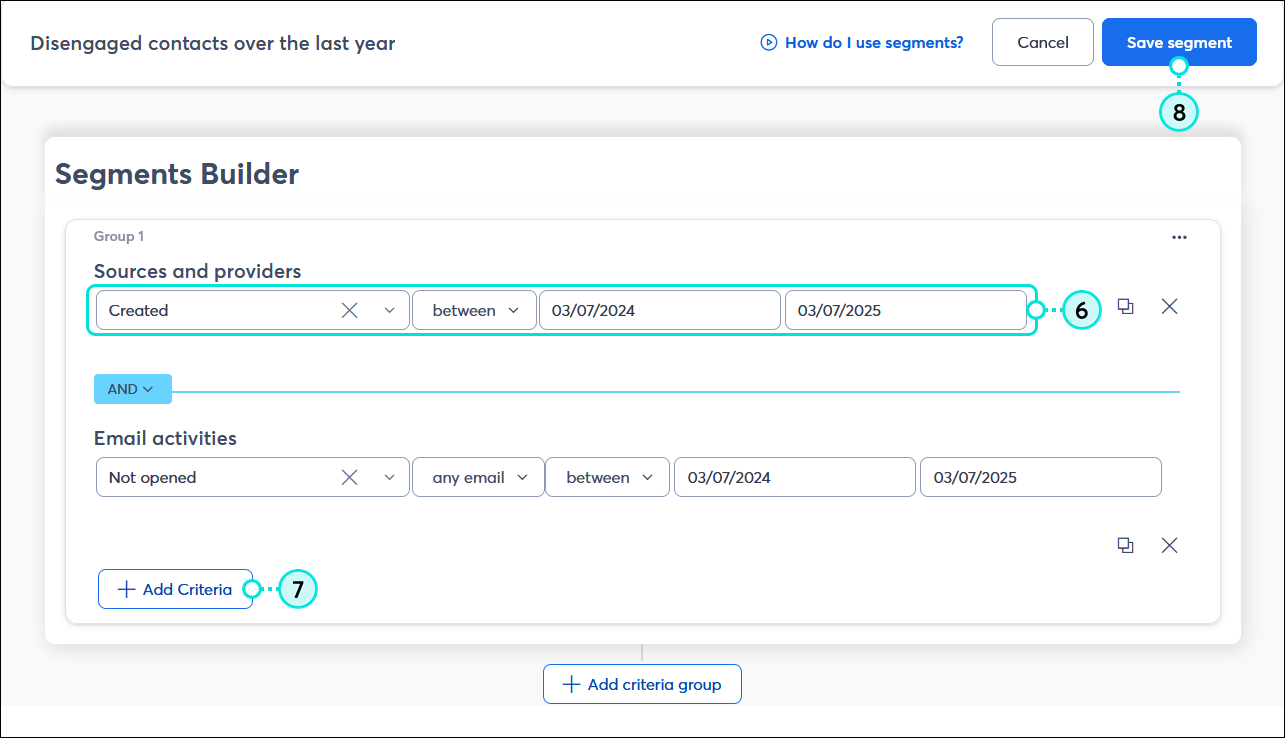
One of the benefits of using our segmentation tools to filter your contacts is that each segment can be as simple or as complex as you need it to be. In this case you can filter your contacts by date added and engagement level at the same time, so you know which of your oldest contacts need the most attention.

  1. Click Contacts > Segments.
  2. Click the Create Segment button in the upper right-hand corner of the page.

    Contacts menu expanded and Segments option selected, Segments tab selected, and Create Segment button 
     
  3. Give your new segment a name so you can identify it in your account later.
  4. Click the + Add Criteria button.

    Segment builder with Name field and Add Criteria button
     
  5. From the Criteria overlay, select "Sources and providers" and then select "Created."

    Segment Builder Criteria overlay with Sources and providers option selected and Created option selected
     
  6. Choose an operator and enter a date or date range.
  7. (Optional) Click + Add Criteria button and select additional criteria to help narrow your segment results.
  8. Click the Save segment button.

    Segments Builder with Sources and providers criteria with Created option between a date range, and Email activities criteria with Not opened option, and any email option between a date range, + Add Criteria button and Save segment buttotn 


Sort your contacts by Date Added

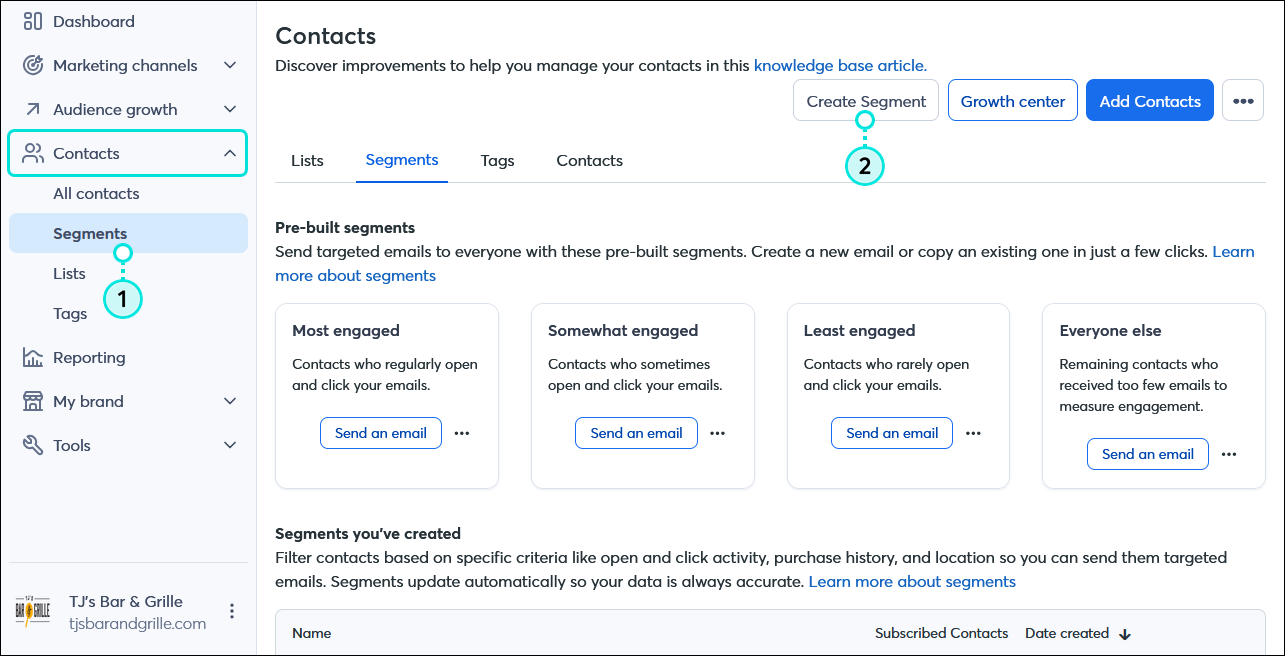
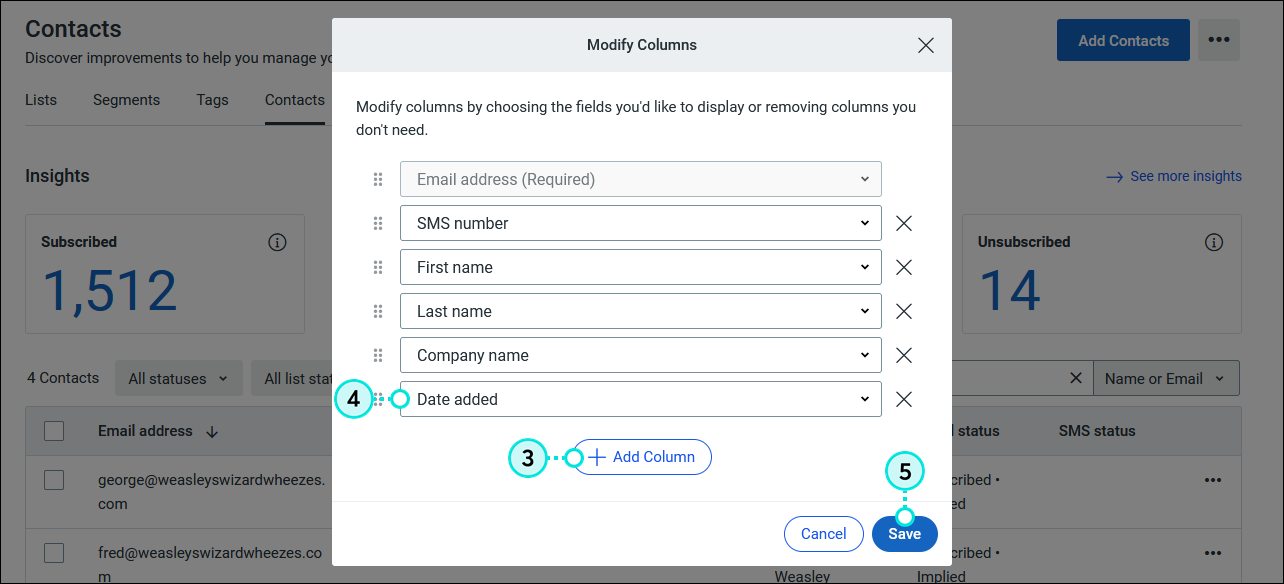
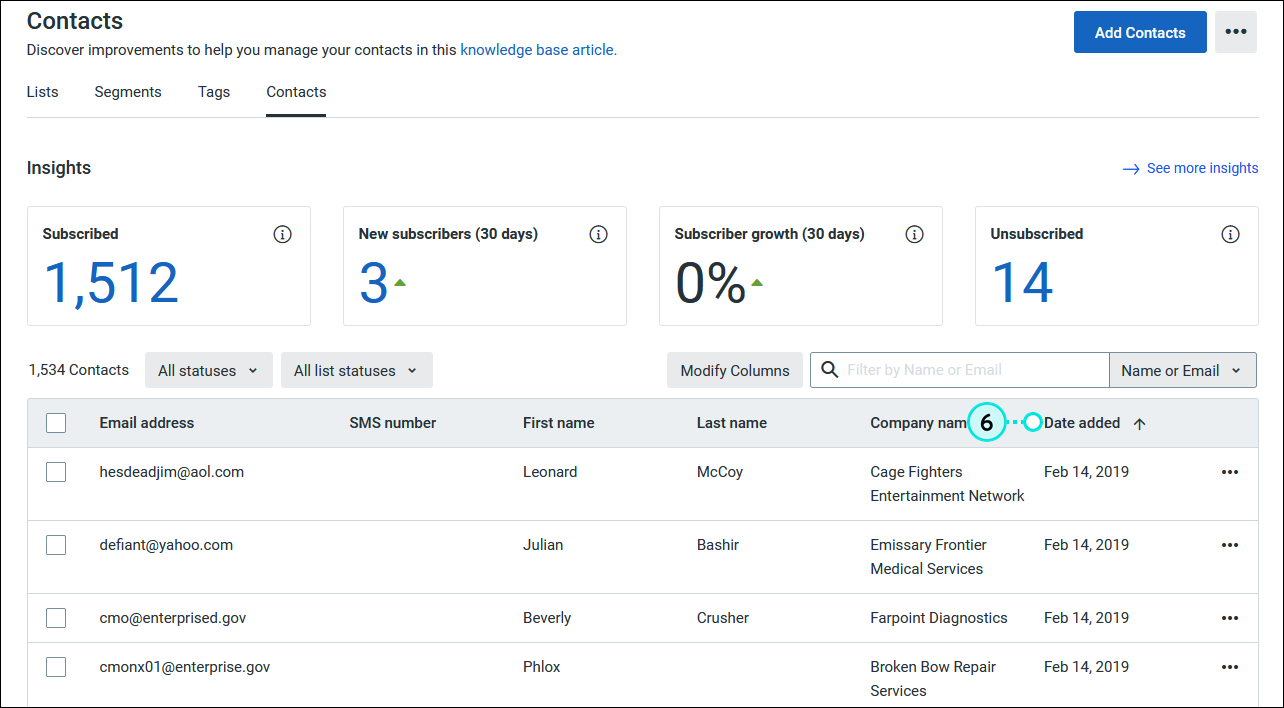
A quick way to check the age of your list is by sorting your contacts by the date you added them. This gives you a good idea of how old your list actually is so that you can better plan your email and SMS marketing efforts.

  1. In the left-hand menu, click Contacts > All contacts.
  2. Click the Modify Columns button.

    Contacts menu expanded and All contacts option selected, Contacts dashboard with Contacts tab selected, and Modify Columns button 
     
  3. Click the + Add Column button at the bottom of the Modify Columns overlay.
  4. Click on the new column and select "Date Added."
  5. Click the Save button.

    Modify Columns overlay, +Add Column button, Date Added option, and Save button
     
  6. Click on the Date Added column to sort your contacts in ascending or descending order by date.

    Contacts tab, Contacts tab selected, and Date Added table header sorted in descending order
     

Now that you know how old your list is, you can work on cleaning up the contacts. Our segmentation tools can help you filter your contacts into different groups based on their interests or behavior so you can decide how to best re-engage with them.


Questions?

Ask the Community

Did this article answer your question?


Constant Contact Logo

Copyright © 2025 · All Rights Reserved · Constant Contact · Privacy Center