
| Important: This article requires you to use HTML code. |
If you collect personal details from your contacts, such as their first name, city, or state, you can easily personalize your custom code email by inserting a Personalization tag and each contact will see the information specific to them! You can also insert account details, such as your organization name or address, that gets pulled directly from your Constant Contact account.
| Did you know? If your website has unique page URLs based on certain contact details, custom fields, or account details, you can personalize your email further by adding dynamic links! |
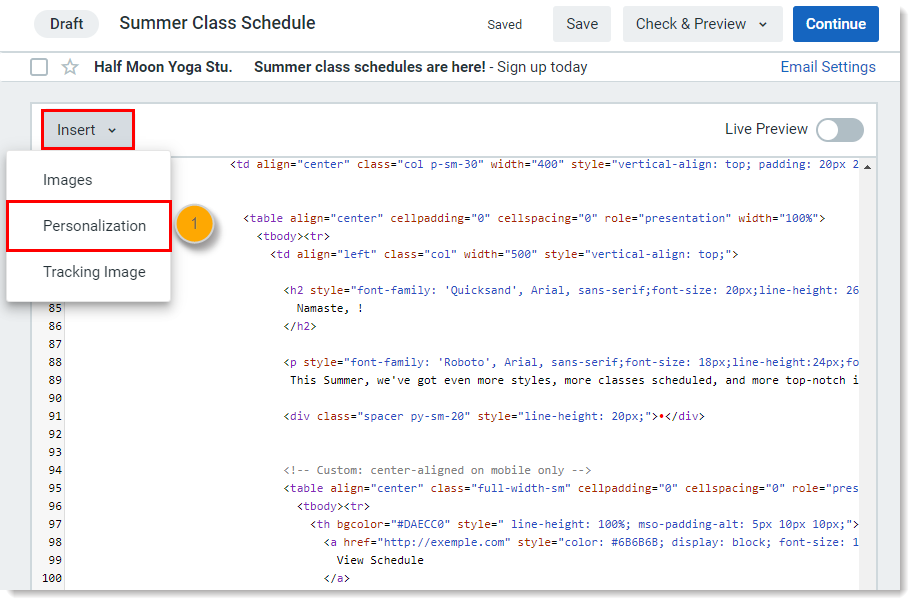
It’s easy to add contact or account details to your email in the Custom Code editor:
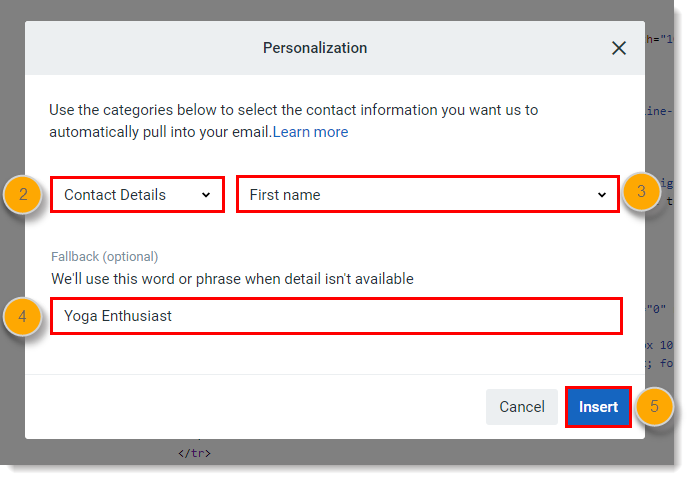
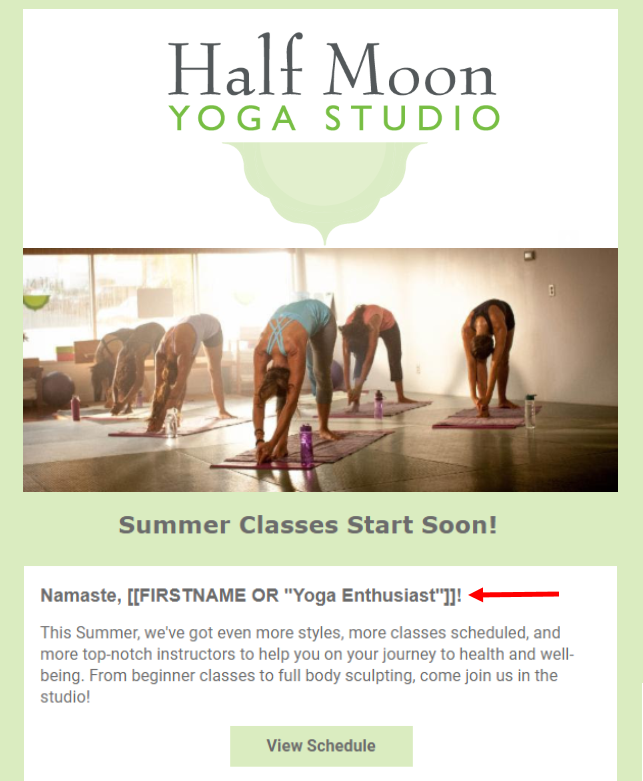
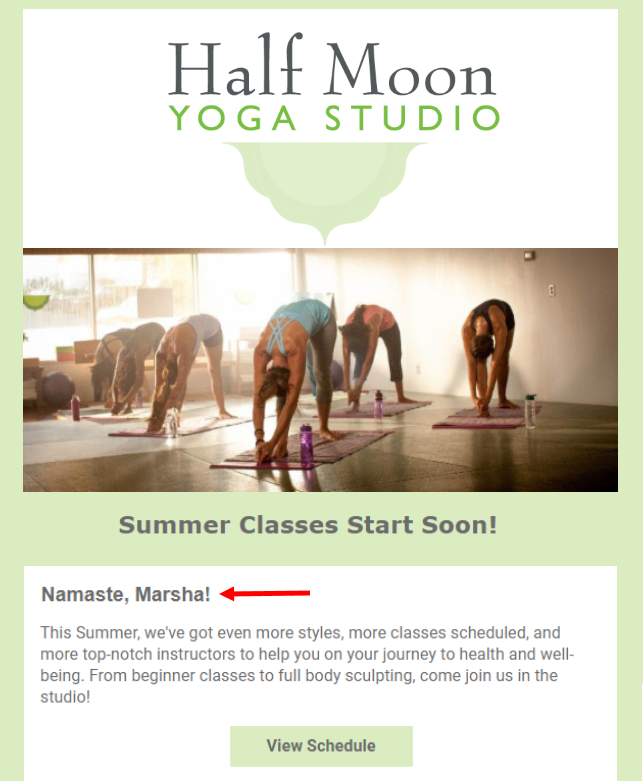
When you preview your email, the contact detail displays the information from your account profile to give you an idea of what your contacts will see. When you send your email, the contact detail displays the unique information you have on file for each contact.
| Personalization tag in an email draft | Personalization in a sent email |
 |  |
If you want to add personalized contact or account details to your HTML yourself, simply use the tag code from the list of supported tags below.
| Contact Detail | Tag Code |
| First name | [[FirstName]] |
| Last name | [[LastName]] |
| Company | [[CompanyName]] |
| Job title | [[JobTitle]] |
| Address line 1 | [[AddressLine1]] |
| Address line 2 | [[AddressLine2]] |
| Address line 3 | [[AddressLine3]] |
| City | [[City]] |
| State name | [[StateName]] |
| Postal code | [[PostalCode]] |
| Home phone | [[HomePhone]] |
| Work phone | [[WorkPhone]] |
| Birthday | [[Birthday]] |
| Anniversary | [[Anniversary]] |
| Email address | [[EmailAddress]] |
| Custom field | [[custom.field_name]] (Replace the text in red with your custom field name. If there are spaces in your custom field name, substitute them with underscores.) |
| Account Detail | Tag Code |
| Organization name | [[account.OrganizationName]] |
| Website address | [[account.SiteURL]] |
| Logo URL | [[account.LogoURL]] |
| Address line 1 | [[account.AddressLine1]] |
| Address line 2 | [[account.AddressLine2]] |
| Address line 3 | [[account.AddressLine3]] |
| City | [[account.City]] |
| State name | [[account.State]] |
| Two-letter state | [[account.usState]] |
| Country | [[account.Country]] |
| Country code | [[account.CountryCode]] |
| Postal code | [[account.PostalCode]] |
| Signature name | [[account.signaturename]] |
| Signature email | [[account.signatureemail]] |
| Signature image URL | [[account.signatureImageURL]] |
Copyright © 2025 · All Rights Reserved · Constant Contact · Privacy Center