This article will review the Agency Tools section in the Lead Gen & CRM Settings menu.
| This article applies only to Agency clients. For individual clients, please return to the help center home page and search for another article. |
Users:
| Administrators | ✓ | |
| Company Managers | ||
| Marketing Managers | ||
| Sales Managers | ||
| Salespersons | ||
| Jr. Salespersons |
Agency Tools are located in the Settings menu panel. Click ![]() User Menu > Settings in the top toolbar, or click
User Menu > Settings in the top toolbar, or click ![]() Settings in the bottom left corner of page, to access Agency Tools. The Settings menu panel will be on the left side of the screen. Agency Tools has its own dedicated section.
Settings in the bottom left corner of page, to access Agency Tools. The Settings menu panel will be on the left side of the screen. Agency Tools has its own dedicated section.
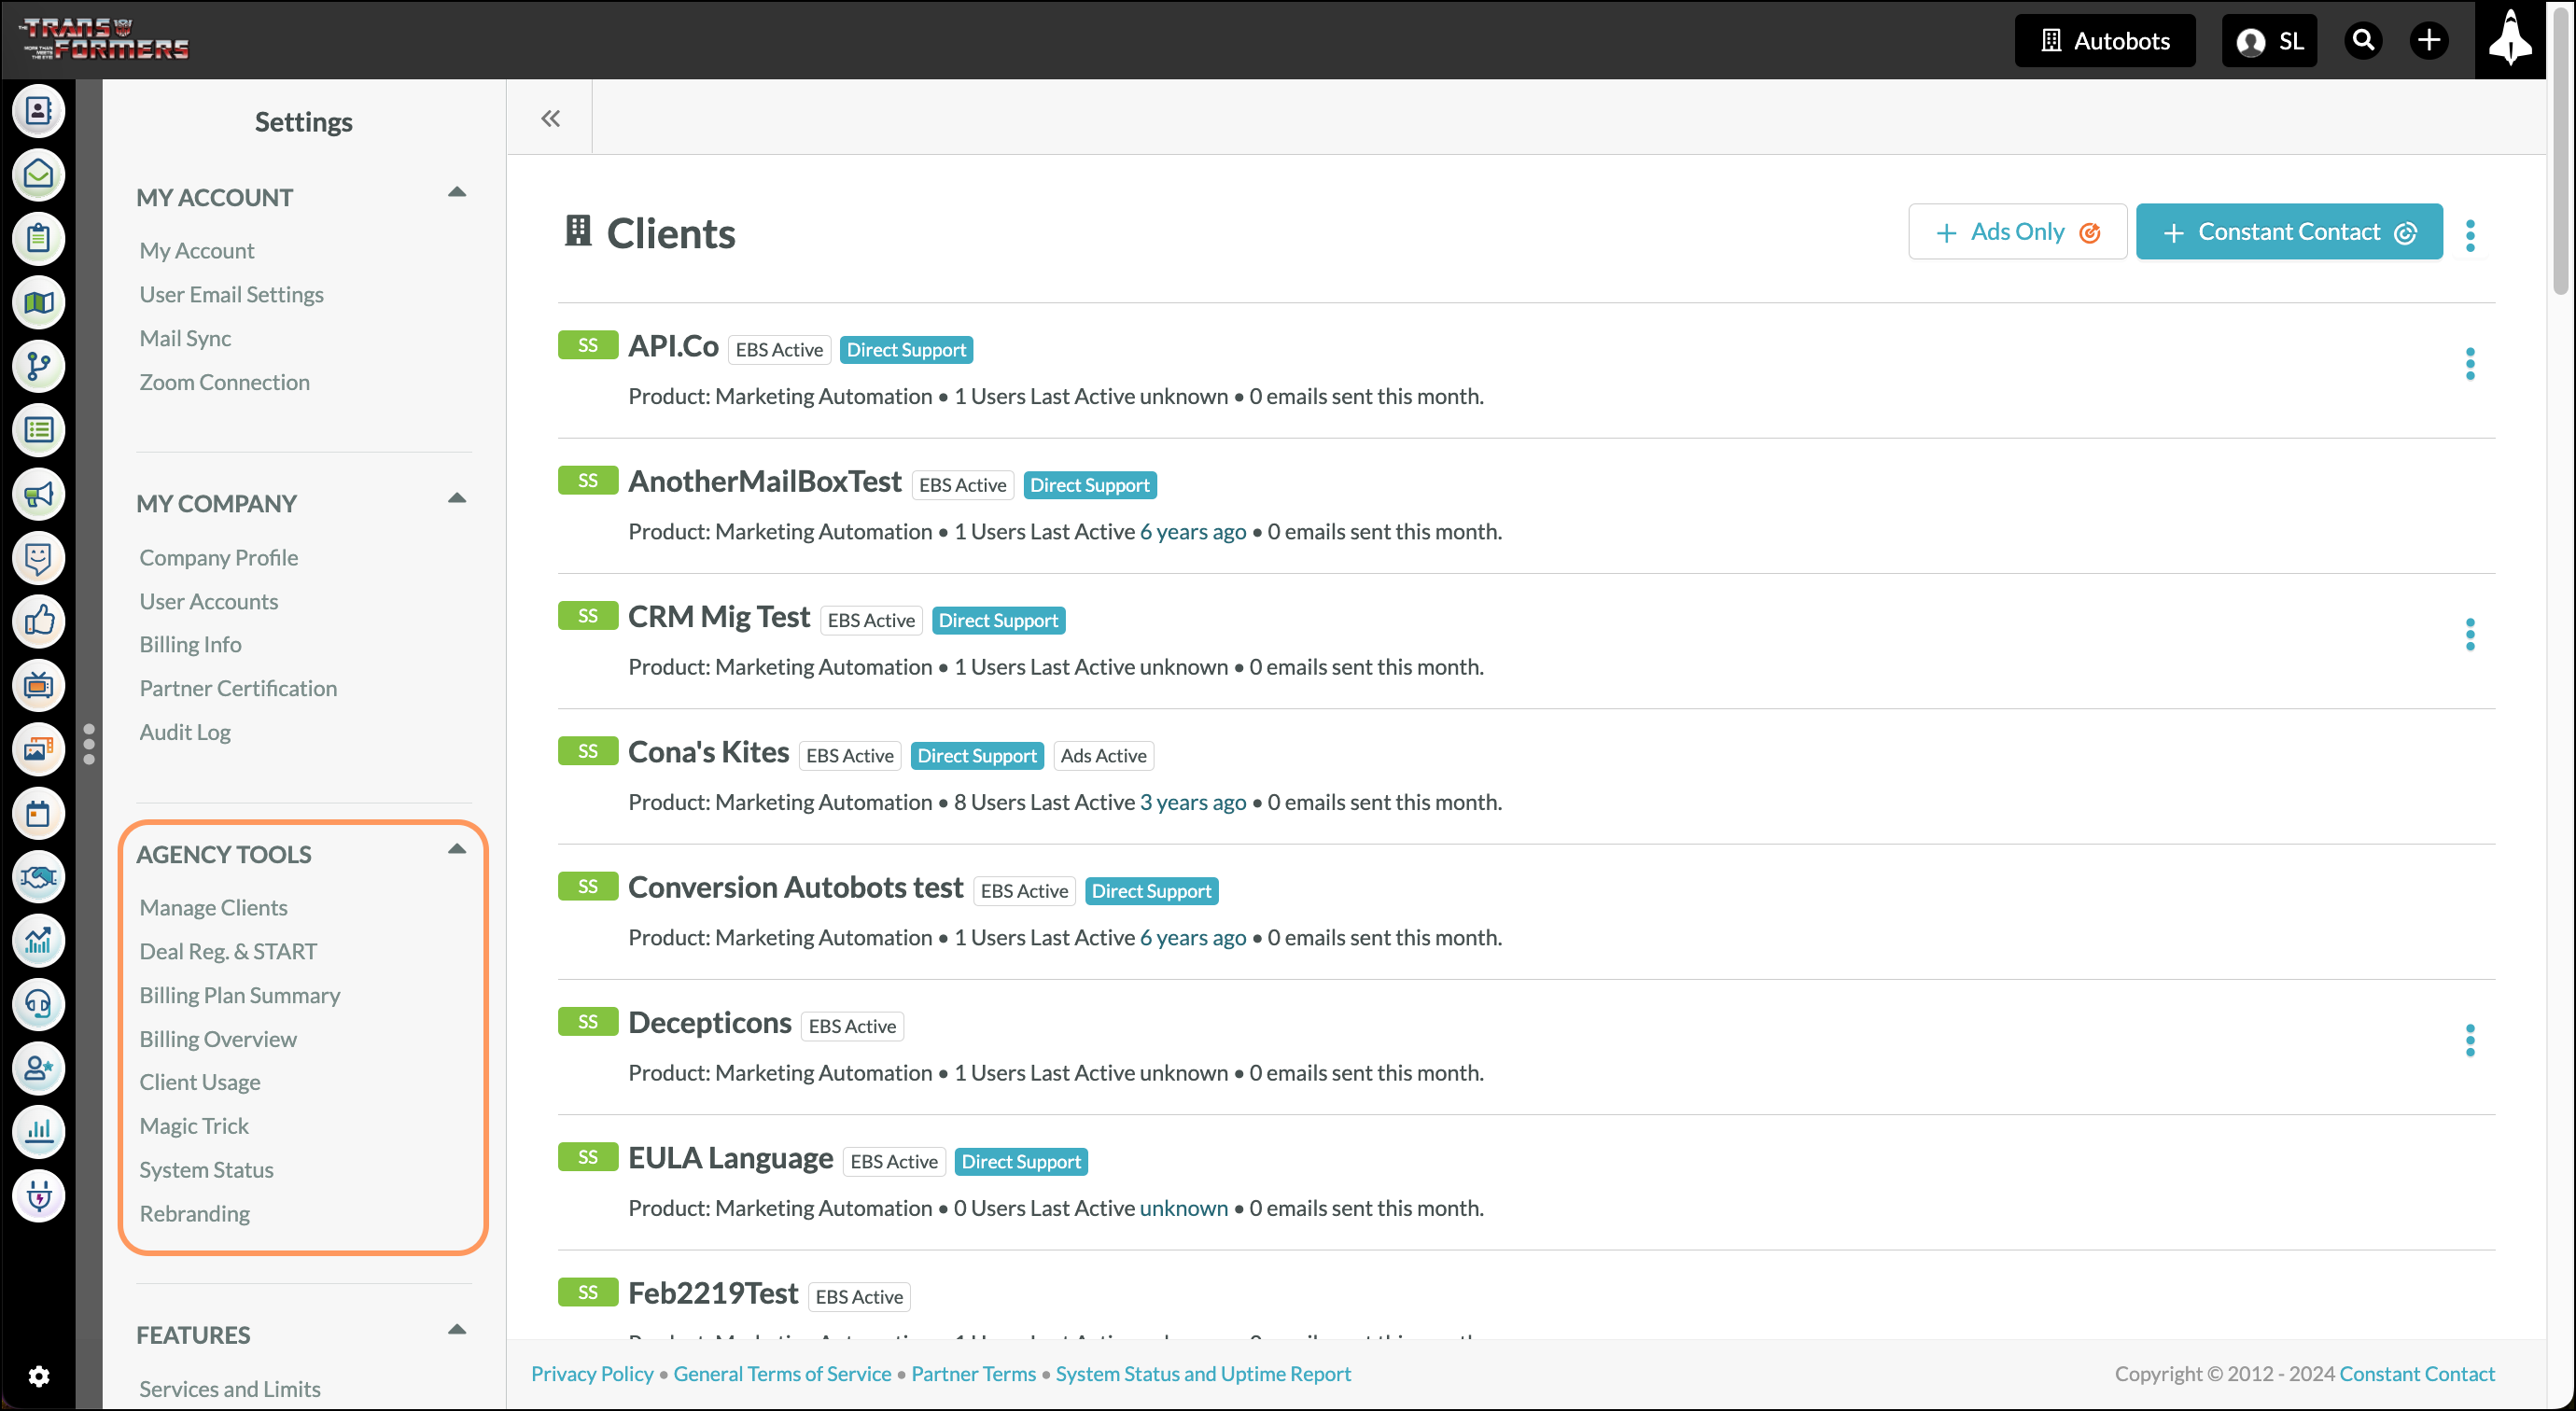
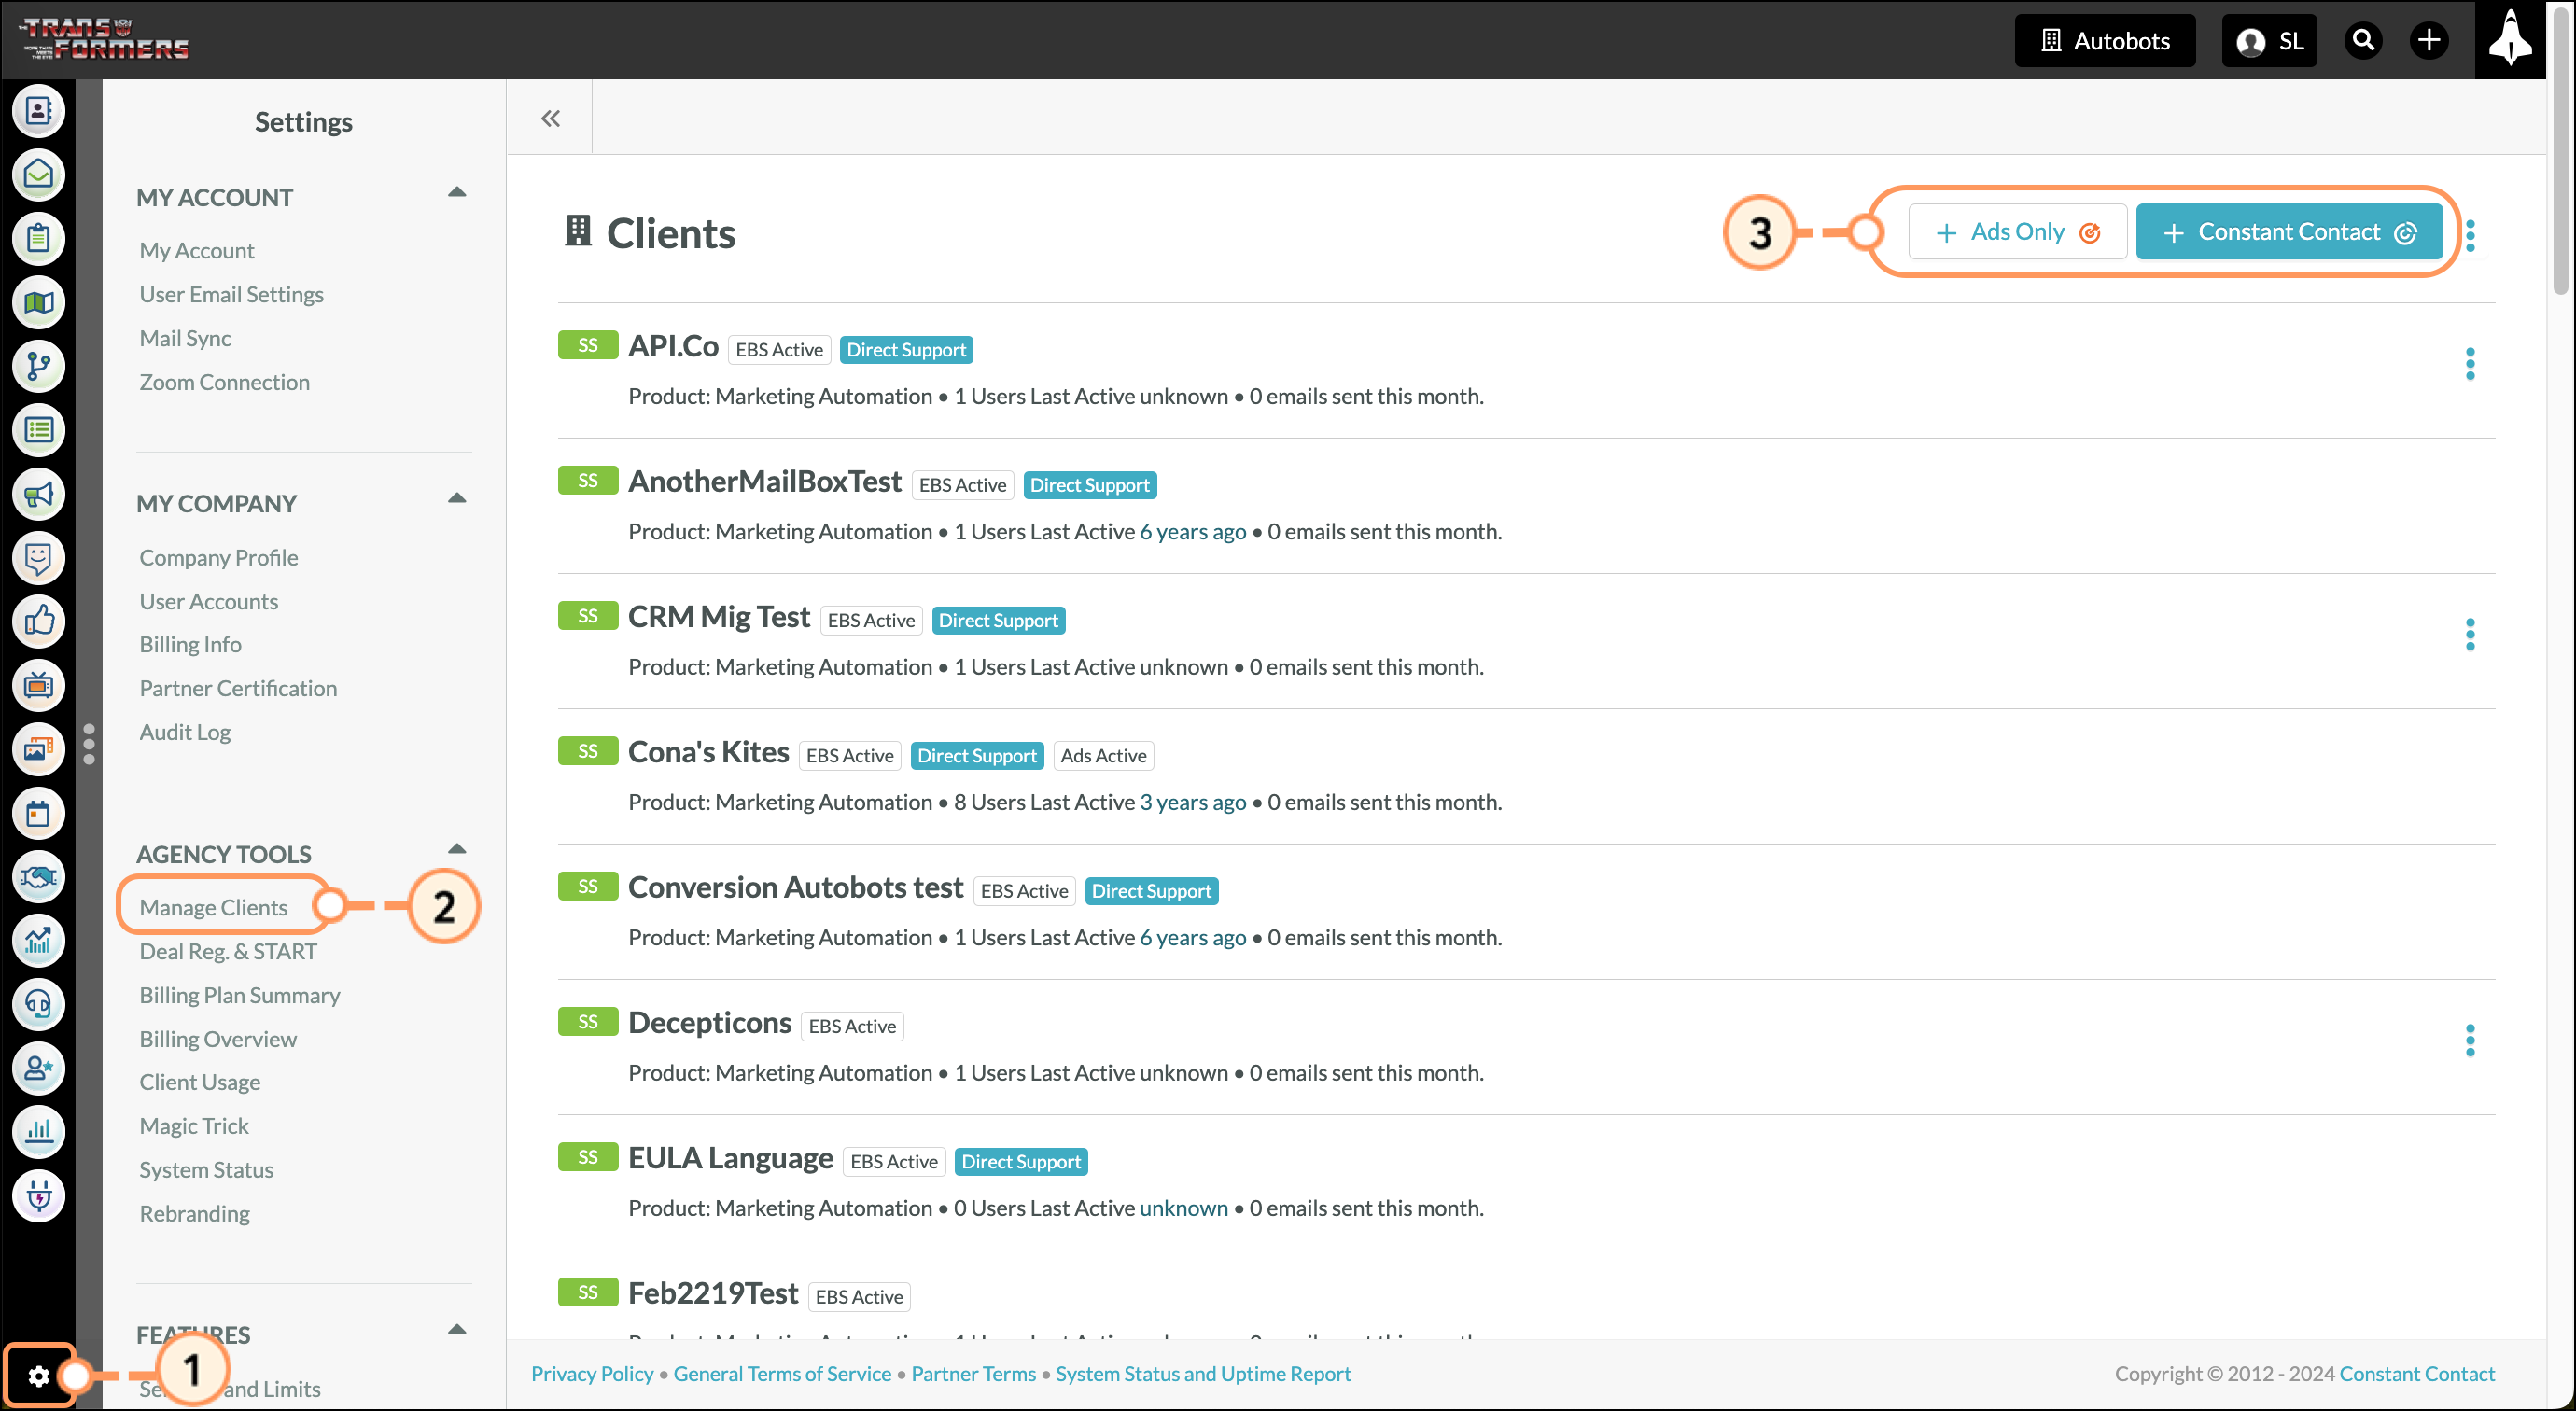
In the Manage Clients menu, there are options available to assist with client management. This menu shows all of your active clients.
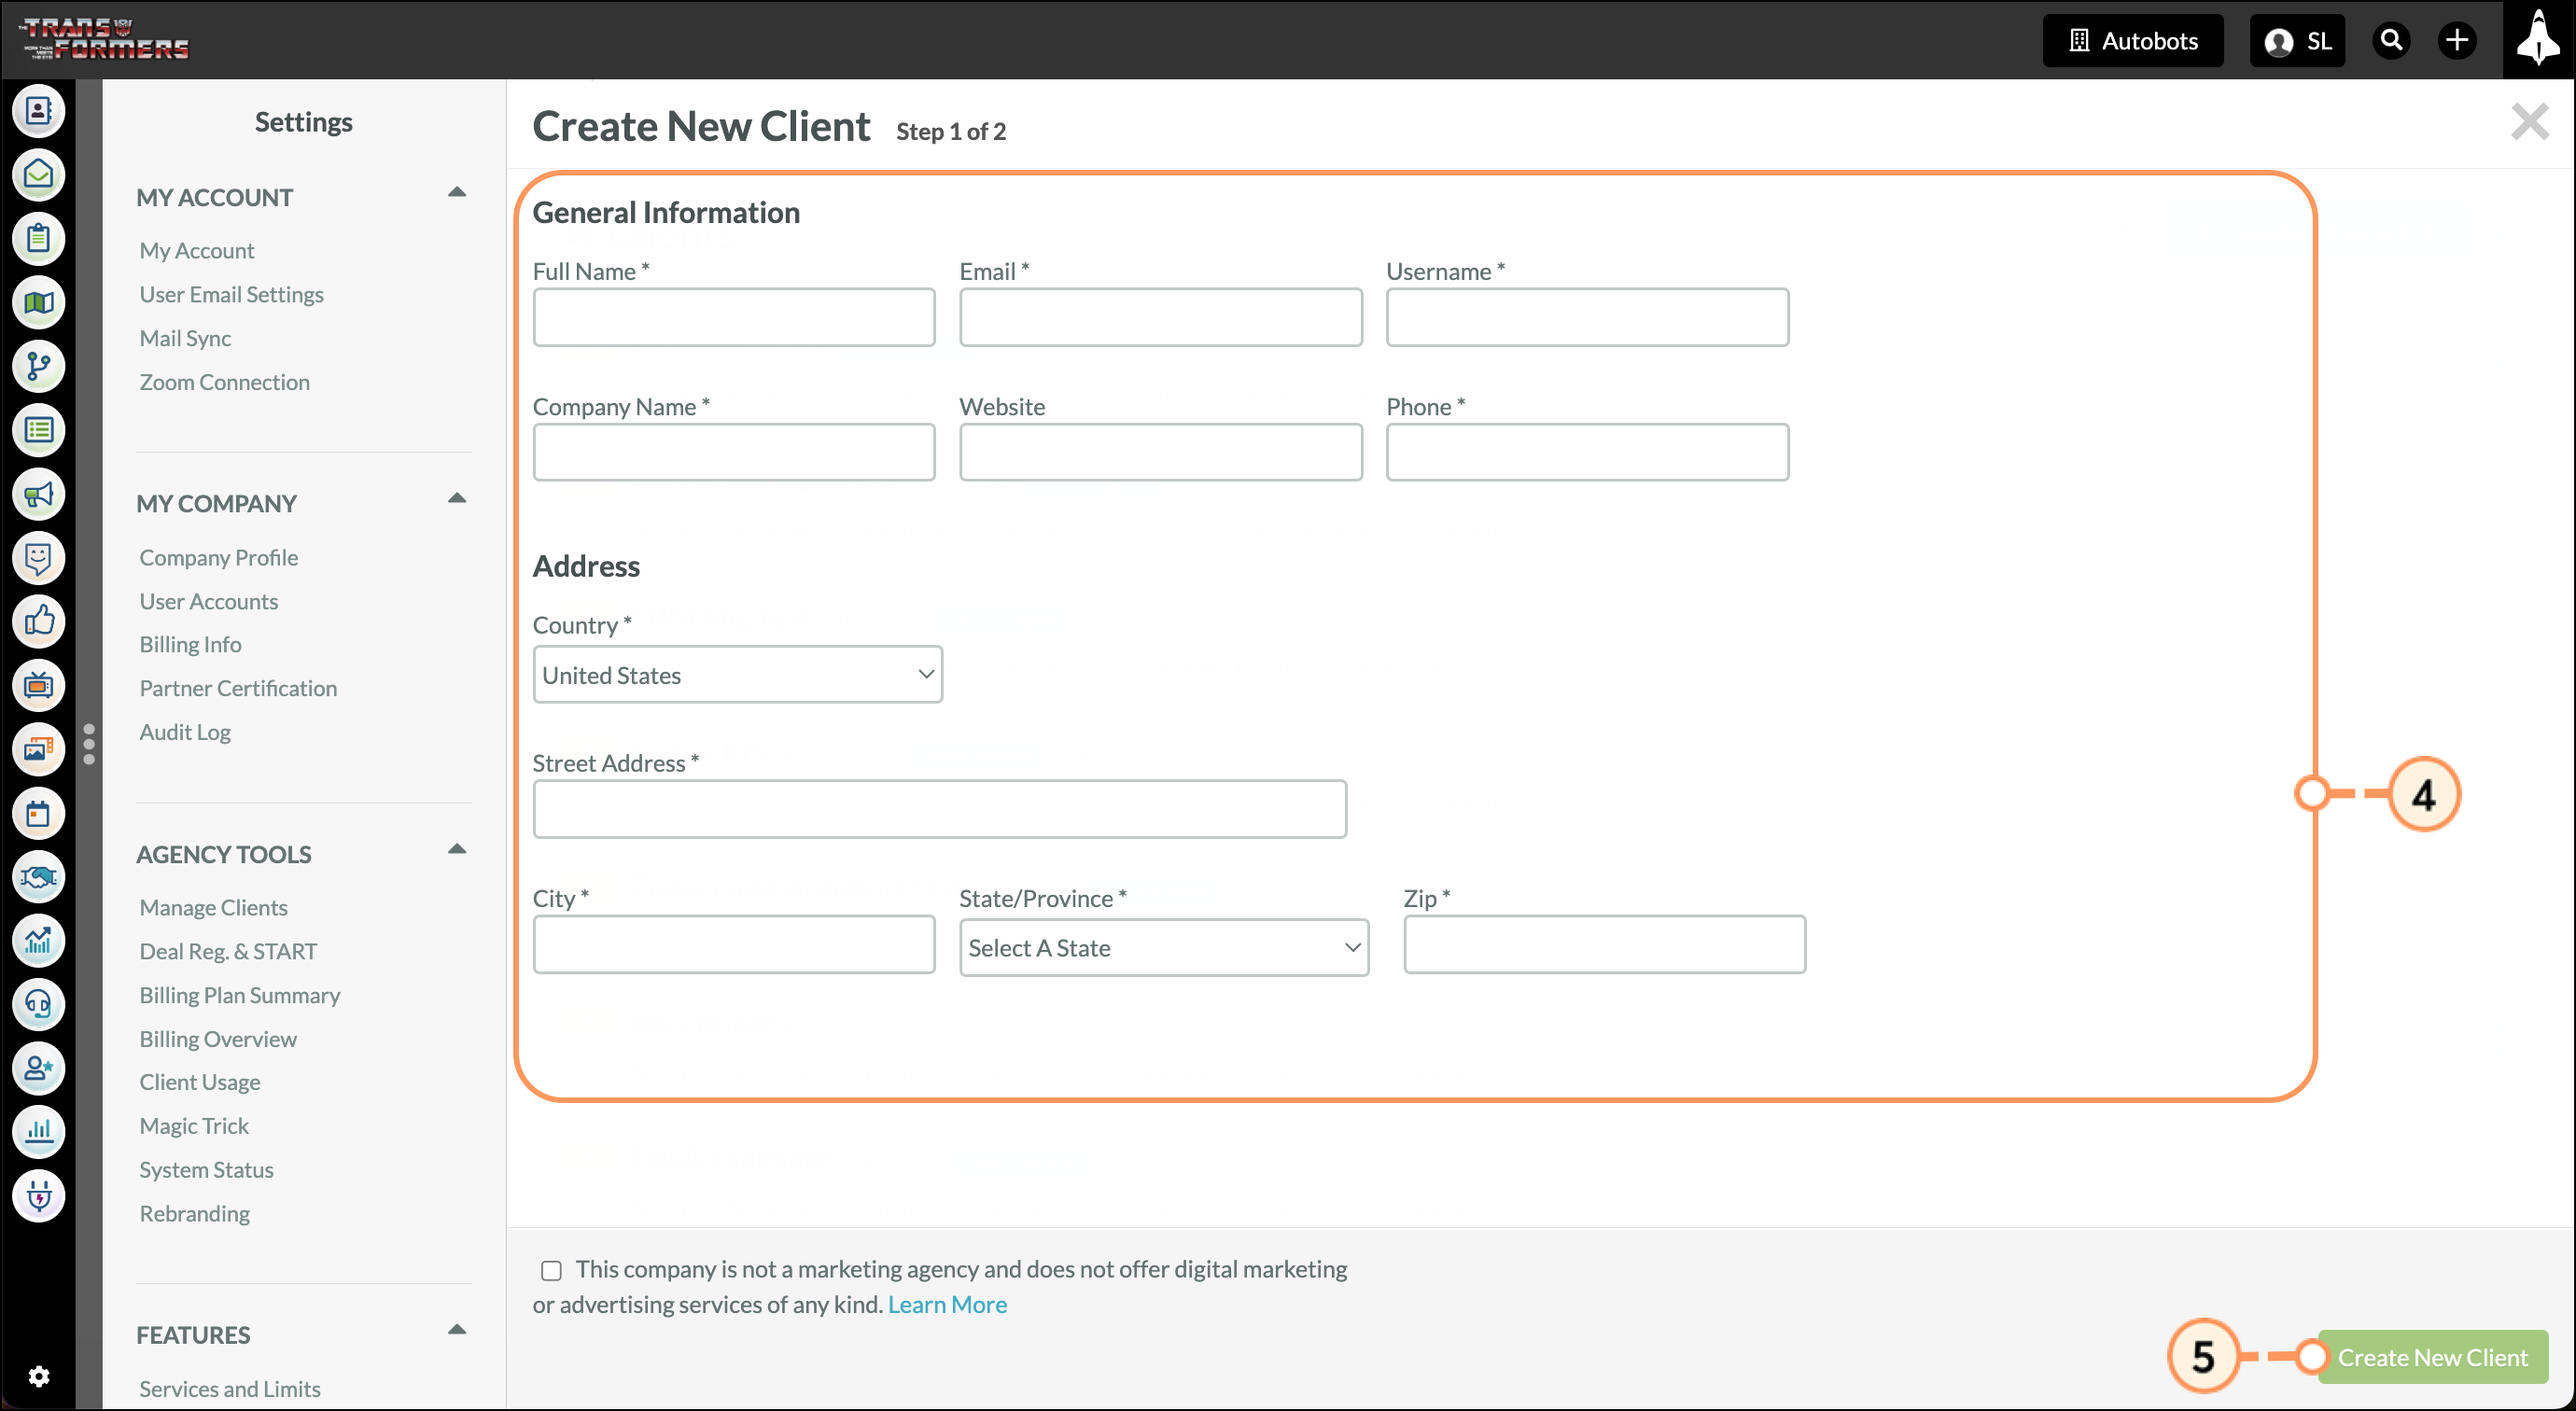
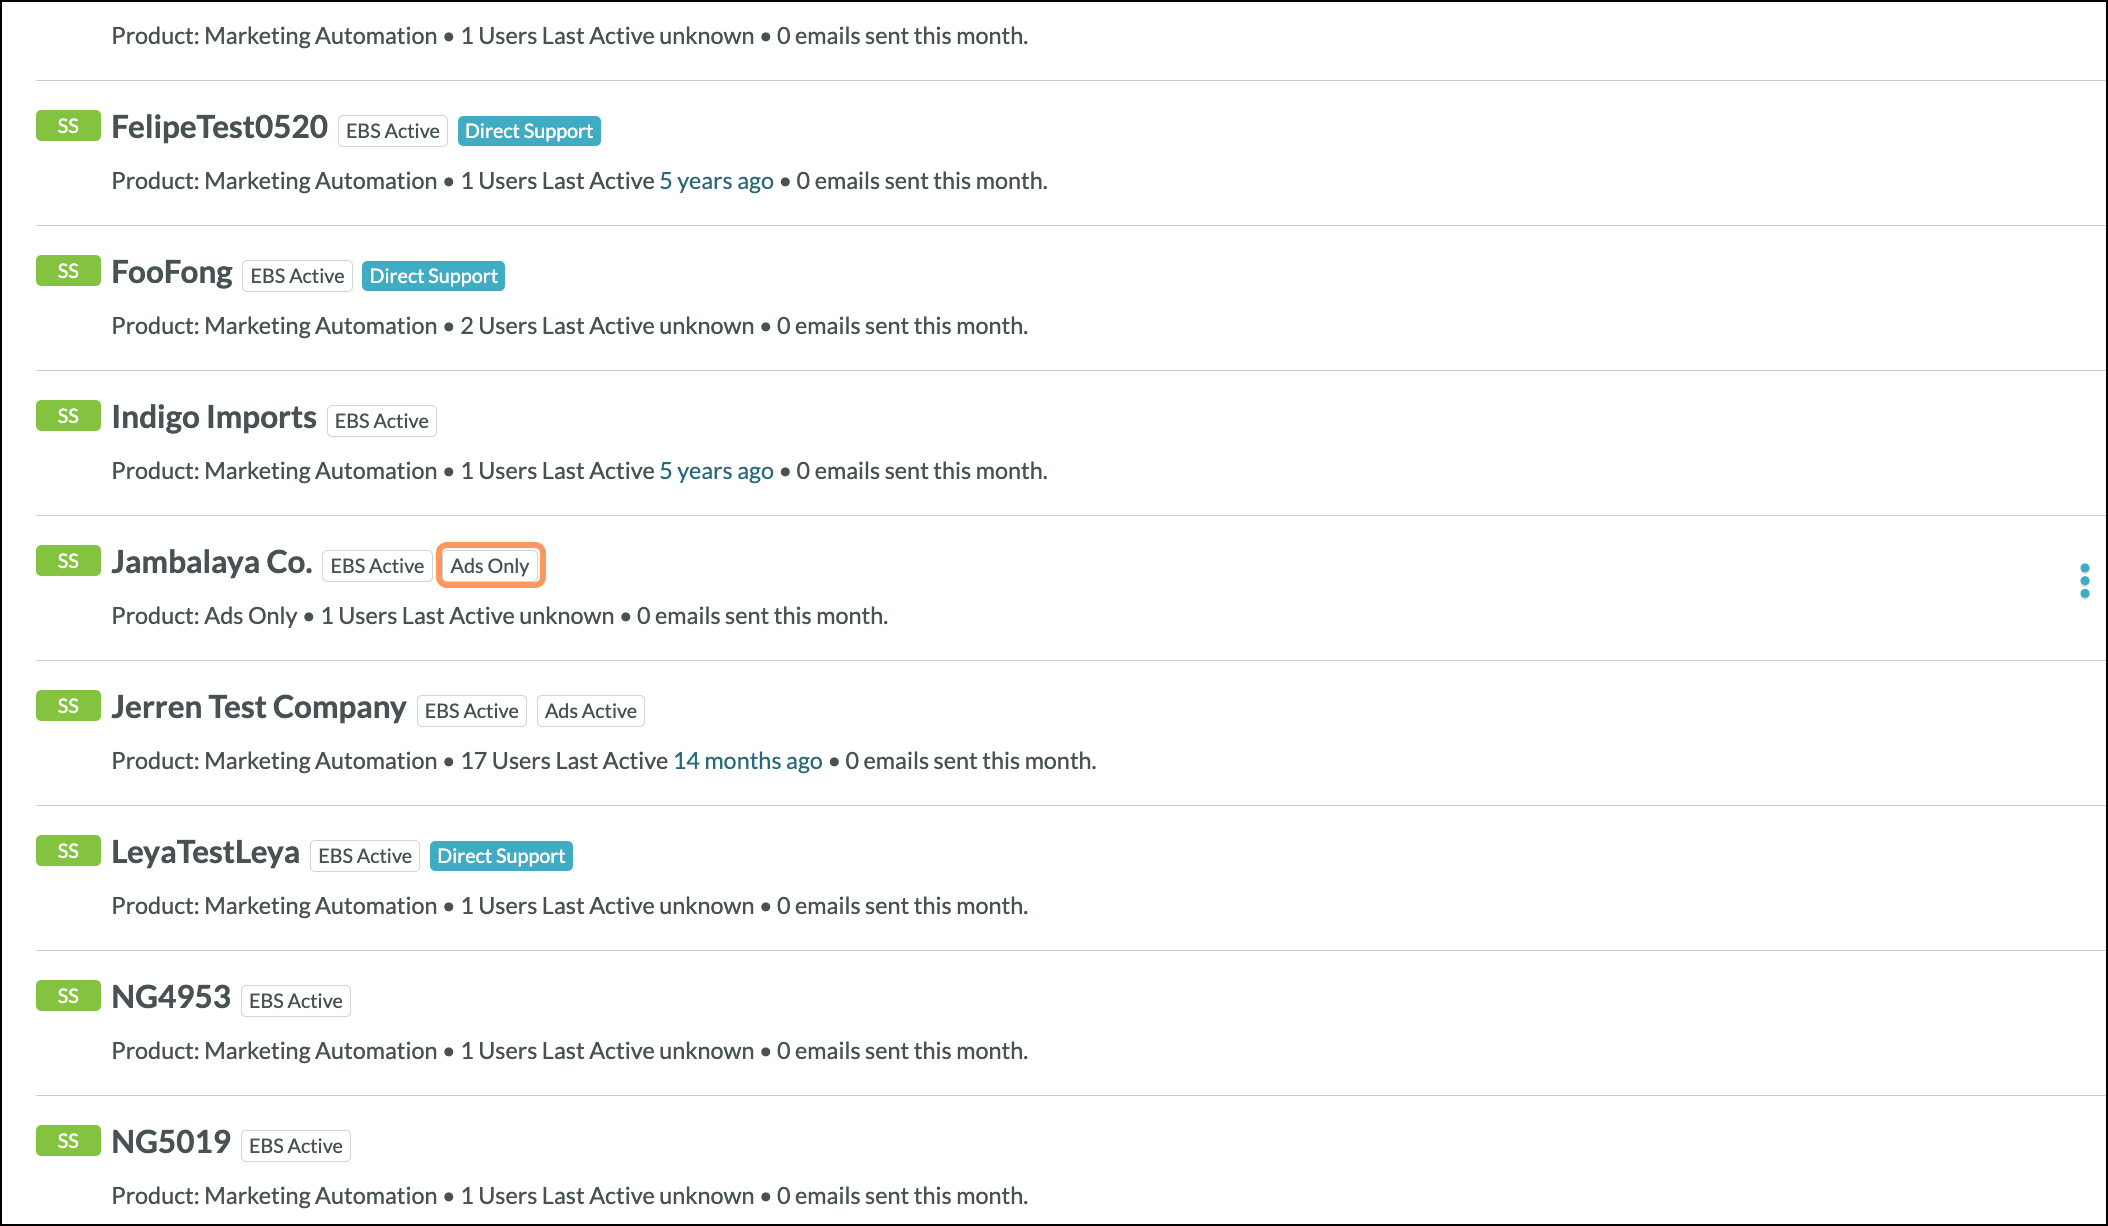
Once created, Lead Gen & CRM Ads Only clients are set with the Ads Only label.
Important: This information will be automatically added under the Company Profile and is required by the CAN-SPAM Act to send emails.
To set email limits for clients, do the following:
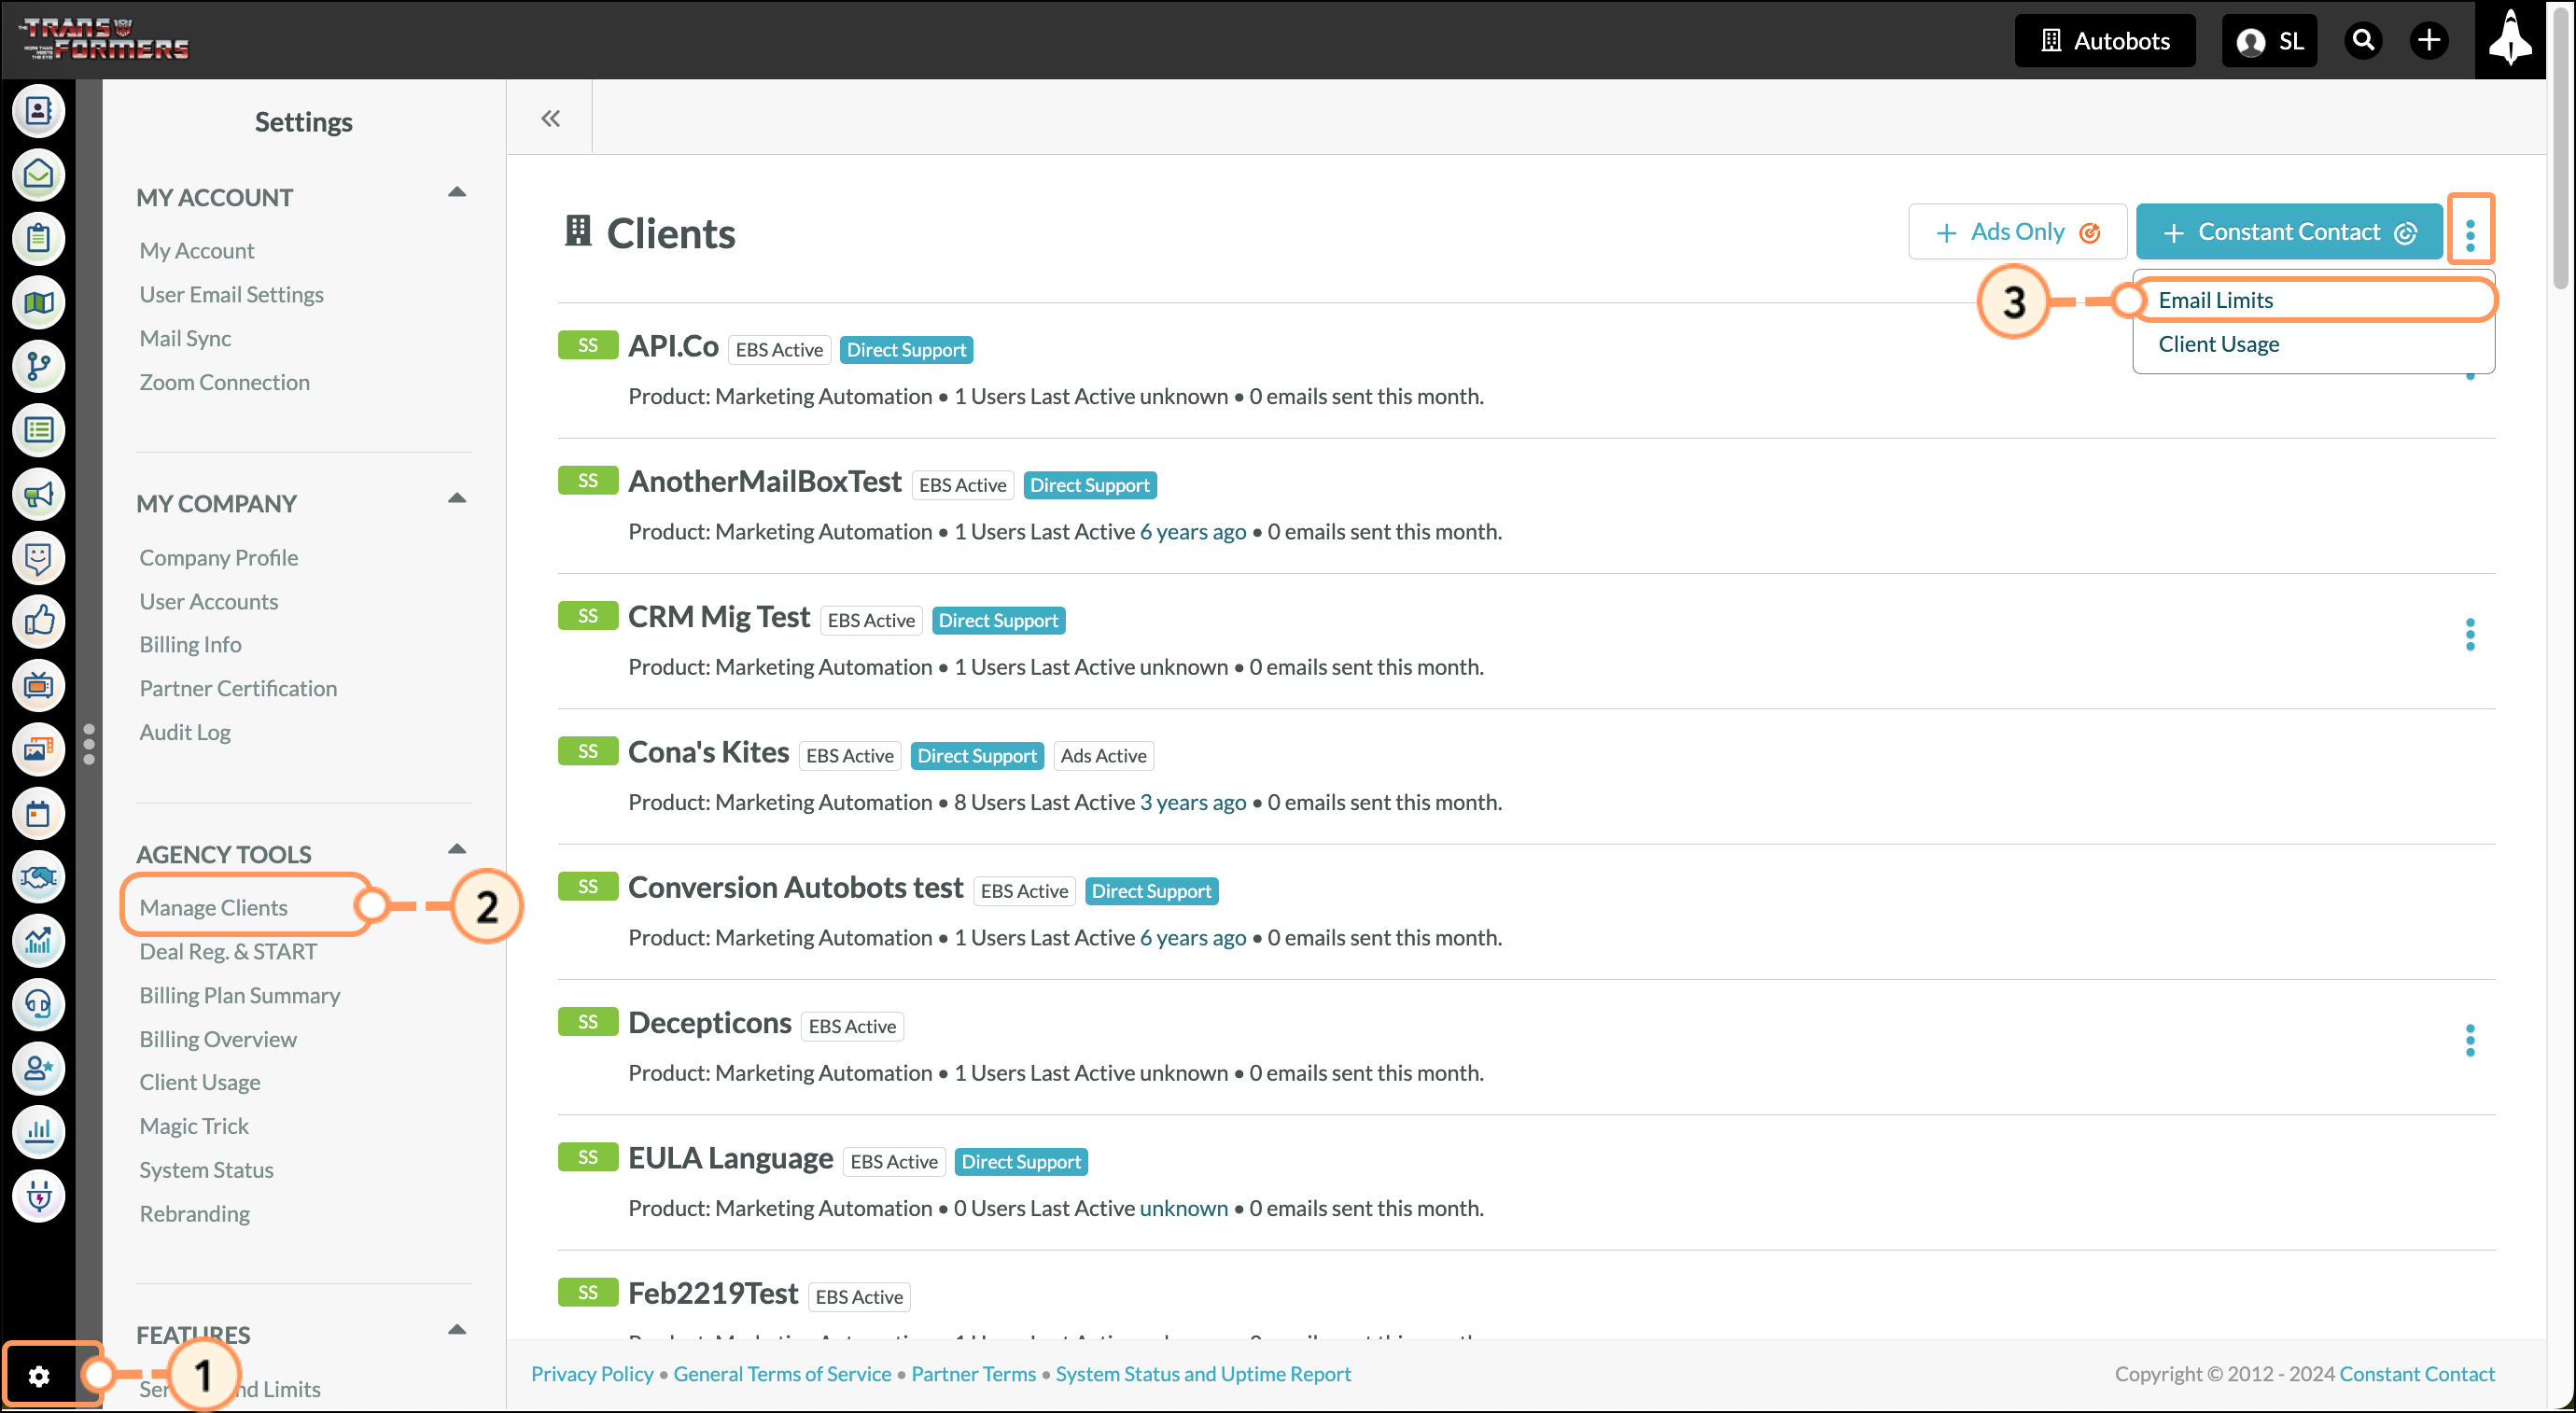
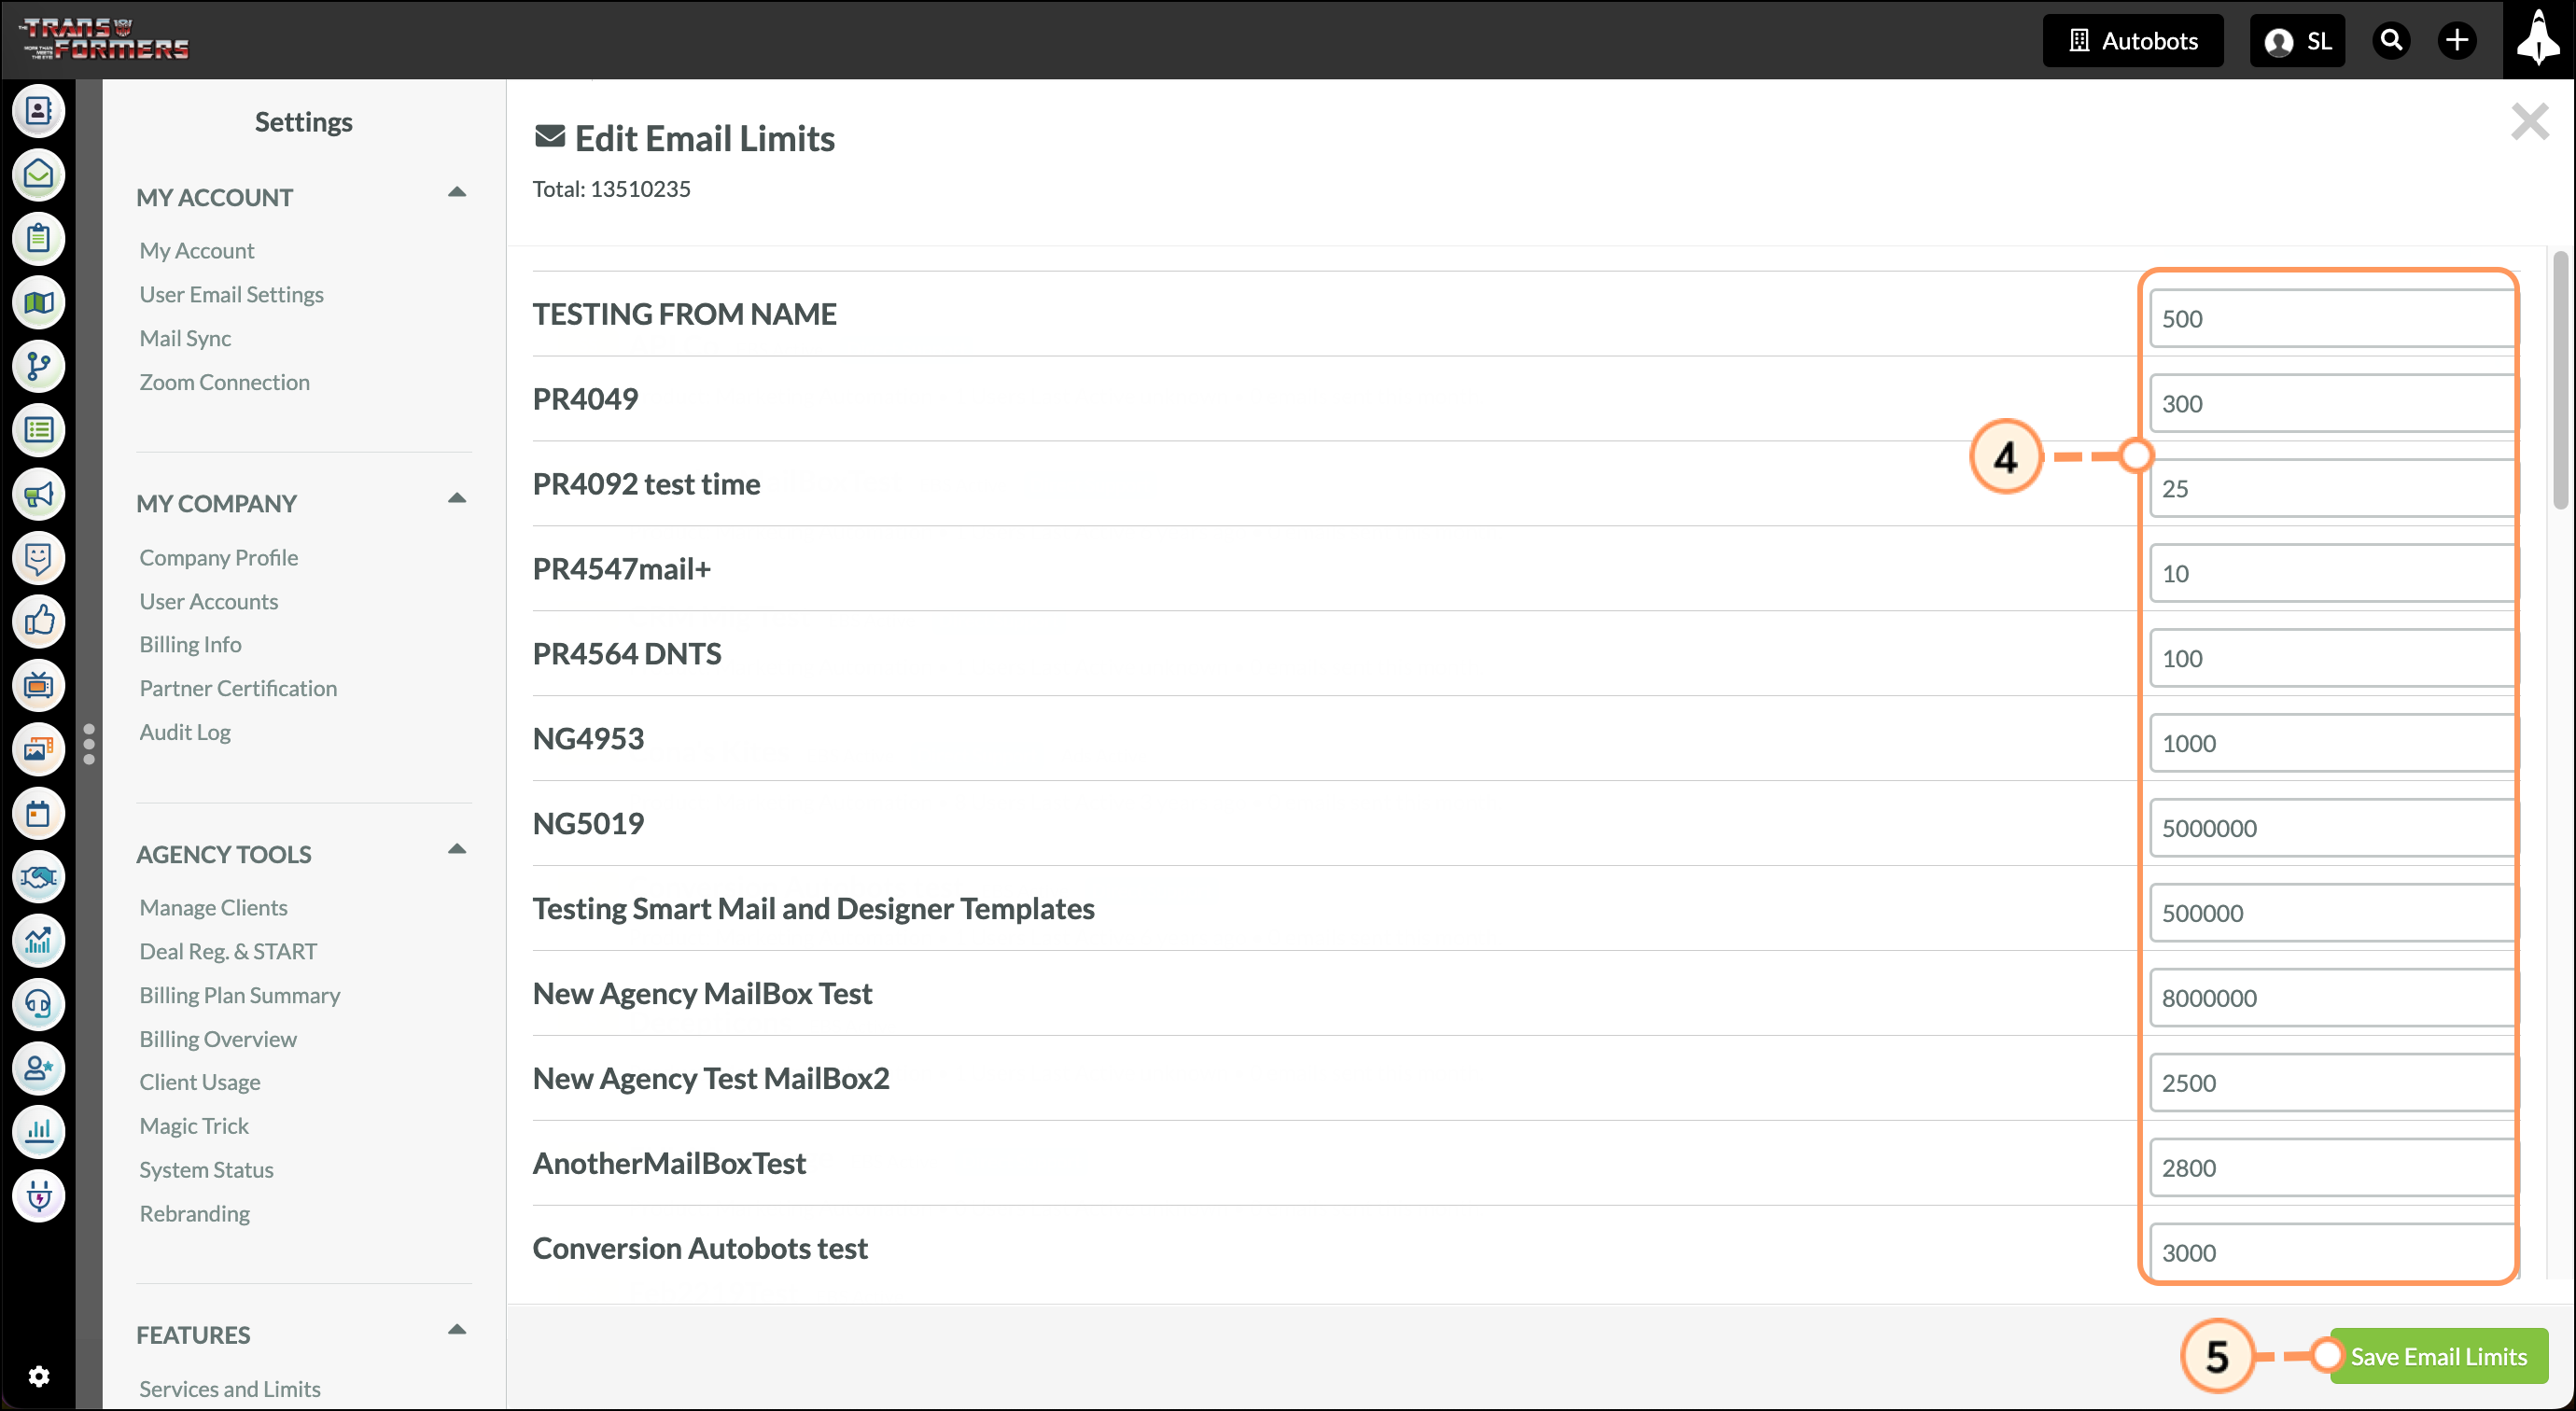
Note: This number will prevent clients from sending more emails that you allow.
To edit client options, do the following:
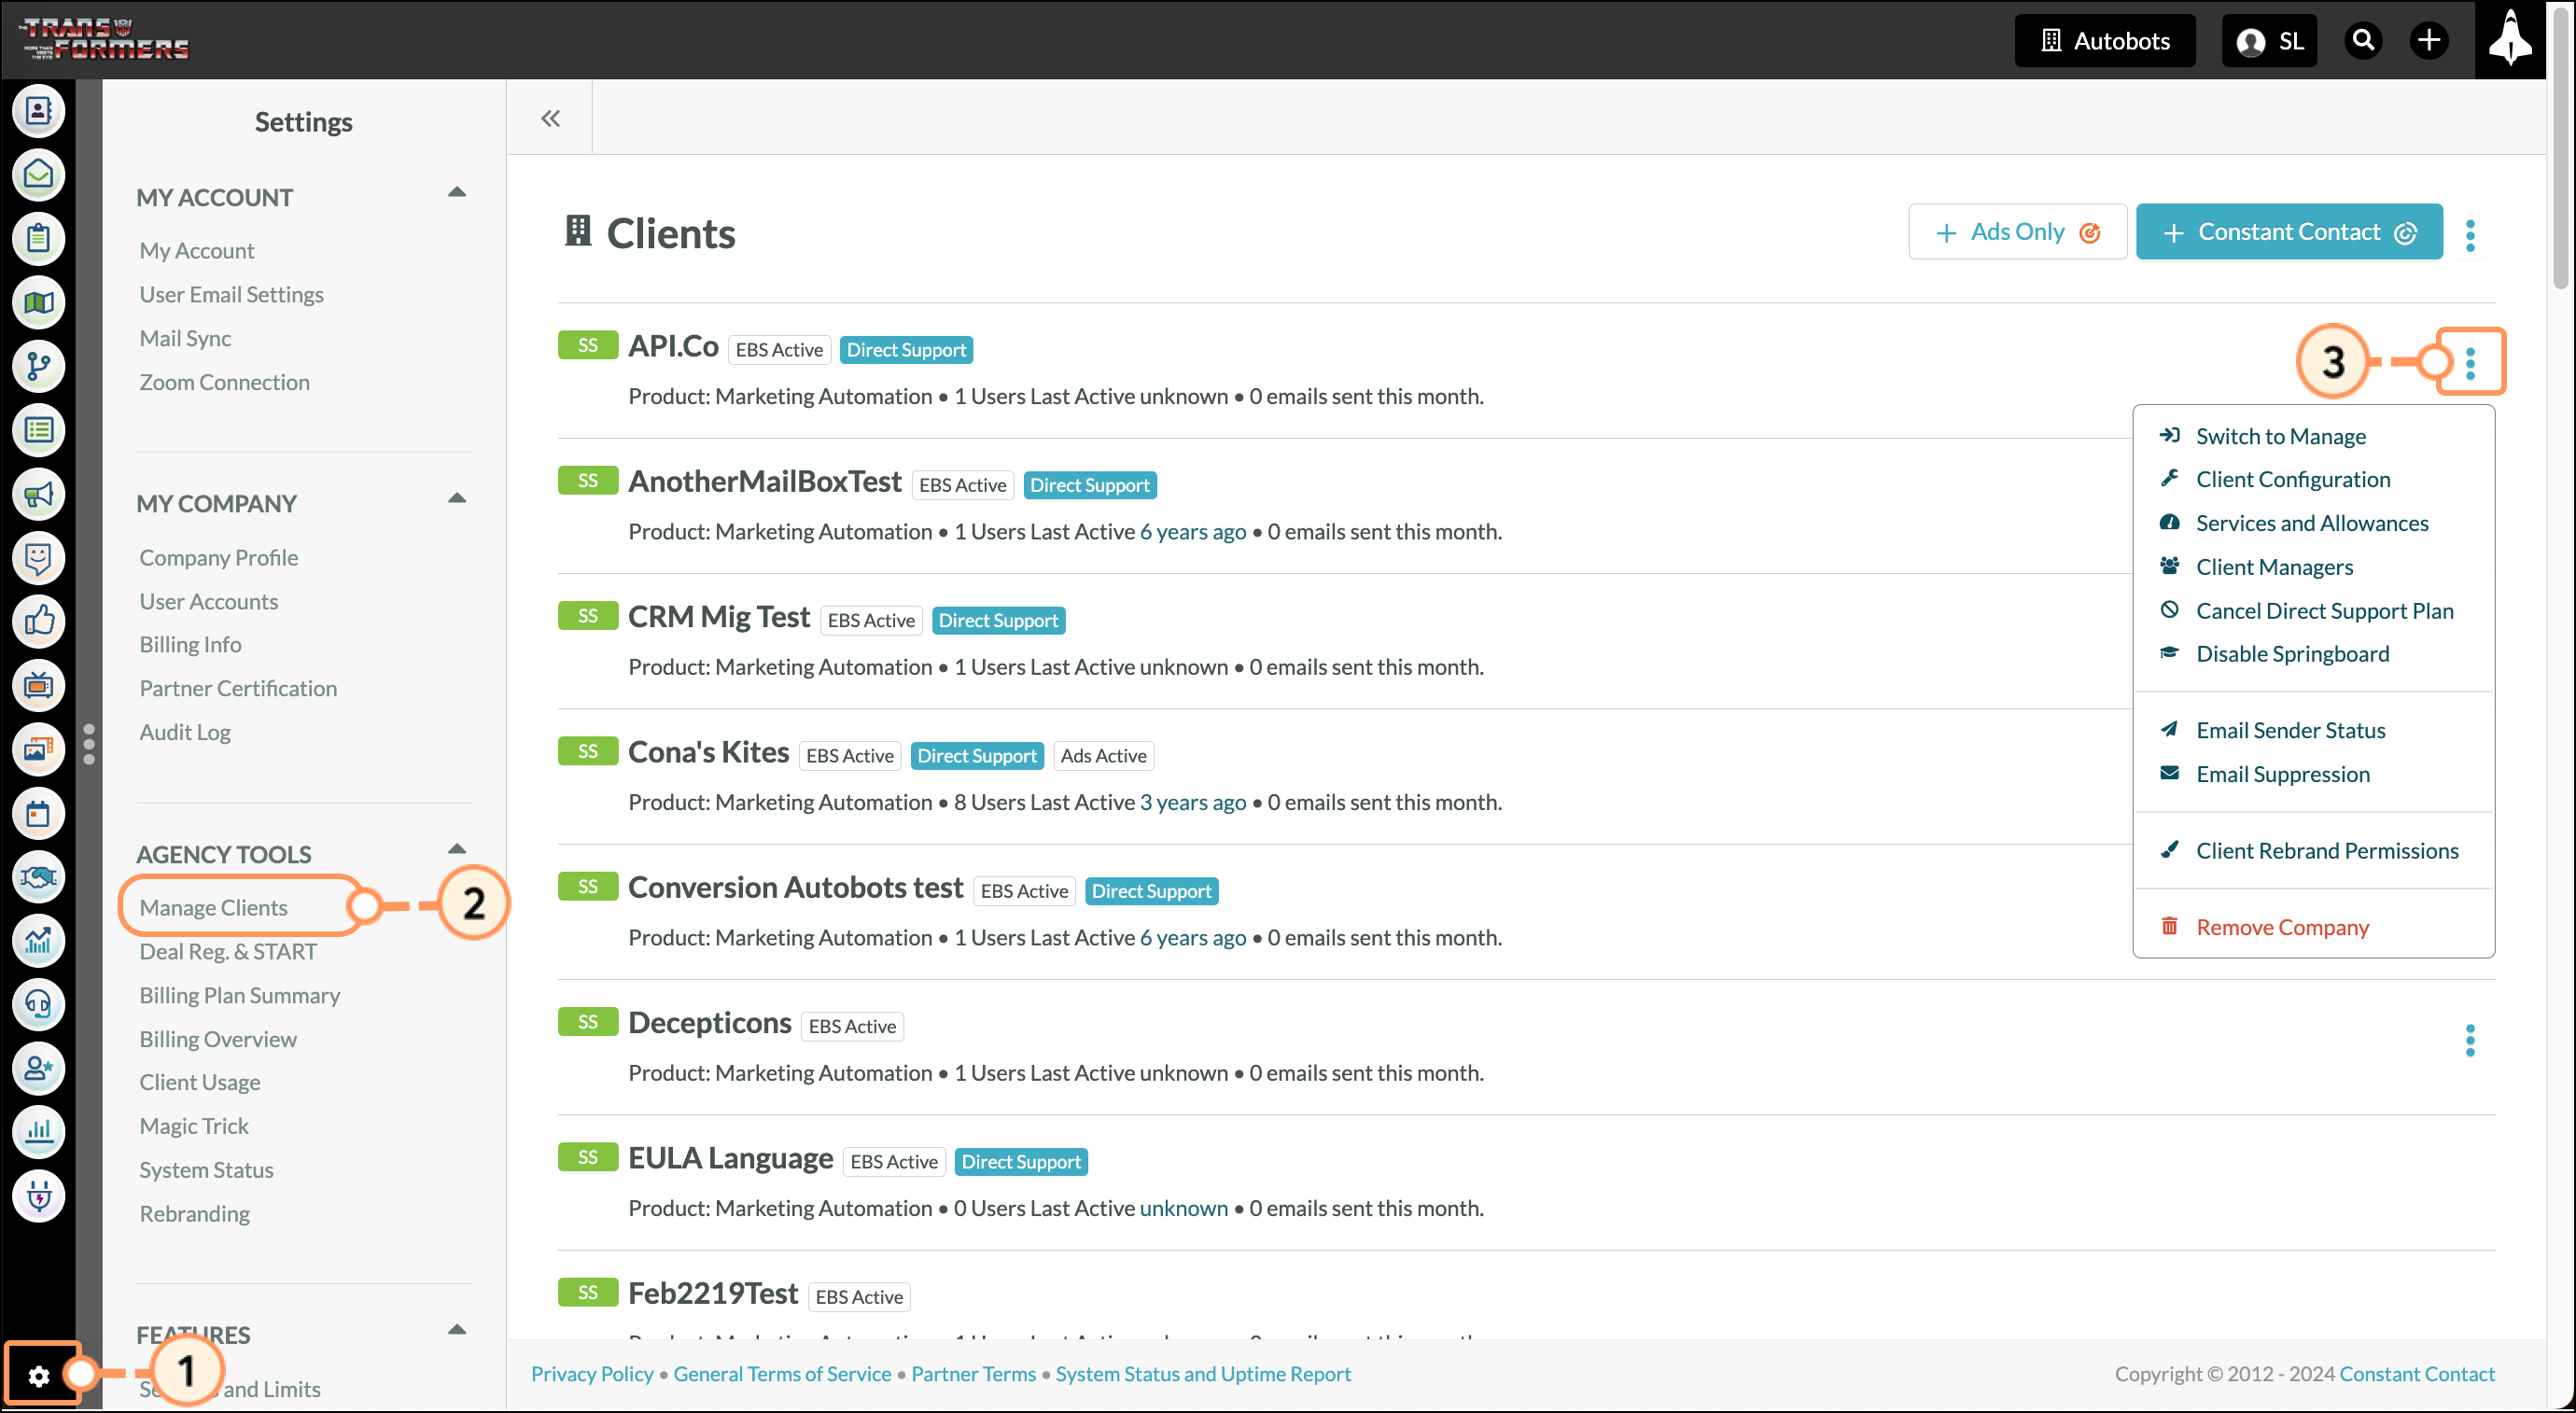
| Option | Description | |||
|
Switch to Manage |
Logs you into the selected client to manage their account. | |||
|
Client Configuration |
Designates the license price and spending limit for each client. | |||
|
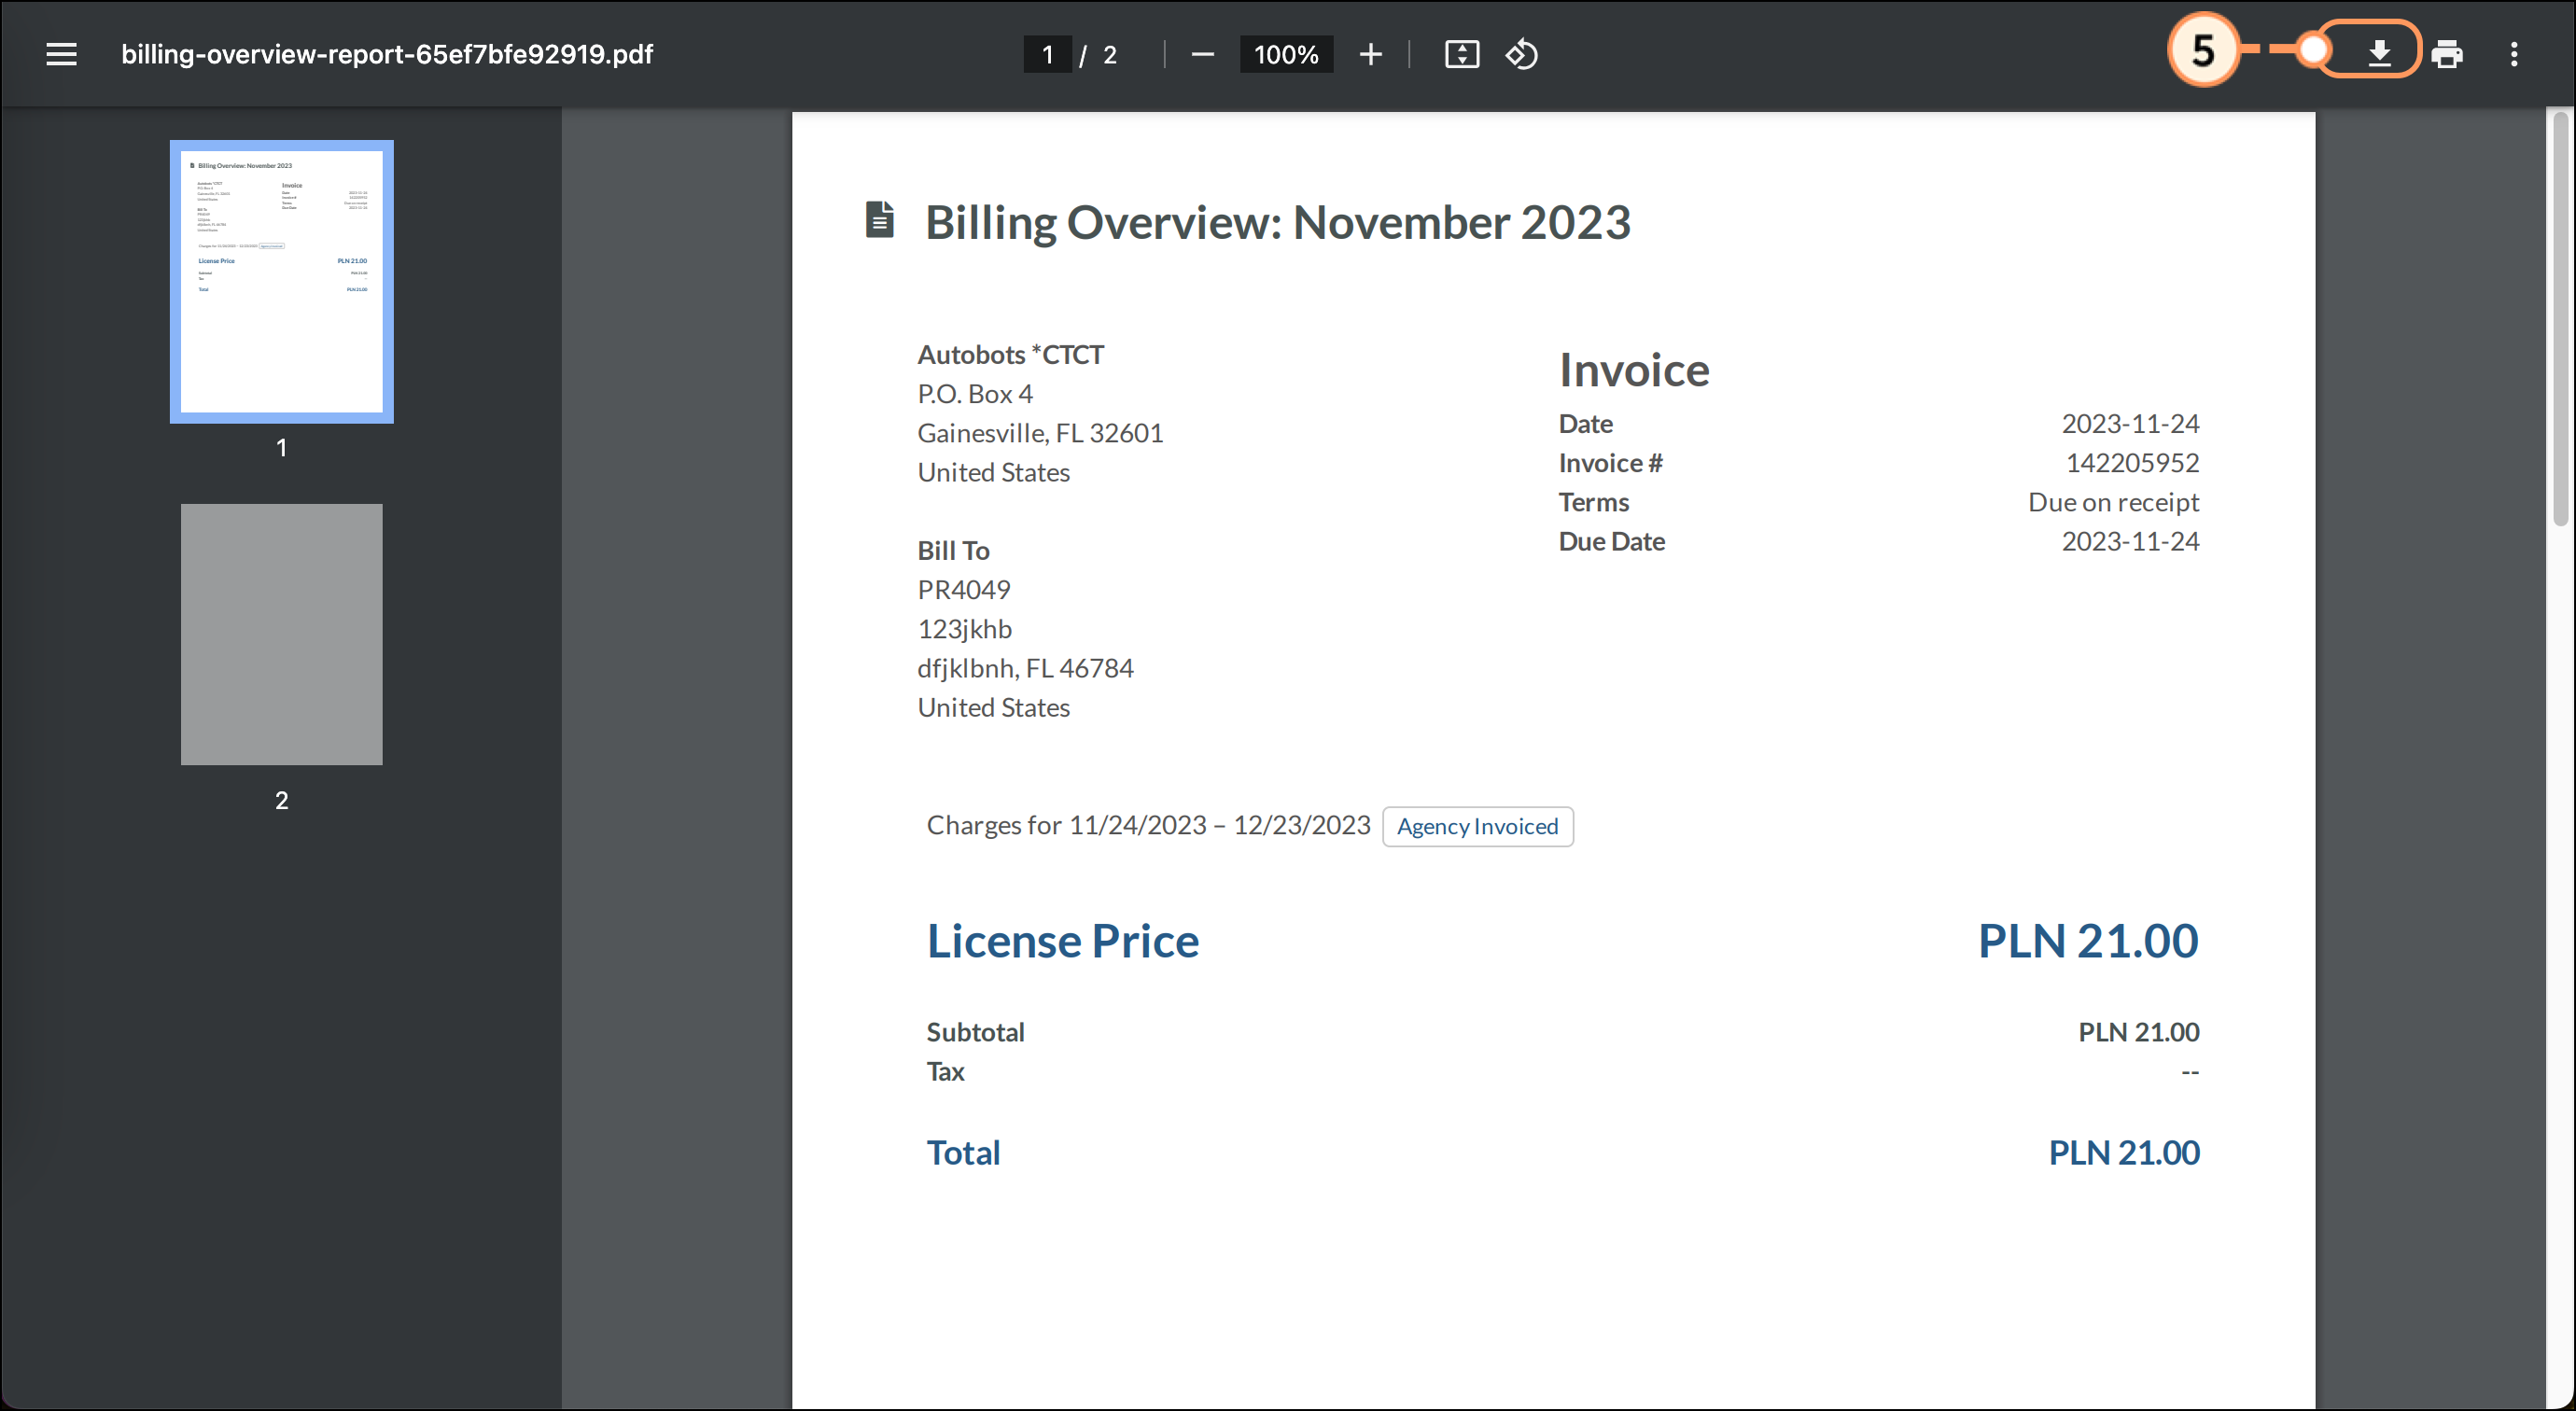
Services Overview |
A breakdown of the billing overview for the client. | |||
|
Client Managers |
Adds or removes users who can access and manage the client. | |||
|
Email Sender |
Displays the client's current sender status and provides a breakdown of different sender statistics. | |||
|
Email Suppression |
Determines whether engagement-based suppression is enabled for the client. Also displays the client's current sender status. | |||
| Edit Google Ads Settings | Hides or enables Google Ads options for the client. Certain Lead Gen & CRM agency partners provide Google Ads as a separate service for their clients. In an effort to provide the most convenience and flexibility, Lead Gen & CRM provides you with the ability to hide this feature from your clients. | |||
| Client Rebrand Permissions | Prevents a client from uploading their own logos to rebrand Lead Gen & CRM. Restrict permissions here if you would like them to use your own logo instead. | |||
| Remove Company | Deletes client account and prohibits access by any users. |
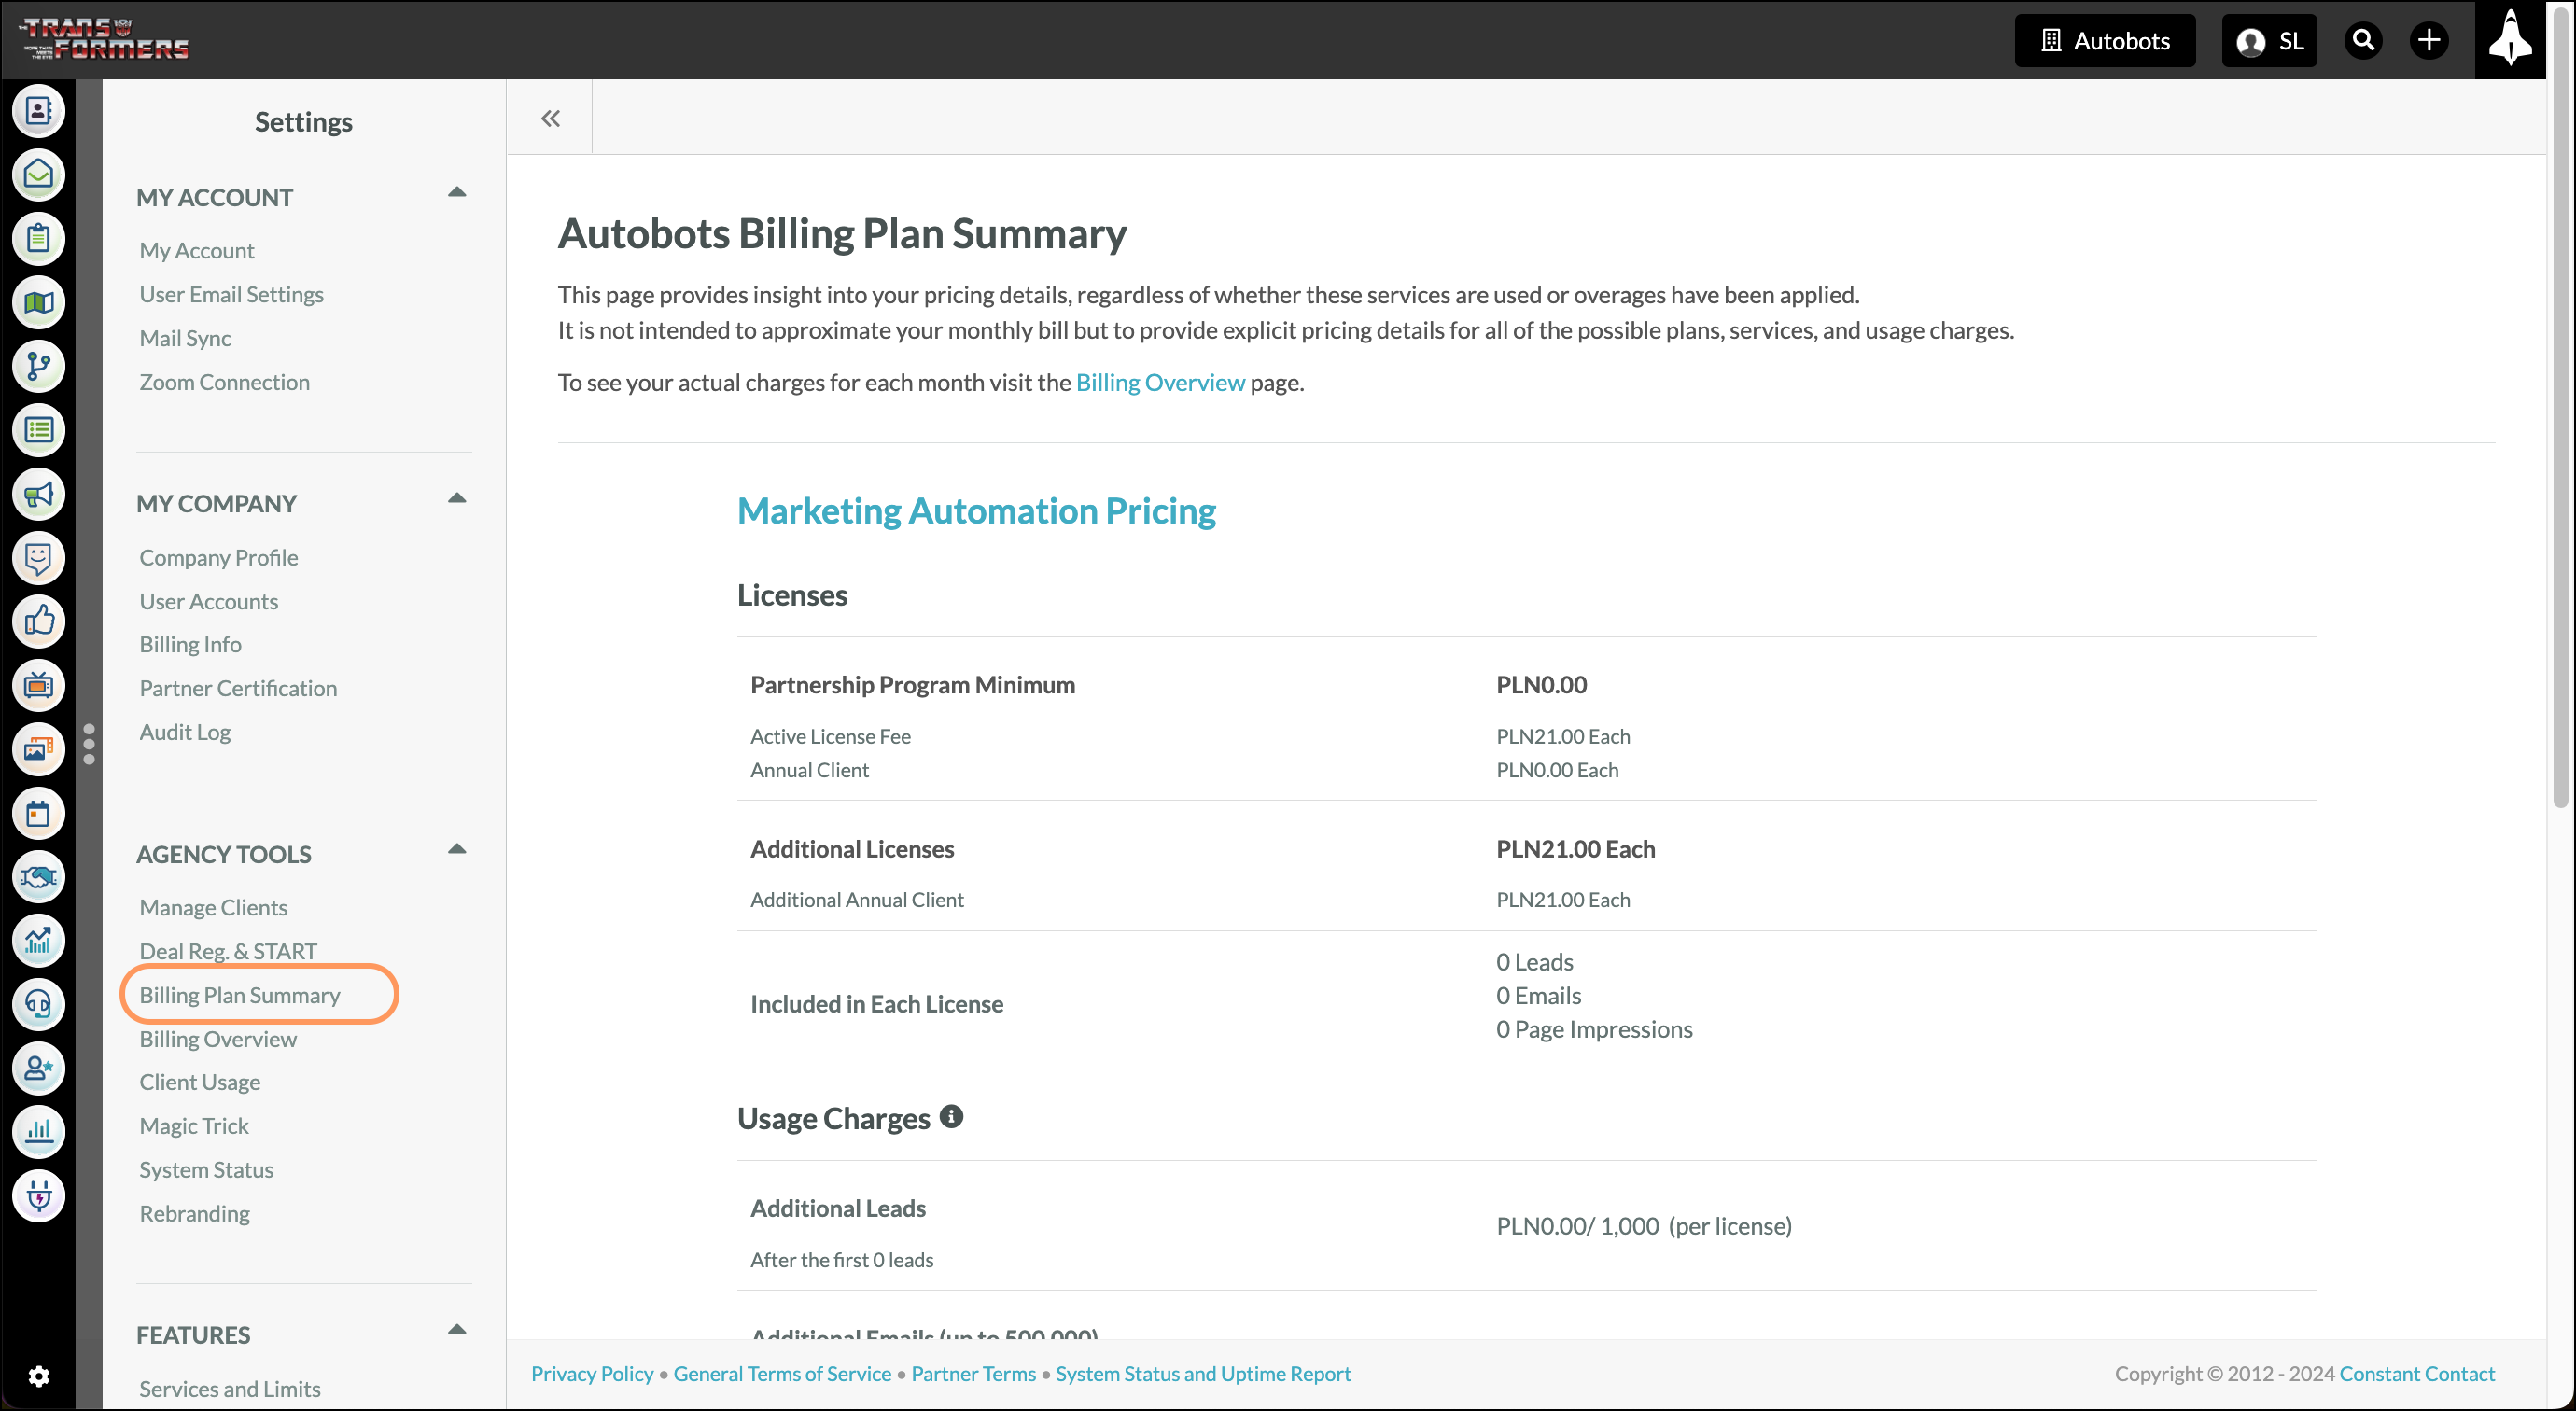
The Billing Plan Summary menu offers billing information in an at-a-glance fashion. Information includes charges for licenses, usage charges, and charges for other services.
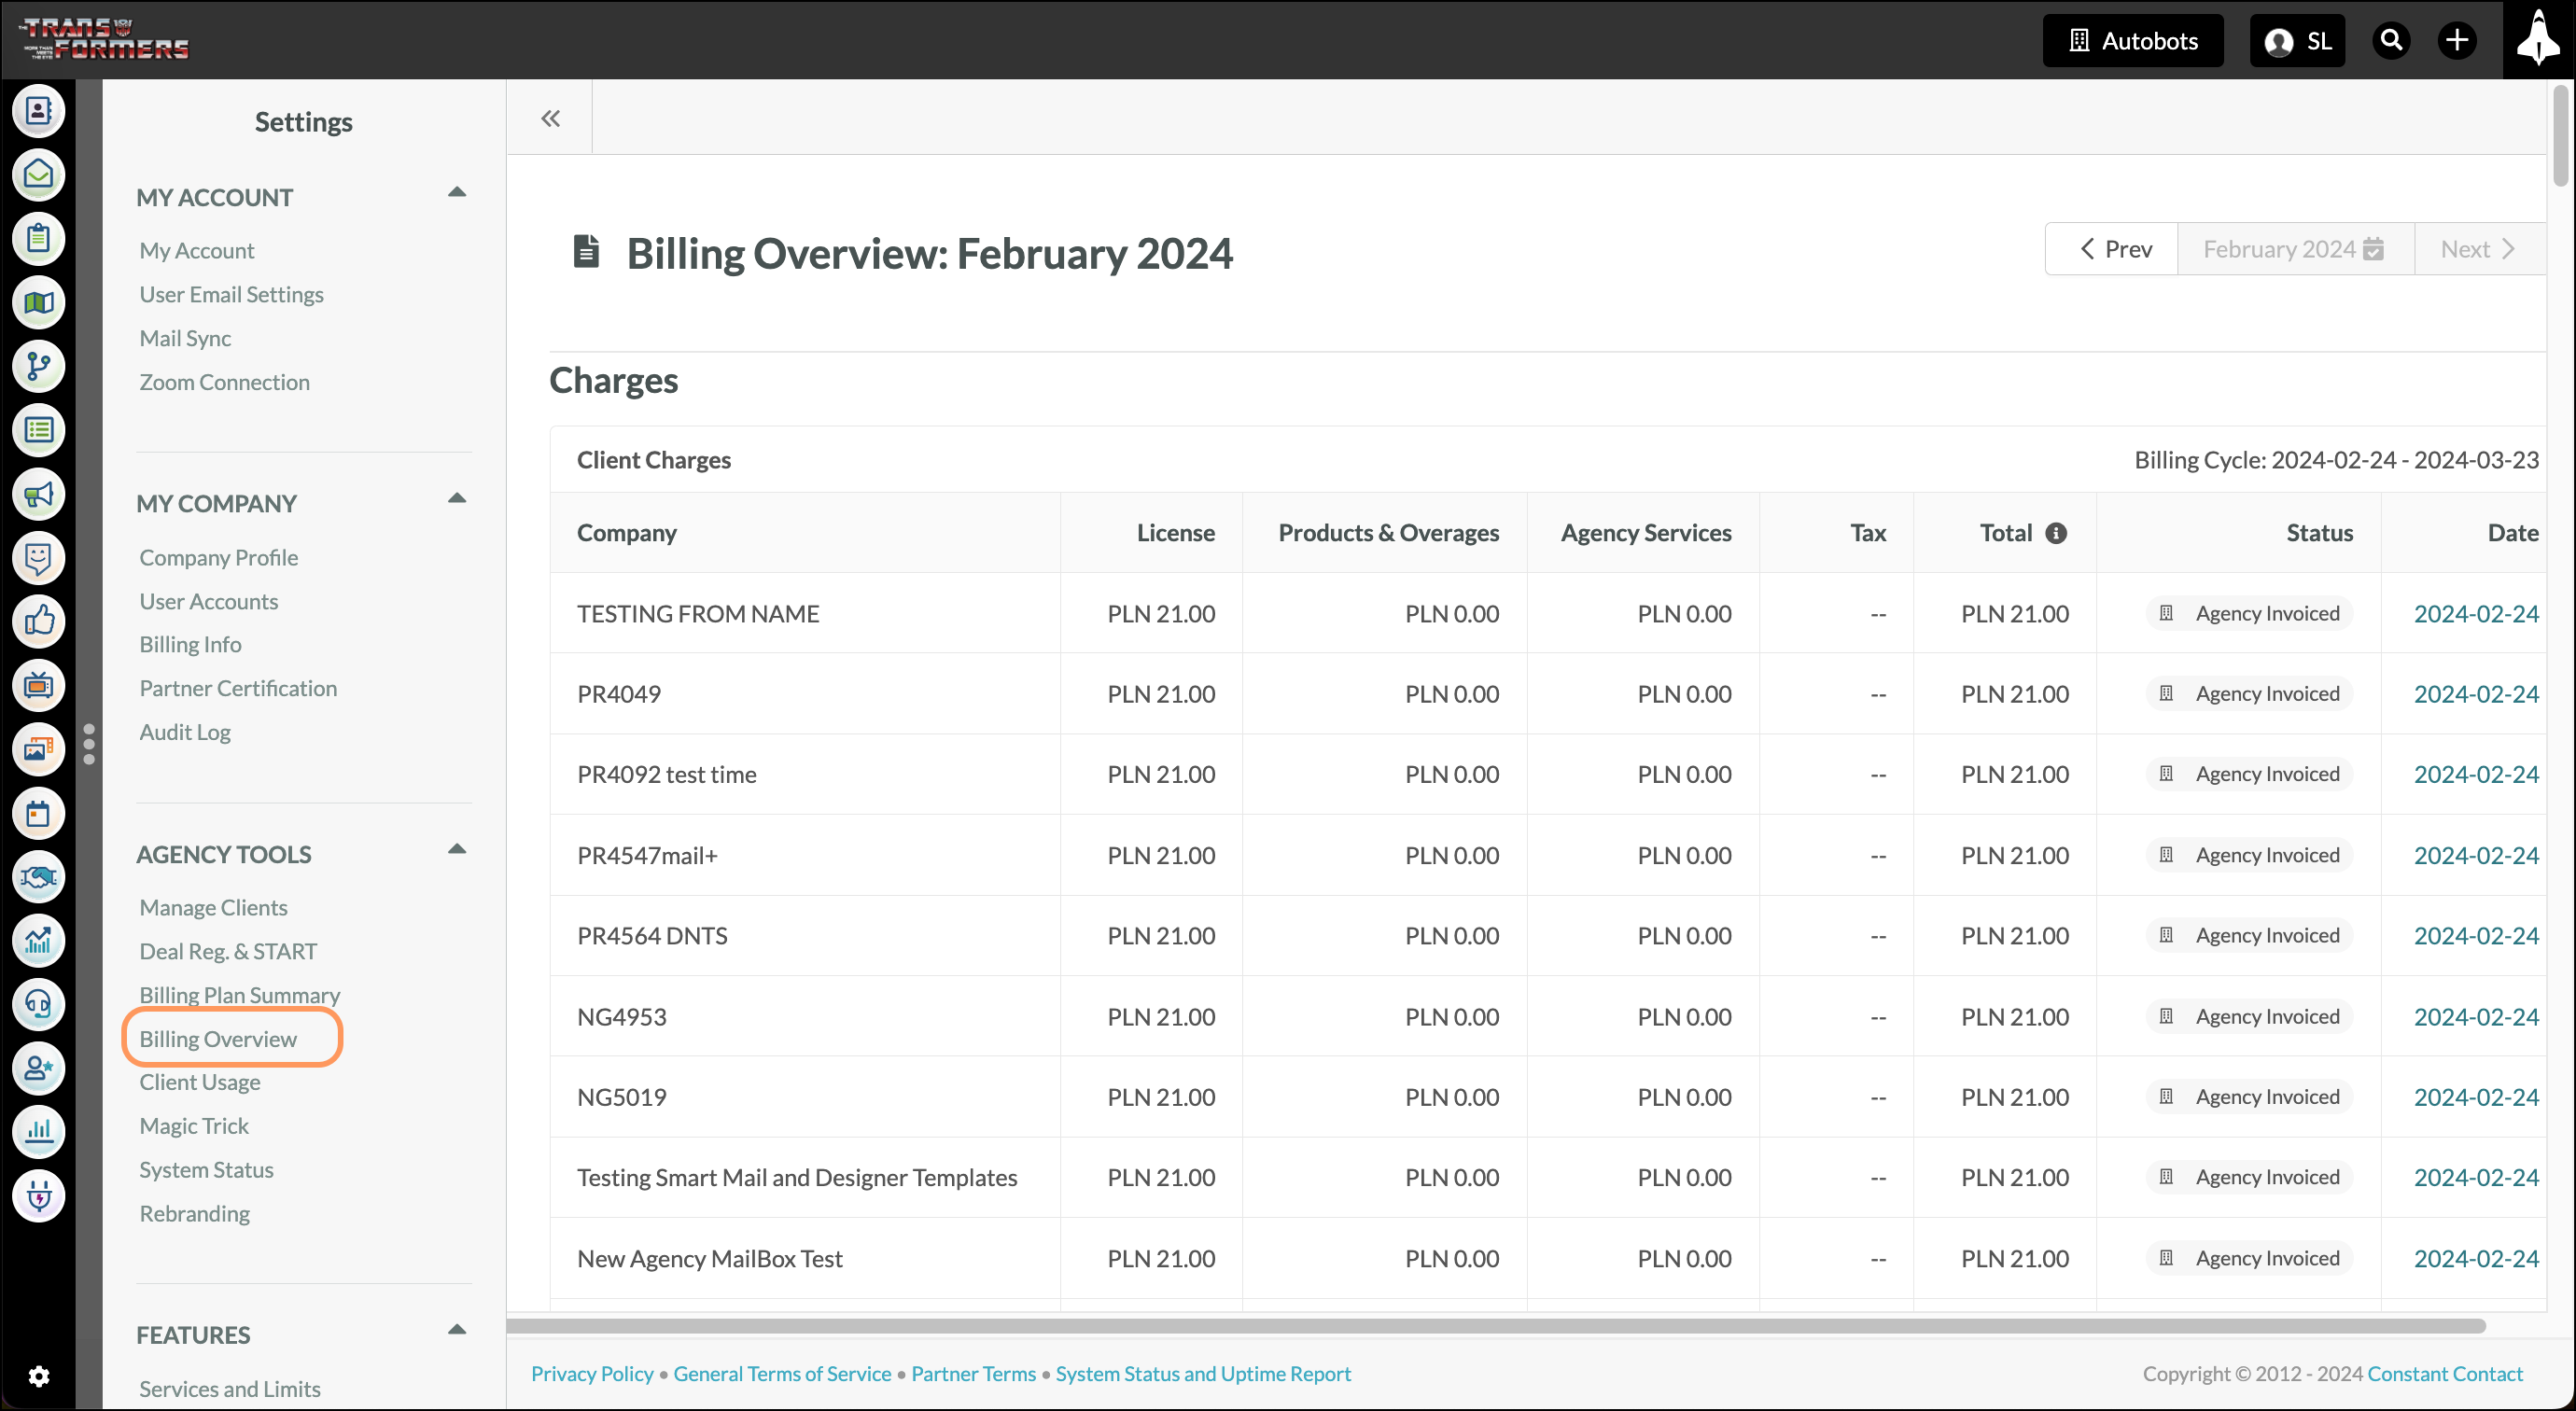
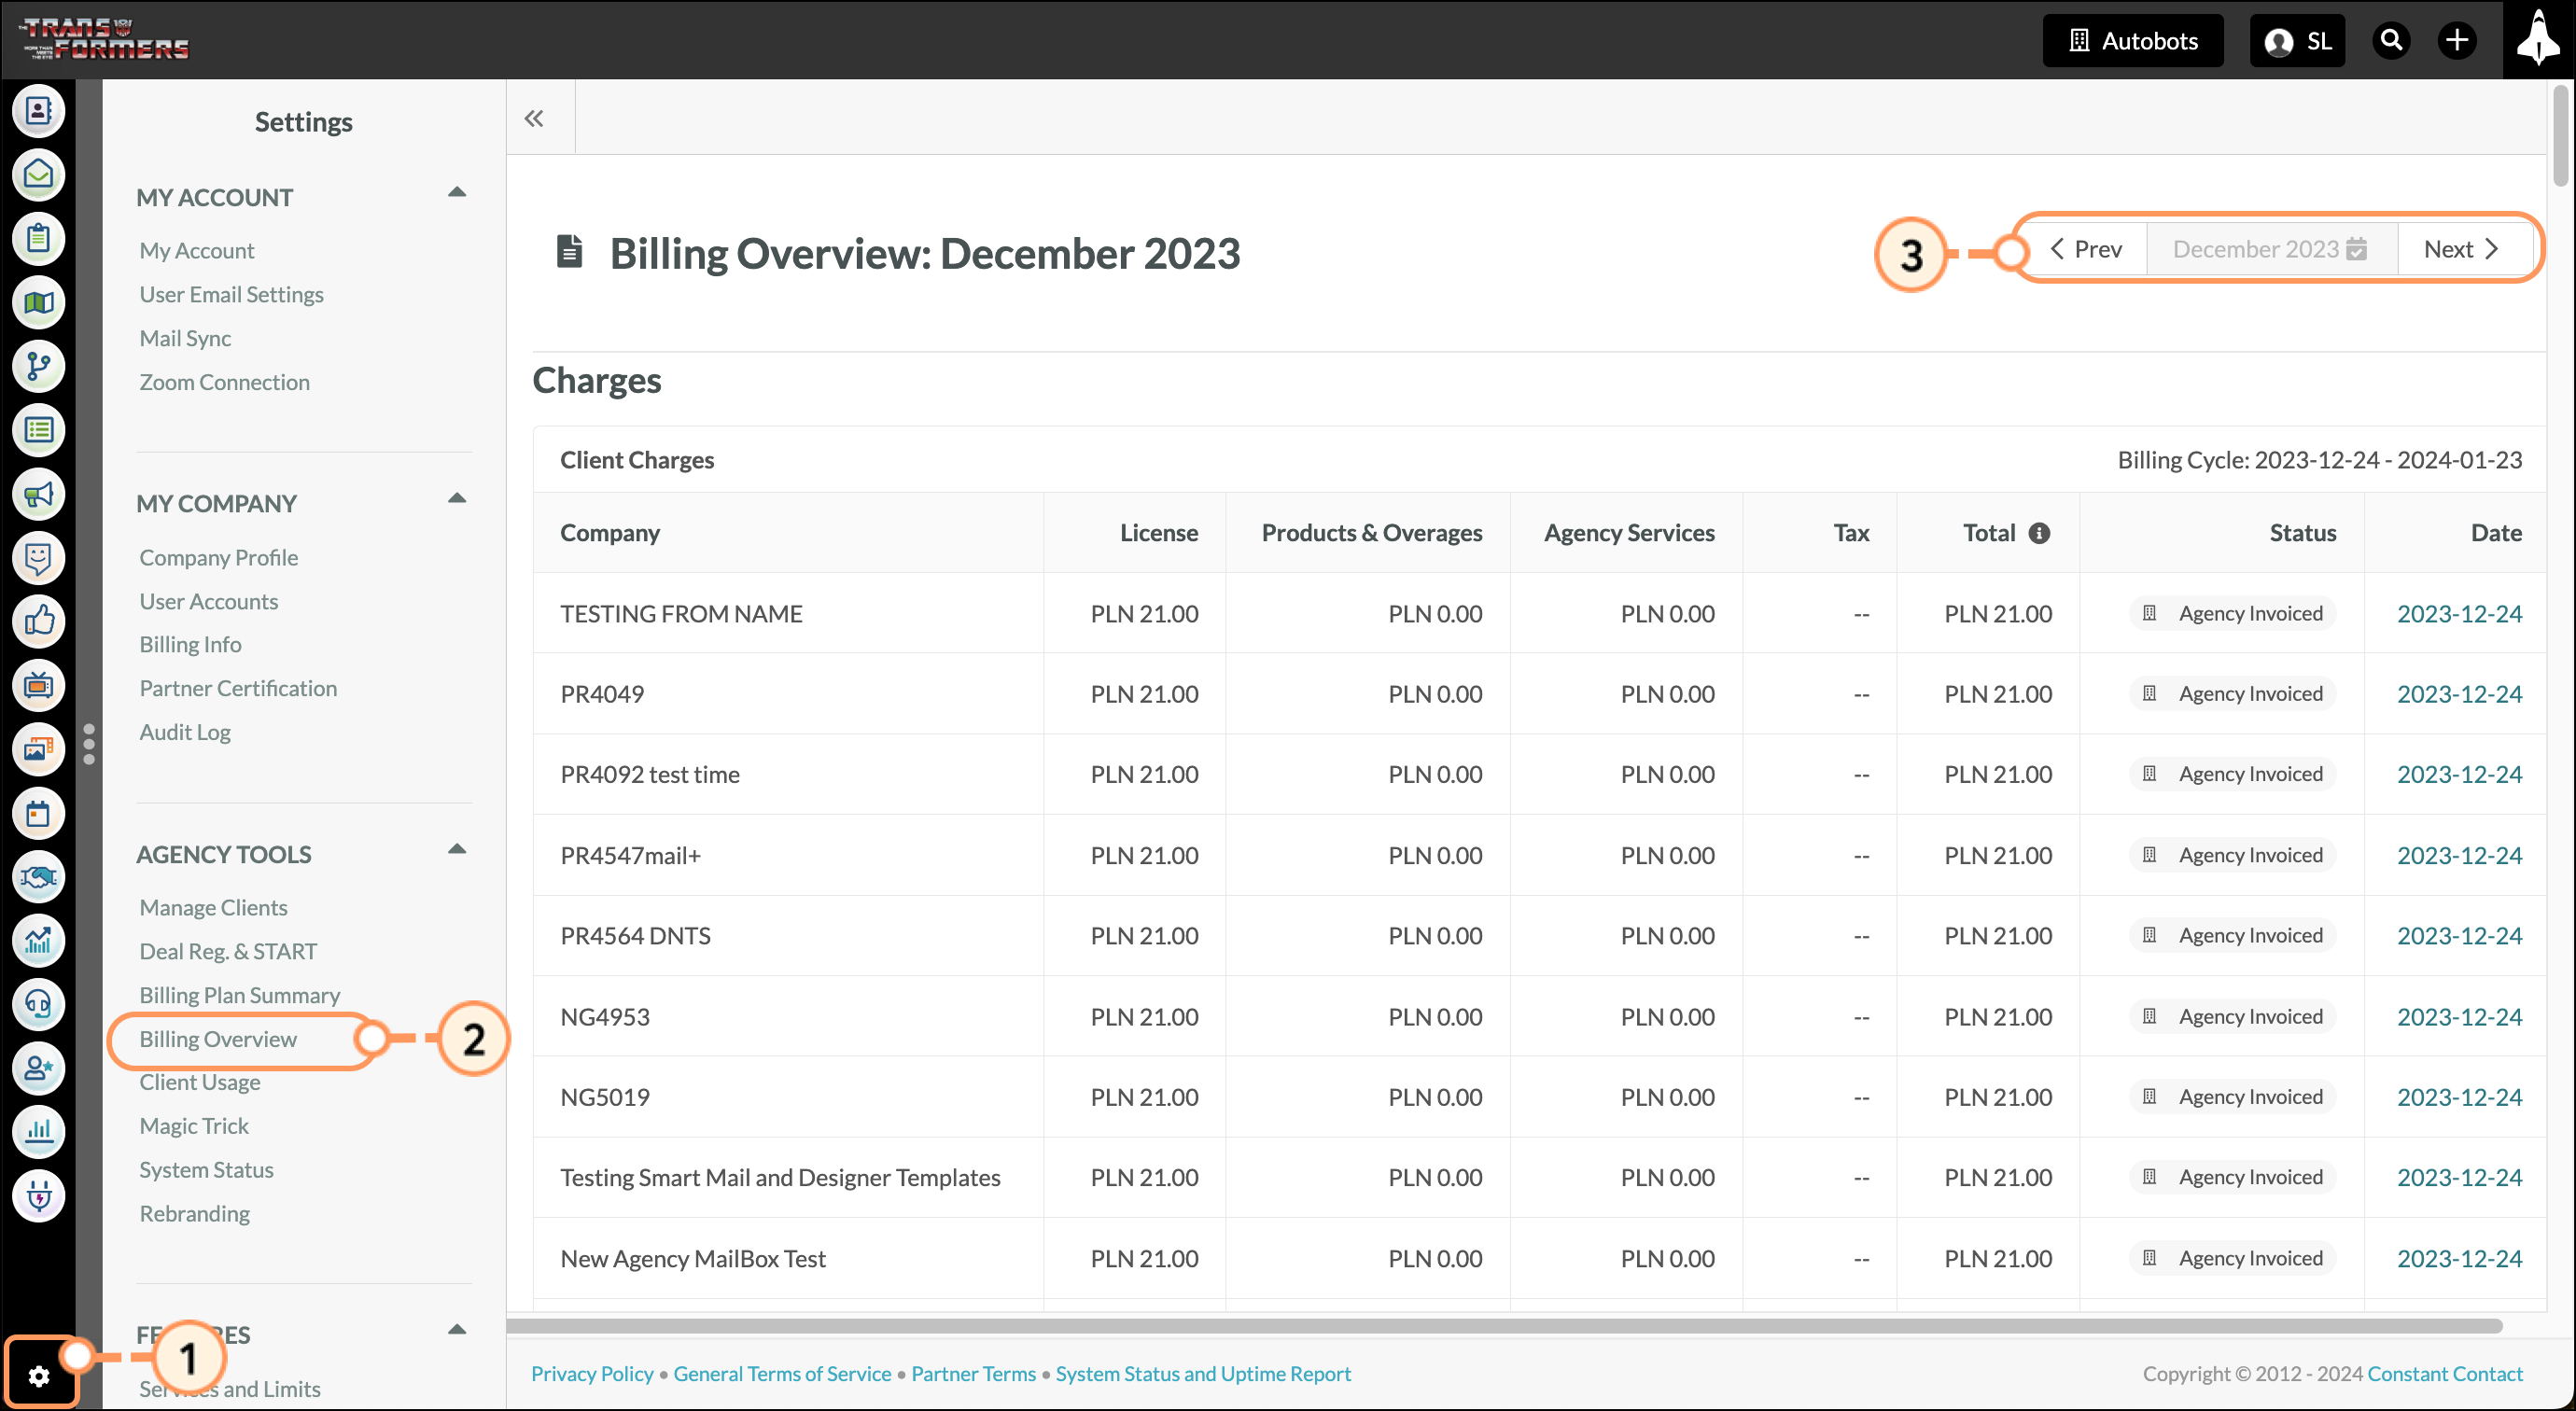
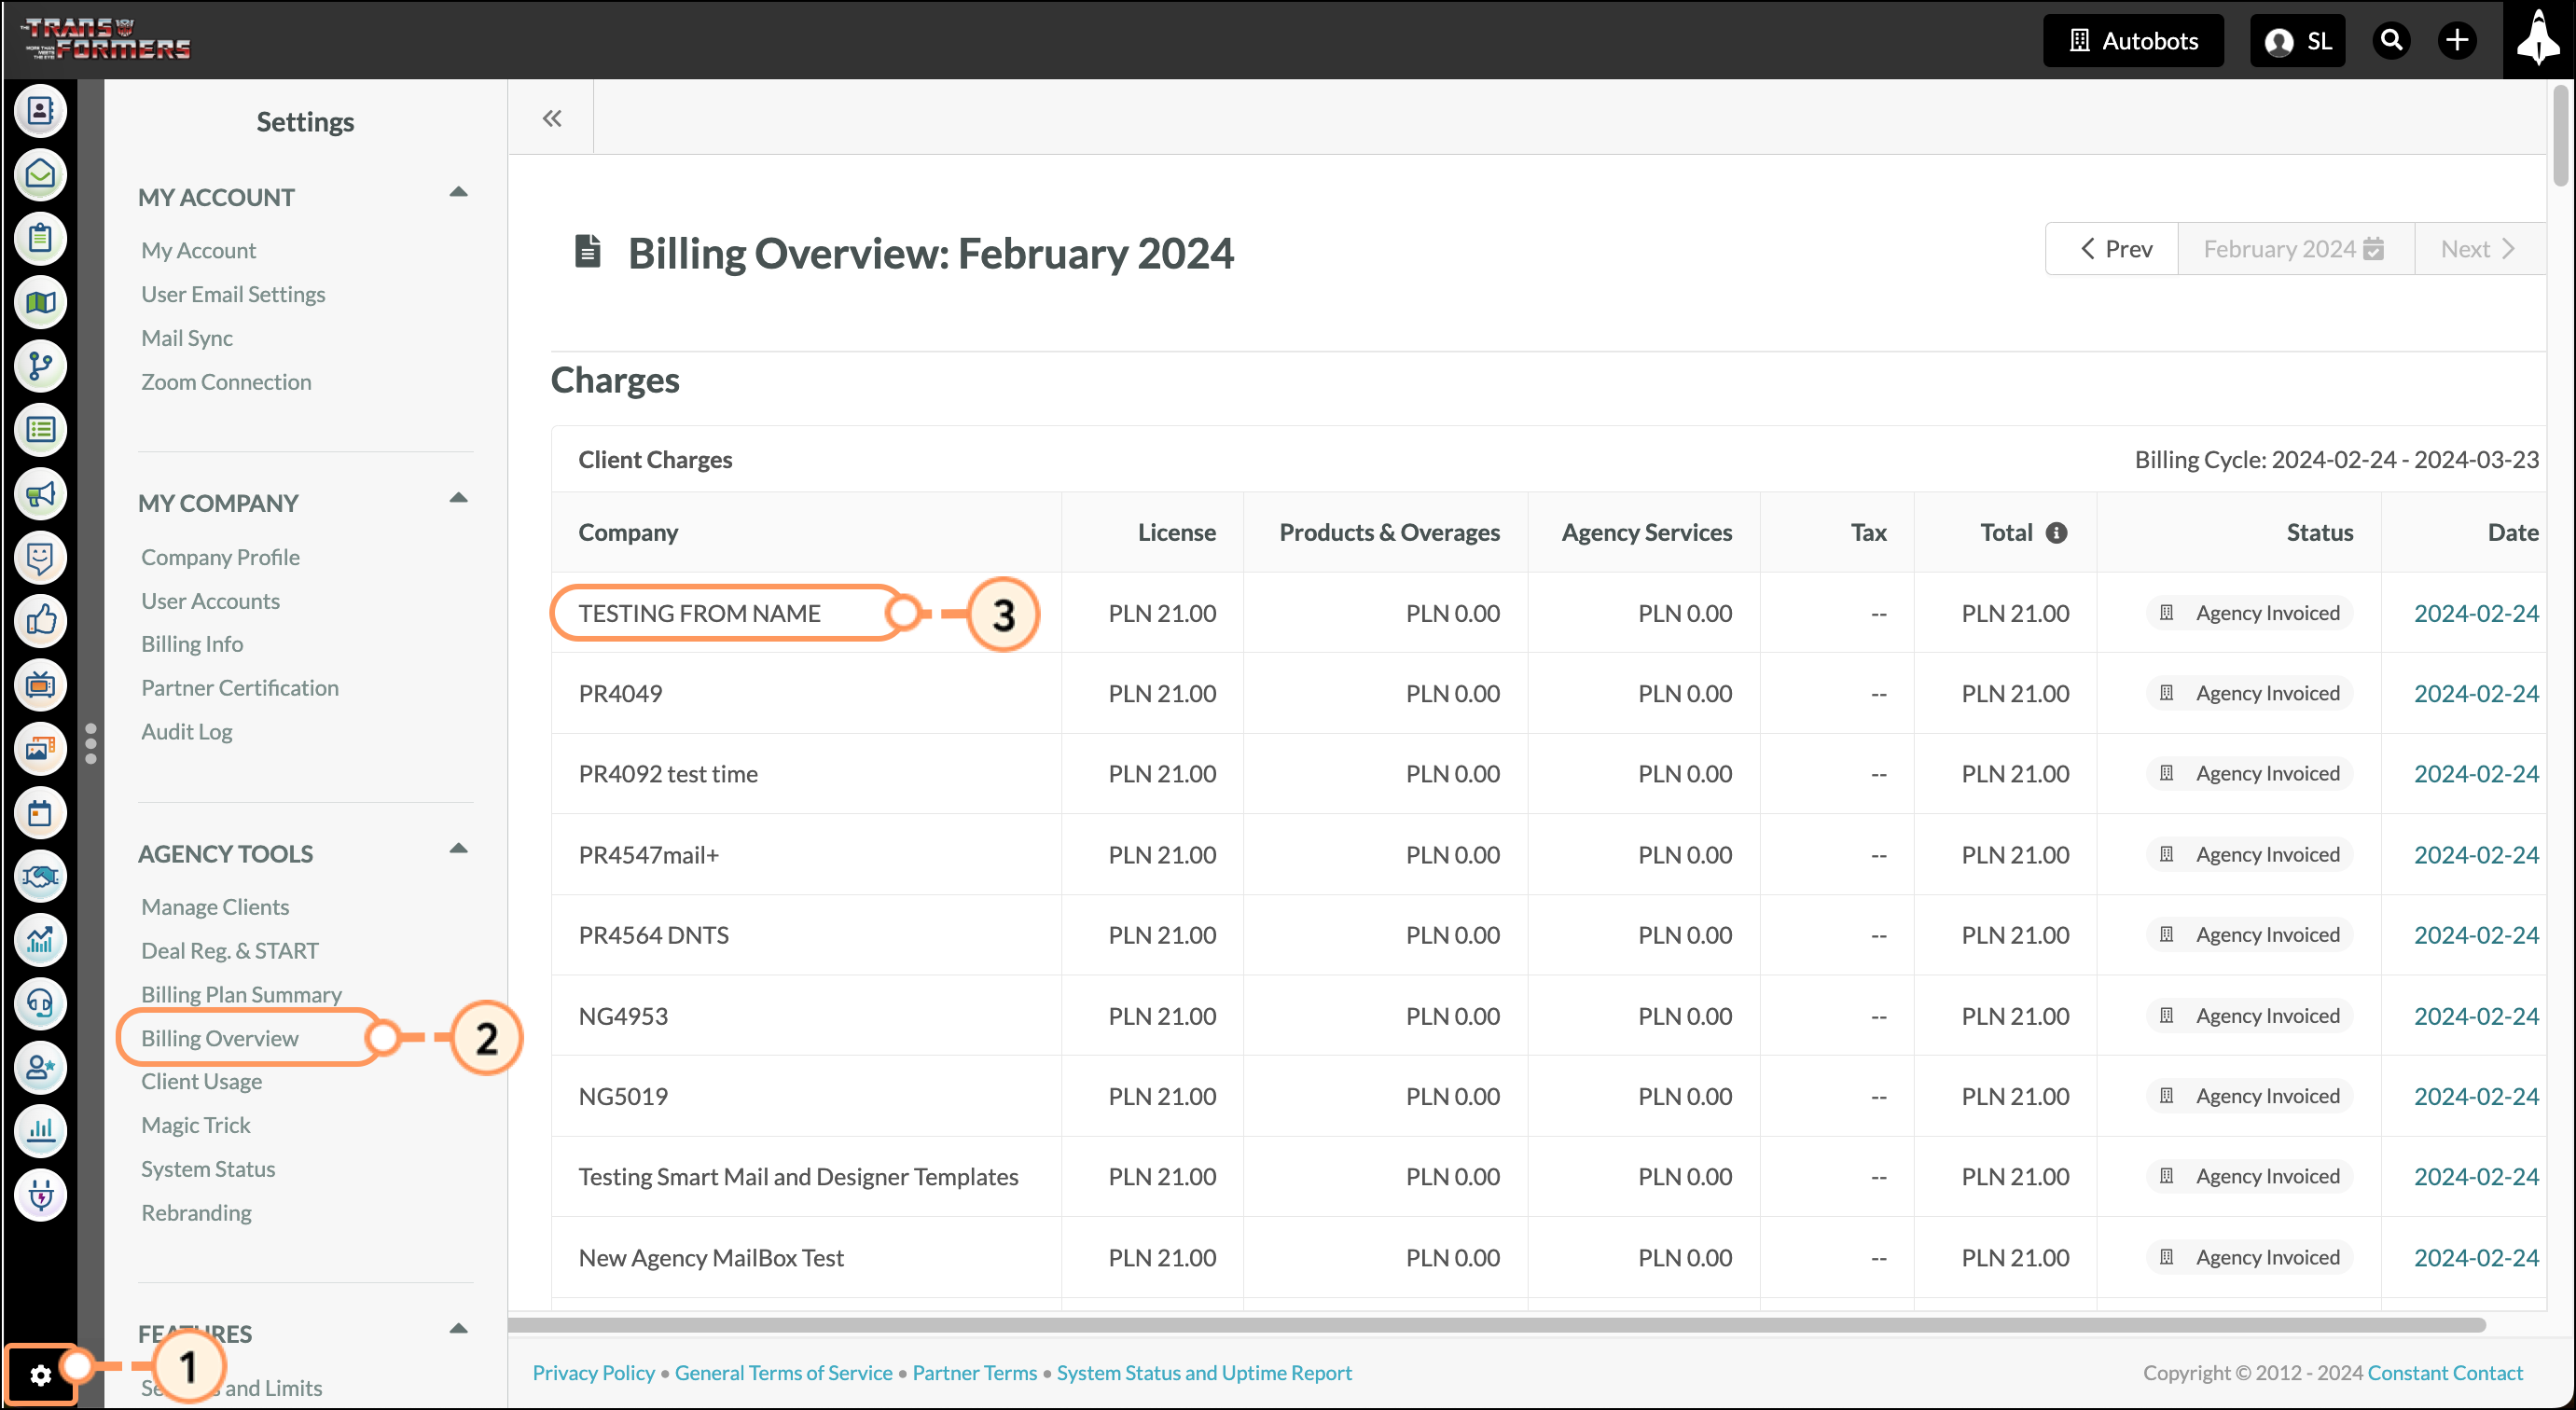
The Billing Overview menu breaks down information by individual client accounts. This breakdown is displayed by month and includes information on charges, clients, transactions, and the amount paid.
Navigate from month-to-month to view previous billing cycles by doing the following:
To export bills as .CSV files, do the following:
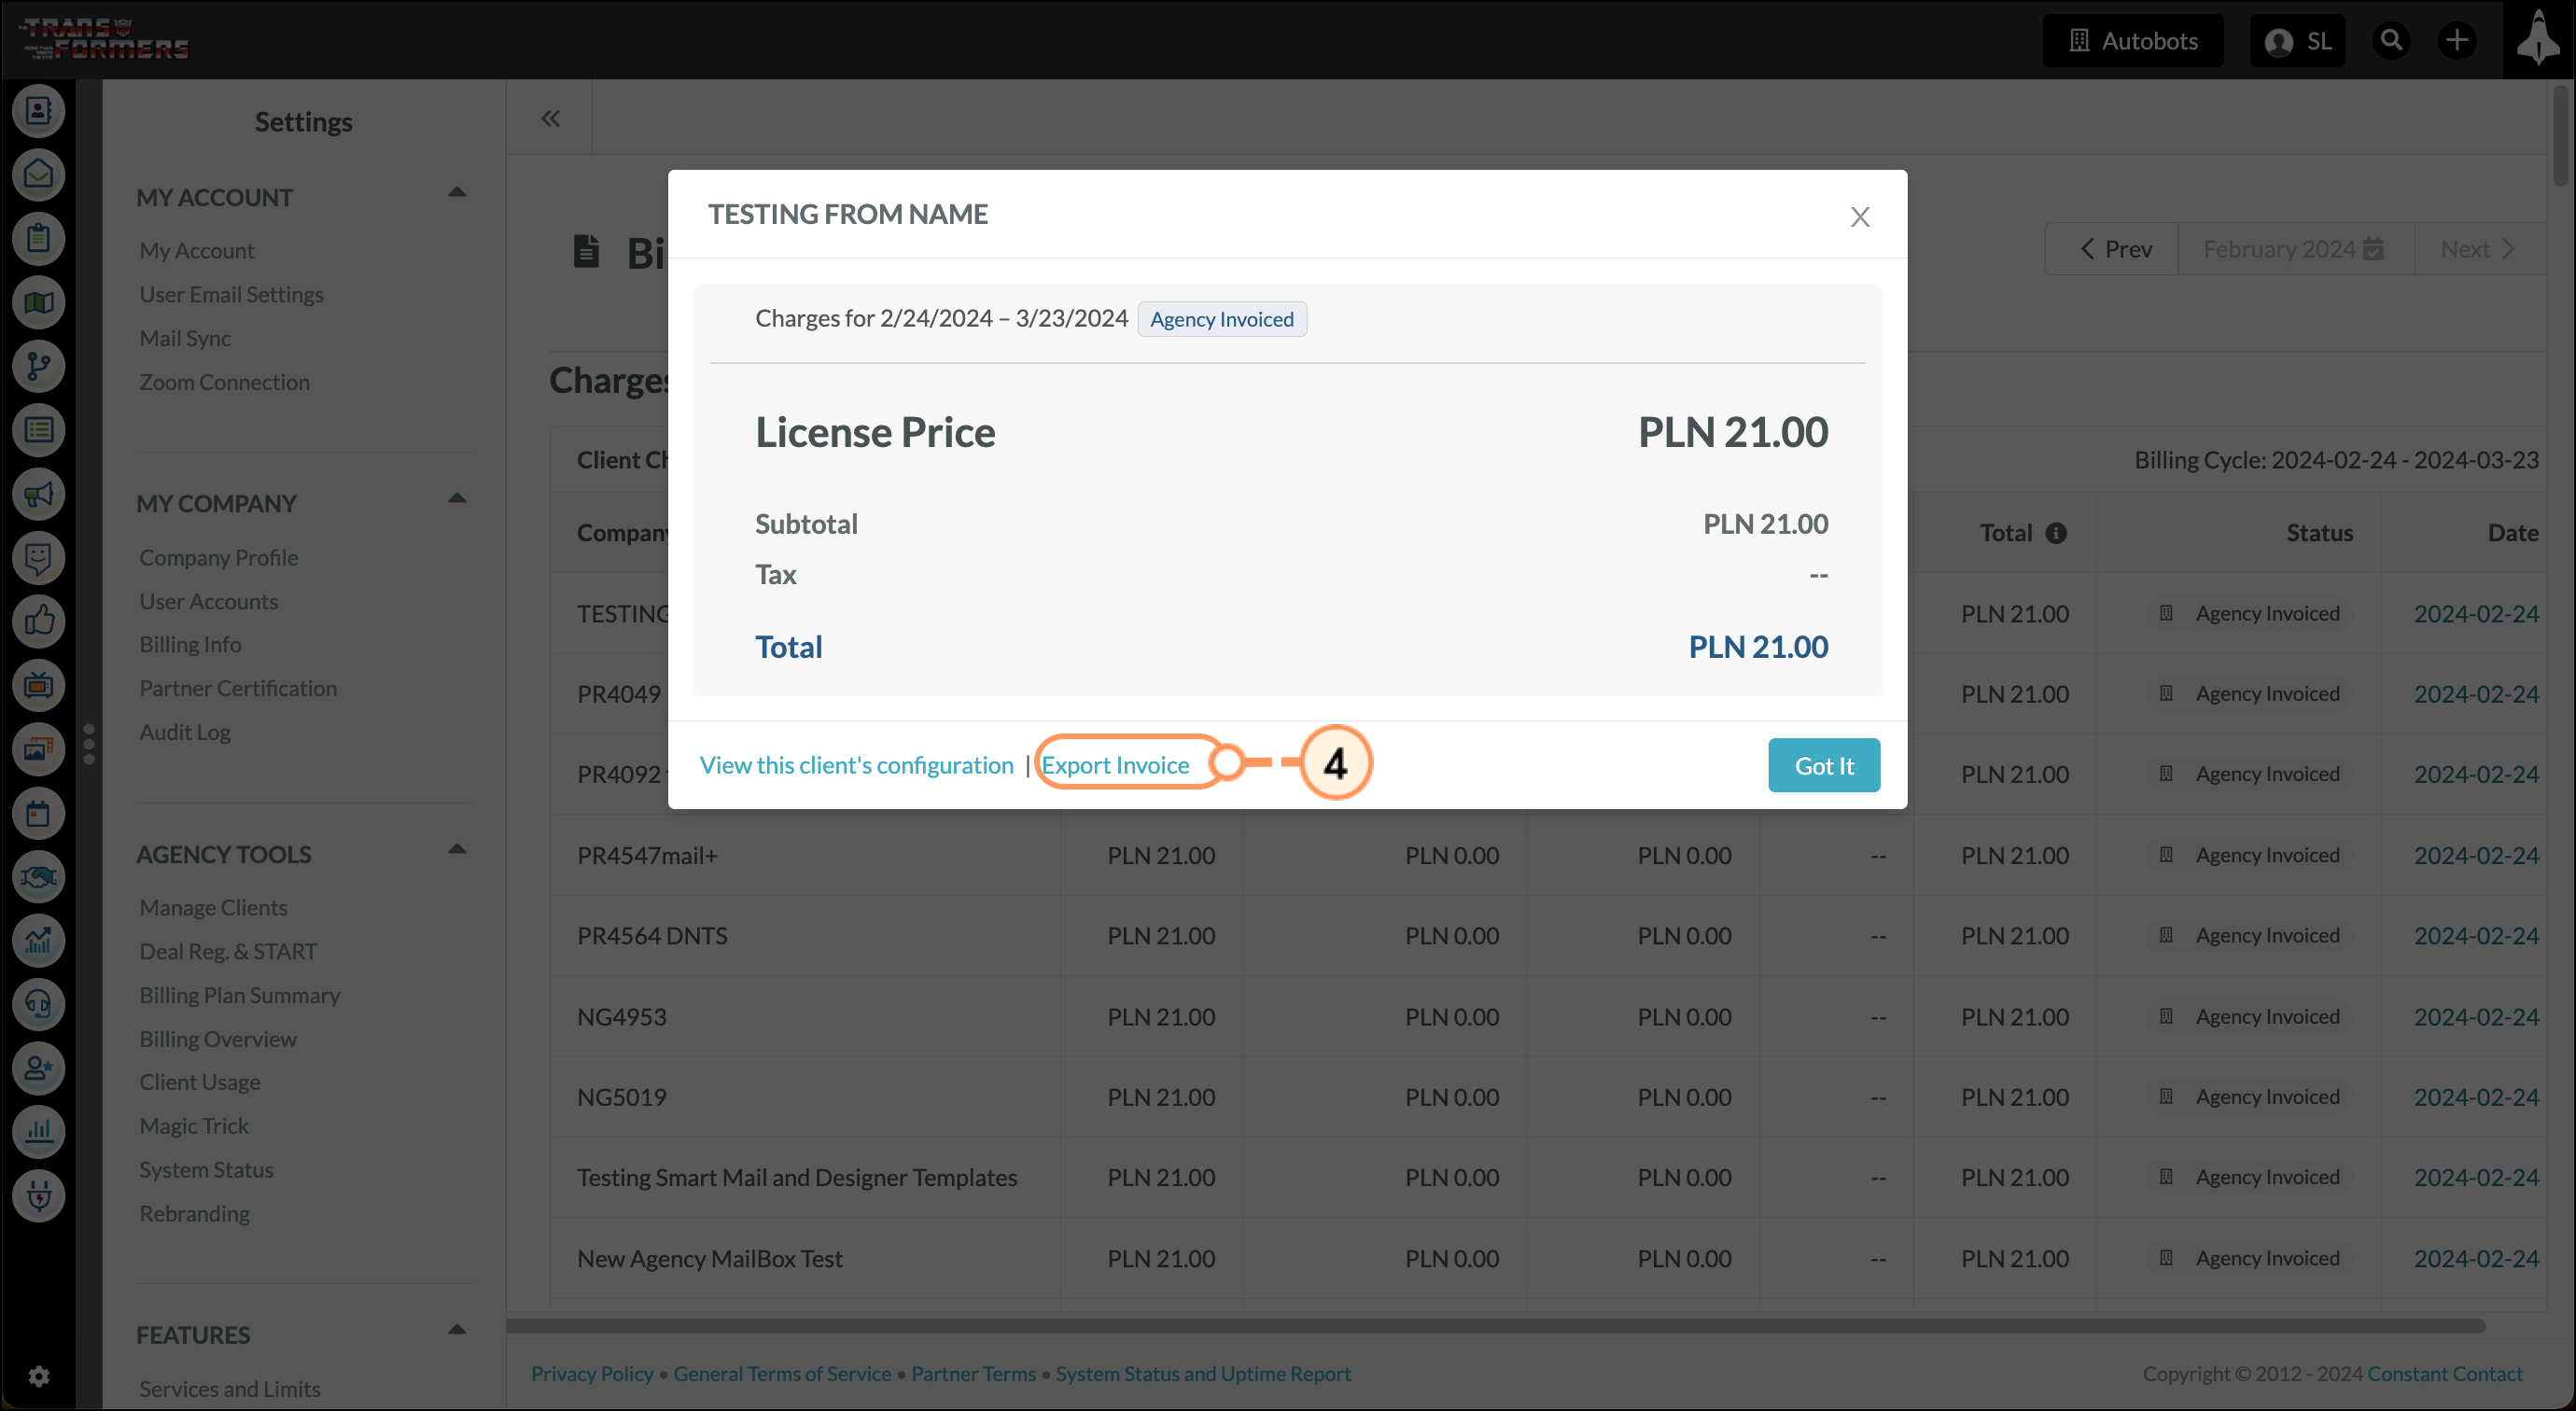
Open the exported .CSV file that is downloaded to your computer.
The Client Usage menu displays usage during the selected month, which is the first day of month through the last day of month. This information may not correspond to the Billing Overview page, which is based on usage during the billing cycle.
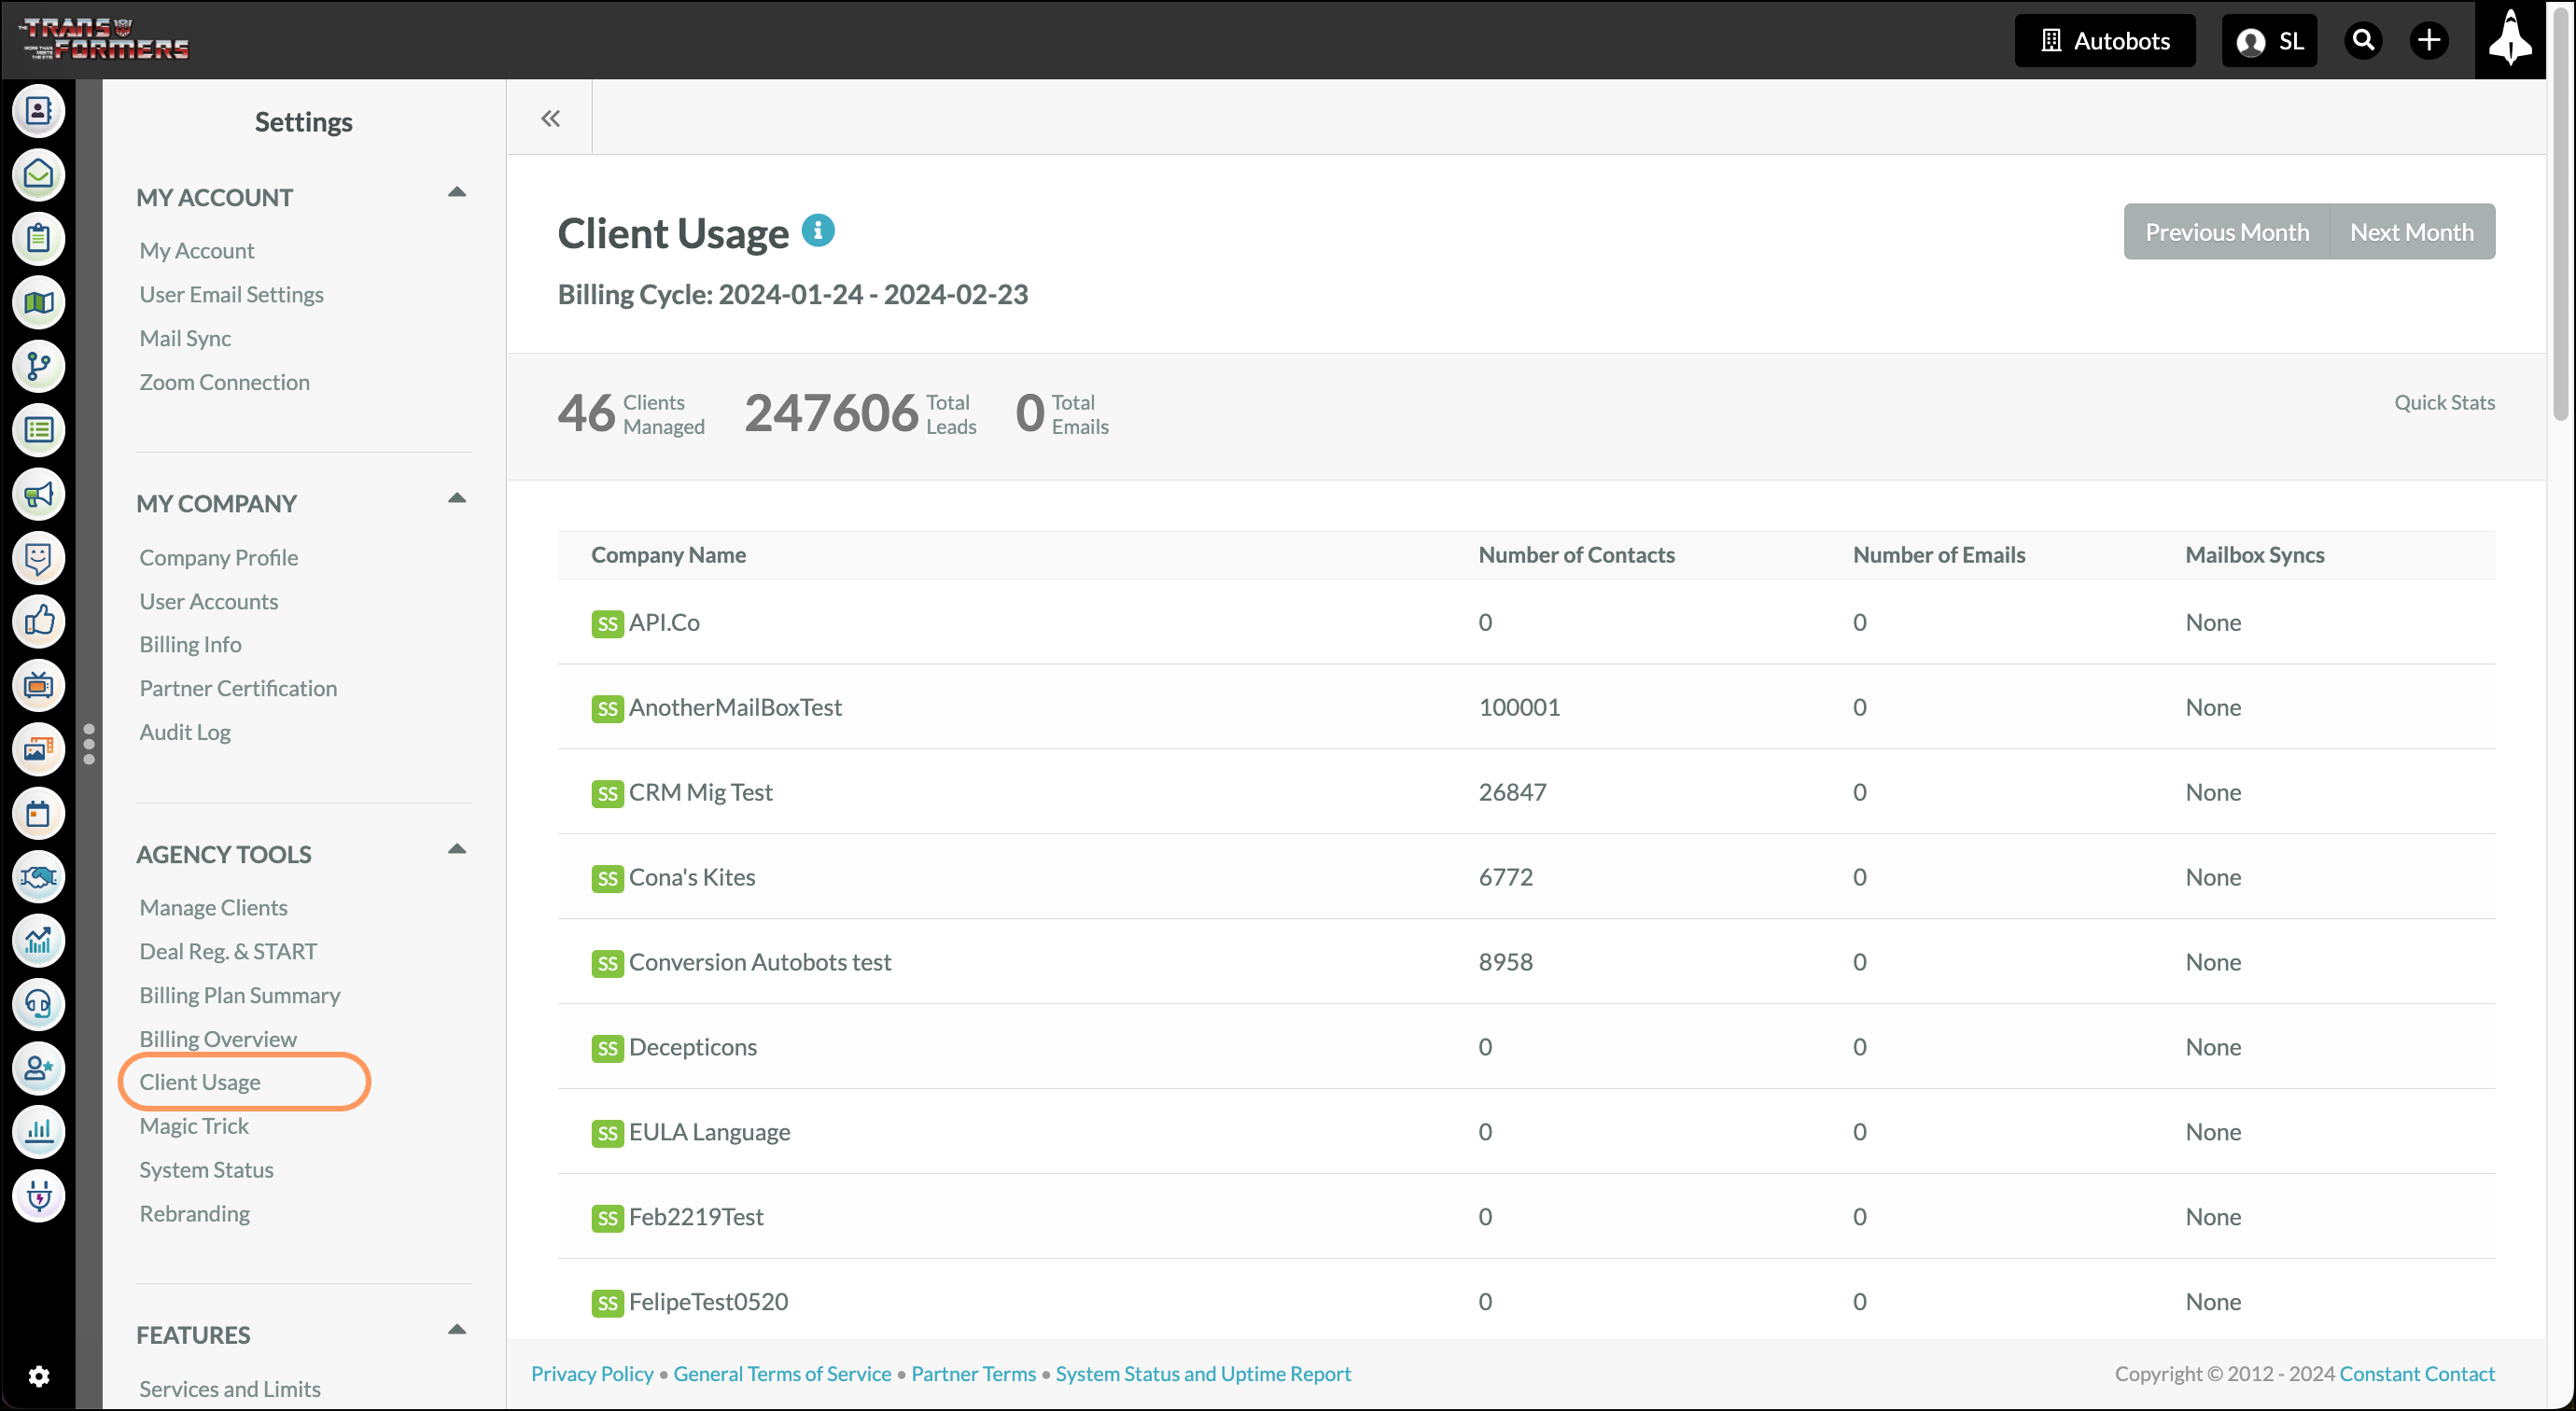
For a given month, the Client Usage menu displays client companies, their total number of contacts, the total number of emails sent, and the used product.
The Magic Trick menu provides information on how to install the Magic Trick, as well as how best to demo the Magic Trick.
The Magic Trick uses Lead Gen & CRM to sell itself. When demonstrated properly, it showcases a wide range of powerful Lead Gen & CRM features in real-time.
This informs the customer that the product works while showing complex features in an easy-to-understand way.
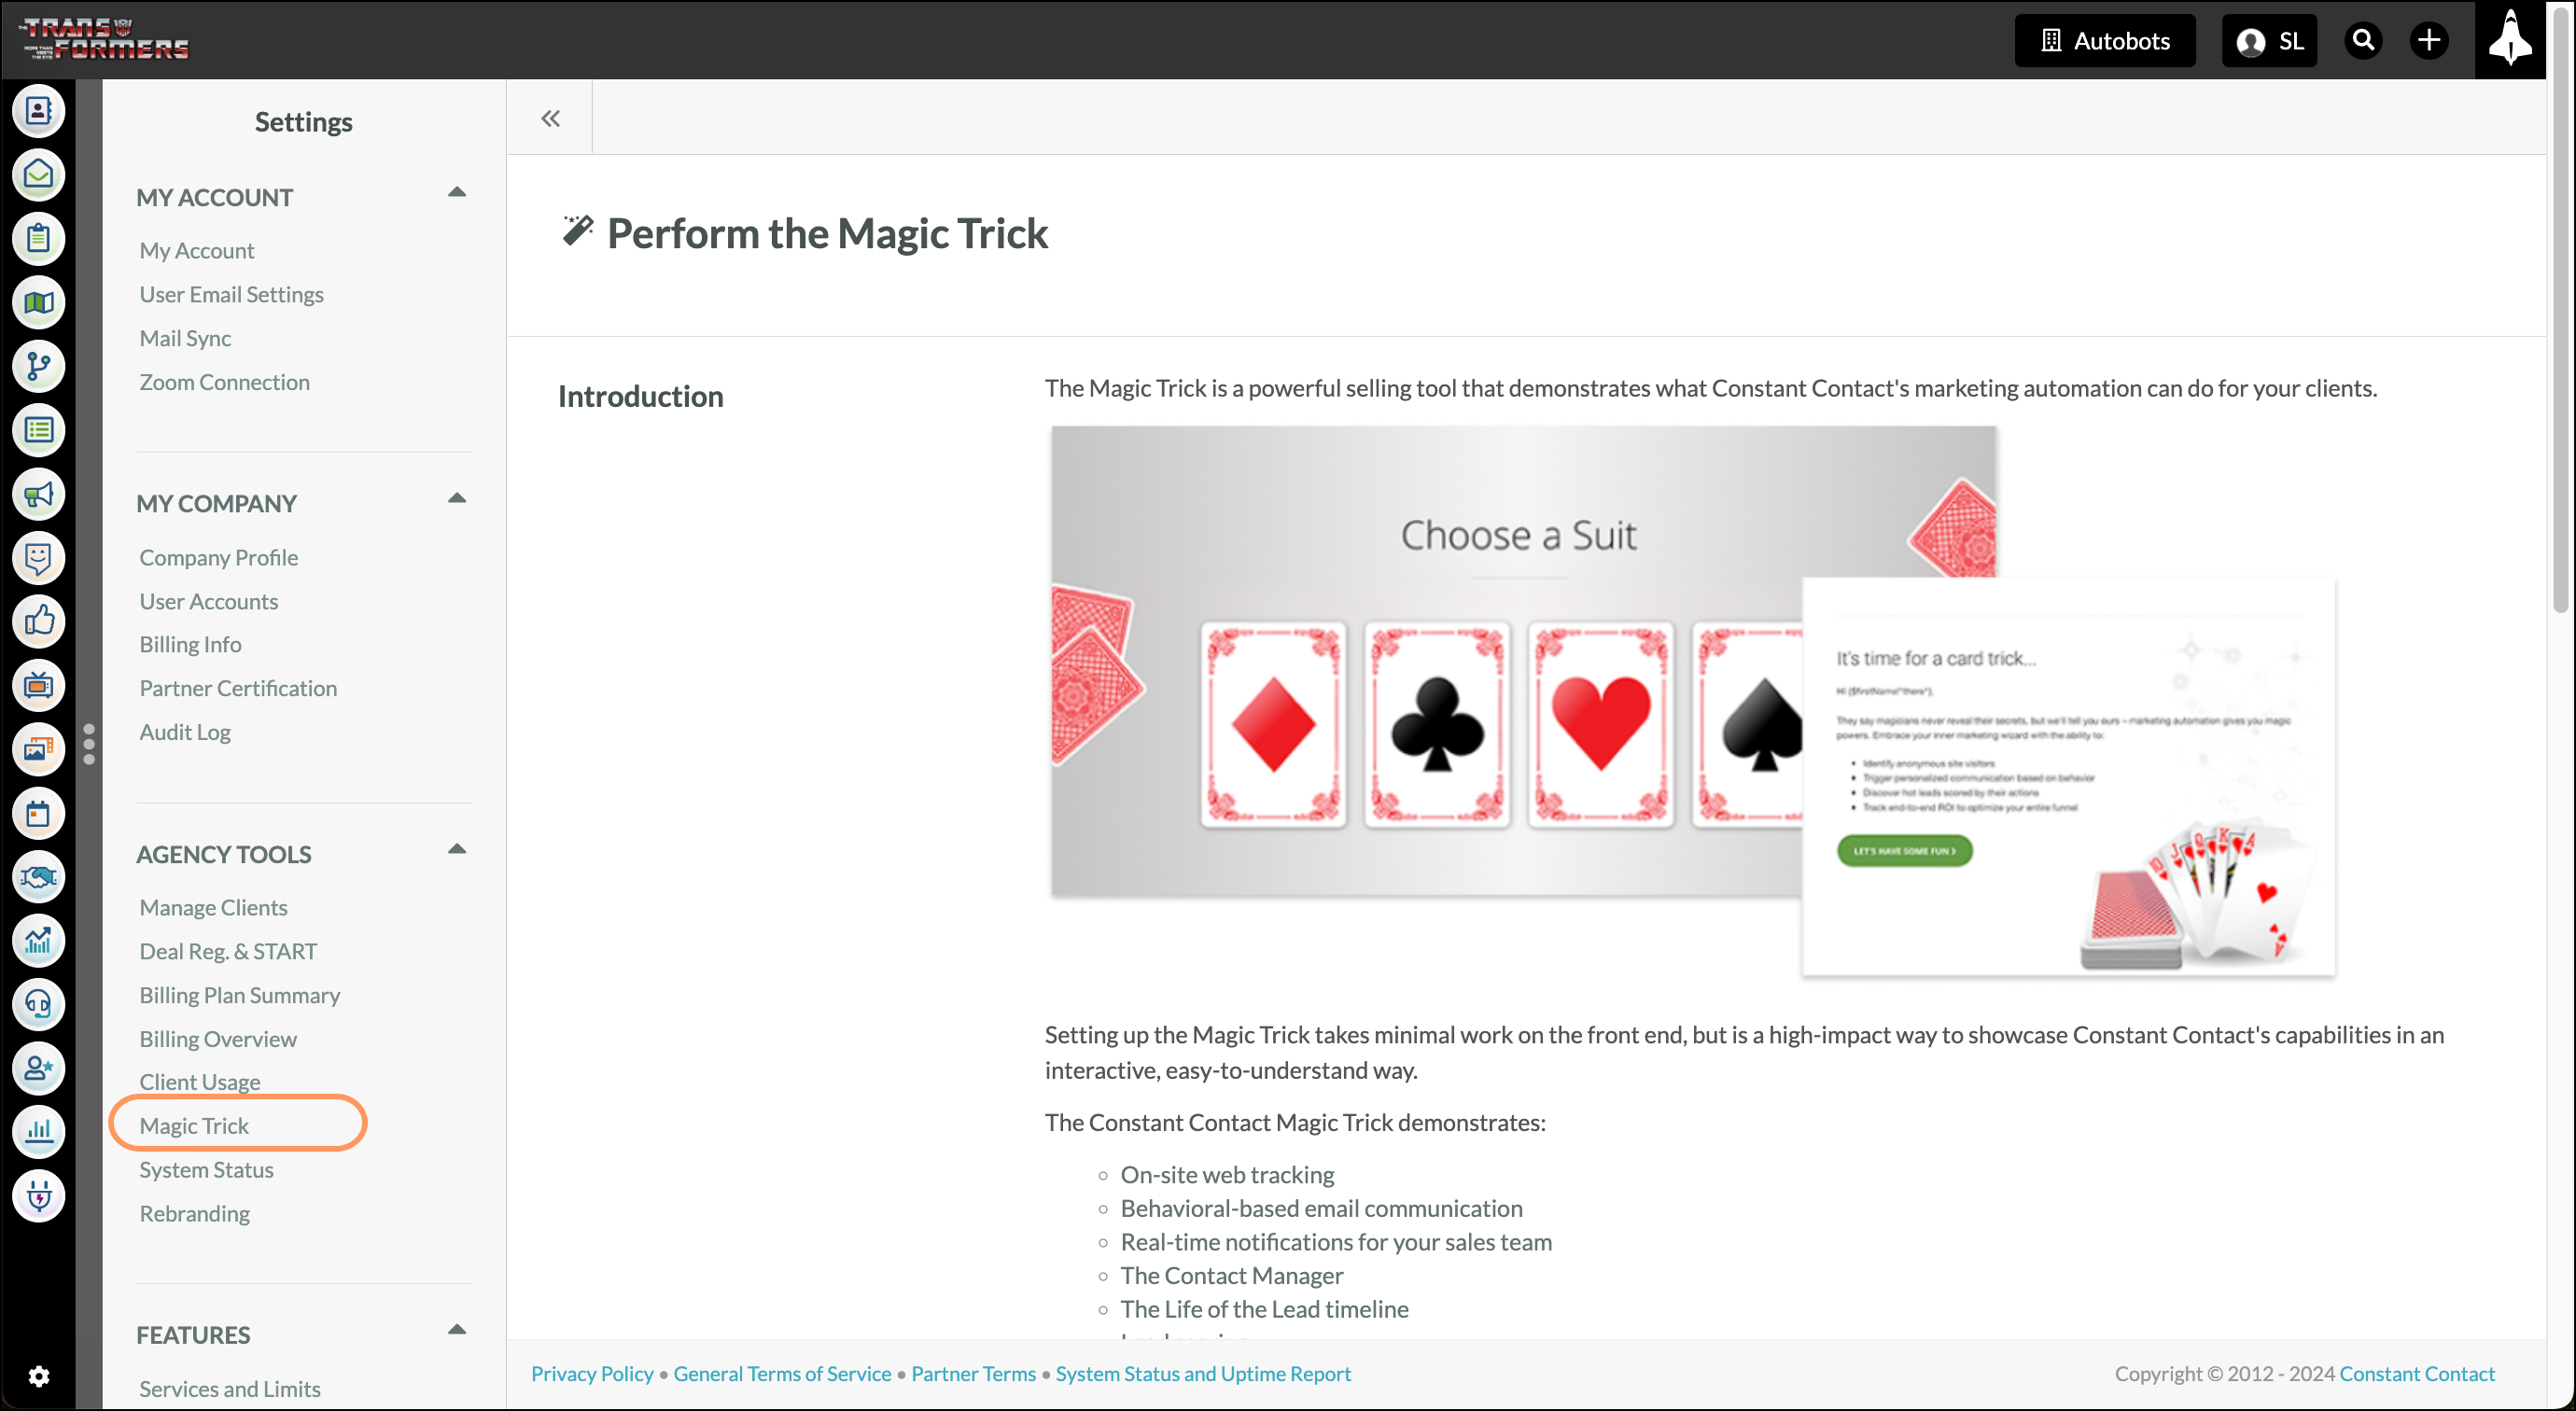
Refer to Installing and Using the Magic Trick for more information on the Magic Trick. Contact Professional Services for further assistance.
The System Status menu provides information on the current status of the platform. Click System Status and Uptime Report for an in-depth look at application status and uptime over the past thirty days.
A green bar means the application is performing as normal, and a yellow or red bar will note any type of delays or outages.
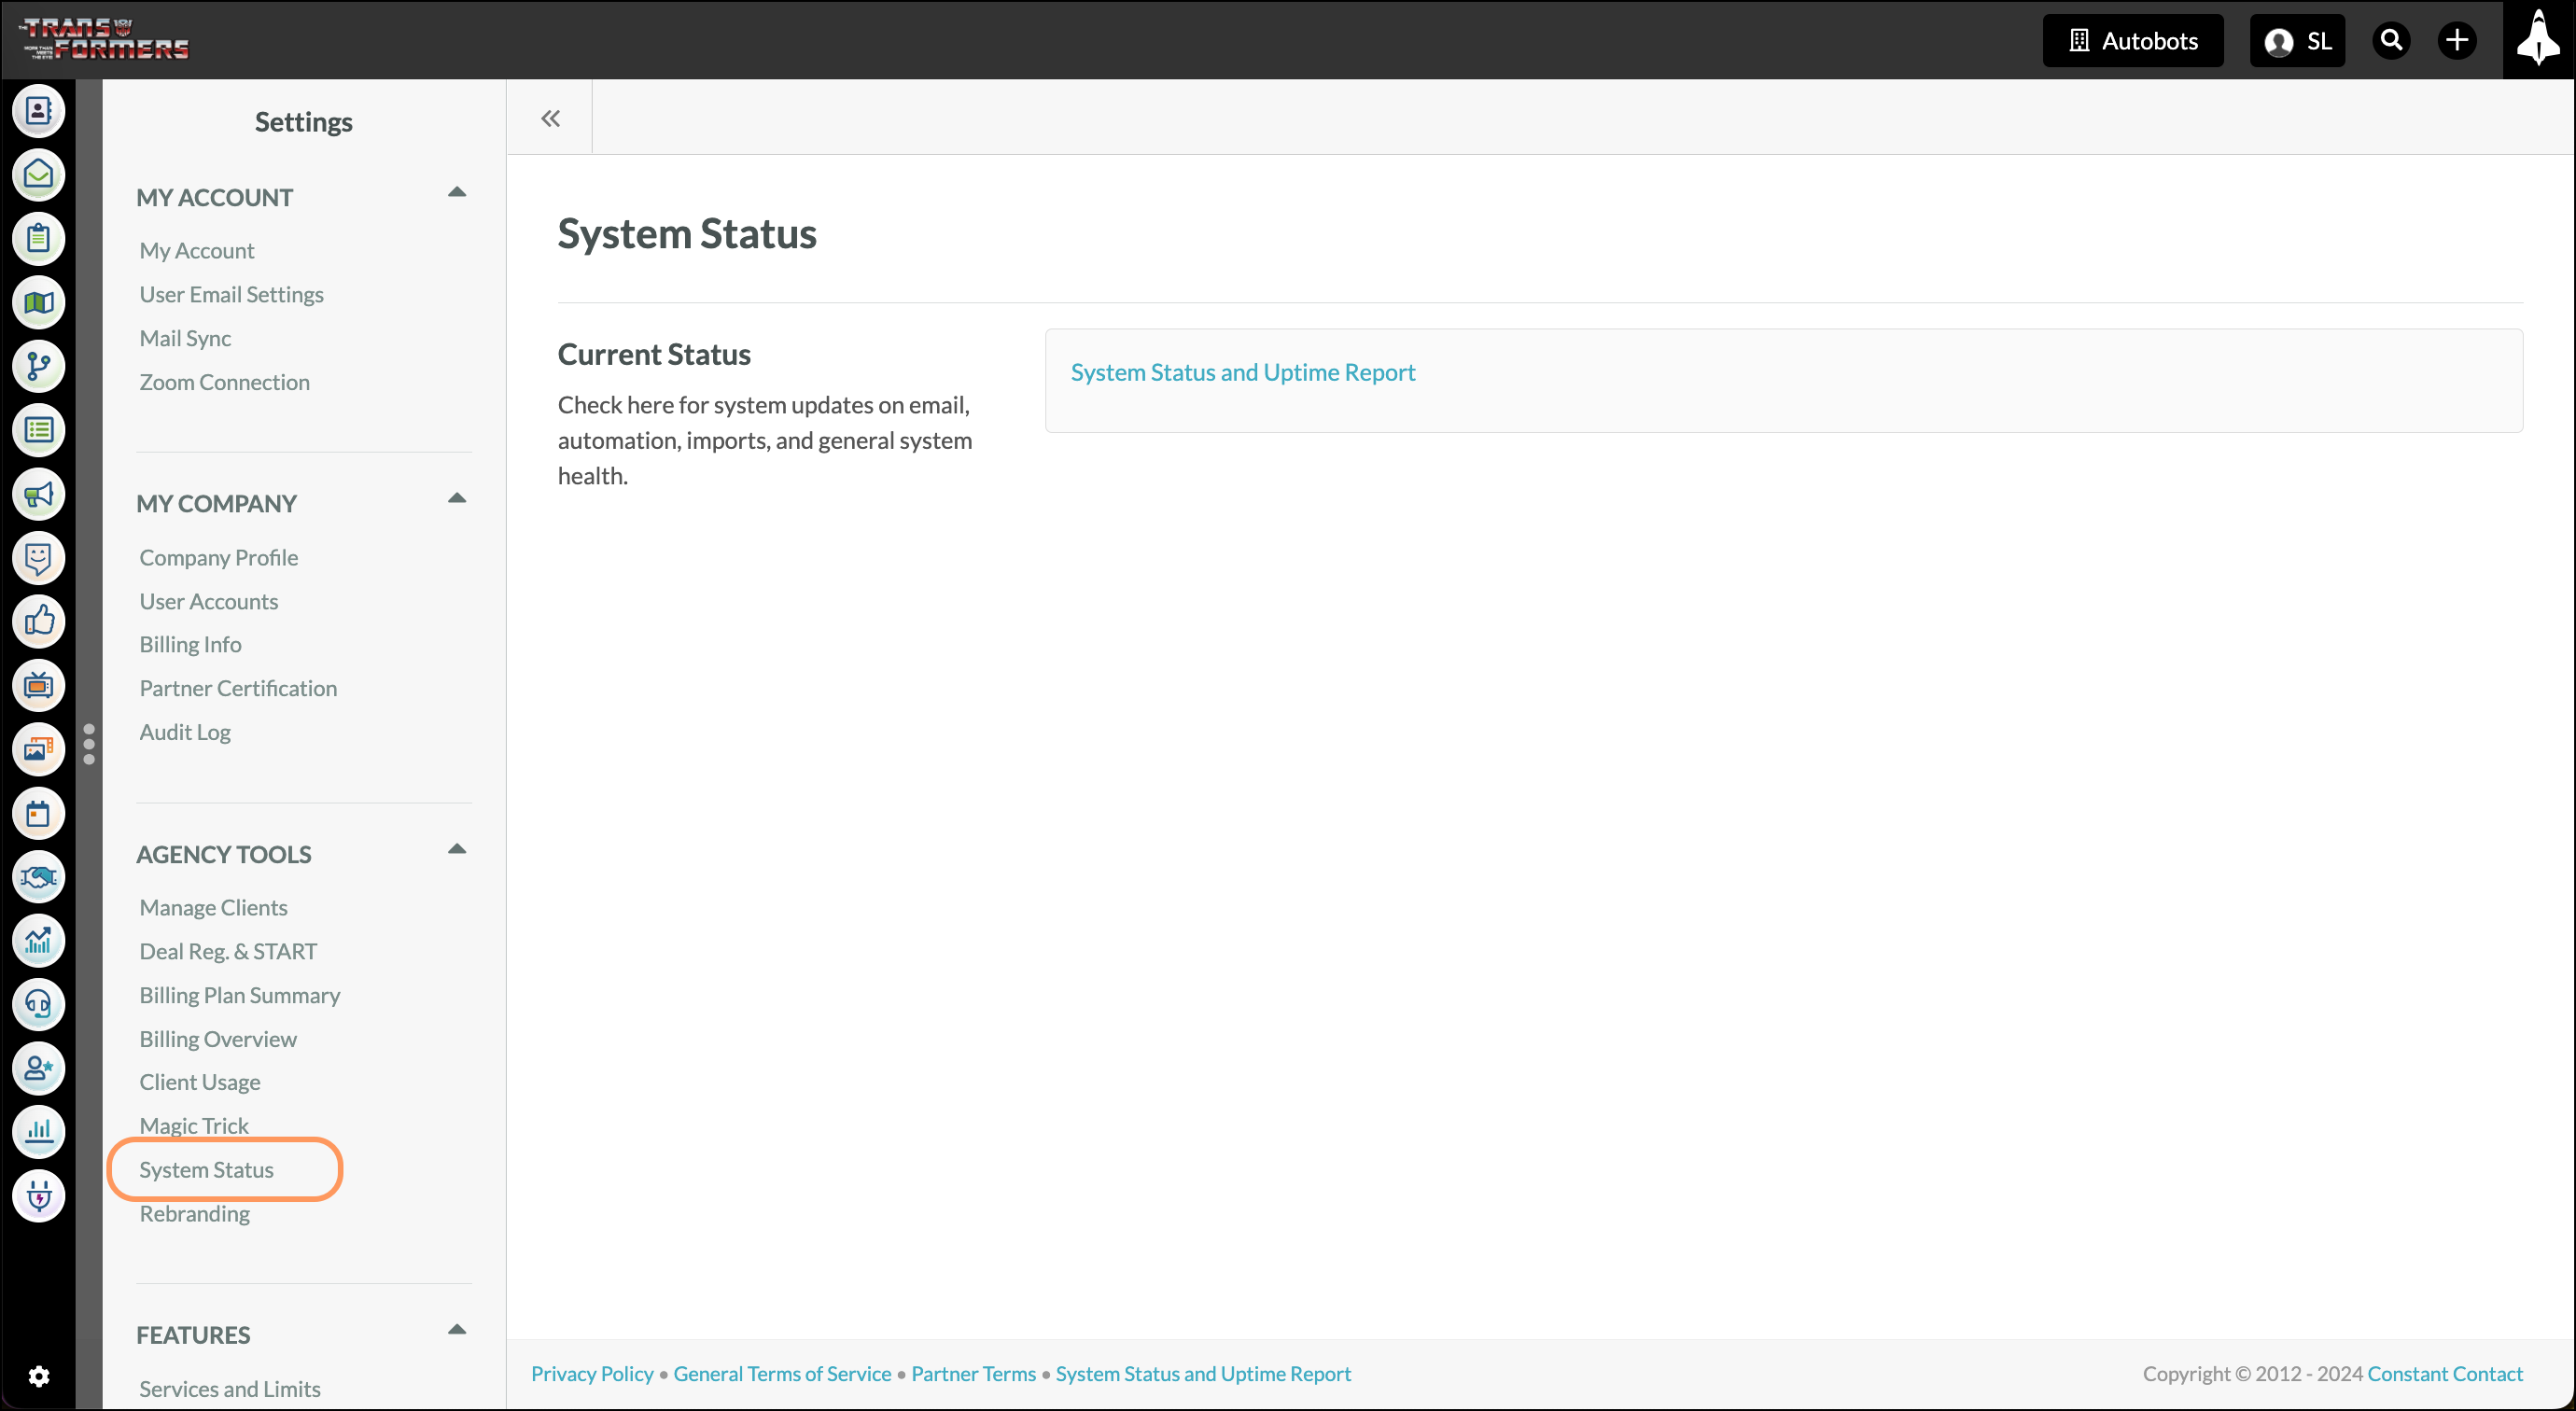
Additionally, the report provides information on any incidents that have occurred with the application.
The Rebranding menu provides white labeling and rebranding options. Rebranding enables you to change several visual components in the application and personalize the software to your company.
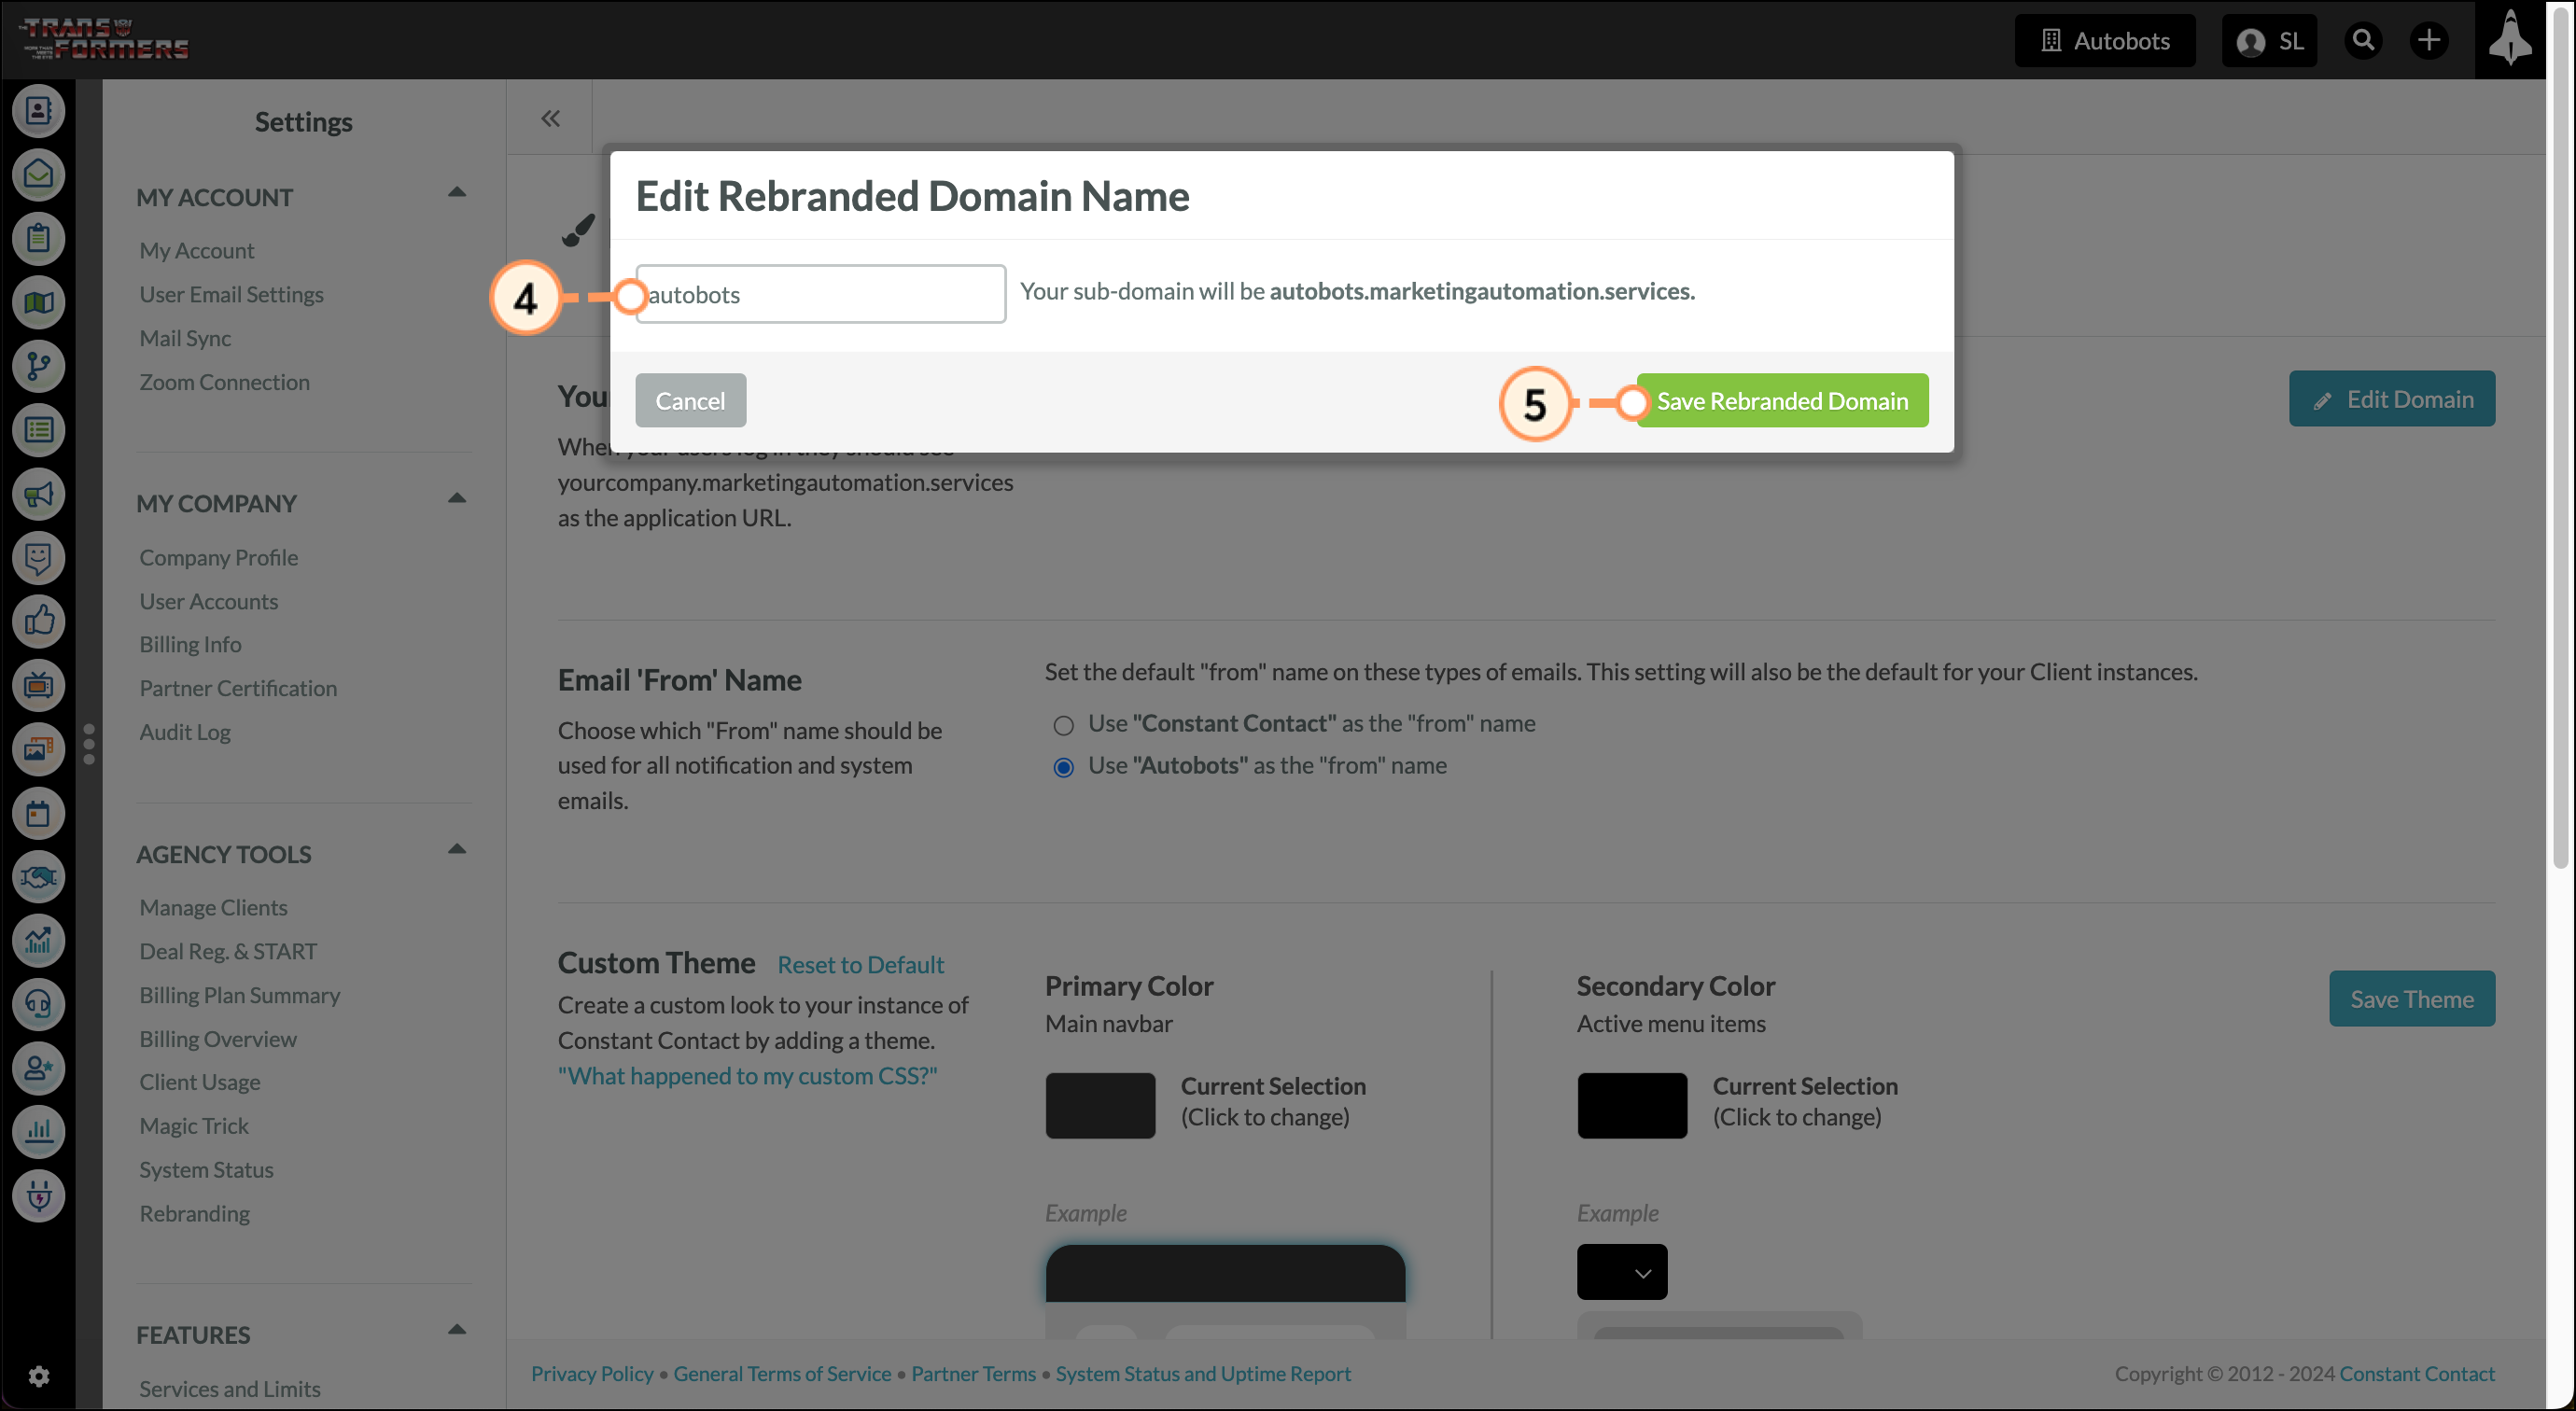
When your users log in, they should see yourcompany.marketingautomation.services as the application URL. You can modify the prefix of this URL, so long as it is not already being used by another company.
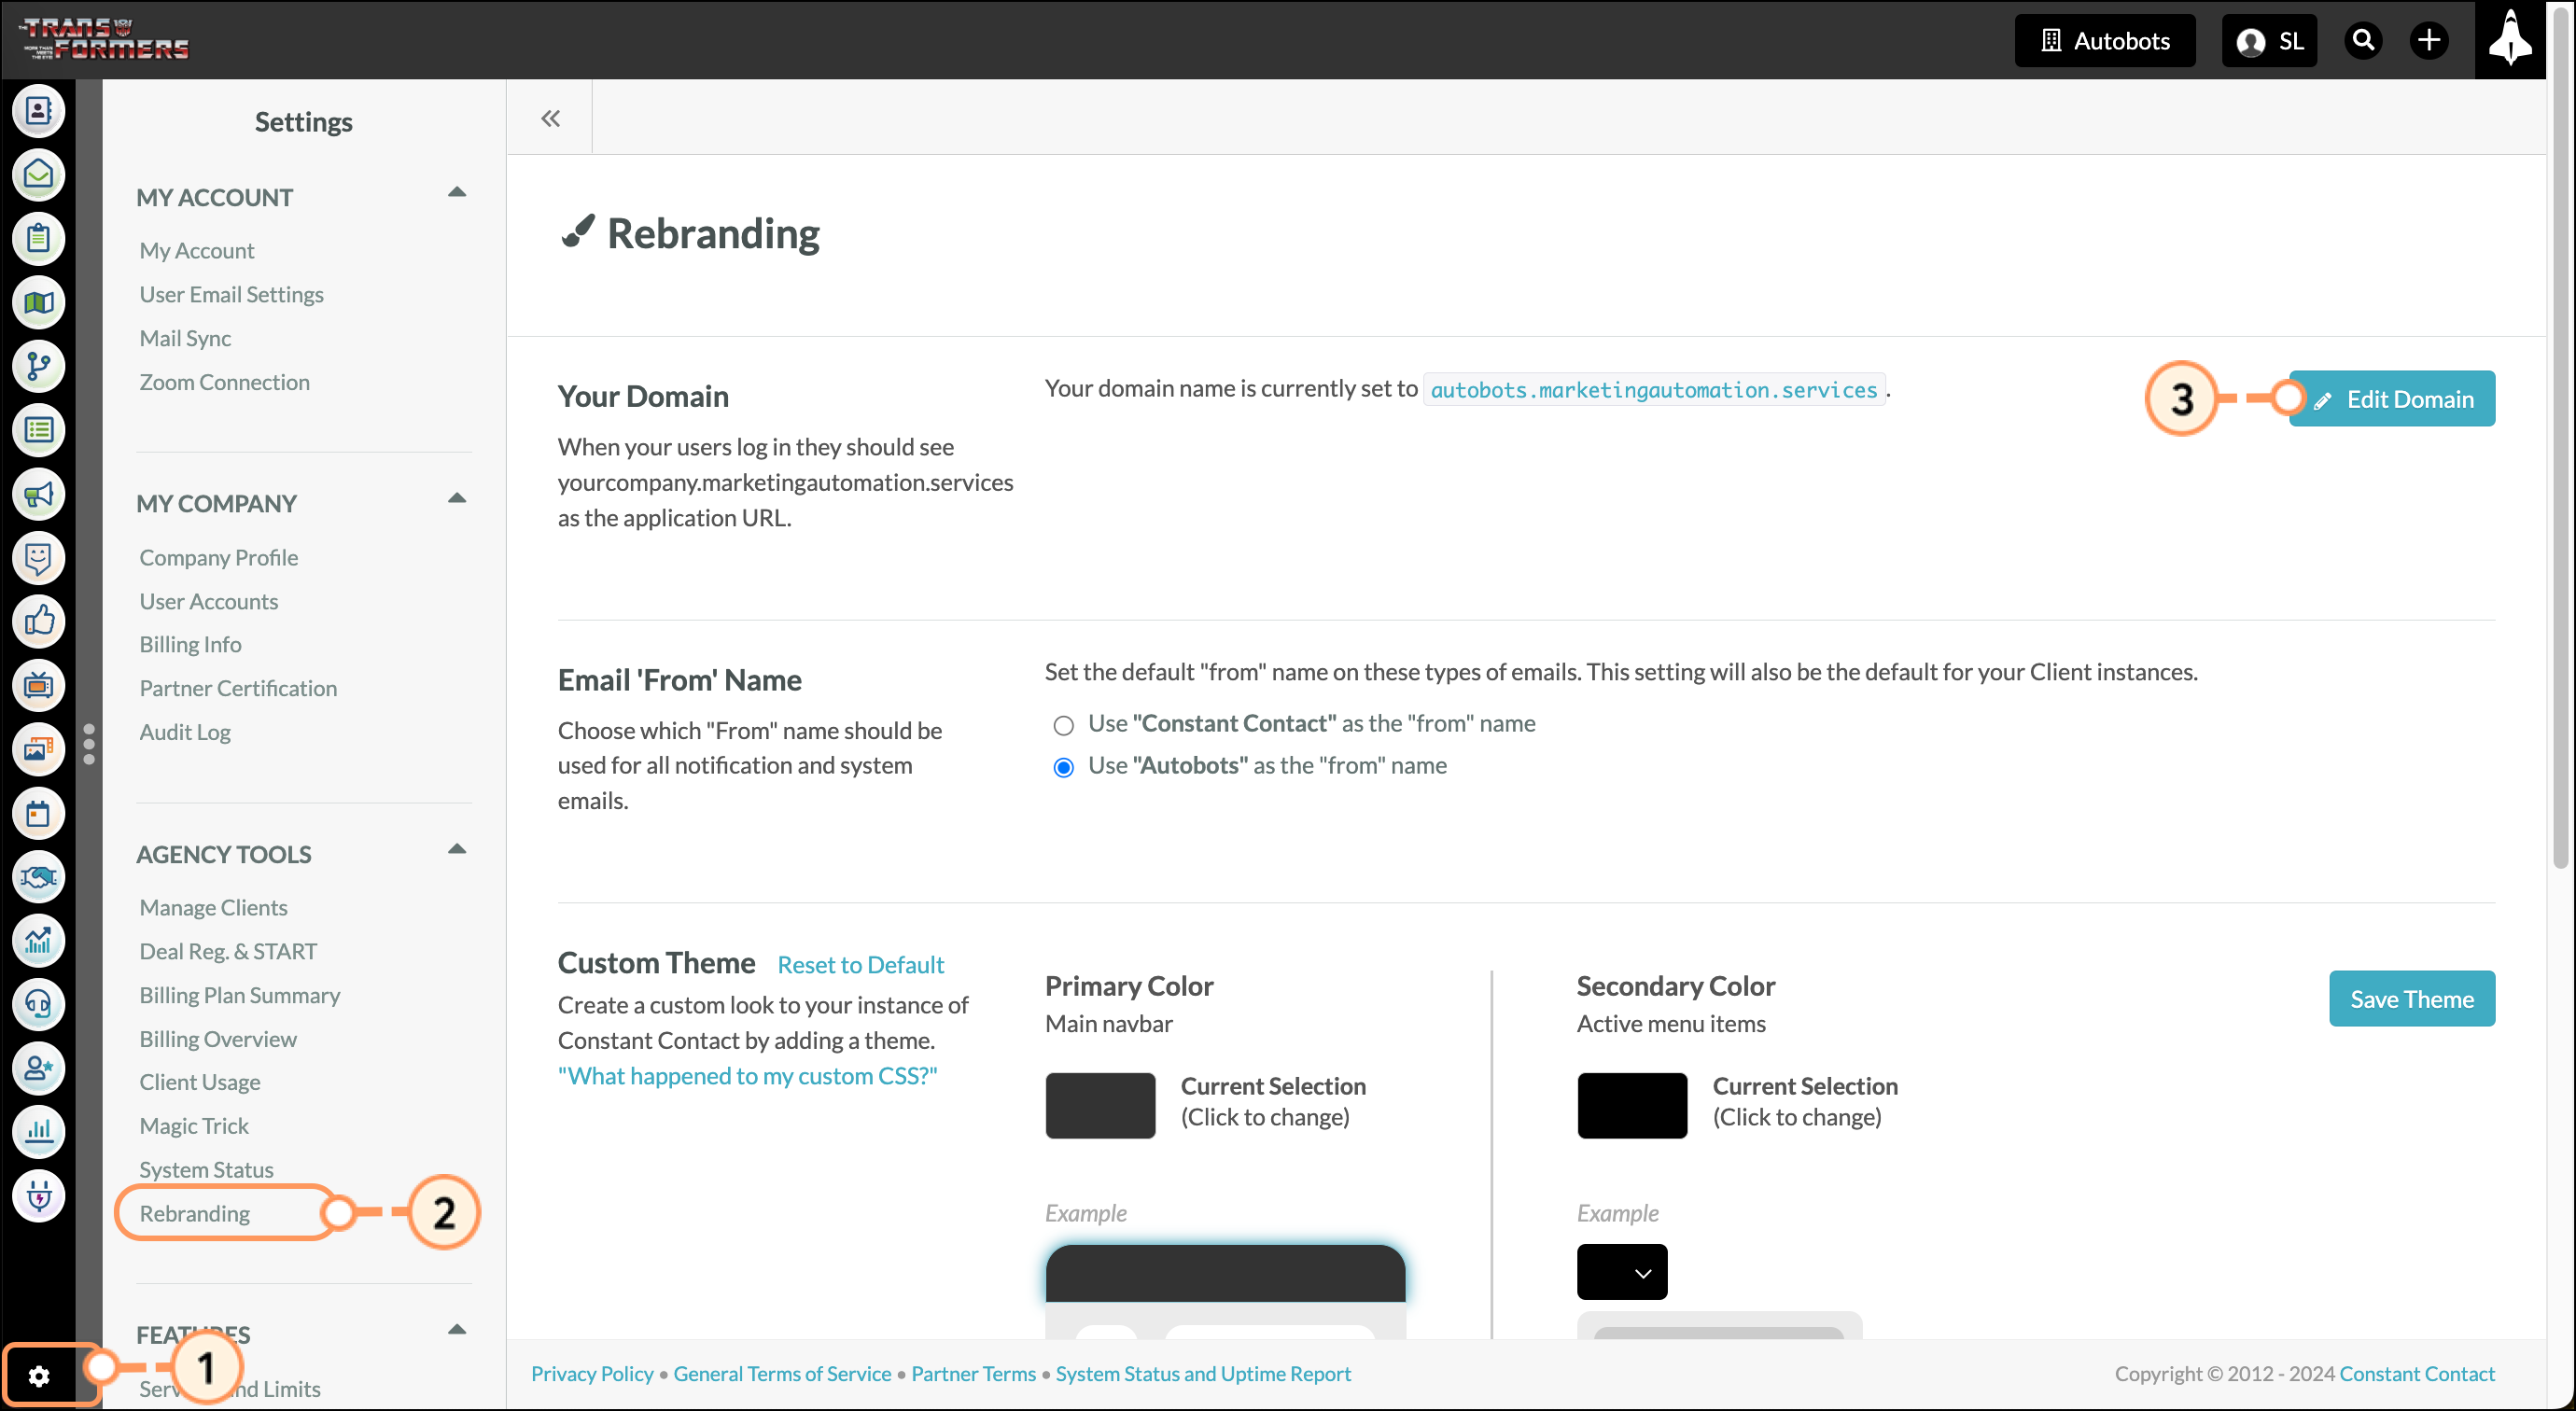
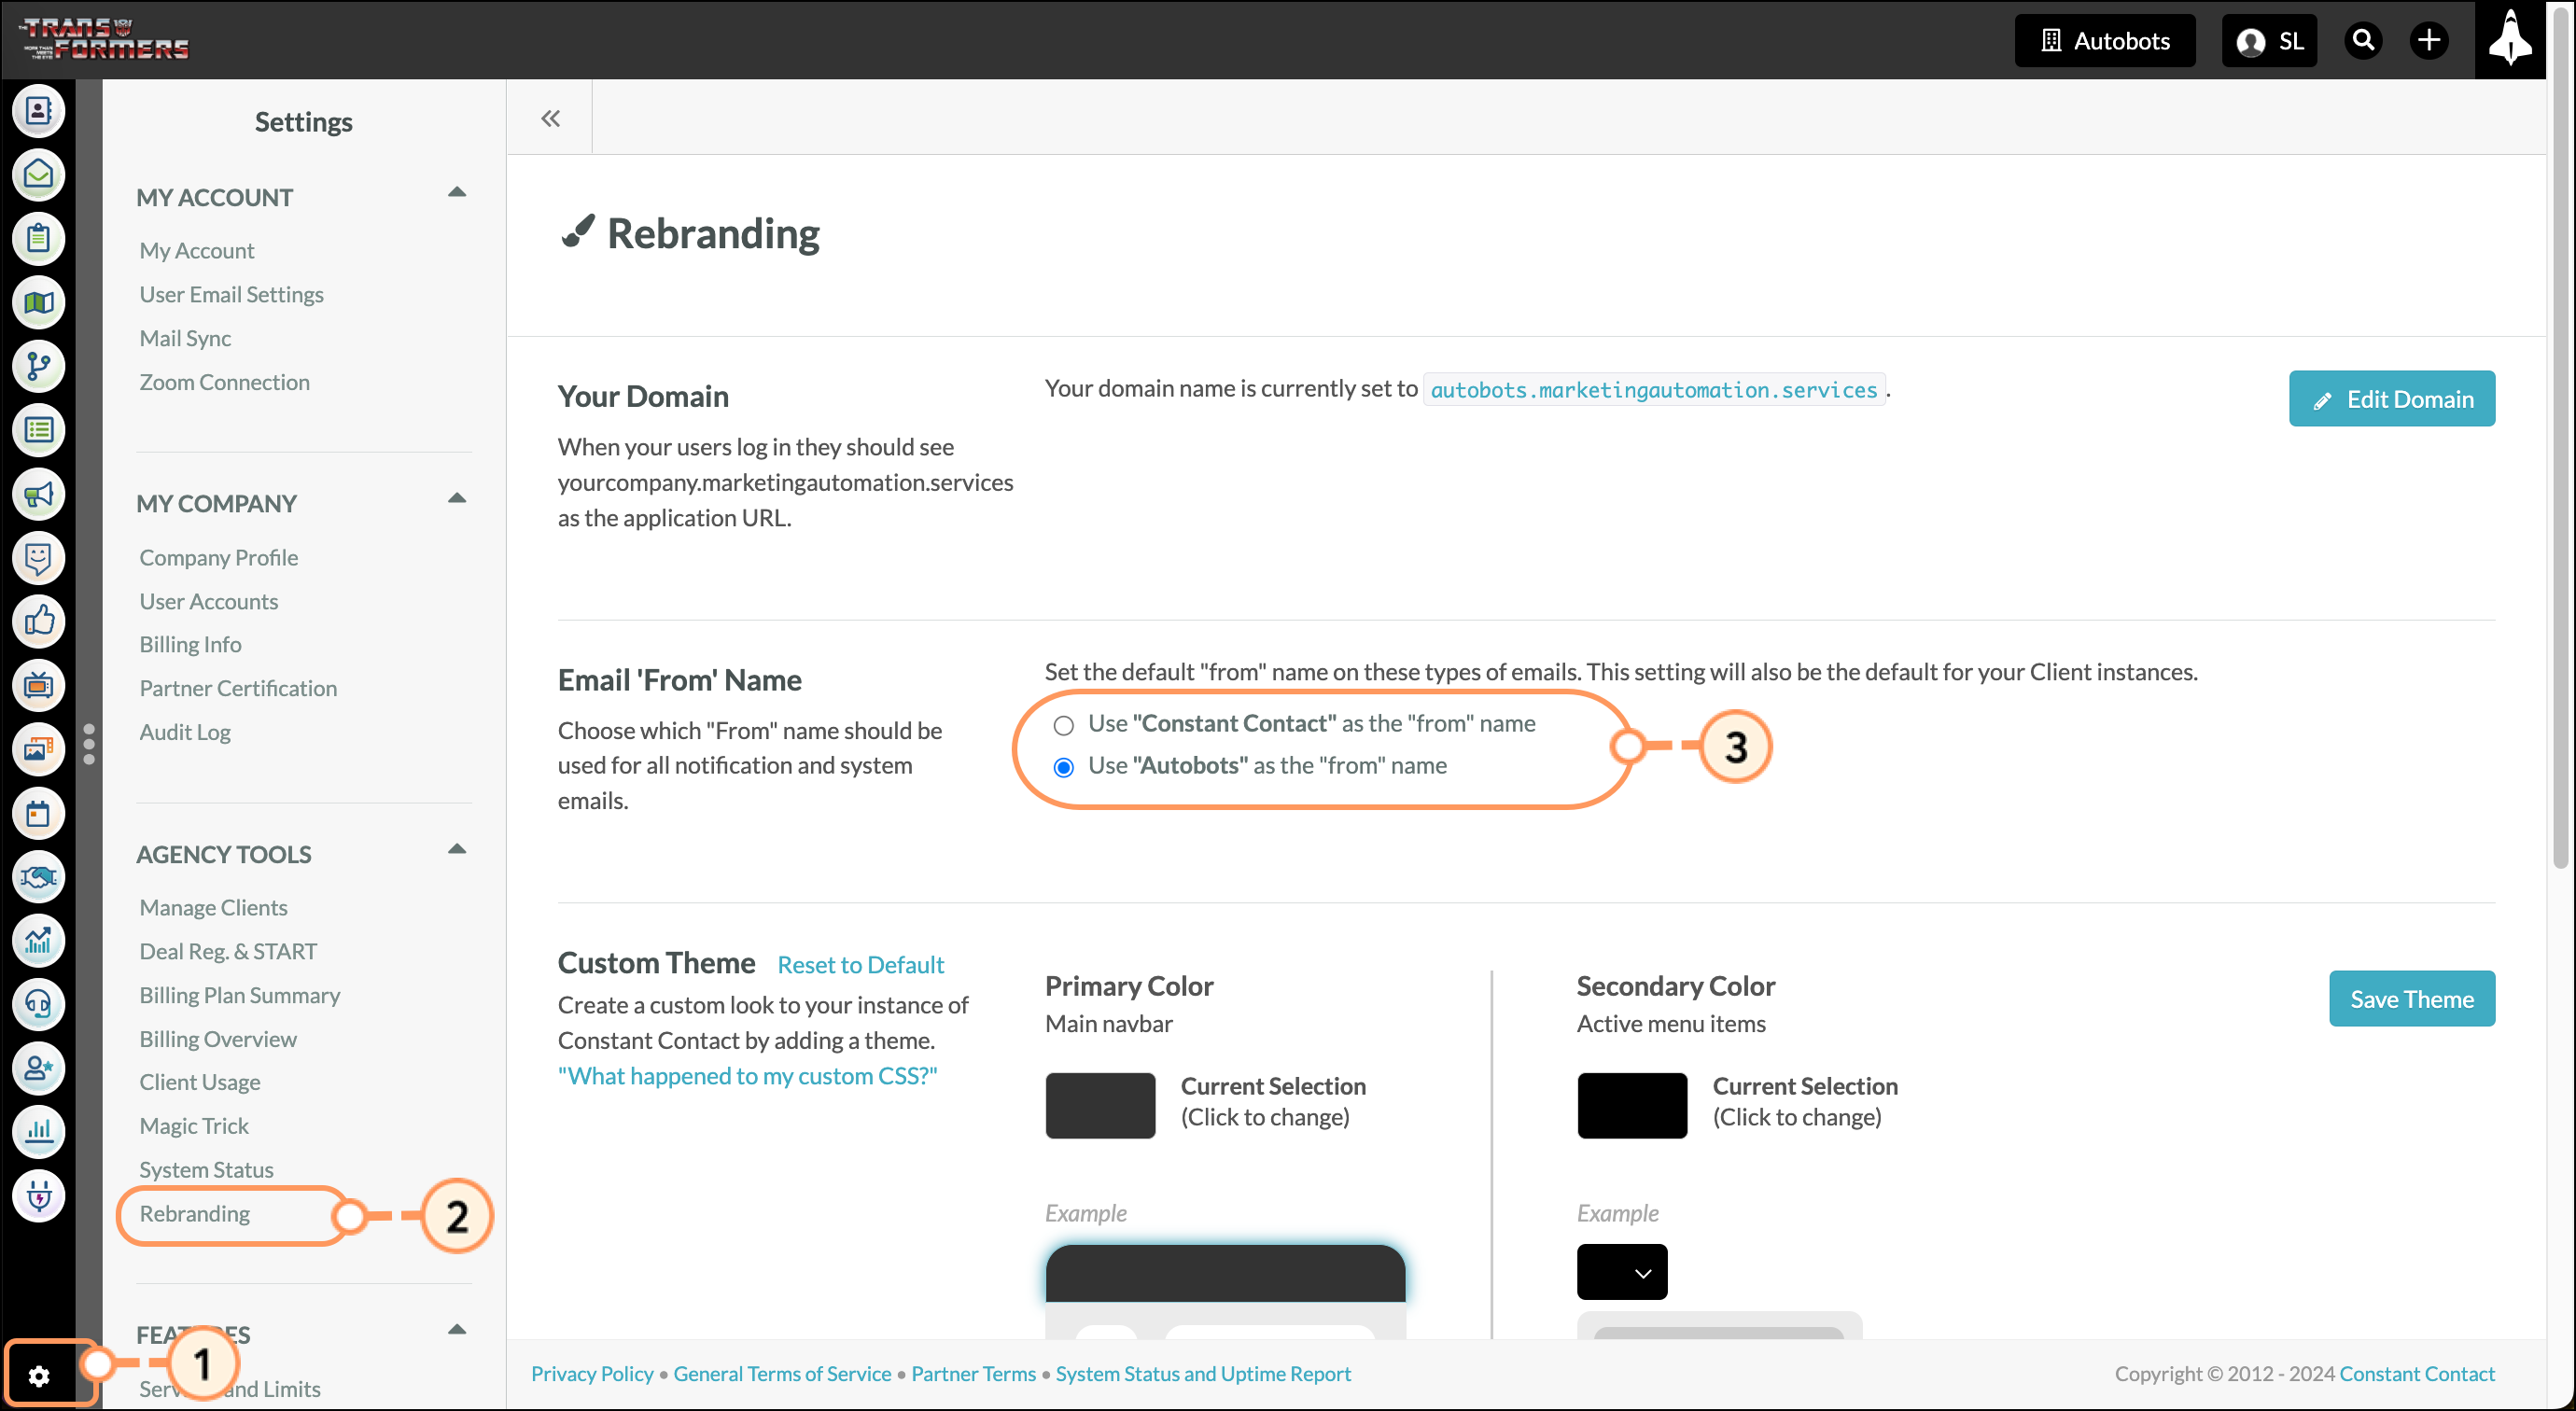
You can set the default From name for all system and notification emails. To set the From name, do the following:
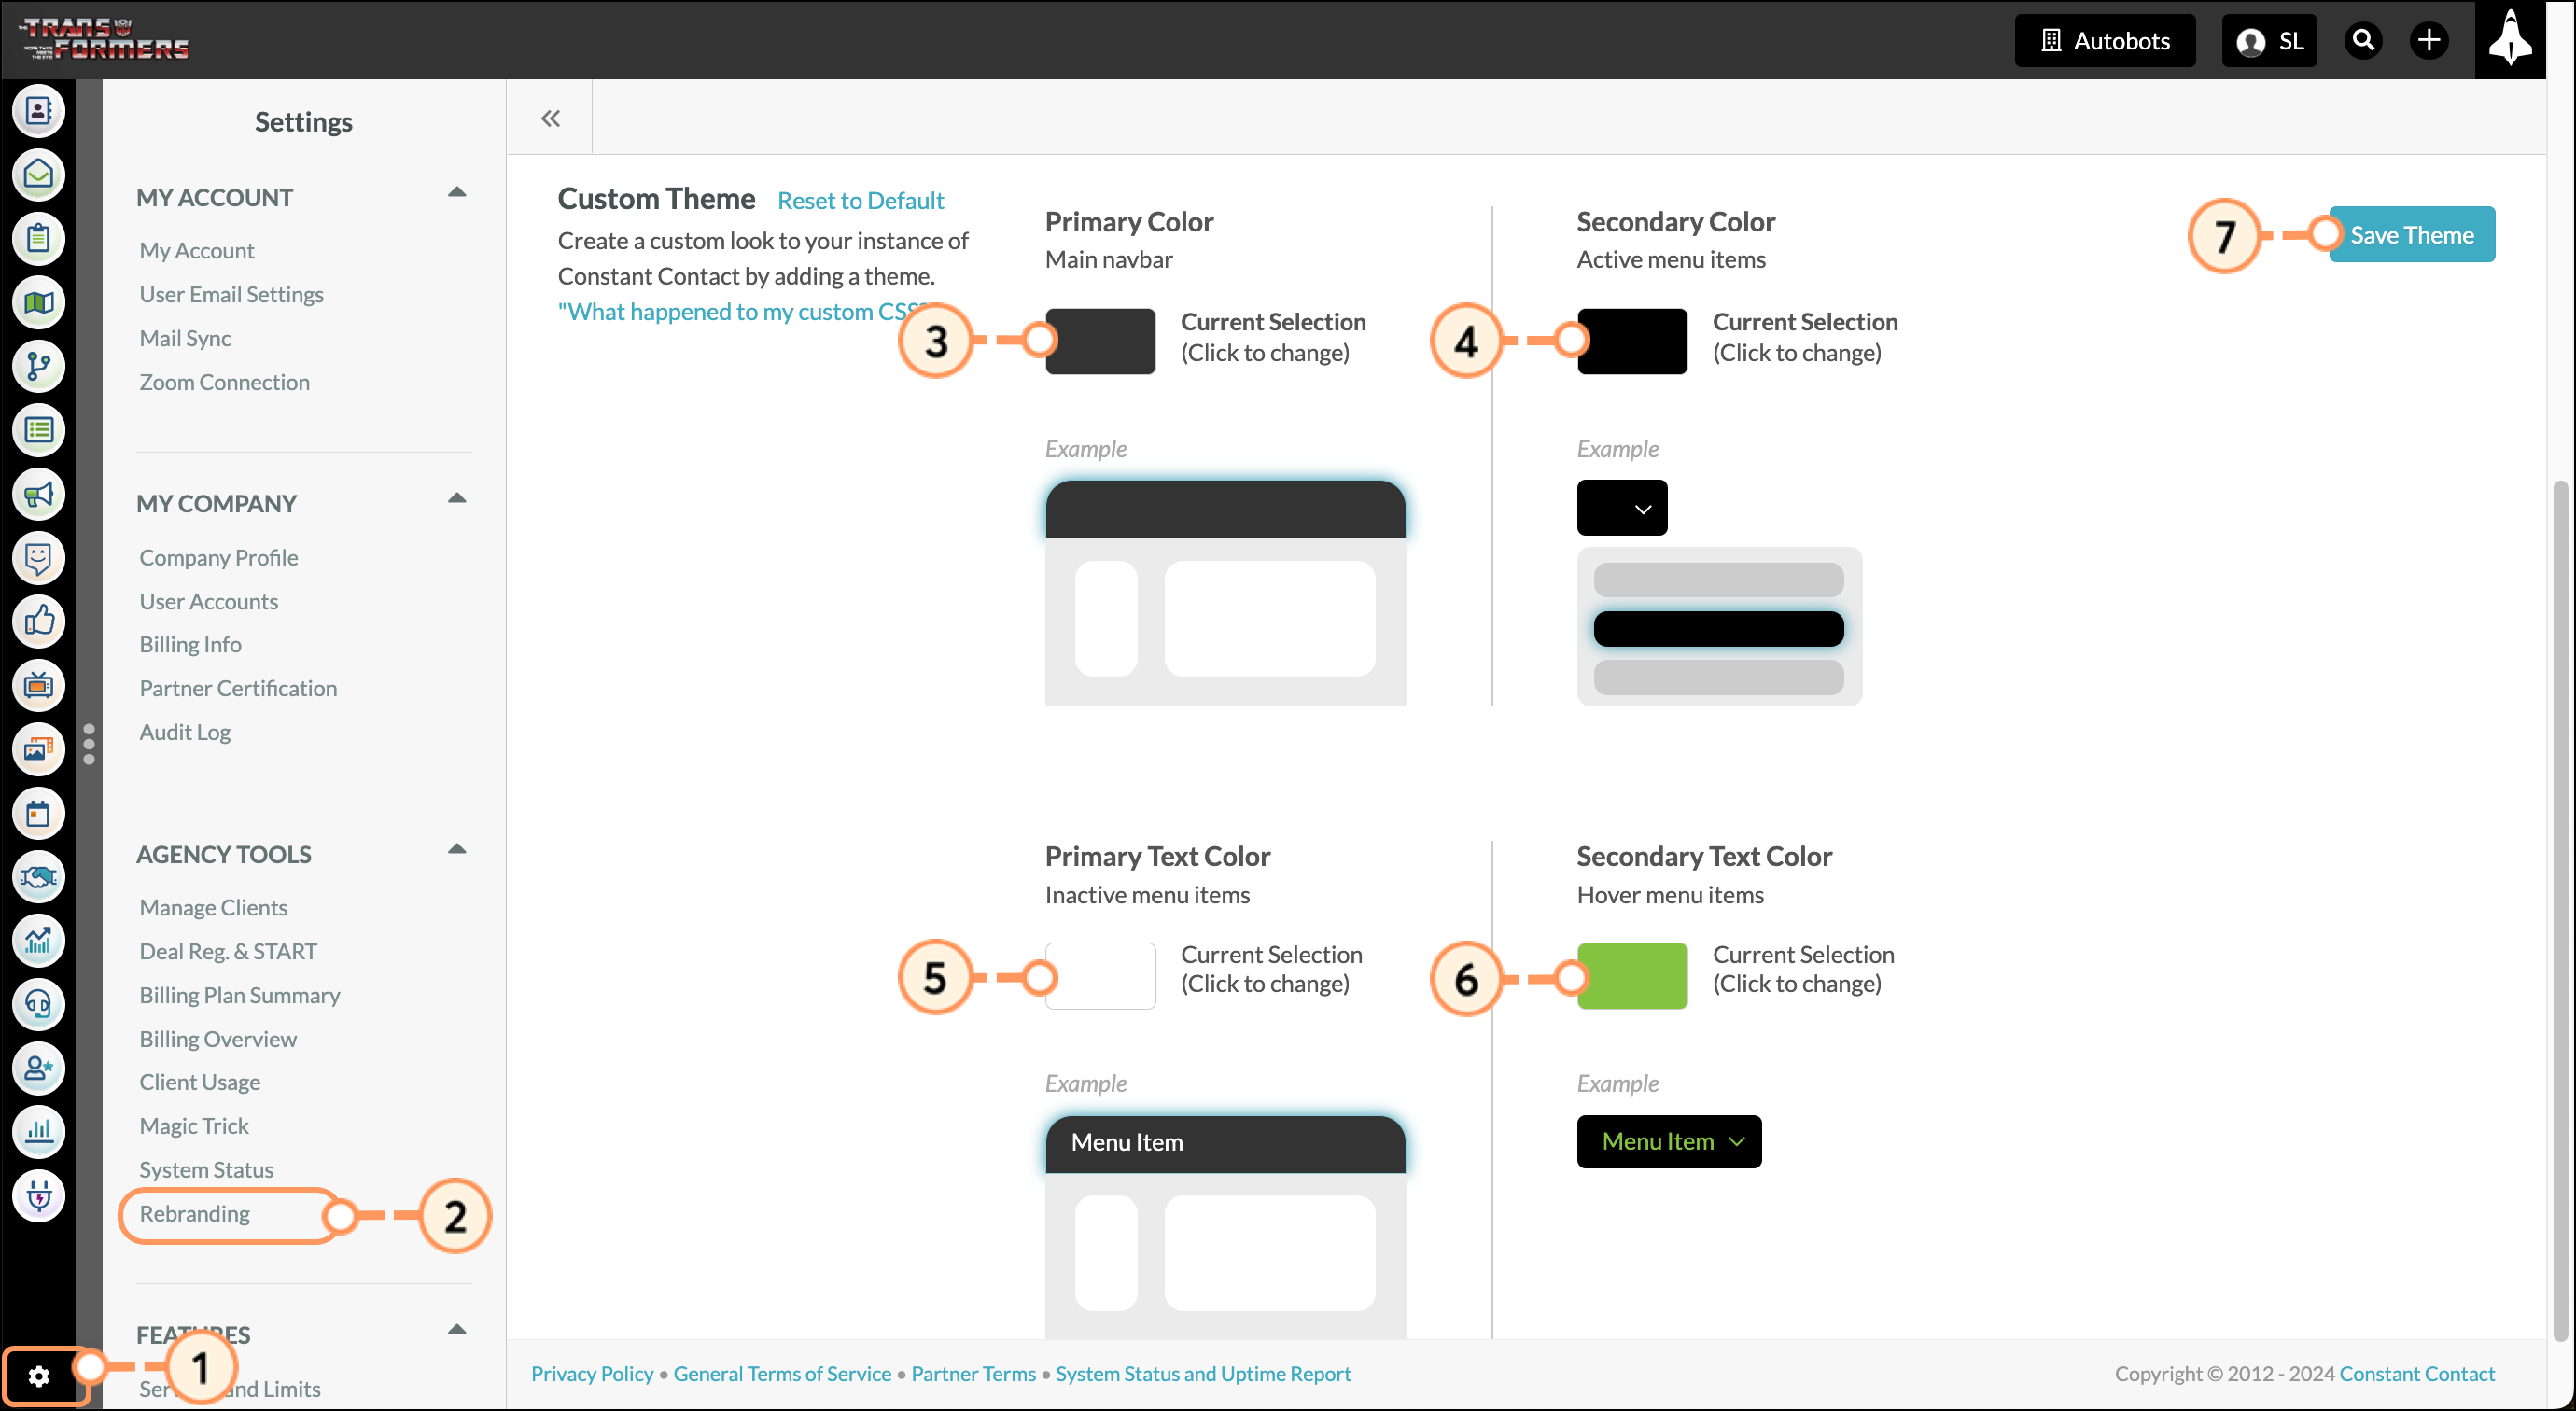
You can customize the colors of your Lead Gen & CRM instance. This does not modify platform functionality in any way. To customize the color scheme of your instance, do the following:
Copyright © 2026 · All Rights Reserved · Constant Contact · Privacy Center