The Sales Pipeline provides a set of features that facilitate, track, and otherwise allow you to oversee the various steps in securing sales. Each stage in a sales pipeline describes the part of the sales process that your team is currently engaged in with a client. In this article, you'll learn how to add new stages to a pipeline and modify stages in a sales pipeline.
Article Contents
Users:
| Administrators | ✓ | |
| Company Managers | ✓ | |
| Marketing Managers | | |
| Sales Managers | ✓ | |
| Salespersons | ✓ | |
| Jr. Salespersons | ✓ | |
The Pipeline Editor
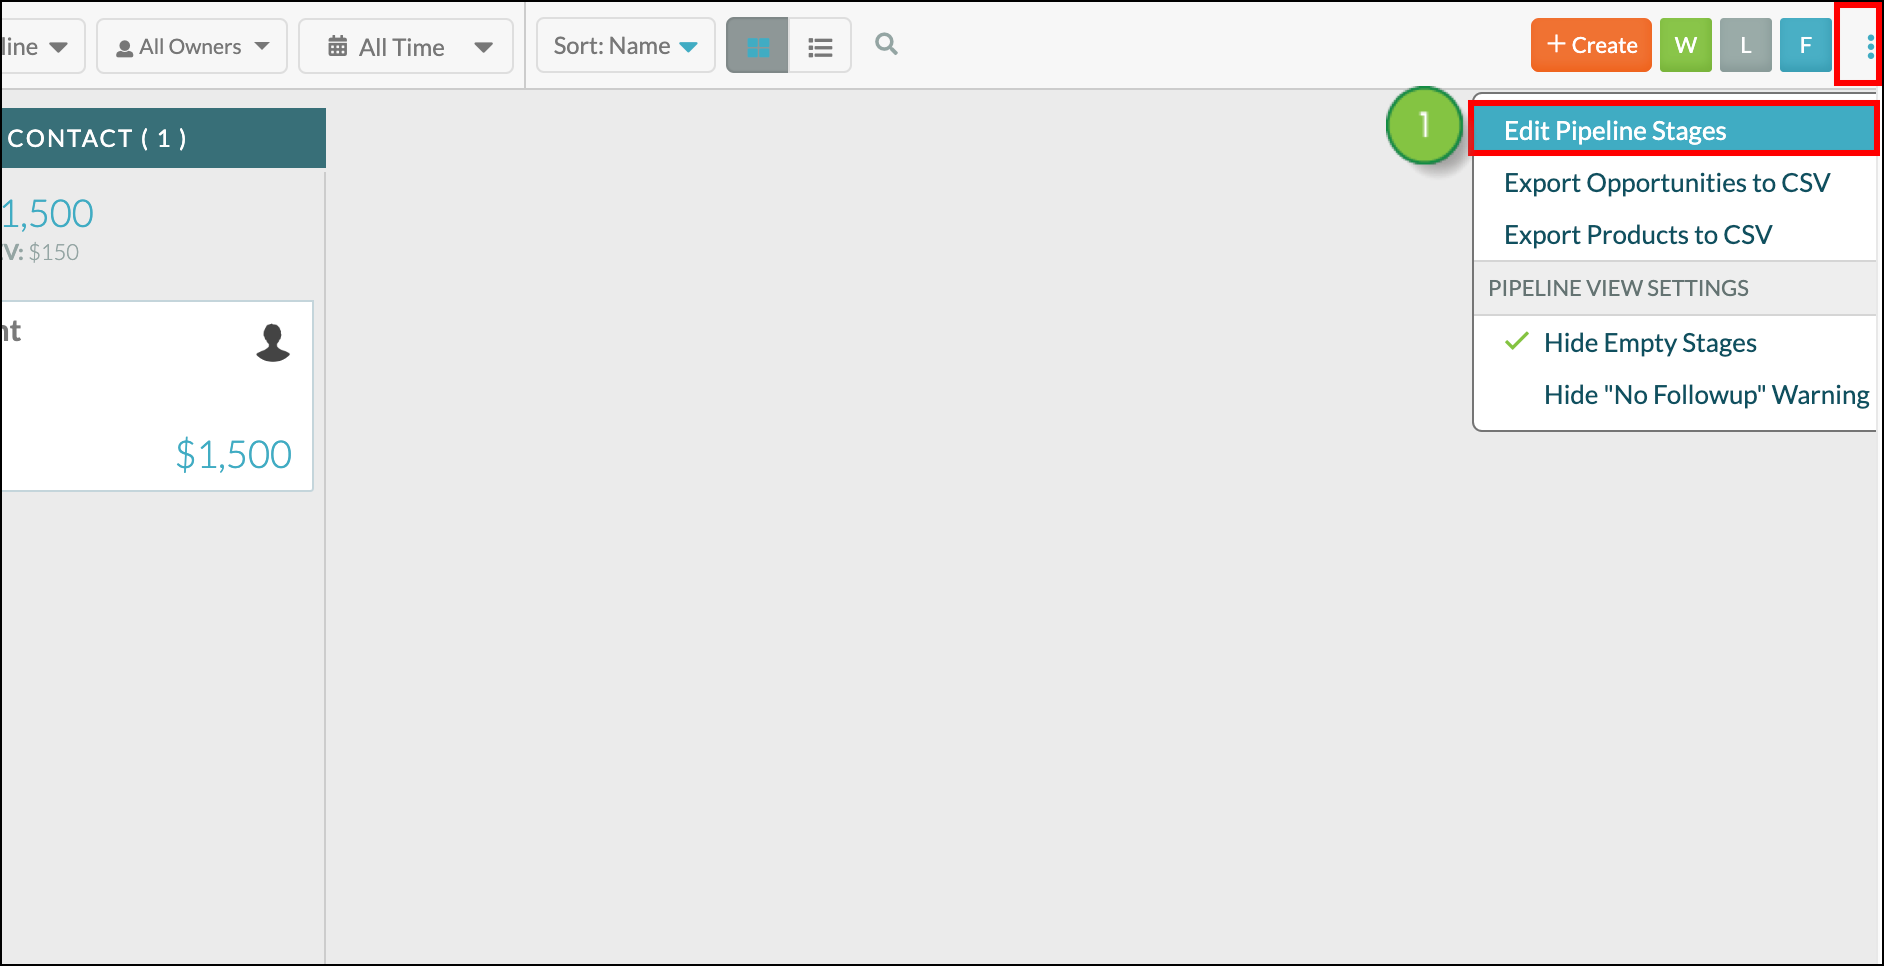
Access the pipeline editor to create new pipelines and edit pipeline stages. To access the Pipeline Editor, start from Sales > Opportunities in the left toolbar.
- Click
 Options.
 - Click Edit Pipeline Stages.
Alternatively, you can do the following:
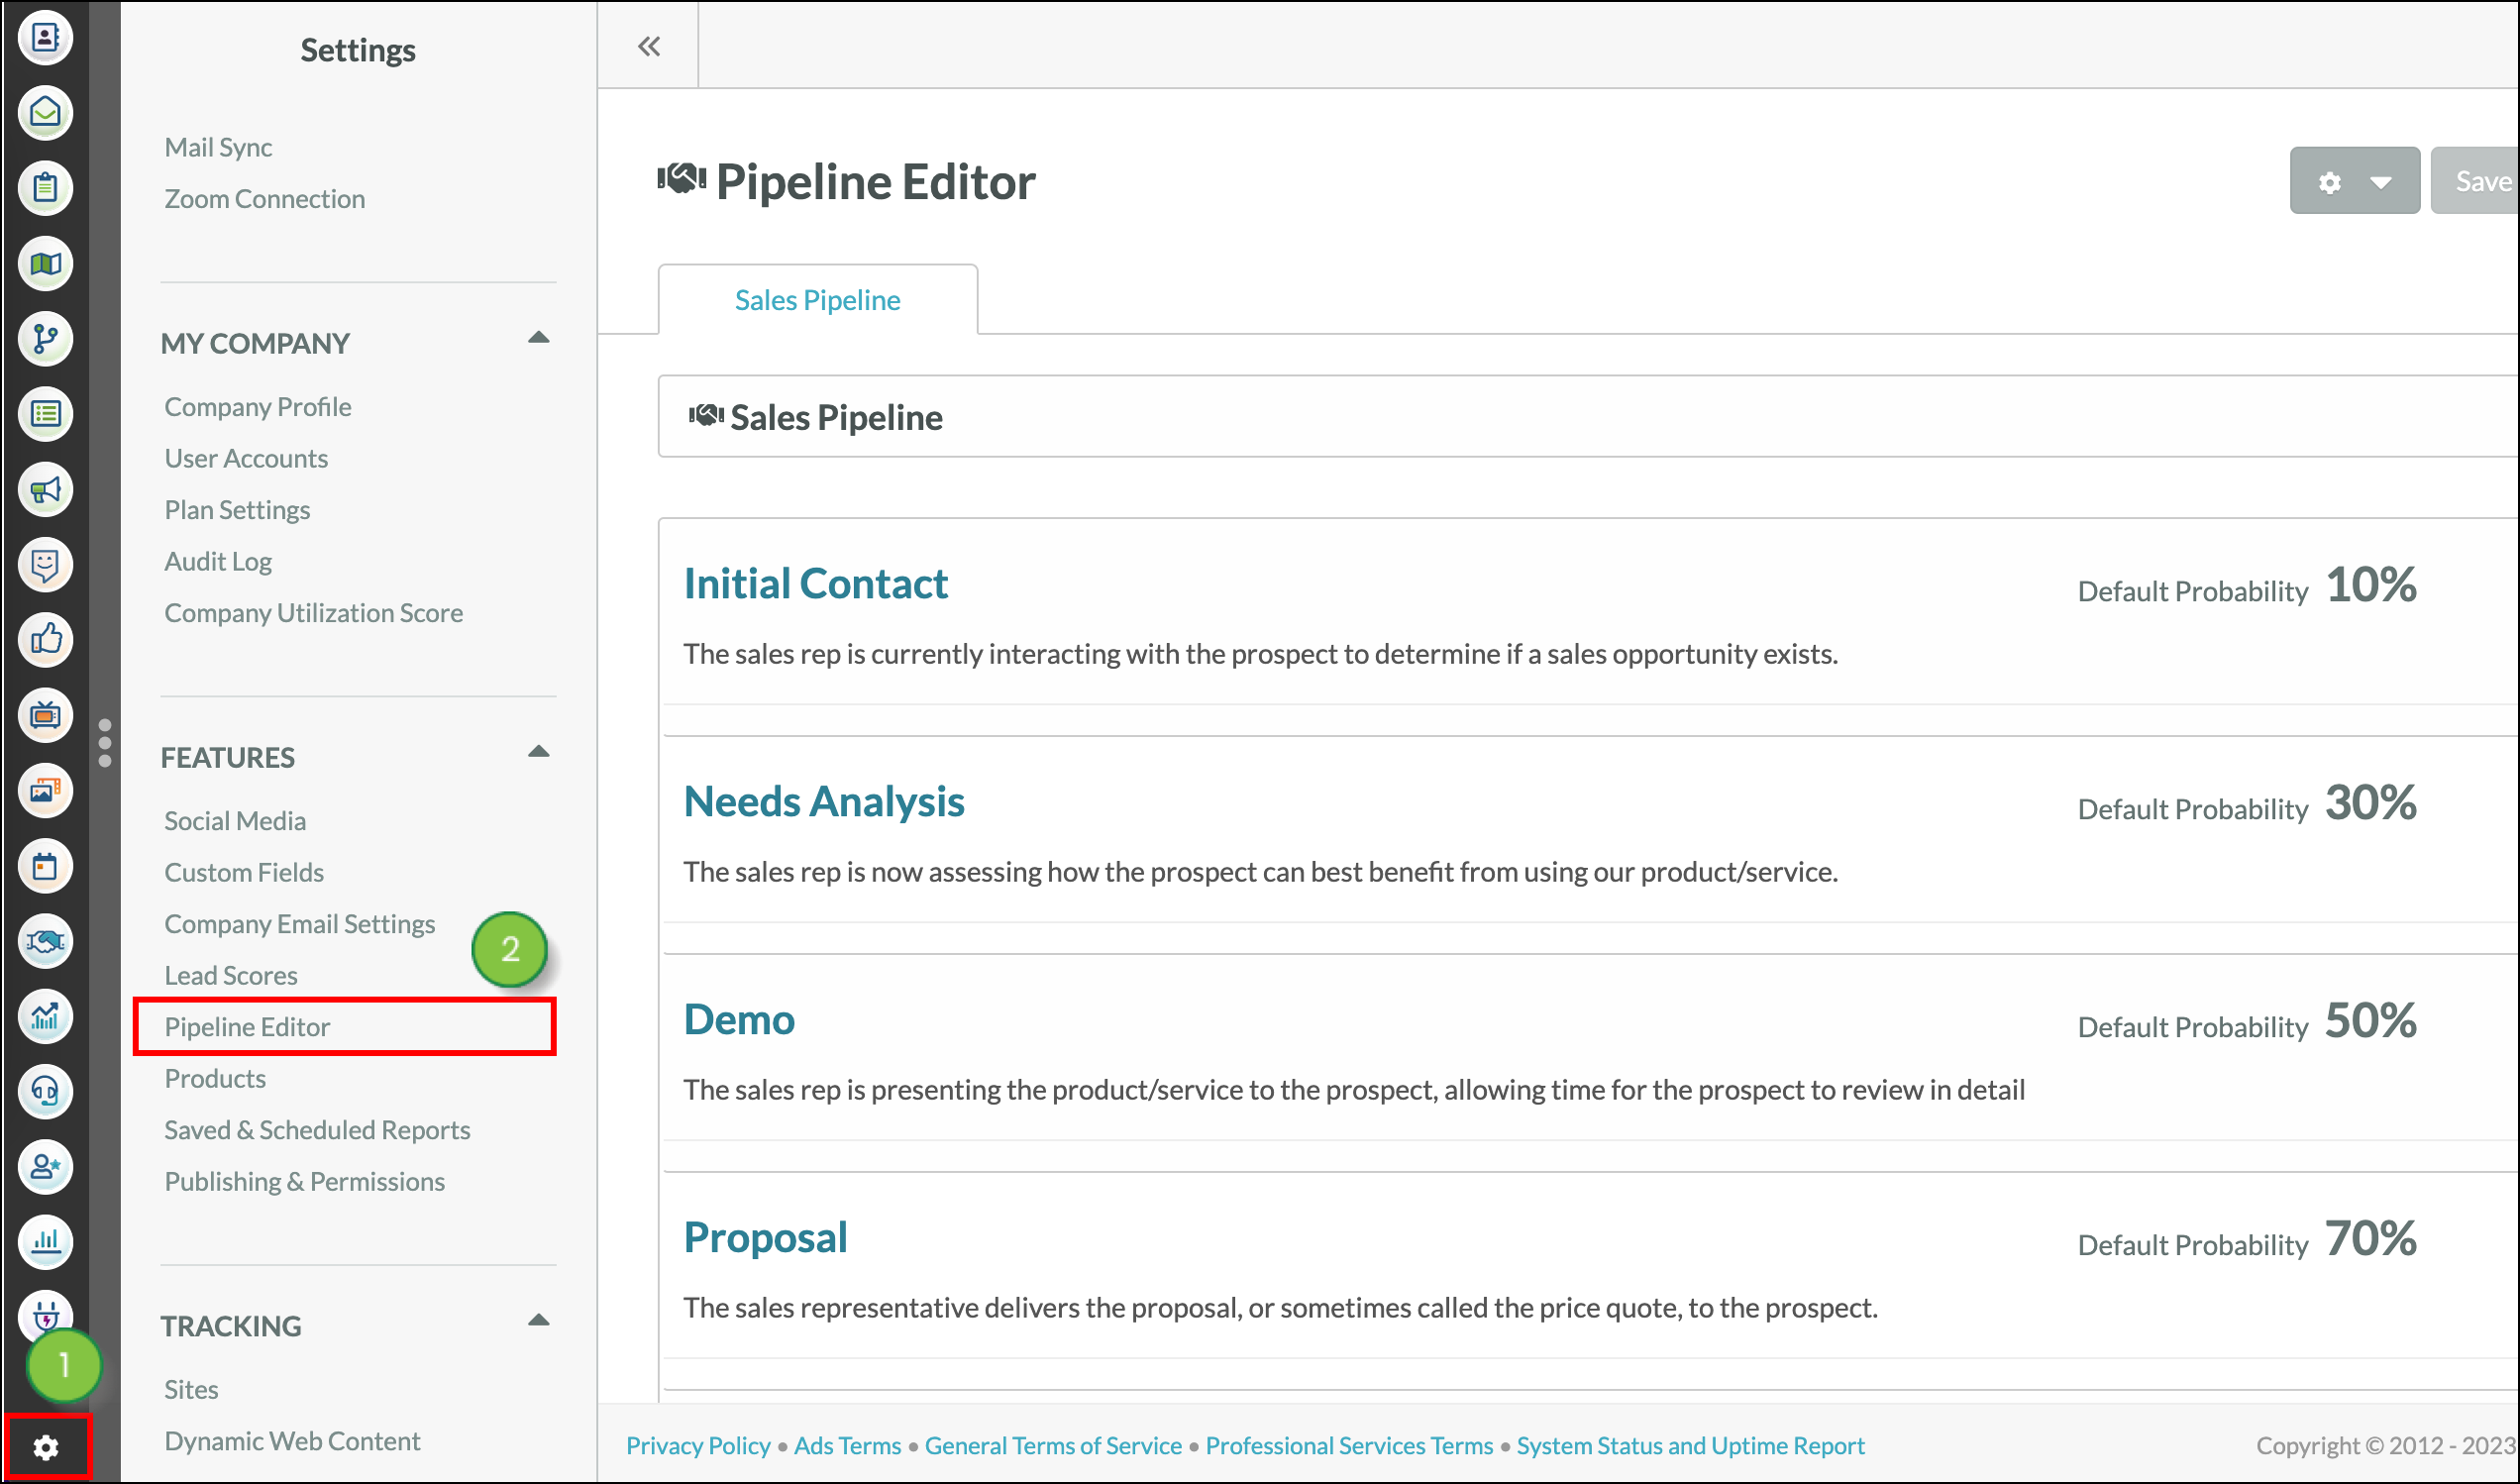
- Click User Menu > Settings in the top toolbar or Settings at the bottom of the left toolbar.
- Click Pipeline Editor, located under Features in the left panel.
Adding Stages to a Pipeline
Created pipelines have no stage data. Stage data must be added to a pipeline for the pipeline to be usable. Stages should be different enough from one another to clearly define where in the sales flow an opportunity is. Pipelines can have as few or as many stages as needed.
Note: Editing the default pipeline, the Sales Pipeline, will automatically create a brand new pipeline with your edited information. This is because you are not able to change the default pipeline. The first tab in the pipeline editor will always be the default pipeline, and will always be titled Sales Pipeline.
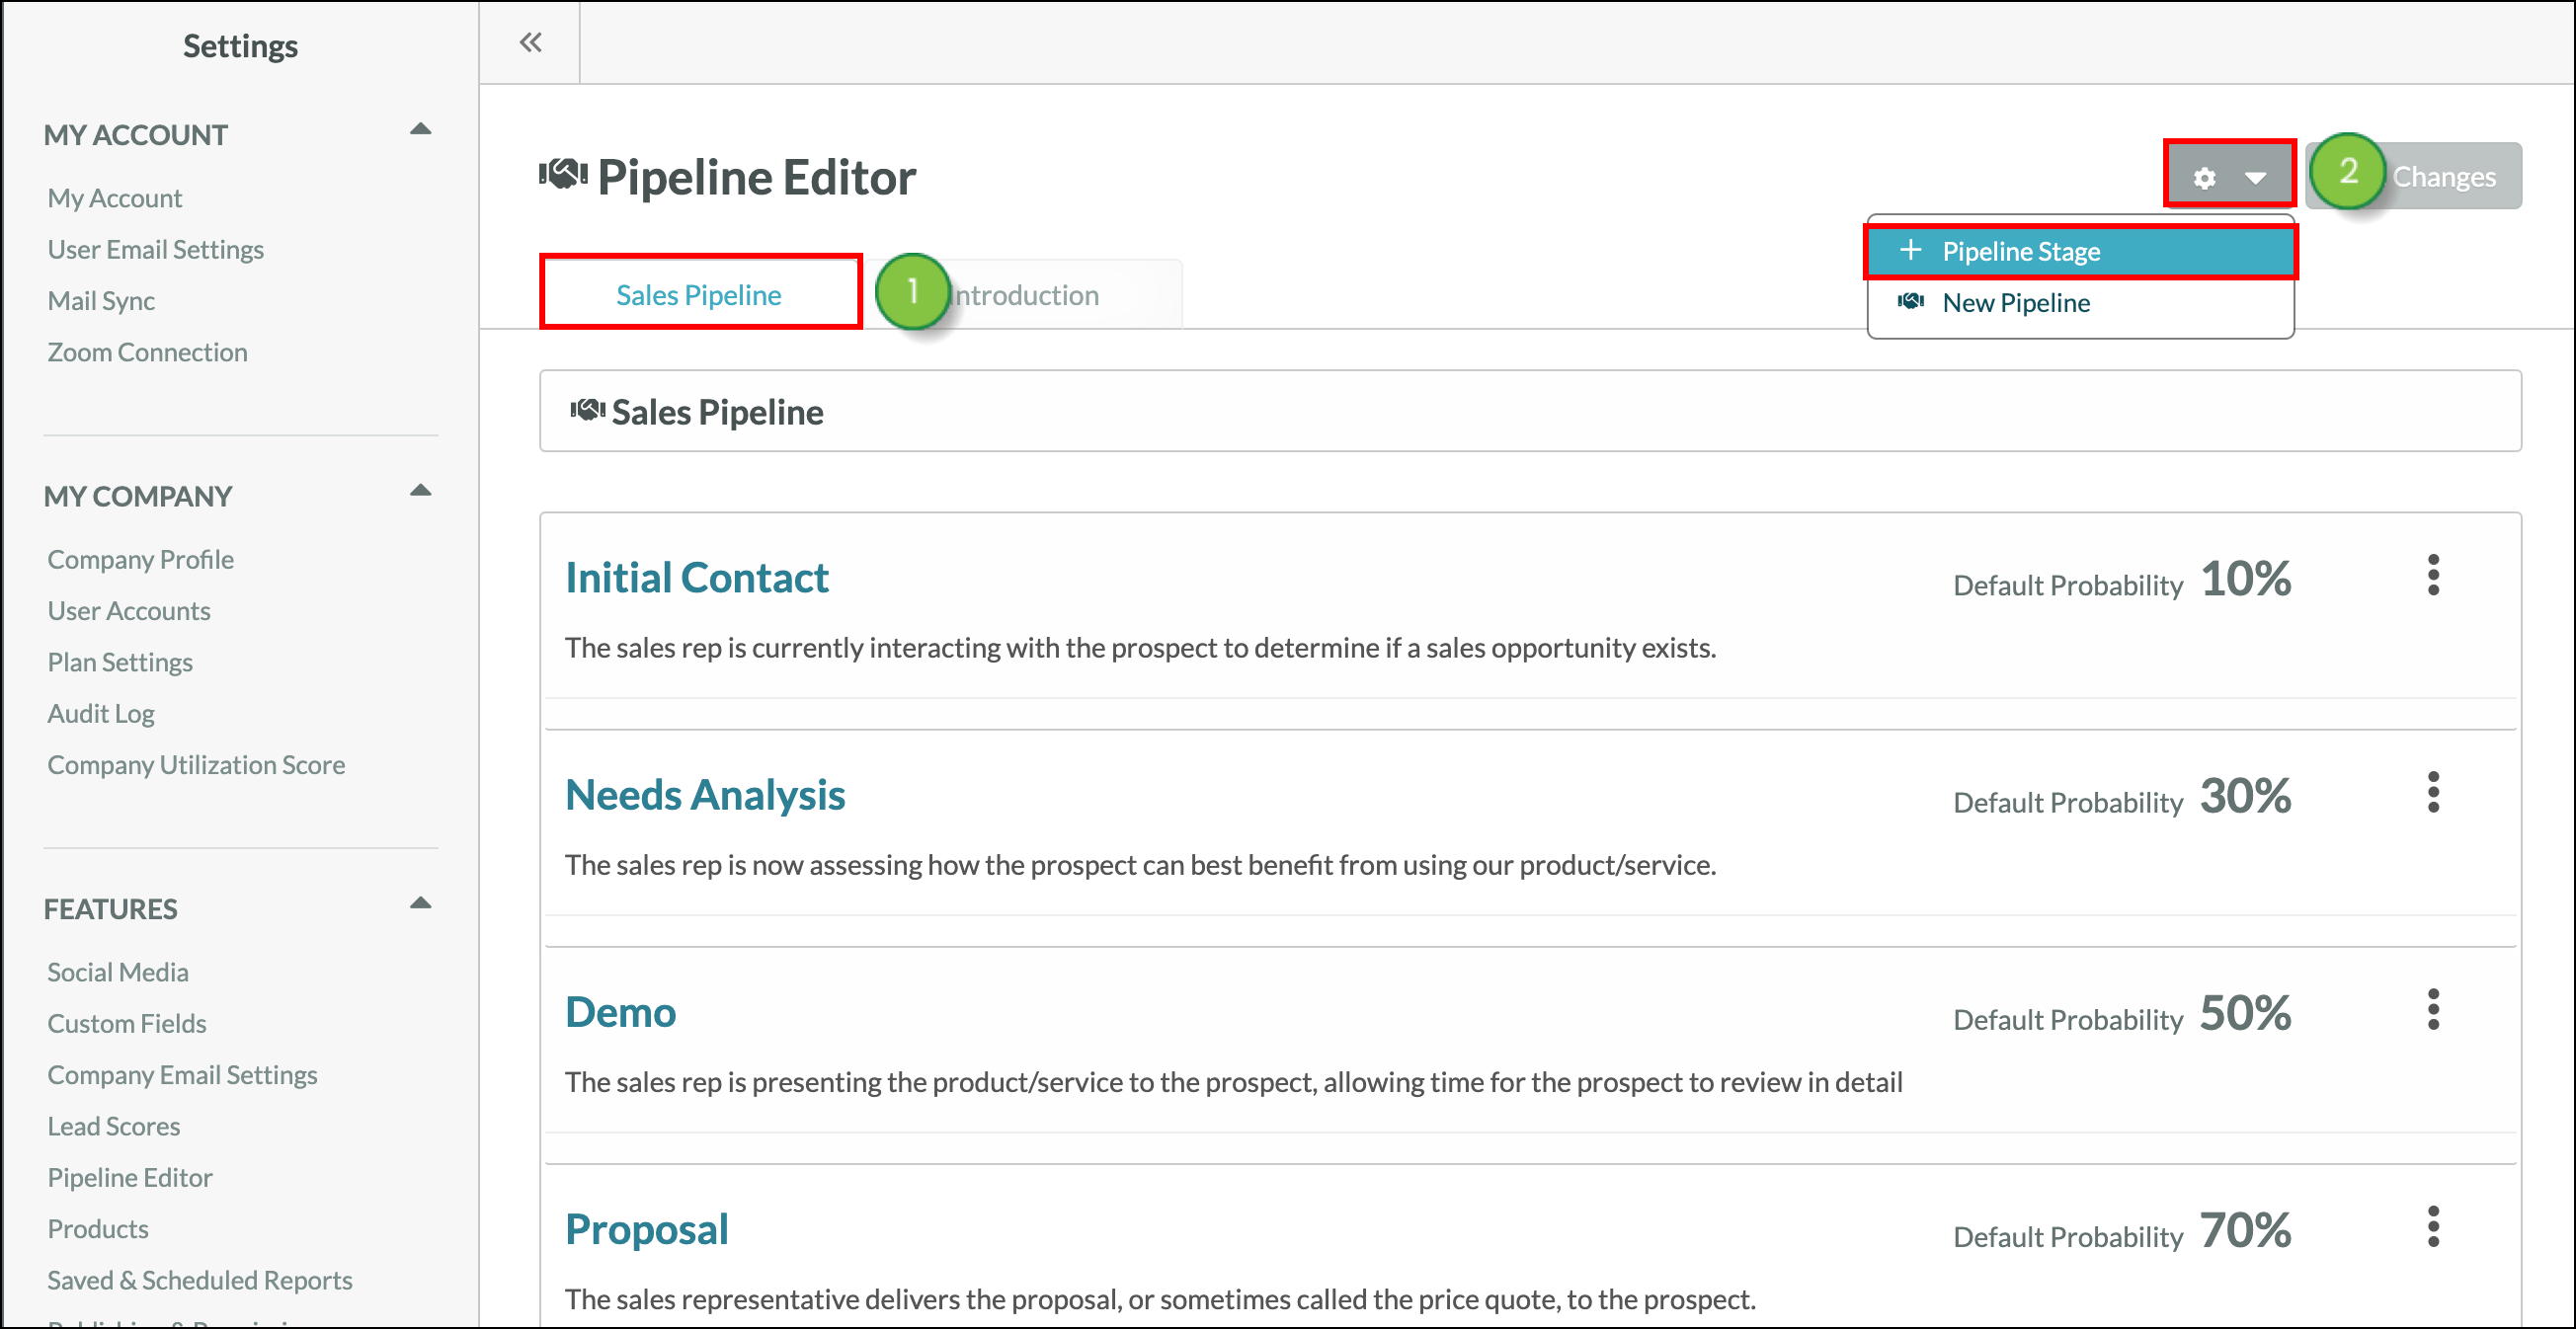
To add stages to a pipeline, start from the Pipeline Editor.
- Select the pipeline tab that you would like to edit.
- Click
 Options > Pipeline Stage.
- Enter a name for the stage in the Deal Stage Name field.
Important: The name of the default pipeline, which is titled Sales Pipeline, cannot be edited. This pipeline cannot be erased.
- Select the pipeline this stage will be part of in the Pipeline drop-down menu.
- Select the probability value in the Probability drop-down menu.
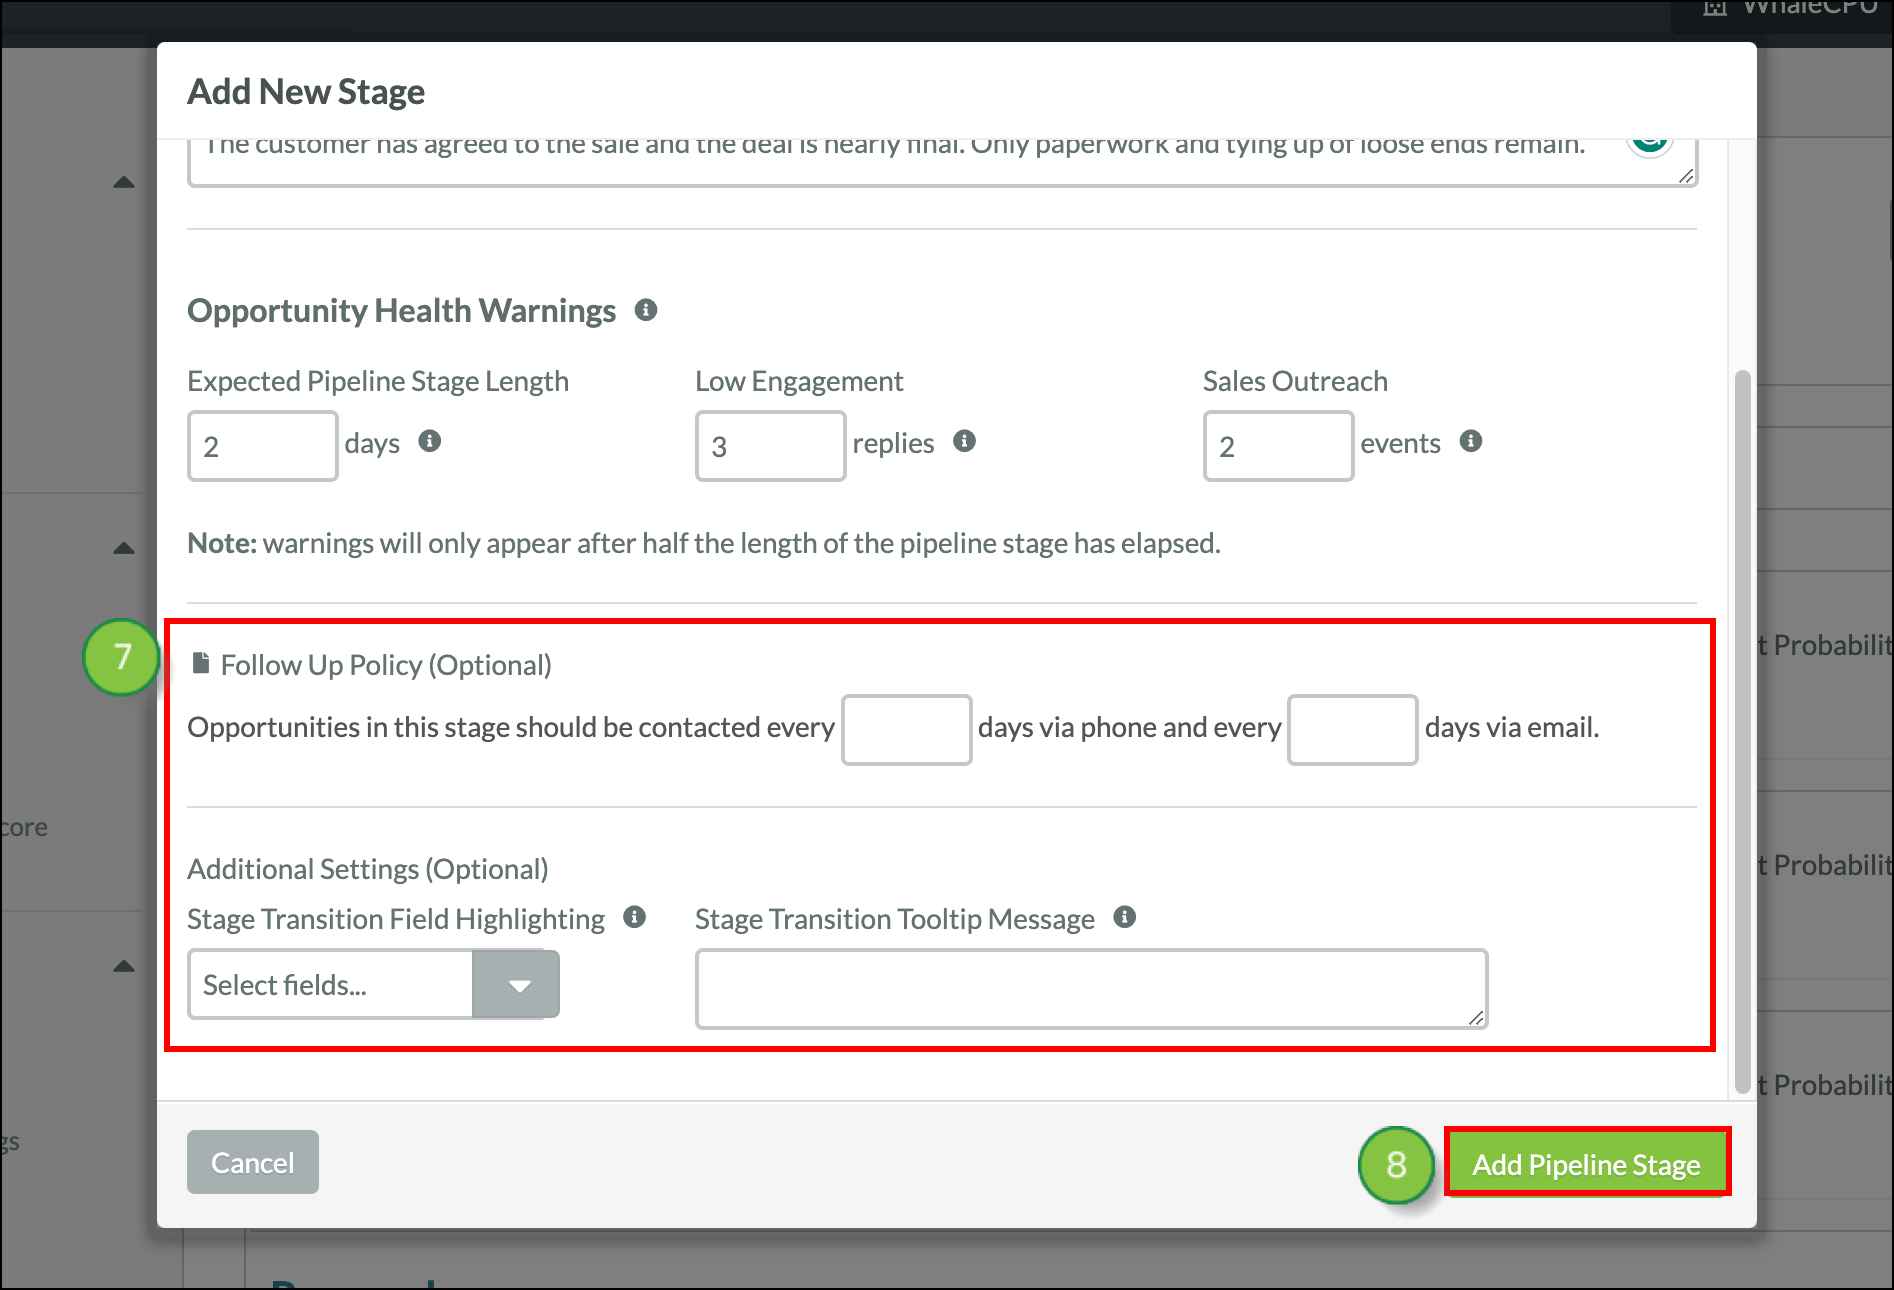
- Enter a description for the stage in the Description field.
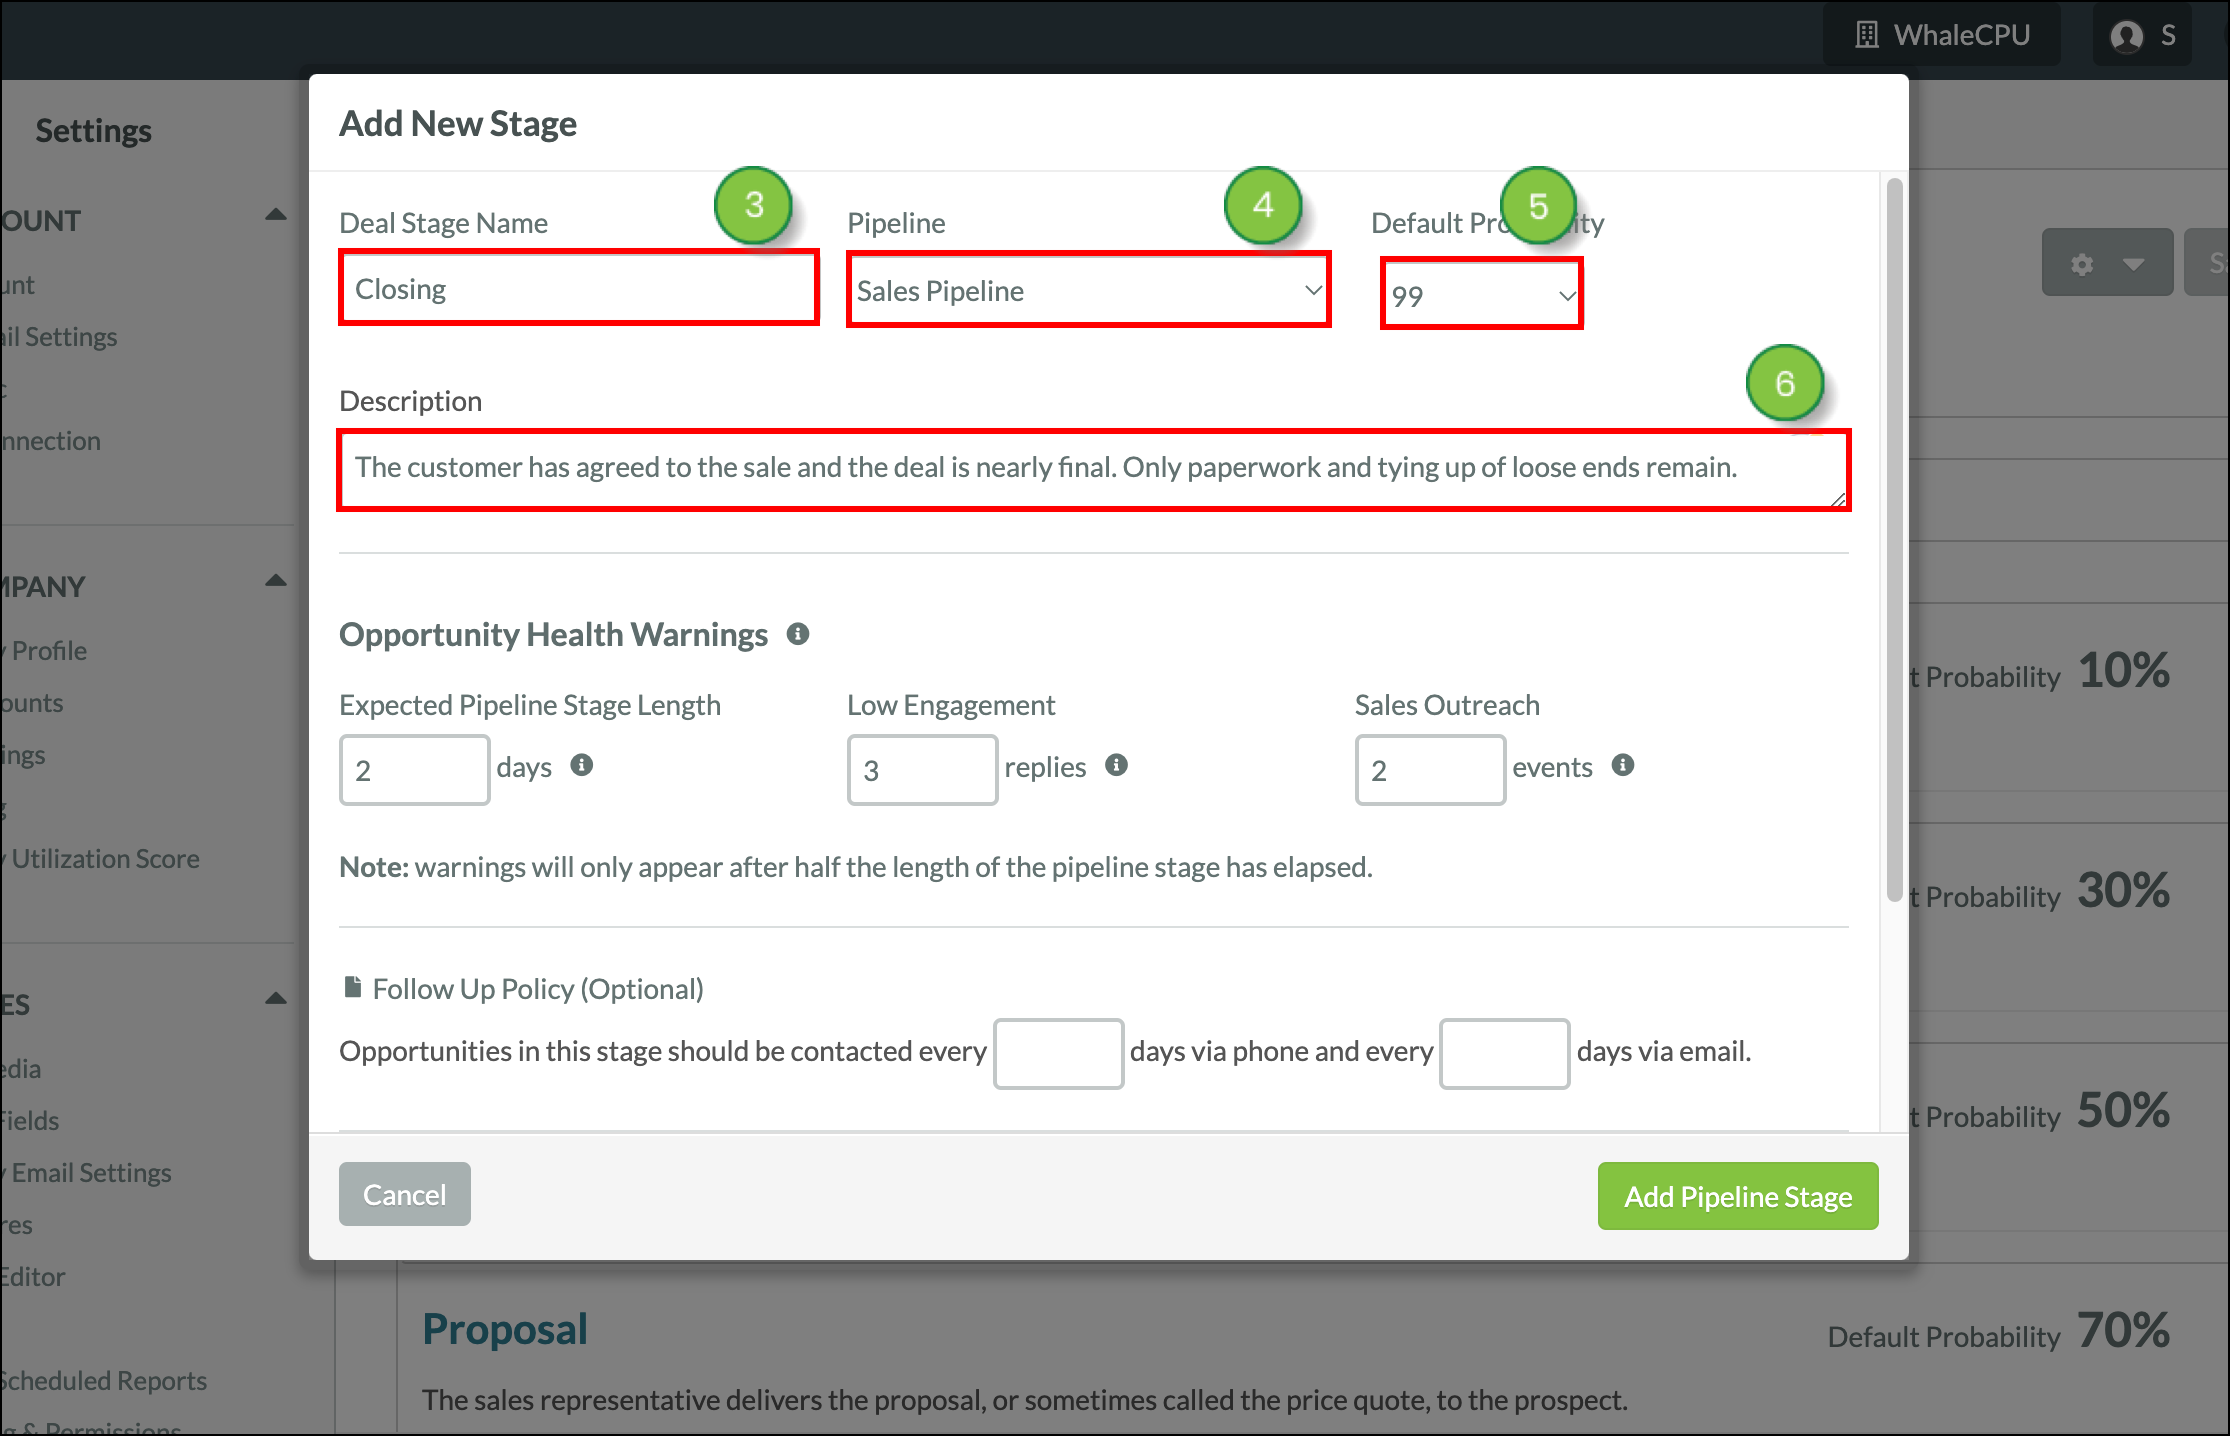
- Optionally, enter the number of days between prior contact that opportunities should be engaged via phone and email in the Sales Automation Policy section.
- Click Add Pipeline Stage.
Editing Pipeline Stages
You can edit pipeline stages as necessary. To edit pipeline stages, start from the pipeline editor.
Note: Editing the default pipeline, the Sales Pipeline, will automatically create a brand new pipeline with your edited information. This is because you are not able to change the default pipeline. The first tab in the pipeline editor will always be the default pipeline, and will always be titled Sales Pipeline.
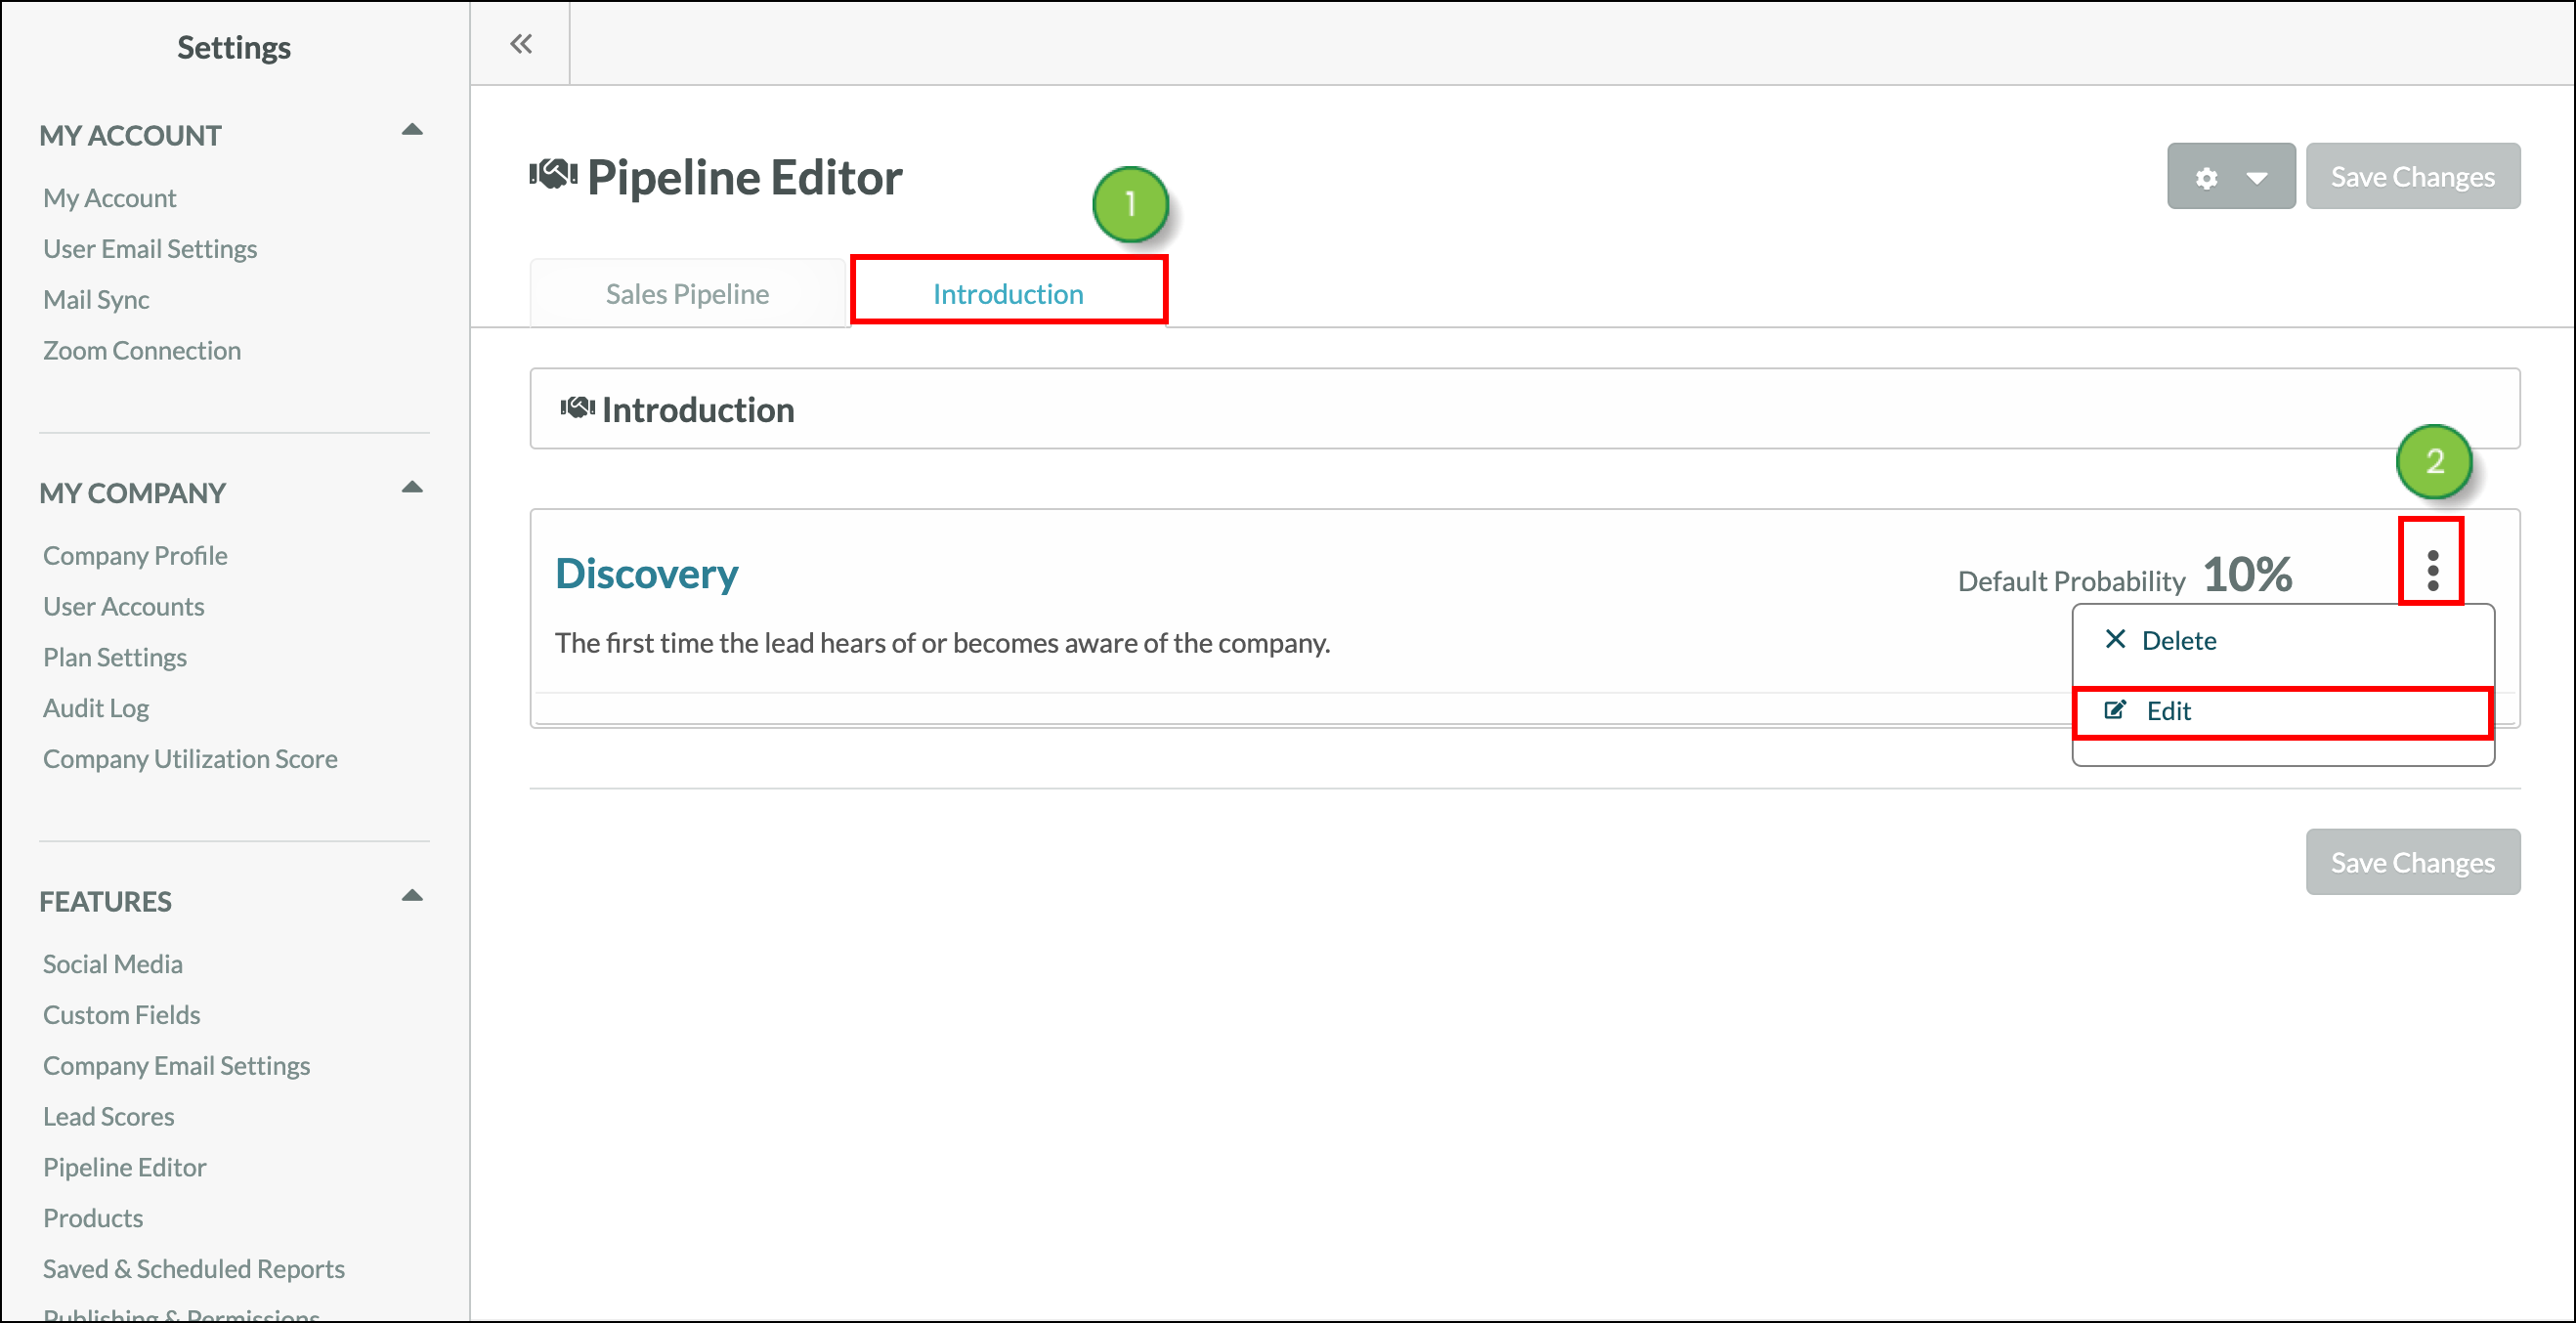
- Select the tab of the desired pipeline.
- Click
 Options > Edit in the desired pipeline stage.
Important: The default pipeline, which is titled Sales Pipeline, cannot be edited.
- Edit individual stage information as necessary.
- Click Save Settings.

Repeat as necessary for all applicable stages. To move your opportunities through stages, you may simply drag and drop them into the correct stage from the Sales Pipeline.
Read Sales Pipeline Overview to learn more about how to use the sales pipeline.