This article will provide an overview of the Pipeline Value report, as well as its available features.
Article Contents
Users:
| Administrators | ✓ | |
| Company Managers | ✓ | |
| Marketing Managers | | |
| Sales Managers | ✓ | |
| Salespersons | ✓ | |
| Jr. Salespersons | ✓ | |
Understanding the Pipeline Value Report
Click Analytics > Pipeline Value to access the Pipeline Value report in Lead Gen & CRM's top toolbar.
The Pipeline Value report provides visual information on closing opportunities across a period of time. The Pipeline Value report is based on the expected close date for an opportunity. As such, the Pipeline Value report helps with forecasting overall sales.
 | Important: Shopping Cart transactions can generate Opportunities; however, Opportunities created from those transactions are not added to the Sales Pipeline at this time. Please accommodate this in your pipeline analysis. |
The Pipeline Value report shows the following information:
- A chosen sales pipeline
- The period of time the report is covering
- The highest-earning sales representatives
- The opportunities in each pipeline stage
- All current sales
- All expected sales
- Total projected sales
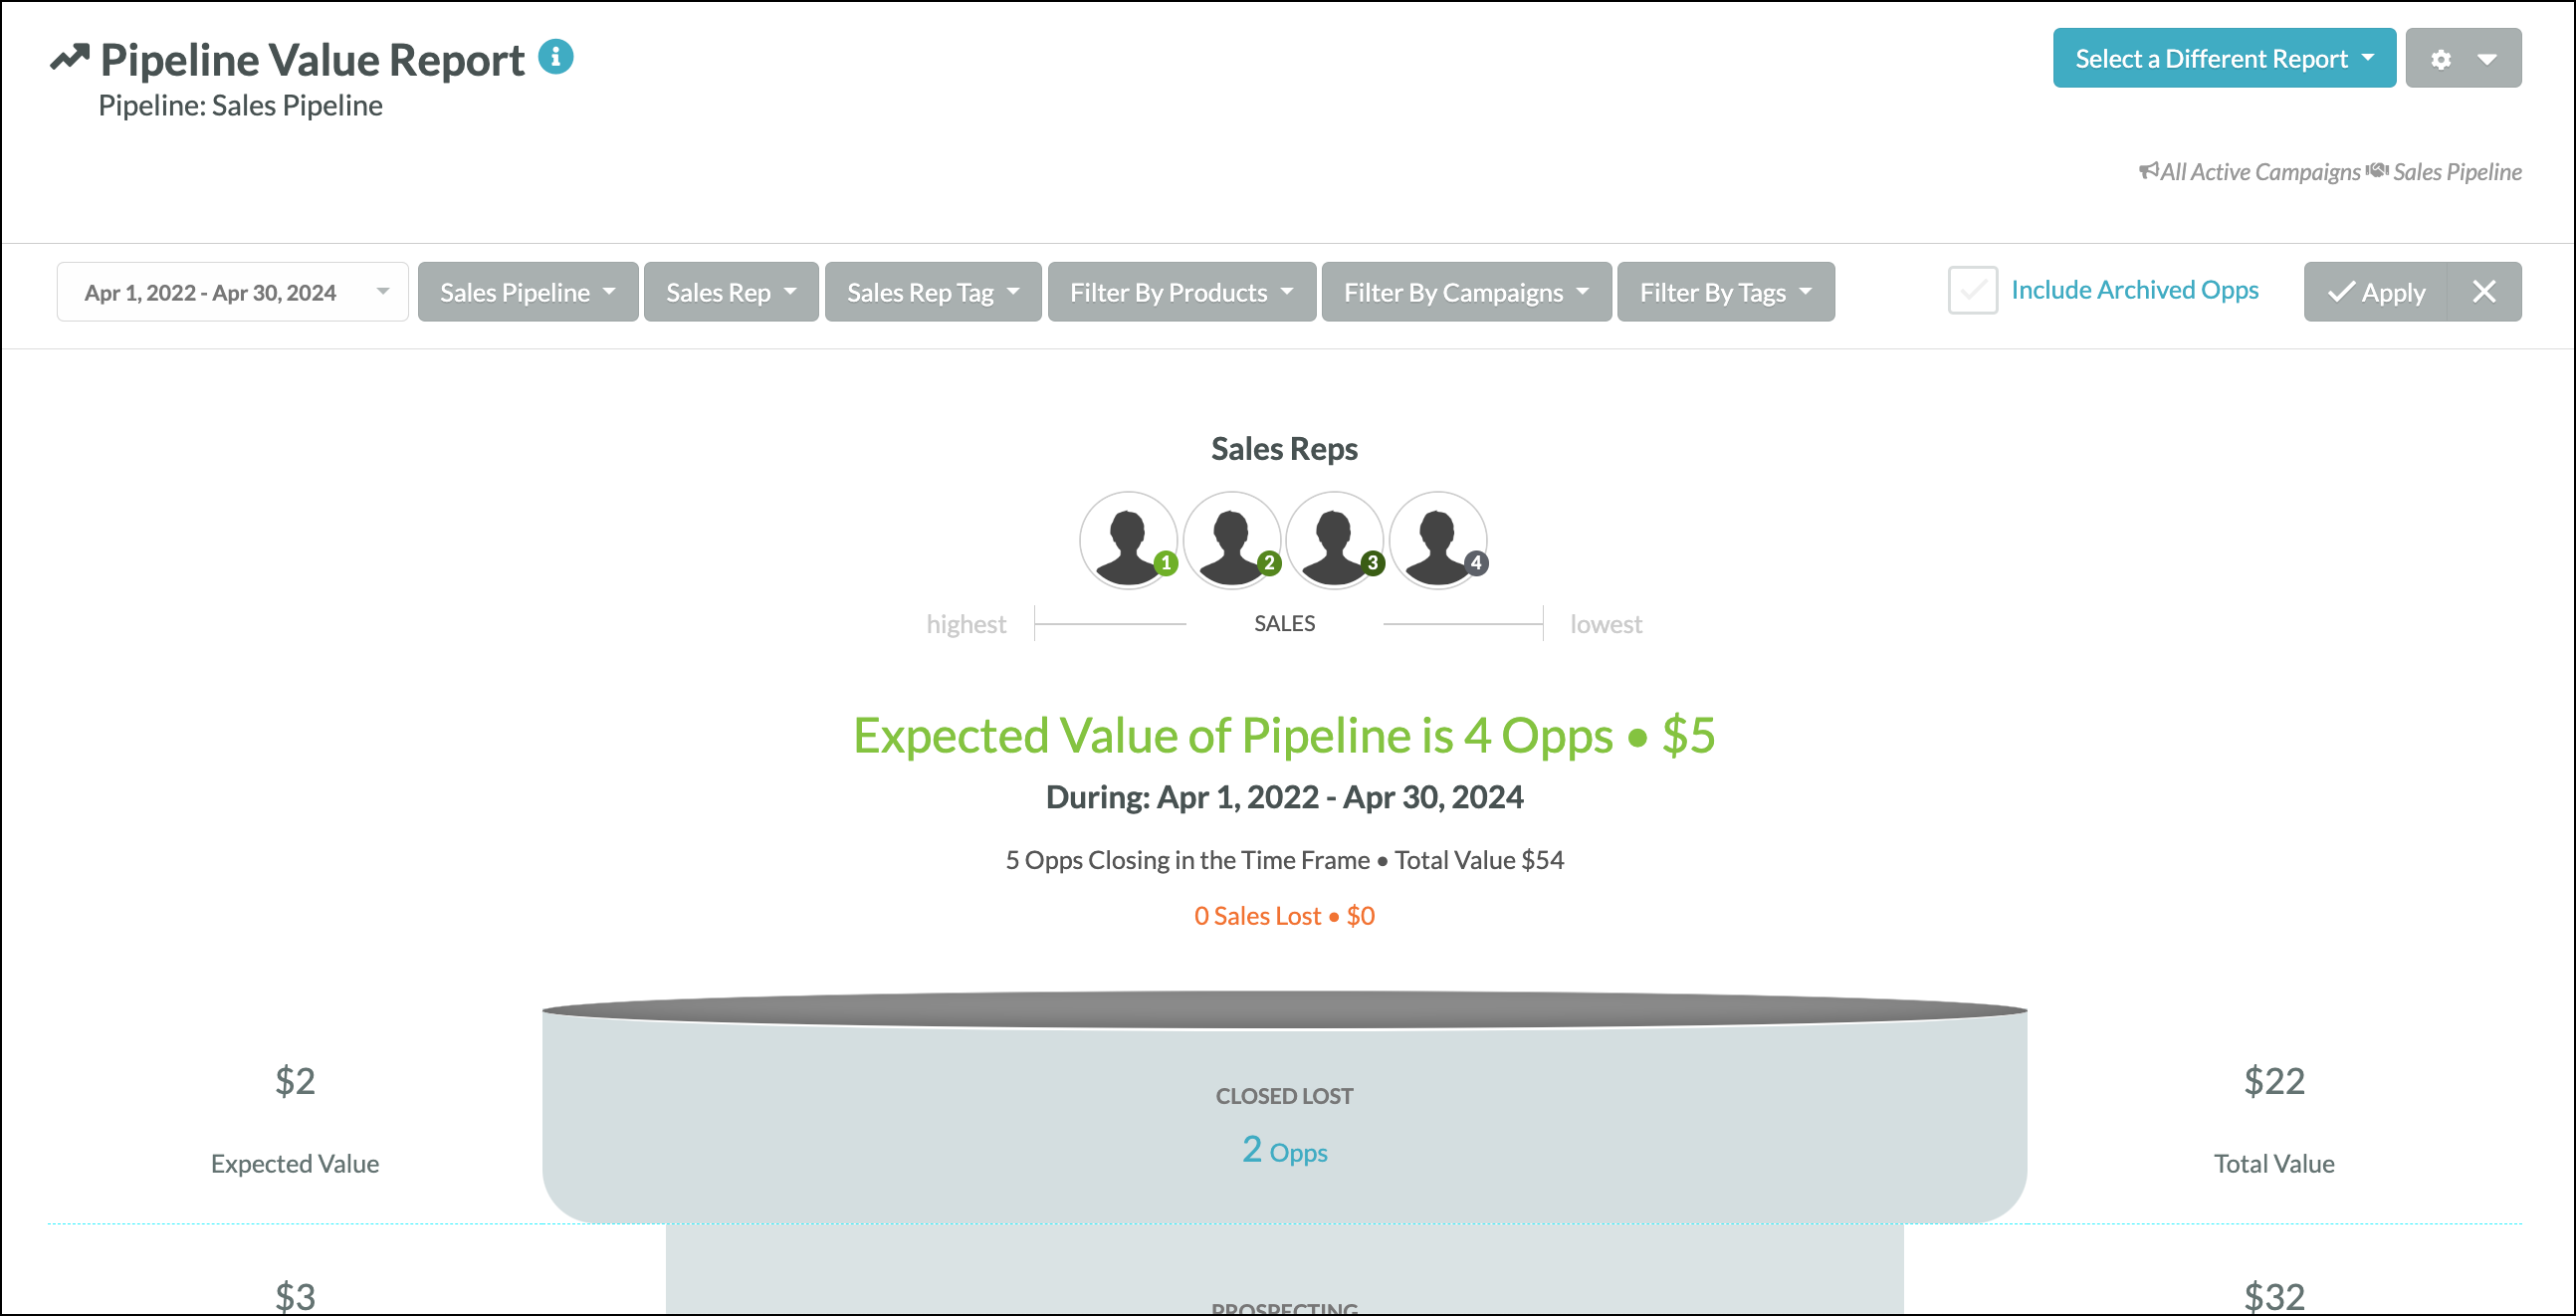
In addition, each stage of the pipeline provides data for the Total Value and Expected Value of all opportunities currently in that stage:
- Total Value is the combined value of all opportunities in the stage.
- Expected Value is calculated by taking the Total Value of each of those opportunities and factoring in the Probability to Close percentage.
Configuring Pipeline Value Reports
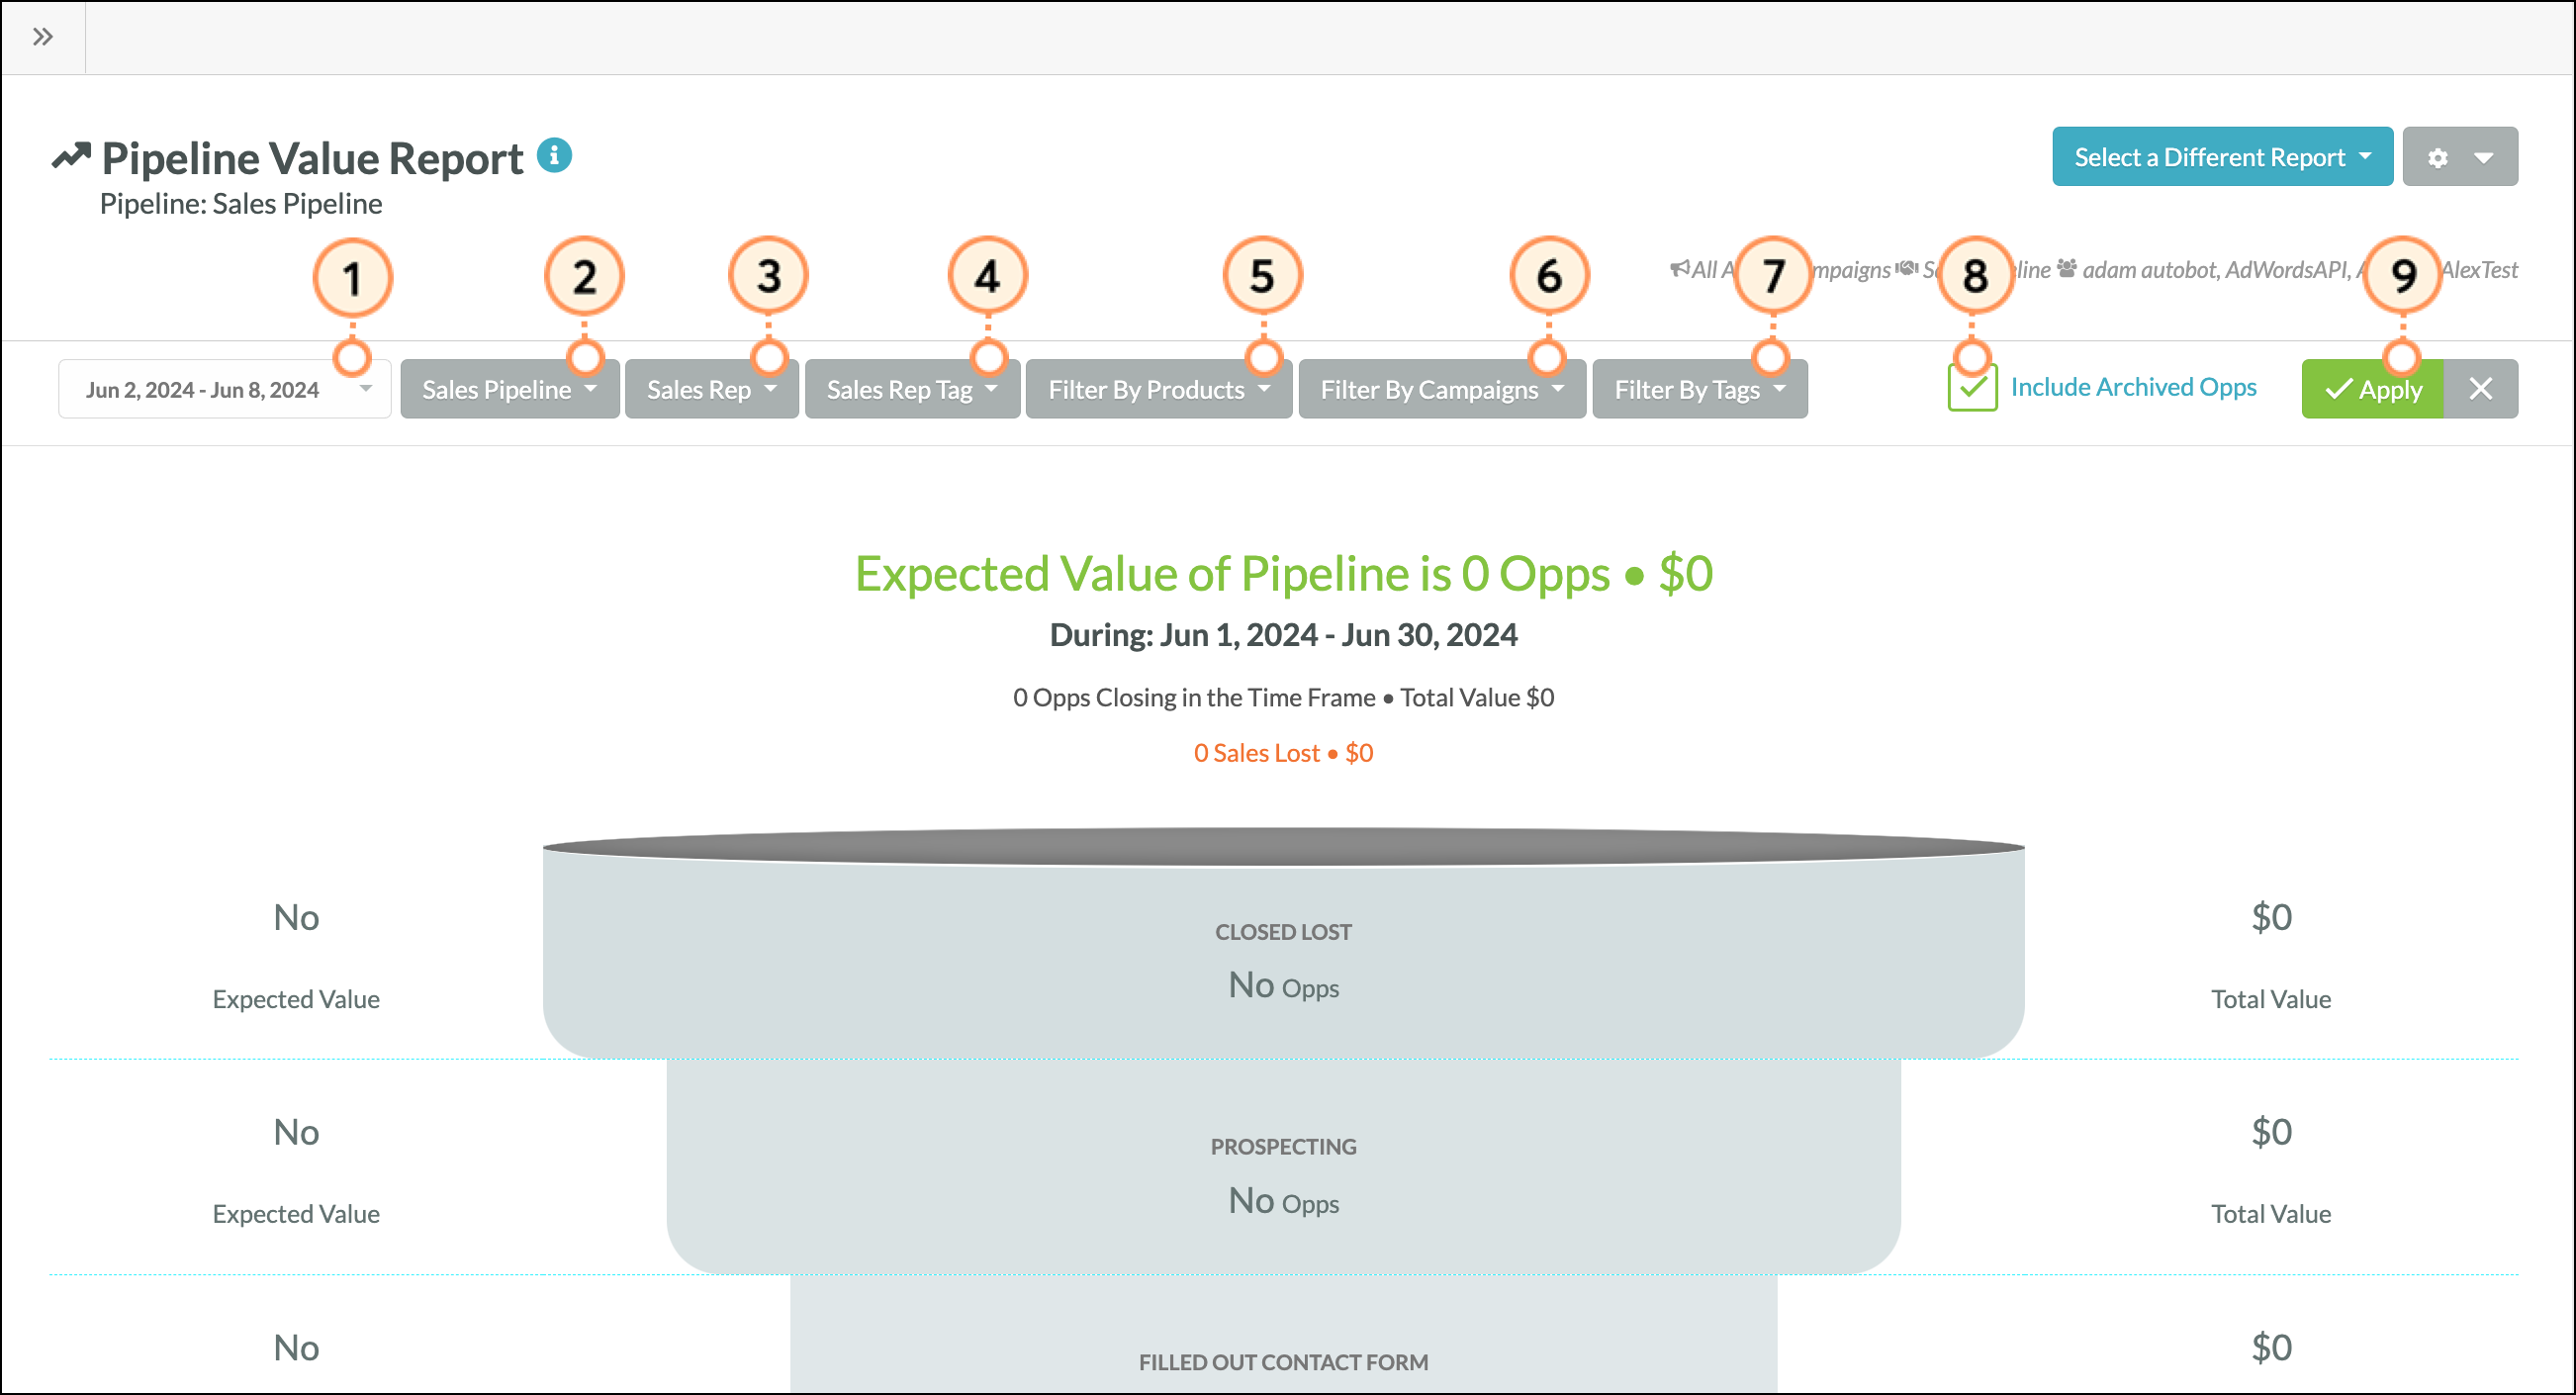
The Pipeline Value report can be configured with data filters to show different details. You can use any or all of these filters. To configure Pipeline Value report filters, do the following:
| Important: Shopping Cart transactions can generate Opportunities; however, Opportunities created from those transactions are not added to the Sales Pipeline at this time. Please accommodate this in your pipeline analysis. |
- Set the desired date range in the Date menu.
- Select the pipeline to view in the Sales Pipeline drop-down menu.
Note: Clicking on the opportunities in a pipeline stage will list their names. Clicking on the opportunity names will take you to their pages in Lead Gen & CRM. - Select the sales representative to view in the Sales Rep drop-down menu.
- Select the relevant tagged representatives in the Sales Rep Tag drop-down menu.
- Select the relevant products in the Filter by Products drop-down menu.
- Select the relevant campaign in the Filter by Campaigns drop-down menu.
- Select the relevant tags in the Filter by Tags drop-down menu.
- Optionally, click the Include Archived Opps checkbox to include archived opportunities.
- Click Apply.
Note: To reset report filters, click  Clear Filters.
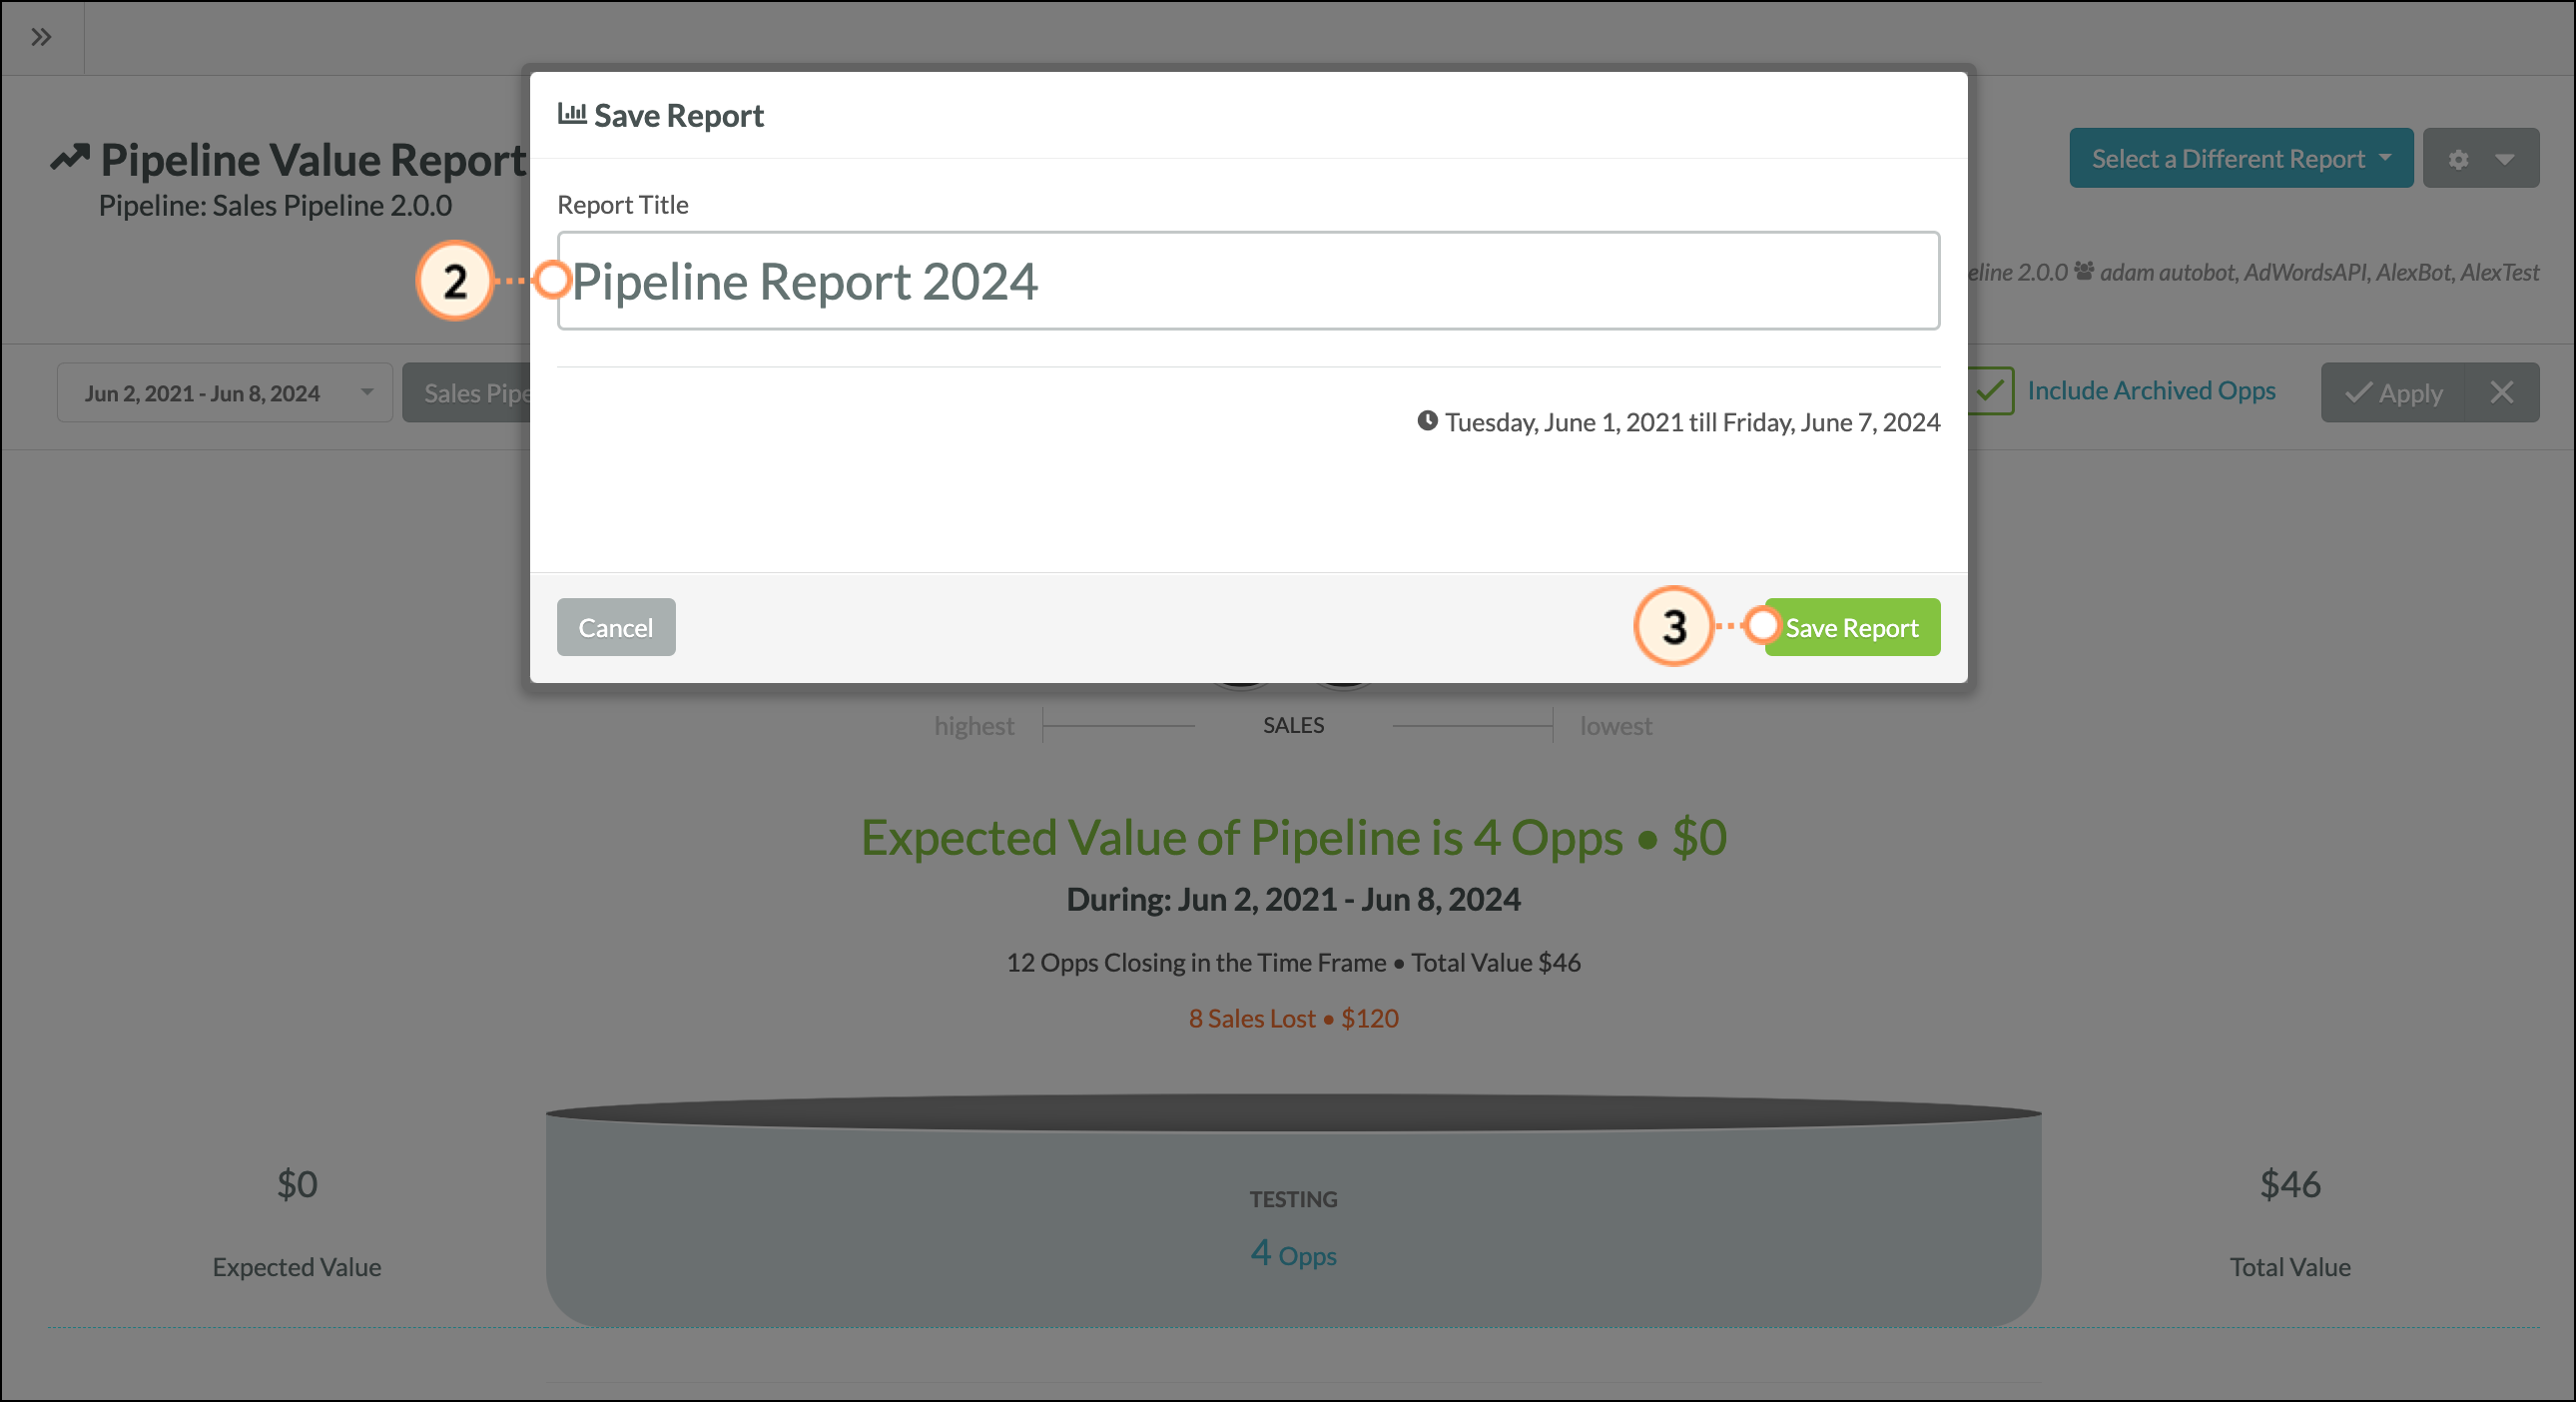
Saving Pipeline Value Reports
To save a configured Pipeline Value report, first configure and apply report filters and then do the following:
- Click
 Options > Save Report.
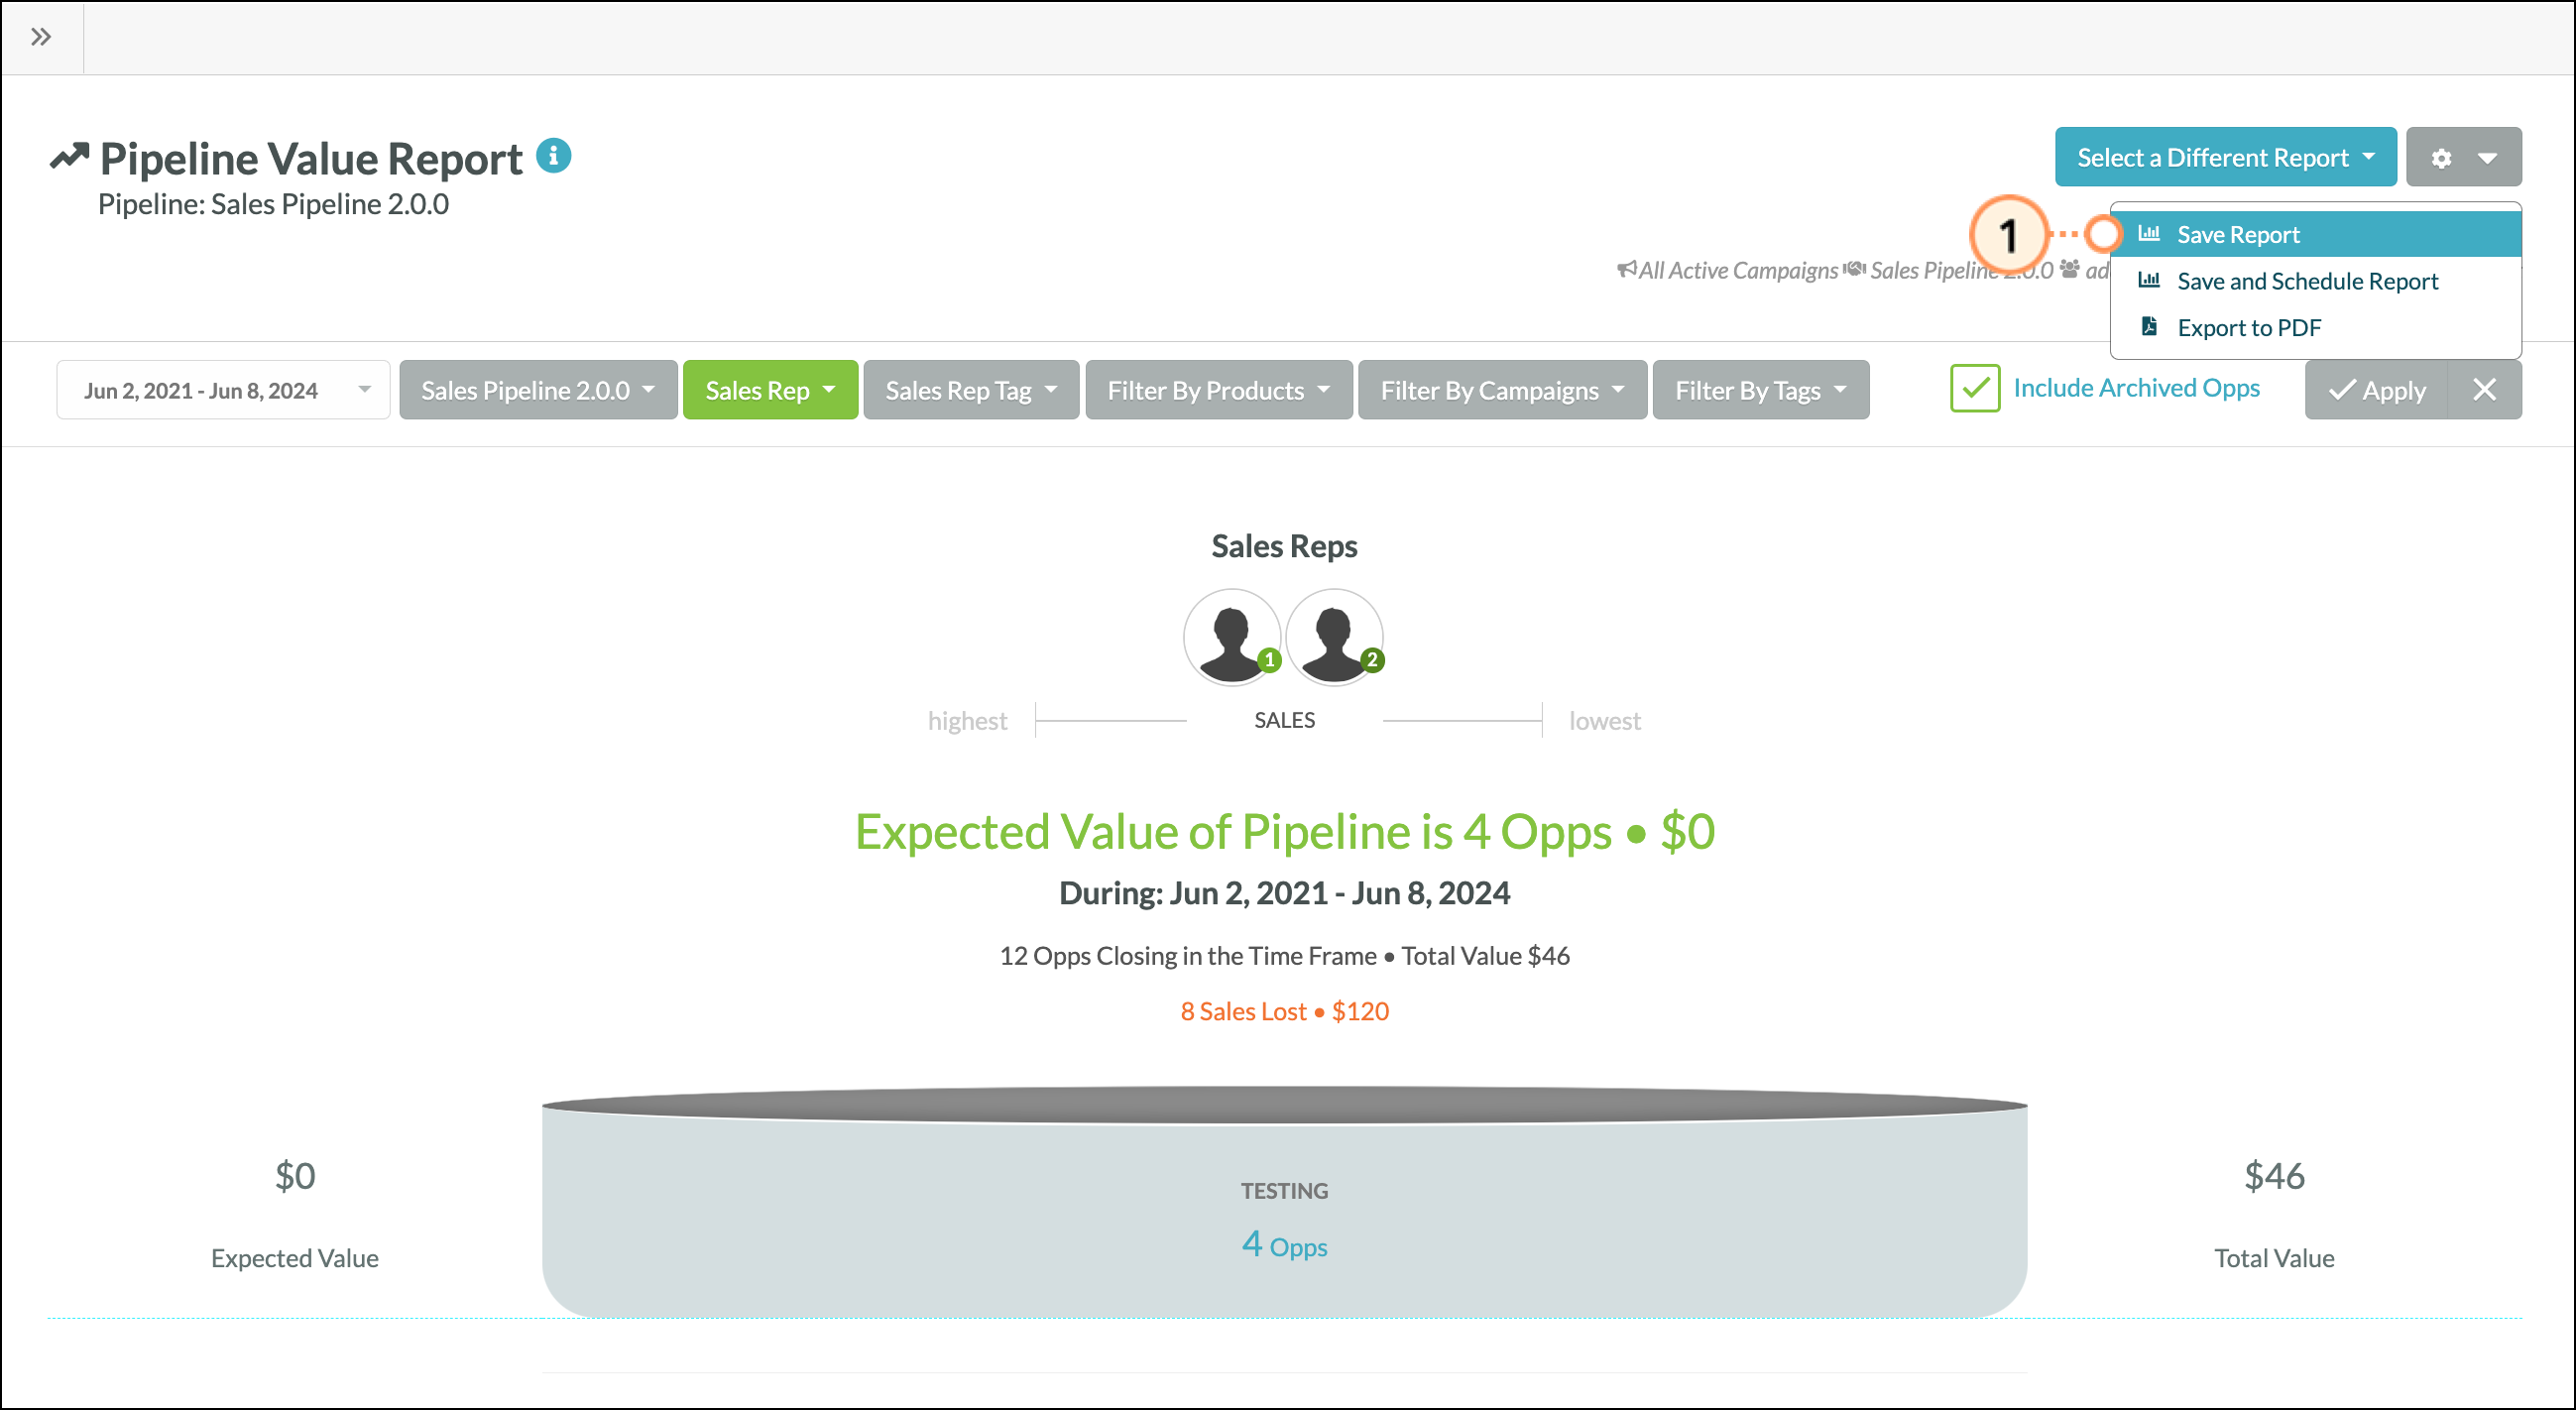
- In the Report Title text box, enter a name for the report.
- Click Save Report.
Once saved, you can delete the saved Pipeline Value reports from the Pipeline Value report screen. Be aware that clicking Options > Delete Report will immediately and irreversibly delete the saved report.
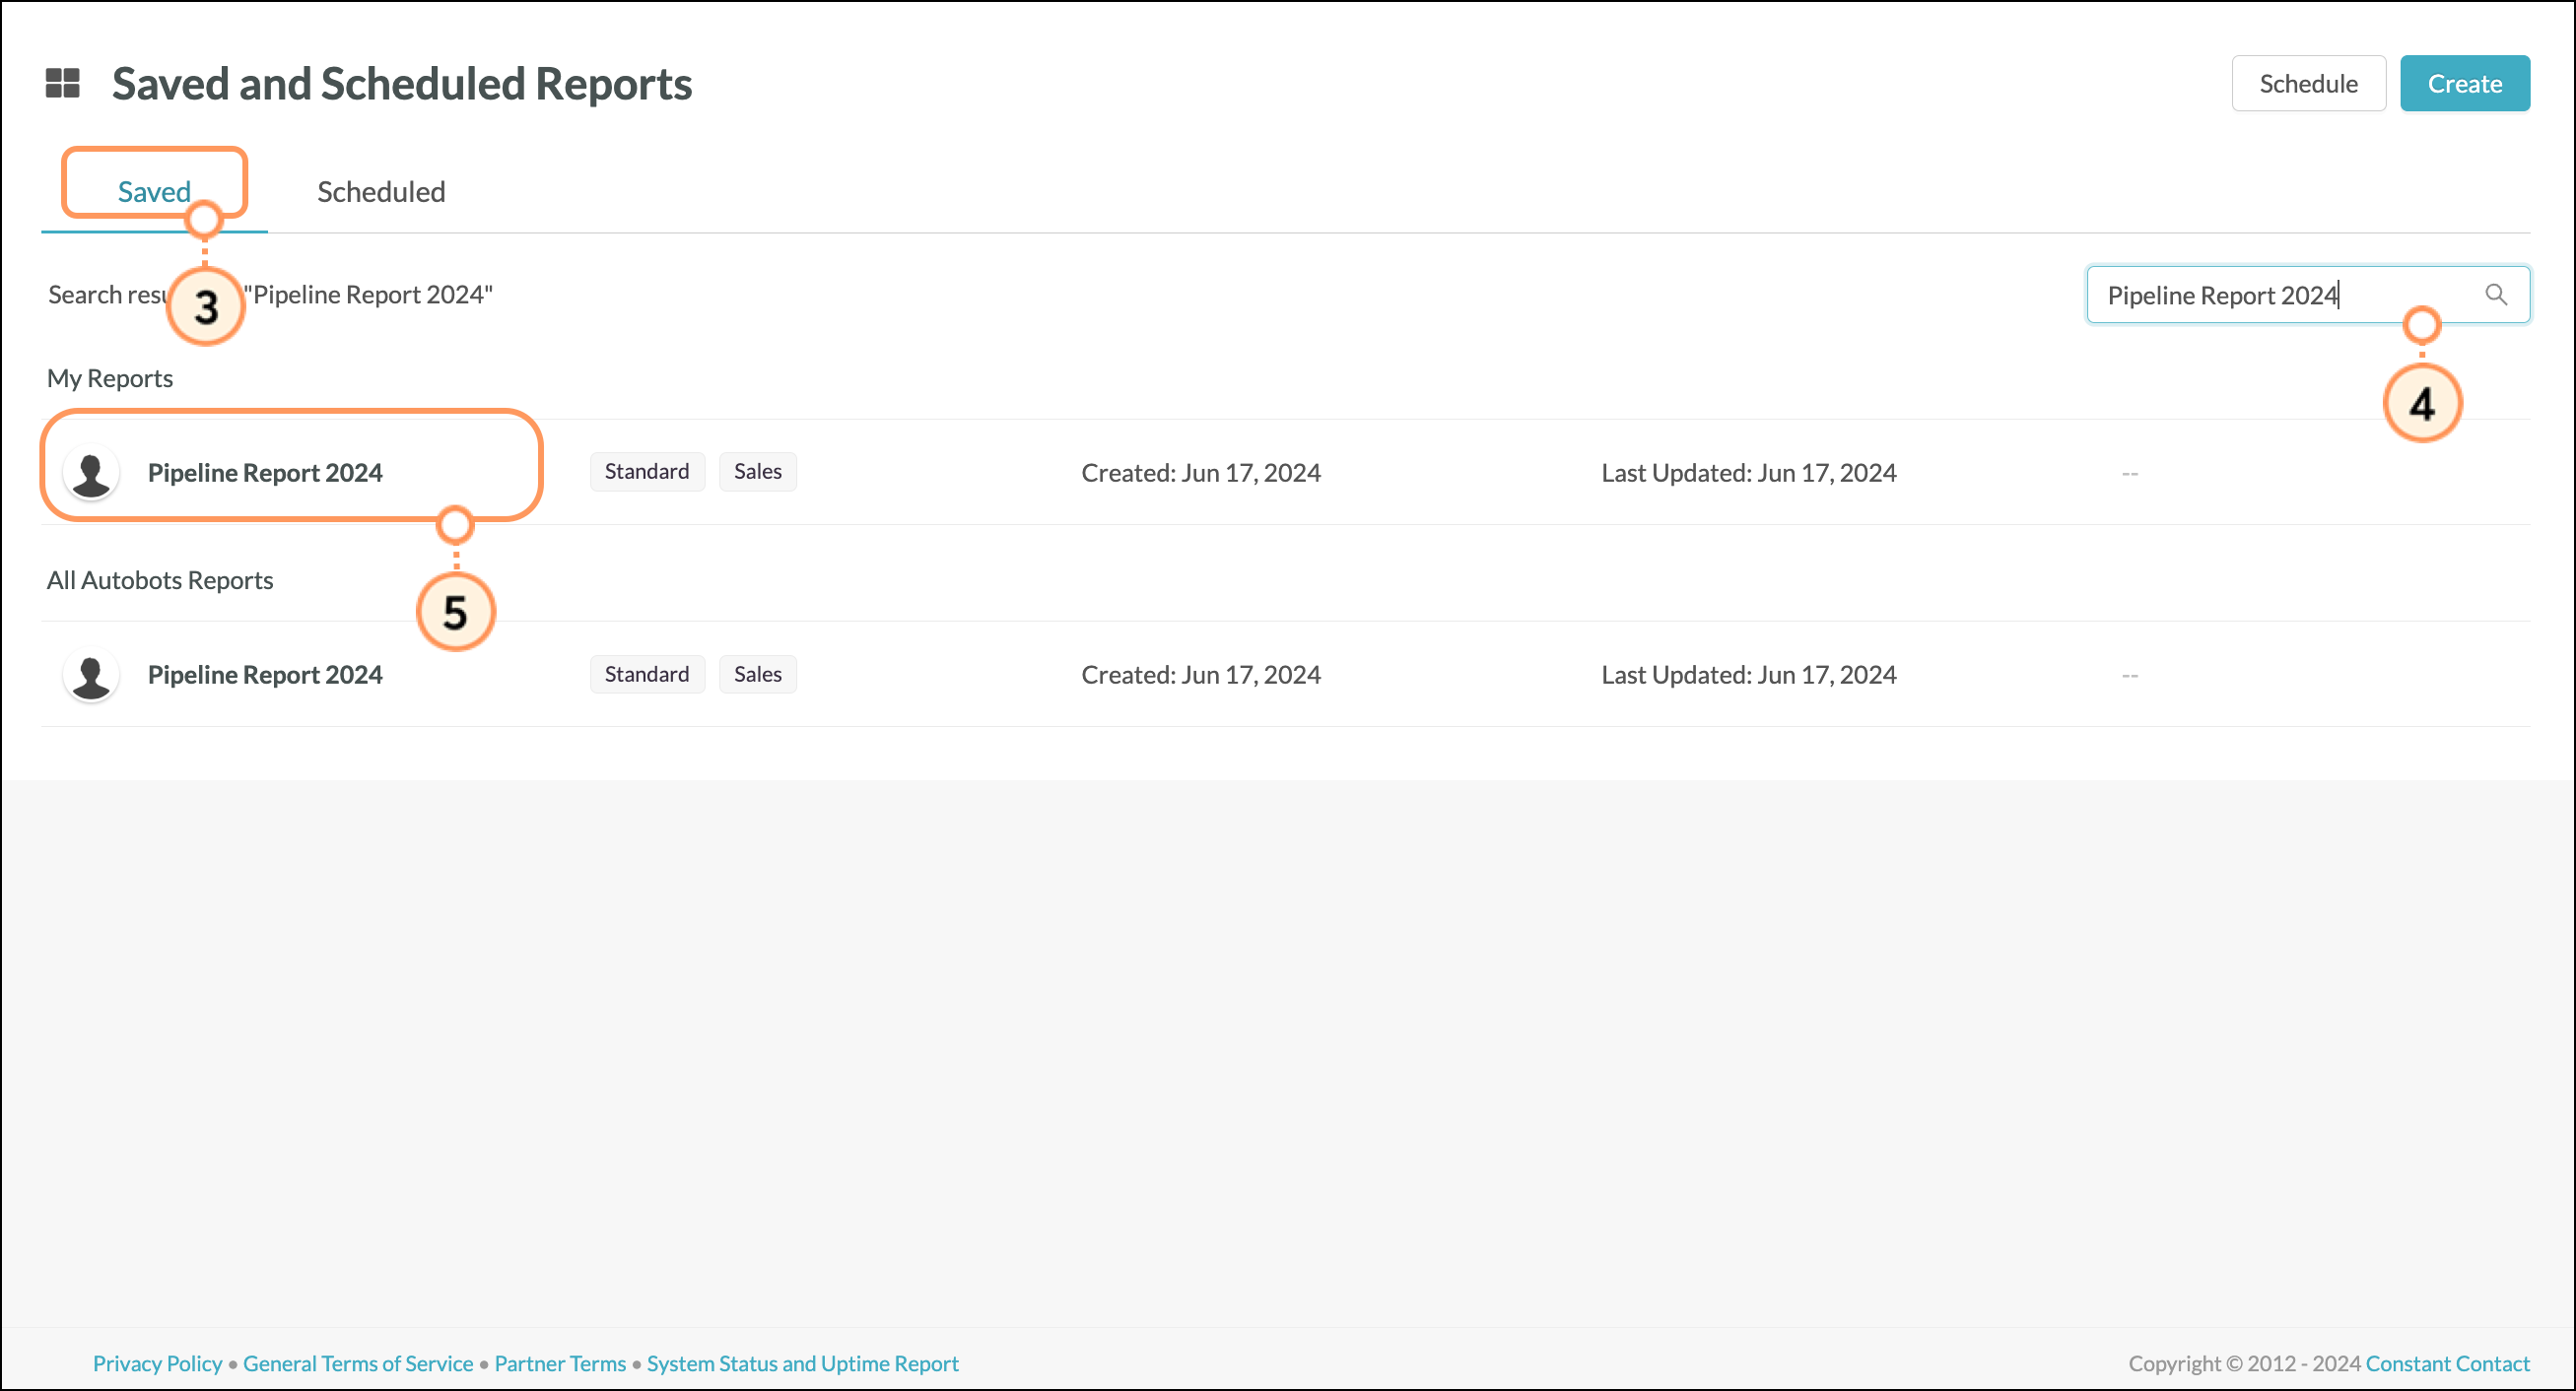
Locating Saved Reports
Once you navigate away from the report page, the saved report and its associated parameters will be reset to their default states. To locate and access previously saved reports, do the following:
- Click Analytics.
- Click Saved and Scheduled Reports in test Lead Gen & CRM's left toolbar.
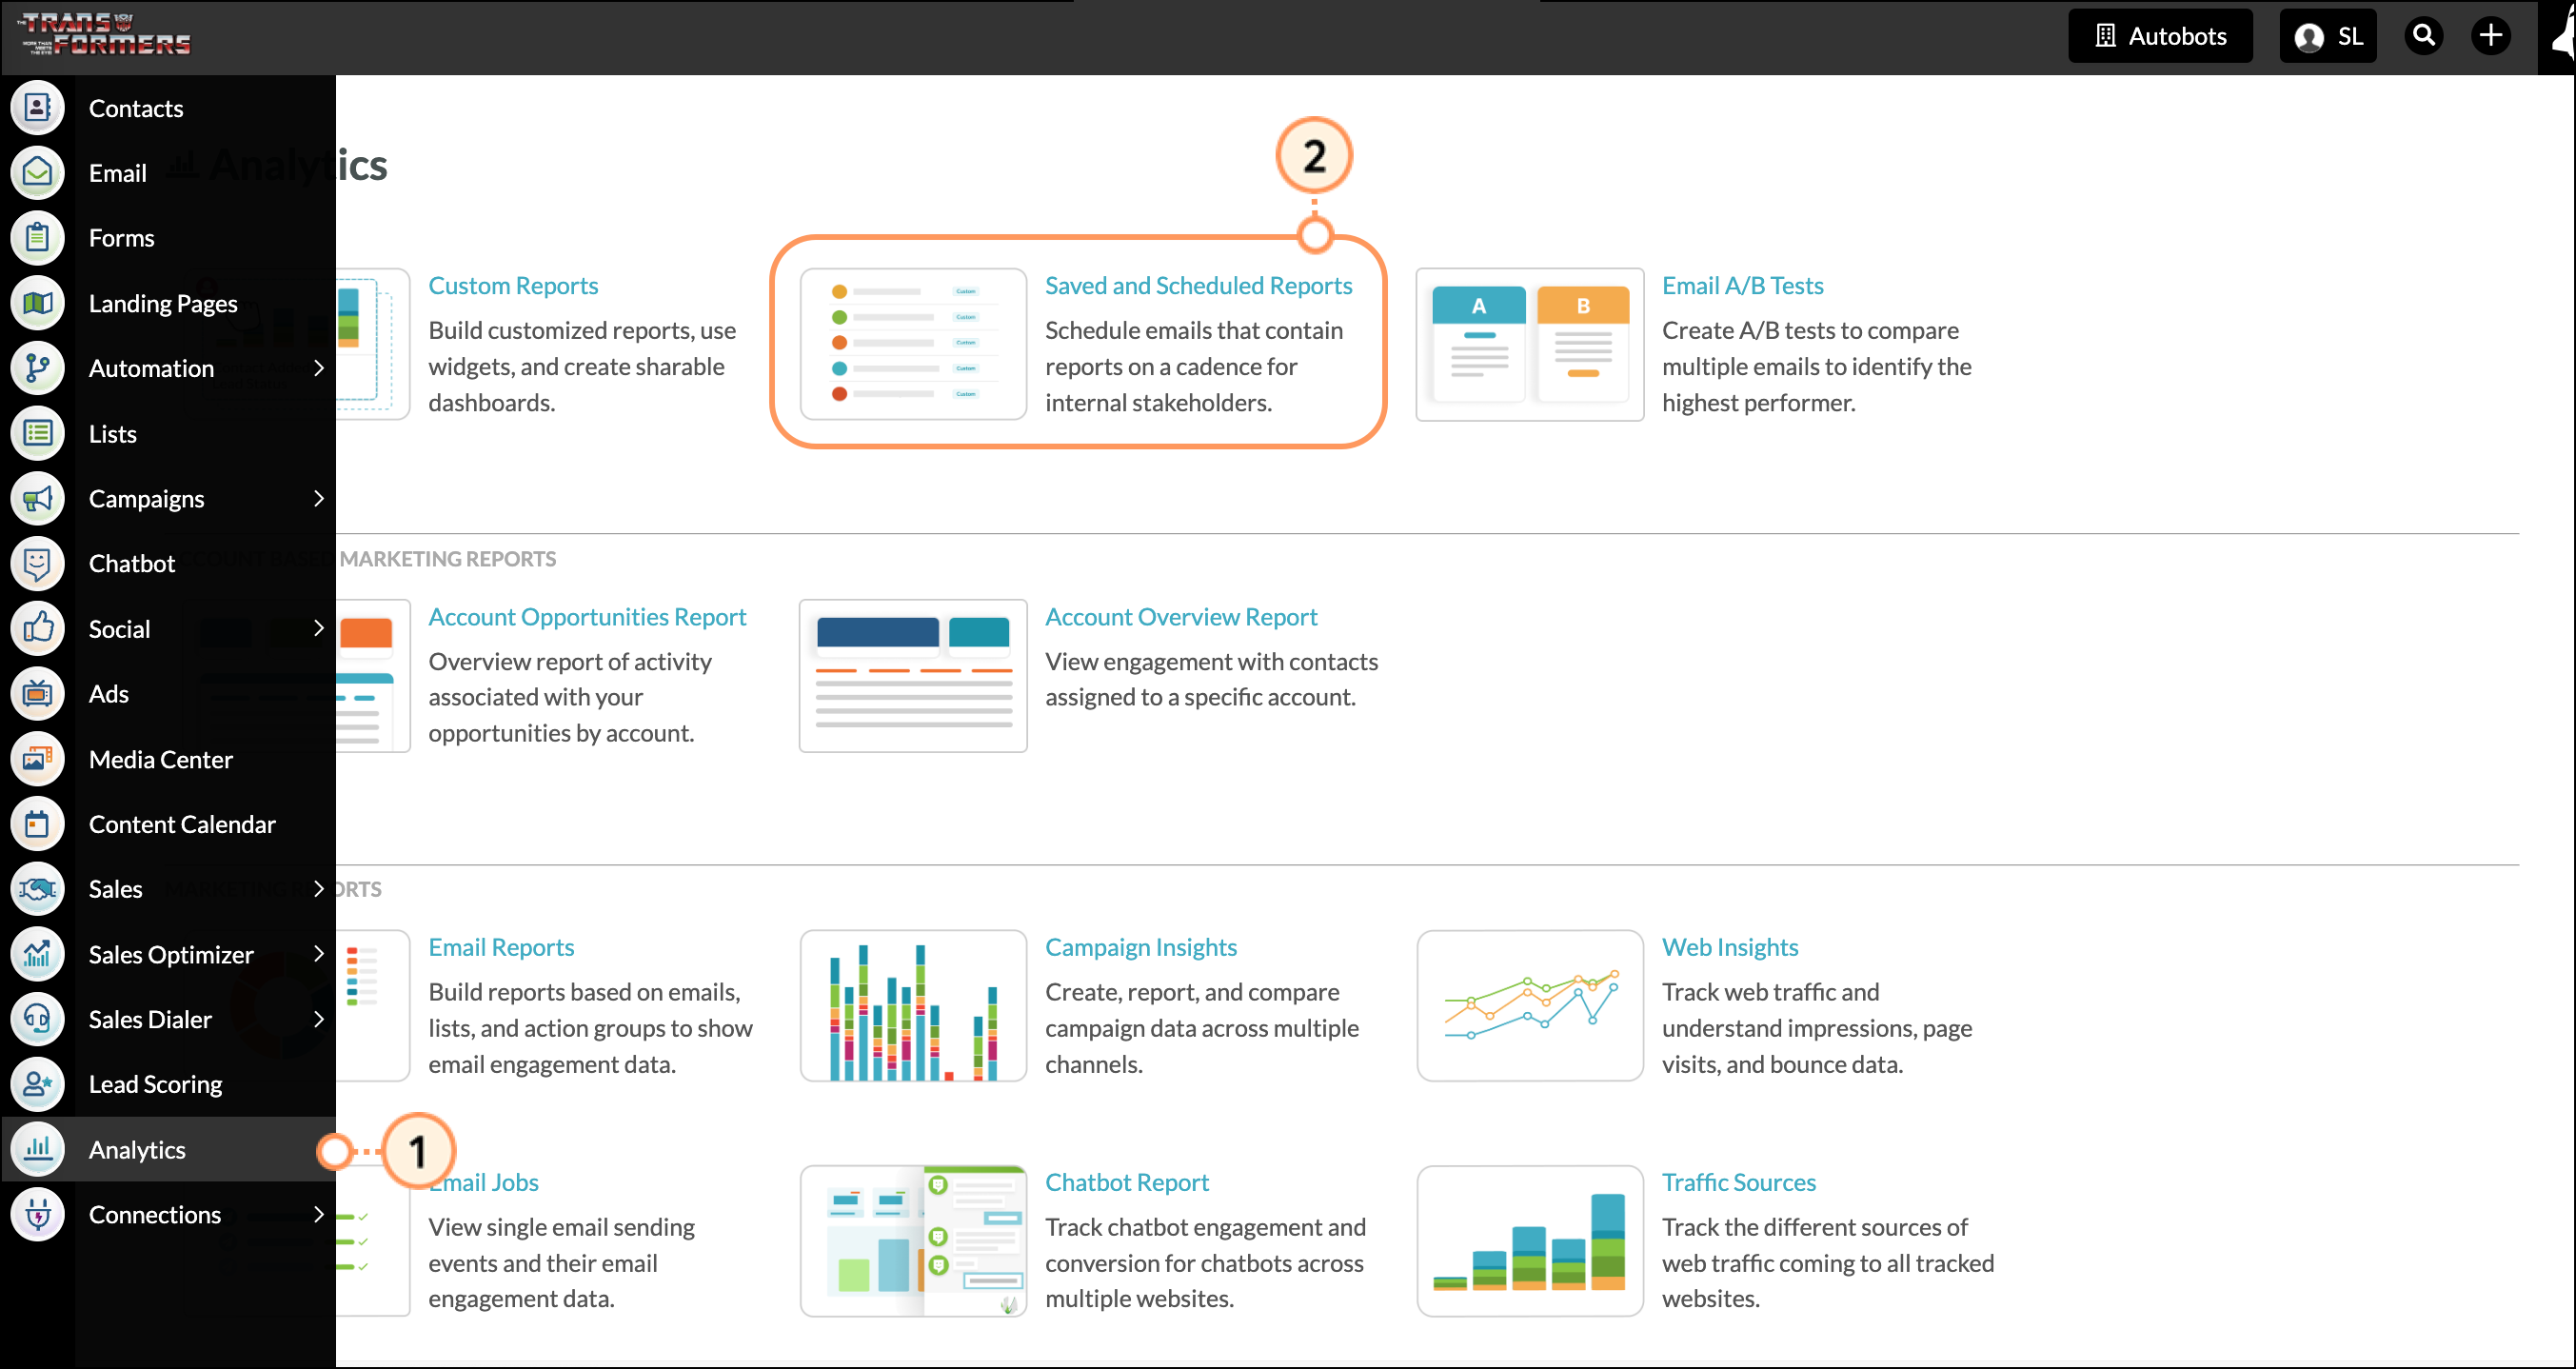
- Click the Saved Reports tab.
- Optionally, enter a report name, subject, keyword, or other applicable search filters in the
 search bar.
 - Click the name of the desired saved report.
Scheduling Pipeline Value Reports
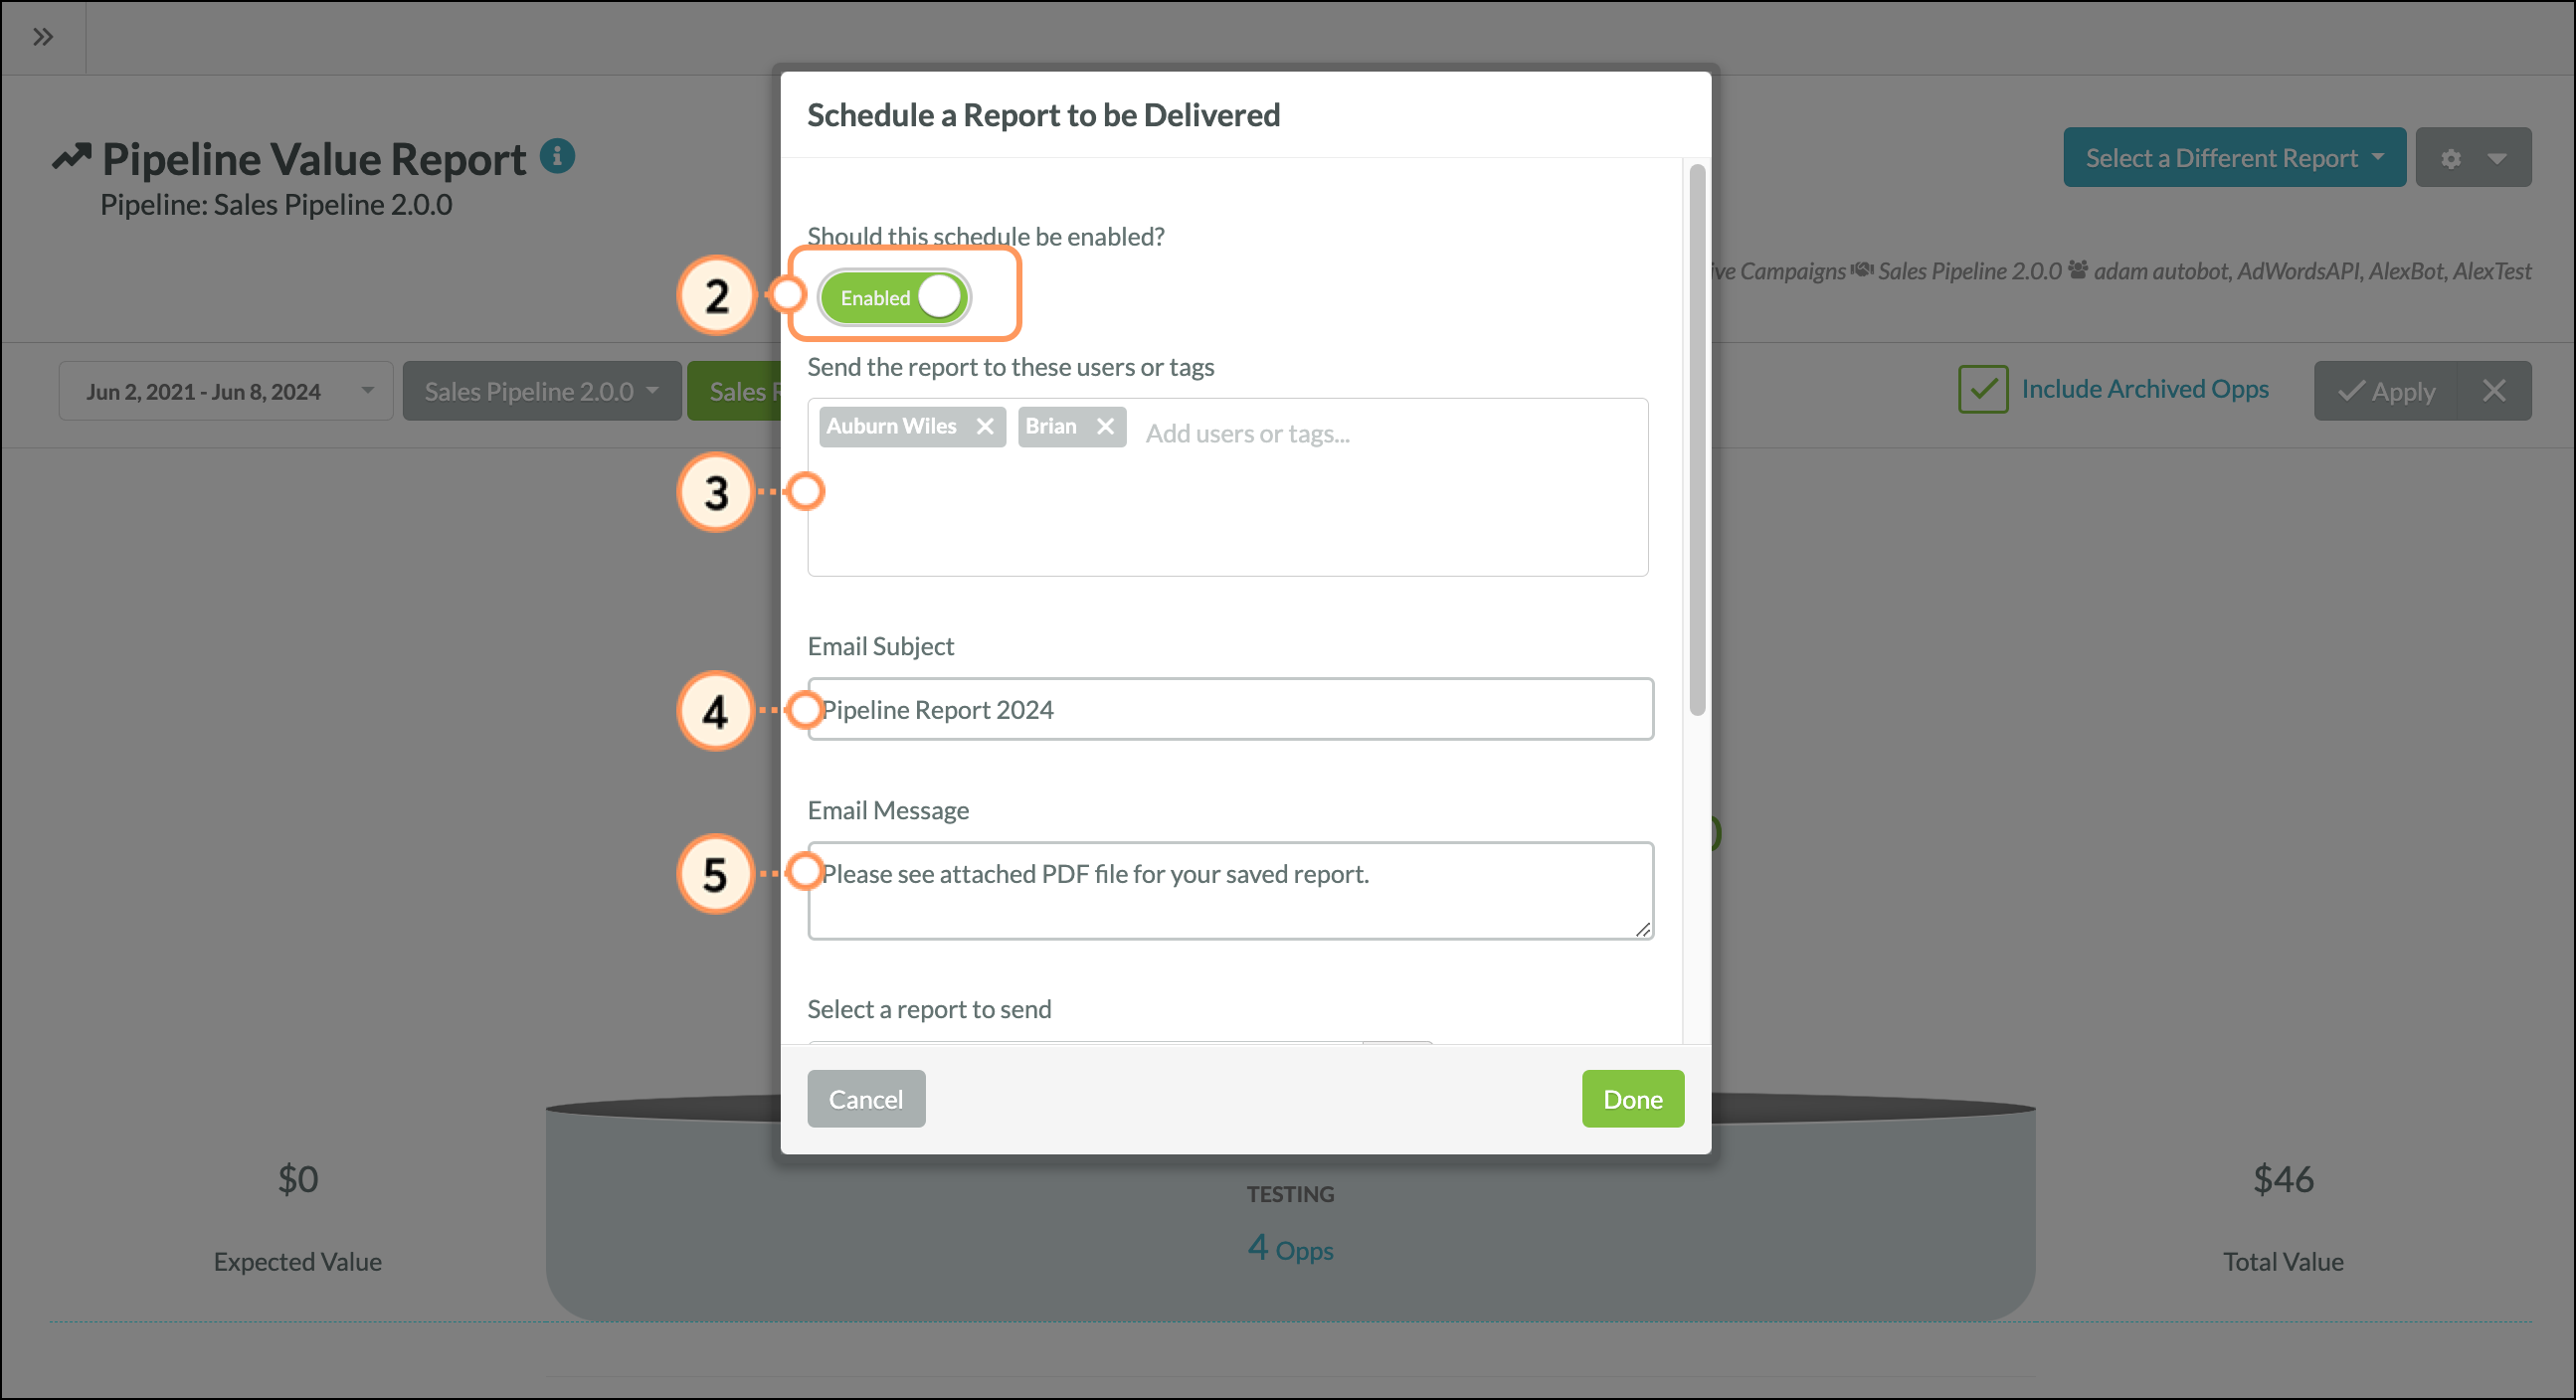
Once a Pipeline Value report has been configured, it can be scheduled to be sent via email. To schedule a Pipeline Value report configure and apply report filters, then do the following:
- Click Options > Schedule Report.
Note: If you have already saved this report, Save and Schedule Report will instead be listed as Schedule Report.
- Ensure that the Should this schedule be enabled? toggle is set to Enabled.
- Enter the names of desired users or tagged groups in the Send this report to these users or tags text box.
- Enter a subject line for the scheduled email in the Email Subject text box.
- Enter the message that will be displayed in the email's body in the Email Message text box.
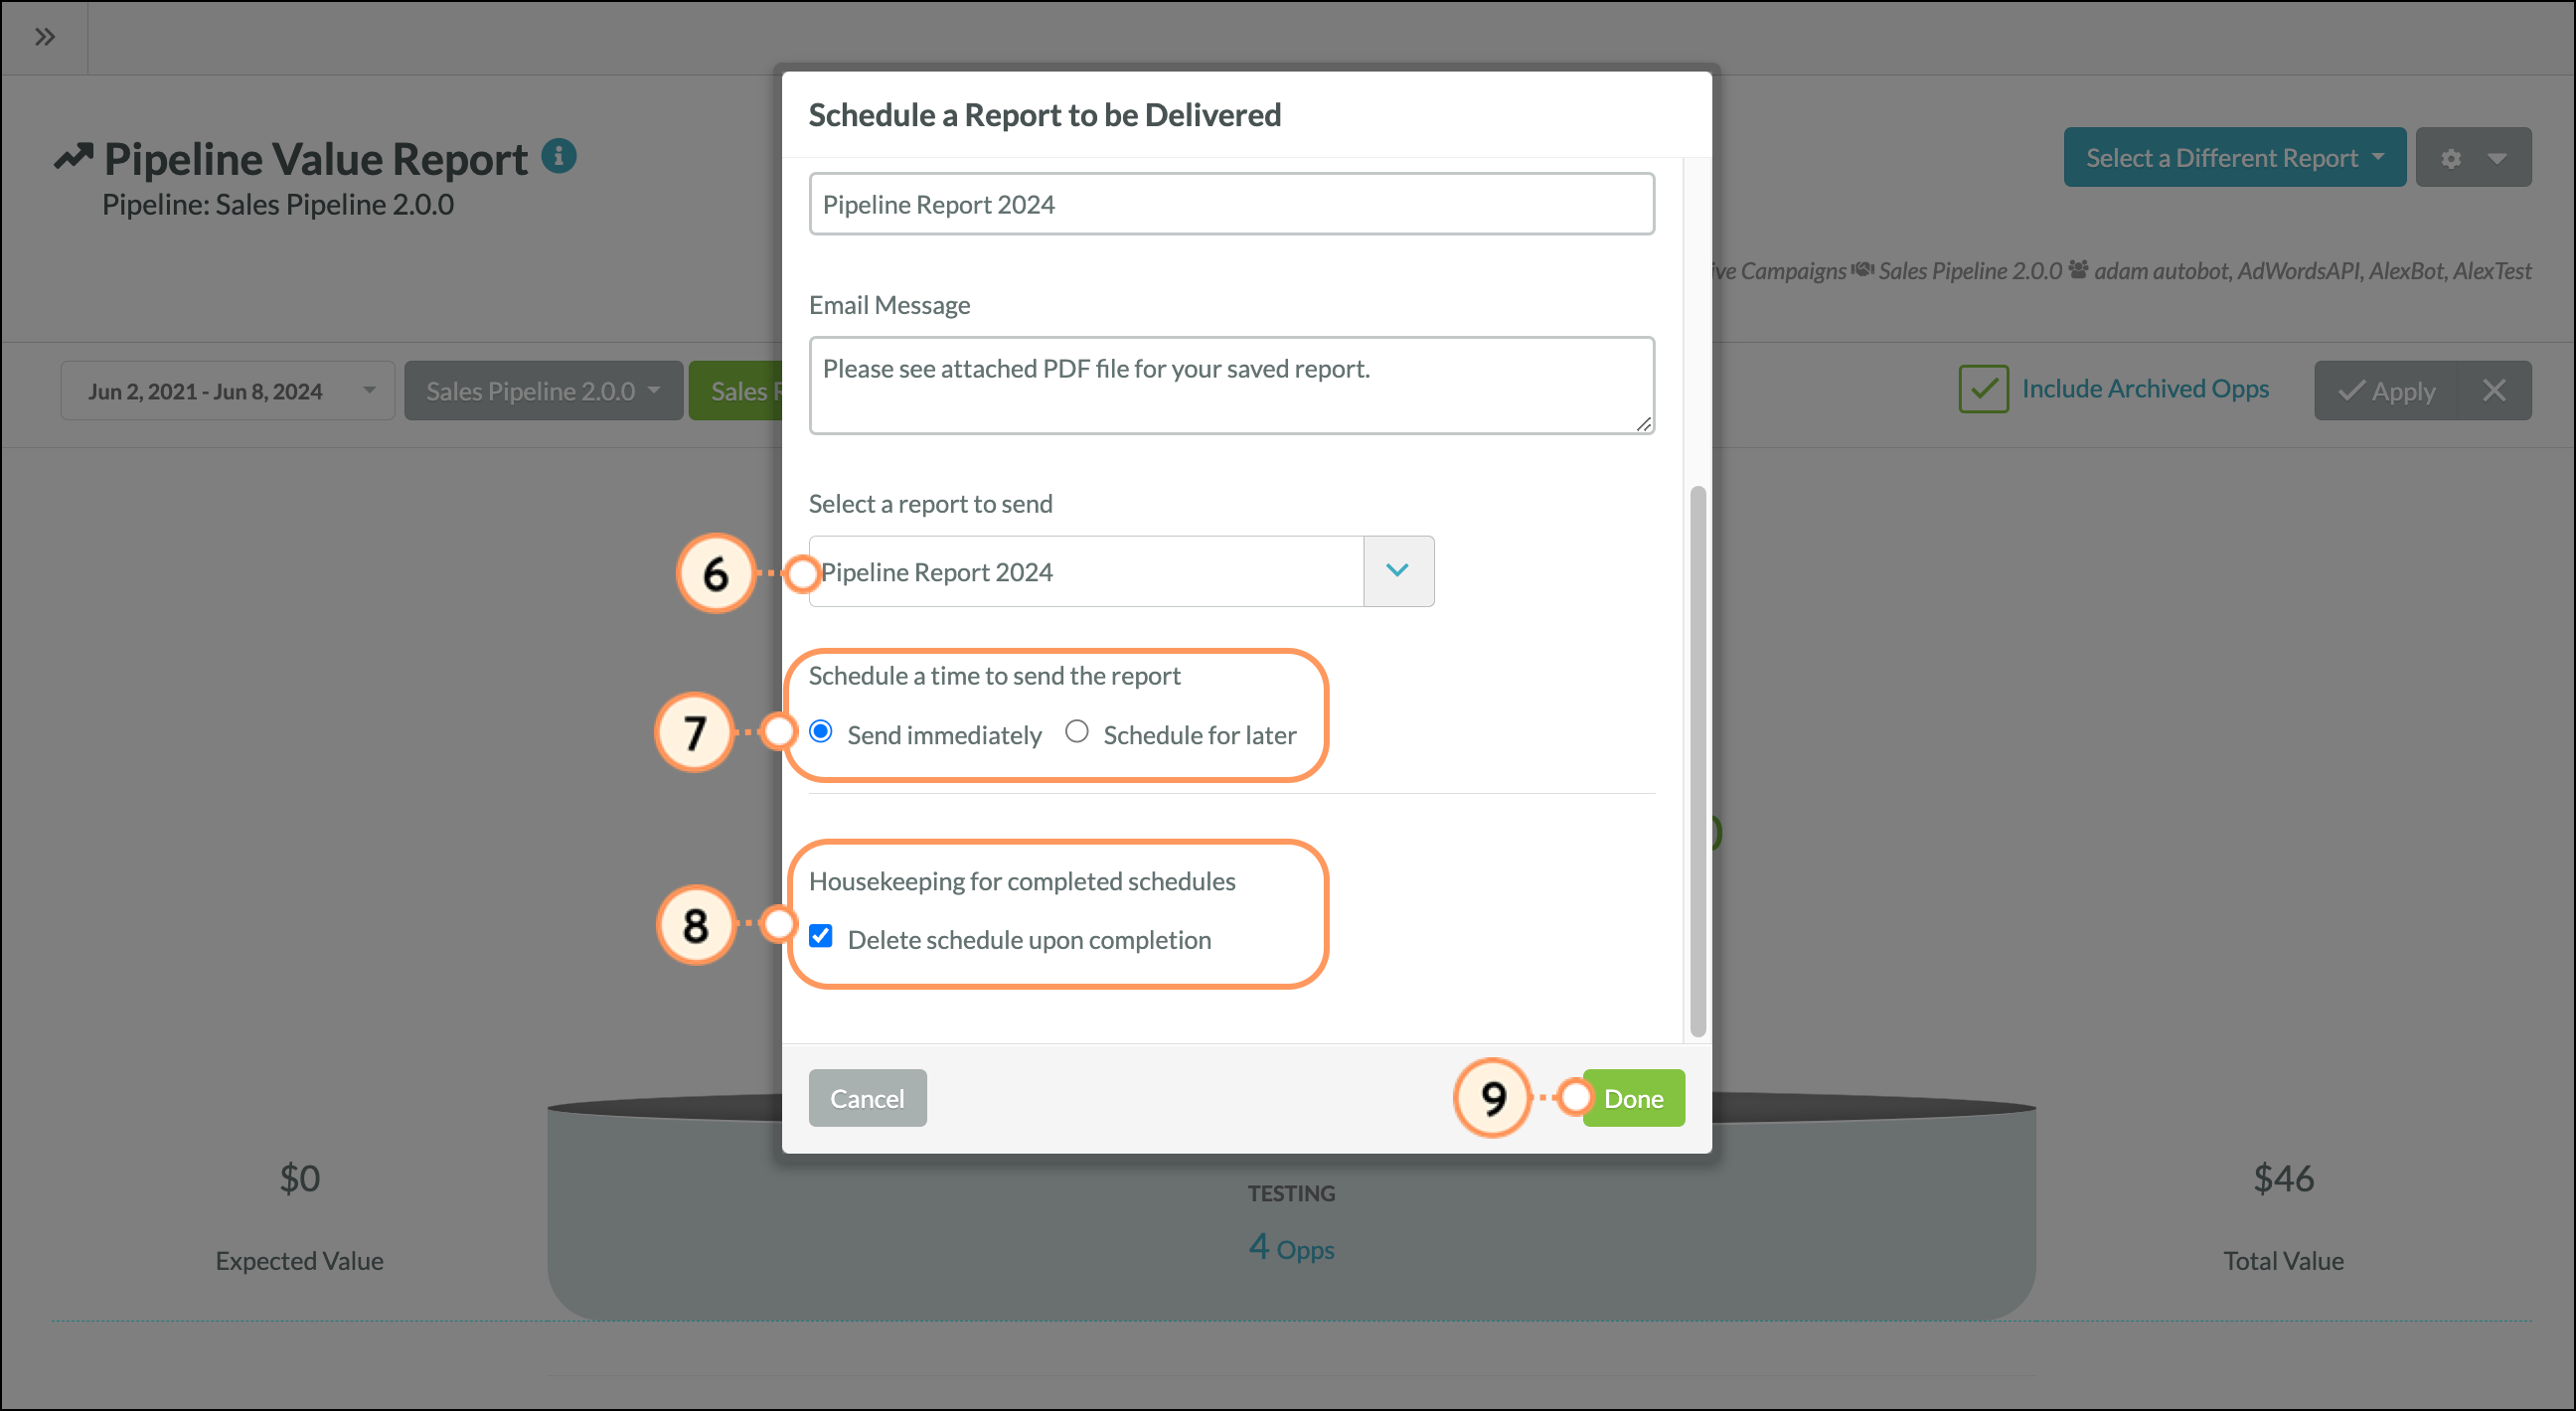
- Select the desired report to send with the email in the Select a report to send drop-down menu.
Note: By default, the Select a report to send drop-down menu will display the report you just saved.
- Select one of the following options in the Select a time to schedule the report section:
• Send immediately: This option will force the email to send as soon as the scheduling is complete.
• Schedule for later: This option will allow you to send the scheduled email as many times as you want at a later date and time.
- Optionally, click the Delete schedule upon completion checkbox to delete the scheduled report after scheduling the report.
- Click Done.
Exporting Pipeline Value Reports
Once a Pipeline Value report has been configured, it can be exported as a .PDF file. To export a Pipeline Value report configure and apply report filters, then do the following:
| Important: Shopping Cart transactions can generate Opportunities; however, Opportunities created from those transactions are not added to the Sales Pipeline at this time. Please accommodate this in your pipeline analysis. |
- Click Options > Export to .PDF.
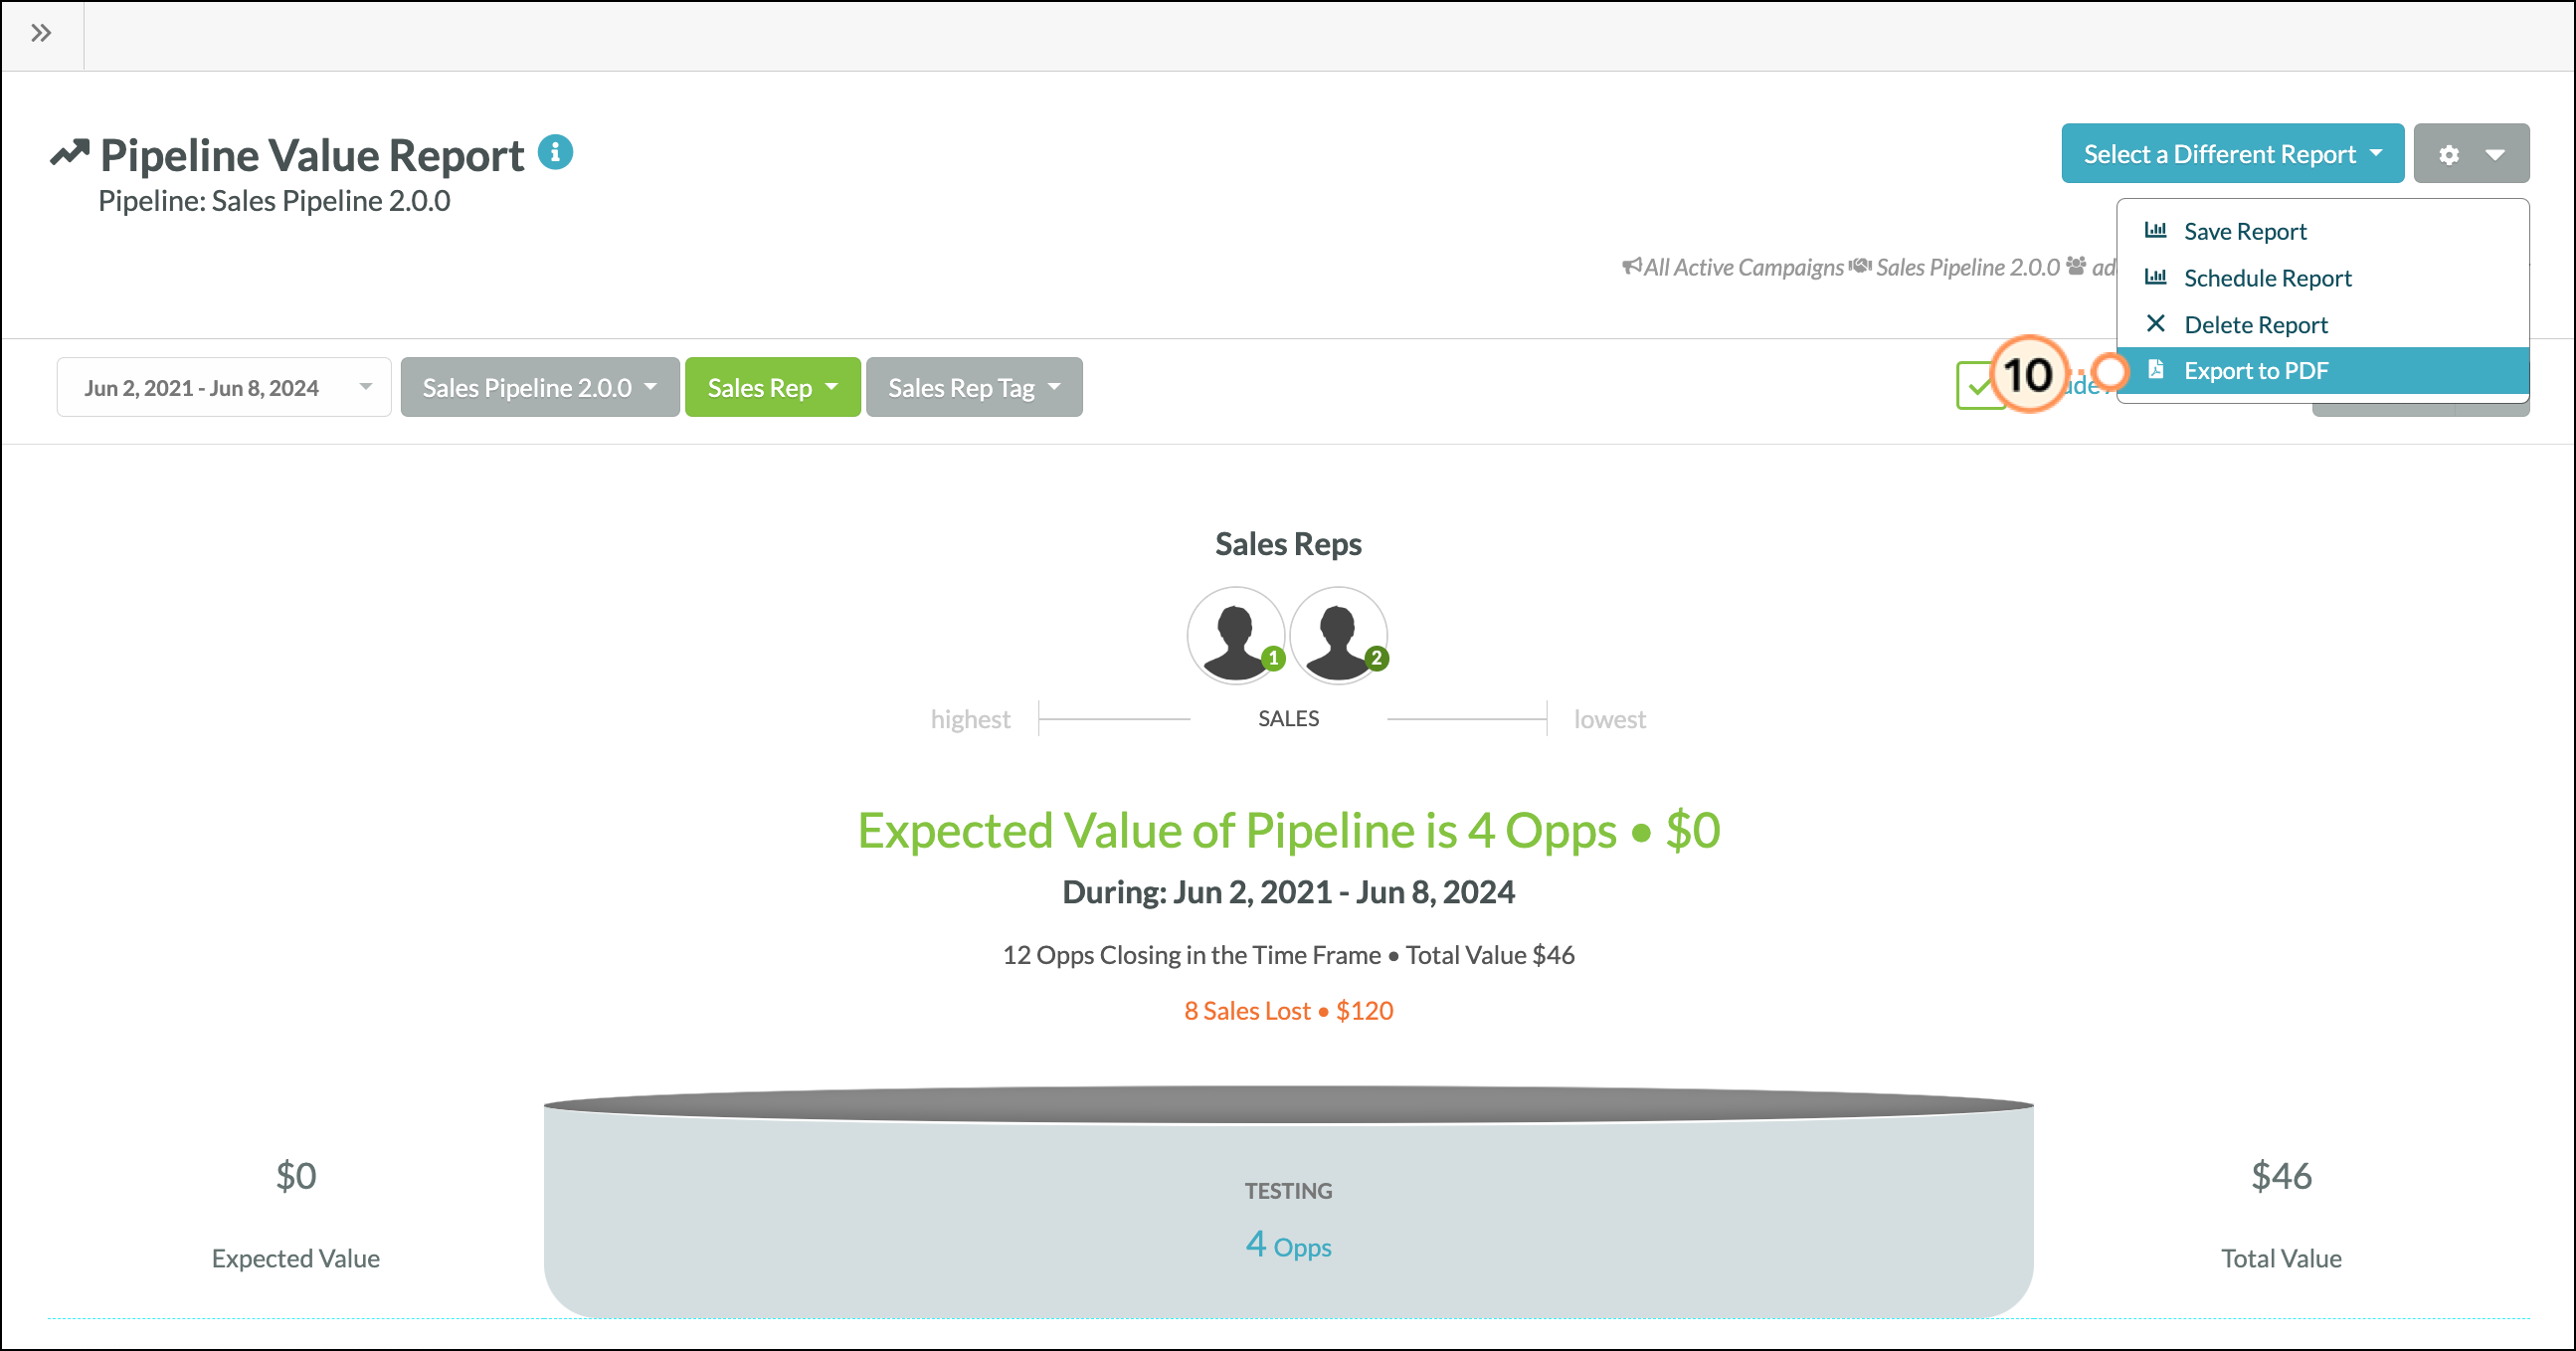
- Save the .PDF file in the .PDF window that appears.
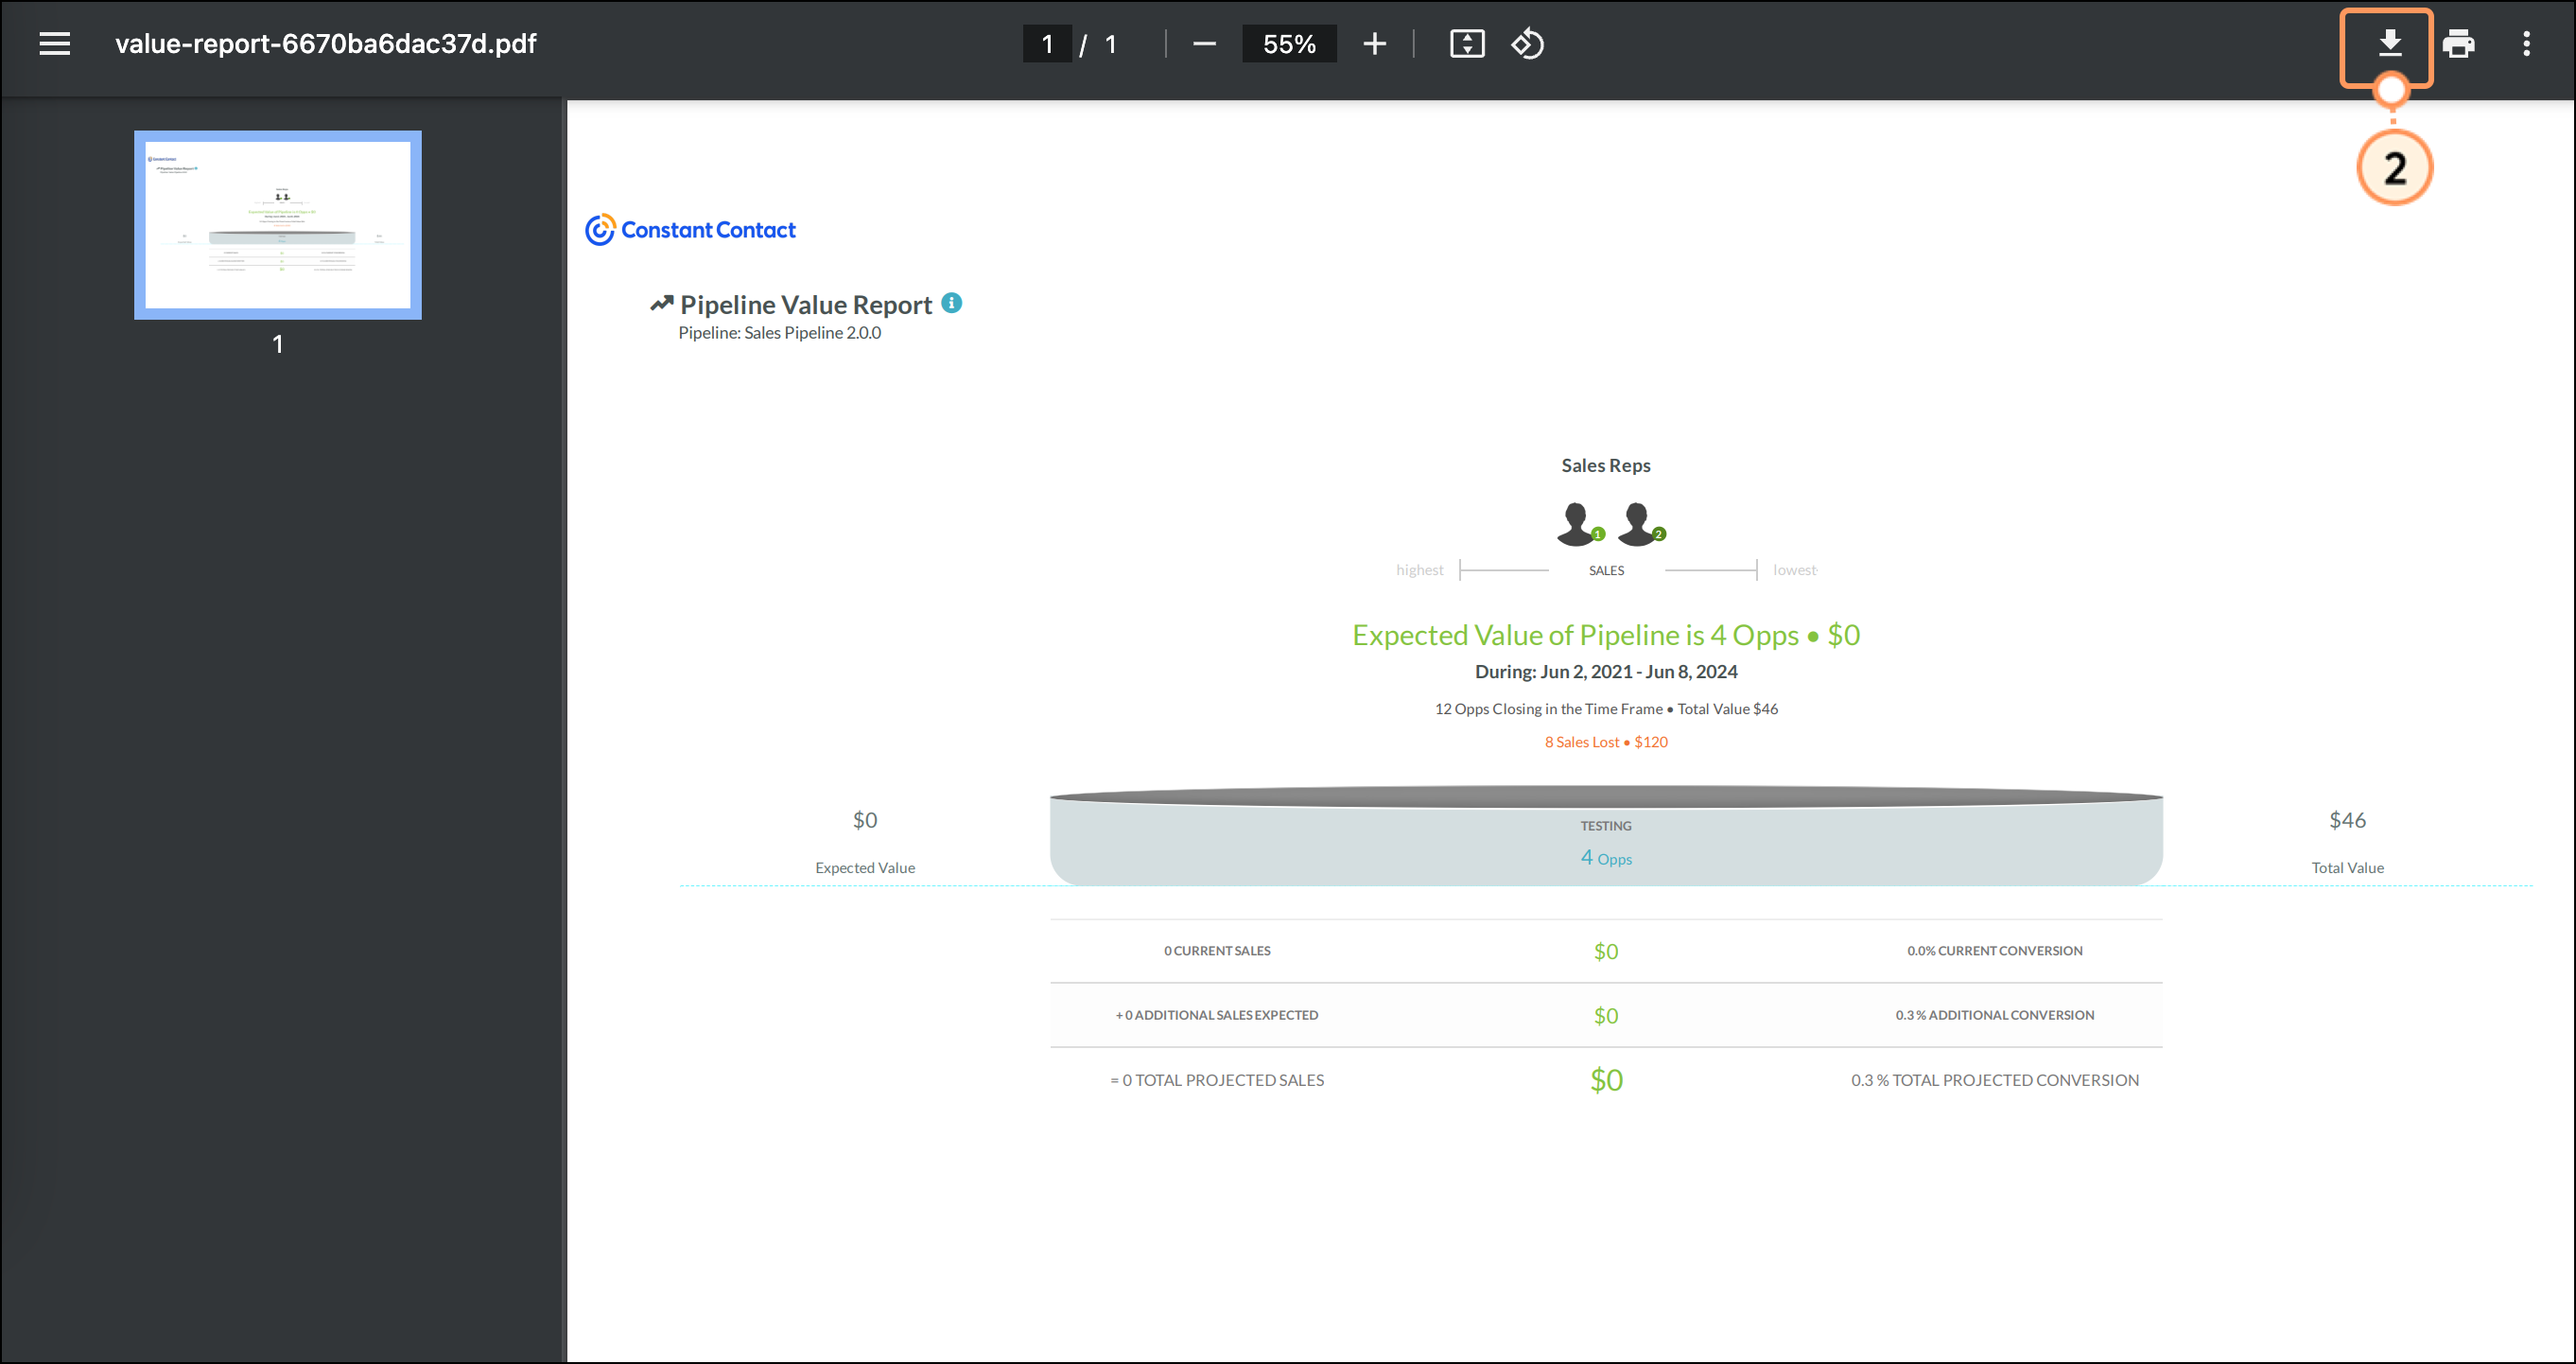
Different web browsers or .PDF viewing programs have different means of saving, downloading, or printing a .PDF file. Refer to their help documentation for more information.