| Administrators | ✓ | |
| Company Managers | ||
| Marketing Managers | ||
| Sales Managers | ||
| Salespersons | ||
| Jr. Salespersons |
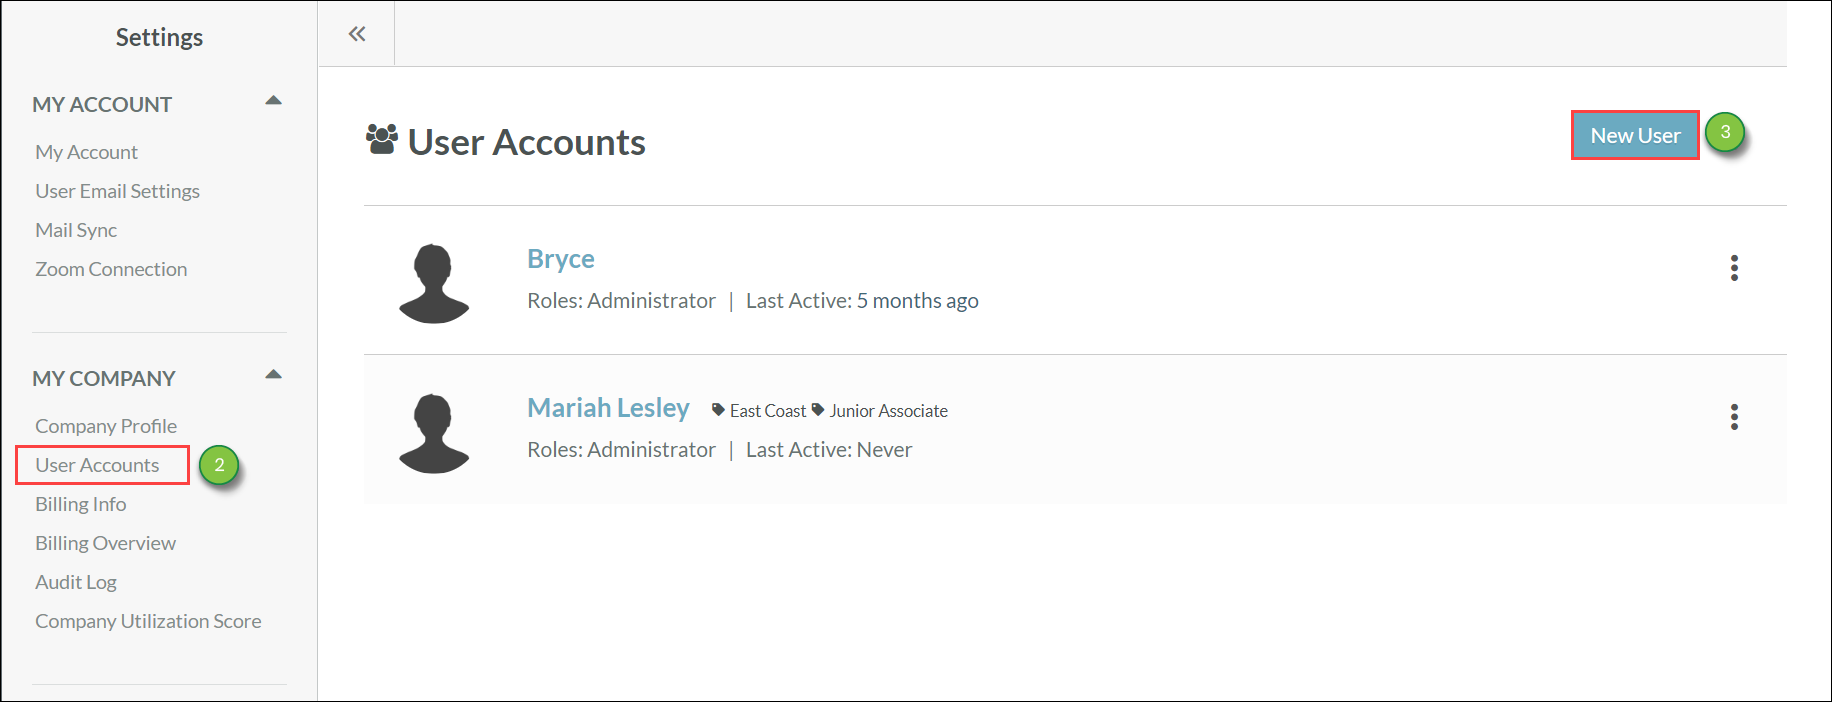
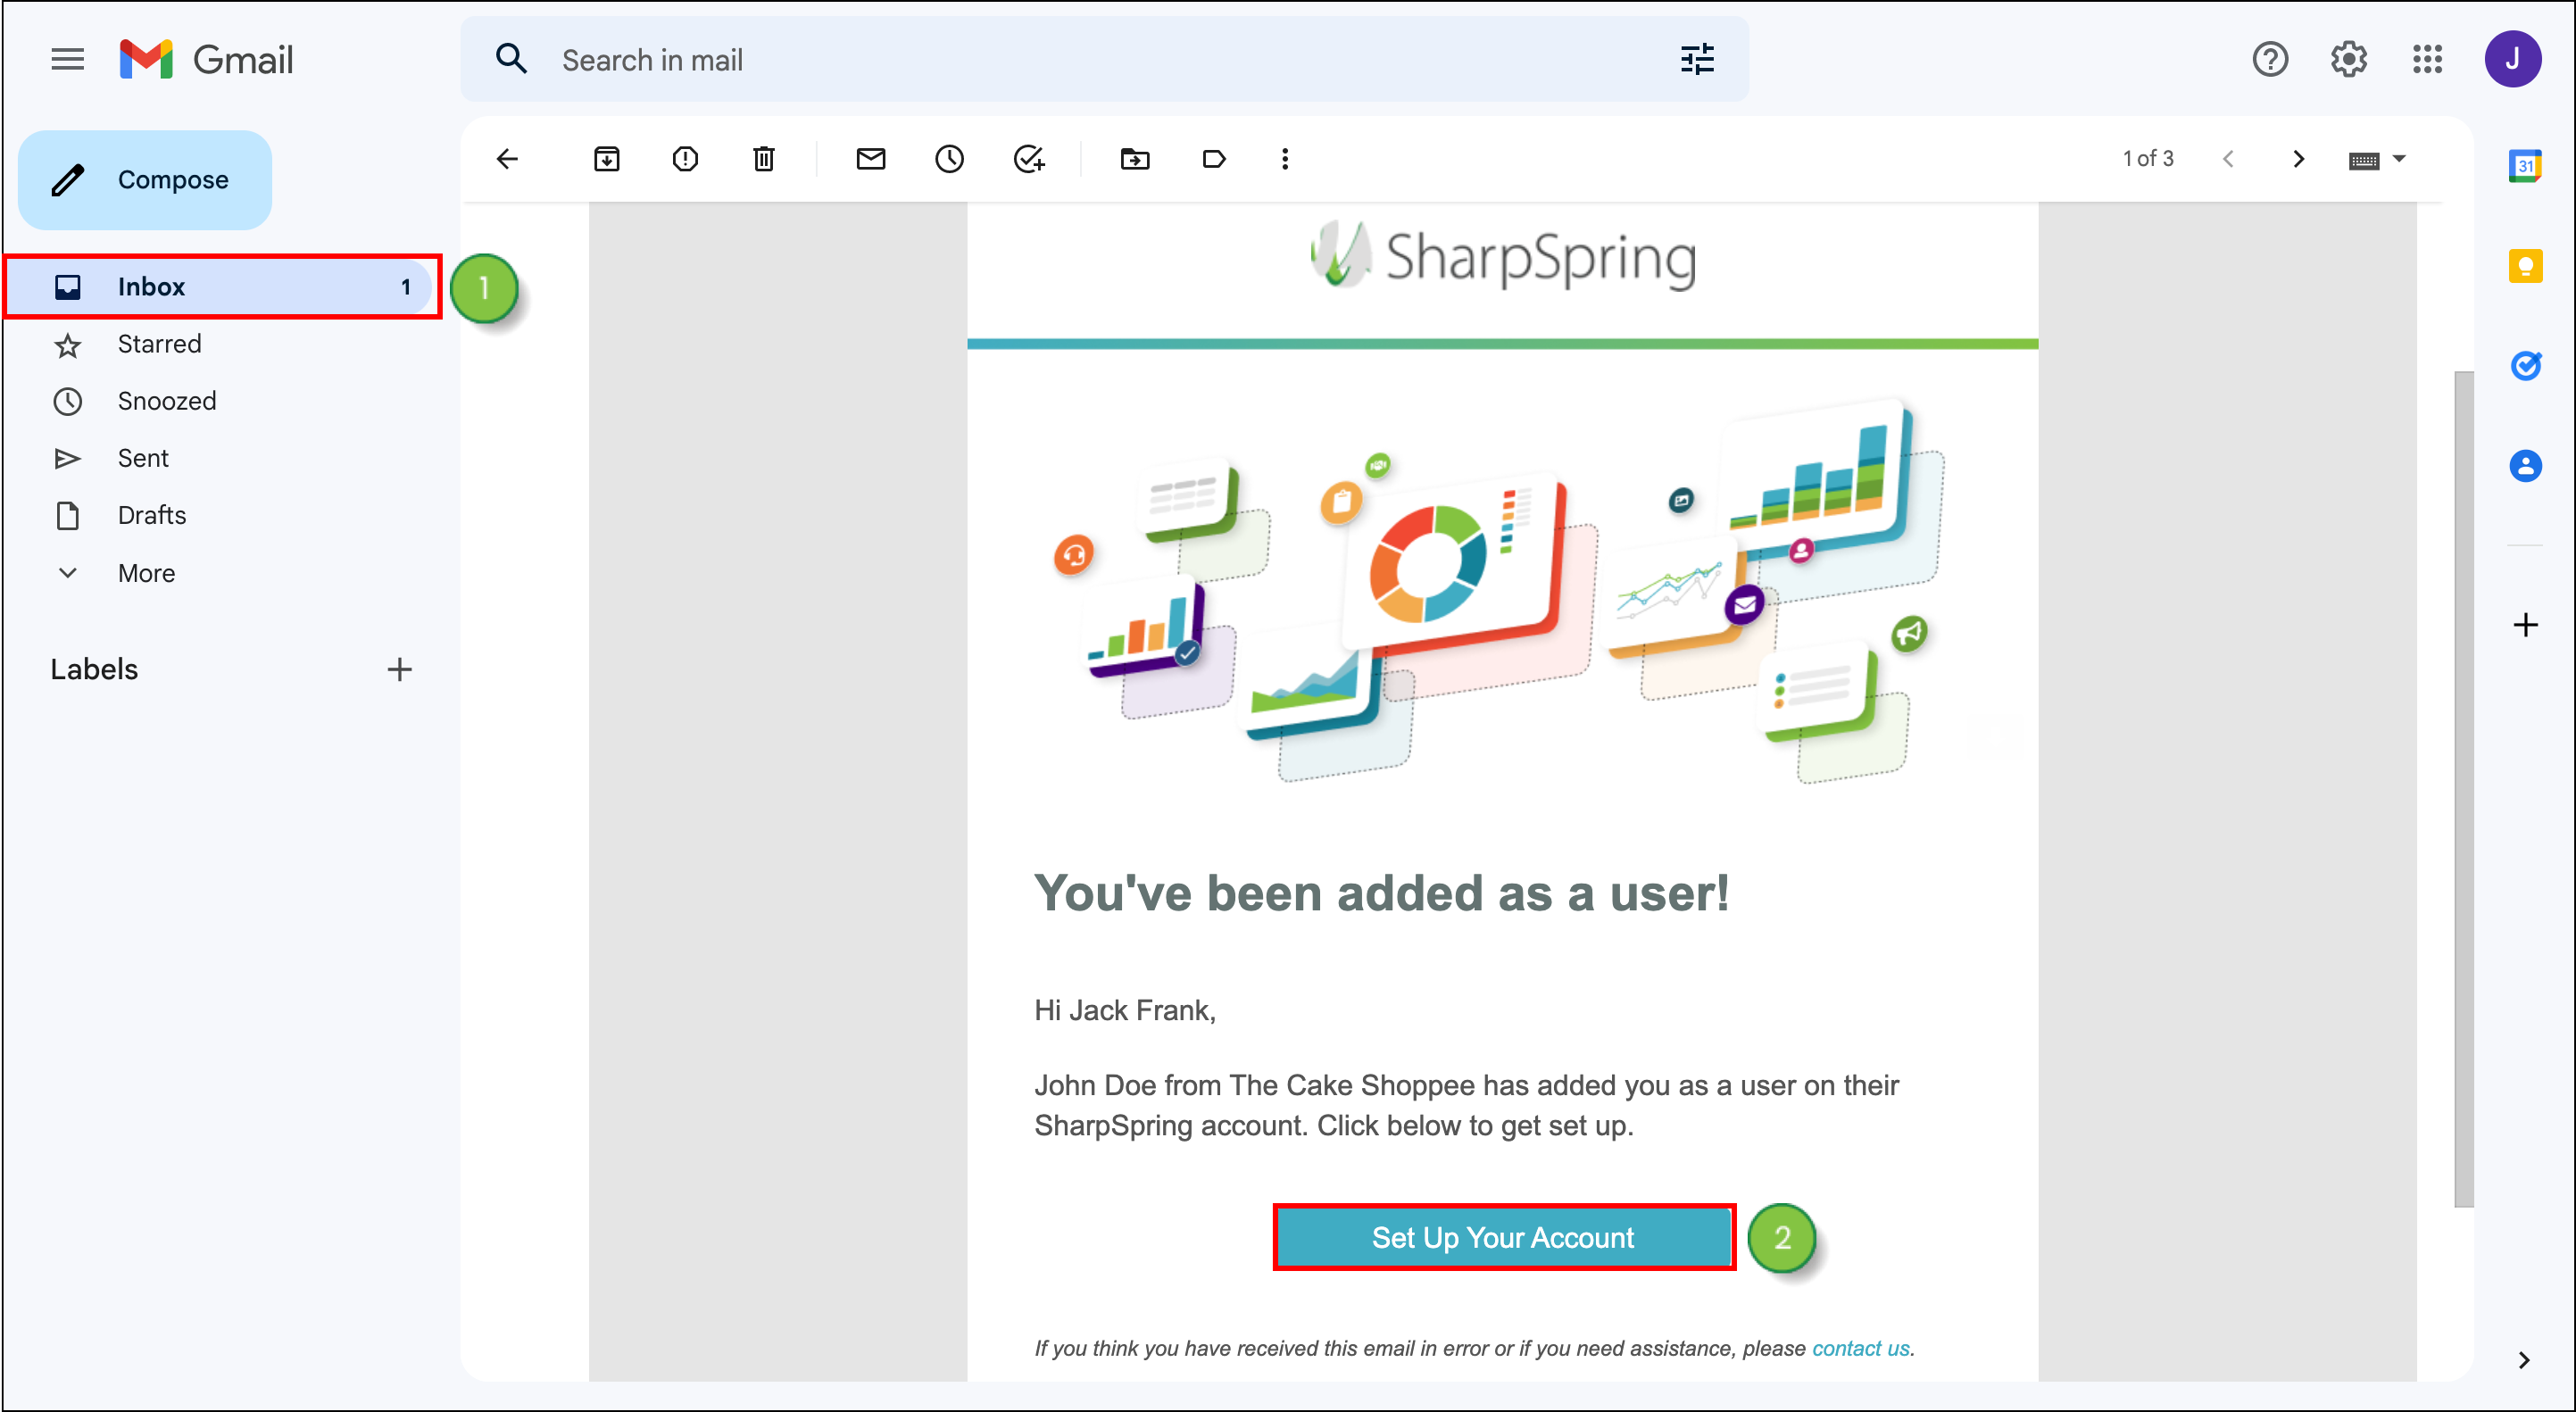
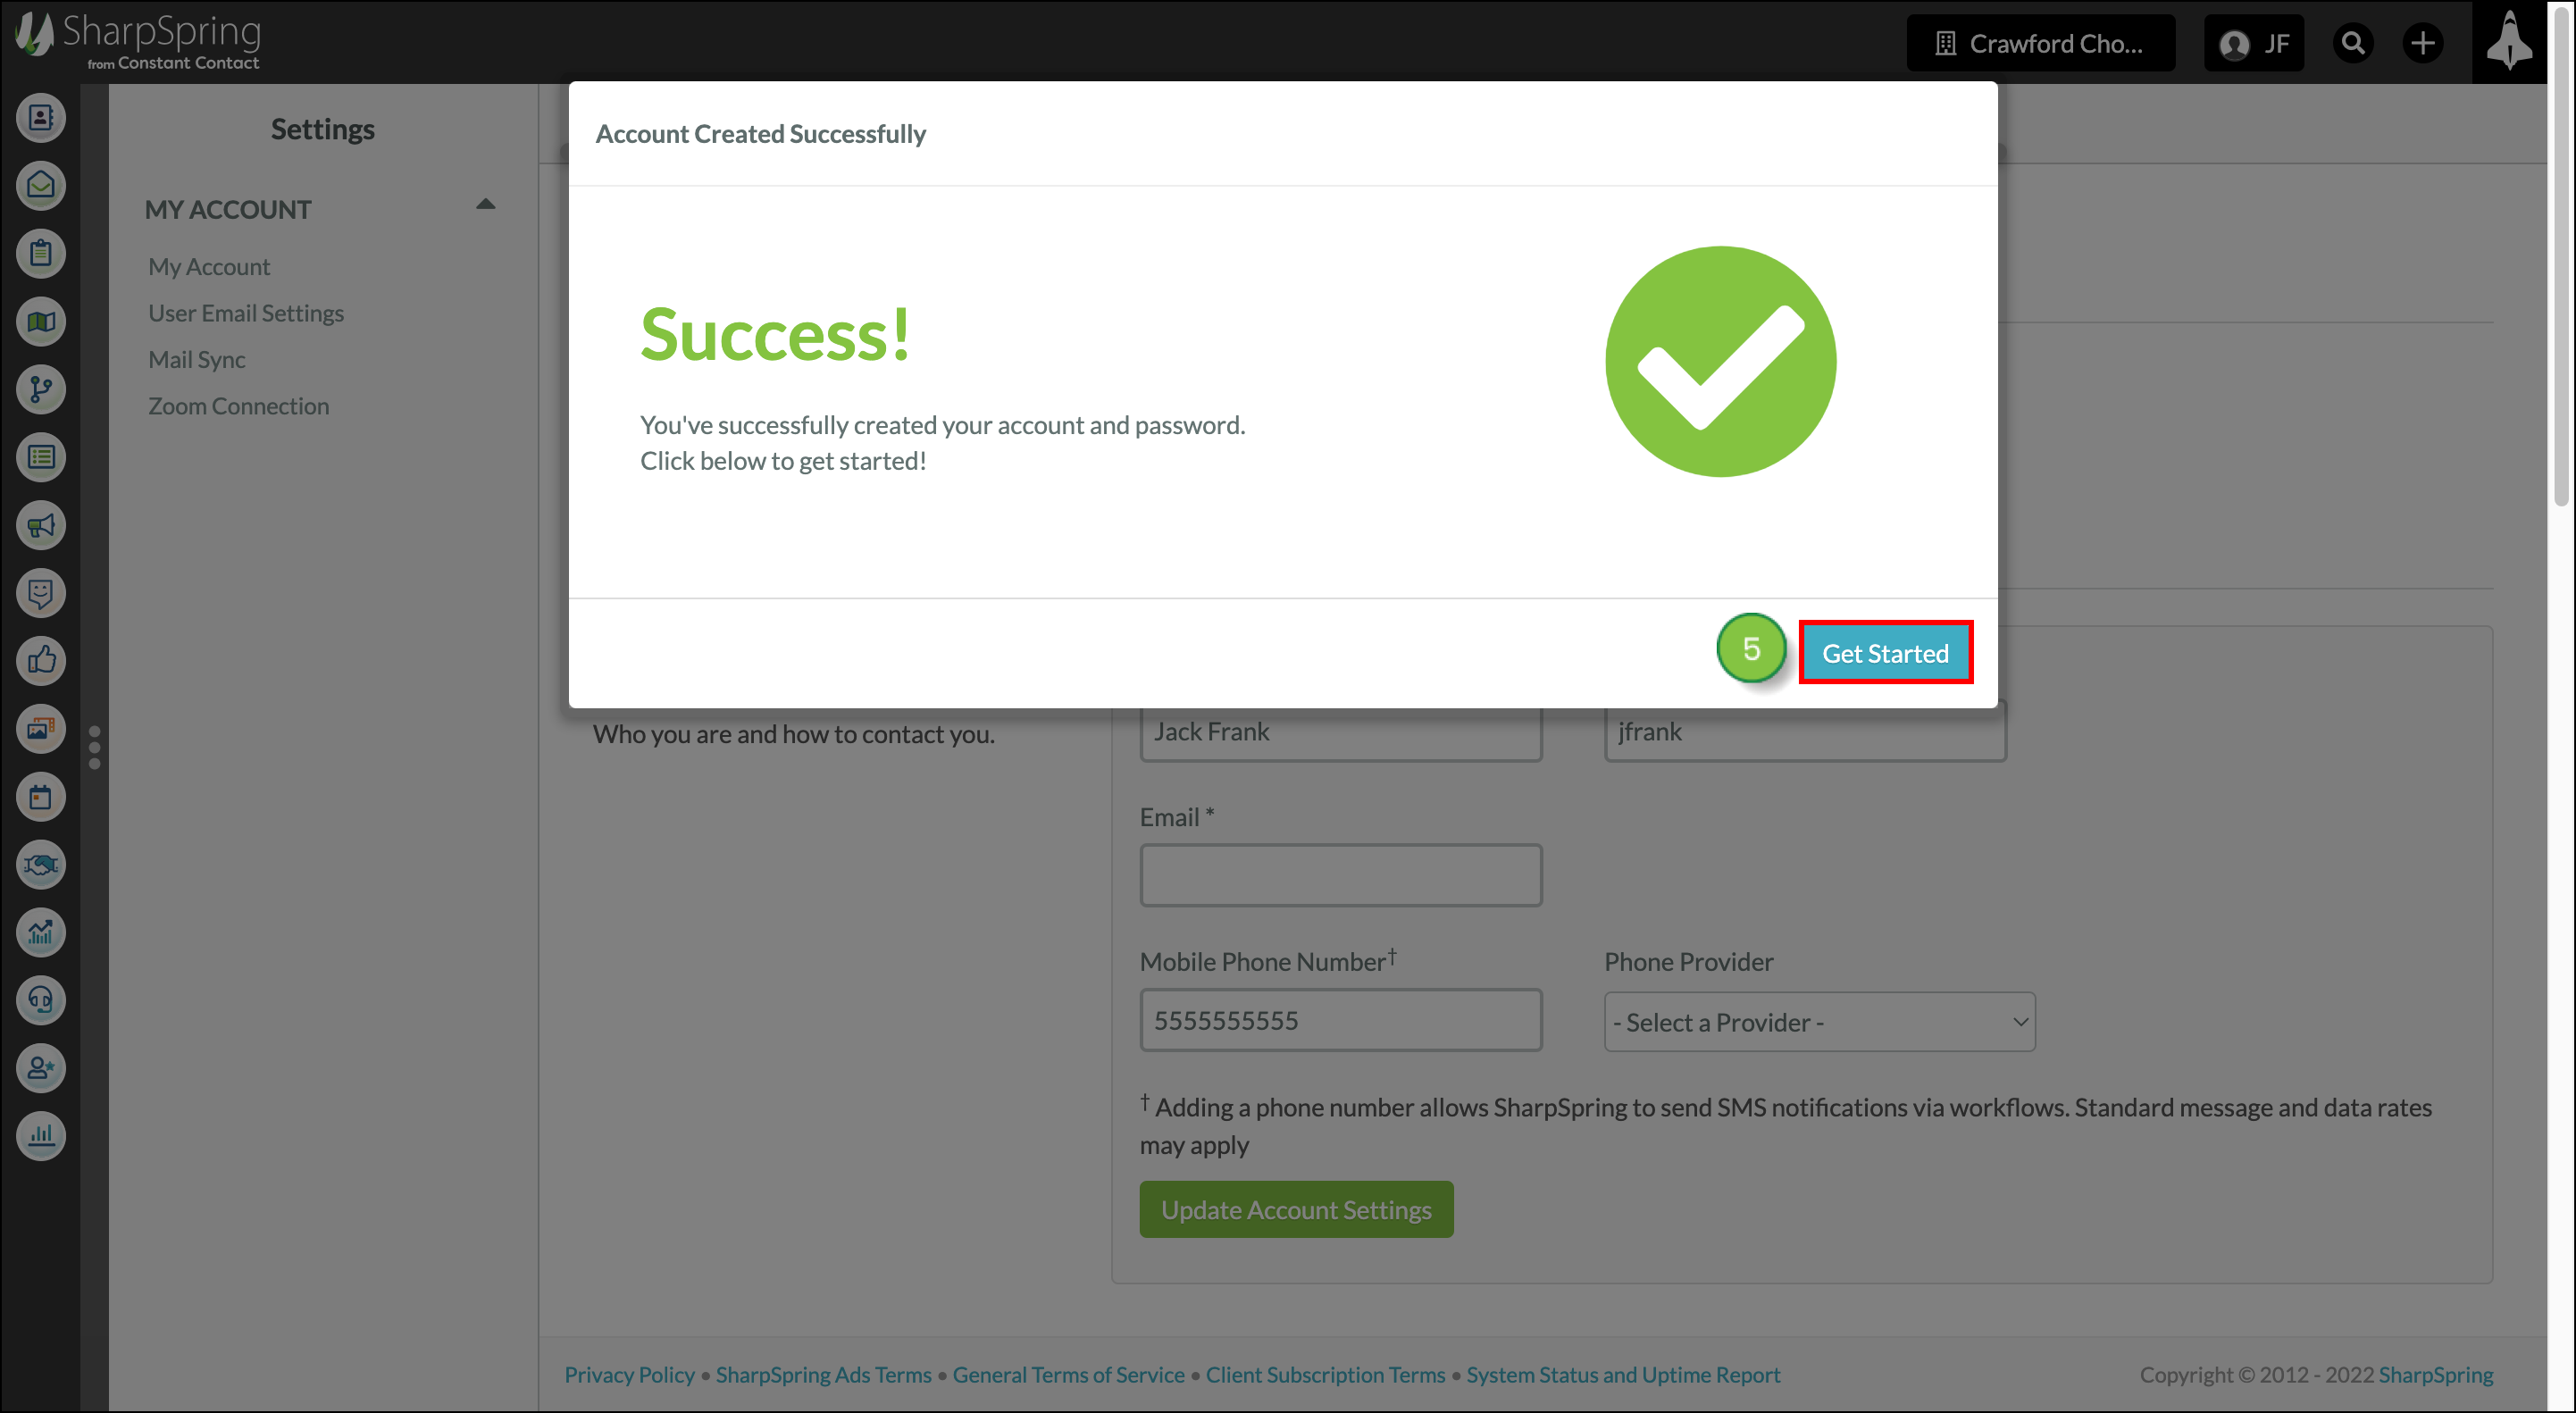
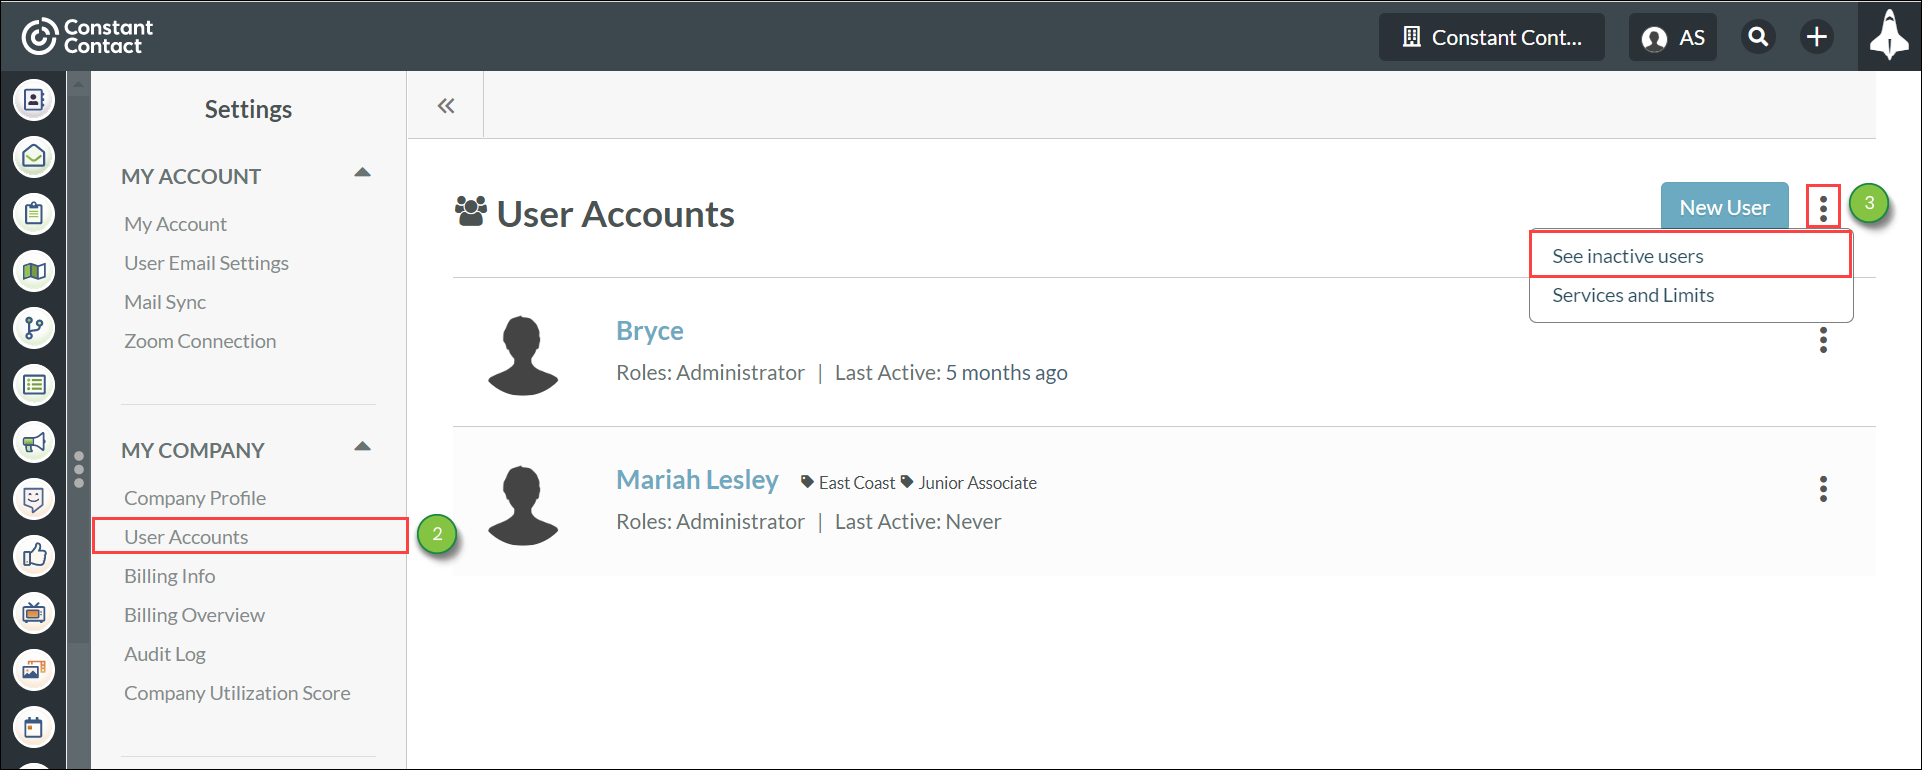
In the User Accounts menu, you can begin adding new users. Currently, there is no limit to the number of users you can add. Once you create the account, your users will receive an email notification with their next steps. They'll need to click the link in their email and create their own password.
Going forward, users will login with the username you've created and the password they've created. Users can change their account username once they've logged in.
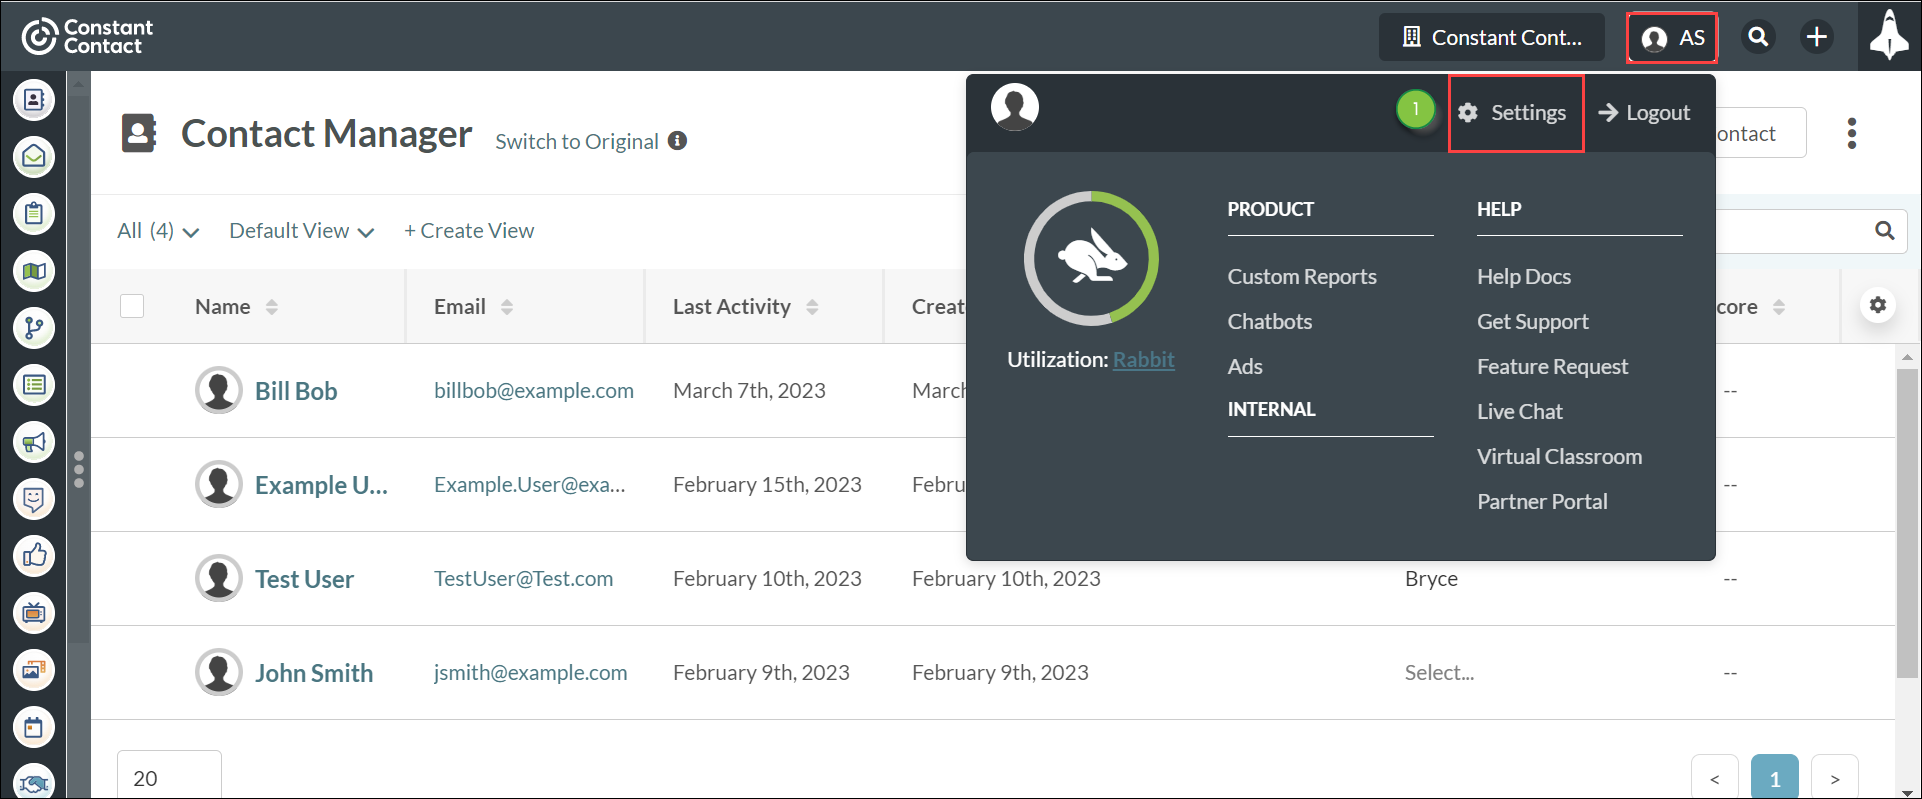
To add a new user, begin from the Settings page.
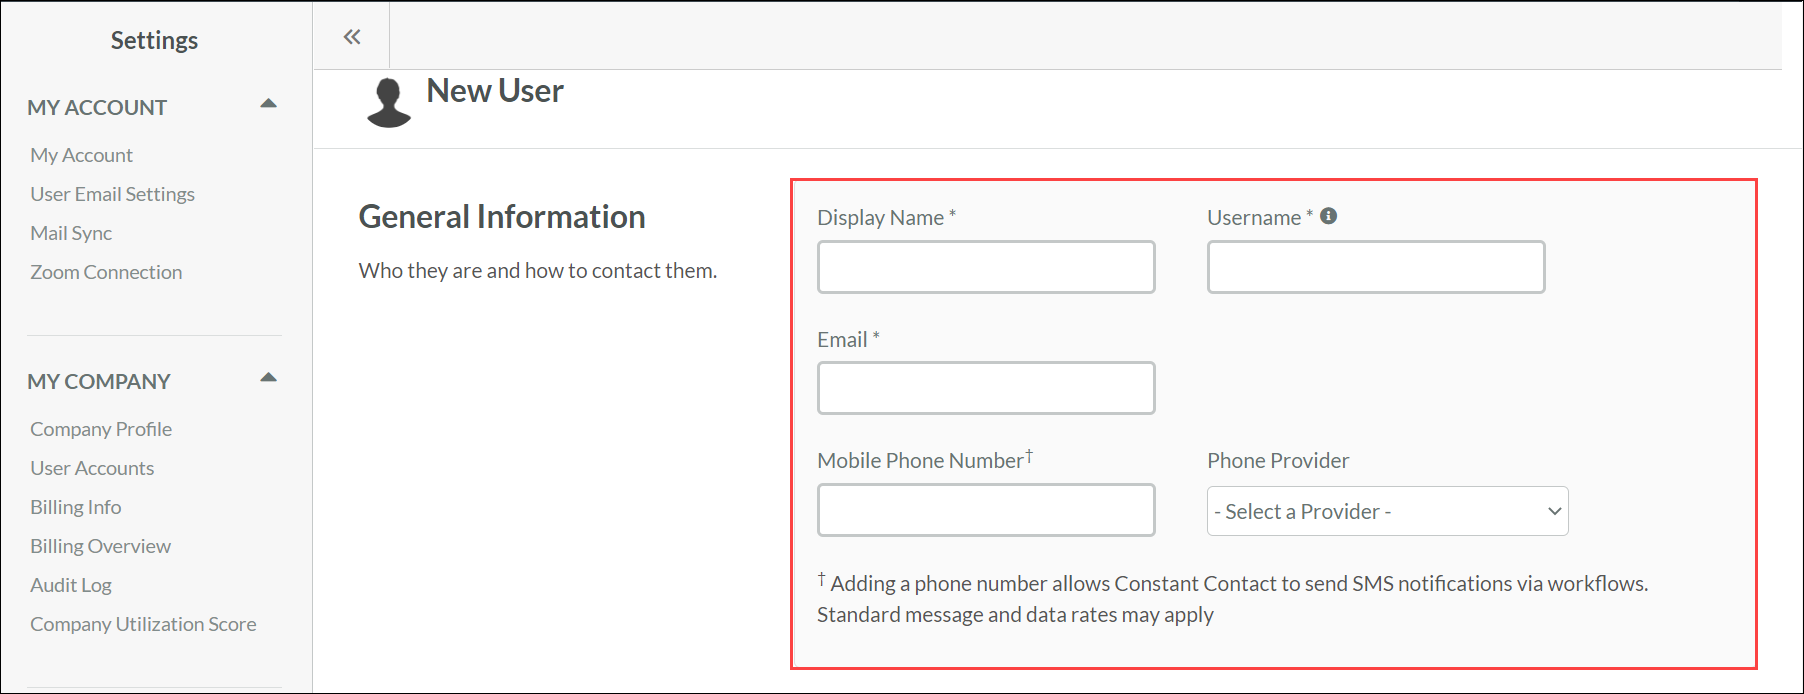
When adding new users, you will need to provide basic information about the user.
Enter the following information in the General Information section:
|
|
Users will create their own passwords once you have created their account. They'll receive an email with a new account link, prompting them to create a password. They can change their general information once their account has been created and they login.
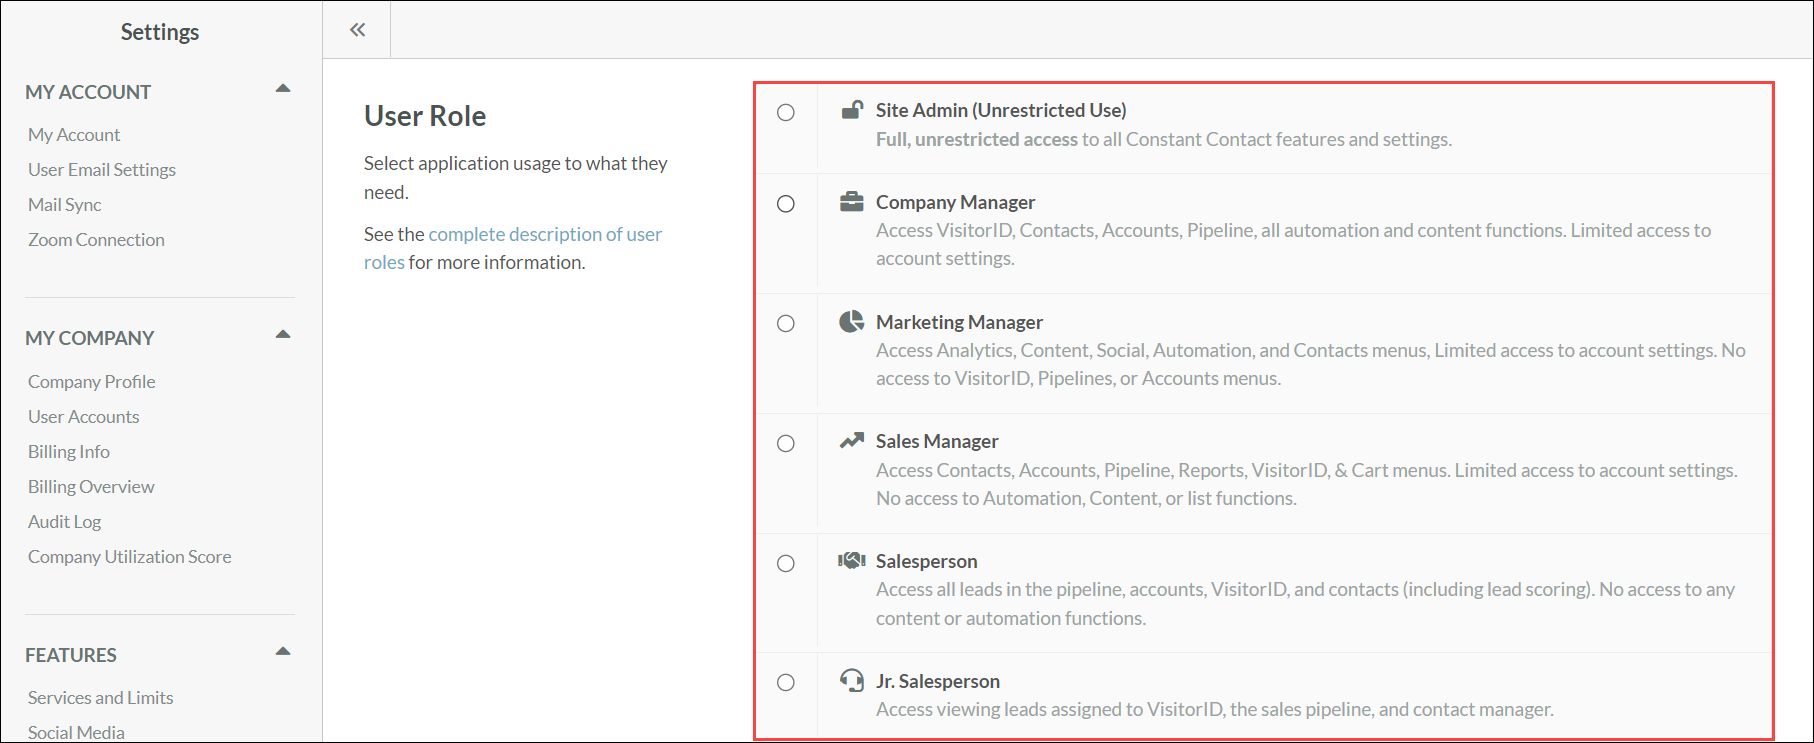
All users can be attributed a user role. Different user roles provide access to different areas of the Lead Gen & CRM application.
User roles can be changed at any time to change access or restrictions for a user. When adding new users, you will need to set the user as one of the following user roles:
Refer to Lead Gen & CRM User Roles Overview for more information on user roles.
Note: To learn how to set social media and bulk email publishing permissions for your users, read the Publishing and Permissions Overview article.
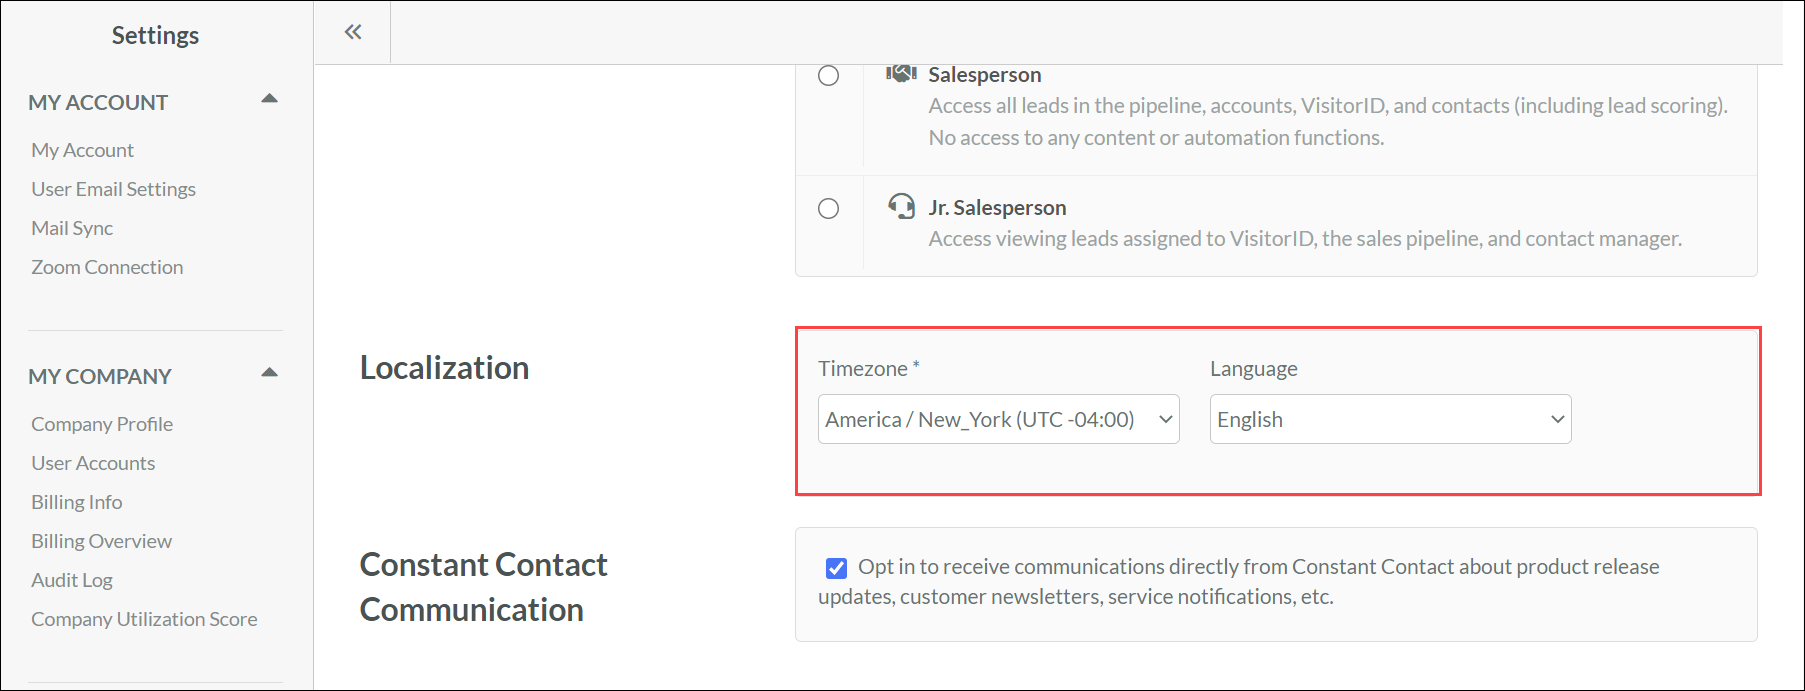
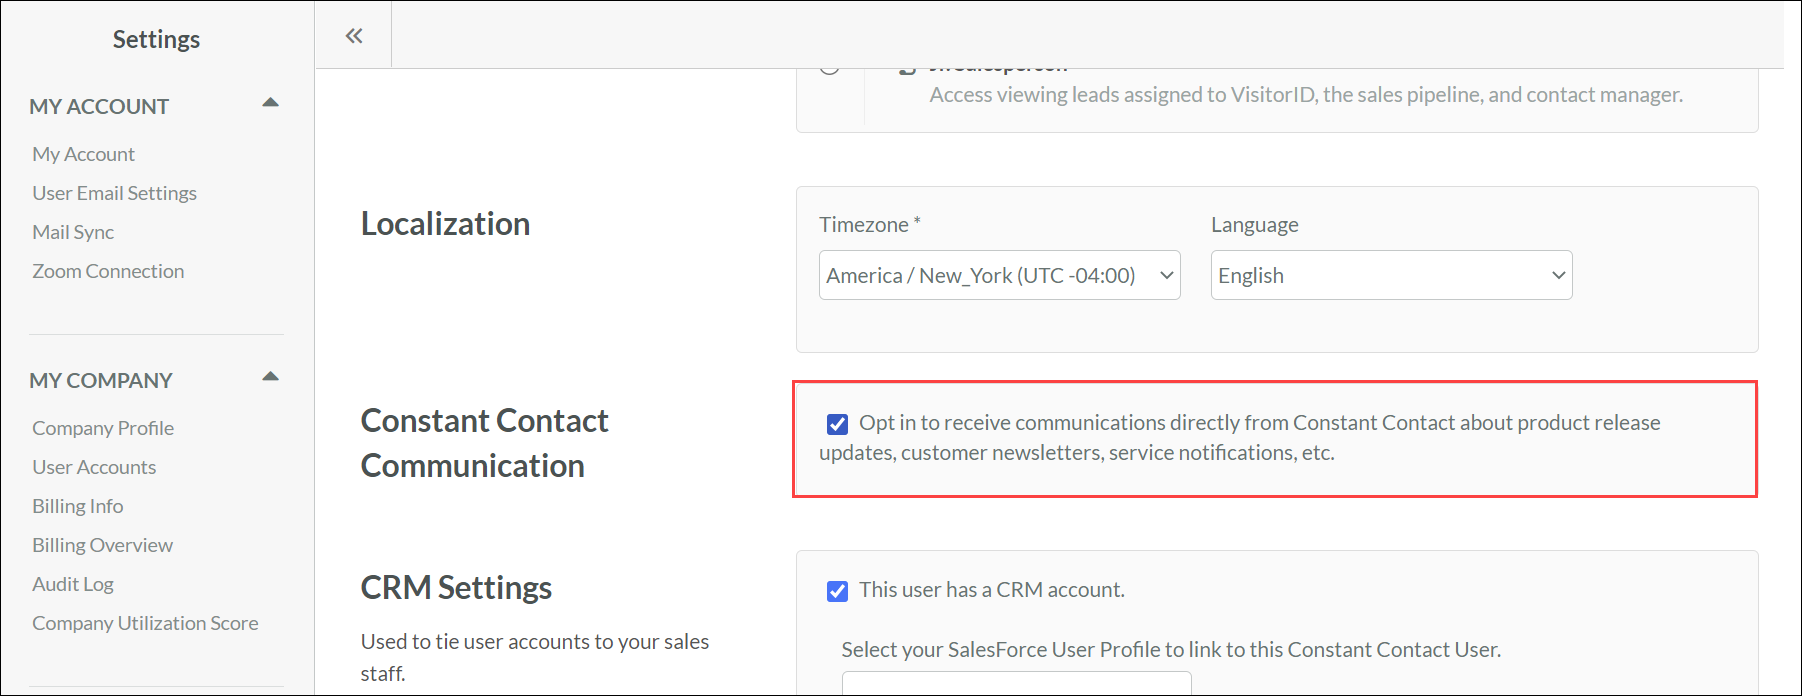
The timezone should be set based on where your user is located.
The language setting is what the user's platform will be translated to. If you set a user's language information to Spanish, then the user’s platform will be displayed in Spanish. When selecting a language, the available options are as follows:
|
|
|
|
|
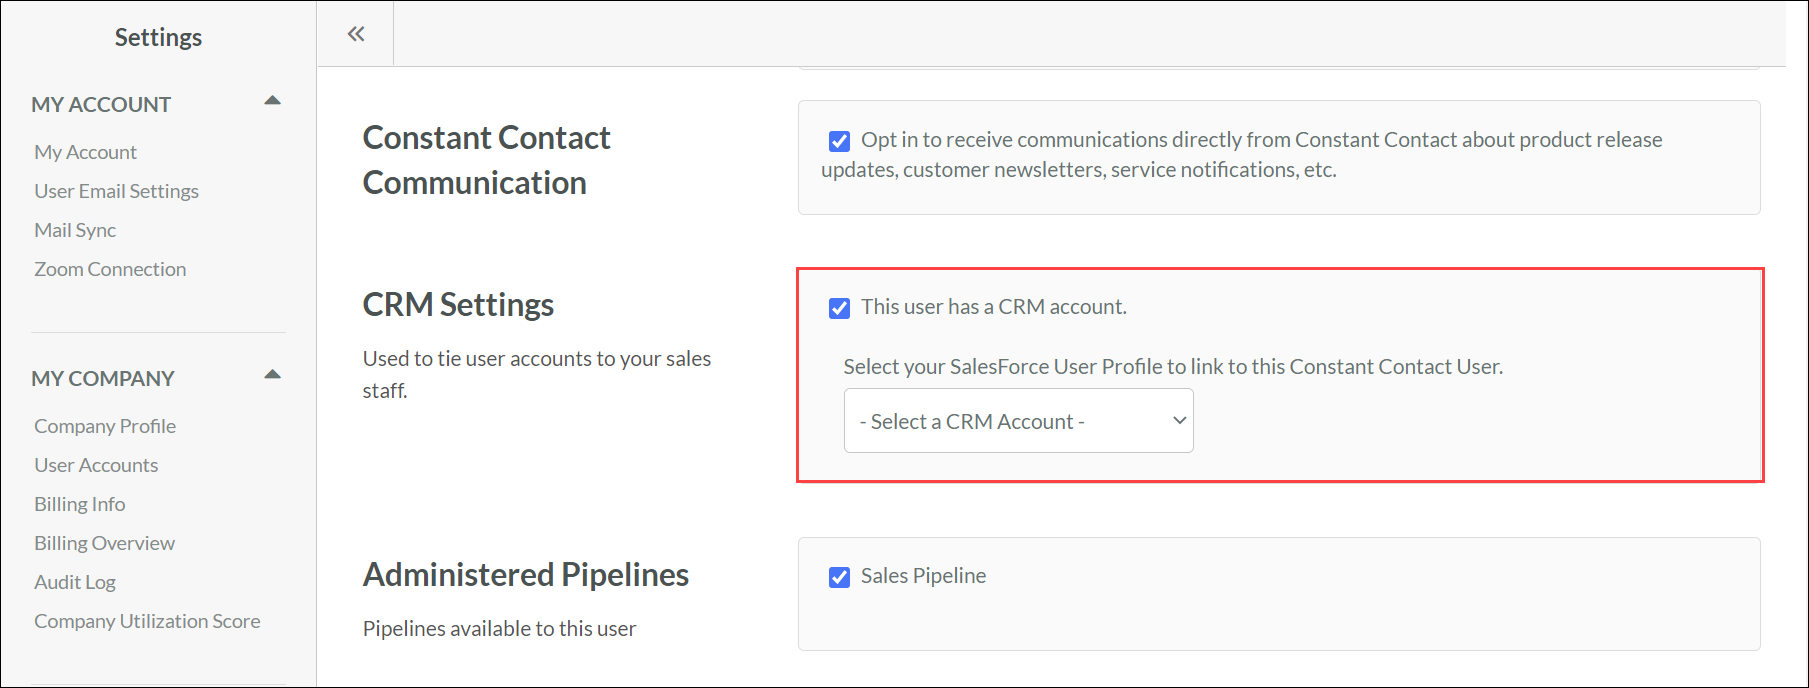
The CRM Settings section is where users can be set to have a Lead Gen & CRM CRM account. Lead Gen & CRM CRM is a powerful customer relationship management (CRM) platform.
Lead Gen & CRM CRM provides many features, including custom deal stages, an easy-to-understand pipeline, multiple types of CRM reports—and so much more.
Refer to Lead Gen & CRM Overview for more information.
In Lead Gen & CRM, the Pipeline feature is a visual representation of a sales flow, and it is the primary tool to use when managing and tracking sales.
When adding users, you can select which pipelines a user has access to by clicking the checkboxes next to individual pipelines.
Refer to Sales Pipeline Overview for more information on creating pipelines.
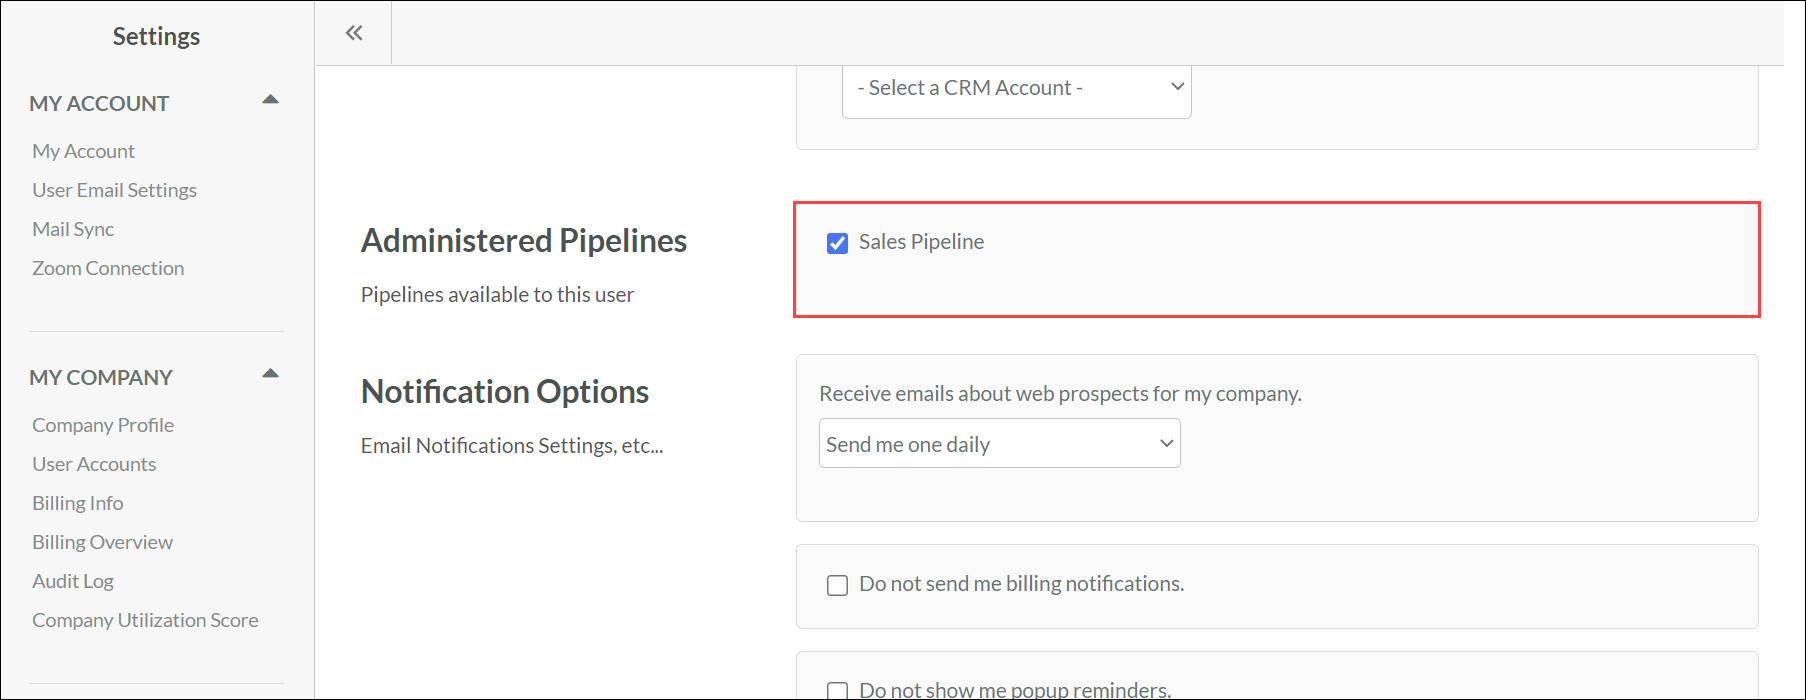
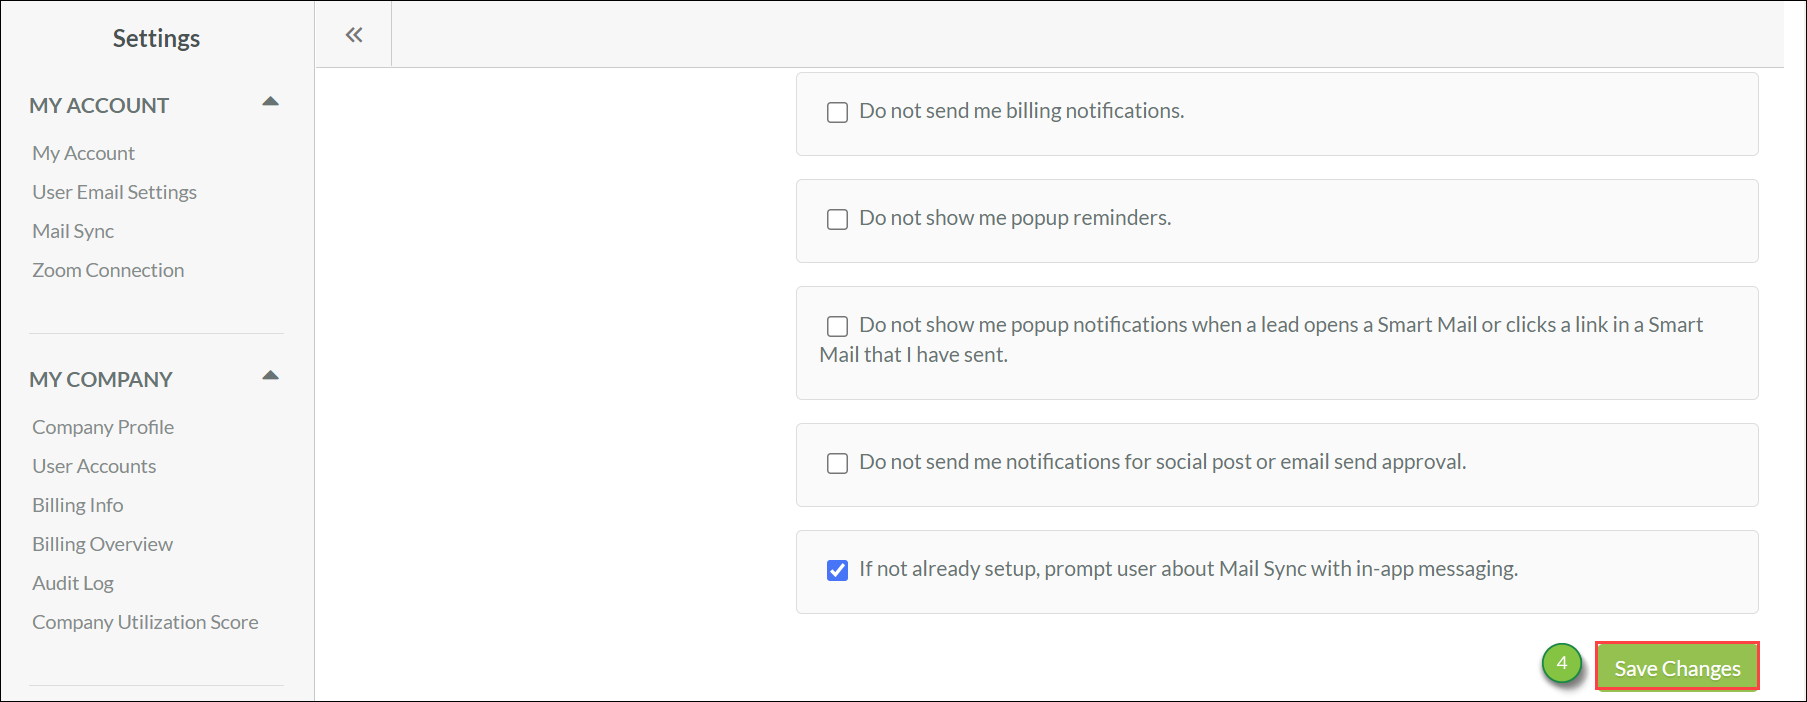
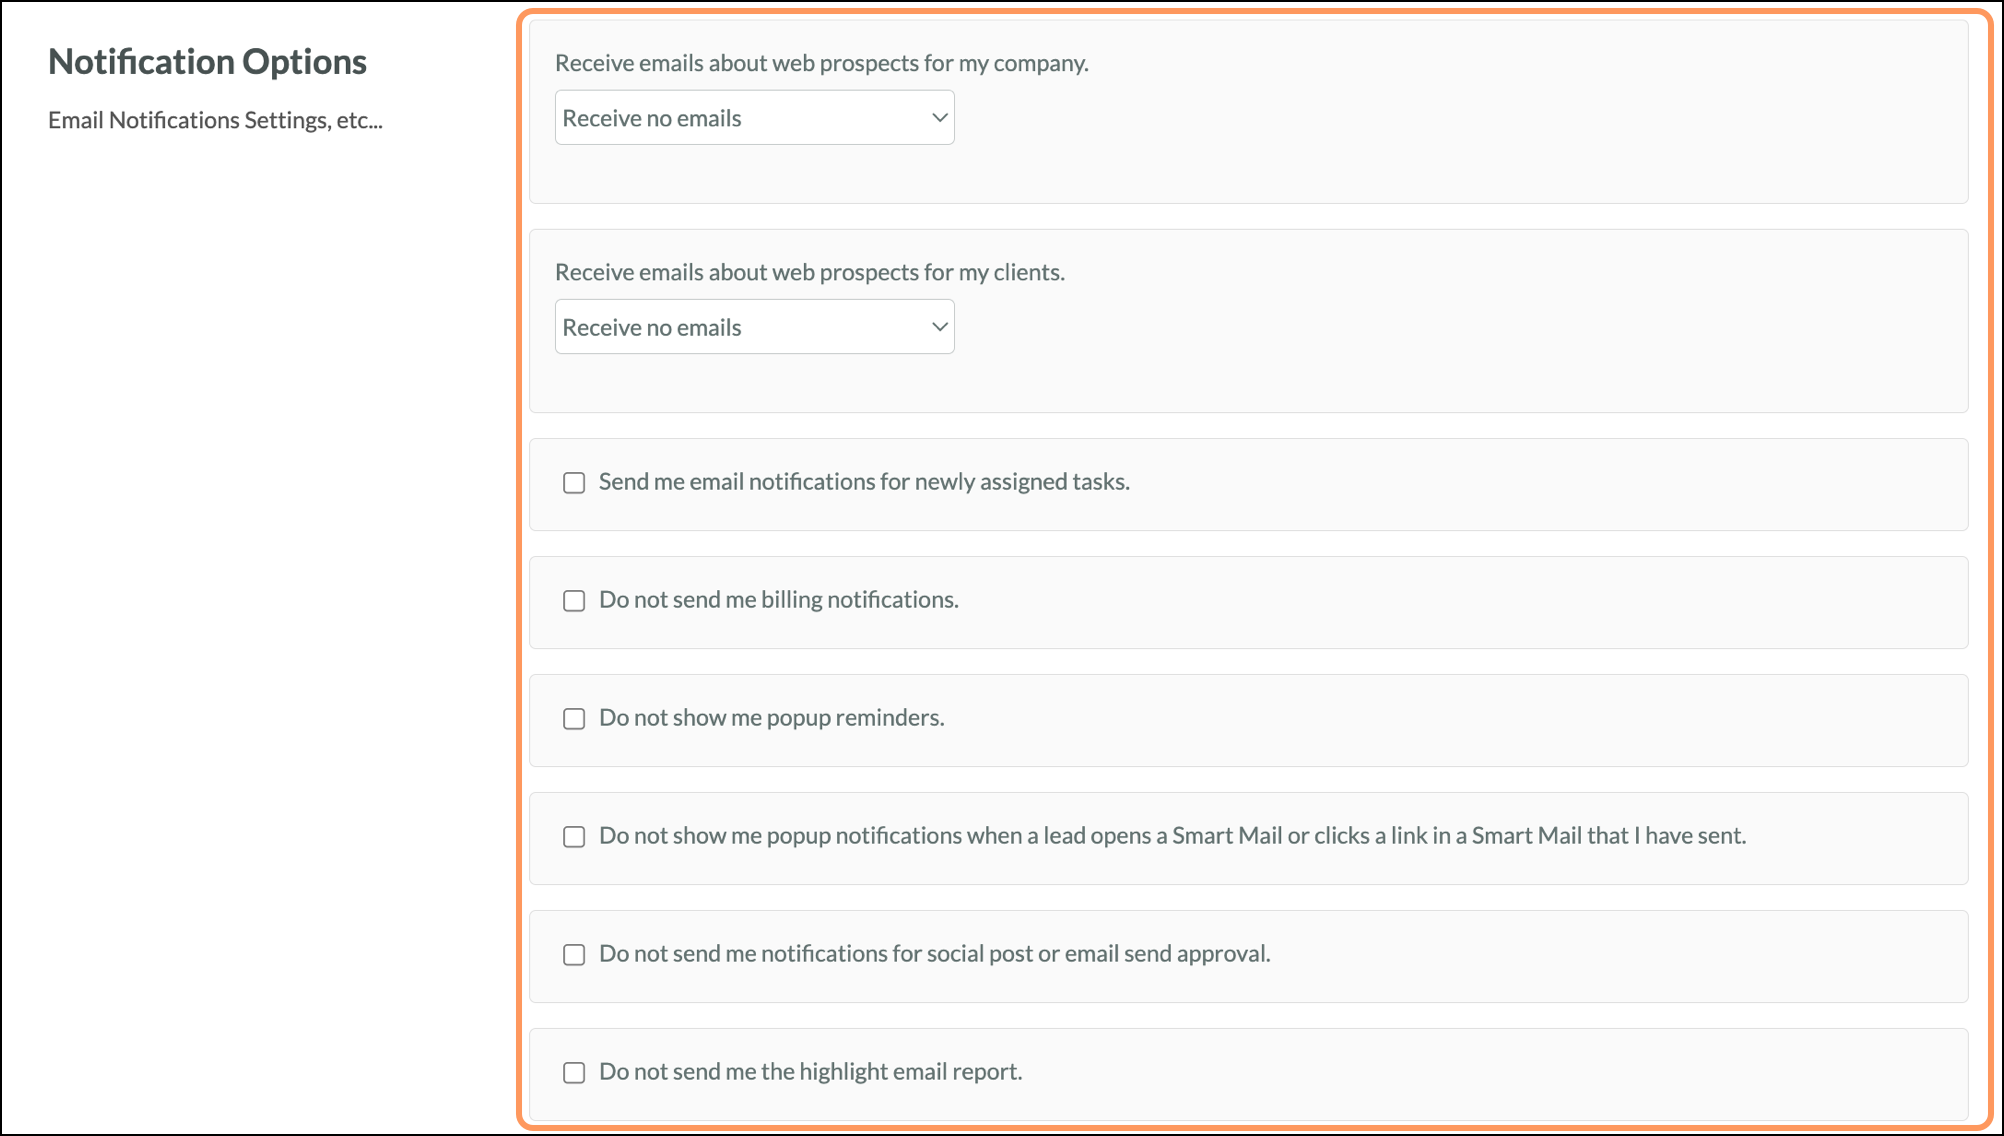
Notifications alert you to certain things that are happening within Lead Gen & CRM. These notifications range from emails to in-application messages. You can set which notifications appear for individual users.
Note: Lead Gen & CRM users that have not opened an email or logged into the application for 180 days will have their system notifications suppressed. This includes VisitorID, billing, and automation-based notifications.
The available notifications are as follows:
The Lead Gen & CRM Communication section provides a way to set users to receive emails and other communications from Lead Gen & CRM.
The material that Lead Gen & CRM sends will go over relevant things that are happening with the platform, such as product release updates.
Lead Gen & CRM will also provide other communications, such as customer newsletters. The content that Lead Gen & CRM sends to users that have this setting enabled will always be professional and courteous.
Once a user has been added to Lead Gen & CRM, they will need to verify their email address. Until they do so, they will be unable to use Lead Gen & CRM's features
To verify email addresses, users must the following from a new tab in their web browser:
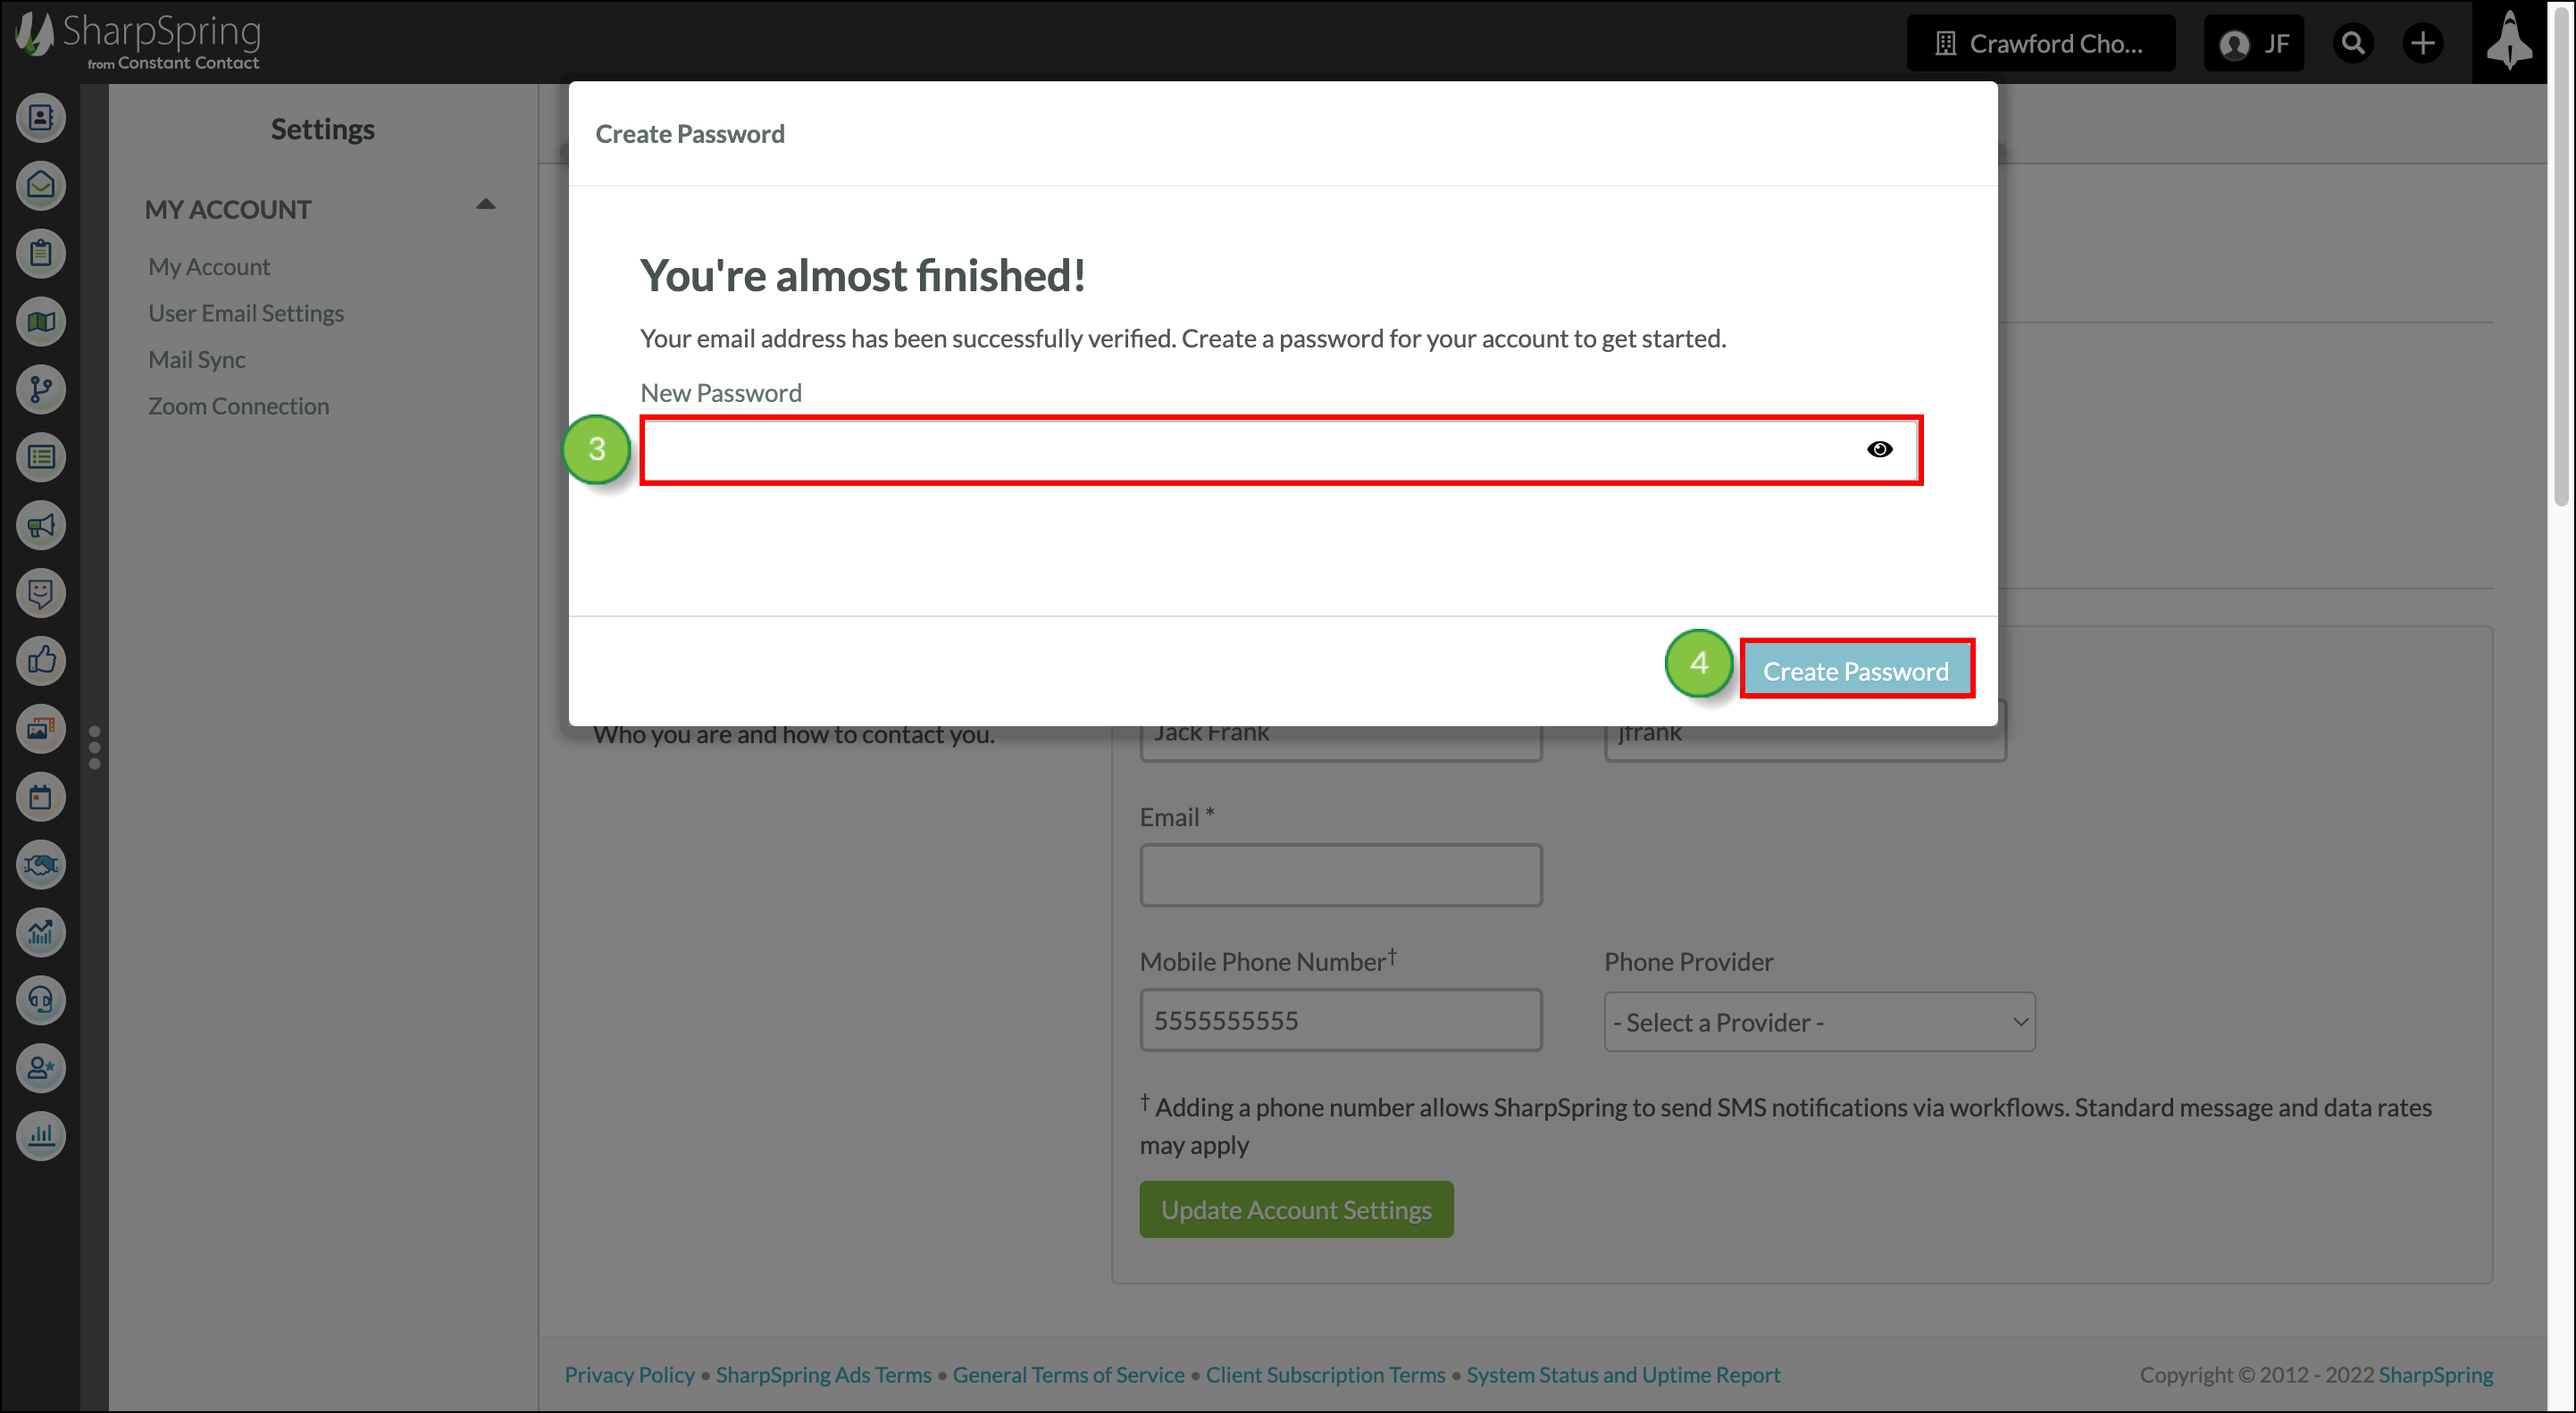
Once the user's email address has been verified, they will be able to enter and update user account information and related settings.
For security reasons, passwords can be changed as needed by contacting Lead Gen & CRM Support to update the user information. Additionally, administrators can ensure the user changes their own information from within their account or by sending a password reset email when a password needs to be updated. Practice safe and proactive password management.
Passwords can be changed as needed when users are logged in to their account or through a password reset email. Practice safe and proactive password management.
To have a user update or change a password through a password reset email, do the following:
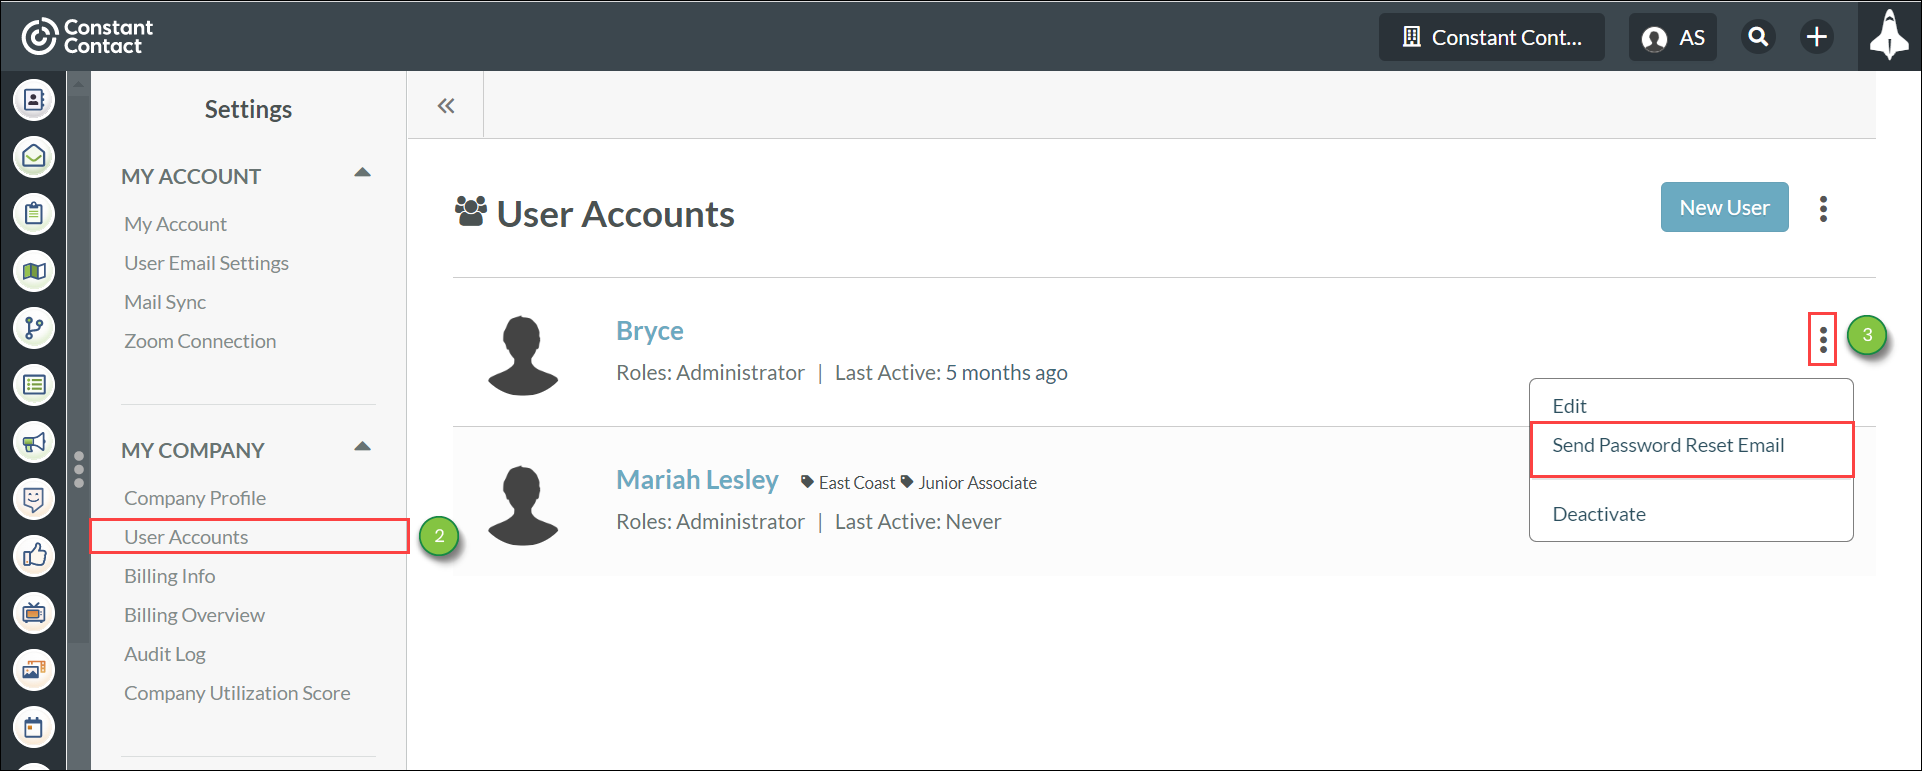
Once complete your user will receive an email with a link prompting them to set a new password.
You can manually deactivate and reactivate users. Keep in mind that Lead Gen & CRM users that have not opened an email or logged into the app for 180 days will have their system notifications suppressed. This includes VisitorID, billing, and automation-based notifications.
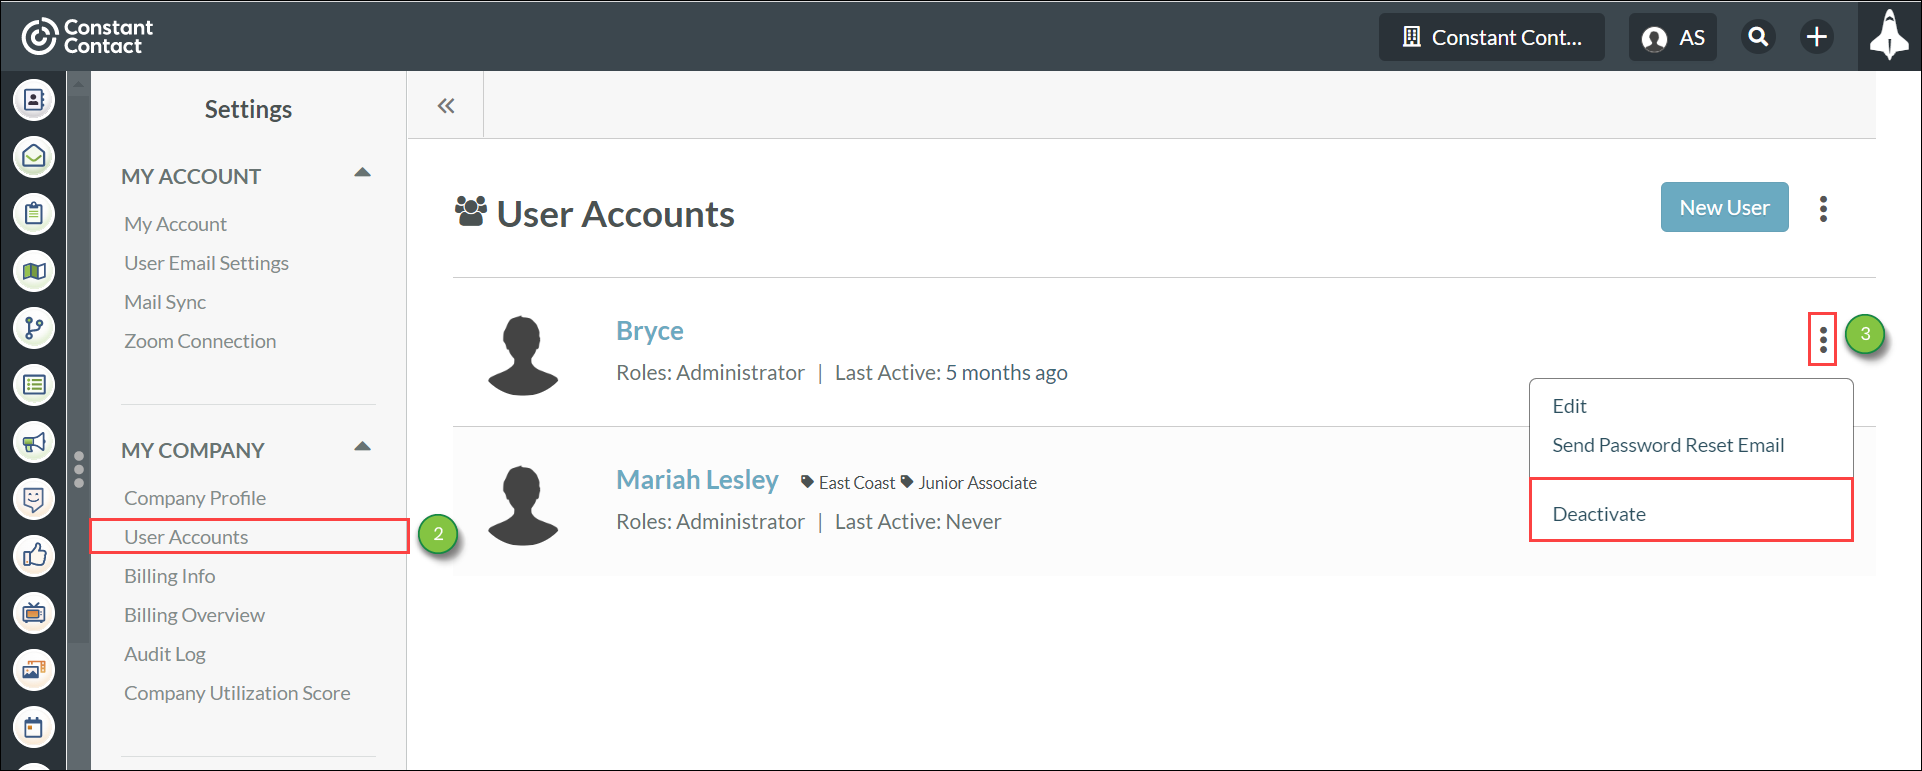
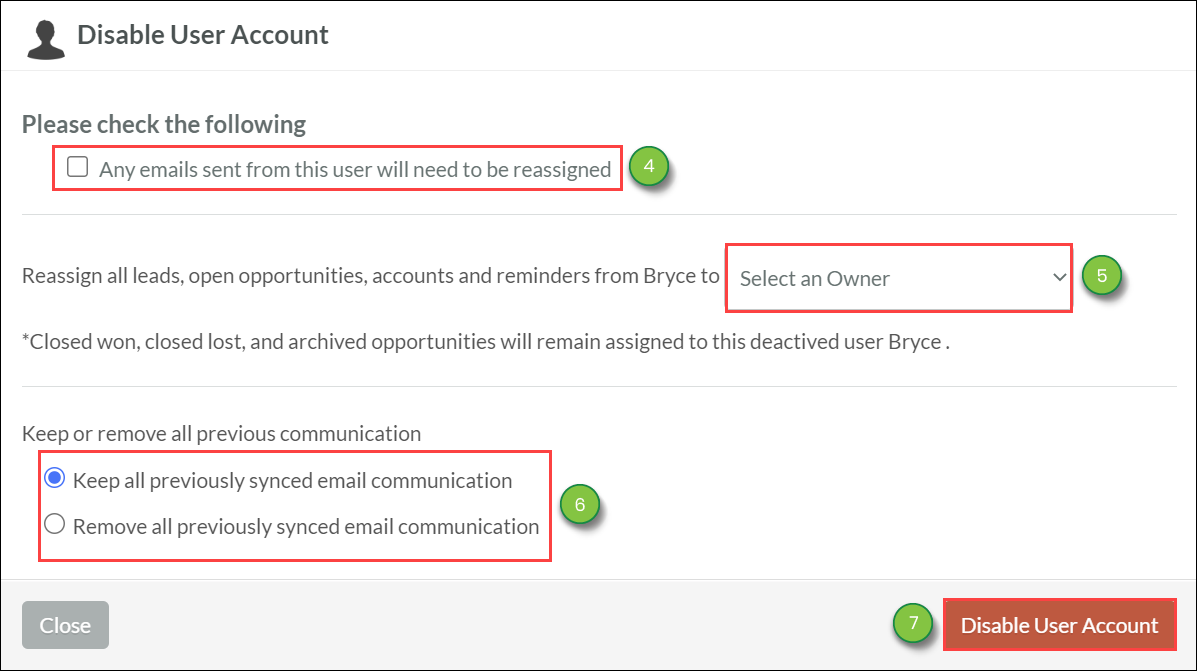
Deactivating Users
While you cannot outright delete users in Lead Gen & CRM, you can deactivate them.
Reactivating Users
You can reactivate previously deactivated users.
Copyright © 2026 · All Rights Reserved · Constant Contact · Privacy Center