While Lead Gen & CRM has its own CRM functionality, the platform also enables you to utilize Salesforce if you are currently using it as your CRM. Our Salesforce integration currently supports Enterprise, Unlimited, Professional, and Performance editions.
This article will detail how to integrate Salesforce with Lead Gen & CRM.
Article Contents
Users:
| Administrators | ✓ | |
| Company Managers | | |
| Marketing Managers | | |
| Sales Managers | | |
| Salespersons | | |
| Jr. Salespersons | | |
 | Tip: Are you looking for information about Constant Contact’s Email and Digital Marketing product? This article is for Constant Contact’s Lead Gen & CRM product. Head on over to the Email and Digital Marketing articles by clicking here. Not sure what the difference is? Read this article. |
 | NOTE: On April 8th, 2024, Salesforce enrolled all of their users into multi-factor authentication (MFA). This means you may need to reconfigure your Salesforce integration with a dedicated integration user to ensure syncing operates as designed. For more info on Salesforce’s implementation of MFA, please view their Help Documentation here. |
Salesforce Requirements
These are the requirements that you must meet in order to use the Salesforce integration:
- You must be using either the Enterprise, Unlimited, Professional, or Performance edition of Salesforce.
- API Access must be turned on, which is enabled by default for Enterprise, Unlimited, and Performance editions. For the Professional edition, all requests for API access must be purchased through Salesforce support.
- The CRM user must be an integration user (also known as API user).
- The CRM user must have the API only permission applied.
- For more info on best practices for setting up API users, click here.
- The CRM user must have modify all data selected within the system administrator profile of Salesforce.
- Password expiration within Salesforce must be turned off.
- To avoid breaking your integration, the user’s setting for “Session Security Level Required at Login” on the integration user’s profile must NOT be set to High Assurance.
Backing Up Salesforce Data
Prior to beginning the integration process, back up your Salesforce data. Refer to the following external Salesforce support articles for more information on backing up Salesforce data:
Additional Preparations
When connected, Salesforce will begin syncing Leads and Contacts in small batches. To ensure a clean connection, you will need to export all Leads and Contacts from Salesforce (including the 18-digit Salesforce ID) and import them into Lead Gen & CRM prior to connecting the systems. This will allow Salesforce to find the records easily and ensure a faster initial sync.
Salesforce Preparations
There are certain things you must do before you can begin integrating Salesforce:
- Log in to Salesforce and navigate to the User Settings menu.
- Ensure that your account is listed as Admin.
- Ensure that the Marketing User checkbox is checked.
- Ensure that the Modify All Data checkbox is checked.
- If you are using Web-to-Lead in Salesforce, ensure that you do not have a default response template enabled.
Note: If you have a default response template enabled, when leads are synchronized with Salesforce from Lead Gen & CRM, Salesforce recognizes that as a form submission event. That will trigger an email to leads with the content of the default response template.
Integrating Salesforce
Once you have configured Salesforce settings, you can begin to integrate:
- Log in to Salesforce and click your name in the top-right corner of Salesforce.
- Click My Settings from the dropdown.
- Click Advanced User Details, located under Personal in the left panel.
- Click Personal Information in the drop-down list.
- Click Edit.
- Click the Role drop-down menu.
- Select Admin.
- Click the Marketing User checkbox.
Important: Once you have successfully connected Salesforce to Lead Gen & CRM, the Accounts, Opportunities, Pipeline, and Reports sections of Lead Gen & CRM will be removed. While you can still open the Sales menu, all sales activity is expected to be conducted within Salesforce. Once the integration is complete, the Salesforce opportunity name will be displayed in the Memberships tab of the associated Lead Gen & CRM contact's record.
Setting Salesforce Passwords to Never Expire
You will need to make sure that your Salesforce password does not expire. If the password expires, it will disconnect the Salesforce API from Lead Gen & CRM:
- Log in to Salesforce and click Setup in the top-right corner of Salesforce.
- Click Security Controls, located under Administer in the left panel.
- Click Password Policies in the drop-down list.
- Select Never expires in the User passwords expire in drop-down list.
Entering Salesforce Credentials into Lead Gen & CRM
After setting password expiration, you will need to input your Salesforce username, password, and security token in Lead Gen & CRM.
Important: Back up all of your Salesforce data before integrating Salesforce with Lead Gen & CRM.
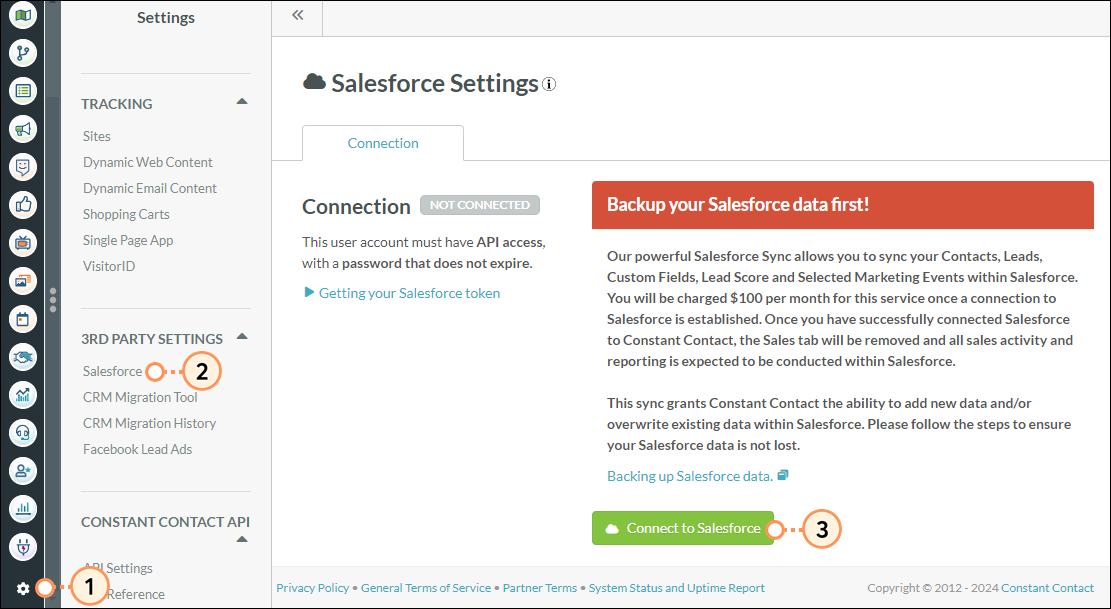
- Log in to Lead Gen & CRM and click Settings in the left toolbar.
- Click Salesforce, located under Third-Party Settings in the left panel.
- Click Connect to Salesforce.
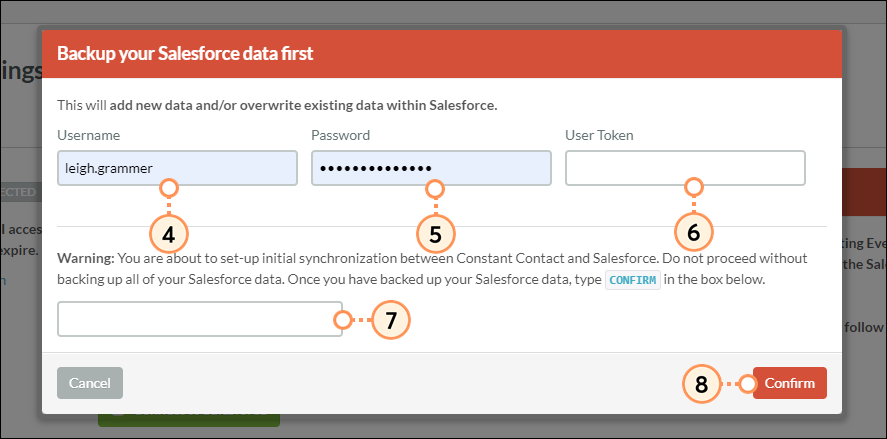
- Enter your username in the Username field.
- Enter your password in the Password field.
- Enter your security token in the User Token field.
- Enter Confirm in the Warning field.
- Click Confirm.
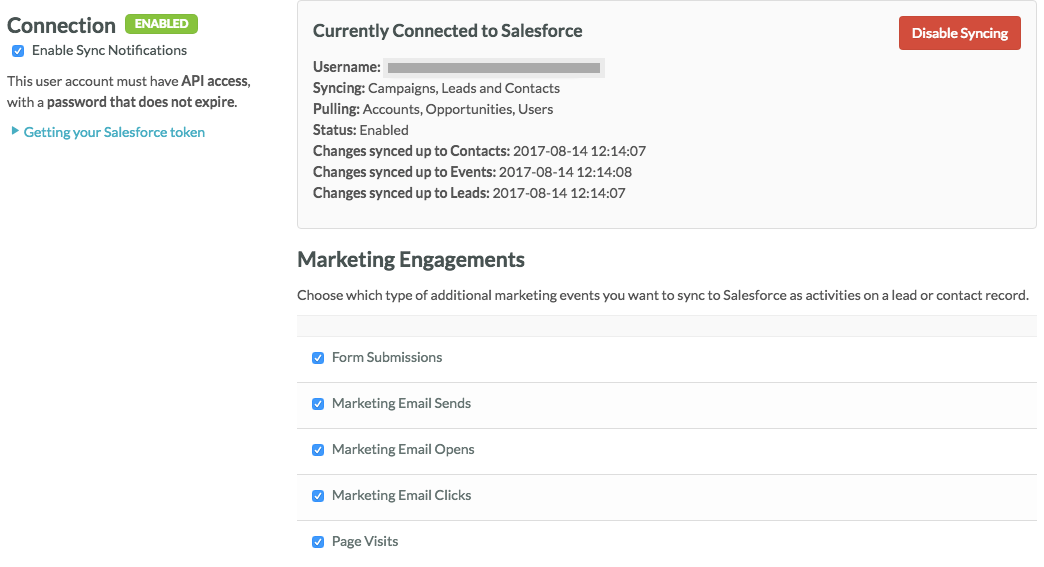
Marketing Engagements
Salesforce allows you to sync marketing events as activities on a lead or contact record. Choose which type of additional marketing events you want to sync to Salesforce as activities on a lead or contact record:
| Events | | Description |
|
Form
Submissions
| | Indicates when a user fills out a form. |
Marketing
Email Sends | |
An activity log showing when an email has been sent through
Lead Gen & CRM.
|
Marketing
Email Opens | |
An activity log showing when an email sent through Lead Gen & CRM has been opened.
|
Marketing
Email Clicks | |
An activity showing the first time a link is clicked in an email
sent through Lead Gen & CRM.
|
|
Page
Visits
| | Indicates that the user has visited a tracked page. |
Lead Synchronization
When Lead Gen & CRM and Salesforce synchronize lead information, consider the following:
- Leads are synced bidirectionally with Salesforce.
- As leads are deleted in Salesforce, they will be deactivated in Lead Gen & CRM. In order for a lead to be reactivated, the lead must fill out a form or be re-imported via the Import Tool.
- In the Salesforce section of the Settings page is the Lead Field Mapping tab. Within this tab, you will be able to decide what lead fields you would like synced on a field-by-field basis. This allows nearly every field to be mapped from Salesforce to Lead Gen & CRM, and vice versa.
- For each field, it is possible to select whether Lead Gen & CRM values will override Salesforce values via the Push option, whether Salesforce values will override Lead Gen & CRM values via the Pull option, or whether any conflicts will be handled via the Two-way option.
- Lead scores can be pushed from Lead Gen & CRM to Salesforce.
- Any lead ownership associations will be synchronized with Salesforce, provided the lead owners are mapped to Lead Gen & CRM accounts.
- A Lead Hyperlink Widget is a link that will funnel Lead Gen & CRM information regarding a lead into Salesforce. It will provide you with a quick glance at the pertinent details for the lead. This link will give you quick access to Lead Gen & CRM's memberships and assignments related to the Life of the Lead, lists, workflows, pending emails, and campaigns.
- Key communication events will funnel into the Salesforce event history. Included in this communication history will be form fill-outs and email history.
Contact Synchronization
When Lead Gen & CRM and Salesforce synchronize contact information, consider the following:
- Contacts are synced bidirectionally with Salesforce.
- In the Salesforce section of the Settings page is the Contact Field Mapping tab. Within this tab, you will be able to decide what contact fields you would like synced on a field-by-field basis. This allows nearly every field to be mapped from Salesforce to Lead Gen & CRM, and vice versa.
- As with lead synchronization, key communication events will be pushed to Salesforce for each contact.
Opportunity Synchronization
When Lead Gen & CRM and Salesforce synchronize lead information, Lead Gen & CRM performs a single-directional synchronization on opportunities. Once you have successfully connected Salesforce to Lead Gen & CRM, the Opportunities section in Lead Gen & CRM will be removed.
Owner Synchronization
In order to synchronize user accounts with Salesforce, Lead Gen & CRM requires you to select a Salesforce account for each Lead Gen & CRM user account.
To map a Lead Gen & CRM account, do the following:
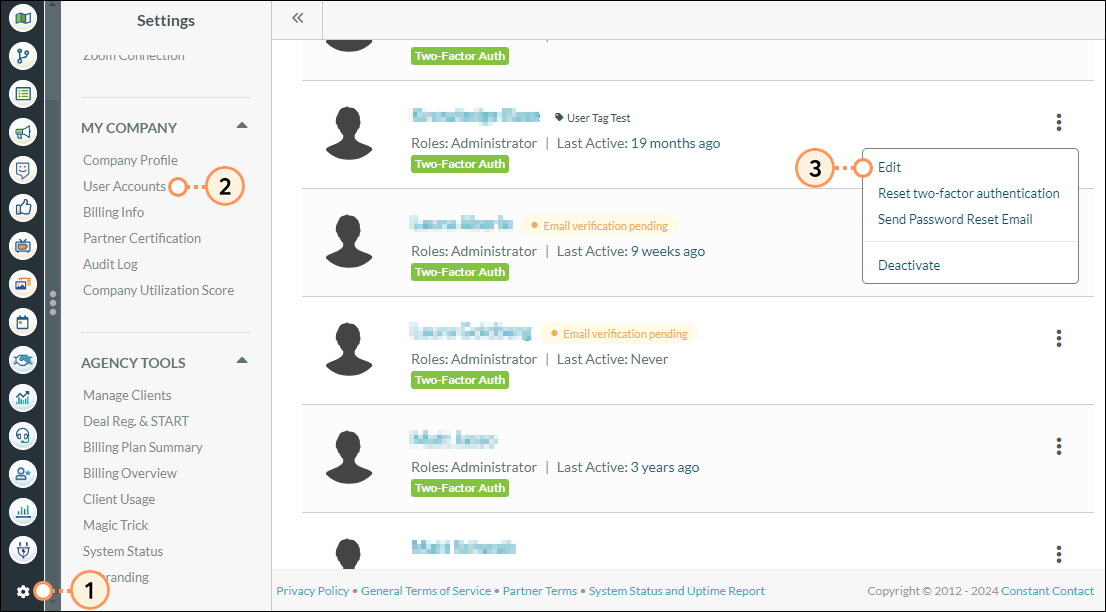
- Click Settings in the left toolbar.
- Click User Accounts, located under My Company in the left panel.
- Click
 Options > Edit next to an account name.
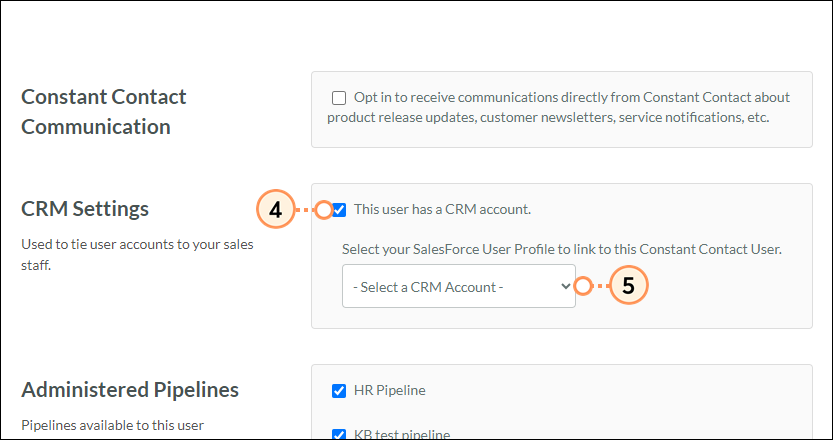
- Click the This user has a CRM account checkbox in the CRM Settings section.
- Select an account for the user in the Select a CRM Account drop-down menu.
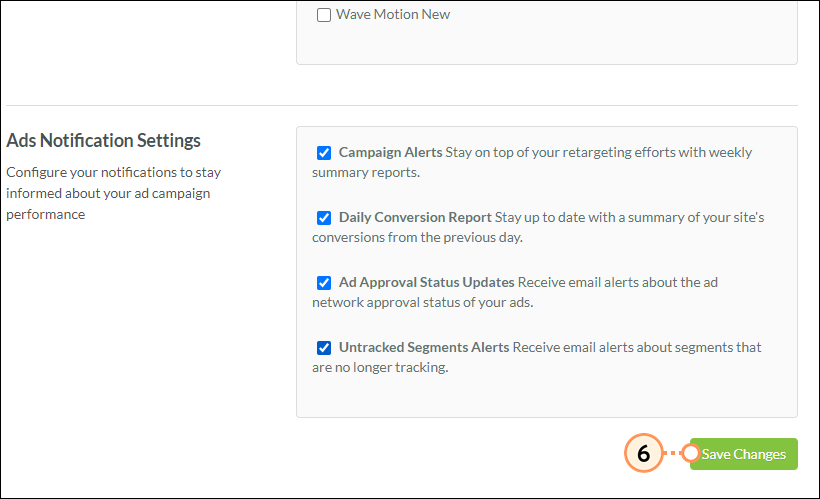
- Click Save Changes.
At this point, any leads, contacts or opportunities associated with that user account will have that association synced bidirectionally.