Lead Gen & CRM
How can we help you?
Search our help articles, video tutorials, and quickstart guides

You've got this. You've got us. Search our Knowledge Base to quickly find answers to your questions.

For G Suite Administrators: Syncing Gmail with Lead Gen & CRM

Article: 000050262
Updated: November 7, 2023

Learn how to use G Suite to sync your Gmail mailbox with Lead Gen & CRM.

 
Users:
Administrators 
Company Managers  
Marketing Managers  
Sales Managers  
Salespersons  
Jr. Salespersons  


Setting G Suite Administrative Parameters

Before you begin, you should ensure that you have the correct login credentials for the Gmail account that will be synced.

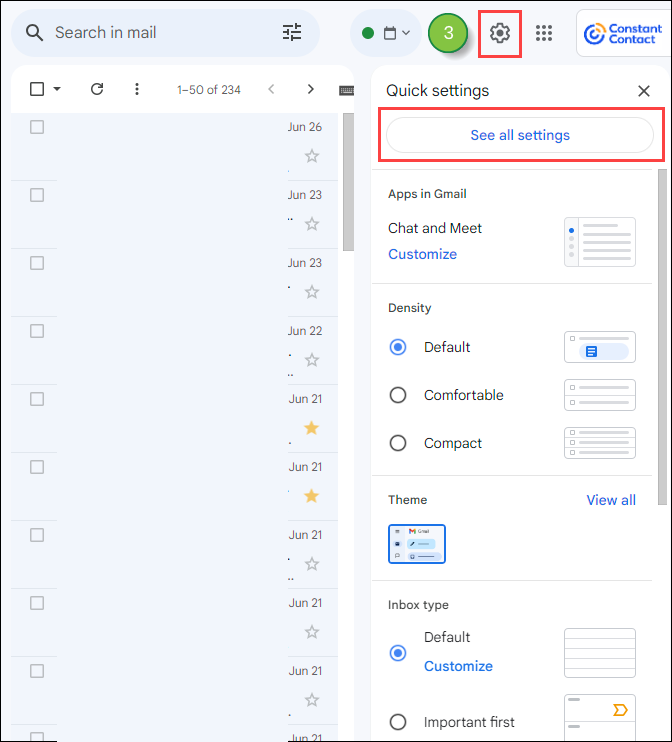
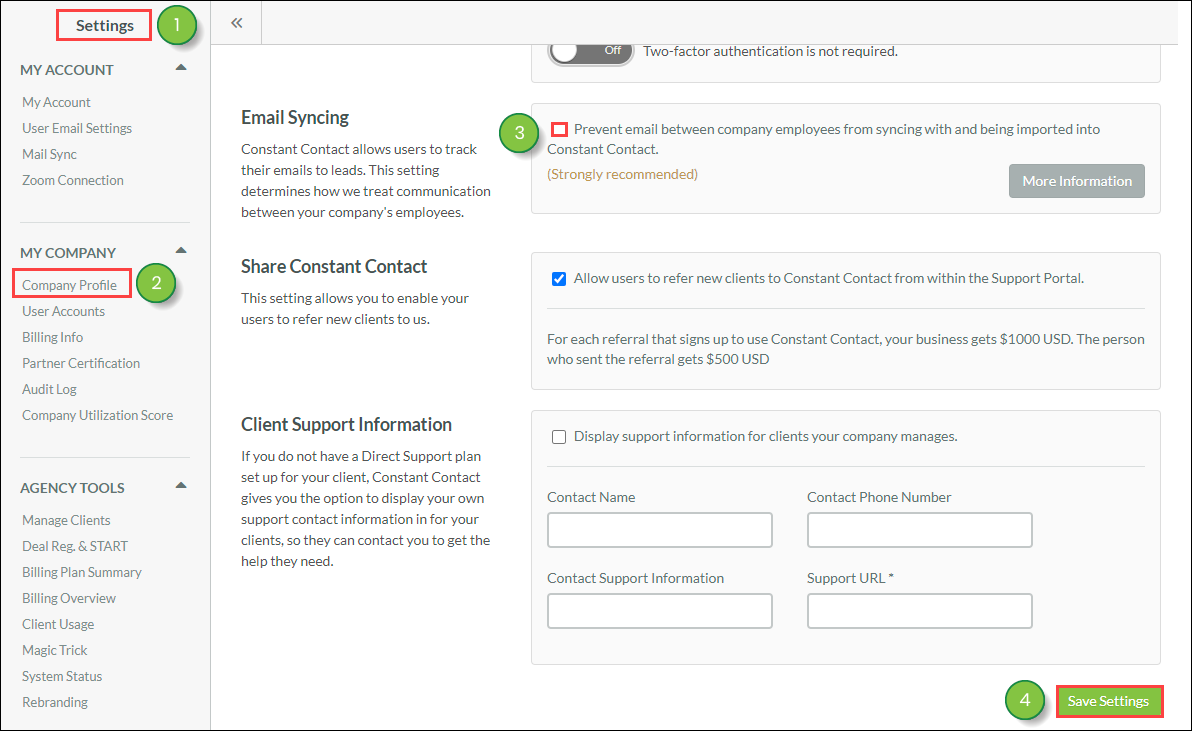
To set administrative parameters for syncing Gmail, do the following:

  1. Open a new tab in your web browser.
  2. Log into a Google account that has G Suite administrator privileges in that browser tab.
  3. Click  layout7.png  Options in the Google toolbar.
  4. Click  cog.png  Admin in the panel that appears.
  5. Click Security.
  6. Click Basic Settings.
  7. Click the Allow users to turn on two-step verification checkbox.
  8. Click Save.

Important: Lead Gen & CRM has no control over how Google grants application permission. Google may change how permission is obtained at any time and without warning. These procedures are constantly changing. The following information may be outdated.


Configuring User Gmail POP and IMAP Settings

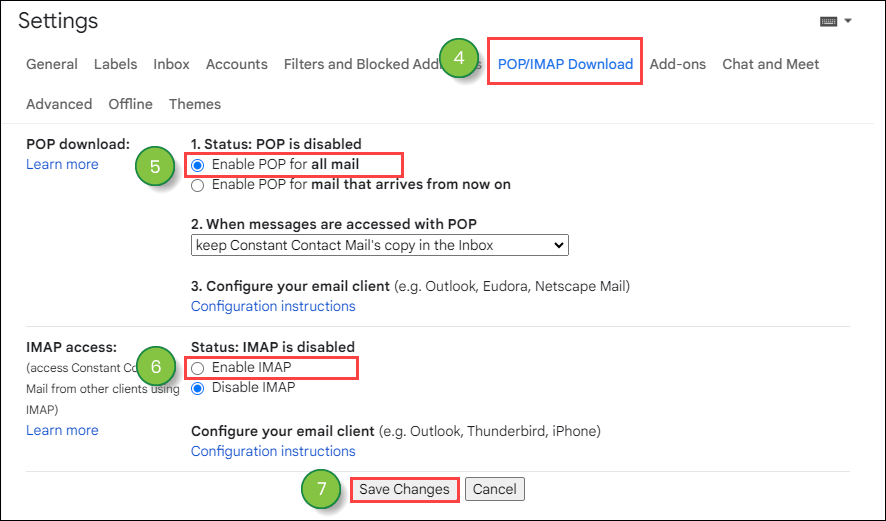
To sync with Lead Gen & CRM, Gmail POP and IMAP settings need to be configured.

To configure these settings, do the following:

  1. Open a new tab in your web browser.
  2. Log into your Gmail account in that browser tab.
  3. Click  cog.png  Options > Settings > See all settings.

    Gmail Settings


  4. Click the Forwarding and POP/IMAP tab in the Settings menu.
  5. Click the Enable Pop for all mail radio button in the POP Download section.
  6. Click the Enable IMAP radio button in the IMAP Access section.
  7. Click Save Changes.

    POP IMAP Settings


Configuring User Google Account Settings

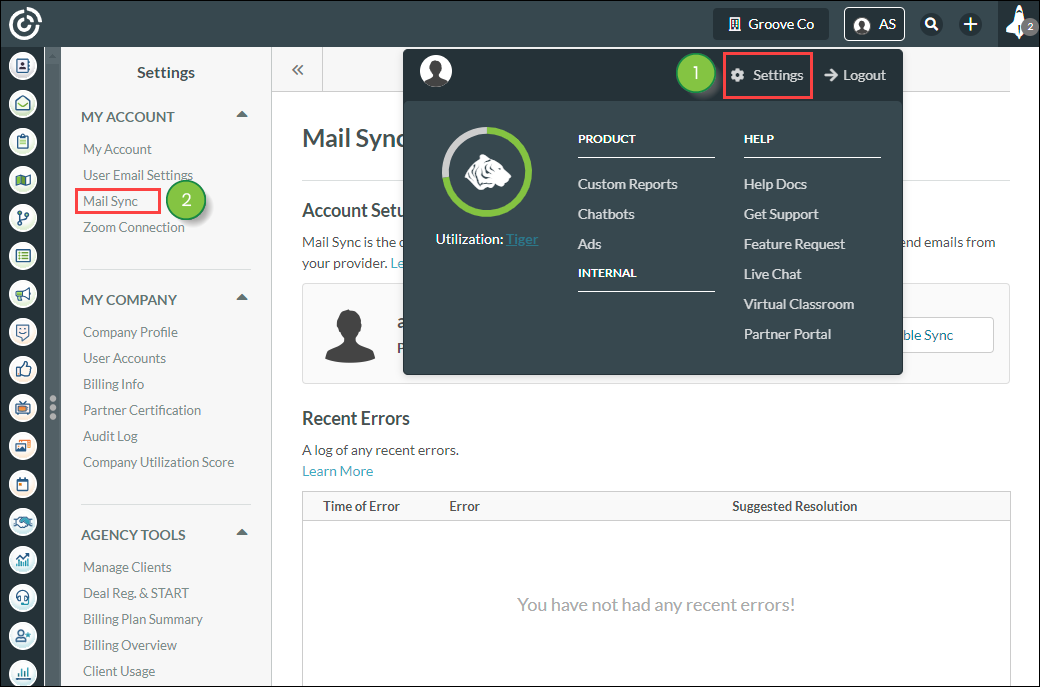
Once administrative parameters have been set, user settings will need to be configured to properly connect with Lead Gen & CRM.

To connect user Google settings, do the following:

  1. Open a new tab in your web browser.
  2. Log into your Gmail account in that browser tab.
  3. Click the user’s portrait.
  4. Click Google Account.
  5. Click Sign-In and Security.
  6. Enable Two-Step Verification, if it is not already enabled.
  7. Click App Passwords.
  8. Enter the password for the Gmail account.
  9. Create an app password for Lead Gen & CRM.
  10. Save the app password.

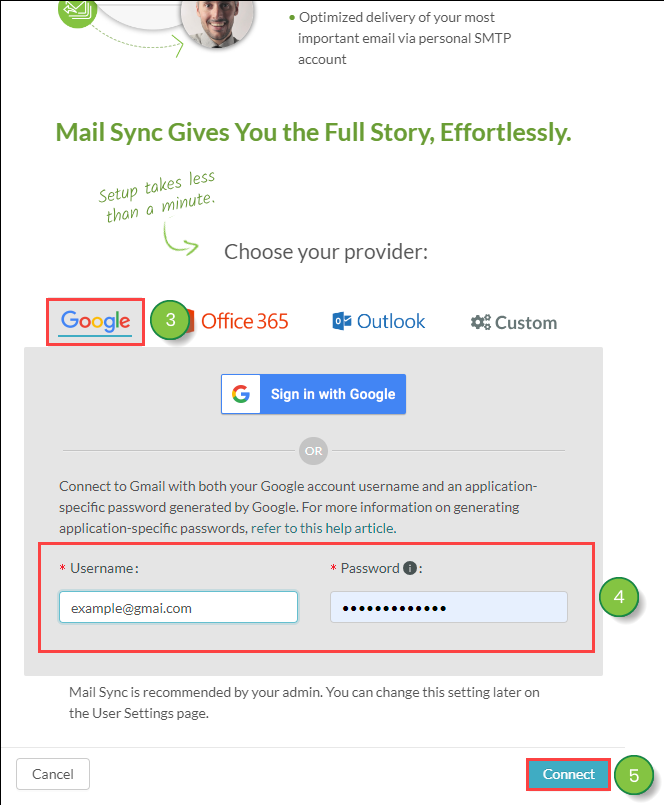
This saved app password will be used as the password when connecting the Gmail account to Lead Gen & CRM.


Connecting Gmail in Lead Gen & CRM

To sync Gmail with Lead Gen & CRM, do the following:

  1. Click Settings.
  2. Click Mail Sync, located under My Account in the left panel.

    Mail Sync Settings


  3. Under Choose your provider, click Gmail.
  4. Enter your Gmail username into the Username field. Paste the 16-digit password for Lead Gen & CRM in the Password field.
  5. Click Connect.

    Sync Gmail


  6. Accept intermediary authorization requests. 

Important: Users of the Legacy SharpSpring Free CRM plan are limited to 100 daily synced emails per user.


Preventing In-House Blocklisting

Occasionally, email sent between company employees will result in failed syncs.

To prevent in-house blocklisting, do the following:

  1. Click Settings in the left toolbar.
  2. Click Company Profile, located under My Company in the left panel.
  3. Scroll down to the Email Syncing section. Uncheck the Prevent email between... checkbox.
  4. Click Save Settings.

    Company Profile Mail Sync Settings


Did this article answer your question?


Constant Contact Logo

Copyright © 2025 · All Rights Reserved · Constant Contact · Privacy Center