| Administrators | ✓ | |
| Company Managers | ✓ | |
| Marketing Managers | ✓ | |
| Sales Managers | ✓ | |
| Salespersons | ✓ | |
| Jr. Salespersons | ✓ |
| Tip: Are you looking for information about Constant Contact’s Email and Digital Marketing product? This article is for Constant Contact’s Lead Gen & CRM product. Head on over to the Email and Digital Marketing articles by clicking here. Not sure what the difference is? Read this article. |
There may be a time when your normal Mail Sync connection to Gmail fails. This is usually due to authorization issues between the two platforms, which is usually cleared up within a short time.
However, this does not mean that you will be unable to connect to your Google account during this time. You can use your Google account to serve as the main connection mechanism.
Refer to Enabling and Configuring Mail Sync for Google Accounts for more information on connecting Mail Sync with your Google account.
To sync with Lead Gen & CRM, Gmail accounts must have POP and IMAP enabled.
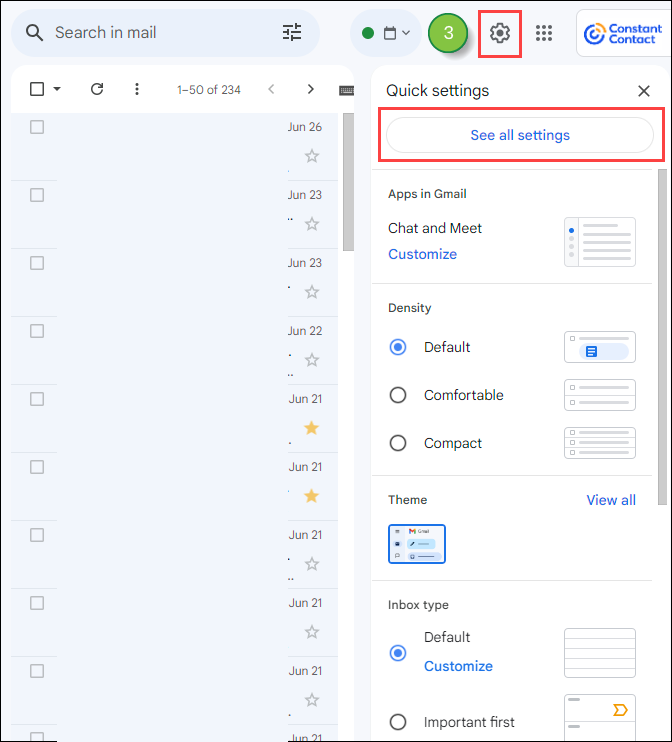
To enable these settings, do the following:
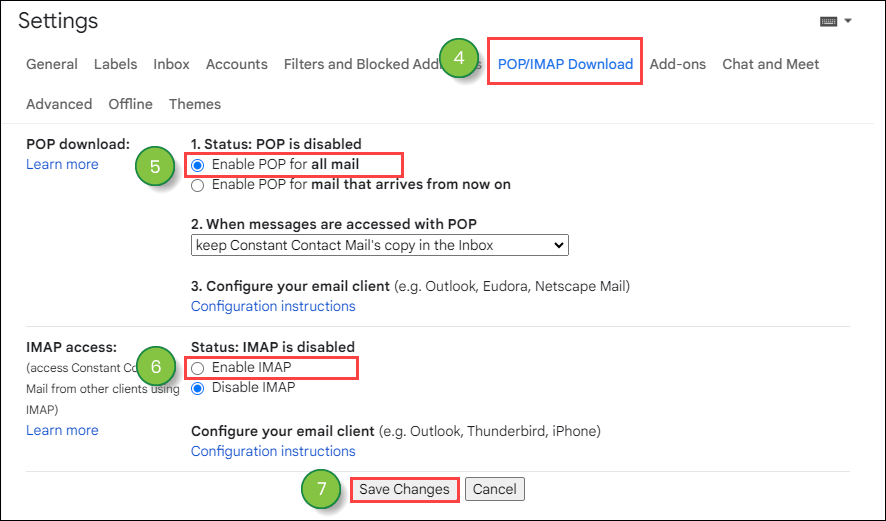
Once you have enabled POP and IMAP settings, you can begin the sync process in Lead Gen & CRM.
Important: Lead Gen & CRM has no control over how Google grants application permission. Google may change how permission is obtained at any time and without warning. These procedures are constantly changing. The information in these procedures may be outdated.
When you have Mail Sync enabled, your Smart Mails will be sent through Simple Mail Transfer Protocol (SMTP). Smart Mails sent through Gmail will require certain authentication and verification. To determine authentication status for accounts that have not yet been synced, do the following:

If you have two-step verification or other parameters set, you will receive the following message:
Authentication failed. Please try again.
Continue reading this article for information on how to resolve the authentication issue.
Two-step verification in Gmail adds an extra layer of security to an email account. While it is not necessary to have two-step verification set up to sync email, Lead Gen & CRM does recommend that clients consider adding this extra layer of security for their email accounts.
Two-step verification provides an additional layer of security for your account, which helps to reduce risks associated with your account being compromised.
Note: For Gmail accounts not using two-step verification, a recent change to the way in which Google allows third-party applications to access Gmail can potentially cause Mail Sync in Lead Gen & CRM to temporarily be unavailable.
By utilizing two-step verification, you make it much more difficult for unwanted parties to access your account. This goes a long way in ensuring your account data is protected.
Once the verification is enabled, you will still be prompted to enter your password when signing in. However, after signing in, you will be prompted to provide a second security token, which is typically a string of alphanumeric characters, to enter your account. This token is delivered to your mobile device via SMS text, a voice call, or by using Google’s mobile app.
To determine two-step verification status, do the following:
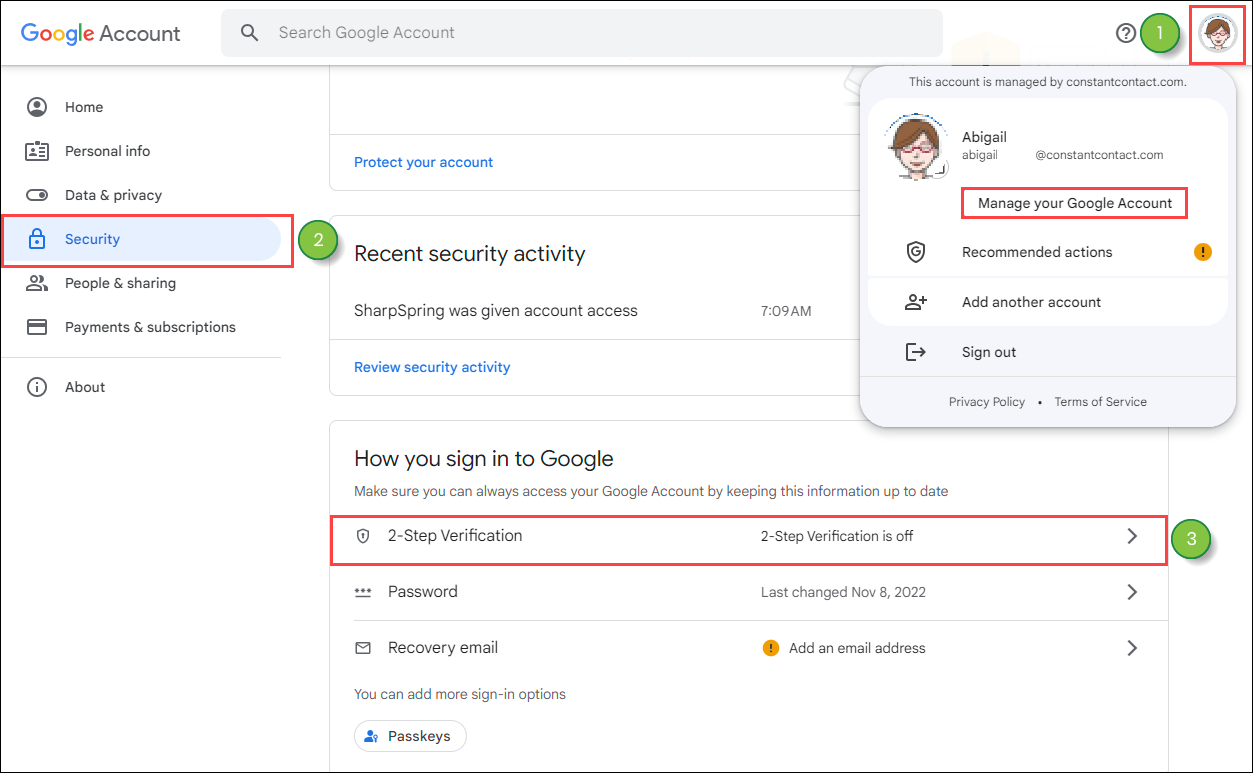
After confirming your two-step verification status, Gmail security settings must be opened so that Lead Gen & CRM can connect to Gmail. To do so, do the following:
Note: If you do not see an option to enable less secure apps, then you will need to contact your G Suite administrator for access. For more information, refer to this external Google help documentation.
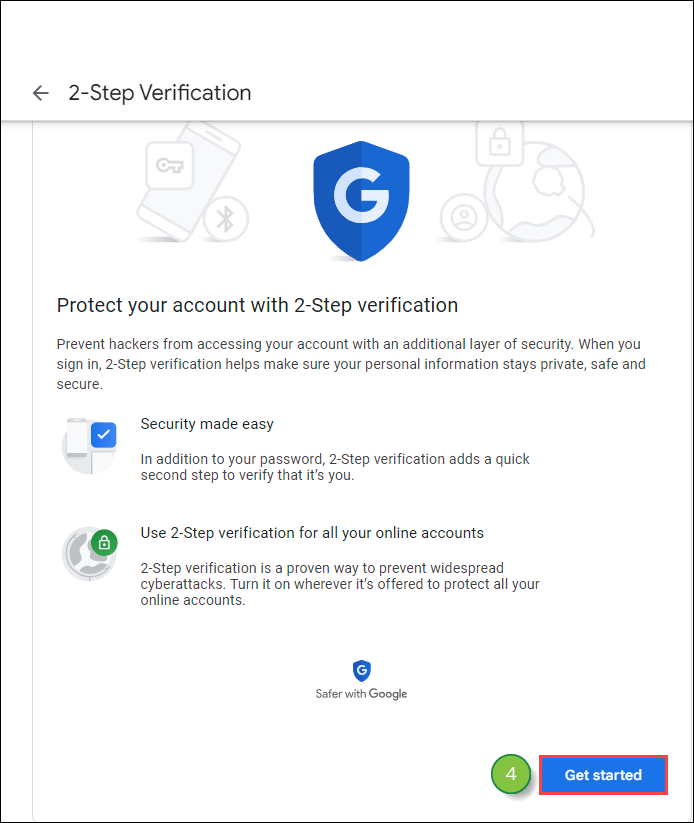
One of the most common issues with Gmail syncing is verification. Two-step verification provides extra security. Lead Gen & CRM recommends that clients add this measure of security to their accounts. To set up two-step verification, do the following:
Important: You will need to have your mobile device on hand to complete this process.
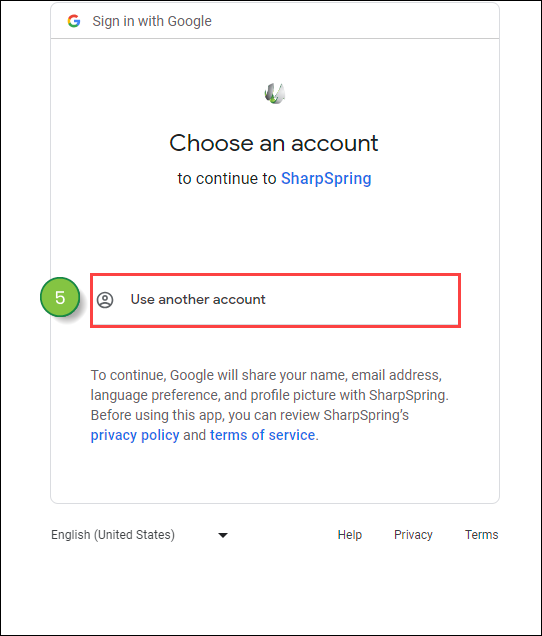
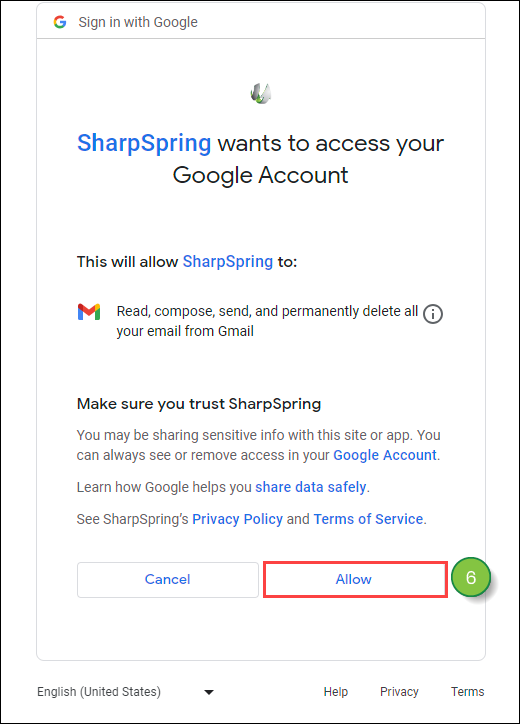
You can sync your Google account with Lead Gen & CRM by using Google's secure authentication process. As this is Google's main method of authenticating account information, Lead Gen & CRM recommends using this process.
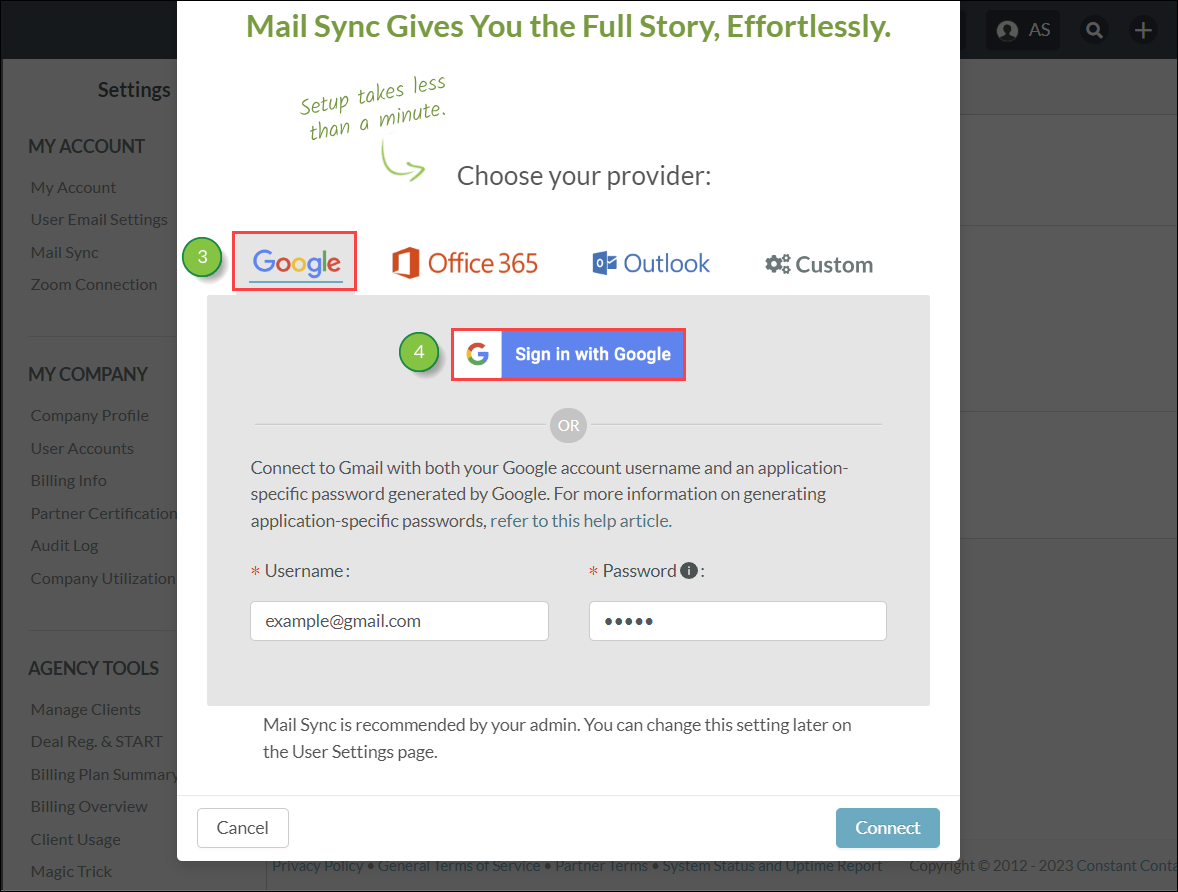
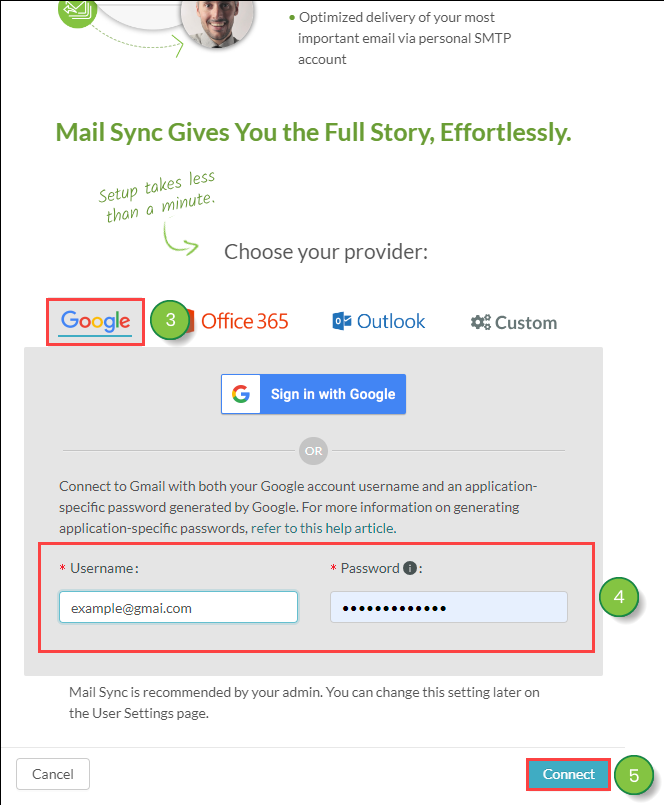
To sync Google accounts with Lead Gen & CRM via Google's authentication process, do the following:
To sync verified Gmail accounts with Lead Gen & CRM, do the following:
Important: Users of the Legacy SharpSpring Free CRM plan are limited to 100 daily synced emails per user.
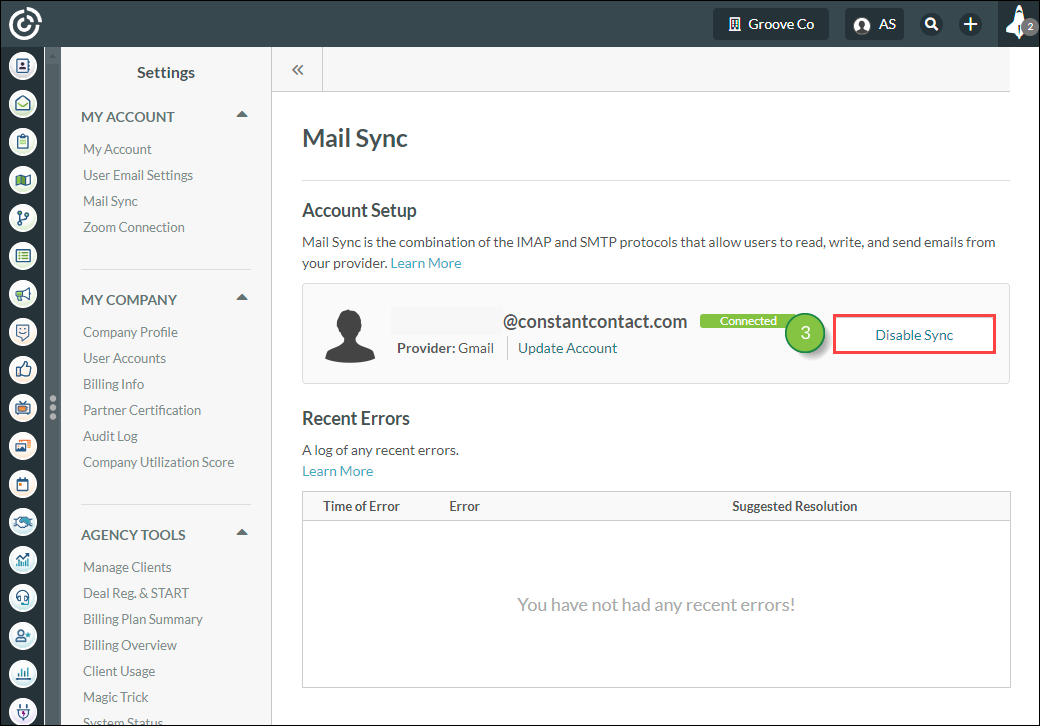
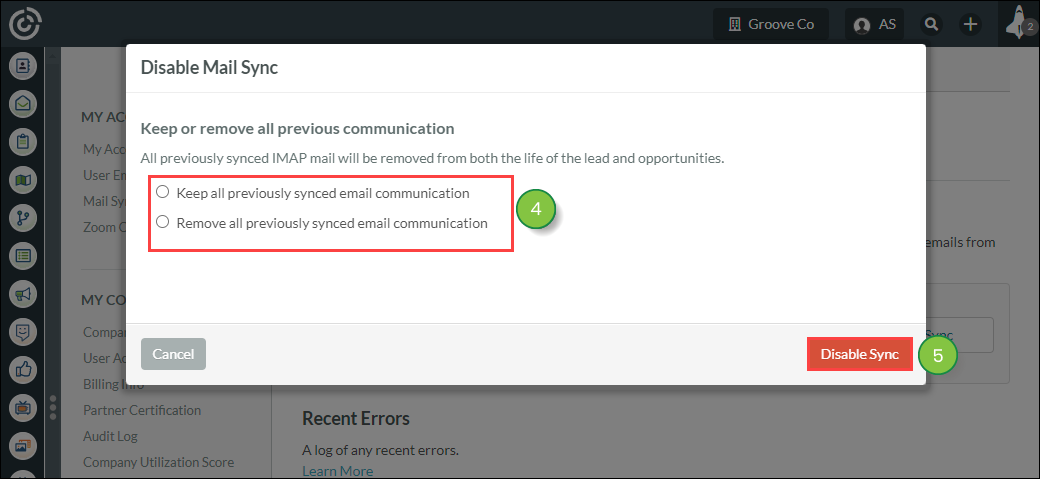
When disabling Mail Sync, you can choose to either keep or remove all previous communication. This means that, if you so choose, you can remove all prior Mail Sync entries from relevant Life of the Lead entries, as well as relevant opportunities. To disable Mail Sync, do the following:
Once your email sync has been removed, you will need to enter new sync information in order for SMTP and other sync features to be enabled.
In addition, once you disable syncing, administrators will see the Your Mail Sync is not configured link eventually appear again in the top toolbar. Use the Mail Sync tool to re-sync as necessary.
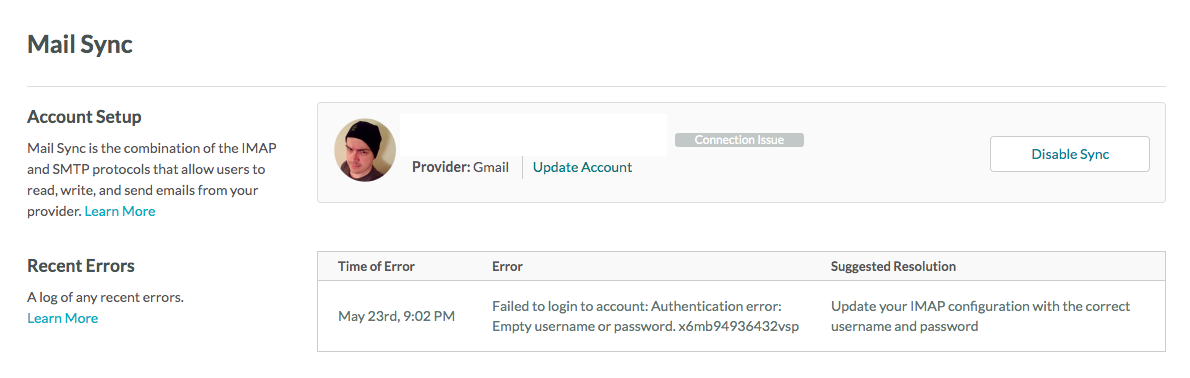
There are many moving parts with Mail Sync, so the process might not connect or may otherwise result in error. However, you can tell if Mail Sync was successful with just a glance.
The Mail Sync settings page provides a running log of all recent errors. The page details the date and time that the error occurred, what the error was, and how best to fix the error.
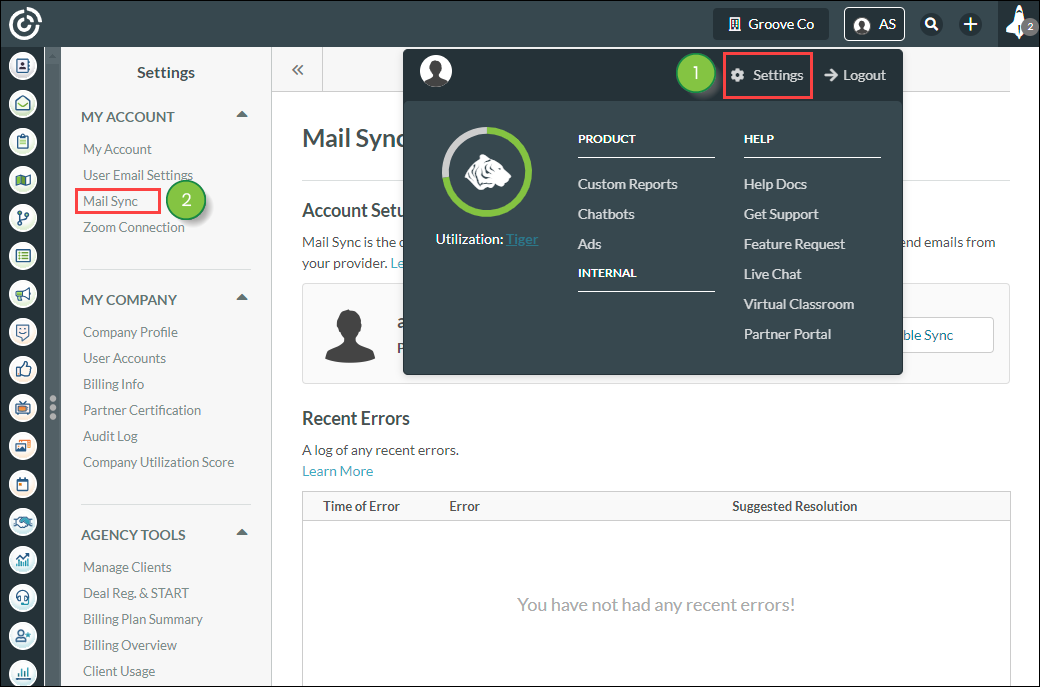
Click ![]() User Menu > Settings > Mail Sync to access the log of all recent errors.
User Menu > Settings > Mail Sync to access the log of all recent errors.
In addition, user accounts with Mail Sync enabled will display their current connection status, as well as any relevant issues.
Once you have enabled Mail Sync, the associated email address will update with one of the following colors and statuses:
| Status | Color | Description | |||
|
Connection |
Unable to connect for two days due to errors. No longer trying to sync. Billing will not be enabled for the duration of this issue. | ||||
|
Error |
An error occurred when attempting to sync the user account's email. Errors include, but are not limited to, using an invalid email address or certain email connectivity issues. | ||||
|
Pending |
This user account is waiting for a raise in the company's mailbox sync limit, or waiting for someone else to disconnect from the company mailbox so that they are below the sync limit. | ||||
|
Enabled | Mail Sync was successfully enabled for this user account. |
Refer to Troubleshooting IMAP Sync Errors for more information on troubleshooting Mail Sync errors.
Copyright © 2026 · All Rights Reserved · Constant Contact · Privacy Center