| Administrators | ✓ | |
| Company Managers | ✓ | |
| Marketing Managers | ✓ | |
| Sales Managers | ✓ | |
| Salespersons | ✓ | |
| Jr. Salespersons | ✓ |
| Tip: Are you looking for information about Constant Contact’s Email and Digital Marketing product? This article is for Constant Contact’s Lead Gen & CRM product. Head on over to the Email and Digital Marketing articles by clicking here. Not sure what the difference is? Read this article. |
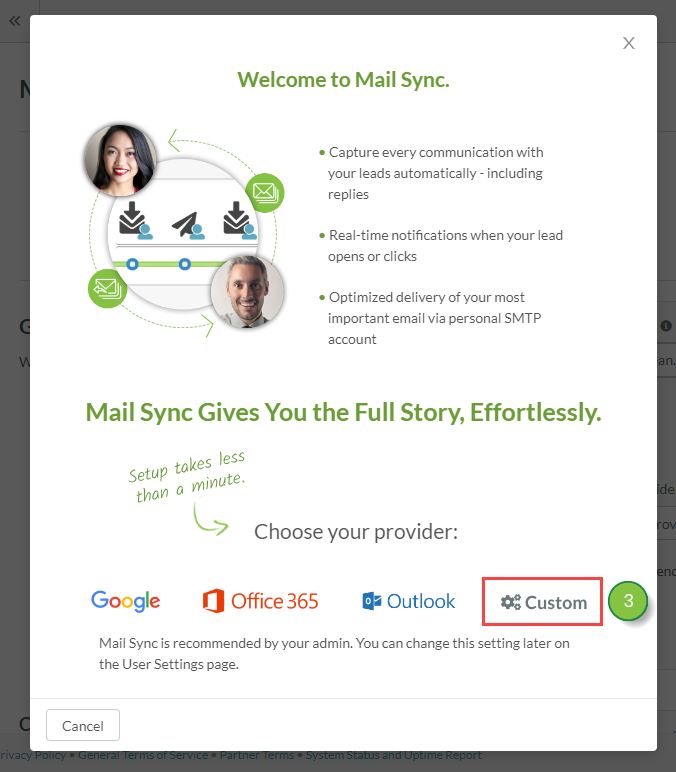
Users who sync their custom email accounts have the added benefit of sending Smart Mails through their individual SMTP accounts. This allows ISPs like Google and Microsoft to recognize these emails as one-to-one or personal messages for optimum delivery.
Once your Mail Sync is set up, then all of your Smart Mail will go through SMTP. This means that when a person receives your Smart Mail, it will look like you sent it through your own inbox and not through Lead Gen & CRM. Additionally, you will be able to view replies from that lead on their Life of the Lead.
As an example, if you sync the inbox for gregg@gmail.com and send Smart Mail, then the recipient will see it coming from gregg@gmail.com.
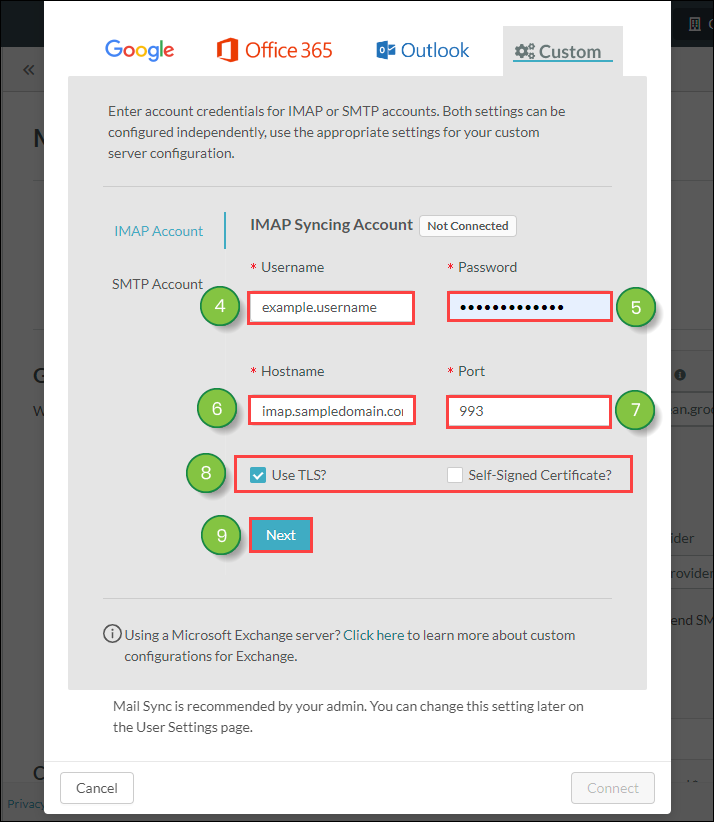
Custom Mail Sync requires information for both IMAP and SMTP sending accounts.
To set up and configure custom IMAP parameters for Mail Sync, do the following:
To set up and configure custom SMTP parameters for Mail Sync, do the following:
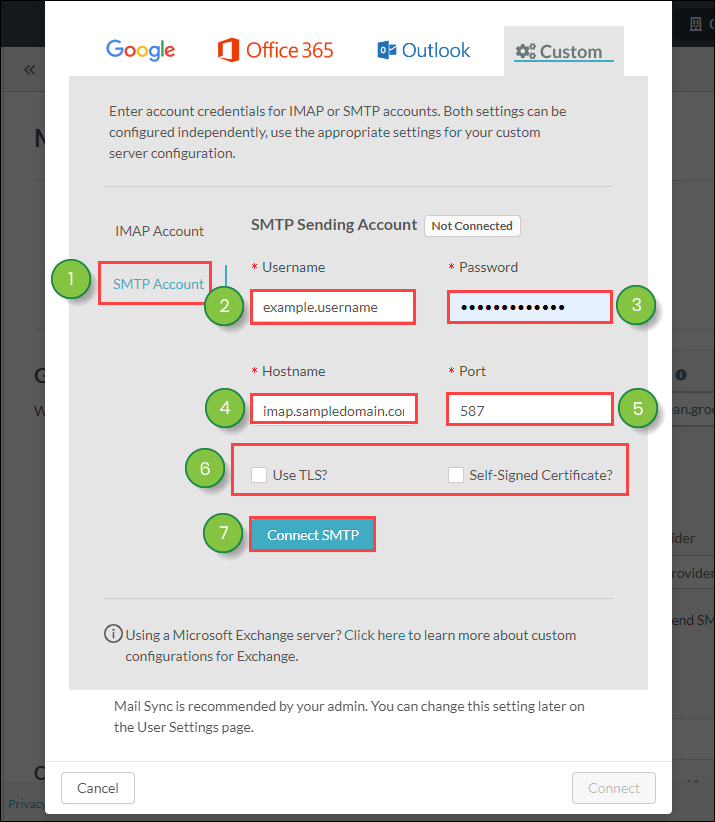
Important: Customers using the legacy SharpSpring Free CRM plan are limited to 100 daily synced emails per user. If the account password is changed outside of Lead Gen & CRM, it will need to be changed within Lead Gen & CRM as well. When using a custom IMAP account, make sure the account is enabled for IMAP to be compatible for syncing. Additionally, confirm that your email information is accurate. Failure to do so may result in the inability to integrate your account. Due to how GoDaddy configures their IMAP services, GoDaddy users may have inconsistent Mail Sync results when using the SecureServer.net hostname.
Note: For information on your provider's SMTP hostname and port parameters, contact your administrator.
Once syncing has been set up, your emails will be sent from domains other than the Lead Gen & CRM domain.
For more common providers, consider the following settings:
| Provider | Hostname | Port | SSL Encryption |
|
Gmail
| imap.gmail.com | 993 | Yes |
|
GoDaddy
| imap.secureserver.net | 143 | Unchecked |
|
123 Reg
| imap.123-reg.co.uk | 993 | Yes |
|
Bluehost
| mail.yourdomain.com (replace yourdomain.com with your domain name) | 993 with SSL/TLS 143 without SSL/TLS | Dependent upon provider |
Contact your administrator for more information on your provider and any relevant settings.
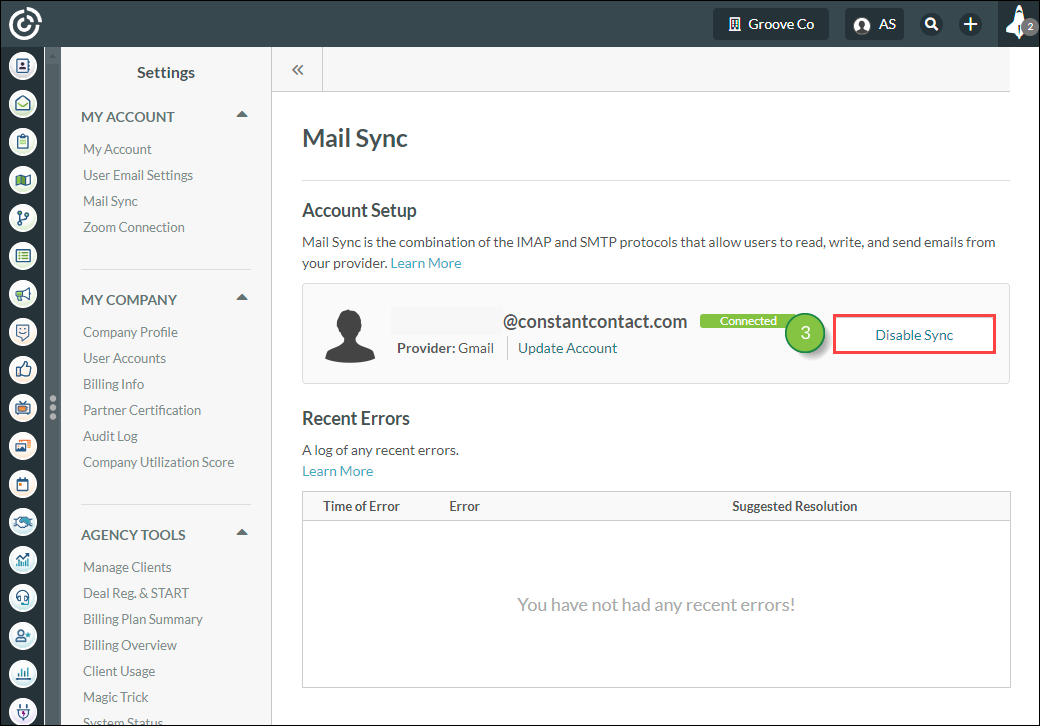
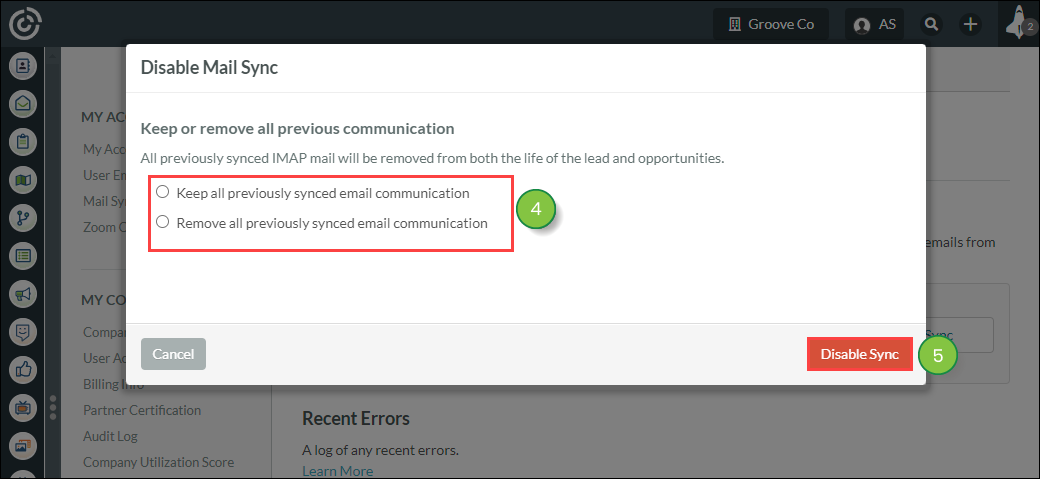
When disabling Mail Sync, you can choose to either keep or remove all previous communication. This means that, if you so choose, you can remove all prior Mail Sync entries from relevant Life of the Lead entries, as well as relevant opportunities. To disable Mail Sync, do the following:
Once your email sync has been removed, you will need to enter new sync information in order for SMTP and other sync features to be enabled.
In addition, once you disable syncing, administrators will see the Your Mail Sync is not configured link eventually appear again in the top toolbar. Use the Mail Sync tool to re-sync as necessary.
There are many moving parts with Mail Sync, so the process might not connect or may otherwise result in error. However, you can tell if Mail Sync was successful with just a glance.
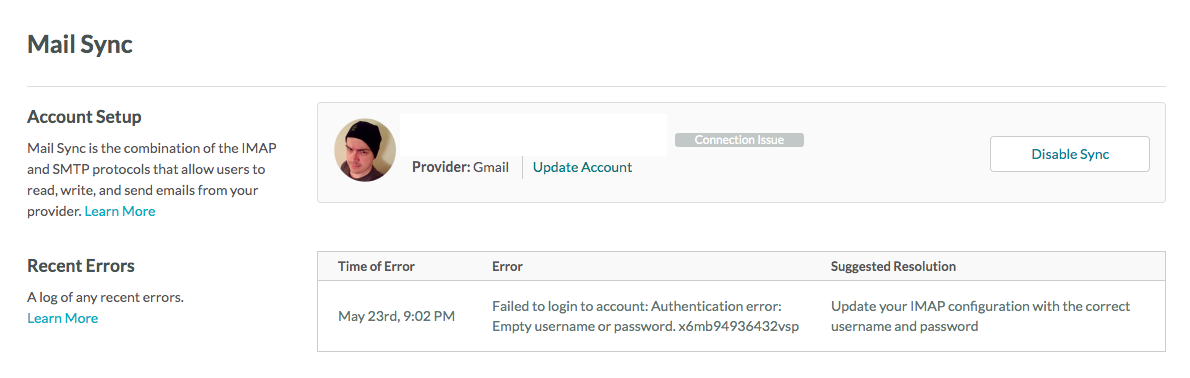
The Mail Sync settings page provides a running log of all recent errors. The page details the date and time that the error occurred, what the error was, and how best to fix the error.
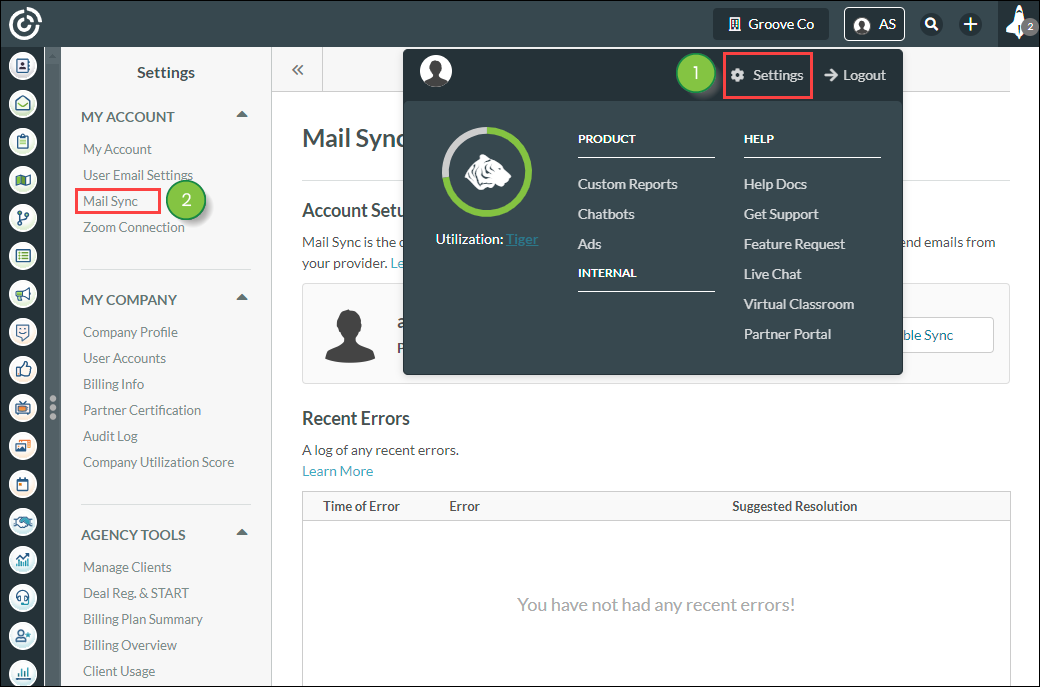
Click ![]() User Menu > Settings > Mail Sync to access the log of all recent errors.
User Menu > Settings > Mail Sync to access the log of all recent errors.
In addition, user accounts with Mail Sync enabled will display their current connection status, as well as any relevant issues.
Once you have enabled Mail Sync, the associated email address will update with one of the following colors and statuses:
| Status | Color | Description | |||
|
Connection |
Unable to connect for two days due to errors. No longer trying to sync. Billing will not be enabled for the duration of this issue. | ||||
|
Error |
An error occurred when attempting to sync the user account's email. Errors include, but are not limited to, using an invalid email address or certain email connectivity issues. | ||||
|
Pending |
This user account is waiting for a raise in the company's mailbox sync limit, or waiting for someone else to disconnect from the company mailbox so that they are below the sync limit. | ||||
|
Enabled | Mail Sync was successfully enabled for this user account. |
Refer to Troubleshooting IMAP Sync Errors for more information on troubleshooting Mail Sync errors.
Copyright © 2026 · All Rights Reserved · Constant Contact · Privacy Center