The footer of your email contains important information, such as your physical address to help contacts easily locate you, and required links to ensure you remain compliant with global anti-spam laws. You can edit the footer design and some of the content directly within your email draft.
What’s included in your email footer
Your email footer automatically contains:
- Your organization's name and physical address—This defaults to what you have entered in your account settings, but can be edited directly within the email draft if necessary.
 |
Did you know? A physical address is legally required to be displayed in your email's footer in order to be compliant with the CAN-SPAM Act. This can be:
- Your storefront
- Your organization’s headquarters
- Your home address
- A valid PO box or virtual mailbox if you don’t have a physical location
|
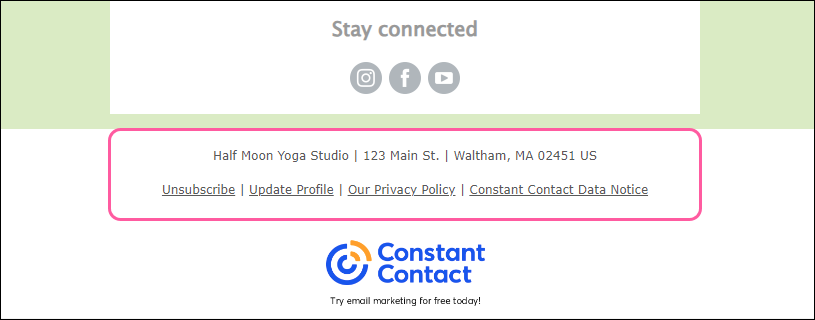
- An "Unsubscribe" link, unique to each contact. To comply with Constant Contact’s anti-spam policy and the CAN-SPAM Act, every email is required to contain a link that allows contacts to opt out of future mailings.
Tip: You can also enable a Comment box to let contacts provide a reason for why they’re unsubscribing. - An "Update Profile" link, if you have it enabled, allows contacts to update their contact details and choose which email lists they want to be on.
- A link to your privacy policy, if you have one.
- A link to Constant Contact's privacy policy.
Update the information in your email footer
You can update the organization name, address, language, layout, and text formatting of the information in your email footer.
 | Note: You cannot delete the footer blocks or any of the compliant information and links within them. |
To edit the footer content:
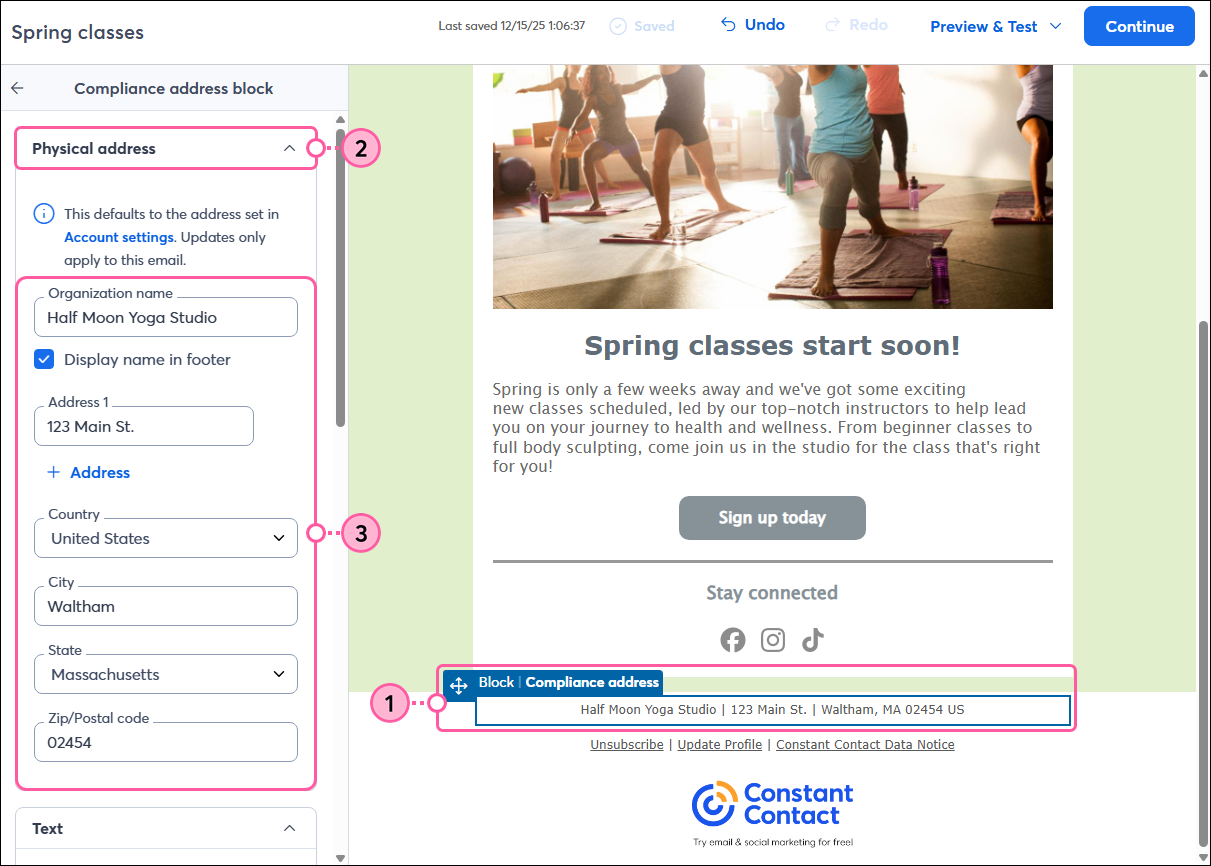
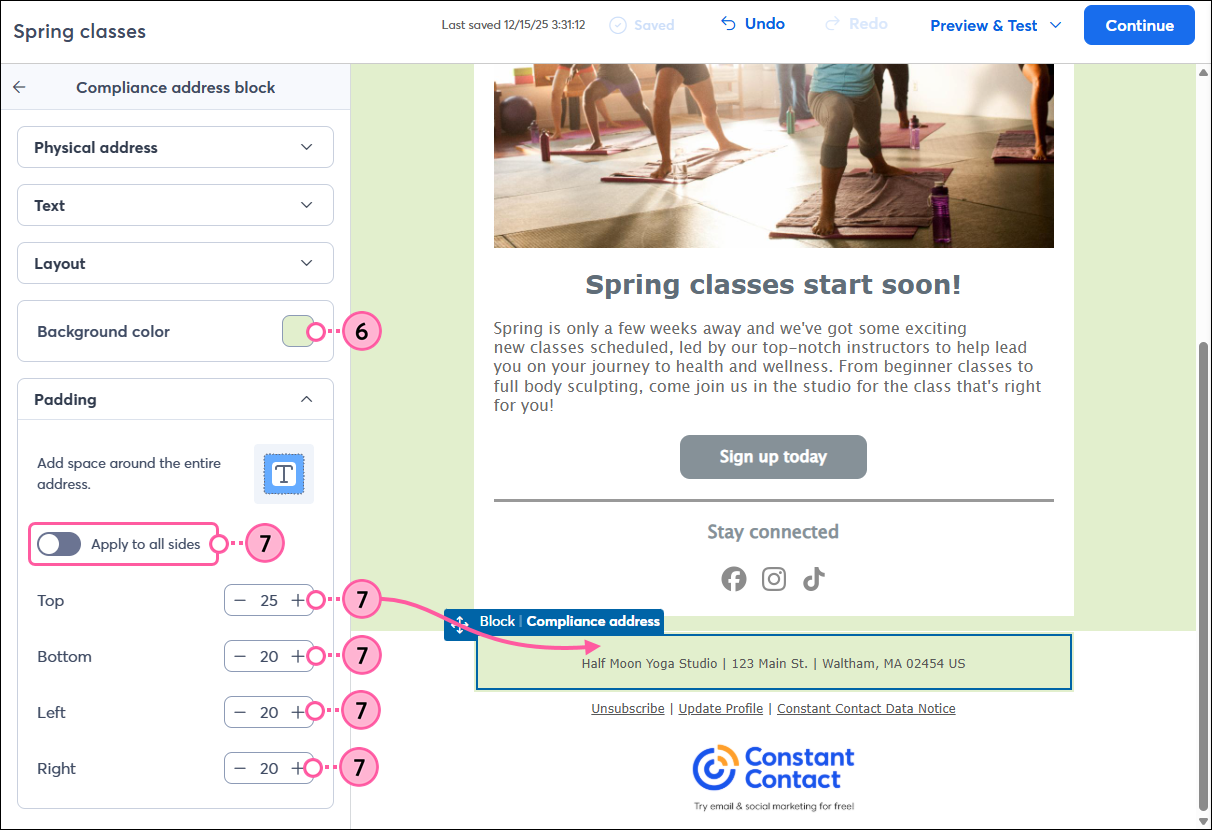
- At the bottom of your email draft, click on the Compliance address block that contains your organization name and address in the footer.
- From the panel on the left, click to expand the Physical address section.
- Fill in the fields to update your name and physical address.
Tip: To avoid errors when saving your address, ensure that you remove any spaces in your zip code.
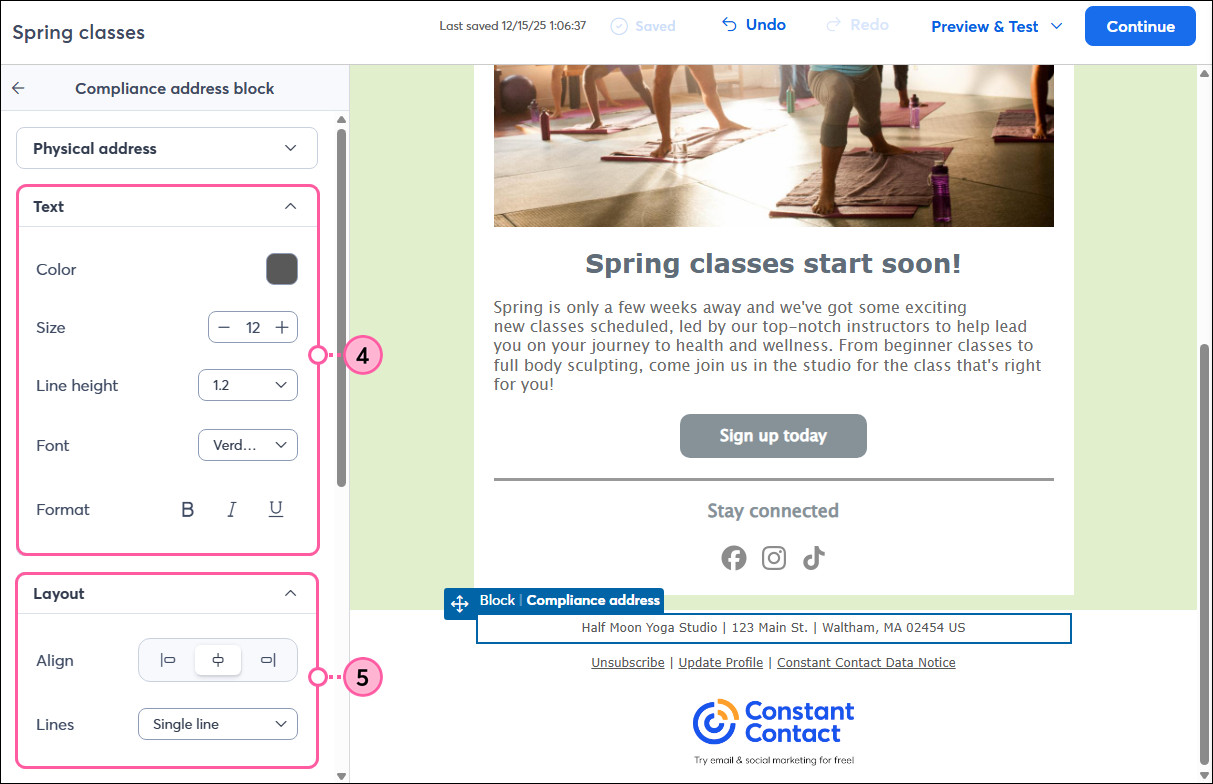
- In the Text section, customize the text color, size, line spacing, font, and emphasis.
- In the Layout section, you can change the text alignment and choose if you want the information displayed in a single line or multiple lines.
- Click the Background color swatch to choose a color for the background of the Compliance address block.
- In the Padding section, click the toggle to apply the same amount of padding around all sides of the text and choose the amount of padding you want, or adjust the padding for the top, bottom, left, and right of the text.
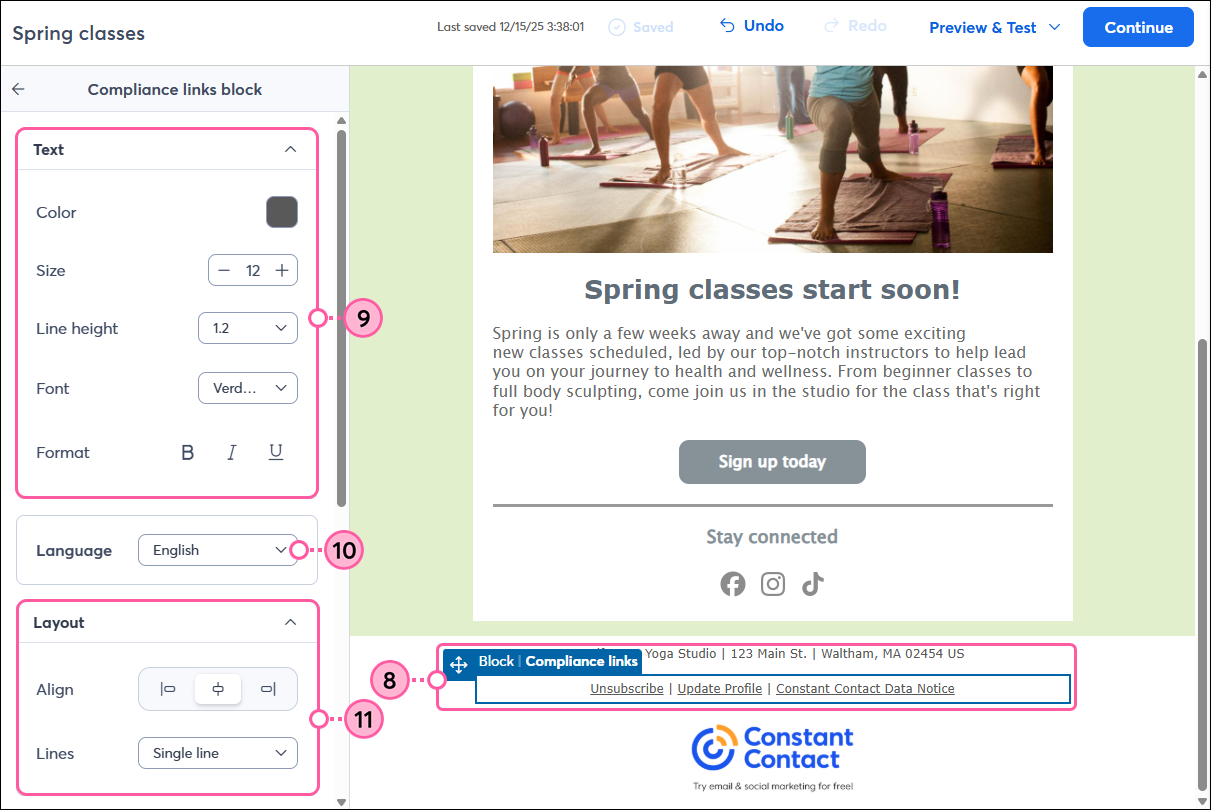
- Click on the block that contains the compliance links.
- From the panel on the left, use the Text section to customize the text color, size, line spacing, font, and emphasis.
- Use the drop-down to update the language.
- In the Layout section, you can change the text alignment and choose if you want the information displayed in a single line or multiple lines.
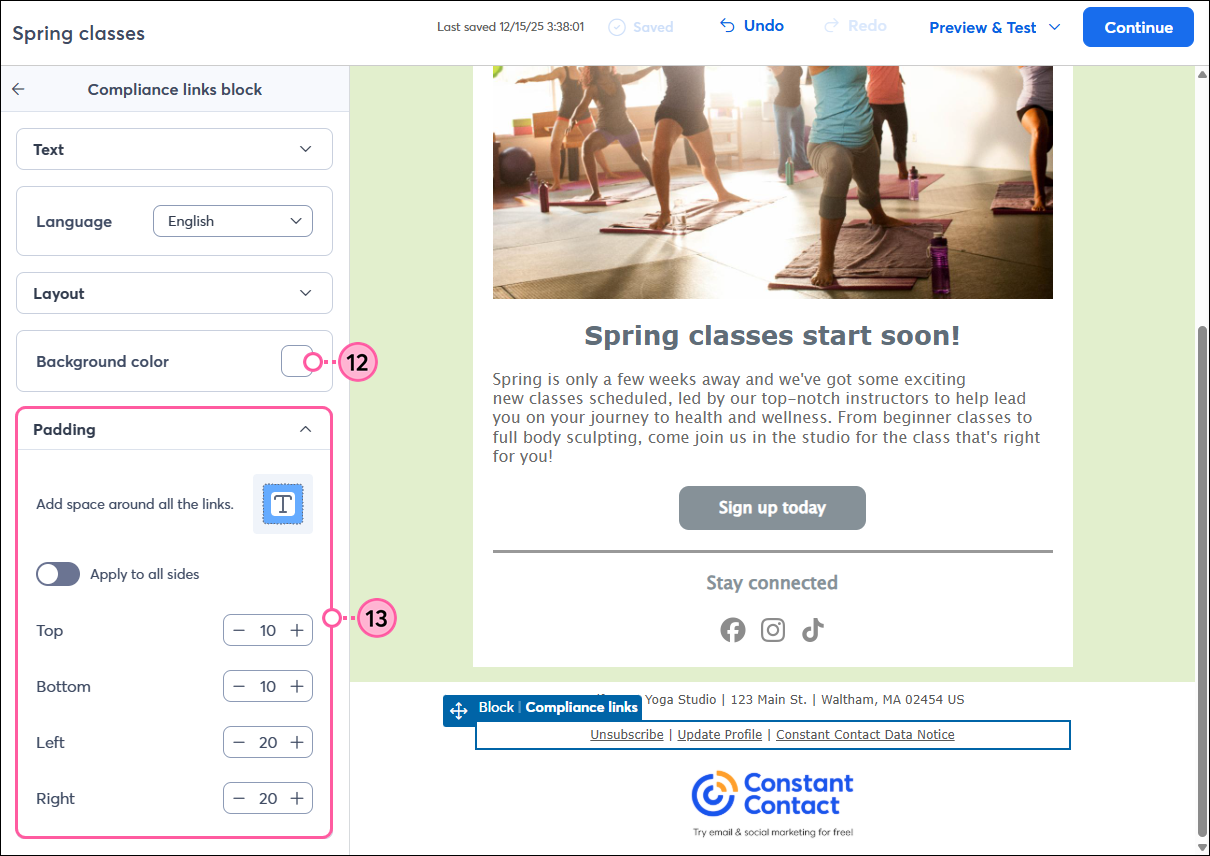
- Click the Background color swatch to choose a color for the background of the Compliance links block.
- In the Padding section, click the toggle to apply the same amount of padding around all sides of the text and choose the amount of padding you want, or adjust the padding for the top, bottom, left, and right of the text.
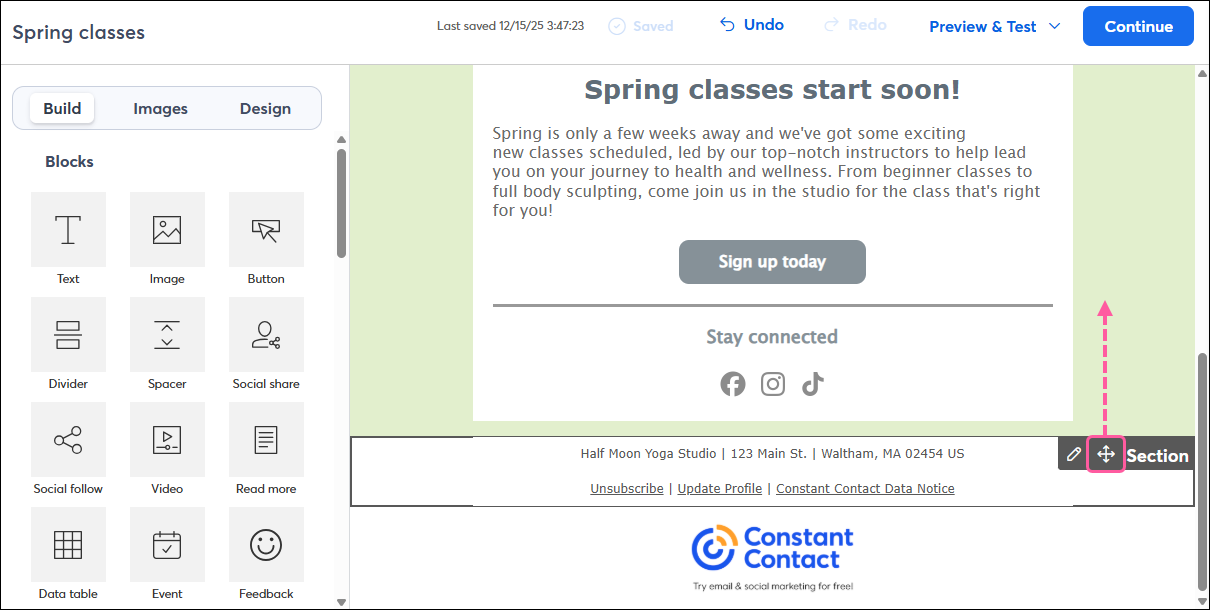
You can also insert additional blocks into your footer, or move the footer information to another spot in your email by clicking and dragging the directional arrows. The footer block will then take on the background design of the rest of your email template, or you can change the background color separately.
If you forget to update the organization name and physical address in your footer while editing your email, you can also edit it when you schedule your email to send.
If your email is already in a "Scheduled" status, you can unschedule it to make edits to the email footer. However, once your campaign is sent, you cannot edit the footer information. Instead, you can copy the sent email and make your edits to the copy before resending it.
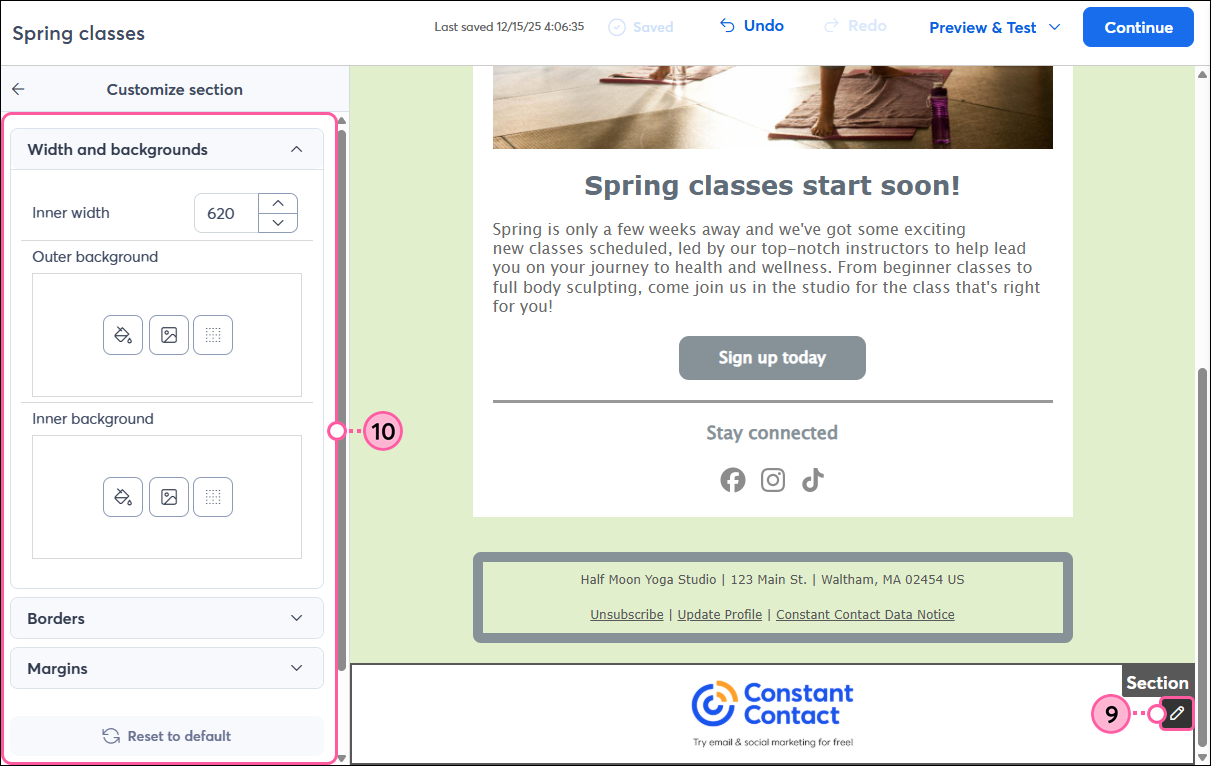
Customize the design of your email footer
To update the design of your footer section to better match the rest of your email template, you can change the width, choose a color or image for the inner and outer backgrounds, add a border to any or all sides of the footer, round the corners, and adjust the margin sizes around the footer content.
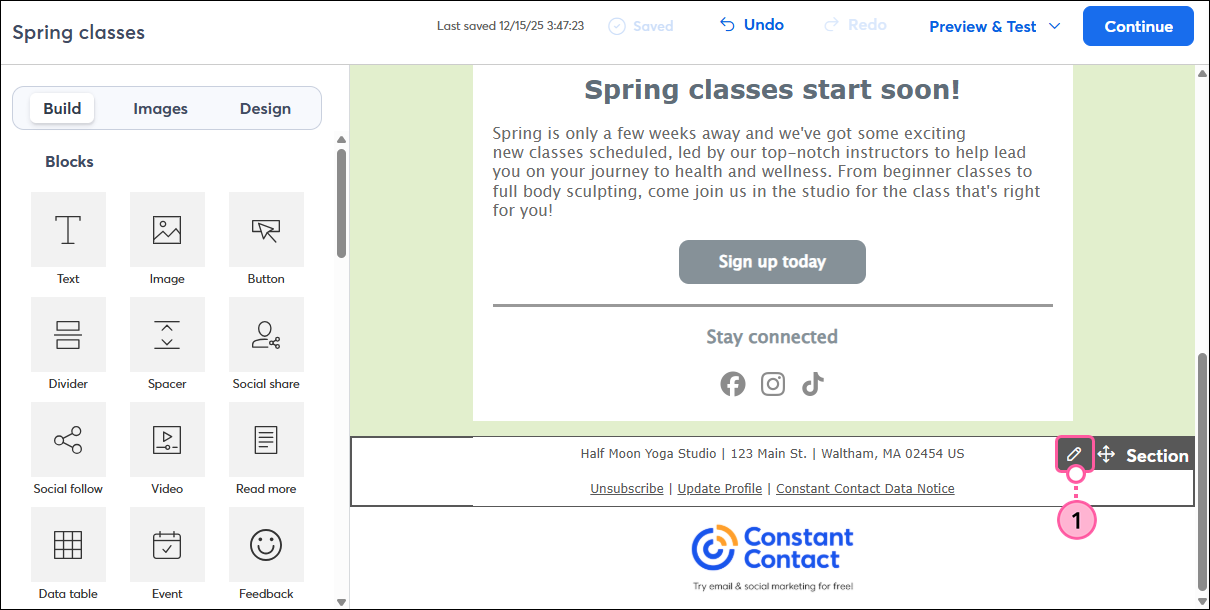
- Hover your cursor over the footer and click the pencil icon.
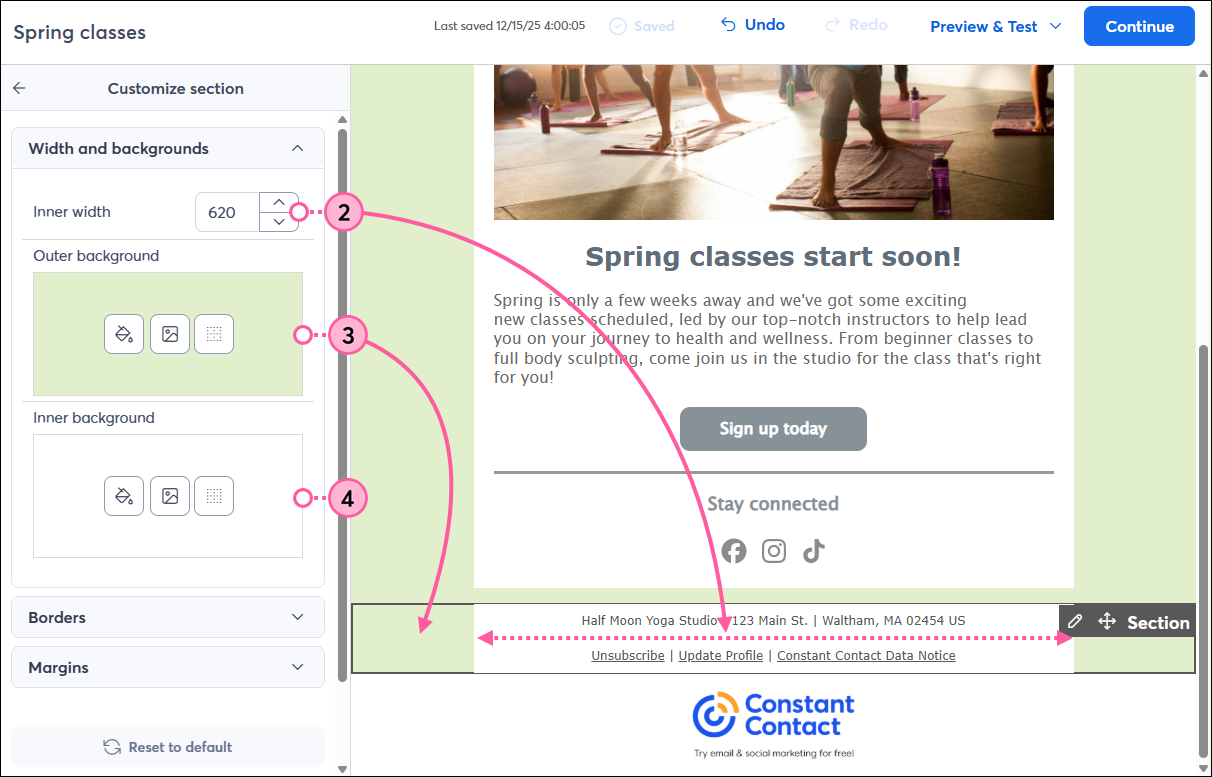
- From the panel on the left, you can adjust the width of the inner background of the email footer, between 300 and 1200 pixels wide.
- Choose a color or image for the outer background of your footer.
- Choose a color or image for the inner background of your footer.
Note: The inner background color or image won't take effect if you’ve changed the background color of the individual blocks within your footer using the steps above.
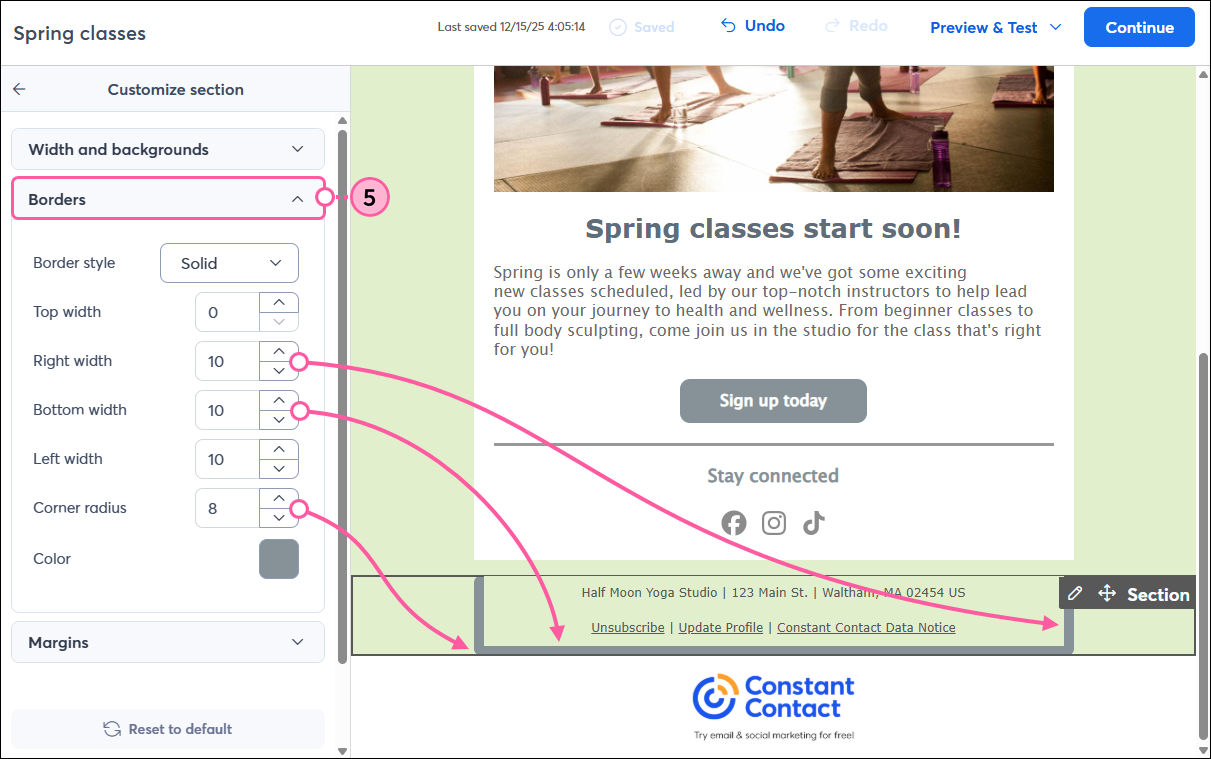
- Click to expand the Borders section. You can add a border to different sides of your footer, adjust the width for each side, choose a border style and color, and create rounded corners for your footer.
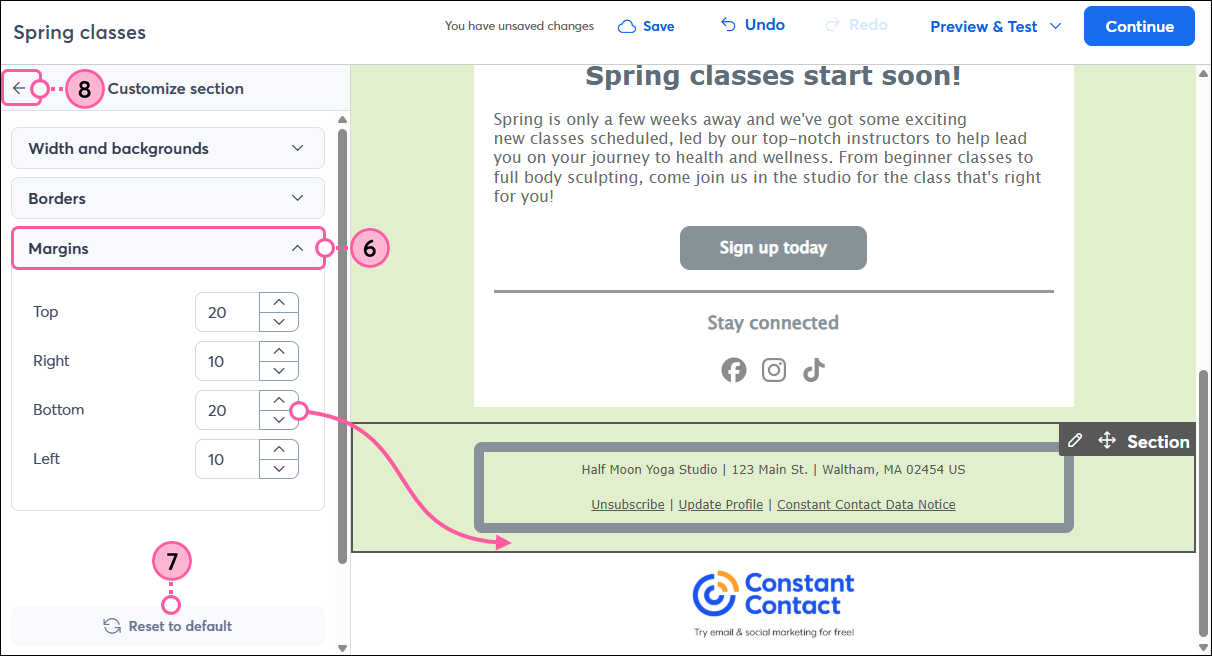
- Click to expand the Margins section. You can adjust the size of the margin on each side of your footer.
- (Optional) To remove any customizations you've made to the footer section, click Reset to default.
- Click the back arrow to return to the Build tab.
- Hover your cursor over the Constant Contact logo in the footer and click the pencil icon.
- Repeat steps 2 to 7 to customize the design of the logo section in your footer.
Change the Constant Contact logo in your footer
After editing your footer to match the rest of your email design, you can also choose a different color for the Constant Contact logo that displays and customize the design of the block further.
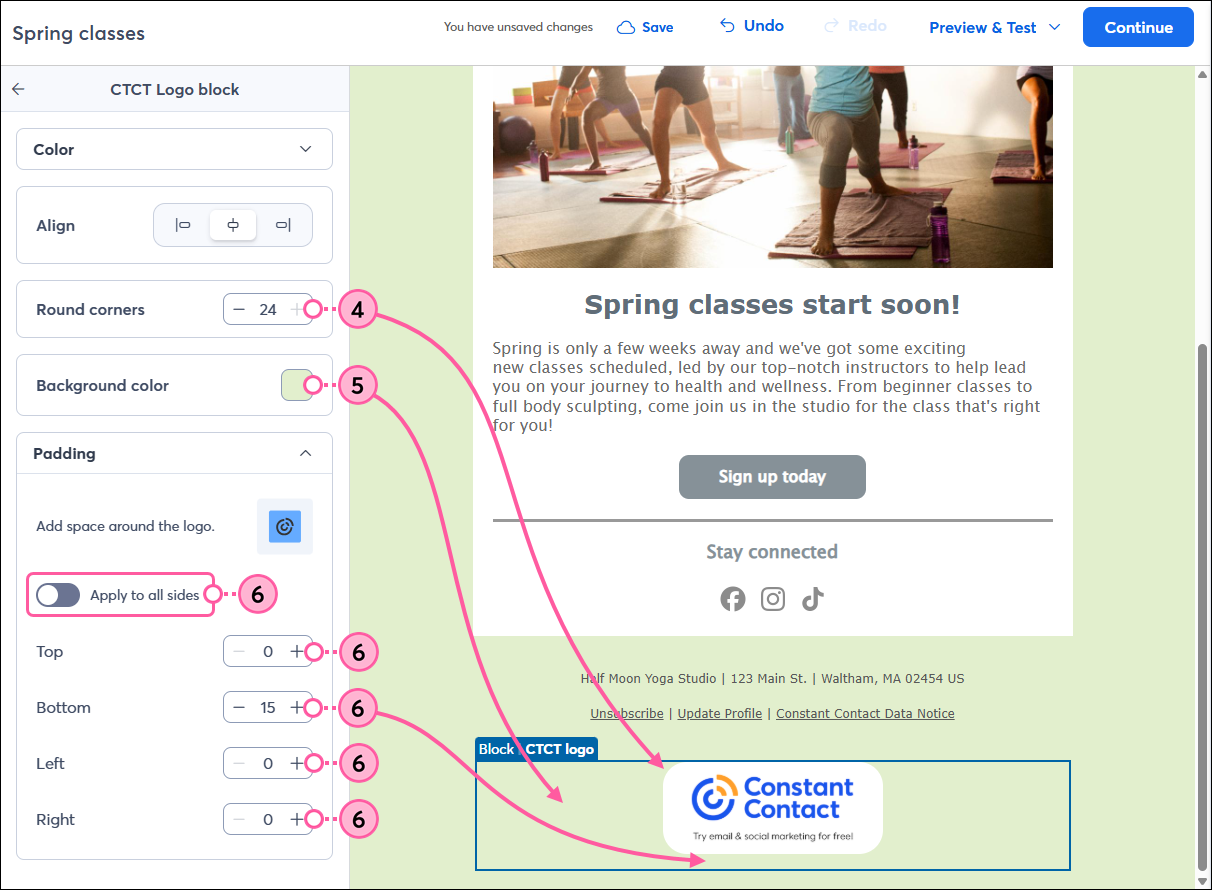
- Click on the Constant Contact logo.
- Choose the logo that best suits your email design.
- Align the logo to the left, center, or right side of the email.

- Round the corners of the logo to change its shape. The higher the number, the more rounded the corners become.
- Click the Background color swatch to choose a color for the background of the logo block.
- In the Padding section, click the toggle to apply the same padding around all sides of the logo, and choose the amount of space you want, or adjust the padding for the top, bottom, left, and right of the logo.