A verified email address proves that you're the owner of the email address and can access its inbox. You only have to verify an email address once, and you can have more than one verified email address in your account.
 | Did you know? If you're using an email address as your user name, this is not related to your account email address. Changing your user name will not affect your verified email addresses and vice versa. |
What email addresses do I need to verify?
- Account email address - Before you can start sending emails from your Constant Contact account, you need to verify the account email address. We automatically send a verification email to the email address you used to sign up for your account, but you can resend the verification email if you didn't receive it. Verifying the account email address ensures that you receive emails from Constant Contact regarding your account, including billing information and password reset emails. You can change your account email address at any time.
- "From" and "Reply-to" email addresses - All "From" and "Reply-to" email addresses must be verified to ensure you're the owner of the address. The "From" address displays in the inbox and shows your contacts who your email is coming from. The "Reply-to" address is the email address used if a contact replies to your email, and lets you route email responses to the people in your organization that are best equipped to handle them. The "From" and "Reply-to" addresses don't have to be the same, and you can even use different "From" and "Reply-to" addresses in different emails, depending on your audience. There is no limit to the number of email addresses you can verify.
- Early Results email address - We can automatically send you an email 48 hours after you send your email to give you an idea of its performance. You can have this report sent to any email address you want, as long as it is verified, while you schedule your email.
- Test email addresses - Although it isn't required, it's a good idea to verify email addresses that may receive a lot of test emails, as there is a limited number of test emails you can send to non-verified email addresses.
Any email address you verify can later be removed, as needed.
What types of email addresses can't be verified?
There are some role or group addresses, such as noreply@ or request@, that Constant Contact never mails to and you aren't able to verify. See the full list of role addresses here:
How do I verify an email address?
There are a few places where you have a chance to verify an email address. It doesn't matter where you verify the email from, the general process is the same—you enter the new email address, we send a verification email to it, and you click the link in the email to complete the verification process.
Verify an address in the account settings
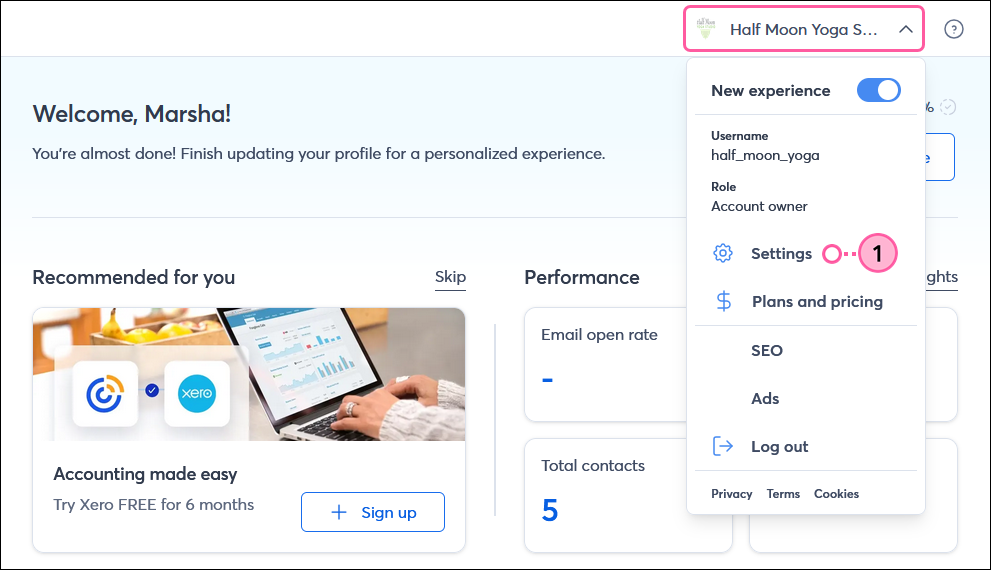
- Click the profile name in the upper-right and select Settings from the drop-down.
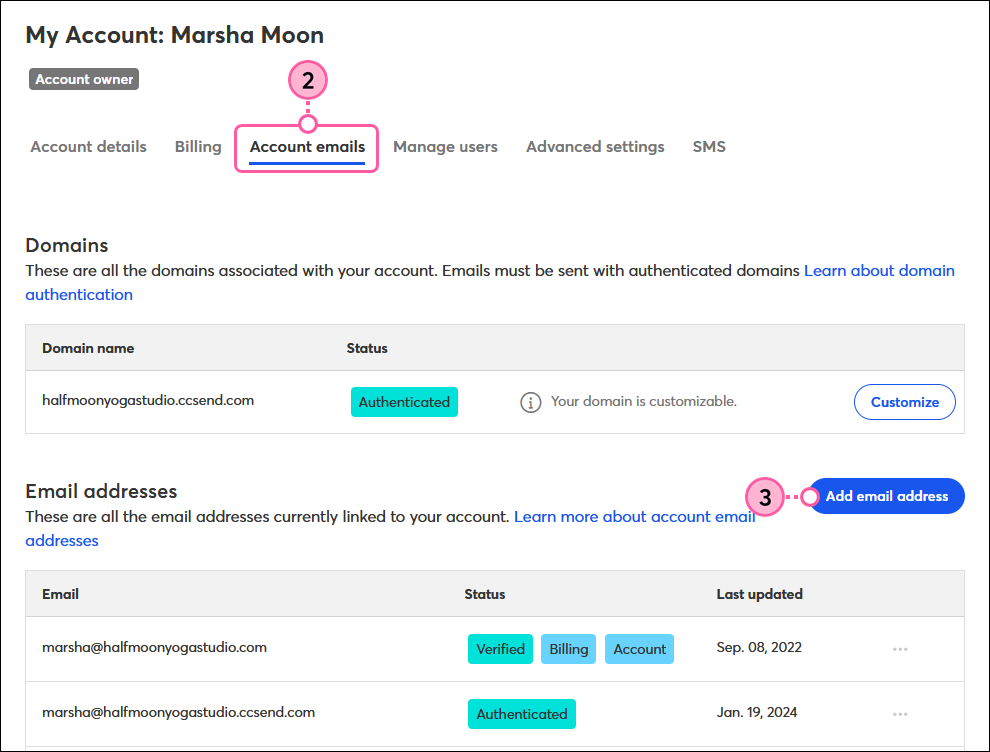
- Click the Account emails tab.
- Click Add email address.
- Depending on your authentication status:
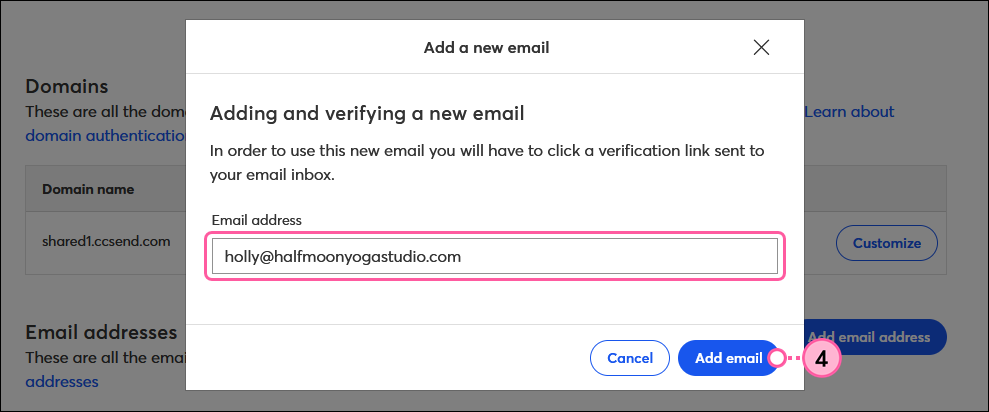
- If you haven’t authenticated a custom domain or customized a ccsend domain, enter the email address you want to verify in the field and click Add email. Then skip to step 6.
Note: If you want to use a custom domain as your "From" address, you’ll also need to authenticate it. Otherwise, it'll be rewritten with our shared ccsend.com domain to comply with the latest email authentication requirements. For example: holly-halfmoonyogastudio.com@shared1.ccsend.com.
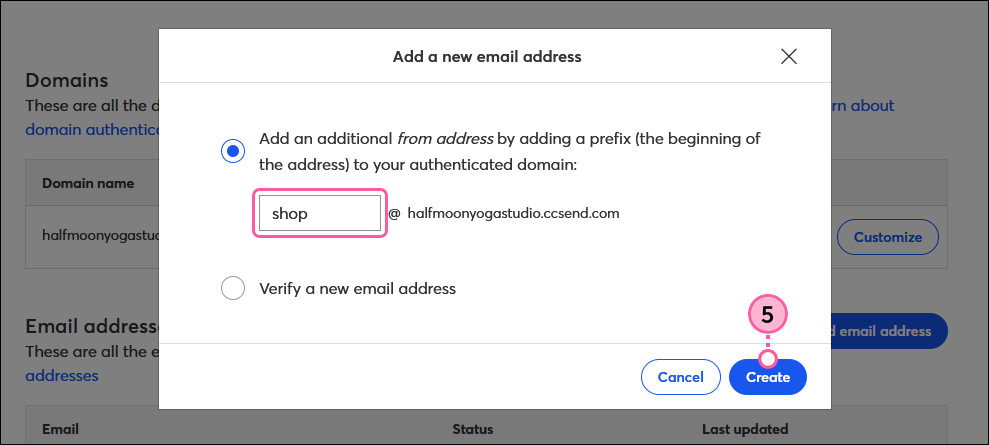
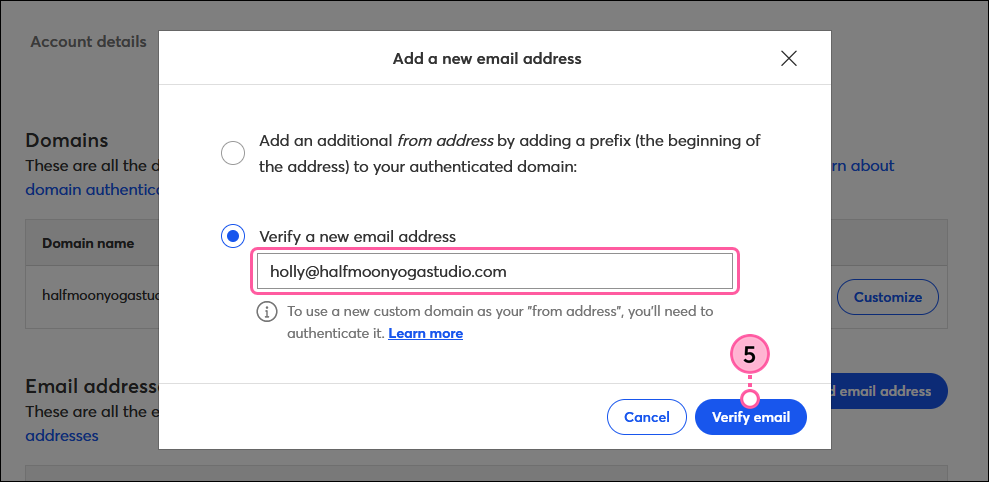
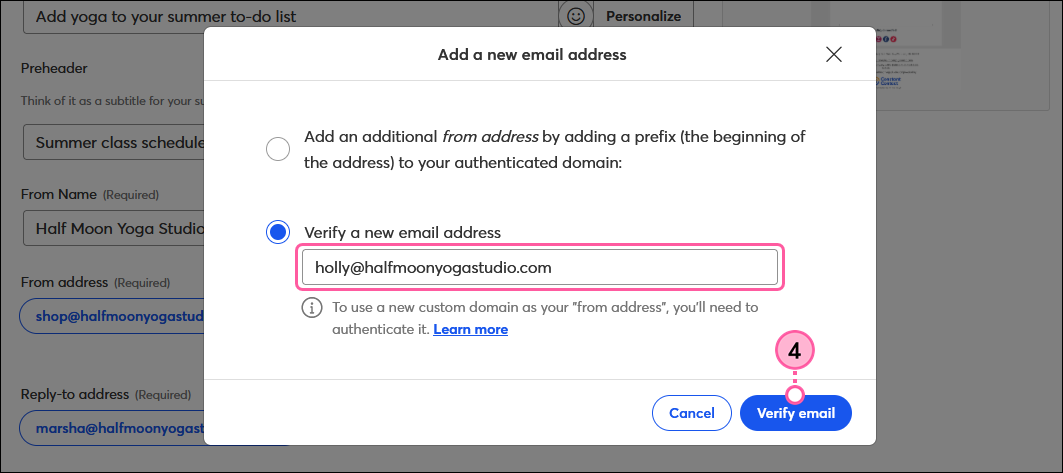
- Select if you want to add another email address with your authenticated custom domain or customized ccsend domain, or if you want to verify a new email address.
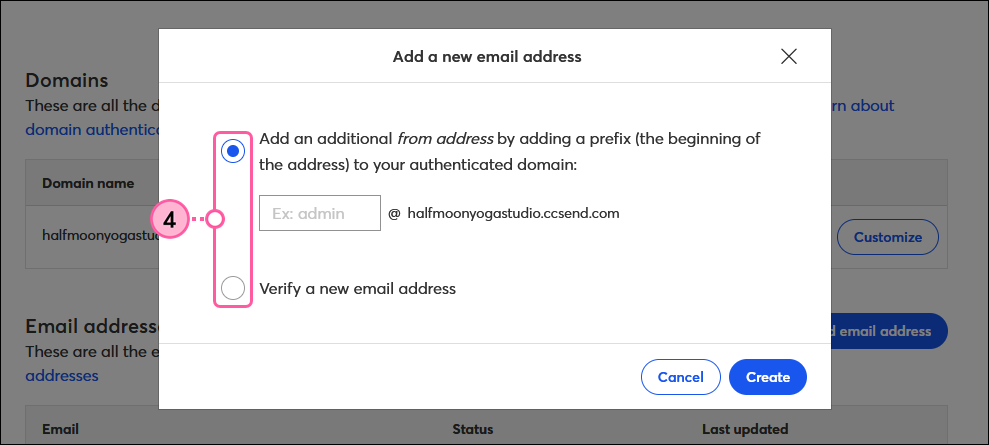
- Depending on your selection in step 4:
- Enter a prefix for the new email address with your authenticated domain and click Create.
Note: If you’re adding an email address with your customized ccsend domain, you won’t receive a verification email since it isn’t connected to an actual email inbox.
- Enter the email address you want to verify in the field and click Verify email.
Note: To use a custom domain as your "From" address, you’ll also need to authenticate it. At this time, you can only authenticate one custom domain in your account.
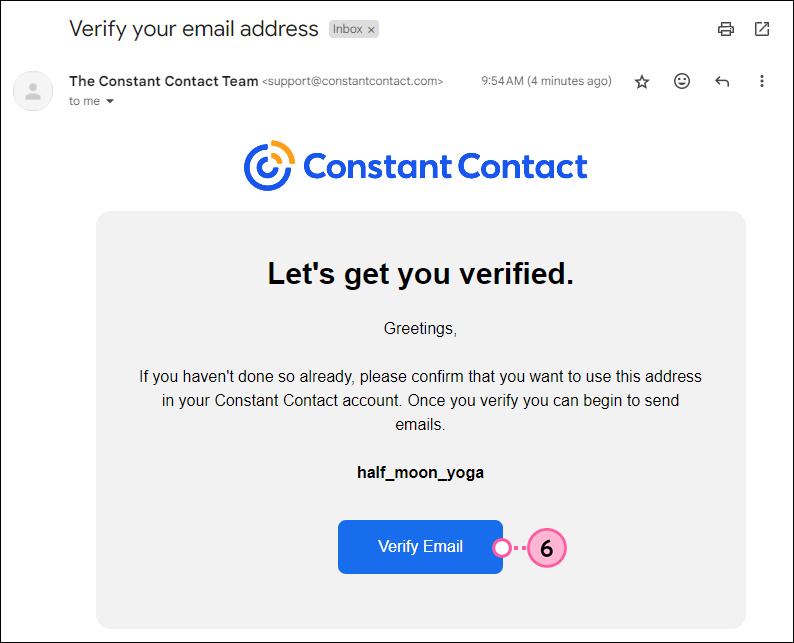
- You'll receive a "Verify your email address" email from the Constant Contact Team. Open the email and click the Verify Email button.
Note: The verification email lists your Account Name, or user name. If you use an email address as your user name, don't worry if it's different from the address you're trying to verify. The Verify Email button is verifying the email address the email was sent to.
You can now choose the verified email address in various places in your account, including your "From" email address (if it's also been authenticated), your "Reply-to" email addresses, the Early Results email address, and your account contact or billing email addresses.
Verify an address within an email draft
You can also verify additional email addresses to use as the From and Reply-to Addresses, and to receive the Early Results email, while you’re scheduling an email.
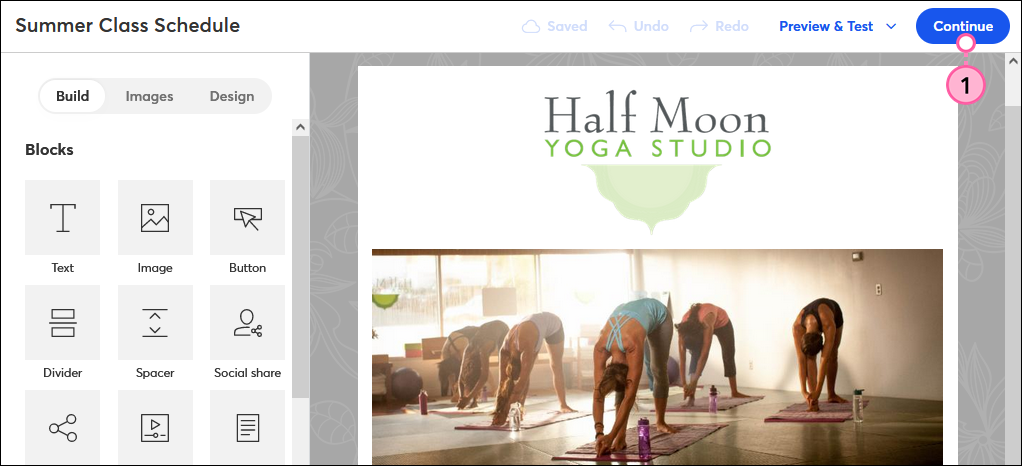
- Within your email draft, click Continue.
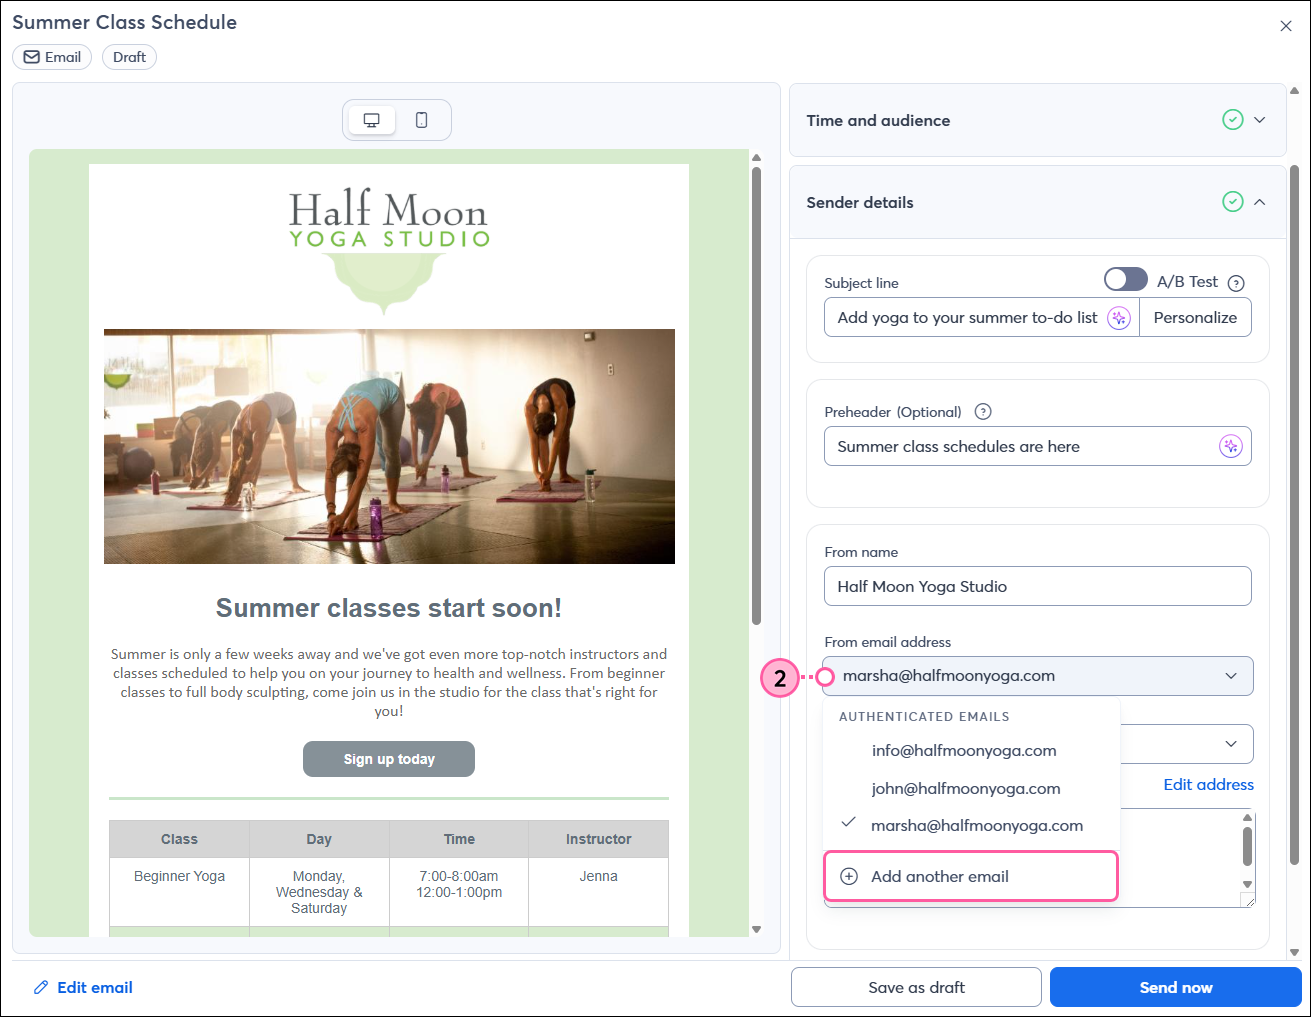
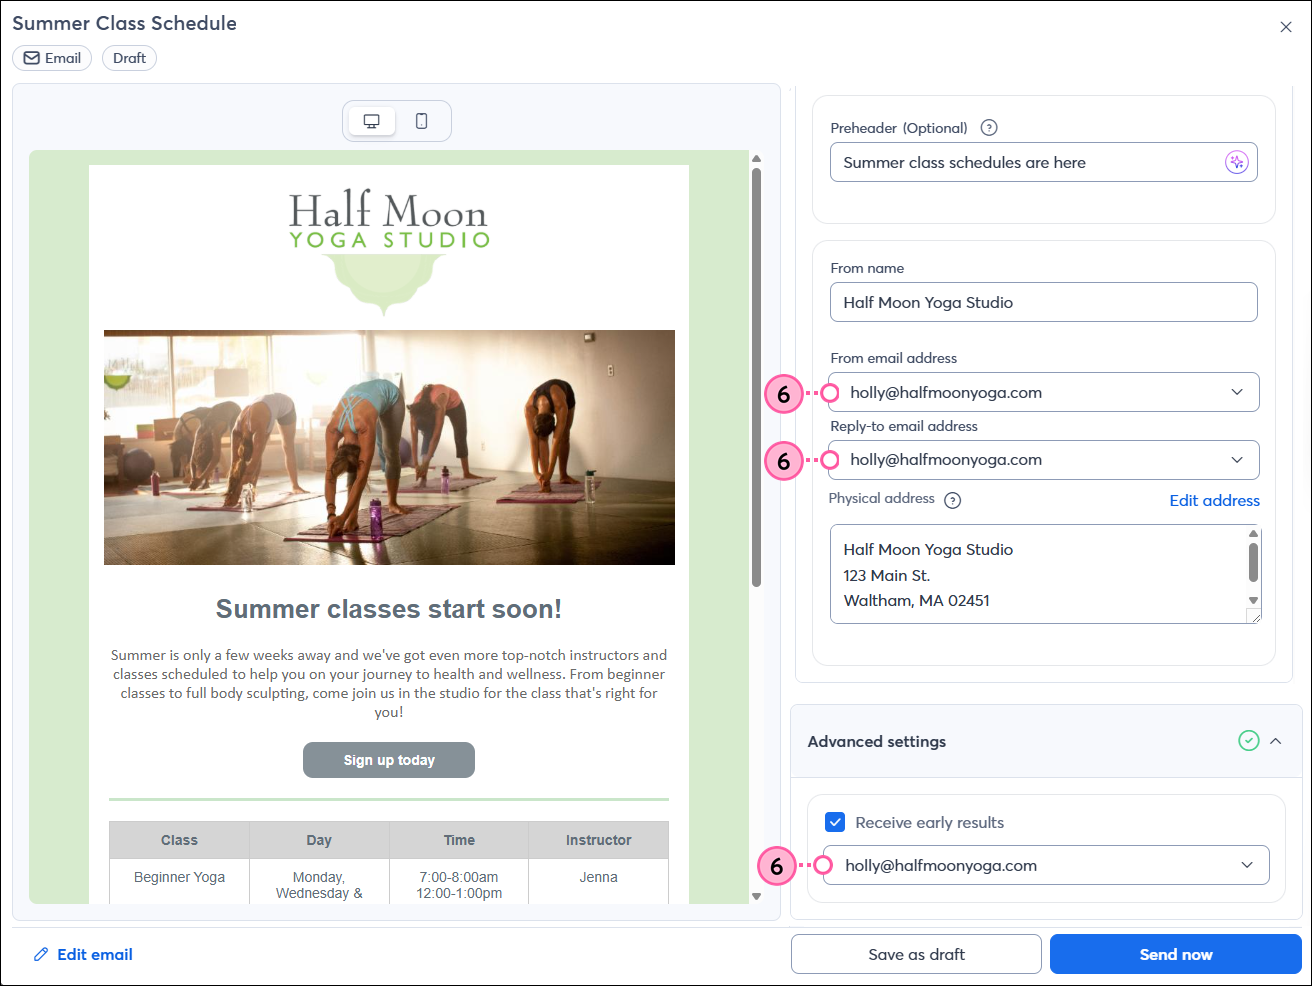
- Select "Add another email" from the From email address, Reply-to email address, or Receive early results drop-down.
- Depending on your authentication status:
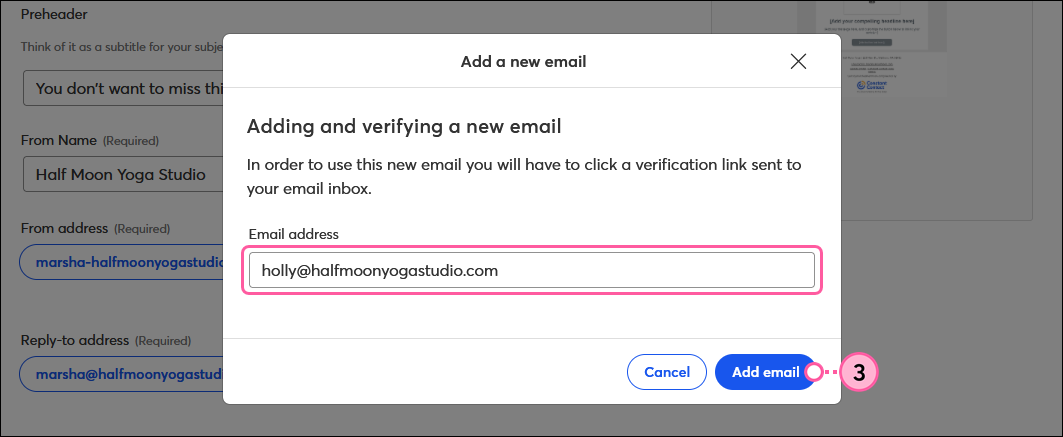
- If you haven’t authenticated a custom domain or customized a ccsend domain, enter the email address you want to verify in the field and click Add email. Then skip to step 5.
Note: If you want to use this as your "From" address, you’ll also need to authenticate it. Otherwise, it'll be rewritten with our shared ccsend.com domain to comply with the latest email authentication requirements. For example: holly-halfmoonyogastudio.com@shared1.ccsend.com.
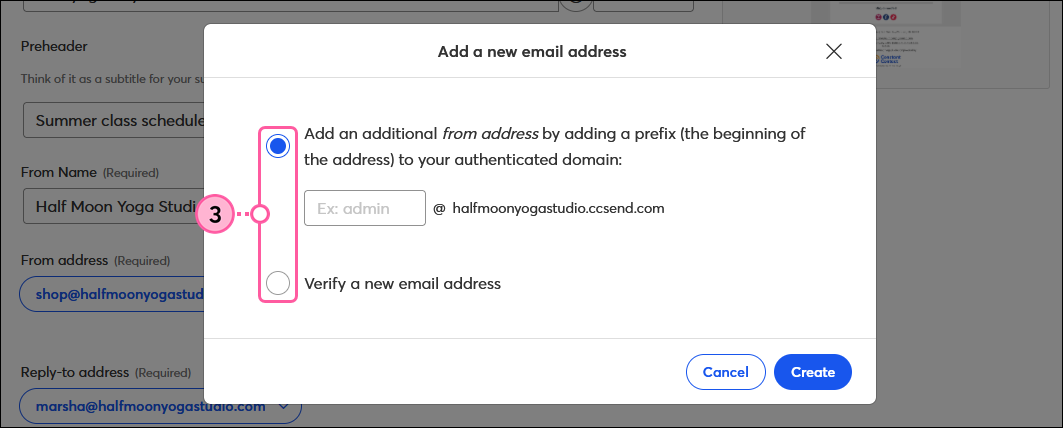
- Select if you want to add another email address with your authenticated custom domain or customized ccsend domain, or if you want to verify a new email address.
- Depending on your selection in step 3:
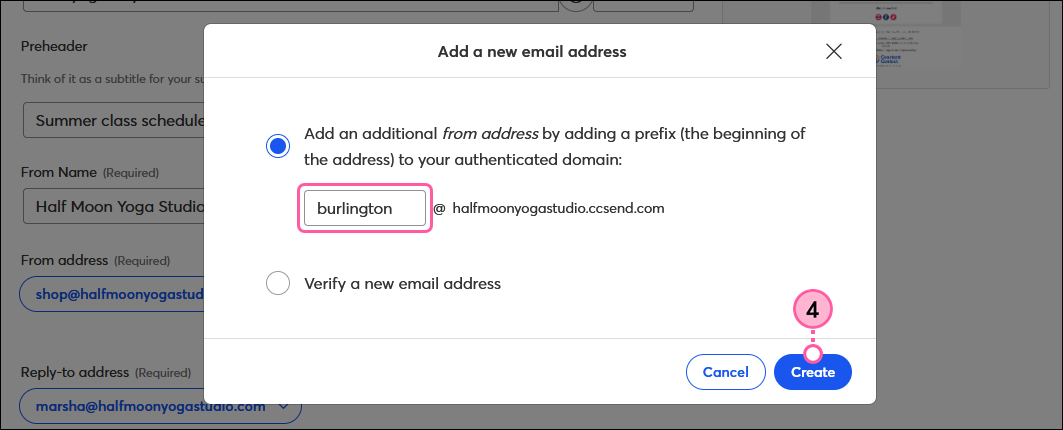
- Enter a prefix for the new email address with your authenticated domain and click Create.
Note: If you’re adding an email address with your customized ccsend domain, you won’t receive a verification email since it isn’t connected to an actual email inbox.
- Enter the email address you want to verify in the field and click Verify email.
Note: To use a custom domain as your From Address, you’ll also need to authenticate it. At this time, you can only authenticate one custom domain in your account.
- You’ll receive a "Verify your email address" email from the Constant Contact Team. Open the email and click the Verify Email button.
Note: The verification email lists your Account name, or user name. If you use an email address as your user name, don't worry if it's different from the address you're trying to verify. The Verify Email button is verifying the email address the email was sent to.

- Once verified, you can select the email address in any of the drop-downs. If you don’t see the verified email address, try refreshing your browser.
Note: You’ll only see your authenticated emails as available options in the “From email address” drop-down.
What if I don't receive the verification email?
If you didn't receive the verification email, make sure the email address is spelled correctly, and try checking your spam or junk folder. If you still don't receive it, here are some other possible reasons.