Think of your contact lists and segments as buckets or containers that you store your contacts in until you're ready to use them. At a basic level, lists and segments help sort your contacts into groups. You have the flexibility to create lists on your own based on your knowledge of your contacts, or select criteria, such as contact information and behavior, to automatically add contacts to a segment when they meet the selected criteria.
Before creating a new list or segment, it's helpful to know what you already have. You can search for a list or segment using the Search bar, filter by list type (list or segment), and sort column data in ascending or descending order by clicking the up or down arrows next to the column titles.
Here's how to create new lists and segments:
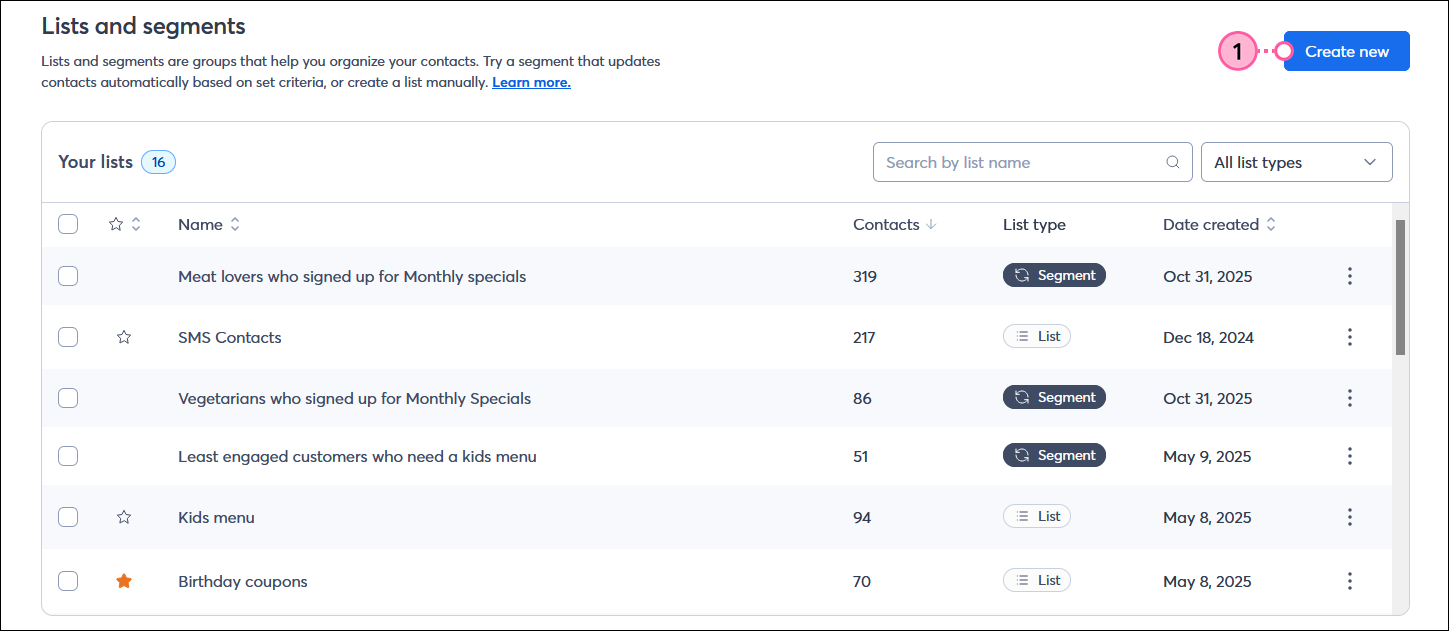
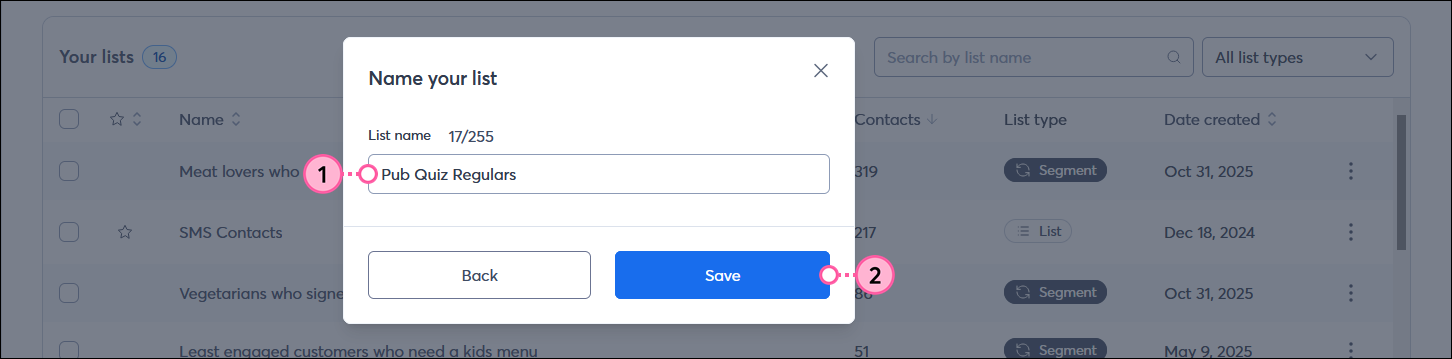
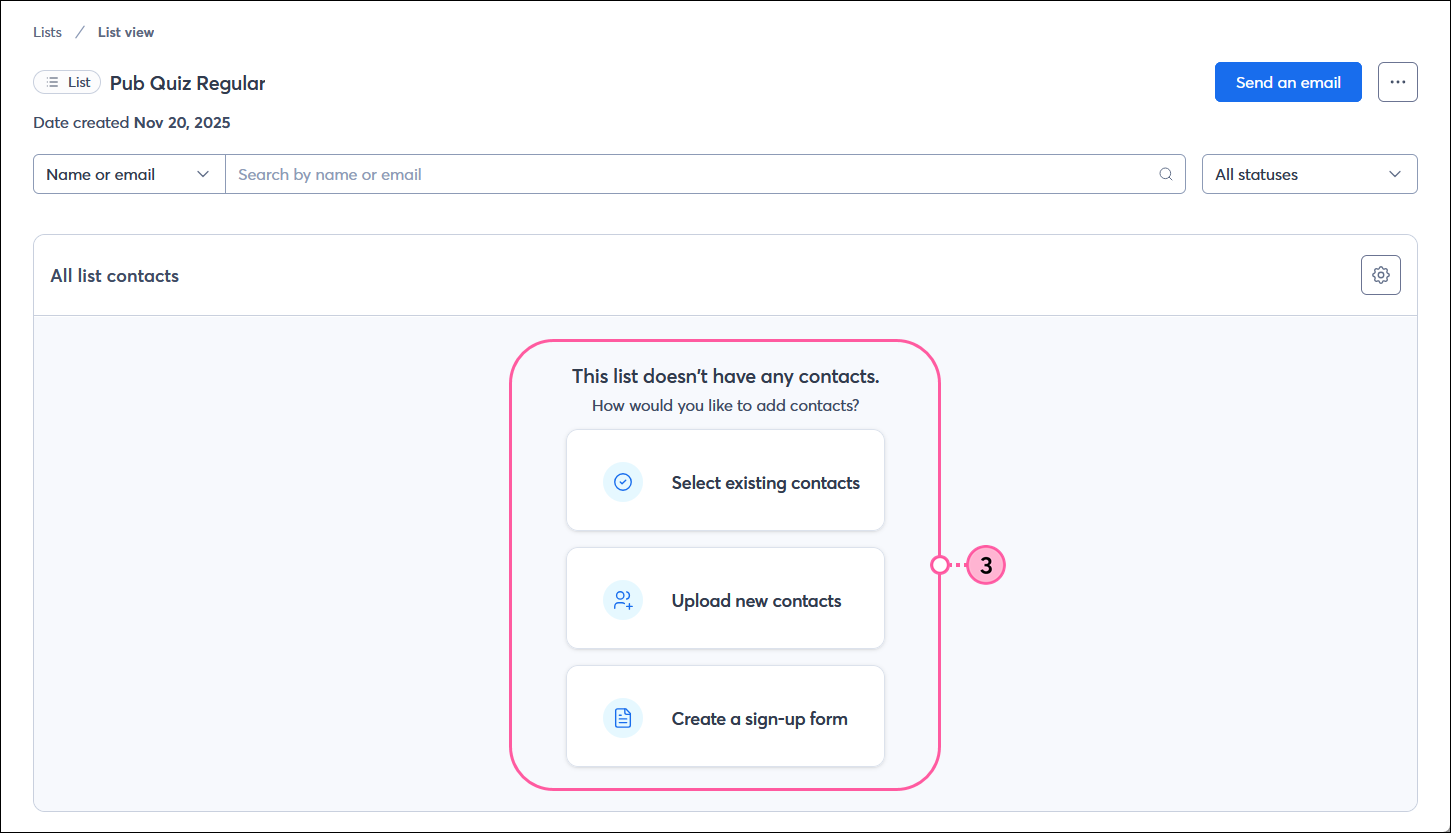
You can create up to 1,000 lists within your account to help organize your contacts. Contacts can be added to multiple lists, and you can move them around as needed. Lists can also be renamed to help you stay organized.
| Upgrade your plan: The number of segments you can create depends on your email plan. If you're unable to create a new segment, you may need to upgrade your plan. |
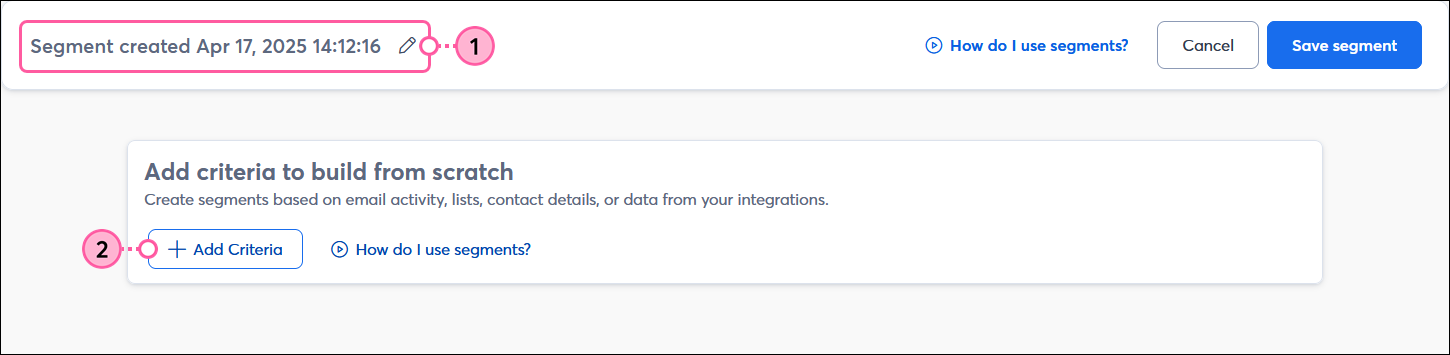
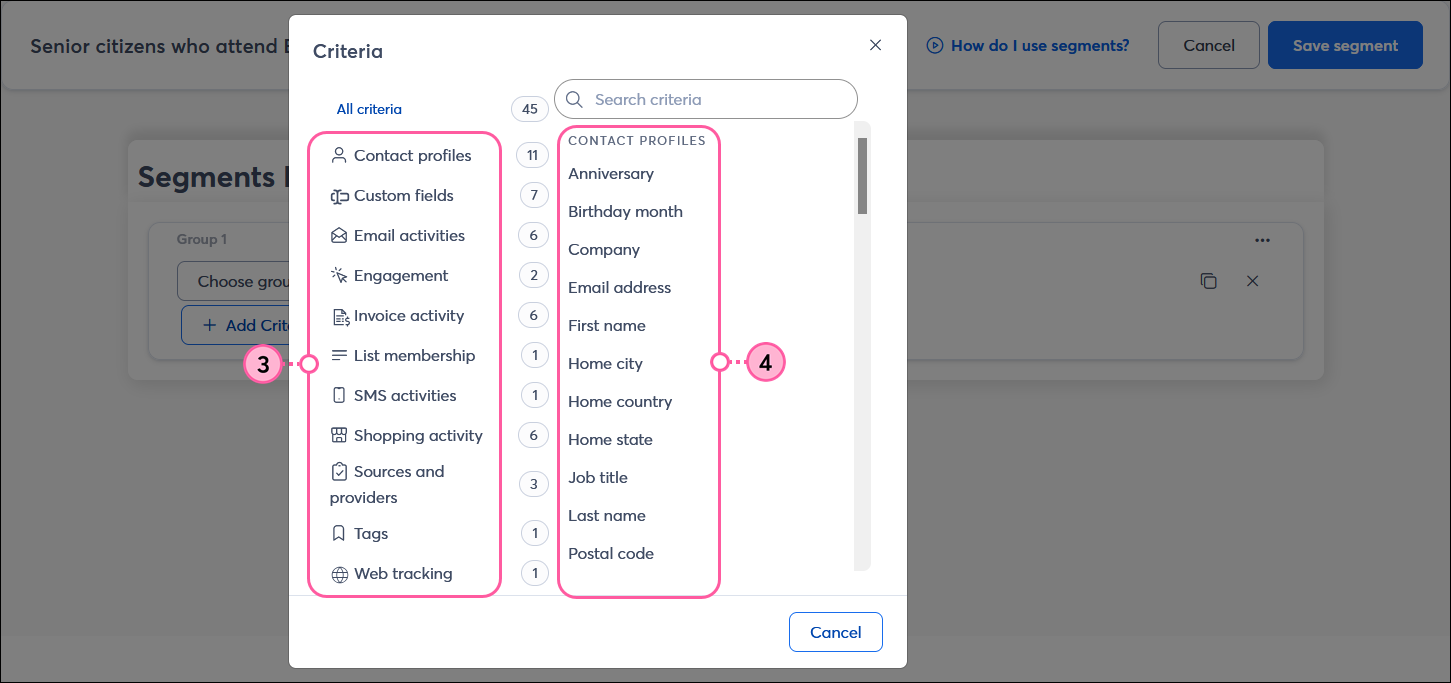
When you create a segment, contacts are automatically added based on specific criteria, including contact information, list membership, and email, SMS, and shopping activity.
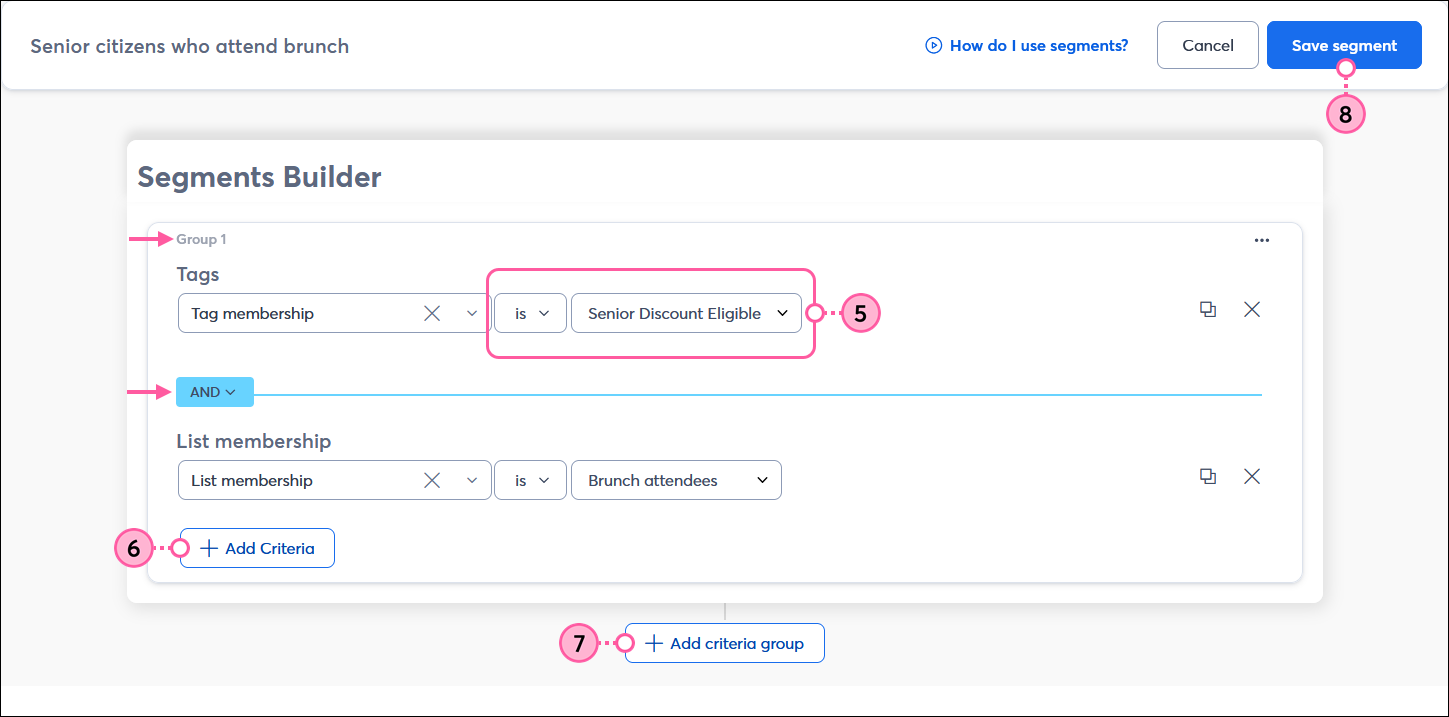
Tag membership is Senior Discount Eligible
Tag membership is not Needs Kids menu
Tag membership is Senior Discount Eligible AND List membership is Brunch attendees
Tag membership is Senior Discount Eligible OR List membership is Senior menus and specials
Tag membership is Senior Discount Eligible AND List membership is Brunch attendees

OR

List membership is Senior menus and specials OR List membership is Senior Center patron
Copyright © 2026 · All Rights Reserved · Constant Contact · Privacy Center
